Keto Pumpkin Pancakes | Anti-Inflammatory, Gluten-free, Dairy-free

Cooking breakfast for everyone on the weekends is one of my husband’s favorite things to do. And this is seriously one of my favorite anti inflammatory breakfasts for fall.

Because how can you beat pancakes and pumpkin?

keto pumpkin pancakes

And since we’re on a mission to control our blood sugar levels, we’re doing it with an anti-inflammatory keto version of pumpkin pancakes that you’re gonna love!

One thing I wanna highlight for these keto pumpkin pancakes is that they’ve got a good amount of protein in them.

What we’ve found in our house is that the kids tend to veer more towards carbs in the morning, so if I use a higher protein recipe, they’re getting a better balanced meal that leads to less blood sugar spikes (and crashes) and keeps us full longer.

keto pumpkin pancakes ingredients

But the norm to accomplish this is to use a protein powder. Instead, I like to use egg white powder for that extra protein. (This trick also keeps it dairy-free.)

Also, if you don’t have pumpkin pie spice mix, you can grab that recipe HERE.

keto pumpkin pancakes in a skillet

Things to note

One thing to note is that you can store these in the fridge if you have leftovers, and I’ve even frozen them to have for anti-inflammatory breakfast and snacks!

Eating for your health shouldn’t mean skipping breakfast or flavor. These pumpkin pancakes prove you can do both — deliciously.
My free Anti-Inflammatory Diet Quick-Start Guide shows you exactly how to get started with blood-sugar-balancing meals like this one.
Download your free Quick-Start Guide and make your mornings both cozy and anti-inflammatory.

Print

Keto Pumpkin Pancakes

5 Stars 4 Stars 3 Stars 2 Stars 1 Star

No reviews

Anti-Inflammatory, Gluten free pancakes perfect for fall

  • Prep Time: 10 minutes
  • Cook Time: 5 minutes
  • Total Time: 15 minutes
  • Yield: 6 pancakes 1x
  • Category: Breakfast, Snack

Ingredients

Units Scale
  • 2 eggs
  • 1/4 cup pumpkin puree
  • 1/2 cup almond flour
  • 1/4 cup egg white powder
  • 1 TBSP pumpkin pie spice
  • 1/4 tsp salt
  • 2 TBSP erythritol (or other granulated sugar-free natural sweetener)
  • 2 TBSP water
  • 1 TBSP avocado oil (to cook pancakes)
 

Instructions

  1. Place all ingredients except avocado oil in a blender; blend until combined- stopping halfway through to scrape the edges down.
  2. Heat a large nonstick skillet to medium. Add avocado oil.
  3. Pour batter into pan, trying to keep it equal to serving size.
  4. Cook 3-4 minutes, flip and cook about 2 minutes until golden brown.
  5. Serve warm. Enjoy!

Did you make this recipe?

Share a photo and tag us @truewell.co — we can’t wait to see what you’ve made!

Cozy Keto Pumpkin Muffins

When it’s fall everybody goes bonkers for pumpkin spice, and these keto pumpkin muffins, which are anti-inflammatory, gluten-free, and sugar-free, should definitely be in your saved + often-used recipe collection.

keto pumpkin muffins

And I get it–it’s (hopefully where you live) starting to cool down for fall, and that crisp snuggly feeling should be crankin’ up!

The only thing is… when we think of ‘cozy’ things, it usually veers in dramatically different directions: Either heavier soups and stews (savory), or warm, sweet breads (sweets direction).

Lucky for you, I’ve got the sweet covered with a fiber-filled, pumpkin-spice loaded muffin that is sugar-free, and also has the added benefit of being a great after-dinner snack (if you add on the pumpkin seeds–they contain melatonin. 😉)

Check out seasonal anti-inflammatory foods for fall HERE.

keto pumpkin muffins

Now, I know some of us like stevia, some prefer erythritol, some like monk-fruit, and on and on. So I put 2 options in the directions to accommodate for either choice, because that one option will determine baking time.

So warm up some unsweetened coconut (or almond) milk and enjoy! 🍂

If you love comfort food but want to keep inflammation and cravings in check, this is your sign.
The free Anti-Inflammatory Diet Quick-Start Guide walks you through the exact foods that balance blood sugar, calm inflammation, and still let you enjoy treats like these keto muffins guilt-free.
🌿 Download your free Quick-Start Guide and make cozy anti-inflammatory living easy.

Print

Cozy Keto Pumpkin Muffins

5 Stars 4 Stars 3 Stars 2 Stars 1 Star

No reviews

These cozy keto pumpkin muffins are anti-inflammatory, gluten-free, will satisfy your sweet tooth and can even help with sleep!

  • Author: Laura @ TRUEWELL
  • Prep Time: 15 minutes
  • Cook Time: 27 minutes
  • Total Time: 42 minutes
  • Yield: 6 muffins 1x
  • Category: Breakfast, Dessert, Snack

Ingredients

Units Scale
  • 4 eggs (large)
  • 1/2 cup pumpkin puree, canned
  • 2 tsp pure vanilla extract
  • 4 TBSP coconut oil (melted)
  • 1 tsp stevia liquid (OR 1/3 cup erythritol (Swerve brand works great))
  • 2 tsp pumpkin pie spice mix
  • 1/4 tsp salt
  • 6 TBSP coconut flour
  • 1 tsp baking powder
  • 1/4 cup pepitas, for topping (optional)

Instructions

  1. Preheat oven to 350 F + prepare pan. Preheat oven to 350 F. Line your muffin tin with liners (paper tend to stick unless you spray with oil).
  2. Mix wet ingredients + spices. Whisk together eggs, pumpkin, vanilla, stevia (or erythritol), coconut oil, cinnamon, and nutmeg in a medium-sized bowl.
  3. Mix dry ingredients. In a small bowl, mix together the coconut flour, salt, and baking powder. Then whisk into the pumpkin batter.
  4. Pour batter into muffin papers. Evenly divide the mixture in the 6-muffin tin cups.
  5. Bake based on type of sweetener used. Bake 22-25 minutes (using stevia as the sweetener), or (27-29 minutes using erythritol as the sweetener).
  6. Test if done. Muffins are ready when a toothpick comes out clean.
  7. Remove, cool + enjoy! Pop muffins onto a towel or cooling rack, and let them cool completely for optimal fluffy texture.

Nutrition

  • Calories: 156

Did you make this recipe?

Share a photo and tag us @truewell.co — we can’t wait to see what you’ve made!

How to Build an Anti-Inflammatory Charcuterie Board

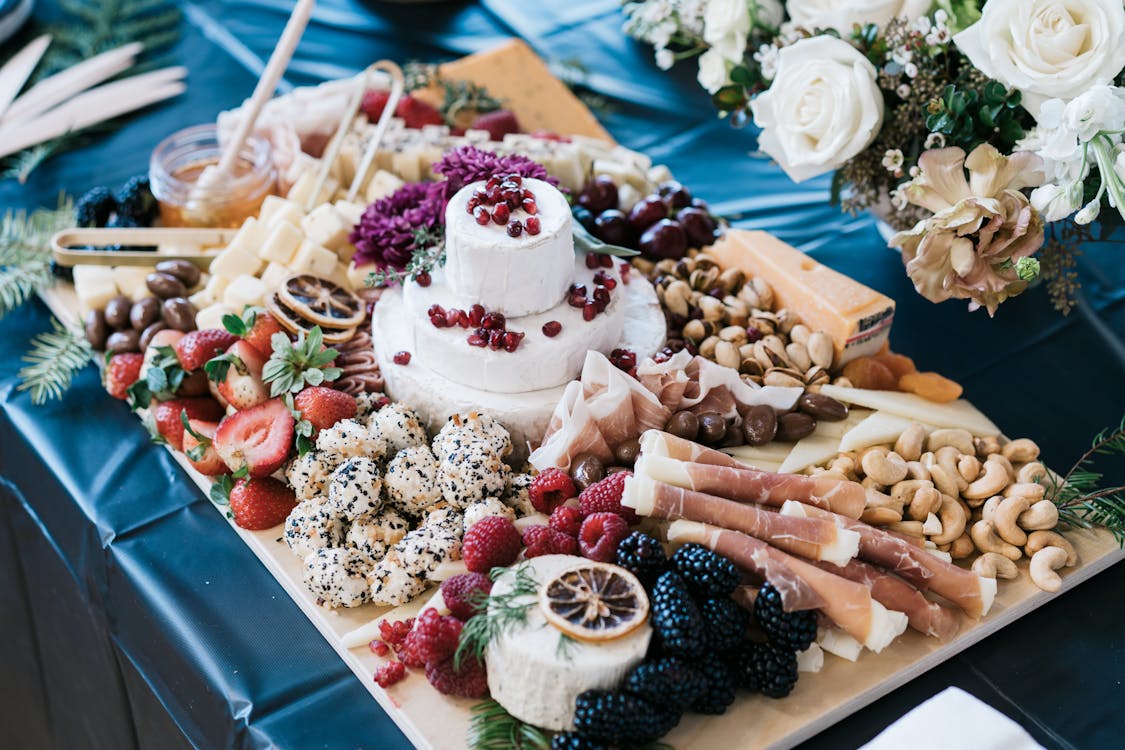
The charcuterie board has become one of the biggest crazes on social media in the last couple years. I’d blame it on how gorgeous they can be… but I think after lockdowns and quarantine, the appeal may also have to do with the fact that they represent togetherness: If you’re building a board, you must be having a get-together.

And that’s what makes them so fun–having a way to entertain and feed guests at the same time! It also doesn’t hurt that there are literally a million ways to build a charcuterie board based on what season, holiday, or event is being celebrated.

anti inflammatory charcuterie board

That being said, most charcuterie boards have a few ingredients as staple items that are no good for those of us trying to live an anti-inflammatory lifestyle.

Especially since the definition of charcuterie revolves around cured meat products (even though nowadays we add on lots of other fun stuff, too!)

So here’s how to build a board that’s just as pretty and fun, while also keeping out the foods that send inflammation into overdrive.

What exactly makes this an anti-inflammatory charcuterie board?

Obviously the thing that will determine how anti-inflammatory your board is will be the ingredients that you add. These are normally the processed meats, breads, crackers, many of the dips or sauces (including honey), and some dairy additions.

anti inflammatory charcuterie board

The thing to remember about making a charcuterie board anti-inflammatory is that it’s made up of so many fresh ingredients that you can still make it gorgeous and fun without all the inflammatory no-go foods.

There are also (thankfully) enough substitutions for things like crackers and dairy-based dips to give us plenty of options that are A-OK on the anti-inflammatory diet.

So let’s get to it.

STEP 1: Choose your base

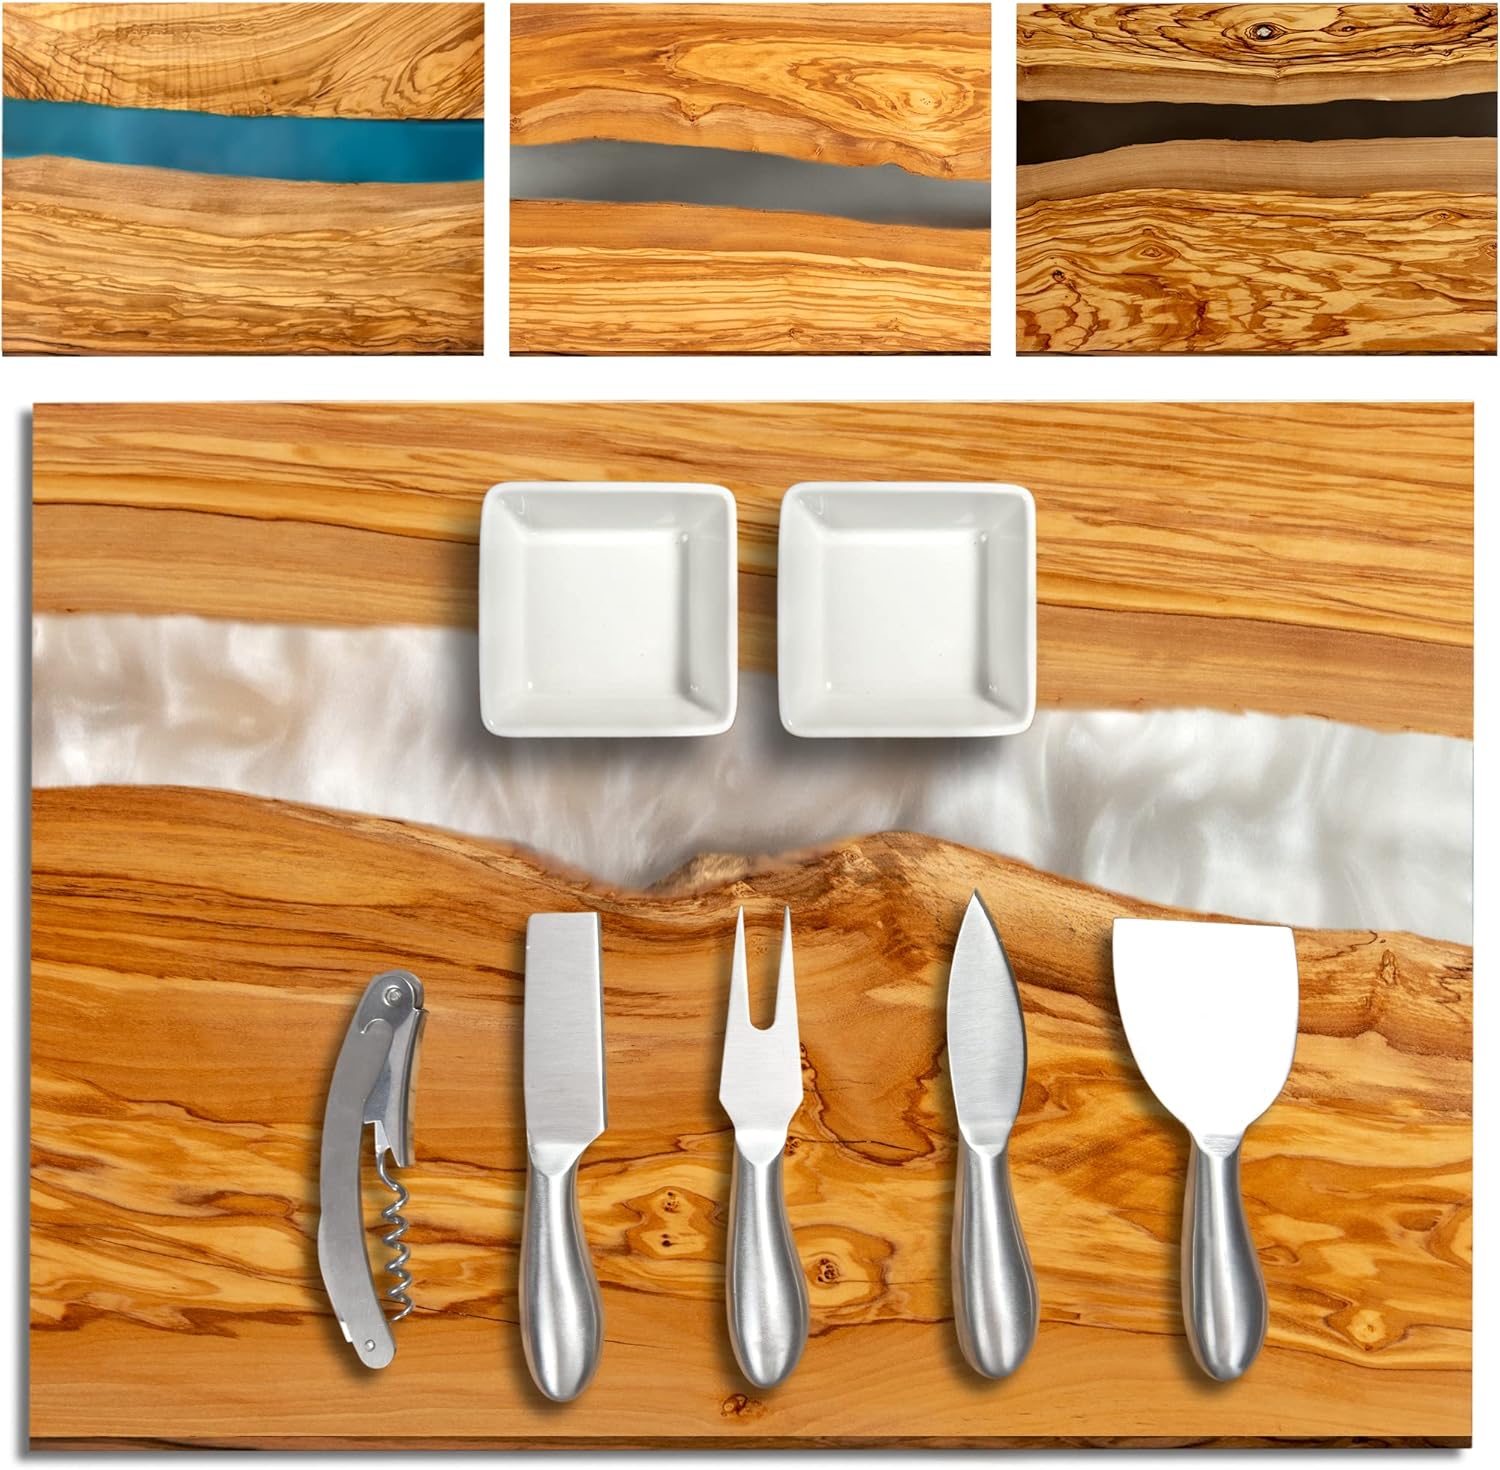
The very first step is choosing what your base will be. Since the word ‘board’ is in ‘charcuterie board’, you may automatically think you need a special board for this. Or even a cutting board (which is a good option).

But the truth is that you can expand this way beyond just a plain ole board.

Platters in various different shapes are great, cutting boards (wooden or stone are the prettiest for this), boards specifically designated for charcuterie, or even something more creative like a dough bowl. (I’ve even been seeing charcuterie boxes lately!) Honestly, the possibilities are endless.

Here are some great options:

*As an affiliate, I may receive a small portion of proceeds of any items you buy through these links, at no extra cost to you. However, I only recommend products I know or use, and love.

Large Acacia Charcuterie Board

Large Acacia Charcuterie Board

Bamboo Serving Trays

Bamboo Serving Trays

Italian Olive Wood Board

Italian Olive Wood Board

You’ve surely even seen some of the spreads down the entire countertop. These are usually referred to as ‘spreads’, ‘tables’, or even ‘grazing tables’.

In that case, you may just need some butcher paper as your base. (Although even this larger cases I do still recommend having some boards and other platters to add visual interest.)

👉How to choose between a board, platter, or table? First think about how many people you’re feeding or entertaining. If it’s just a few, a smaller board or platter is perfect. 5-10 would be better served with a board. 20-30 people may warrant several boards or a spread.

There’s really no formal calculation on this, but just know that these boards are traditionally the thing people see when they walk in the door to your get-together.

Although they can be used as the option for sides at a meal, they’re normally used as appetizers before the main meal.

Since people love to graze, especially when having drinks and mingling, it’s highly likely the whole thing will be cleaned off by the end of your get-together.

STEP 2: Layering and levels

Different levels could work for smaller boards, but is usually best when you have a larger board, need a little extra space, or are doing a spread.

The best types of varying levels would be things like raised cake platters, or even a bowl upside down as a pedestal for a smaller platter to sit on.

Using layers can give the board a really interesting add-on while helping to delineate or highlight certain ingredients.

Stoneware Cake Stand

Stoneware Cake Stand

Gold 5 Pcs Cake Stands

Gold 5 Pcs Cake Stands

3-Tier Serving Tray Stand

3-Tier Serving Tray Stand

For example, if you have some special ingredients for those with allergies or foods that contain alcohol that kids don’t need to partake in, special levels can designate those foods separately.

I’ve even used separate platters before to keep crackers away from the juices of the fruits and veggies.

STEP 3: Ingredients

Obviously the ingredients are the star of the show. Even though the goal here is an anti-inflammatory board, it should still be pointed out that most of your guests (if this is for a get-together) probably don’t eat by anti-inflammatory guidelines.

Discover My Unique 4-Pronged Approach to the Anti-Inflammatory Diet So You Can Get Started Immediately (Without Getting Overwhelmed or Cleaning Out Your Entire Pantry)

  • Why a full-scale pantry clean out is NOT the best way to start your anti-inflammatory journey, and the steps you can take instead to make sure you’re fueling your body with foods that love you back
  • The essential foods you MUST add into your diet if you want to nourish and heal your body naturally
  • My anti-inflammatory shopping list so you can quickly fill your cart with the right foods (no googling in the produce aisle or wasting hours staring at ingredient lists)

When this is the case, don’t be afraid to add in ingredients that you don’t eat yourself. Most people appreciate the variety, even if you’re not eating some of those foods.

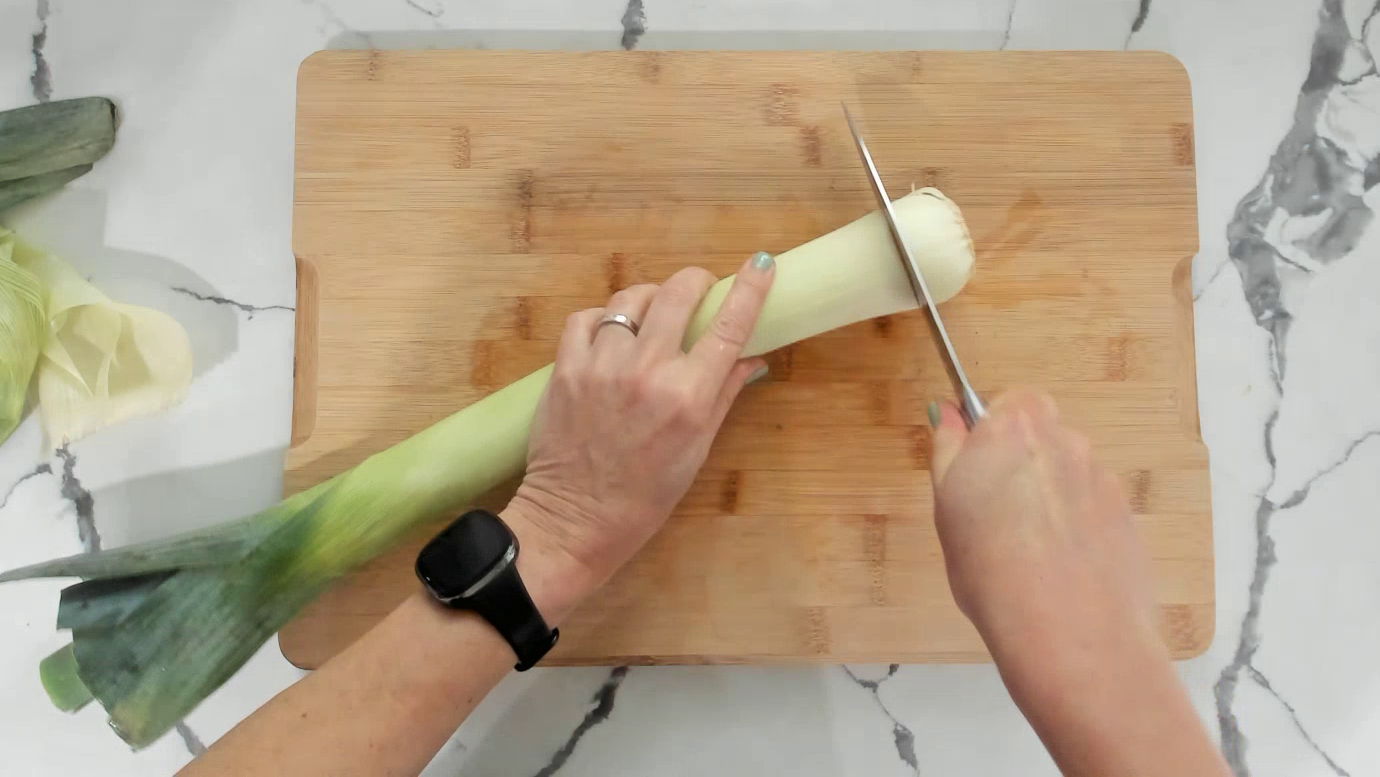
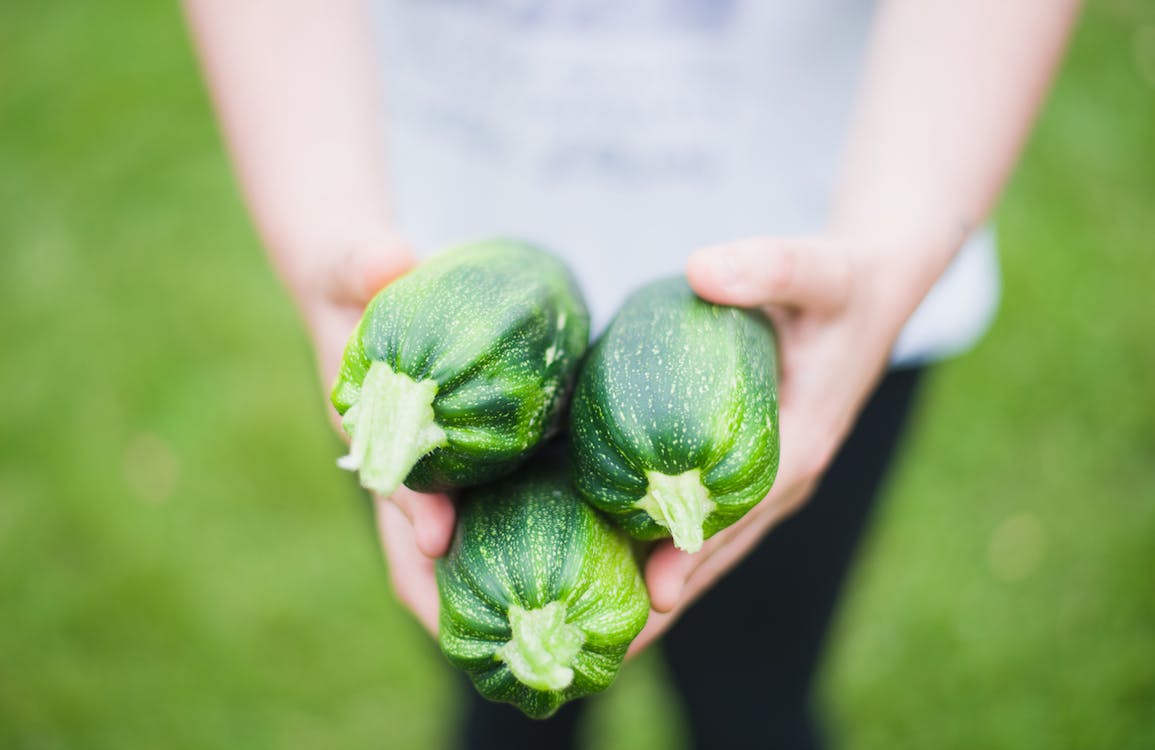
Another important thing to consider is the season or theme of the get-together (or board). Winter and fall themes probably shouldn’t include things like zucchini or summer squash while spring and summer themes wouldn’t include cranberries.
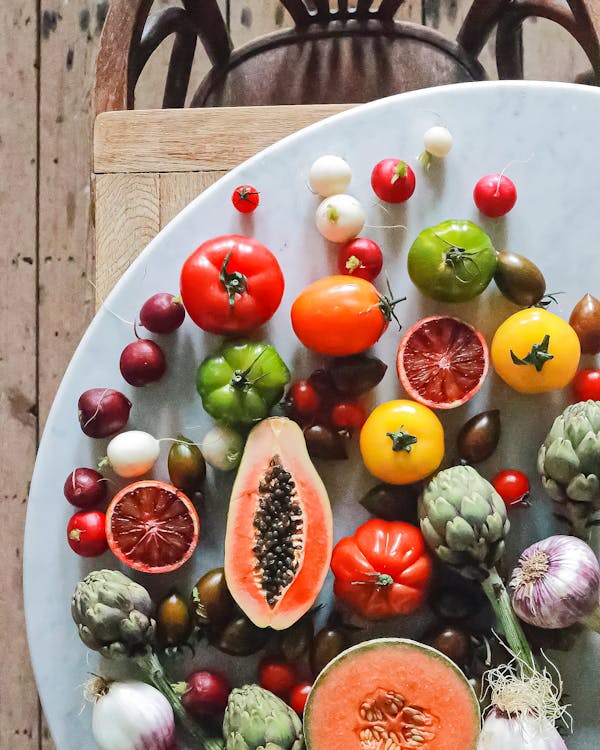
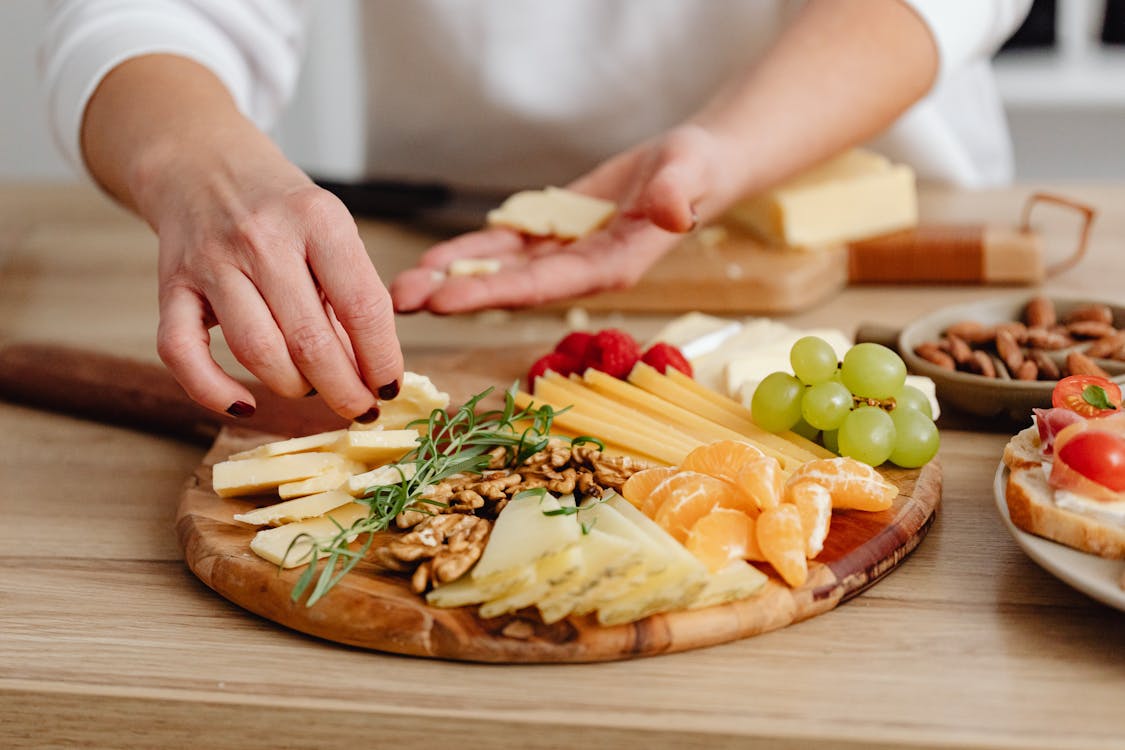
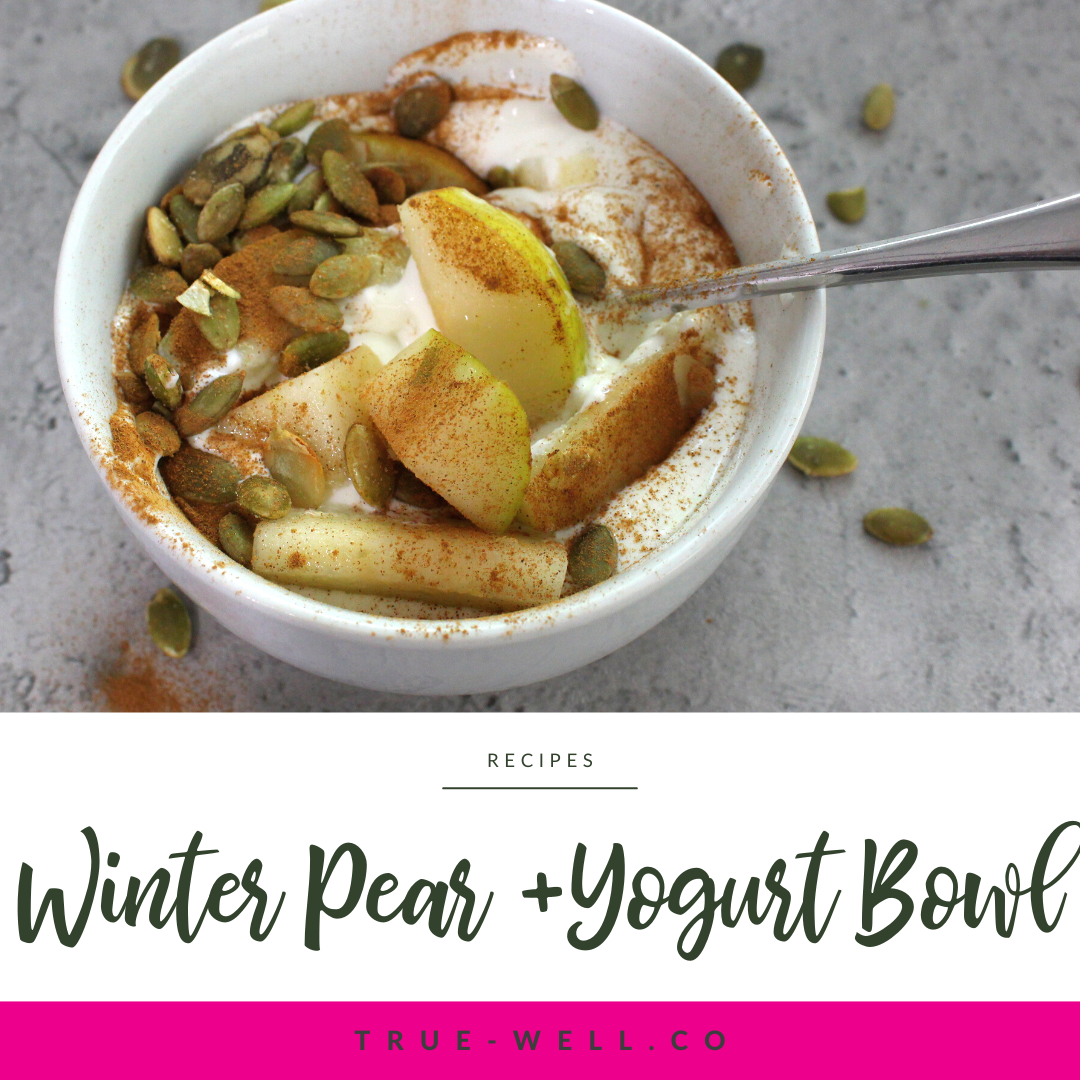
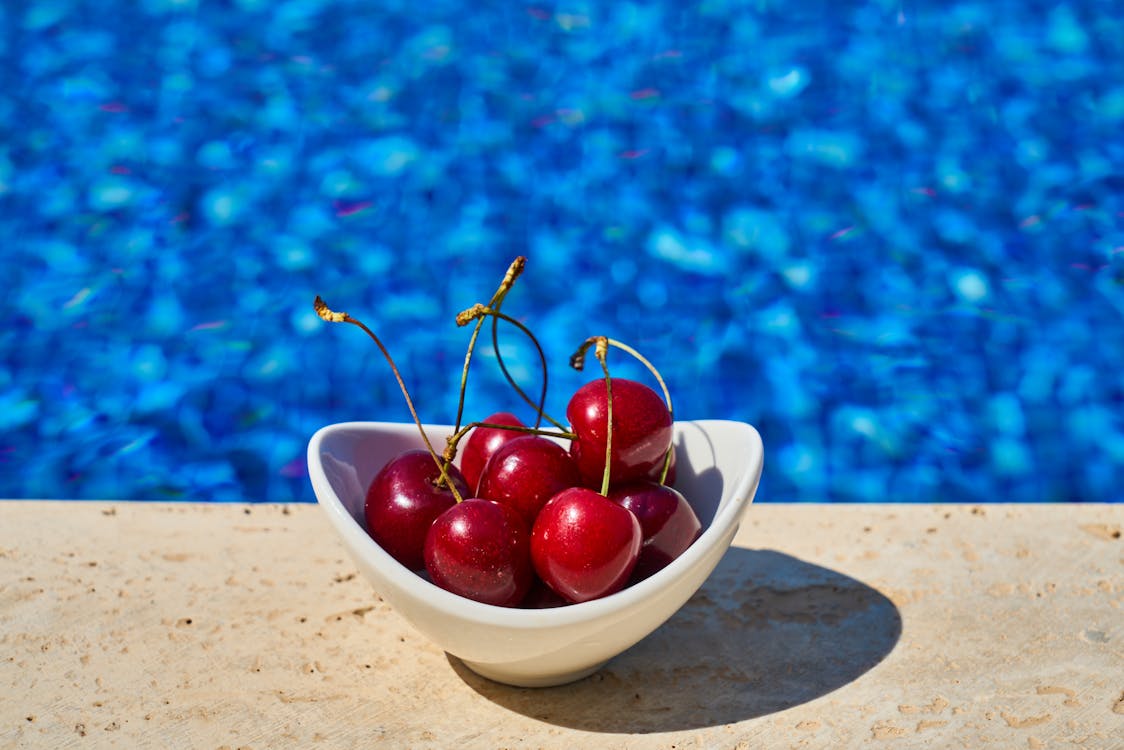
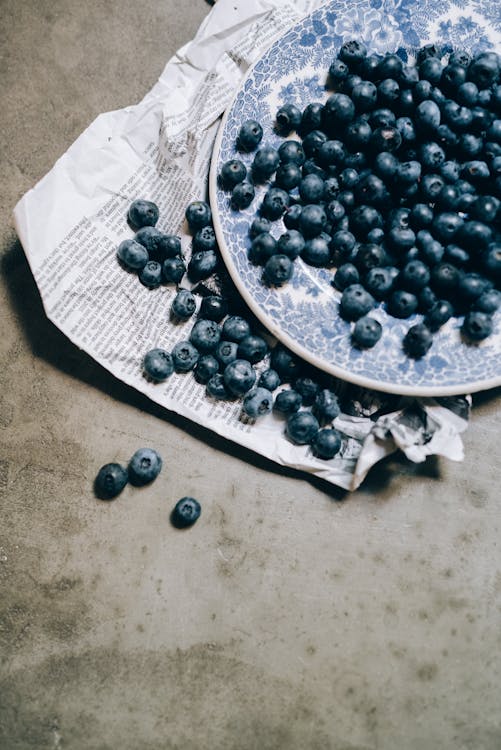
anti inflammatory charcuterie board

Fruit and Veggies

Unless the board is specifically for, say, pre-dinner vs dessert (meaning no fruit vs no veggies), I like to make sure I have a mix of half veggies and half fruit. I also add in lots of extra finger foods like nuts and sometimes seeds. These all work perfectly for an anti-inflammatory diet.
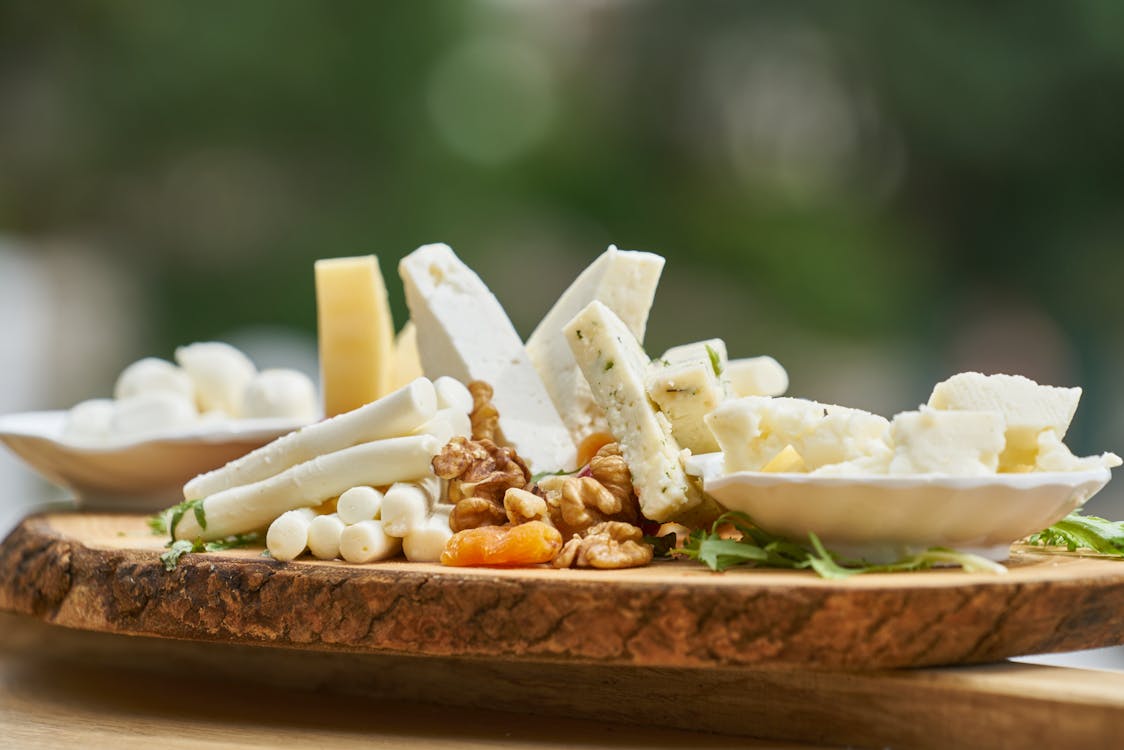
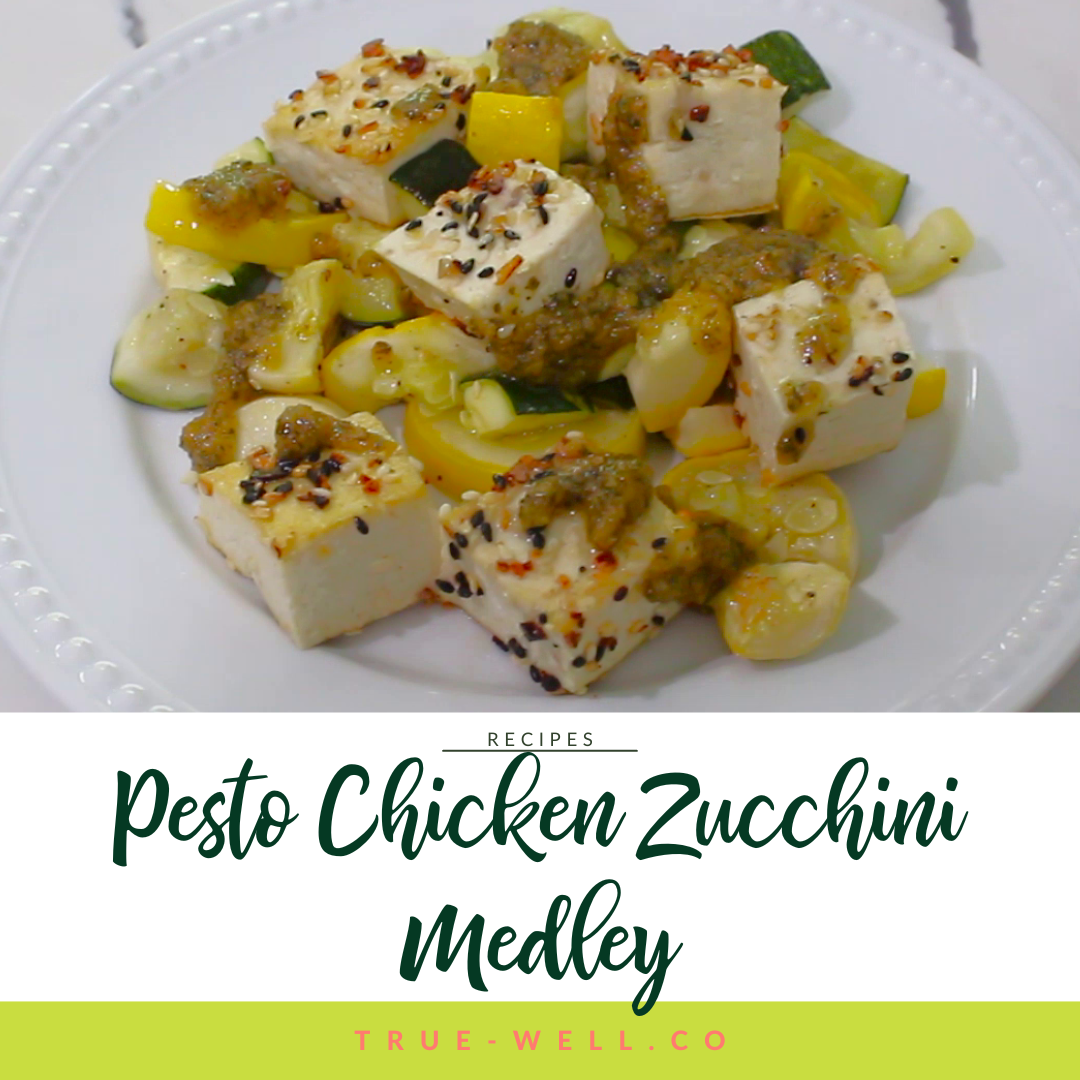
anti inflammatory charcuterie board

Cheese

Cheese can be ok if it’s organic, but it may be a good idea to keep it separate if you have anyone who can’t have dairy.

Cheeses that are great for charcuterie boards include mozzarella pearls and pre-sliced cheese that you can cut into different shapes if needed.

Triangular shapes are popular because you can layer pieces while shifting the directions, creating a super cool pattern. Soft cheeses like brie may be ok, but try to choose organic as well.
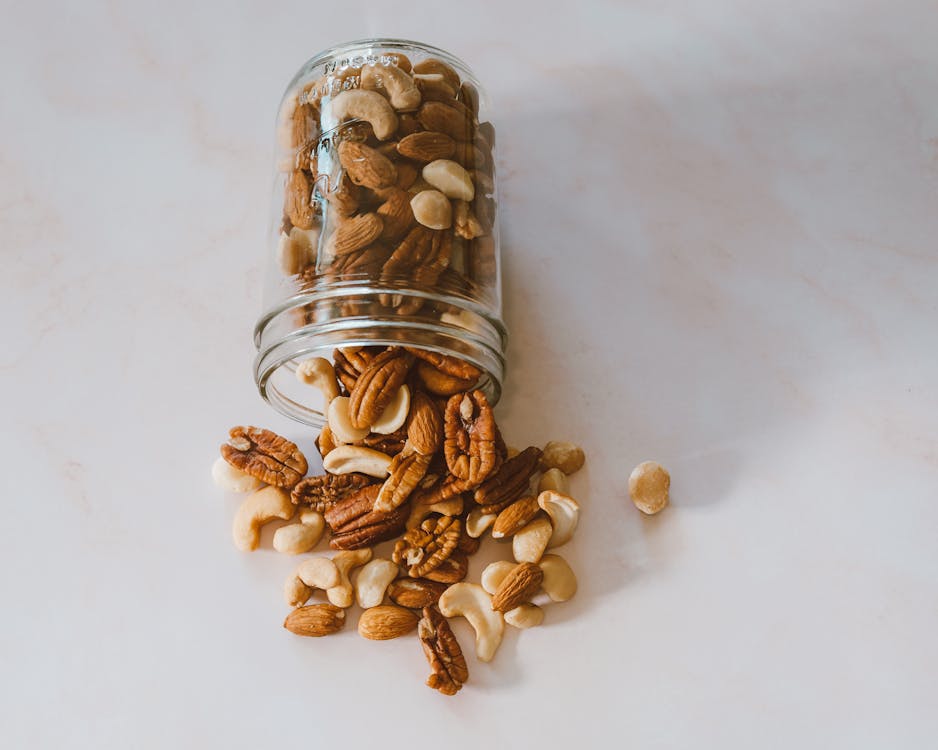
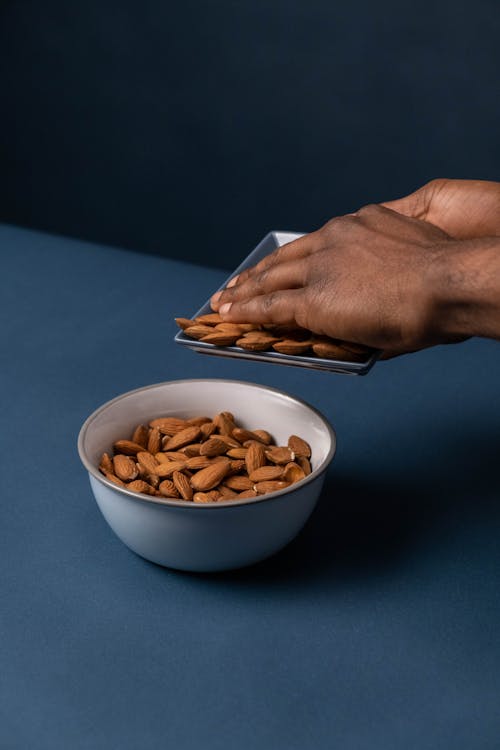
anti inflammatory charcuterie board

Nuts

Unless there’s a severe nut allergy, these can be a great way to add texture and variety. I recommend buying the kinds that are salted and roasted, and individual types, not mixed. (This allows easier flexibility in arranging them.)
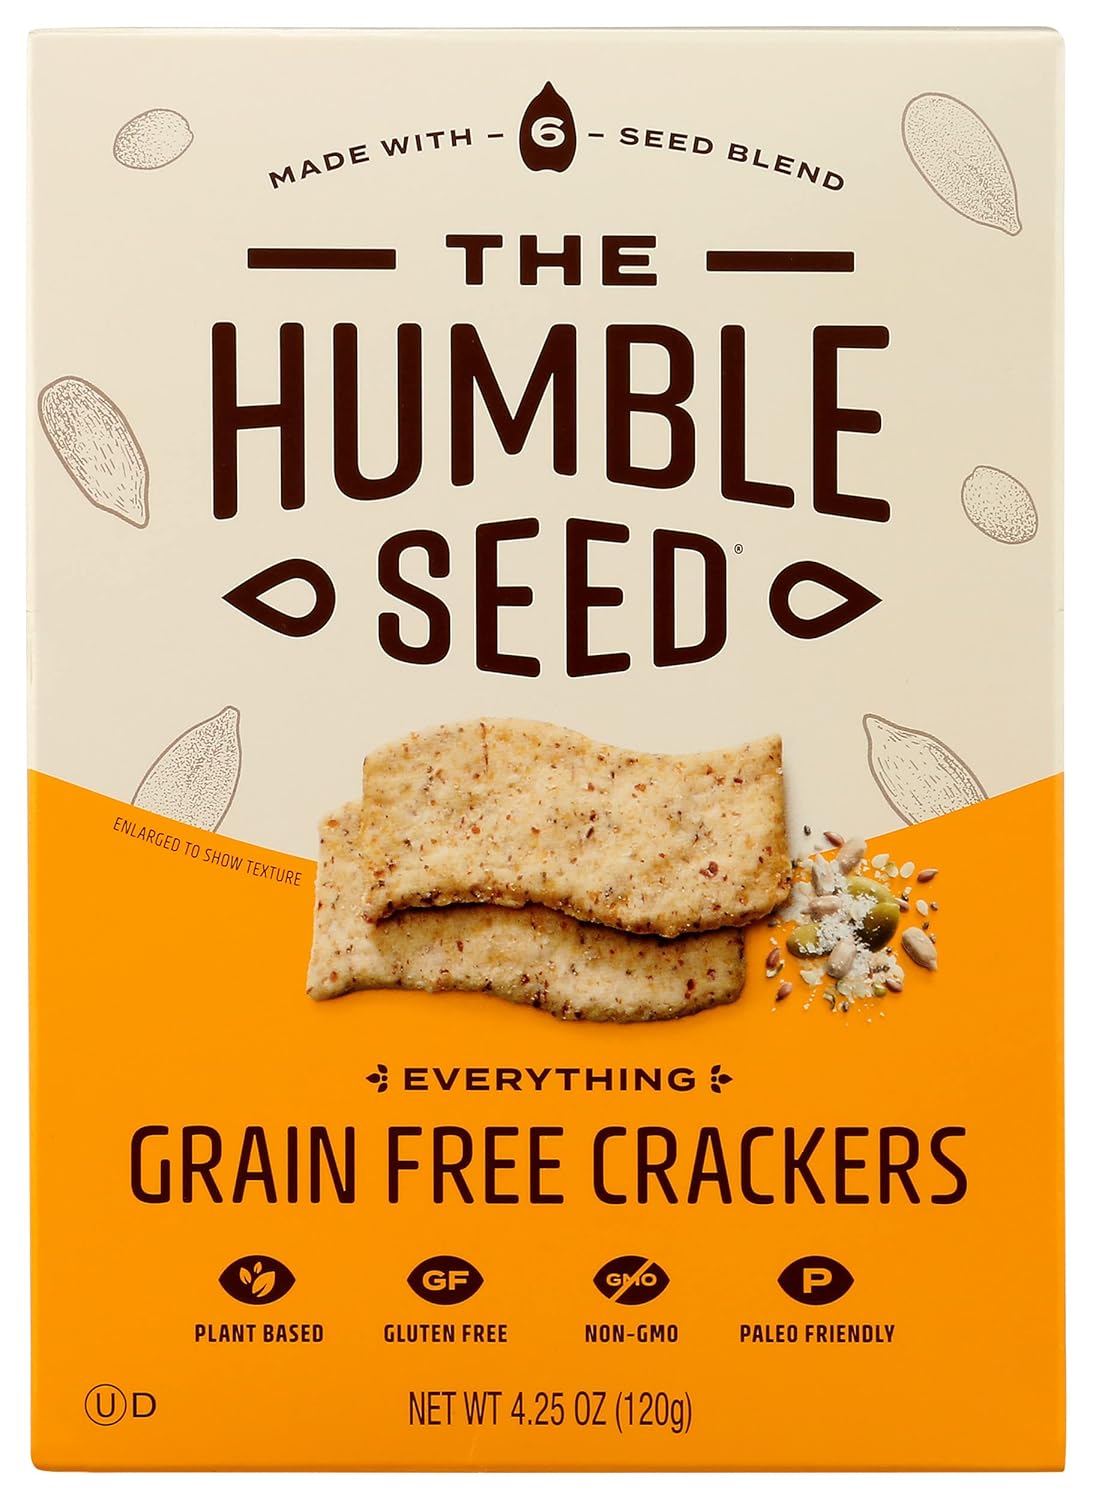
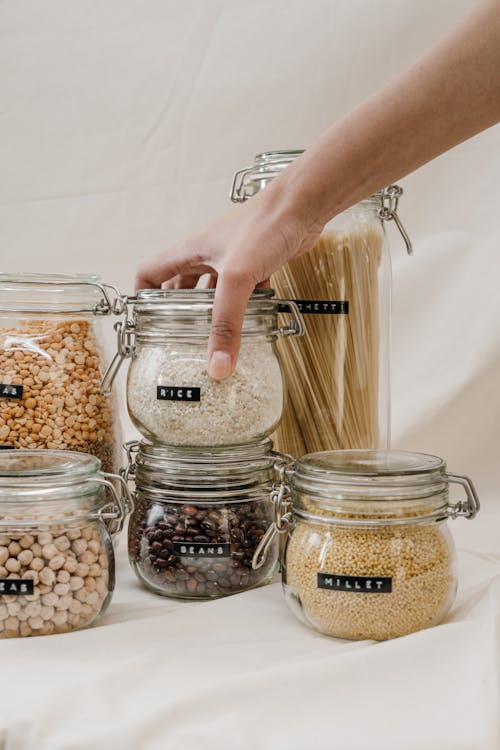
Crackers and breads

Bread can be a tricky addition because slices can dry out quickly. It’s especially tricky when it’s gluten-free or grain-free because the slices are more crumbly and hard to manage.

If you include bread, I do recommend pre-slicing it so that the guest line can move along quicker and nobody has to handle a knife.

I personally don’t usually include breads just because they can be tough to deal with when I have so many other things going on as the hostess.

But if you really want to include it (or just try out some yummy grain-free bread!) I recommend the Simple Mills brand:

Simple Mills Crackers

Simple Mills Crackers

Crackers are usually a fun addition because you can use them to separate sections on a board, and they come in different shapes to add visual interest.

Gluten-free or grain-free are a little more limited in variety, but can be just as fun!

I’ve recently found these grain-free crackers that are yummy and have just enough crunch to satisfy:

The Humble Seed Crackers

The Humble Seed Crackers

Keto Crackers

Keto Crackers

Paleo Thin Crackers

Paleo Thin Crackers

Protein

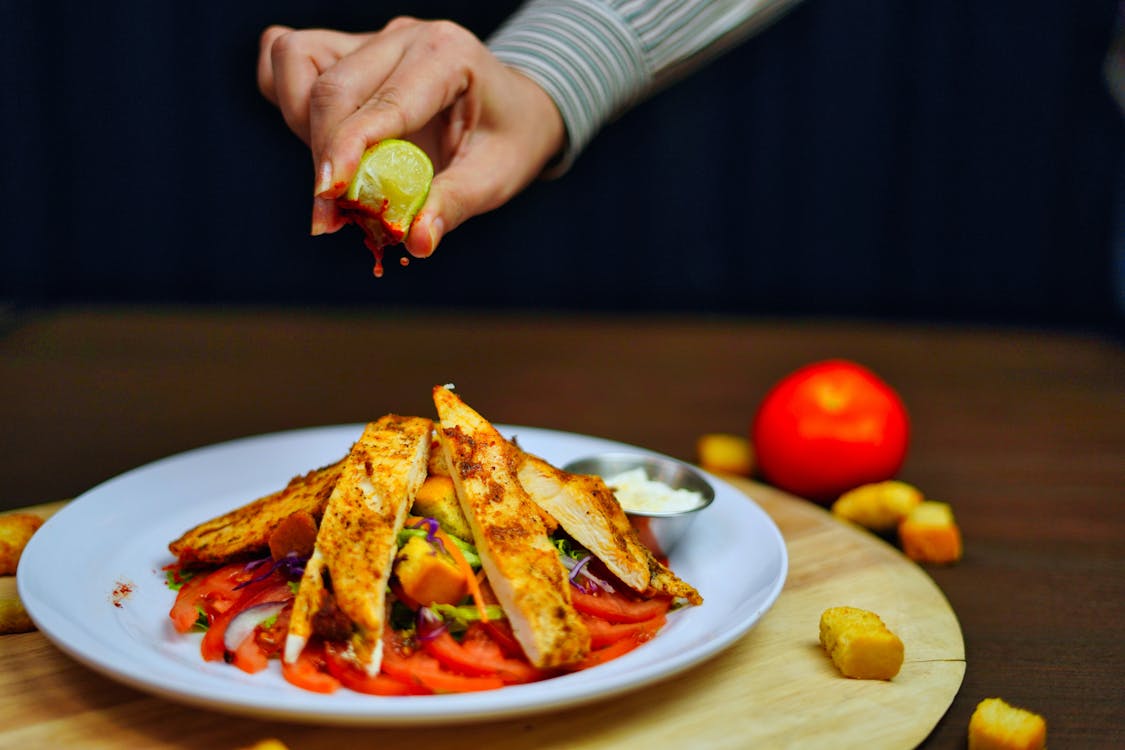
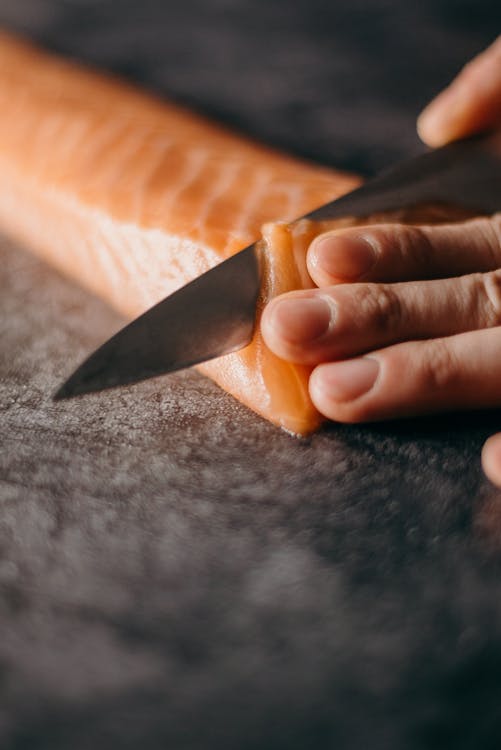
As said before, processed meats are a definite no-no on an anti-inflammatory diet. So if you choose to leave them out, you can still always add chunked-up grilled or baked chicken, steak bites, or even tuna.

There are some brands now that are uncured, so this may even be an option. If you do opt to have processed meats, I still recommend choosing organic.

Eggs are also a really great protein option. Boiled, that is. (Unless you’re doing a breakfast or brunch board, in which scrambled can still work too.)

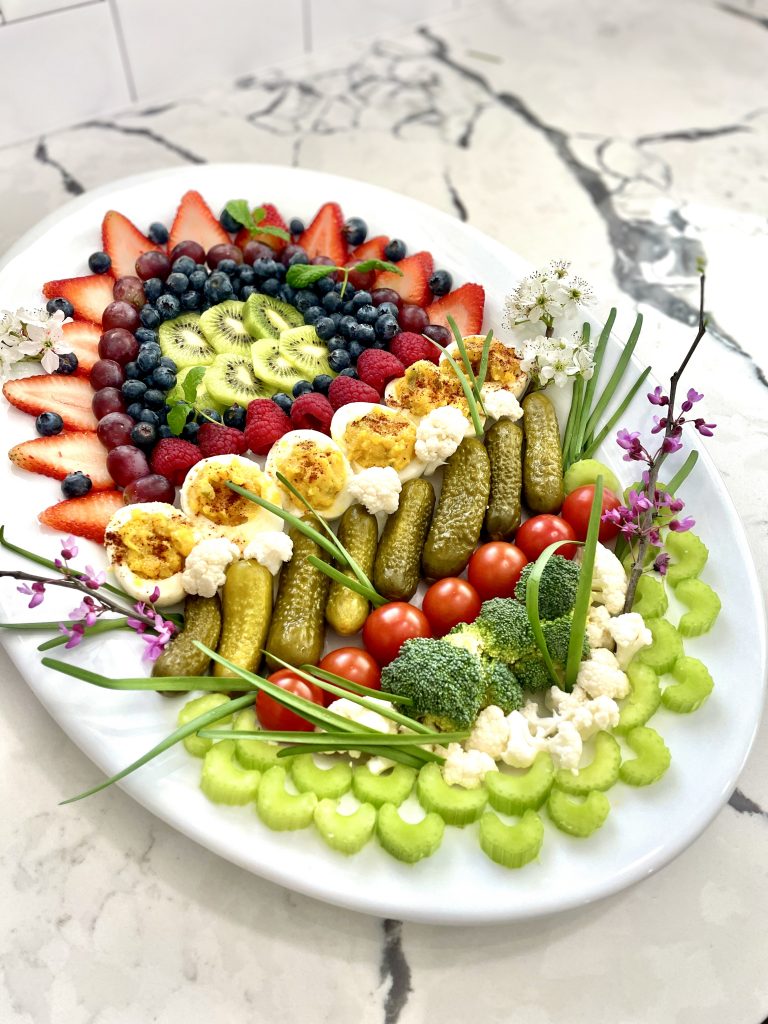
Deviled eggs are becoming a popular addition as well since they’re cooked, prepped, ready to go, and usually super yummy.
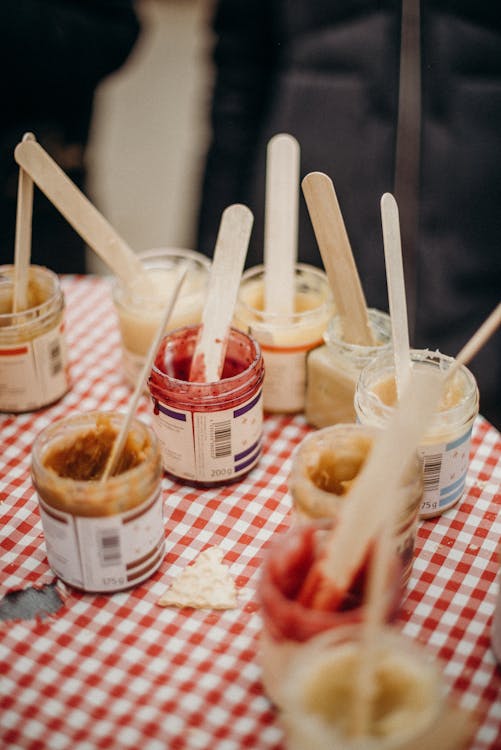
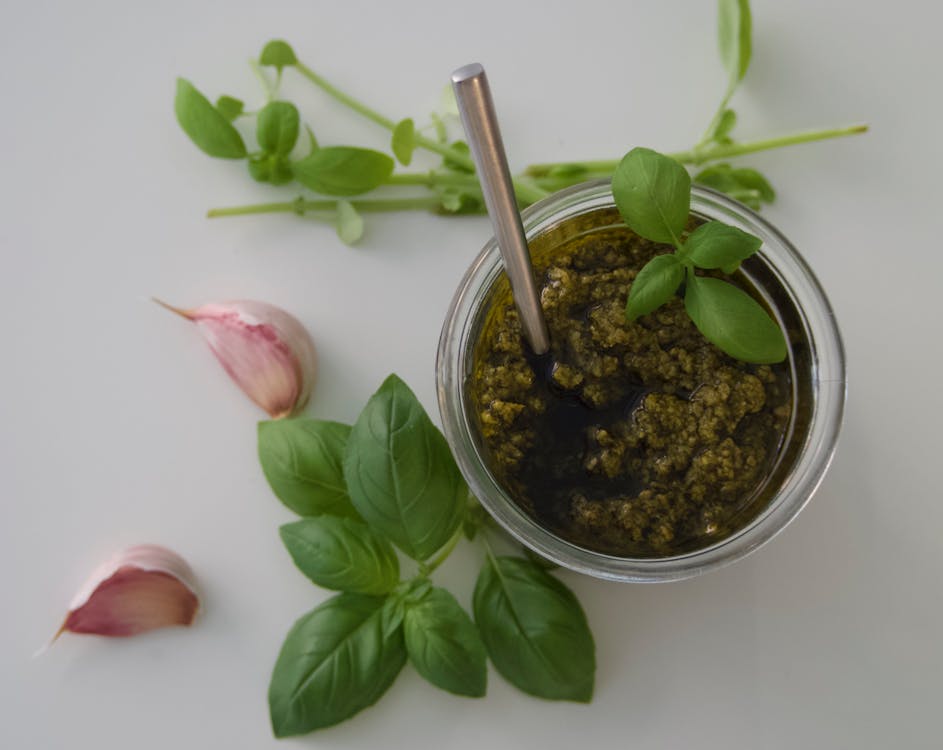
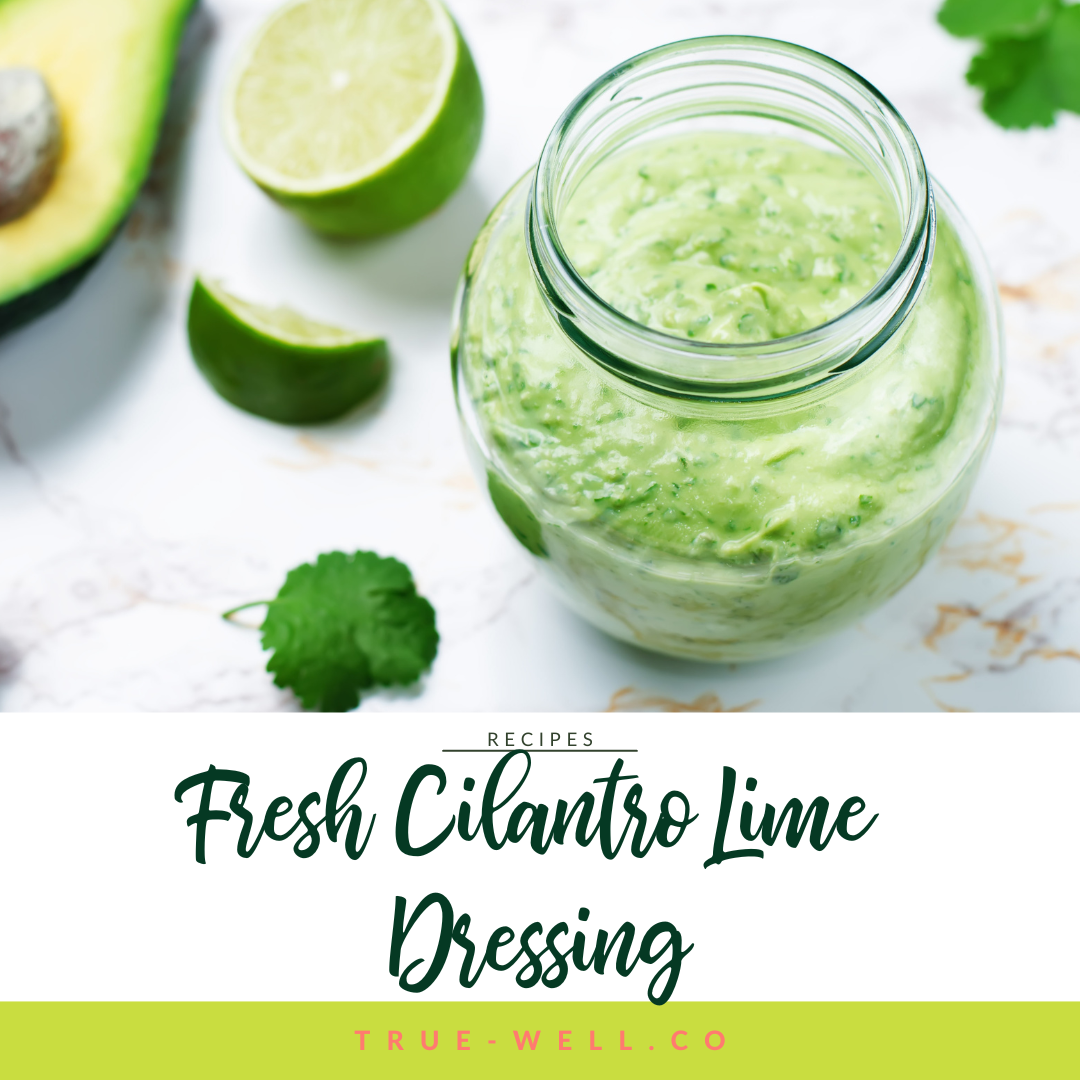
anti inflammatory charcuterie board

Sauces and spreads

Any anti-inflammatory sauces, spreads, or condiments will probably have to be homemade as most store-bought versions are full of inflammatory oils, preservatives, and non-organic dairy.

Some good options for these include hummus, bean dips, and homemade versions of dips or dressings for dipping veggies.

Honey has sugar, sure, but it can be a nice add-on for others. I always recommend raw and organic.

Fruit spreads are also a favorite as they pair well with cheeses and crackers. It can be hard to find sugar-free versions that also don’t have artificial sweeteners. So if you’re going for anti-inflammatory just for yourself, you may need to whip this one up yourself.

Consider color

Since one goal of the charcuterie board is to sit and be gorgeous, an important thing to consider when choosing your ingredients is color.

Some boards vary color throughout the board, while others have distinct color groupings.

💡 Think about how you want to arrange the board, or the colors you may need to emphasize before making final choices on ingredients to go on the board.

For example, I did a 4th of July board last year that distinctly moved from red to white to blue. This meant that I didn’t include ANYTHING that was green.

STEP 4: Design and place

The most fun part of a charcuterie board is designing it, then placing all the ingredients!

Designs can be literally anything, but the most eye-catching ones usually follow any of these patterns:

  • Linear separations
  • Symmetrical design
  • Color groupings
  • Balanced color through the board
  • Randomized texture

Basically, don’t just put stuff willy-nilly on the board. Have a visual plan in place and follow it, adjusting as needed.

And don’t forget to place your levels as you go as well (like the tiered cake platters.)
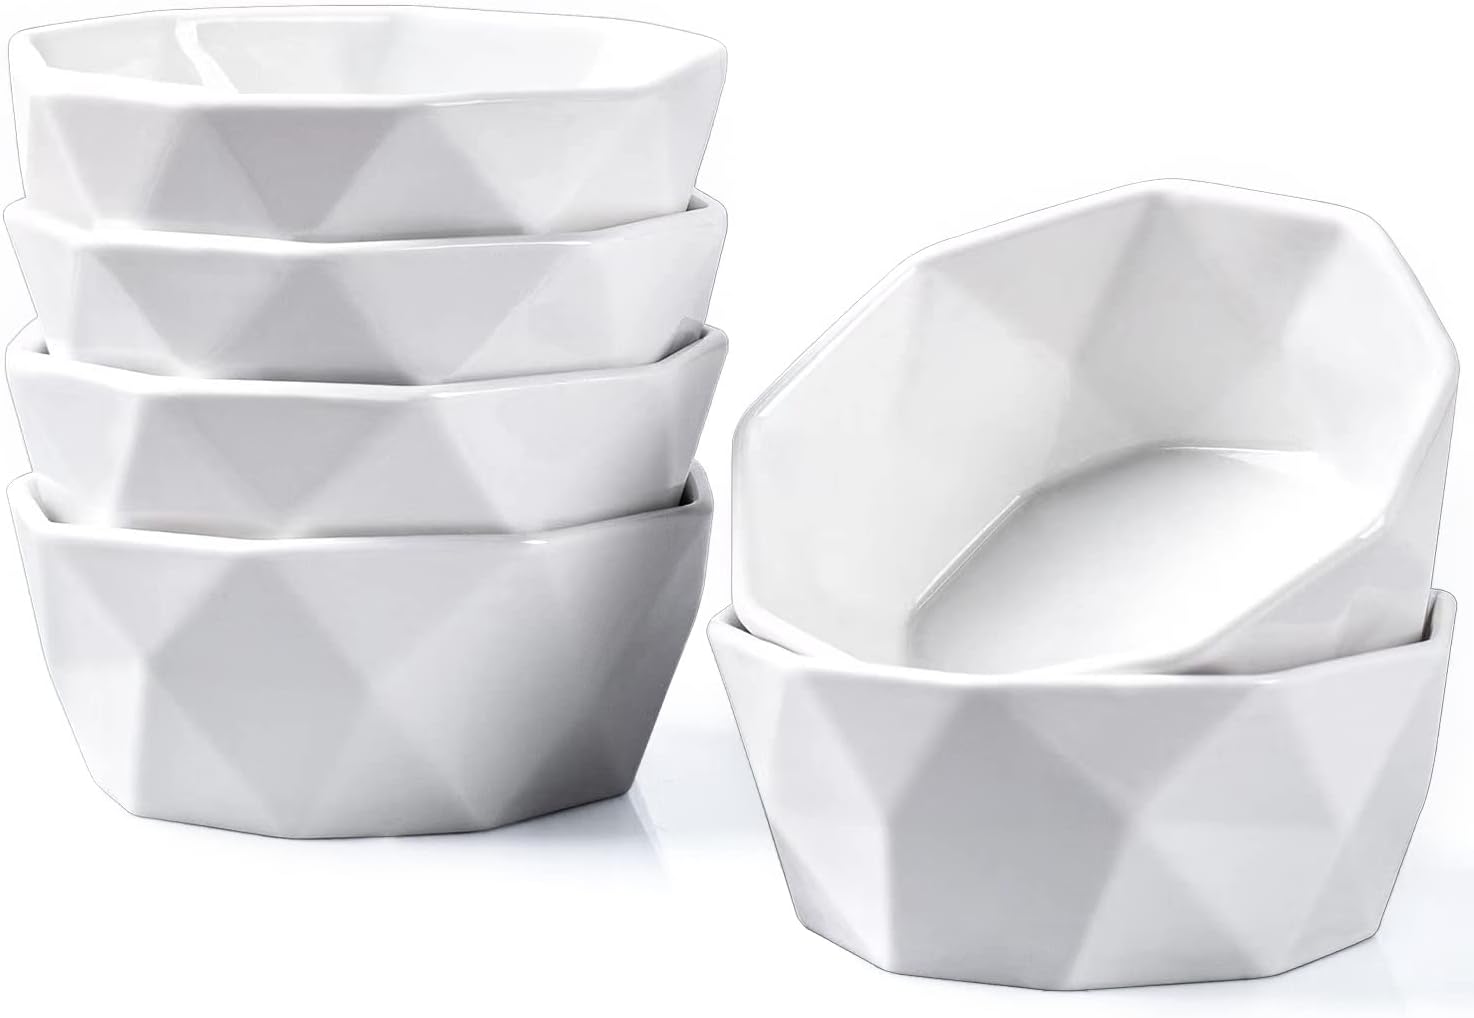
STEP 5: Containers

This step is needed for any sauces or condiments, but it’s also a neat visual add-on for things that are small and may need to be contained (like nuts or seeds.) I even use them sometimes for olives since they’re sometimes covered in oil or brine.

Using small containers like ramekins is perfect, but I’ve even seen other fun stuff like cupcake papers or silicone cupcake wrappers. Just make sure the spacing is random or proper spacing throughout the board or table.

LE TAUCI Ramekins

LE TAUCI Ramekins

Geometric Porcelain Ramekins

Geometric Porcelain Ramekins

Wooden Acacia Serving Bowls

Wooden Acacia Serving Bowls

Porcelain Dip Bowls

Porcelain Dip Bowls

Scalloped Stoneware Ramekins

Scalloped Stoneware Ramekins

An art professor in college once pointed out that the goal of any piece of art is to encourage the eye to move around the total piece, not just focus on one thing. This is the same concept with charcuterie boards. You may have a main focal ‘part’, but you want the entire thing to be visually appealing.

STEP 6: Decor and garnish

I think this is the most fun part, because it speaks to whatever season, holiday, or event you’re celebrating!

anti inflammatory charcuterie board

Decor and garnish can be as simple as letters or numbers cut out of cheeses, as easy and natural as flowers from your yard, or as themed as paper or plastic cutouts and do-dads you’ve purchased specifically for this get-together.

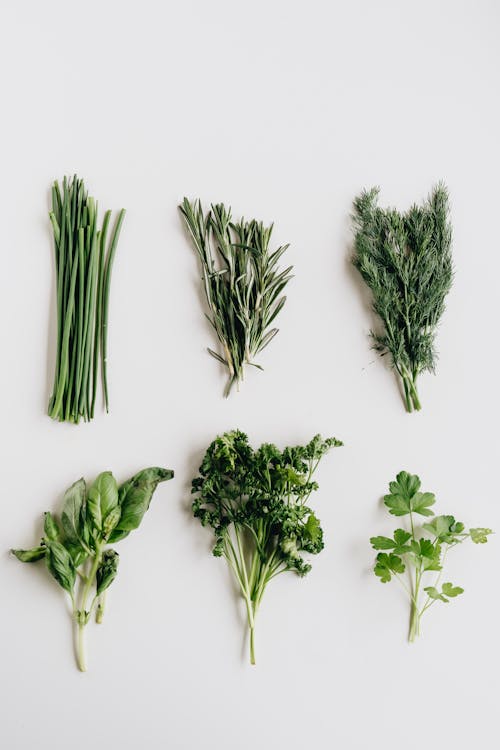
Garnish can also be as simple as fresh herbs.

anti inflammatory charcuterie board

The possibilities are endless.

These, too, should be spaced out so they make sense visually and continue to encourage eye movement around the board.

STEP 7: Plates and serving

Plates are necessary for charcuterie serving, but make sure that you pay attention to the types of foods you have as well.

  • Do you need spoons to scoop anything?
  • Are there soft cheeses or spreads that require a knife?
  • Would toothpicks be the obvious choice for some of the foods (like olives)?
  • Would little serving forks be best for spearing things?

Make sure you have appropriate serving pieces to make things easy. (And don’t forget the napkins! 😉)

20 Piece Large Serving Set

20 Piece Large Serving Set

Charcuterie Board Utensils

Charcuterie Board Utensils

Cocktail Picks (Colored)

Cocktail Picks (Colored)

Bamboo Knot Skewers

Bamboo Knot Skewers

Wooden Ball Food Picks

Wooden Ball Food Picks

Bamboo Mini Forks

Bamboo Mini Forks

STEP 8: Timing

I’ll be the first to warn you that making a charcuterie board can take a while!

That being said, you want to try to time the finished masterpiece with when your guests arrive (unless you have a large enough fridge to accommodate until then.)

Just remember that the last thing you want is a food poisoning situation from foods that have been out too long because you made the thing first thing in the morning when guests didn’t arrive until late afternoon.

anti inflammatory charcuterie board

I will sometimes place the tiered platters and ramekins, then arrange the nuts and crackers earlier. Then when it’s closer to time for guests to arrive I’ll place the cold items and garnish with decor right as people arrive.

If it’s just a board I’m making for us at home, the kids will NOT let me do it alone! So it’s actually a kind of cool time to spend together creating something pretty we can eat when we’re finished. 🥰

~

Charcuterie boards can be a super fun way to add spark and interest to your food choices at any get-together! (I still have friends who talk about boards I’ve done on various holidays.)

But admittedly, it can be a challenge to create one that’s anti-inflammatory. Don’t despair, though–it CAN be done!

Check out my other charcuterie boards and get the ingredients lists and charcuterie platter ideas of your own! 👇

The ‘Easter’ anti-inflammatory charcuterie platter:

anti inflammatory charcuterie board

The ‘Spring Anti-Inflammatory Charcuterie Board’:

anti inflammatory charcuterie board

The ‘Summer Anti-Inflammatory Charcuterie Board’:

And hit me up on Insta! Post your charcuterie board and tag me! @truewell.co

💖

Winter Pear and Yogurt Bowl

When apples are done for the fall, pears move right on in to take center stage! And this Winter Pear and Yogurt Bowl is super versatile, macro balanced, and oh so yummy!

pear and yogurt bowl breakfast

This recipe is also featured in the Winter Anti-Inflammatory Meal Prep session (check it out and get your free guide!)

The thing that’s so great about nourishing yogurt bowls like this is that you can add whatever you feel like adding (like as long as it’s anti-inflammatory and falls in your macros if you’re trying to lose or gain weight.)

And although we used Greek yogurt for this bowl, if you’re dairy-free, you can simply sub that out for coconut or almond yogurt.

winter pear and yogurt bowl breakfast

Another reason these are so easy is that you can just throw it together in 3 minutes.

But the yogurt mixture can be portioned out, and the toppings can separately be portioned out so you can meal prep them ahead of time for the week. (Win!)

woman eating a winter pear and yogurt bowl breakfast

Now, I really used to not like pears that much. Even though we had a pear tree as a kid, they were the variety that big food companies use to can (you know–the ones that sit on the grocery store shelves?) I don’t like the grittiness.

But if you get the winter varieties that are a bit smaller, the skin is actually very soft and the inside texture isn’t gritty. Which is why I now love pears. 🍐

Since I keep the skins on (they’re full of nutrients like apple skins are!) I use a trick to quickly and easily slice and core them.

How to quickly and easily cut and core a pear:

  1. Cut off a thin slice from the bottom of the pear so it sits flat
  2. Cut the top skinny part off
  3. Use an apple corer/slicer the same way you would an apple
pear and yogurt bowl

Here’s what I put into my creamy and nourishing Winter Pear and Yogurt Bowl:

Print

Winter Pear and Yogurt Bowl

5 Stars 4 Stars 3 Stars 2 Stars 1 Star

No reviews

  • Prep Time: 5 minutes
  • Total Time: 5 minutes
  • Yield: 1 1x
  • Category: Breakfast, Snack

Ingredients

Units Scale
  • 1 cup Greek yogurt, Plain and unsweetened (or coconut or almond yogurt for dairy-free or vegan)
  • 1/2 pear (halved and cored)
  • 1/4 tsp cinnamon
  • 23 drops liquid stevia
  • 1/8 tsp vanilla extract
  • 1/8 cup pepitas ((pumpkin seeds))

Instructions

  1. Dip yogurt into a bowl. Add the stevia and vanilla extract, then stir till completely mixed.
  2. Top with pear slices. Sprinkle with cinnamon.
  3. Enjoy!

Did you make this recipe?

Share a photo and tag us @truewell.co — we can’t wait to see what you’ve made!

Like this recipe? Prep it and 5 others with the Winter Anti-Inflammatory Meal Prep Guide! {Click the image to grab it!}👇

winter anti inflammatory  meal plan
pear and yogurt bowl

Crispy Kale Chips

If you’re looking for a super easy and healthy winter snack, Crispy Kale Chips are a super easy choice! They’re the ‘savory cotton candy’ of the snack world. Each bite is lightly crisp but dissolves in each addictive bite.

The other plus is that these Crispy Kale Chips are crazy easy to make.

crispy kale chips

The printable recipe is below, and it’s also featured in our Winter Meal Prep session (check it out and get the printable guide!)

Step 1: Choose your kale

First of all, opt for organic if you can. Greens easily soak up pesticides, especially since the part you eat isn’t protected by a shell or a pod cover or skin. Pesticides are inflammatory to all bodies, so it’s best to be safe. If that’s not an option, make sure you wash it well when you get home.

Second, I know it can be tempting to grab a bag of the pre-chopped kale, but that’s a huge mistake. The reason is that they don’t remove the stems, and you’ll be left for an hour just trying to trim out all the mini stems.

crispy kale chips

Instead, get a bundle of whole kale leaves.

Step 2: Trimming kale for kale chips

One method I’ve found to trim kale leaves is to hold the end of the stem, and use a paring knife to sort of scrape the leafy part away from the stem.

crispy kale chips

You do have to be careful that you don’t cut through the stem, especially if your knife is super sharp.

The other option would be to lay the whole leaf flat and just cut out the stem. Or, you could fold the leaf in half and just make a single cut to remove the stem of the kale.

crispy kale chips

Once the stems are removed, simply tear the pieces in medium to large chunks and place in a bowl.

Step 3: Massaging kale for kale chips

Adding oil is going to help with the crispness, so drizzle some avocado, warmed coconut oil, or MCT oil on the kale leaves in the bowl.

Some people don’t think it’s necessary, but I do like to massage the leaves to loosen the fibers. Also this allows the oil to get evenly distributed.

You’ll literally just stick your hands in, massage the leaves, and turn over chunks as you’re working to get the oil on everything.

*DON’T SEASON YET!

crispy kale chips

Step 4: Cooking kale for kale chips

Cooking the kale is super easy. You simply place the contents of the bowl on a large baking pan.

crispy kale chips

Kale cooks at 300 degrees F for about 20 minutes or so. Keep an eye out and make sure they’re getting browned (this is how they get crispy) without getting burned.

Step 5: Cool, season, and enjoy!

Let them cool to finish crisping, and then add sea salt or any other seasonings you wish. It’s best to wait until they’re cooked to season because they shrink and it’s really easy to over-season your kale chips.

Kale Chips flavor options

Some flavor options are:

  • Ranch (nutritional yeast + lemon juice + salt)
  • Chili Lime (chili powder + lime juice + salt)
  • Salt and Vinegar (vinegar + salt)
crispy kale chips

And enjoy! They can be stored in a baggie or container on the counter for a few days.

Print

Crispy Kale Chips

5 Stars 4 Stars 3 Stars 2 Stars 1 Star

No reviews

  • Prep Time: 5 minutes
  • Cook Time: 20 minutes
  • Total Time: 25 minutes
  • Yield: 4 1x
  • Category: Snack

Ingredients

Scale
  • 1 bunch kale leaves (organic)
  • 1 TBSP avocado oil (or warmed coconut, or MCT)

Instructions

  1. Prehead the oven to 300 degress F.
  2. Wash and trim all kale leaves.
  3. Tear leaves into medium to large chunks and place in a large bowl.
  4. Drizzle the oil, and massage to evenly distribute the oil.
  5. Spread the entire bowl of kale on a baking sheet, spreading out as much as possible.
  6. Cook for about 20 minutes, making sure the leaves are getting browned without burning to ensure crispness.
  7. Remove from oven and let cool.
  8. Season with sea salt or any other seasoning of choice.
  9. Enjoy! (Can be stored on counter in a container for a few days)

Did you make this recipe?

Share a photo and tag us @truewell.co — we can’t wait to see what you’ve made!

Like this recipe? Prep it and 5 others with the Winter Anti-Inflammatory Meal Prep Guide! Click the image below to grab it! 👇

winter anti inflammatory diet meal plan
crispy kale chips

Sauteed Cabbage and Chicken Sausage One-Pan Meal

Cold winter nights call for warm and easy one-pan meals like this Sautéed Cabbage and Chicken Sausage.

sauteed cabbage and chicken sausage one-pan meal

Even though I’ve been averse to cabbage for a long time (from having my parents and grandparents tell me to eat some cabbage non-stop growing up), I’ve come back around to it.

Mainly because I know it’s chock-full of needed nutrients for winter and has anti-inflammatory properties. But also because when it’s cooked right, it’s actually really delicious. And that’s exactly what this dish is. Delicious. And easy.

Here’s how to make it:

sauteed cabbage and chicken sausage one-pan meal

Step 1: Chop the cabbage

Cabbage almost always has dirt on it, even if it looks clean at first. Make sure you peel the outer few layers and wash all the dirt off really good. (Gritty cabbage is unpleasant cabbage.)

Cut the cabbage into slices, then chop the slices into medium to smallish chunks. (This depends on what your preference is.)

*If you’re prepping this for later in the week, store it in a baggie until the night of.

sauteed cabbage and chicken sausage one-pan meal

Step 2: Sautee the cabbage

Next, add the avocado oil to a sautee pan and turn the heat to medium warm. Add the cabbage and salt, and sautee it until it’s on the verge of being soft.

Then add the dijon mustard and lemon juice.

Step 3: Add the sausage

Slice the chicken sausage into chunks or rounds and add it to the pan. Keep stirring until the chicken is warmed through.

Plate and enjoy!

Don’t be afraid to add a spinach or kale salad on the side! 🍃

The printable recipe is below, and it’s also featured in our Winter Meal Prep session (check it out and get the printable guide!)

Print

Sauteed Cabbage and Chicken Sausage Pan

5 Stars 4 Stars 3 Stars 2 Stars 1 Star

No reviews

  • Prep Time: 5 minutes
  • Cook Time: 10 minutes
  • Total Time: 15 minutes
  • Yield: 4 1x
  • Category: lunch, Main Course

Ingredients

Scale
  • 16 oz chicken sausage (Make sure there's no cheese inside for dairy-free)
  • 1 head purple cabbage (sliced and chopped)
  • 2 TBSP avocado oil
  • 2 tsp lemon juice
  • 1 tsp dijon mustard
  • 1/4 tsp salt

Instructions

  1. Heat a cast-iron skillet over medium heat. Once hot, add the sausage and cook for six to eight minutes, until cooked through. Then remove and set aside.
  2. Add the cabbage wedges to the skillet and cook until browned and slightly charred on both sides, about five minutes total.
  3. In a small bowl, mix together the olive oil, lemon juice, mustard, and salt. Add the sausage and cabbage to plates. Drizzle the dressing over the cabbage and enjoy!

Notes

Per serving:

Fat: 16g

Carbs: 11 g

Fiber: 3 g

Sugar: 5 g

Protein: 23 g

Nutrition

  • Calories: 279

Did you make this recipe?

Share a photo and tag us @truewell.co — we can’t wait to see what you’ve made!

Like this recipe? Prep it and 5 others with the Winter Anti-Inflammatory Meal Prep Guide! {Click the image below to grab it} 👇

winter anti inflammatory meal plan
sauteed cabbage and chicken sausage one-pan meal

Creamy Pumpkin Alfredo with Spaghetti Squash Noodles

If you like alfredo sauce on anything you’ll LOVE this Creamy Pumpkin Alfredo with Spaghetti Squash Noodles!

pumpkin alfredo sauce

Honestly, my kids have made an Olympic sport of turning up their noses at dinners I make, then retracting their comments once they taste it.

This is one of those dinners. They loved it.

The thing that’s cool about this recipe, if you’re worried about the pumpkin taste, is that you actually can’t even taste the pumpkin. It makes the sauce a slightly more orange color, but adds a nutritional boost without even affecting the flavor hardly at all.

We like to use it on top of spaghetti squash because the seasonal winter produce is anti-inflammatory goodness that provides tons of fiber and vitamins like A, B6, and C. (All of which are amazing for cold and flu season!)

pumpkin alfredo sauce

The pumpkin in the alfredo sauce gives it an additional boost of those nutrients as well. Plus, the healthy fats in the alfredo sauce base are used to absorb alllll that Vitamin A. (Healthy triple whammy!)

The printable recipe is below, and it’s also featured in our Winter Anti-Inflammatory Meal Prep session (check it out and get the printable guide!)

Print

Creamy Pumpkin Alfredo Sauce on Spaghetti Squash Noodles

5 Stars 4 Stars 3 Stars 2 Stars 1 Star

No reviews

  • Prep Time: 10 minutes
  • Cook Time: 30 minutes
  • Total Time: 40 minutes
  • Yield: 4 1x
  • Category: Main Course

Ingredients

Units Scale
  • 1 spaghetti squash
  • 2 TBSP avocado oil (or butter)
  • 5 tsp minced garlic
  • 1 cup pumpkin puree (canned)
  • 2 1/2 cups heavy cream (organic)
  • 1/2 cup parmesan cheese (organic, grated from the block)

Instructions

  1. Preheat the oven to 350 degrees F. Cut the squash in half lengthwise. Place on a pan covered in foil. Roast for 30-40 minutes.
  2. Remove squash from oven and let cool enough to touch.
  3. Flip halves over, then use a fork to scrape the spaghetti 'noodles' out of the middle into a bowl.
  4. For the sauce (don't make ahead of time, you want this to be made immediately before serving): Heat the avocado oil and garlic over medium heat. Add the pumpkin and cream, stirring. Simmer until lightly thickened, then add the parmesan cheese and stir until combined.
  5. Plate the squash noodles, then top with pumpkin alfredo sauce.
  6. This is also great topped with organic crumbled bacon or grilled chicken.
  7. Enjoy!

Did you make this recipe?

Share a photo and tag us @truewell.co — we can’t wait to see what you’ve made!

Like this recipe? Prep it and 5 others with the Winter Anti-Inflammatory Meal Prep Guide! Click the image below to grab it!👇👇👇

pumpkin alfredo sauce

Roasted Leek and Cauliflower Soup

Truthfully, in the past I’d never tried leeks–even in something as yummy as this Roasted Leek and Cauliflower Soup.

roasted leek and cauliflower soup

I’m embarrassed to admit that every time I thought of leeks, I remembered the scene in Bridget Jones’ Diary where she tried to make leek soup and left the blue rubber band in it and the entire soup was blue. 😝 😹

But thankfully I got over it and now absolutely love the taste of leeks! Which is why this soup is so great. It truly embodies the anti-inflammatory winter produce with a warm, creamy, and filling soup.

roasted leek and cauliflower soup

Try it out, and don’t forget to top it with organic crumbled bacon or even some sharp cheddar and chives!

The printable recipe is below, and it’s also featured in our Winter Freestyle Meal Prep session (check it out and get the printable guide!)

Print

Roasted Leek and Cauliflower Soup

5 Stars 4 Stars 3 Stars 2 Stars 1 Star

No reviews

  • Prep Time: 35 minutes
  • Cook Time: 20 minutes
  • Total Time: 55 minutes
  • Yield: 4 1x
  • Category: Main Course

Ingredients

Units Scale
  • 1 head cauliflower (About 2 cups chopped)
  • 2 leeks (medium to small)
  • 2 TBSP minced garlic
  • 2 TBSP avocado oil (or melted coconut oil)
  • 1/4 cup almond butter (or cashew)
  • 3 tsp thyme leaves (fresh)
  • 3 cups water
  • 1/8 tsp paprika
  • 1 TBSP lemon juice
  • 1 tsp salt and pepper (to taste)

Instructions

  1. Preheat oven to 350 degrees F. Spread the cauliflower florets and leeks on a baking sheet. Drizzle with 1 TBSP avocado oil and lightly season with salt and pepper.
  2. Roast for 25 minutes, turning pan halfway through. Let it get lightly browned but not burned.
  3. Let cool about 5-10 minutes, then, into a high-powered blender add all the roasted vegetables, almond butter, thyme leaves, lemon juice and half the water (1 1/2 cups).
  4. Blend until pureed, then add the remaining ingredients and pulse a few more times.
  5. Pour into a saucepan and let the soup heat until warmed up completely. Adjust seasonings to taste.
  6. You may add more water or even broth if the soup is too thick.
  7. Top with a dollop of sour cream or organic bacon crumbles. Enjoy

Did you make this recipe?

Share a photo and tag us @truewell.co — we can’t wait to see what you’ve made!

Like this recipe? Prep it and 5 others with the Anti-Inflammatory Winter Freestyle Meal Prep Guide! {Click the image to grab it!}👇

roasted leek and cauliflower soup

Chicken Sausage with Roasted Broccoli and Cauliflower

When it comes to easy anti-inflammatory dinners, this Chicken Sausage with Roasted Broccoli and Cauliflower couldn’t be easier.

chicken sausage with roasted broccoli and cauliflower

Chicken sausage is one of my favorite ways to eat chicken because it’s a little different than our same ole’, same ole’ chicken, and you can find it with delicious add-ins like feta and sundried tomato.

Broccoli and cauliflower are cold-weather staples, but an important part of an anti-inflammatory diet for their phytochemicals.

This entire meal is super simple and low carb, which is important for keeping blood sugar under control, thereby controlling chronic inflammation.

This recipe is also a snap to meal prep! 😉

**This recipe is featured in our Fall Anti-Inflammatory Meal Prep Session! 

Ingredients

  • 1 pack of chicken sausage
  • 1 head of broccoli
  • 1 head of cauliflower
  • 1/2 red onion
  • avocado or olive oil
  • salt + pepper
  • garlic powder

Prep + Instructions

This meal is so simple because the ingredients are very straightforward, with no complex prep or cooking.

  1. Preheat the oven to 350 F.
  2. Chop florets from broccoli and cauliflower, as well as the onion.
  3. Place them on a sheet pan lined with foil or a grill mat.
  4. Drizzle oil, then season with salt, pepper, and garlic powder.
  5. Place broccoli and cauliflower pan into the oven for 25-30 minutes.
  6. Cut the chicken sausage links into bite-sized pieces.
  7. In a skillet, heat the sausage until warm and golden.
  8. Remove the skillet from heat; plate the chicken sausage.
  9. Remove the broccoli and cauliflower from the oven when done; plate with the chicken sausage.
  10. Enjoy!

Notes + Make it easier

*Most chicken sausage is already pre-cooked, you need only heat it up. But CONFIRM this, as the sausage will need to cook much longer to ensure it’s fully cooked if it doesn’t specify ‘precooked’ or ‘fully cooked’ on the label.

*Save time by buying broccoli and cauliflower pre-chopped.

*If you’ve prepped/roasted the broccoli and cauliflower ahead of time, reheat it in the microwave while warming the chicken sausage in a skillet.

👇Click the image below to grab the free Fall Anti-Inflammatory Meal Prep Guide! 👇

fall anti-inflammatory meal prep guide free pdf
Print

Chicken Sausage with Roasted Broccoli and Cauliflower

5 Stars 4 Stars 3 Stars 2 Stars 1 Star

No reviews

  • This entire meal is super simple and low carb, which is important for keeping blood sugar under control, thereby controlling chronic inflammation.


**This recipe is featured in our Fall Anti-Inflammatory Meal Prep Session!

  • Author: Laura Brigance, MS, CHC
  • Prep Time: 5 minutes
  • Cook Time: 25-30 minutes
  • Total Time: 0 hours
  • Yield: 4 servings 1x
  • Category: Dinner
  • Method: Oven + Cooktop

Ingredients

Scale
  • 1 pack of chicken sausage
  • 1 head of broccoli
  • 1 head of cauliflower
  • 1/2 red onion
  • avocado or olive oil
  • salt + pepper
  • garlic powder

Instructions

  1. Preheat the oven to 350 F.
  2. Chop florets from broccoli and cauliflower, as well as the onion.
  3. Place them on a sheet pan lined with foil or a grill mat.
  4. Drizzle oil, then season with salt, pepper, and garlic powder.
  5. Place broccoli and cauliflower pan into the oven for 25-30 minutes.
  6. Cut the chicken sausage links into bite-sized pieces.
  7. In a skillet, heat the sausage until warm and golden.
  8. Remove the skillet from heat; plate the chicken sausage.
  9. Remove the broccoli and cauliflower from the oven when done; plate with the chicken sausage.
  10. Enjoy!

Notes

*Most chicken sausage is already precooked, you need only heat it up. But CONFIRM this, as the sausage will need to cook much longer to ensure it’s fully cooked if it doesn’t specify ‘precooked’ or ‘fully cooked’ on the label.

*Save time by buying the broccoli and cauliflower pre-chopped.

*If you’ve prepped/roasted the broccoli and cauliflower ahead of time, reheat it in the microwave while warming the chicken sausage in a skillet.

Did you make this recipe?

Share a photo and tag us @truewell.co — we can’t wait to see what you’ve made!

📌PIN IT FOR LATER!

chicken sausage with roasted broccoli and cauliflower

Roasted Brussels Sprouts Caesar Salad with Ground Turkey

roasted brussels sprouts caesar salad with ground turkey

Even though brussels sprouts alone are one of my all-time faves for veggies (which is saying something since we never had them growing up!), merging a basic roasted brussels sprouts recipe with the added protein of ground turkey, a spicy crunch of sliced radishes, and topping it off with a caesar flair is an amazingly simple and downright delicious upgrade!

Ingredients

Ground turkey

Ground turkey is a perfect way to add in lean protein. It can also be a great way to reduce the consumption of red meat as a substitute. Just keep in mind that the lower fat content means it will be a bit more dry.

Brussels sprouts

Part of the cruciferous family, Brussels sprouts contain compounds that help protect against cancer, as well as phytochemicals that help reduce inflammation. They’re also packed with fiber and super simple to cook.

Radishes

Radishes are low in calories, but full of antioxidants and fiber. They’re a great way to pack in more nutrients and have the versatility of being eaten raw or cooked.

Pumpkin seeds

Packing in more protein than nuts, pumpkin seeds also contain fiber and are full of minerals like manganese, phosphorus, and magnesium.

Garlic

Garlic is one of my favorite ingredients to use in the fall and winter. This is because it’s cold and flu (and COVID) season, and garlic helps boost the immune system.

It’s also been shown to reduce high blood pressure, pull down chronic inflammation, reduce cholesterol levels, and even help prevent cancer. It also has antibiotic properties, so I’d say this is an amazing staple to use all fall and winter long!

Dijon mustard

Dijon mustard (and yellow) are my favorite condiment to use in an anti-inflammatory diet. This is because they’re sugar-free, low-calorie, and give an amazing boost of acidic flavor.

Instructions

  1. Preheat oven to 400 degrees F.
  2. In a large bowl, toss brussels sprouts with a splash of olive oil and season with salt and pepper. Toss well and place on baking sheet lined with parchment paper or foil.
  3. Place in oven and bake for 30 minutes.
  4. Brown the ground turkey.
  5. Add olive oil, lemon juice mustard, garlic, and salt and pepper to taste into a blender. Blend until creamy.
  6. Once brussels sprouts are finished cooking, remove from oven and let cool a few minutes.
  7. Then place brussels sprouts, turkey, and radish into large mixing bowl. Add dressing and toss well.

Notes

*Save time by buying the Brussels sprouts already halved.

*This is a great meal prep meal! Just store the dijon separately from the rest and reheat and toss before eating.

*Add in even more fiber and bulk by plating this on top of a bed of romaine leaves.

👇Click the image below to grab the free Fall Anti-Inflammatory Meal Prep Guide!

fall anti inflammatory meal prep guide pdf
Print

Roasted Brussels Sprouts Caesar Salad with Ground Turkey

5 Stars 4 Stars 3 Stars 2 Stars 1 Star

No reviews

This delicious anti-inflammatory twist on a Caesar salad merges roasted Brussels sprouts + ground turkey and a spicy crunch of radishes.

  • Prep Time: 15 minutes
  • Cook Time: 30 minutes
  • Total Time: 45 minutes
  • Yield: 4 1x
  • Category: Main Course
  • Method: Oven + Cooktop

Ingredients

Units Scale
  • 1 lb ground turkey (extra lean )
  • 5 cups brussels sprouts (halved)
  • 1/2 cup radishes (sliced)
  • 1/2 cup pumpkin seeds
  • 1/3 cup extra virgin olive oil
  • 3 tsp minced garlic
  • 1/4 cup lemon juice (or 1/2 lemon)
  • 2 TBSP Dijon mustard
  • 1 tsp salt/pepper (to taste)

Instructions

  1. Preheat oven to 400 degrees F.
  2. In a large bowl, toss brussels sprouts with a splash of olive oil and season with salt and pepper. Toss well and place on baking sheet lined with parchment paper or foil.
  3. Place in oven and bake for 30 minutes.
  4. Brown the ground turkey.
  5. Add olive oil, lemon juice mustard, garlic, and salt and pepper to taste into a blender. Blend until creamy.
  6. Once brussels sprouts are finished cooking, remove from oven and let cool a few minutes.
  7. Then place brussels sprouts, turkey, and radish into large mixing bowl. Add dressing and toss well.

Notes

*Save time by buying the Brussels sprouts already halved.

*This is a great meal prep meal! Just store the dijon separately from the rest and reheat and toss before eating.

*Add in even more fiber and bulk by plating this on top of a bed of romaine leaves.

Did you make this recipe?

Share a photo and tag us @truewell.co — we can’t wait to see what you’ve made!

roasted brussels sprouts caesar salad with ground turkey

Low Carb Eggplant Parmesan Casserole (Without Breadcrumbs)

With only a handful of simple ingredients, this Low Carb Eggplant Parmesan Casserole (without breadcrumbs) is easy to make and perfect for busy weeknights or summer meal prep.

low carb eggplant parmesan casserole without breadcrumbs

We’re covering step-by-step instructions for the perfect eggplant casserole every time, and even give you ideas for customizing the flavors to your liking. So, let’s get started and satisfy those cravings!

😎🍉THIS LOW-CARB EGGPLANT PARMESAN CASSEROLE RECIPE IS FEATURED IN OUR SUMMER ANTI-INFLAMMATORY MEAL PREP SESSION + GUIDE! CLICK HERE TO SEE IT IN ACTION AND GET THE FREE MEAL PRINTABLE MEAL PREP GUIDE!

Why This Eggplant Casserole Recipe is a Game Changer

This eggplant casserole recipe is a game-changer for several reasons:

  1. First, it’s made with simple and flavorful ingredients that are easy to find at any grocery store. I especially love that it’s full of anti-inflammatory summer produce.
  2. Second, it’s a low-carb and gluten-free option that doesn’t compromise on taste. Instead of using simple carb packed gluten-free flour or breadcrumbs, we just omit the breadcrumbs altogether.
  3. Finally, it has a larger number of servings, so it can be meal prepped and served for more than one meal.

Let’s explore the ingredients that make this dish so delicious.

Simple and Flavorful Ingredients

Eggplant

Eggplant is one of my favorite anti-inflammatory summer vegetables! Not only is it packed with antioxidants, vitamins, and fiber, it’s also a great substitute for meat. Oh yeah–and it’s low-carb!

Low Carb Marinara

As most things on the grocery store shelf these days… marinara or any other kind of tomato-based sauce most likely has (completely unnecessary) added sugar.

If you’re buying your marinara, check the ingredient label and make sure it’s sugar-free as sugar is extremely inflammatory.

If you can’t find any, make our Low-Carb Marinara sauce for this recipe instead.

Cheeses

The best way to keep as anti-inflammatory as possible with any cuisine (like Italian) that has loads of dairy is to buy organic.

Extra virgin olive oil

This oil is a staple in Italian cooking, and is also an anti-inflammatory staple. It’s loaded with monounsaturated fats and has been used in Mediterranean cuisine for centuries.

If you can’t find an EVOO oil spray, try out a Misto. You can fill it with any kind of oil you like and pump it to get the can pressurized so you can spray oil onto your food.

And if you don’t have EVOO on hand, you can use avocado oil, butter, ghee, or coconut oil.

Step-by-Step Instructions for Perfect Eggplant Casserole Every Time

  1. If you don’t have jarred sauce, make the Low-Carb Marinara first.
  2. Preheat your oven to 450°F. Line 2 baking sheets with a grill mat, or with foil, and spray the foil with avocado oil.
  3. While the sauce is cooking, slice the eggplant into 1/4 inch thick slices. Place the slices on the prepared pans. Season with salt and bake for 20 minutes.
  4. Meanwhile combine ricotta, egg, parsley and 1/4 cup of grated cheese in a medium bowl.
  5. Pour 1/2 cup sauce on the bottom of a 9×12 baking dish, add 1/3 of eggplant to cover the bottom of the dish. Top with 1/3 of the ricotta cheese mixture, 3/4 cup of the mozzarella cheese and 3/4 cup of the sauce. Then repeat the process two more times, reserving the third layer of mozzarella for the topping. Finish with 2 tablespoons of grated cheese.
  6. Push the oven temp up to 400F.
  7. Cover the baking dish with foil and bake approximately 40 min, until cheese is melted and bubbling.
  8. Remove the foil and bake an additional 10 minutes.
  9. Remove from the oven and let it set and cool about 10 minutes before serving.

Ideas for Customizing Your Eggplant Casserole to Your Tastes

Now that you have the basics of the low-carb eggplant parmesan casserole down, it’s time to get creative and add your own twist to the recipe. One idea is to switch up the cheese by using cheddar or feta instead of mozzarella.

You can also add in different vegetables such as zucchini or spinach, or even some ground beef or turkey for a heartier dish.

For those who like a little kick in their meals, try adding some red pepper flakes or cayenne pepper to the tomato sauce. And if you’re a fan of herbs, consider throwing in some basil or oregano to give the casserole a fresh and flavorful taste.

Want more protein? Add a pound of cubed or shredded chicken breast into the layering process.

With so many possibilities for customization, you can make this low-carb eggplant parmesan casserole a staple in your meal rotation by switching up the ingredients and flavors to your liking.

Frequently Asked Questions About Eggplant Casserole

With its hearty combination of vegetables and savory spices, eggplant casserole is a versatile and satisfying dish that’s easy to tweak to your taste. Here are some of the most frequently asked questions about this eggplant casserole:

How do I prepare the eggplant?

To prepare the eggplant for the casserole, you’ll need to slice it into rounds or long strips, depending on your preference. Sprinkle some salt on the slices and let them sit for about 30 minutes to draw out any bitterness. Then rinse the eggplant and pat it dry before proceeding with the recipe.

Can I use other vegetables besides eggplant?

Absolutely! Eggplant casserole is a great dish for using up whatever vegetables you have on hand. Some popular additions include zucchini, bell peppers, mushrooms, and onions. You can also experiment with different cheeses, herbs, and spices to create your own unique flavor profile.

Can I remove the eggplant skin or do I leave it on?

Most recipes for eggplant parmesan will have you leave the skins on. This helps maintain the structure of the slices, but cooking will actually soften the skins. There are a ton of phytonutrients in the skin, so I say leave it on!

Can I make this dish ahead of time?

Yep! Eggplant casserole is a great dish for meal prep, as it can be made ahead of time and reheated later.

  1. Simply assemble the casserole according to the recipe,
  2. Then cover it tightly with plastic wrap and store it in the fridge for up to 2 days.
  3. When you’re ready to eat, simply remove the plastic wrap and pop the casserole in the oven for about 30 minutes, or until heated through.

Whether you’re pressed for time or looking for a flexible meal prep option, this recipe is your new go-to. And with tips for customizing the flavors, you can enjoy it again and again, every summer.

😎🍉THIS LOW-CARB EGGPLANT PARMESAN CASSEROLE RECIPE IS FEATURED IN OUR SUMMER ANTI-INFLAMMATORY MEAL PREP SESSION + GUIDE! CLICK HERE TO SEE IT IN ACTION AND GET THE FREE MEAL PRINTABLE MEAL PREP GUIDE!

Print

Low Carb Eggplant Parmesan Casserole (Without Breadcrumbs)

5 Stars 4 Stars 3 Stars 2 Stars 1 Star

No reviews

With only a handful of simple ingredients, this Low Carb Eggplant Parmesan Casserole (without breadcrumbs) is easy to make and perfect for busy weeknights or meal prep. 

  • Author: Laura Brigance, MS, CHC
  • Prep Time: 10 minutes
  • Cook Time: 70 minutes
  • Total Time: 1 hour 20 minutes
  • Yield: 6 1x
  • Category: Dinner
  • Method: Oven
  • Cuisine: Italian

Ingredients

Units Scale
  • 2 pounds eggplant, 1 large or 2 medium
  • extra virgin olive oil spray
  • 1 teaspoon sea salt
  • 12 ounces part-skim ricotta, organic
  • 1/4 cup + 2 tbsp Parmesan
  • 1/4 cup fresh parsley, chopped
  • 1 large egg
  • 21/2 cups part-skim mozzarella, organic
  • 4 cups Low-Carb Marinara Sauce or sugar-free jarred marinara sauce

Instructions

  1. If you don’t have jarred sauce, make the Low-Carb Marinara first.
  2. Preheat your oven to 450°F. Line 2 baking sheets with a grill mat, or with foil, and spray the foil with EVOO. Use a Misto and fill with extra virgin olive oil if you can’t find avocado cooking spray at the store.
  3. While the sauce is cooking, slice the eggplant into 1/4 inch thick slices. Place the slices on the prepared pans. Season with salt and bake for 20 minutes.
  4. Meanwhile combine ricotta, egg, parsley and 1/4 cup of grated cheese in a medium bowl.
  5. Pour 1/2 cup sauce on the bottom of a 9×12 baking dish, add 1/3 of eggplant to cover the bottom of the dish. Top with 1/3 of the ricotta cheese mixture, 3/4 cup of the mozzarella cheese and 3/4 cup of the sauce. Then repeat the process two more times, reserving the third layer of mozzarella for the topping. Finish with 2 tablespoons of grated cheese.
  6. Push the oven temp up to 400F.
  7. Cover the baking dish with foil and bake approximately 40 min, until cheese is melted and bubbling.
  8. Remove the foil and bake an additional 10 minutes.
  9. Remove from the oven and let it set and cool about 10 minutes before serving.

Notes

Make this recipe up to 2 days ahead of time and store it in the fridge covered.

To meal prep this, prepare your Low-Carb Marinara ahead of time, as well as the eggplant. Bake it and store in the fridge in a sealed container until you need to assemble the casserole.

Nutrition

  • Serving Size:
  • Calories: 343
  • Fat: 21.8 g
  • Saturated Fat: 7.8 g
  • Carbohydrates: 16.3 g
  • Fiber: 2.7 g
  • Protein: 20.4 g

Did you make this recipe?

Share a photo and tag us @truewell.co — we can’t wait to see what you’ve made!

📌 PIN IT FOR LATER!

low carb eggplant parmesan casserole without breadcrumbs

Savor the Season: Pesto Chicken with Zucchini and Squash Medley

When it comes to fresh and easy for anti-inflammatory summer dinners, this Pesto Chicken with Zucchini and Squash Medley are at the top of the list!

This fresh recipe takes advantage of the anti-inflammatory summer produce, while giving a super yummy, balanced, and low carb dinner in no time. Plus it’s super easy to meal prep!

pesto chicken with zucchini and squash medley

😎🍉THIS PESTO CHICKEN WITH ZUCCHINI AND SQUASH MEDLEY RECIPE IS FEATURED IN OUR SUMMER ANTI-INFLAMMATORY MEAL PREP SESSION + GUIDE! CLICK HERE TO SEE IT IN ACTION AND GET THE FREE MEAL PRINTABLE MEAL PREP GUIDE!

I LOVE recipes that use several seasonal and fresh produce options like this one. I grew up on a farm, so we always had a ton of fresh vegetables during the summer. But… we didn’t make pesto, like…ever.

It took until I was a real grownup before I started venturing in Italian cuisine beyond spaghetti and meatballs. And boy was I missing out!

Pesto is the perfect dressing for this dish, as the ingredients for it are in season during summer as well.

You’ll need:

Ingredients

  • 1 lb boneless, skinless chicken breasts
  • Salt and pepper to taste (approx 1/2 tsp of each)
  • 2 medium zucchini
  • 2 medium summer squash
  • 1/2 onion, yellow or red
  • 2 TBSP avocado oil
  • Fresh Easy Pesto

Instructions

Chicken

Cut the chicken breast into cubes, then toss into a large pan with the avocado oil. Cook until mostly cooked through.

If you’re looking for a plant-based or vegan recipe, the chicken can easily be subbed out for firm (organic!) tofu or white beans (canned).

closeup of a person holding zucchini

Zucchini , squash, and onion

Wash and cut the zucchini and squash into cubes. Roughly chop the onion.

When chicken is nearly done, add the zucchini, squash, and onion, and season everything with salt and pepper.

Saute until the zucchini and squash are soft and cooked.

Remove from heat.

pesto in a jar with basil and garlic

Plating

Toss the medley with our Fresh and Easy Pesto, then plate and serve.

Notes

  • Make sure to use the freshest zucchini and summer squash you can. And during the summer you may find several different varieties. They’re pretty much all delicious and cook about the same, so get creative if you want!
  • The chicken can be subbed out for firm tofu or even white beans if you’d like this to be plant-based or vegan.

😎🍉THIS PESTO CHICKEN WITH ZUCCHINI AND SQUASH MEDLEY RECIPE IS FEATURED IN OUR SUMMER ANTI-INFLAMMATORY MEAL PREP SESSION + GUIDE! CLICK HERE TO SEE IT IN ACTION AND GET THE FREE MEAL PRINTABLE MEAL PREP GUIDE!

Print

Savor the Season: Pesto Chicken with Zucchini and Squash Medley

5 Stars 4 Stars 3 Stars 2 Stars 1 Star

No reviews

This fresh recipe takes advantage of the anti-inflammatory summer produce, while giving a super yummy, balanced, and low carb dinner in no time. Plus it’s super easy to meal prep!

  • Author: Laura Brigance, MS, CHC
  • Prep Time: 5 minutes
  • Cook Time: 15
  • Total Time: 20 minutes
  • Yield: 4 1x
  • Category: Dinner
  • Method: Cooktop
  • Cuisine: Italian

Ingredients

Scale

    • 1 lb boneless, skinless chicken breasts
    • Salt and pepper to taste (approx 1/2 tsp of each)
    • 2 medium zucchini
    • 2 medium summer squash
    • 1/2 onion, yellow or red
    • 2 TBSP avocado oil
    • Fresh Easy Pesto

Instructions

  1. Cut the chicken breast into cubes, then toss into a large pan with the avocado oil. Cook until mostly cooked through.
  2. Wash and cut the zucchini and squash into cubes. When chicken is nearly done, add the zucchini and squash, and season everything with salt and pepper. Saute until the zucchini and squash are soft and cooked.
  3. Remove from heat.
  4. Toss the medley with our Fresh and Easy Pesto, then plate and serve.

Notes

  • Make sure to use the freshest zucchini and summer squash you can. And during the summer you may find several different varieties. They’re pretty much all delicious and cook about the same, so get creative if you want!
  • The chicken can be subbed out for firm tofu or even white beans if you’d like this to be plant-based or vegan.

Nutrition

  • Serving Size:
  • Calories: 495
  • Fat: 36.4 g
  • Saturated Fat: 6.1 g
  • Carbohydrates: 11.1 g
  • Fiber: 3 g
  • Protein: 30.6 g

Did you make this recipe?

Share a photo and tag us @truewell.co — we can’t wait to see what you’ve made!

📌 PIN IT FOR LATER!

Paleo Chicken Fajita Bowls

When it comes to easy anti-inflammatory meal prep dinners that are also crowd-pleasers, these Paleo Chicken Fajita Bowls with fresh cilantro lime dressing take the prize.

paleo chicken fajita bowls

What’s so great about fajita bowls is that they’re so easy to personalize. We normally just cook the ingredients and set it out assembly line to let the kids create their own chicken fajita bowls.

😎🍉THIS PALEO CHICKEN FAJITA BOWLS RECIPE IS FEATURED IN OUR SUMMER ANTI-INFLAMMATORY MEAL PREP SESSION + GUIDE! CLICK HERE TO SEE IT IN ACTION AND GET THE FREE MEAL PRINTABLE MEAL PREP GUIDE!

Another thing about these versatile meal prep chicken bowls is that you really can adjust the veggies to whatever season it is. This recipe is perfect for summer as we use lettuce and bell peppers that are in season during summer.

Also to note is that–again, speaking to the versatility of these bowls–they can be made dairy-free and grain-free. (See notes below.)

Ingredients

  • Boneless, skinless chicken breasts (organic are best)
  • Bell peppers (any color, but organic is best as peppers are on the Dirty Dozen list)
  • Onion (red, yellow, or whatever you have on hand)
  • Lime (the juice really kicks up the flavor of chicken fajita!)
  • Brown rice (or cauliflower rice for Paleo, low-carb/keto)
  • Salt and pepper (to taste)
  • Fajita seasoning (make sure this is sugar-free)
  • 1 can of black beans, drained and rinsed (omit if sticking to Paleo)
  • Cheddar cheese or feta for topping (omit if sticking to Paleo)
  • Avocado (make sure it’s ripe)
  • Cilantro Lime Dressing
  • Avocado oil (for cooking-if you don’t have any, you can use butter, ghee, or coconut oil)

Instructions

Chicken

To begin preparing these tasty Paleo Chicken Fajita Bowls, start by slicing your chicken breasts into thin strips and season with the fajita seasoning. Next, slice up your onions and bell peppers, taking care to remove all seeds and stems.

Once that’s done, heat up your skillet and add some avocado oil, then toss in your chicken and stir until cooked through. Then squeeze the lime juice all over your chicken.

Next, add your sliced onions and bell peppers to the skillet and stir-fry until they are slightly softened.

squeezing lime on chicken fajita bowl

Rice

While the onions and peppers are cooking, make your rice (or cauliflower rice) according to package instructions.

Beans

Black beans or pinto beans are traditional for Latin fare. If you’re following Paleo guidelines these can be omitted.

Otherwise, make sure to drain the beans from the can, then rinse them really well. This helps minimize bloating if you’re sensitive to beans.

You can warm them a little in a pot on the cooktop with a little water, salt, and chopped cilantro. (Sometimes I’ll throw in some dried onion flakes to give them a bit more flavor.)

chicken fajita bowls

Toppings

Choose your toppings based on whether or not you’re going true Paleo (dairy-free) or not.

Then it’s time to layer your bowls. The base is usually rice or other whole grain, then layer in your fajita chicken, peppers, and onions. Top with black beans, cheese, and avocado. Then drizzle the fresh cilantro lime dressing on top!

Additional Tips

These are super easy to meal prep for the week:

  1. Just make the chicken, peppers, and onions; and rice ahead of time, then layer into meal prep containers.
  2. Store up to 5 days in the fridge. Heat up when you’re ready to eat it, then drizzle the dressing on top before serving.

😎🍉THIS PALEO CHICKEN FAJITA BOWLS RECIPE IS FEATURED IN OUR SUMMER ANTI-INFLAMMATORY MEAL PREP SESSION + GUIDE! CLICK HERE TO SEE IT IN ACTION AND GET THE FREE MEAL PRINTABLE MEAL PREP GUIDE!

Print

Chicken Fajita Bowls Meal Prep

5 Stars 4 Stars 3 Stars 2 Stars 1 Star

No reviews

When it comes to easy anti-inflammatory meal prep dinners that are also crowd-pleasers, these Paleo Chicken Fajita Bowls with fresh cilantro lime dressing take the prize.

  • Author: Laura Brigance, MS, CHC
  • Prep Time: 5 minutes
  • Cook Time: 25-30 minutes
  • Total Time: 30
  • Yield: 6 1x
  • Category: Dinner, Lunch
  • Method: Cooktop
  • Cuisine: Mexican

Ingredients

Units Scale
  • 1 lb organic chicken breasts
  • 1 onion (red or yellow)
  • 2 bell peppers (any color/s)
  • Brown rice (or cauliflower if doing Paleo/low-carb/keto)
  • 2 Limes (or 1/4 cup lime juice)
  • Black beans (unless Paleo/low-carb/keto)
  • 1/2 cup shredded cheddar or Mexican blend cheese (omit if dairy-free or Paleo)
  • 1 Avocado (large and ripe)
  • Fresh Cilantro Lime Dressing

Instructions

  1. Start by slicing your chicken breasts into thin strips.
  2. Next, slice up your onions and bell peppers, taking care to remove all seeds and stems.
  3. Heat up your skillet and add some avocado oil, then toss in your chicken and stir until cooked through.
  4. Next, add your sliced onions and bell peppers to the skillet and stir-fry until they are slightly softened.
  5. If you’re following Paleo guidelines these can be omitted. Otherwise, make sure to drain the beans from the can, then rinse them really well. 
  6. Warm them a little in a pot on the cooktop with a little water, salt, and chopped cilantro. (Sometimes I’ll throw in some dried onion flakes to give them a bit more flavor.)
  7. Choose your toppings based on whether or not you’re going true Paleo (dairy-free) or not.
  8. Layer your bowls starting with the rice, then layer in your fajita chicken, peppers, and onions.
  9. Top with black beans, cheese, and avocado.
  10. Then drizzle the fresh cilantro lime dressing on top!

Notes

These are super easy to meal prep for the week:

    1. Just make the chicken, peppers, and onions; and rice ahead of time, then layer into meal prep containers.

    1. Store up to 5 days in the fridge. Heat up when you’re ready to eat it, then drizzle the dressing on top before serving.

Nutrition

  • Serving Size:
  • Calories: 396
  • Fat: 12.8 g
  • Saturated Fat: 3.2 g
  • Carbohydrates: 46.7 g
  • Fiber: 8.3 g
  • Protein: 25.9 g

Did you make this recipe?

Share a photo and tag us @truewell.co — we can’t wait to see what you’ve made!

📌PIN IT FOR LATER!

Fresh Cilantro Lime Dressing

This Fresh Cilantro Lime Dressing is not only a refreshing and yummy summer classic, but it also boasts incredible anti-inflammatory properties.

fresh cilantro lime dressing

😎🍉THIS FRESH CILANTRO LIME DRESSING RECIPE IS FEATURED IN OUR SUMMER ANTI-INFLAMMATORY MEAL PREP SESSION + GUIDE! CLICK HERE TO SEE IT IN ACTION AND GET THE FREE MEAL PRINTABLE MEAL PREP GUIDE!

Crafted with a handful of wholesome and fresh summer ingredients, this Anti-Inflammatory Cilantro Lime Dressing is a simple yet powerful addition to your kitchen repertoire.

By incorporating this dressing into your meals, you can effortlessly infuse your dishes with health-enhancing benefits, promoting well-being from within.

Ingredients

  • 1 bunch of fresh cilantro
  • 1 TBSP minced garlic
  • 3 TBSP lime juice
  • 1/4 cup extra virgin olive oil
  • 1 avocado
  • 1/2 tsp salt (or to taste)

Instructions

This sauce is so easy. You literally throw everything in a high-powered blender and pulse into a sauce. Done.

*If your blender isn’t blending this, it’s perfectly ok to add a few more TBSP lime juice and/or EVOO until the blender can do its thing.

Notes

  • Store up to 3 days in the fridge (the sauce will naturally start to brown due to the avocado.)
  • Perfect on our Paleo Chicken Fajita Bowls recipe!

😎🍉THIS FRESH CILANTRO LIME DRESSING RECIPE IS FEATURED IN OUR SUMMER ANTI-INFLAMMATORY MEAL PREP SESSION + GUIDE! CLICK HERE TO SEE IT IN ACTION AND GET THE FREE MEAL PRINTABLE MEAL PREP GUIDE!

Print

Fresh Cilantro Lime Dressing

This Fresh Cilantro Lime Dressing is not only a refreshing and yummy summer classic, but also boasts incredible anti-inflammatory properties.

  • Author: Laura Brigance, MS, CHC
  • Prep Time: 5 minutes
  • Total Time: 5 minutes
  • Yield: 4 1x
  • Category: Dinner
  • Method: Blender
  • Cuisine: Mexican

Ingredients

Scale
  • 1 bunch of fresh cilantro
  • 1 TBSP minced garlic
  • 3 TBSP lime juice
  • 1 avocado

  • 1/2 tsp salt (or to taste)

Instructions

  1. Throw all the ingredients in a blender.
  2. Blend until smooth.

Notes

    • Store up to 3 days in the fridge (the sauce will naturally start to brown due to the avocado.)

    • Perfect on our Paleo Chicken Fajita Bowls recipe!

Nutrition

  • Serving Size:
  • Calories: 103
  • Fat: 8.9 g
  • Saturated Fat: 1.2 g
  • Carbohydrates: 6.8 g
  • Fiber: 4.1 g
  • Protein: 1.4 g

Did you make this recipe?

Share a photo and tag us @truewell.co — we can’t wait to see what you’ve made!

📌 PIN IT FOR LATER!

fresh cilantro lime dressing

Low-Carb Marinara Sauce

Packed with vibrant flavors and anti-inflammatory ingredients, this Low-Carb Marinara Sauce is a delicious way to keep inflammation at bay and blood sugar balanced.

low carb marinara sauce

Say goodbye to traditional marinara sauces loaded with sugars and unhealthy additives, and say hello to a healthier, low-carb alternative that doesn’t compromise on taste.

Each spoonful of this delightful sauce boasts a harmonious blend of antioxidant-rich tomatoes, aromatic herbs, and a hint of garlic, providing a burst of flavor that will leave you craving for more. (Seriously- my kids would rather have this than the store-bought kind.)

😎🍉THIS LOW-CARB MARINARA RECIPE IS FEATURED IN OUR SUMMER ANTI-INFLAMMATORY MEAL PREP SESSION + GUIDE! CLICK HERE TO SEE IT IN ACTION AND GET THE FREE MEAL PRINTABLE MEAL PREP GUIDE!

What makes this marinara different is two things:

  1. We don’t add any sugar like so many of the store-bought brands do. Sugar is highly inflammatory, as well as addictive, so we eliminate that right off the bat. Tomatoes are already slightly sweet so there’s no reason to add it in the first place.
  2. Instead of extra virgin olive oil, we use avocado oil (see ingredients below for more details.)

Ingredients

Tomatoes

Tomatoes, the star ingredient, are bursting with lycopene—an antioxidant known to reduce inflammation and protect against chronic diseases.

Garlic

Alongside tomatoes, we’ve added a touch of garlic, known for its immune-boosting and anti-inflammatory properties, enhancing both the taste and health benefits of this sauce.

Italian seasoning

Dried Italian seasonings add a burst of flavor to this low-carb marinara sauce, but also have antioxidant properties. They’re added right in with all other ingredients at the same time so the flavors can meld as the herbs are rehydrated.

If you happen to have fresh herbs (like oregano, rosemary, and thyme), it’s absolutely fine to add these, but don’t do it until right before the sauce is ready.

Fresh herbs don’t need long to inject their flavors, and shouldn’t be overcooked.

Extra virgin olive oil

Extra virgin olive oil is the quintessential ingredient for Mediterranean fare, so it’s no surprise that it’s the oil of choice for this recipe. My tip for buying EVOO is to check the label and try to find one that comes out of California.

Tests were done several years back and they found that olive oils that come from other countries weren’t 100% olive oil. They were being mixed with cheaper oils, and it was considered legal because of the labeling and import laws in other countries.

In the US they’re strict about that, so buying your EVOO from California ensures you’re actually getting olive oil and not a mix.

Instructions

  1. Peel and smash your garlic, then sautee it right in the pot you’ll be making your sauce in, with the avocado oil in the bottom.
  2. After 1-2 minutes, add all the rest of the ingredients and stir really well.
  3. Let the sauce simmer 15-20 minutes and you’re done!

Notes

  • This sauce is amazing for dipping as well!
  • Store in the fridge, sealed, up to a week.

😎🍉THIS LOW-CARB MARINARA RECIPE IS FEATURED IN OUR SUMMER ANTI-INFLAMMATORY MEAL PREP SESSION + GUIDE! CLICK HERE TO SEE IT IN ACTION AND GET THE FREE MEAL PRINTABLE MEAL PREP GUIDE!

Print

Low-Carb Marinara Sauce

5 Stars 4 Stars 3 Stars 2 Stars 1 Star

No reviews

 Packed with vibrant flavors and anti-inflammatory ingredients, this Low-Carb Marinara Sauce is a delicious way to keep inflammation at bay and blood sugar balanced.

  • Author: Laura Brigance, MS, CHC
  • Prep Time: 5 minutes
  • Cook Time: 15-20 minutes
  • Total Time: 0 hours
  • Yield: 4 1x
  • Category: Dinner
  • Method: Cooktop
  • Cuisine: Italian

Ingredients

Scale
  • 28 oz can crushed tomatoes
  • 2 cloves garlic, smashed
  • 2 TBSP Italian seasoning
  • 1 tsp Extra virgin olive oil
  • salt + pepper, to taste

Instructions

  1. Add the crushed tomatoes into a high-powered blender. Pulse until smooth and pureed into a sauce.
  2. In a large pot, saute the garlic with extra virgin olive oil, then add all the other ingredients. Let simmer 15-20 minutes.

Notes

    • This sauce is amazing for dipping as well!

    • Store in the fridge, sealed, up to a week.

Nutrition

  • Serving Size:
  • Calories: 39
  • Fat: 1.6 g
  • Saturated Fat: 0.3 g
  • Carbohydrates: 6.6 g
  • Fiber: 2.2 g
  • Protein: 1.4 g

Did you make this recipe?

Share a photo and tag us @truewell.co — we can’t wait to see what you’ve made!

📌PIN IT FOR LATER!

Fresh Easy Pesto

Our Fresh Easy Pesto boasts a vibrant blend of aromatic basil leaves, rich extra virgin olive oil, toasted nuts, and zesty garlic. It’s super simple to make and takes a boring dish to amazing in, like, 5 minutes!

fresh easy pesto

😎🍉THIS FRESH EASY PESTO RECIPE IS FEATURED IN OUR SUMMER ANTI-INFLAMMATORY MEAL PREP SESSION + GUIDE! CLICK HERE TO SEE IT IN ACTION AND GET THE FREE MEAL PRINTABLE MEAL PREP GUIDE!

Not only does this Fresh Easy Pesto recipe provide an explosion of flavors, but it also offers a myriad of health advantages. The basil leaves contain essential oils that have been found to possess anti-inflammatory properties, helping to reduce swelling and pain.

The extra virgin olive oil is packed with heart-healthy monounsaturated fats, known for their anti-inflammatory effects, while also providing a luscious texture to the pesto.

Ingredients

Basil

Basil is such an aromatic herb, and summer dishes are perfect with it! Honestly, herbs like this can get so expensive that we just grow them on our back patio. I even have friends who grow them in their kitchen window boxes to enjoy the health and flavor benefits.

I know you may be tempted to buy the chopped basil at the grocery store, but I beg you to use super fresh, it makes such a difference!

Parmesan

Parmesan is another ingredient that can get real pricey, real quick. Grating your own is always the best option, because when a manufacturer does it, they add some type of starch to keep it from clumping. This can affect any recipe you’re making. So I always advise buying a block of parmesan and grating it yourself.

fresh easy pesto

Extra virgin olive oil

Extra virgin olive oil is the perfect oil for this recipe, because you’re not cooking it. SO many food bloggers and cooking websites have it wrong on this! EVOO has a very low smoke point, which means if you cook with it, it will burn and oxidize easily.

That’s why fresh sauces and dressings like this recipe are perfect for the bold flavor of extra virgin olive oil. If you don’t have any on hand, you can sub avocado oil.

Minced garlic

Garlic can be tricky to keep on hand because it tends to dry out really fast if it’s not super fresh. And it can be tricky to find super fresh. Even though it’s super convenient to keep a jar of minced garlic on hand in the fridge, I don’t always advise it because they add preservatives to keep it from going bad.

That being said, if I’ve had a run of our grocery store giving me dried-out old garlic cloves, I’ve been guilty of throwing my hands up and buying a jar of minced. Do what’s best for your household. 🙂

ingredients for fresh easy pesto

Pine nuts

Pine nuts are really thought of as essential to classic pesto recipes. But many people are allergic to nuts, and they can also get really expensive. There’s been a huge trend in using different types of nuts in leu of pine nuts, so it’s absolutely ok to sub out a different type of nut, or just omit them altogether.

I will say I love experimenting with different flavors, so if you’re a curious cook like me, try some walnuts or cashews!

Instructions

Literally the only prep you need for this is to throw it into the blender in the order the recipe says. Done and done!

Notes

Make sure to store this in a sealed container, and you can even double or triple this to make sure you have enough on hand for a couple of weeks!

😎🍉THIS FRESH EASY PESTO RECIPE IS FEATURED IN OUR SUMMER ANTI-INFLAMMATORY MEAL PREP SESSION + GUIDE! CLICK HERE TO SEE IT IN ACTION AND GET THE FREE MEAL PRINTABLE MEAL PREP GUIDE!

Print

Fresh Easy Pesto

5 Stars 4 Stars 3 Stars 2 Stars 1 Star

No reviews

Our Fresh Easy Pesto boasts a vibrant blend of aromatic basil leaves, rich extra virgin olive oil, toasted nuts, and zesty garlic. It’s super simple to make and takes a boring dish to amazing in, like, 5 minutes!

  • Author: Laura Brigance, MS, CHC
  • Prep Time: 5
  • Total Time: 5 minutes
  • Yield: 4 servings 1x
  • Category: Dinner
  • Method: Blender
  • Cuisine: Italian

Ingredients

Units Scale
  • 2 cups fresh basil leaves
  • 1/2 cup Parmesan (freshly grated)
  • 1/2 cup extra virgin olive oil
  • 1 TBSP minced garlic (about 3 cloves)
  • salt + pepper to taste
  • 1/3 cup pine nuts (or other nuts / optional)

Instructions

  1. Place basil and nuts in a high-powered blender and pulse 3-4 times.
  2. Add garlic and cheese and pulse again.
  3. Add olive oil and pulse until smooth.

Notes

*Use over salads or even as a dip!

*Store in fridge for up to 2 weeks; may need to let come to room temperature before using as olive oil can solidify in the fridge.

Nutrition

  • Serving Size:
  • Calories: 408
  • Fat: 42.5 g
  • Saturated Fat: 7.5 g
  • Carbohydrates: 5.1 g
  • Fiber: 2.3 g
  • Protein: 6.5 g

Did you make this recipe?

Share a photo and tag us @truewell.co — we can’t wait to see what you’ve made!

fresh easy pesto

Grilled Salmon with Sauteed Green Beans for a Quick + Healthy Summer Meal

Summer is in full swing, and there’s nothing quite like a sizzling grill to usher in the season. (Not that my husband needs summer as an excuse.)

grilled salmon and sauteen green beans

Grilled salmon and sautéed green beans make for a wholesome, flavorful meal that’s perfect for any weeknight meal. Get ready to elevate your grilling game and enjoy a healthy, mouthwatering meal that’s sure to impress even your pickiest eaters.

😎🍉THIS GRILLED SALMON WITH SAUTEED GREEN BEANS RECIPE IS FEATURED IN OUR SUMMER ANTI-INFLAMMATORY MEAL PREP SESSION + GUIDE! CLICK HERE TO SEE IT IN ACTION AND GET THE FREE MEAL PRINTABLE MEAL PREP GUIDE!

Ingredients

To reap the health benefits of these dishes, it’s important to understand why salmon and green beans are a nutritional powerhouse.

Salmon is a great source of omega-3 fatty acids, which have been shown to reduce inflammation, protect against heart disease and stroke, and potentially even improve brain function.

Similarly, green beans are packed with vitamins and nutrients like vitamin C, vitamin K, and iron, all of which contribute to healthy bones, skin, and immune function.

Plus, both dishes are high in protein and low in calories, making them a great choice for an anti-inflammatory dinner that won’t spike blood sugar.

Salmon

To create the perfect grilled salmon, you need to start with a good cut of fish.

close up of someone cutting a salmon filet

Look for fresh salmon fillets with firm, pink flesh and no signs of discoloration or strong odor. Choose wild-caught salmon over farm-raised for the healthiest option.

Green Beans

When you’re picking out the best summer green beans, there are a few things you should look for. First, go for beans that are bright green and feel nice and firm when you touch them.

Avoid beans that look dull or have any yucky spots on them. You want the beans to be crispy and make a snapping sound when you bend them.

cutting green beans on a cutting board

Also, try to find beans that are skinny and smooth because they’re tastier and easier to cook. If you can, get beans that are all about the same size so they cook evenly.

Instructions

This meal is a bit of a back-and-forth dance, so be patient but have your ingredients ready to go.

Grilling salmon to perfection

Before grilling, remove the skin from the salmon fillets. To do this, use a sharp knife to make a small incision between the flesh and skin at one end of the fillet. Hold the skin with one hand and use a back-and-forth motion with the knife to separate the skin from the flesh, pulling the skin away as you go.

Next, season your salmon fillets with the dry seasonings.

When grilling, preheat your grill to medium-high heat and lightly oil the grates. Place the salmon fillets on the grill, skin-side down if left on, and cook for 6-8 minutes per side or until the flesh is opaque and flakes easily with a fork.

grilled salmon on a plate with a lemon and tartar sauce

Grilling is a great way to prepare salmon, as it highlights the natural flavors of the fish and adds a smoky touch to it. Before grilling, make sure to preheat your grill to medium-high heat and lightly oil the grates to prevent the fish from sticking.

The key to grilling salmon is to avoid overcooking it, as it can quickly become dry and lose its delicate texture.

Creating Flavorful Sauteed Green Beans

These sautéed green beans will add a delicious pop of flavor to your grilled salmon dish, making it a complete and satisfying meal for a summer day.

To create flavorful sautéed green beans, start by heating up a pan with a little bit of avocado oil. You want just enough oil to coat the bottom of the pan. Once the pan is hot, add the green beans, salt, and onion flakes. Stir the green beans to ensure they are evenly coated with the oil and seasoning.

Cook the green beans until they are tender but still slightly crispy, which should take around 8-10 minutes. You want to be sure not to overcook them as they can turn mushy and lose their flavor.

Other sides to pair it with

This simple meal really is very low-carb. For some this is perfect. But if you’d like to add more complex carbs, a small serving of brown rice or quinoa are perfect sides to pair it with. These whole grains give some healthy carbohydrates and fiber to keep you feeling full.

whole grains in jars

Notes

  • Make sure fish reaches an internal temperature of 145 F (63 C) using a food thermometer.
  • To prevent the salmon from sticking to the grates, make sure the grill is super clean, and that the grill is super hot. (You can use tongs and a paper towel coated in oil to get the grates well-oiled.)

😎🍉THIS GRILLED SALMON WITH SAUTEED GREEN BEANS RECIPE IS FEATURED IN OUR SUMMER ANTI-INFLAMMATORY MEAL PREP SESSION + GUIDE! CLICK HERE TO SEE IT IN ACTION AND GET THE FREE MEAL PRINTABLE MEAL PREP GUIDE!

Print

Grilled Salmon with Sauteed Green Beans

5 Stars 4 Stars 3 Stars 2 Stars 1 Star

No reviews

With a (sugar-free) sweet soy sauce marinade and hints of lemon and garlic, this Grilled Salmon pairs beautifully with sauteed green beans for the perfect quick and delicious summer dinner!

  • Author: Laura Brigance, MS, CHC
  • Prep Time: 2 hours
  • Cook Time: 20 minutes
  • Total Time: 2 hours 20 minutes
  • Yield: 6 1x
  • Category: Dinner
  • Method: Cooktop + Grill

Ingredients

Units Scale

Grilled Salmon

  • 1 1/2 pounds salmon fillets (wild-caught)
  • 1 tsp lemon pepper seasoning
  • 1 tsp garlic powder
  • 1/2 tsp sea salt
  • 1/3 cup gluten-free soy sauce (or Liquid Aminos)
  • 1/3 cup brown erythritol (Swerve brand is great)
  • 1/4 avocado oil

Sauteed Green Beans

  • 1 lb Fresh green beans
  • salt to taste
  • 1 TBSP onion flakes
  • 1 TBSP avocado oil (for the pan)

Instructions

  1. Season the salmon fillets with the lemon pepper, garlic powder, and salt. Place the salmon in a large baggie.
  2. Stir together soy sauce (or liquid aminos), brown erythritol, water, and avocado oil in a small bowl until the brown erythritol has dissolved.
  3. Pour the mixture into the baggie of the salmon fillets. Seal, then turn to coat the fillets.
  4. Let them marinate for at least 2 hours in the fridge.
  5. When it’s time to cook dinner, preheat the grill to medium heat and make sure the grate is very clean and oiled.
  6. While the grill is heating, trim the ends off the green beans.
  7. In a large skillet, heat the avocado oil over medium high heat. Add the green beans.
  8. After about 3 minutes sprinkle the green beans with sea salt and onion flakes. Turn them to coat with oil and the seasonings. Then let them saute for another 5-7 minutes, turning once.
  9. While the green beans are cooking, place the salmon fillets on the grill and discard the remaining marinade.
  10. Cook the salmon until it easily flakes with a fork, approximately 6-8 minutes per side.
  11. Check the green beans are sauteed to personal preference.
  12. Plate both, and enjoy!

Nutrition

  • Serving Size:
  • Calories: 213
  • Fat: 8.4 g
  • Saturated Fat: 1.3 g
  • Carbohydrates: 18.1 g
  • Fiber: 2.4 g
  • Protein: 28.5 g

Did you make this recipe?

Share a photo and tag us @truewell.co — we can’t wait to see what you’ve made!

grilled salmon and sauteen green beans

Cherry Almond Smoothie for Summer

As summer heats up, there’s nothing quite as refreshing as this Cherry Almond Smoothie to help you cool down and nourish your body–and takes less than 5 minutes to make!

cherry almond smoothie for summer

This Anti-Inflammatory Cherry Almond Smoothie is especially great since it harnesses the power of anti-inflammatory ingredients that packs a punch of flavor while promoting your overall well-being.

😎🍉THIS CHERRY ALMOND SMOOTHIE RECIPE IS FEATURED IN OUR SUMMER ANTI-INFLAMMATORY MEAL PREP SESSION + GUIDE! CLICK HERE TO SEE IT IN ACTION AND GET THE FREE MEAL PRINTABLE MEAL PREP GUIDE!

Ingredients

Cherries

Cherries, the star ingredient of this vibrant smoothie, are not only a delectable summer fruit but also a nutritional powerhouse. Bursting with antioxidants and phytochemicals, cherries boast potent anti-inflammatory properties.

By incorporating these luscious berries into your diet, you can help combat inflammation and potentially reduce the risk of chronic diseases.

bowl of cherries in front of a pool in the summer

But- another lesser-known fact is that tart cherries have specifically been studied for their ability to boost sleep. So if you’re having trouble sleeping, maybe opt for this smoothie as your dinner or after-dinner snack on those hot summer nights!

Almonds

Almonds not only add a delightful nutty flavor but also offer a wealth of nutrients. Packed with healthy fats, fiber, and vitamin E, almonds have been known to reduce inflammation and support heart health.

woman pushing almonds from plate into bowl on a table

What makes this smoothie even more appealing is that it’s sugar-free. This is important since sugar is one of the most inflammatory foods you can eat.

Substitutions and additions

Milk

The almond milk should be unsweetened and with as few thickeners as possible. If you don’t have almond milk, you can easily sub regular cow’s milk if dairy isn’t inflammatory to you, unsweetened coconut milk, or any other unsweetened non-dairy milk.

I don’t recommend oat milk because it’s straight simple carbs, and raising blood sugar levels is inflammatory.

Protein powder

Don’t skip this ingredient!

Protein in smoothies is SO important because of the usually high carb content from fruits. The protein (and healthy fats) are what complete the ‘trifecta’ of macros to create this balanced and anti-inflammatory Cherry Almond Smoothie.

Many people prefer whey protein powder because of the studies showing it’s more beneficial at muscle assimilation than other proteins. However, it is derived from dairy. If you’re dairy-free, you can absolutely use a plant-based protein powder or even egg white protein powder.

If you opt for plant-based, it can get thicker than whey protein powder, so keep in mind you may need to add a little more milk.

If you opt for egg white powder, keep in mind that it may not come with the vanilla flavoring. You may need to test and see if this means you add a couple drops of vanilla extract as well, or if the almond and cherry flavors are beautiful on their own.

On ANY protein powder substitution, be aware of the sweetener component. Many protein powders contain some type of sweetener. So make sure it’s not an artificial sweetener.

If you choose a protein powder that doesn’t have a sweetener, keep reading for what sweeteners you can add.

Sweetener

If you do add sweetener because the protein powder isn’t sweetened or just want it sweeter, make sure you use an anti-inflammatory option. This means aiming for natural zero-calorie sweeteners like stevia, monk fruit, allulose, or erythritol.

Almond butter

Although the almond butter really helps kick up the almond flavor in this recipe, if you don’t have any, you can easily substitute a different nut. Pistachios, coconut, hazelnuts, or pecans are amazing flavor pairings with cherries. You can sub in the same amount of nuts as nut butter.

If you’re avoiding nuts, use a seed like sunflower, pumpkin, or tahini (sesame).

Peanut butter is also an option!

Almond extract

Although the almond butter gives a small amount of flavoring overall, almond extract can really boost that popular almond punch that pairs so beautifully with cherries for this healthy smoothie. (Especially if you’re using a different type of nut butter and still want that almond flavor to shine through.)

Instructions

For any smoothie, the best way to make sure it isn’t easily clumped is to add the liquid in first, then everything else. Blenders need a lot of moisture to help blend and chop at the same time, while ensuring proper movement of the whole smoothie.

woman pouring a cherry almond smoothie from blender into glasses

I have to say, every time we make this smoothie the kids are in love. I’ve found that it’s definitely cheaper to buy frozen tart cherries than fresh in the summer (which is a total bummer), but we do still buy fresh and make some seriously yummy summer creations (like this Cherry Almond Smoothie!)

What makes it super fun is adding shaved dark chocolate on top and a fun straw! 😋

😎🍉THIS RECIPE IS FEATURED IN OUR SUMMER ANTI-INFLAMMATORY MEAL PREP SESSION + GUIDE! CLICK HERE TO SEE IT IN ACTION AND GET THE FREE MEAL PRINTABLE MEAL PREP GUIDE!

Print

Cherry Almond Smoothie for Summer

5 Stars 4 Stars 3 Stars 2 Stars 1 Star

No reviews

A creamy anti-inflammatory sugar-free summer smoothie bursting with fresh cherries and protein.

  • Author: Laura Brigance, MS, CHC
  • Prep Time: 5 minutes
  • Cook Time: 0 min
  • Total Time: 5 minutes
  • Yield: 1 smoothie 1x
  • Category: Smoothies
  • Method: Blender
  • Cuisine: American

Ingredients

Units Scale
  • 1 cup of frozen pitted tart cherries (unsweetened)
  • 1 scoop vanilla protein powder
  • 2 tsp almond butter
  • 1 tsp pure almond extract
  • 1 cup unsweetened almond milk (or water)
  • 6 + ice cubes

Instructions

  1. Place all ingredients into a high-powered blender and blend until smooth.
  2. Pour into a glass and enjoy!

Notes

*Protein powder: Make sure your protein powder is sugar-free, and also is free of artificial sweeteners.

Nutrition

  • Serving Size: 1 smoothie
  • Calories: 291
  • Fat: 9.8 g
  • Carbohydrates: 29.5 g
  • Fiber: 3.6 g
  • Protein: 21.9 g

Did you make this recipe?

Share a photo and tag us @truewell.co — we can’t wait to see what you’ve made!

📌 PIN IT FOR LATER!

Low Carb Blueberry Scones | Grain-Free, Sugar-Free


Not only are these Low-Carb Blueberry Scones grain-free and sugar-free, they’re also super delicious and the perfect summer bulk recipe to bake to have a quick + easy breakfast or snack on hand anytime!

low carb blueberry scones

What’s even better about this low-carb scone is that it’s bursting with juicy blueberries. So each bite is infused with antioxidants that combat inflammation, supporting your body’s natural healing processes.

😎🍉THIS LOW-CARB BLUEBERRY SCONES RECIPE IS FEATURED IN OUR SUMMER ANTI-INFLAMMATORY MEAL PREP SESSION + GUIDE! CLICK HERE TO SEE IT IN ACTION AND GET THE FREE MEAL PRINTABLE MEAL PREP GUIDE!

The other beautiful thing about this anti-inflammatory breakfast recipe is that these scones are low in carbs, making them a fantastic option for those following a low-carbohydrate lifestyle.

These ingredients provide a delightful balance of flavors, while keeping the carb count in check– which means your blood sugar stays balanced as well.

blueberries scattered on a plate

Ingredients

Sounds silly, but I love when summer is here simply for the large selection in berries. Blueberries are notorious for their low-sugar qualities and anti-inflammatory superpowers, so I love using them fresh as much as possible!

  • 1 1/3 cups almond flour (blanched)
  • 1/4 cup arrowroot flour (the package may say ‘arrowroot powder’
  • Pinch of sea salt
  • 1 tsp baking powder
  • 1 cup fresh blueberries (make sure to wash them first and let them dry)
  • 1/4 cup avocado oil
  • 3 TBSP keto maple syrup (if you don’t have this, you may try another sugar-free natural sweetener that’s granulated. Usually erythritol or allulose are good choices for baking; Swerve brand is great!)
  • 2 tsp vanilla extract (pure, not the fake stuff!)
  • 1 egg (large, organic)

Instructions

  1. Preheat oven to 350 F (177 C) and line a metal baking pan with parchment paper.
  2. Whisk the dry ingredients together in a medium mixing bowl. Then stir in the blueberries.
  3. Whisk the wet ingredients together in a small mixing bowl, then stir into the dry ingredients until a batter is formed.
  4. Pour the batter into the baking pan, shaping into a circle if you wish.
  5. Bake for approximately 30 minutes.
  6. Let cool for at least 10 minutes, cut into eight servings, and enjoy!
low carb blueberry scones

Tips + Notes

  • Any other nut flour (except tiger nut as it’s not really a nut) should be able to be subbed in this recipe.
  • Letting the scones completely cool down after baking is *really* important as it’s grain-free, and the cooling process helps the other binder ingredients in the recipe set.
  • You can also sub any other fresh berry! (We make this recipe with raspberries and cherries as well!)

😎🍉THIS LOW-CARB BLUEBERRY SCONES RECIPE IS FEATURED IN OUR SUMMER ANTI-INFLAMMATORY MEAL PREP SESSION + GUIDE! CLICK HERE TO SEE IT IN ACTION AND GET THE FREE MEAL PRINTABLE MEAL PREP GUIDE!

Print

Low Carb Blueberry Scones | Grain-Free, Sugar-Free

5 Stars 4 Stars 3 Stars 2 Stars 1 Star

No reviews

When keeping blood sugar balanced by avoiding grains and sugar is necessary, it’s a sure hit to have a recipe on hand like these Low-Carb Blueberry Scones. 

  • Author: Laura Brigance, MS, CHC
  • Prep Time: 5 minutes
  • Cook Time: 30 + 10 min cool down
  • Total Time: 45 minutes
  • Yield: 8 1x
  • Category: Breakfasts and Snacks
  • Method: Oven
  • Cuisine: American
  • Diet: Diabetic

Ingredients

Units Scale
  • 1 1/3 cups almond flour
  • 1/4 cup arrowroot flour
  • Pinch of sea salt
  • 1 tsp baking powder
  • 1 cup fresh blueberries
  • 1/4 cup avocado oil
  • 3 TBSP keto maple syrup
  • 2 tsp vanilla extract
  • 1 egg

Instructions

  1. Preheat oven to 350 F and line a metal baking pan with parchment paper.
  2. Whisk the dry ingredients together in a medium mixing bowl. Then stir in the blueberries.
  3. Whisk the wet ingredients together in a small mixing bowl, then stir into the dry ingredients until a batter is formed.
  4. Pour the batter into the baking pan, shaping into a circle if you wish.
  5. Bake for approximately 30 minutes.
  6. Let cool for at least 10 minutes, cut into eight servings, and enjoy!

Notes

*Any other nut flour (except tiger nut as it’s not really a nut) should be able to be subbed in this recipe.

*Letting the scones completely cool down after baking is *really* important as it’s grain-free, and the cooling process helps the other binder ingredients in the recipe set.

*You can also sub any other fresh berry!

Nutrition

  • Serving Size:
  • Calories: 224
  • Sugar: 7.2 g
  • Sodium: 301.9 mg
  • Fat: 10.8 g
  • Carbohydrates: 15.3 g
  • Protein: 3.6 g
  • Cholesterol: 23.3 mg

Did you make this recipe?

Share a photo and tag us @truewell.co — we can’t wait to see what you’ve made!

low carb blueberry scones

Salmon Burgers with Lemon Dill Sauce

These healthy Salmon Burgers with Lemon Dill Sauce are super easy and perfect for spring or summer. Serve on a grain-free bun or just with a salad or fresh vegetable sides (like our Roasted Spring Vegetables) for a filling and yummy anti-inflammatory dinner!

This recipe is featured in our Spring Anti-Inflammatory Meal Prep Guide! Grab it HERE!

Ingredients

LEMON DILL SAUCE

  • 1/2 cup Paleo mayonnaise
  • 1 lemon (juiced and zested)
  • 2 TBSP chives (minced)
  • 1 Garlic clove (minced)
  • 1 TBSP dill (fresh, minced)
  • 1/2 tsp salt
  • 1/2 tsp pepper

SALMON PATTIES

  • 1 lb salmon (Wild-caught, fresh, with no skin)
  • 1/4 cup onion, minced
  • 1 TBSP dill (fresh, minced)
  • 2 tsp Dijon mustard
  • 1 TBSP almond flour (can sub in coconut flour if needed)
  • 1 TBSP capers, minced
  • 1/2 tsp salt
  • 1/2 tsp pepper
  • 1/2 cup arrowroot starch (or tapioca)
  • 2 TBSP avocado oil (for frying)

Instructions

PREPARE THE LEMON DILL SAUCE

Mix all of the ingredients together really well and store in the fridge until needed.

*If meal prepping, store in a sealed container in the fridge up to 5 days.

MAKE THE SALMON PATTIES

  1. Cut the salmon into strips, then chop into very small pieces. (Chopping tends to be better than using a food processor.)
  2. Put the salmon into a medium-sized bowl, then add the onion, dill, mustard, almond flour, capers, salt, and pepper.
  3. Combine really well, then divide the mixture into four, creating patties out of each portion.
  4. Pour the arrowroot flour into a flat bowl or container; dredge the patties in it, coating both sides.
  5. Heat a non-stick pan over medium-high heat. When the pan is hot, add the avocado oil and give it a minute to heat the oil.
  6. Place all four salmon patties in the pan; cook 4-5 minutes on each side.
  7. Remove patties from the pan. Plate them while hot and top with the Lemon Dill Sauce.

Notes

*If meal prepping, the patties can be stored layered with parchment paper in a sealed container or baggie in the fridge for up to 3 days.

*If you like a tangier sauce, substitute the Paleo mayo for Greek yogurt.

This recipe is featured in our Spring Anti-Inflammatory Meal Prep Guide! Grab it HERE!

Print

Salmon Burgers with Lemon Dill Sauce

5 Stars 4 Stars 3 Stars 2 Stars 1 Star

No reviews

These healthy Salmon Burgers with Lemon Dill Sauce are super easy and perfect for spring or summer. Serve on a grain-free bun or just with a salad or fresh vegetable sides (like our Roasted Spring Vegetables) for a filling and yummy anti-inflammatory dinner!

  • Author: Laura Brigance, MS, CHC
  • Prep Time: 20 minutes
  • Cook Time: 8 minutes
  • Total Time: 28 minutes
  • Yield: 4 1x
  • Category: Dinner
  • Method: Cooktop

Ingredients

Units Scale

Lemon Dill Sauce

  • 1/2 cup Paleo mayonnaise
  • 1 lemon (juiced and zested)
  • 2 TBSP chives (minced)
  • 1 Garlic clove (minced)
  • 1 TBSP dill (fresh, minced)
  • 1/2 tsp salt
  • 1/2 tsp pepper

Salmon Patties

  • 1 lb salmon (Wild-caught, fresh, with no skin)
  • 1/4 cup onion, minced
  • 1 TBSP dill (fresh, minced)
  • 2 tsp Dijon mustard
  • 1 TBSP almond flour (can sub in coconut flour if needed)
  • 1 TBSP capers, minced
  • 1/2 tsp salt
  • 1/2 tsp pepper
  • 1/2 cup arrowroot starch (or tapioca)
  • 2 TBSP avocado oil (for frying)

Instructions

Prepare the Lemon Dill Sauce

Mix all of the ingredients together really well and store in the fridge until needed.

*If meal prepping, store in a sealed container in the fridge up to 5 days.

Make the salmon patties

  1. Cut the salmon into strips, then chop into very small pieces. (Chopping tends to be better than using a food processor.)
  2. Put the salmon into a medium-sized bowl, then add the onion, dill, mustard, almond flour, capers, salt, and pepper.
  3. Combine really well, then divide the mixture into four, creating patties out of each portion.
  4. Pour the arrowroot flour into a flat bowl or container; dredge the patties in it, coating both sides.
  5. Heat a non-stick pan over medium-high heat. When the pan is hot, add the avocado oil and give it a minute to heat the oil.
  6. Place all four salmon patties in the pan; cook 4-5 minutes on each side.
  7. Remove patties from the pan. Plate them while hot and top with the Lemon Dill Sauce.

Notes

*If meal prepping, the patties can be stored layered with parchment paper in a sealed container or baggie in the fridge for up to 3 days.

*If you like a tangier sauce, substitute the Paleo mayo for Greek yogurt.

Did you make this recipe?

Share a photo and tag us @truewell.co — we can’t wait to see what you’ve made!