This Red Velvet Smoothie is the BEST red beet smoothie I’ve had, hands down.
Not only is it super easy, it packs in healthy fats plus mega antioxidants with non-peeled red beets. Plus it’s sugar-free, gluten-free, and can be adapted easily to be dairy free.
If you’re all in on healthy anti-inflammatory smoothies that taste like dessert, you HAVE to try this one!
Here’s how to make this divine red velvet smoothie:
You’ll need-
2 cups of milk
2 cups of ice
½ avocado
½ beet
3 TBSP cocoa powder
2 scoops vanilla protein powder (non-sugar sweetened)
2 TBSP granular sweetener
Directions:
Cut up the beet
So the first thing we’re gonna do is wash the beet really well (these tend to still have a lot of dirt on them) and then cut up the beet.
You can peel the beet if you want, but studies have shown that good bacteria from unpeeled vegetables can help boost the immune system. So I opt NOT to peel mine.
Then cut it up really small. If you don’t have a high-powered blender, boil them first for 20-40 minutes to get them softer and then let them cool.
Those can go right into the blender.
And don’t throw the greens away! You can chop them up and use them in dishes like frittatas, in salads, and even nourish bowls.
Avocado
Cut open your avocado and spoon out ½ of it into the blender.
If you’re not using the other half, seal it in a snack-size baggie and store it in the fridge with the seed in it.
Milk
Add your milk—I say use full-fat whole if you tolerate dairy, if not, choose an unsweetened dairy-free version
Cocoa Powder
Add your Cocoa powder
Vanilla Protein Powder
Make sure you use vanilla flavored protein powder, but one that is not sweetened with sugar. Best bets are sweetened with stevia, monk fruit, or allulose.
Sweetener
Add your natural, zero-calorie sweetener – I prefer stevia, monk fruit, erythritol, or allulose.
Remember, per anti-inflammatory guidelines, we’re steering clear of any sugar, but also artificial sweeteners.
Ice
Add your Ice
Blend
Blend until it’s super smooth, keeping an eye on the beet chunks.
Tips
Now if you’re watching your blood sugar levels, a good trick is to add in more protein.
Two ways to add a boost of protein to this would be to:
sub in ½ cup of Greek yogurt for ½ of the milk, or
This Red Velvet Smoothie is super easy and packs in healthy fats plus mega antioxidants with red beets. If you’re all in on healthy anti inflammatory smoothies that taste like dessert, you’ll love this red beet smoothie!
Author:Laura Brigance, MS, CHC
Prep Time:5
Total Time:5 minutes
Yield:21x
Ingredients
Scale
2 cups of milk
2 cups of ice
1/2 avocado
1/2 beet
3 TBSP cocoa powder
2 scoops Vanilla protein powder (non-sugar sweetened)
2 TBSP granular sweetener (2-4 TBSP, to taste)
Instructions
Wash the beet really well and cut it up into super small chunks. If you don’t have a high powered blender, you may want to boil the beet for 20-40 minutes to soften it up. Add the beet to the blender.
Cut open your avocado and spoon out ½ of it into the blender.
Cooking breakfast for everyone on the weekends is one of my husband’s favorite things to do. And this is seriously one of my favorite anti inflammatory breakfasts for fall.
Because how can you beat pancakes and pumpkin?
And since we’re on a mission to control our blood sugar levels, we’re doing it with an anti-inflammatory keto version of pumpkin pancakes that you’re gonna love!
One thing I wanna highlight for these keto pumpkin pancakes is that they’ve got a good amount of protein in them.
What we’ve found in our house is that the kids tend to veer more towards carbs in the morning, so if I use a higher protein recipe, they’re getting a better balanced meal that leads to less blood sugar spikes (and crashes) and keeps us full longer.
But the norm to accomplish this is to use a protein powder. Instead, I like to use egg white powder for that extra protein. (This trick also keeps it dairy-free.)
One thing to note is that you can store these in the fridge if you have leftovers, and I’ve even frozen them to have for anti-inflammatory breakfast and snacks!
Eating for your health shouldn’t mean skipping breakfast or flavor. These pumpkin pancakes prove you can do both — deliciously. My free Anti-Inflammatory Diet Quick-Start Guide shows you exactly how to get started with blood-sugar-balancing meals like this one. ✨ Download your free Quick-Start Guide and make your mornings both cozy and anti-inflammatory.
Pumpkin puree, coffee, erythritol or other granulated natural sugar-free sweetener, vanilla extract, unsweetened non-dairy milk of your choice, and pumpkin pie spice.
You don’t have to give up your favorite fall latte to stay anti-inflammatory — you just need the right ingredients. My free Anti-Inflammatory Diet Quick-Start Guide shows you exactly how to swap out sneaky inflammatory foods for blood-sugar-friendly ones (like this version of your PSL!). 🍂 Grab your free Quick-Start Guide and learn how to make every cozy craving work for your health.
Prepare the 2 parts of your pumpkin spice latte
First, you need to go ahead and start your coffee brewing. This will take a few minutes.
While your coffee is brewing, add that cup of nondairy milk to a small saucepan and turn it to medium heat, then add in your sweetener, and the pumpkin puree.
And then whisk it really well until it’s all mixed together,and let it get really warm.
Then turn off your heat, add the vanilla extract and pumpkin spice, give it another good whisk…
And then you’re ready to pour it up!
Pour it up like a barista
Put the coffee in your mug first, then pour the pumpkin milk mixture into the coffee.
This Healthy Pumpkin Spice Latte proves you can sip something sweet, creamy, and comforting — without the sugar crash or inflammation spike. Want more anti-inflammatory recipes that feel just as indulgent? ✨ Download the free Anti-Inflammatory Diet Quick-Start Guide and start enjoying seasonal favorites that fuel your energy and calm inflammation all year long.
The Anti-Inflammatory Vegan Pumpkin Cheesecake Smoothie You’ve Been Waiting For
Today we’re making what tastes like dessert but is a balanced meal with a fall-inspired yummy twist: Pumpkin Cheesecake Smoothies
So, there’s nothing better than that break in heat from the summer and smelling fall in the air, and when it comes to easy, yummy, FAST meals, you can’t beat a smoothie.
This fall-inspired, anti inflammatory Pumpkin Cheesecake Smoothie owes its anti-inflammatory balanced macro goodness to pumpkin and banana and a surprise ingredient that gives it that creamy cheesecake mouthfeel that keeps us coming back for more. 😋
When you can sip on something this creamy and know it’s anti-inflammatory, that’s a win-win. My free Anti-Inflammatory Diet Quick-Start Guide shows you how to build more everyday meals just like this — balanced, satisfying, and healing from the inside out. ✨ Grab your free Quick-Start Guide and start feeling your best this fall.
And here’s how you make it…
Prep Your Ingredients
Although many smoothies are just ‘dump and blend’, this one needs two ingredients pre-frozen: a banana and the pumpkin puree.
We keep bananas that were about to go bad in a baggie in the freezer so I always have them on hand for smoothies (or ice cream). But the pumpkin puree is a different story.
For this smoothie I measured out the pumpkin puree and placed it on a silmat and put it in the freezer. (This should freeze for about 30 minutes to an hour.)
Dump and Blend
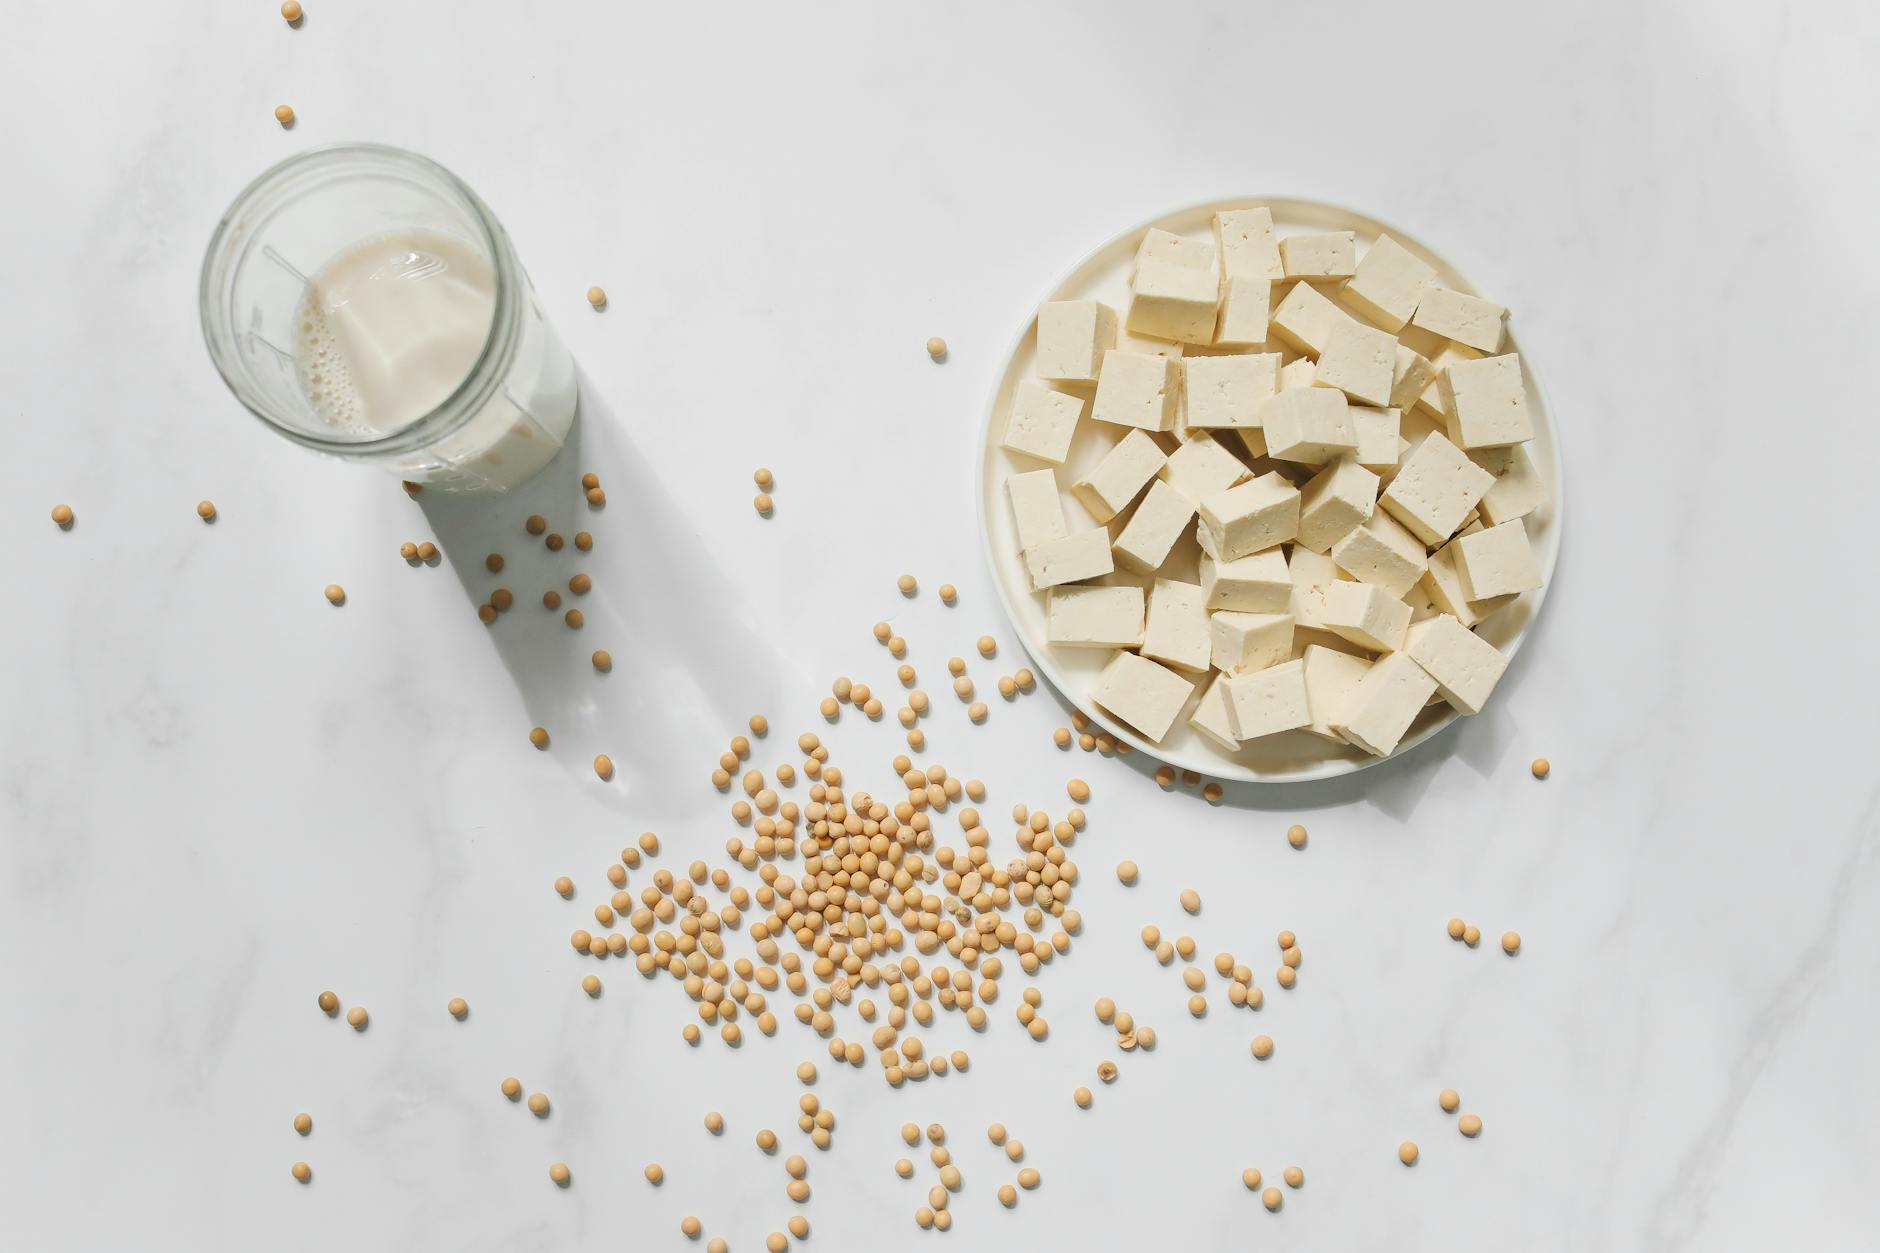
Once those 2 ingredients are frozen you’re free to dump them all in a high-powered blender (my choice is the Ninja), including our secret ingredient that we use instead of cream cheese: Silken tofu.
(Some links may be affiliate links, meaning if you click on and then purchase, I’ll get a portion of the proceeds, at no additional charge to you.) 🙂
Now, if you’ve never eaten or used tofu before, settle down. I used to avoid it like the plague because of all the bad press soy has gotten over the years. The truth is that it’s full of vegan (complete) protein, fiber, and healthy fat.
The reason some soy isn’t considered healthy is because if it’s NOT organic, it’s laden with chemicals, and the soy oil is extremely oxidized.
So choose organic and you’re good to go!
Also, if you can’t find silken (which is a much softer version), you can still use medium or firm, you may just have to add a few TBSP of water and blend longer for it to get super smooth.
Blend all your ingredients until super smooth (scraping the insides of the blender if needed).
So, what happens regularly around our house is that I’m looking for my spice mix, and…. It’s been all used up by my kids, and they also conveniently forget to tell me we’re out of it.
So I started keeping spice mix recipes so I can make my own any time that happens.
Here’s how to make your own pumpkin spice mix to keep in your pantry.
Our ingredients are :
Ground cinnamon
Ground ginger
Ground nutmeg
Ground cloves
Ground allspice
And our last surprise ingredient is a pinch of ground black pepper.
The reason I love adding in ground black pepper is that all the other spices already have mega anti-inflammatory properties, but black pepper has a compound in it that boosts absorption of the nutrients in the other ingredients.
Love that cozy pumpkin spice flavor — but want it to love you back? Grab my free Anti-Inflammatory Diet Quick-Start Guide to learn how to use everyday ingredients (like this spice blend!) to calm inflammation, balance blood sugar, and boost energy naturally. 🍁 Download your free Quick-Start Guide and turn every recipe into a feel-good one.
When I make spice mixes, I like to just use a measuring cup that has a spout so I can pour it into the container without a funnel.
So I add all the spices into the measuring cup, no special order, then stir really well. You want to make sure to get everything mixed really really well, then pour into your storage container.
This spice mix is perfect in any recipe that calls for pumpkin pie spice mix, like pumpkin smoothies, pumpkin seed granola, pumpkin muffins, and even pumpkin pie.
Anti-Inflammatory Recipes I use this Homemade Pumpkin Pie Spice mix in:
When it’s fall everybody goes bonkers for pumpkin spice, and these keto pumpkin muffins, which are anti-inflammatory, gluten-free, and sugar-free, should definitely be in your saved + often-used recipe collection.
And I get it–it’s (hopefully where you live) starting to cool down for fall, and that crisp snuggly feeling should be crankin’ up!
The only thing is… when we think of ‘cozy’ things, it usually veers in dramatically different directions: Either heavier soups and stews (savory), or warm, sweet breads (sweets direction).
Lucky for you, I’ve got the sweet covered with a fiber-filled, pumpkin-spice loaded muffin that is sugar-free, and also has the added benefit of being a great after-dinner snack (if you add on the pumpkin seeds–they contain melatonin. 😉)
Now, I know some of us like stevia, some prefer erythritol, some like monk-fruit, and on and on. So I put 2 options in the directions to accommodate for either choice, because that one option will determine baking time.
So warm up some unsweetened coconut (or almond) milk and enjoy! 🍂
If you love comfort food but want to keep inflammation and cravings in check, this is your sign. The free Anti-Inflammatory Diet Quick-Start Guide walks you through the exact foods that balance blood sugar, calm inflammation, and still let you enjoy treats like these keto muffins guilt-free. 🌿 Download your free Quick-Start Guide and make cozy anti-inflammatory living easy.
There’s nothing better than that break in heat from the summer and smelling fall 🍂 in the air, and when it comes to easy, yummy, FAST meals, you can’t beat a smoothie— And if you love pumpkin spice as much as I do, you’re gonna love this!
So this fall-inspired, Anti Inflammatory Pumpkin Spice Smoothie (that is a mouthful!)—is packed with anti-inflammatory goodness like pumpkin, avocado, spinach, and ginger, and I have a feeling it’s gonna become your GO TO smoothie for fall from now on.
Now, as much as I’d like this to be a gorgeous pumpkin color, as with all smoothies that have greens added…it’s green. But this absolutely doesn’t detract from it’s yumminess–pinky promise.
And here’s how you make it:
Step 1: Gather your ingredients
This smoothie is made with pumpkin, banana, avocado, spinach, ginger, pumpkin pie spice, ginger, nondairy milk, egg white powder, and keto maple syrup.
Love fall flavors and feeling amazing after you eat? Grab my free Anti-Inflammatory Diet Quick-Start Guide to learn how to turn cozy seasonal favorites (like this pumpkin spice smoothie!) into meals that naturally balance blood sugar and fight inflammation. 🍁 Get your free Quick-Start Guide here and start feeling your best this season.
Step 2: Put them all in the blender
Honestly this is why smoothies are so darn easy. You just put them all in the blender at once.
The one caveat for this smoothie (I’d suggest) is to hold off on the egg white powder until everything else is nice and smooth, because it can make it thicker.)
A high-powered blender is always recommended, like this Ninja, or if you want to spend more, the Vitamix is a favorite for a higher price tag.
(Some links may be affiliate links, meaning if you click on and then purchase, I’ll get a portion of the proceeds, at no additional charge to you.) 🙂
If your smoothie is having a hard time blending, you may need to add a little more liquid to it. If it gets too thick it can’t run back down to the bottom where the blades are doing their thang.
Step 4: Assess sweetness
I always like to do a little taste-test and just make sure the sweetness is where I like it. If it needs more, I add a tiny bit at a time. If there’s no sweetener in the recipe, I add a natural zero calorie sweetener like liquid stevia, monk fruit, or erythritol.
Step 5: Pour it up + enjoy!
In all honesty, sometimes smoothies make way more than I can handle in one sitting. So if it’s a bit too much, just store it in the fridge for up to a day.
Love fall anti-inflammatory recipes? Check out my Fall Anti-Inflammatory Meal Prep Session where I prep for 4+ meals in an hour! CLICK HERE to read!
2 TBSP egg white powder (or plant-based plain protein powder)
Instructions
Place all ingredients into a high-powered blender.
Blend until smooth.
If too thick, add a few TBSP of water at a time, or 4-5 ice cubes.
Taste test to determine if sweet enough.
Pour into a large glass and enjoy!
Notes
Per serving:
Fat- 9g
Carbs-40g
Fiber-7g
Protein-12g
Nutrition
Calories:267
Every ingredient you add to your blender can either feed inflammation or fight it. My free Anti-Inflammatory Diet Quick-Start Guide shows you exactly how to choose the right ones — so every smoothie, meal, or snack helps you lower inflammation and boost energy naturally. 🎃 Download your free Quick-Start Guide and start blending smarter today!
For those of us living with inflammation, the first cool breath of fall can feel like medicine.
After months of heavy heat, the air softens. The light turns golden. Nature seems to exhale … wrapping us in a palette of rust, amber, and cinnamon that reminds us to slow down and root ourselves again.
And just as the world shifts, so does what it offers.
There really is no shortage of sources of superfoods for those of us following an anti-inflammatory diet.
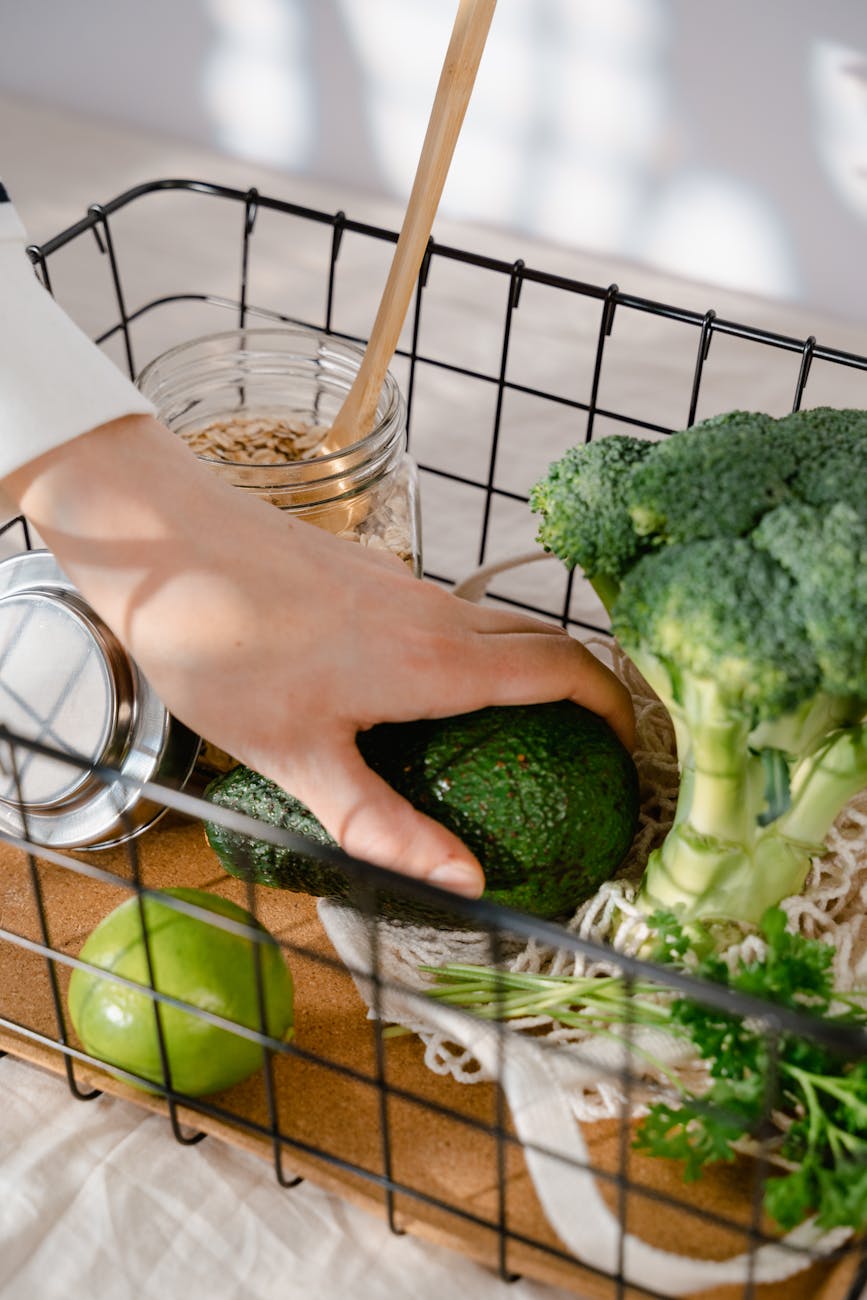
The beauty of this season is that even as summer’s abundance fades, the markets are still overflowing with anti-inflammatory staples. From earthy root vegetables to crisp apples and immune-supporting herbs, it’s a time to eat deeply … to choose warmth, grounding, and color on your plate.
Here are three of my favorite categories to focus on as the temperatures drop:
Veg and Fruits: grounding, fiber-rich, and full of protective antioxidants
Herbs: fragrant plant medicine that supports digestion and immunity
and Spices: warming allies that keep circulation flowing and inflammation quiet
Here are my favorites that make fall feel (and taste) like healing.
Greens like kale, arugula, collard greens, and swiss chard are packed full of vitamins and antioxidants. And they’re versatile enough that many can be eaten raw, cooked, as a stand-alone side, or even as a soup or casserole component.
Pumpkins
Arguably the most popular fall vegetable, pumpkins provide an amazing source of Vitamin A (the color gives you that hint on beta carotene), balanced polyunsaturated fats, Vitamins C and E, and several other essential minerals.
They’re also packed with fiber and healthy carbs, and can be stored for a long period of time (in a dry pantry or frozen) without going bad.
Butternut Squash
Butternut squash is also packed with Vitamin A, but it’s also an amazing source of Vitamin C as well. Compared to pumpkins, it’s more dense in energy, meaning: per serving it contains more calories, carbs, and fiber.
No meal plan this week? No problem! Grab the (free!) FALL ANTI-INFLAMMATORY MEAL PREP GUIDE! Click HERE or the image above!
Sweet Potatoes and White Potatoes
Sweet potatoes also have a ton of Vitamin A. But aside from that, their nutritional value is nearly the same as white potatoes. And even though white potatoes have more carbs, this occurs as starches versus the sugar content in sweet potatoes, which is something to consider if you’re watching your blood sugar levels.
Either are great options for soups or even just sliced and baked as healthier fries.
Beets
One of the most overlooked vegetables (in my opinion) is the beet. Beets are high in folate and manganese, but also contain betalains, which gives it the bright red color, and is associated with reduced cancer risk.
Not only can you eat the beet itself, but the greens are also a fantastic source of nutrition. Beets can be roasted, sauteed, pickled, or boiled; and the greens can be used in salads or saved for soup broths.
Apples
Ahhh…the quintessential fruit for fall! Apples peak season is September, so take advantage of this amazing time of year to get super fresh apples! The best way to eat them is raw, as fresh as possible, and with the skin on.
Not only do apples give tons of fiber, the skin contains quercetin, which is amazing for those with allergies, and it also reduces inflammation.
🌿 Want to know exactly which foods help lower inflammation year-round? Grab the free Anti-Inflammatory Diet Quick-Start Guide. It’s your shortcut to understanding what to eat, what to skip, and how to balance your blood sugar without cutting everything you love. 👉 Download the Quick-Start Guide and start feeling the difference this week.
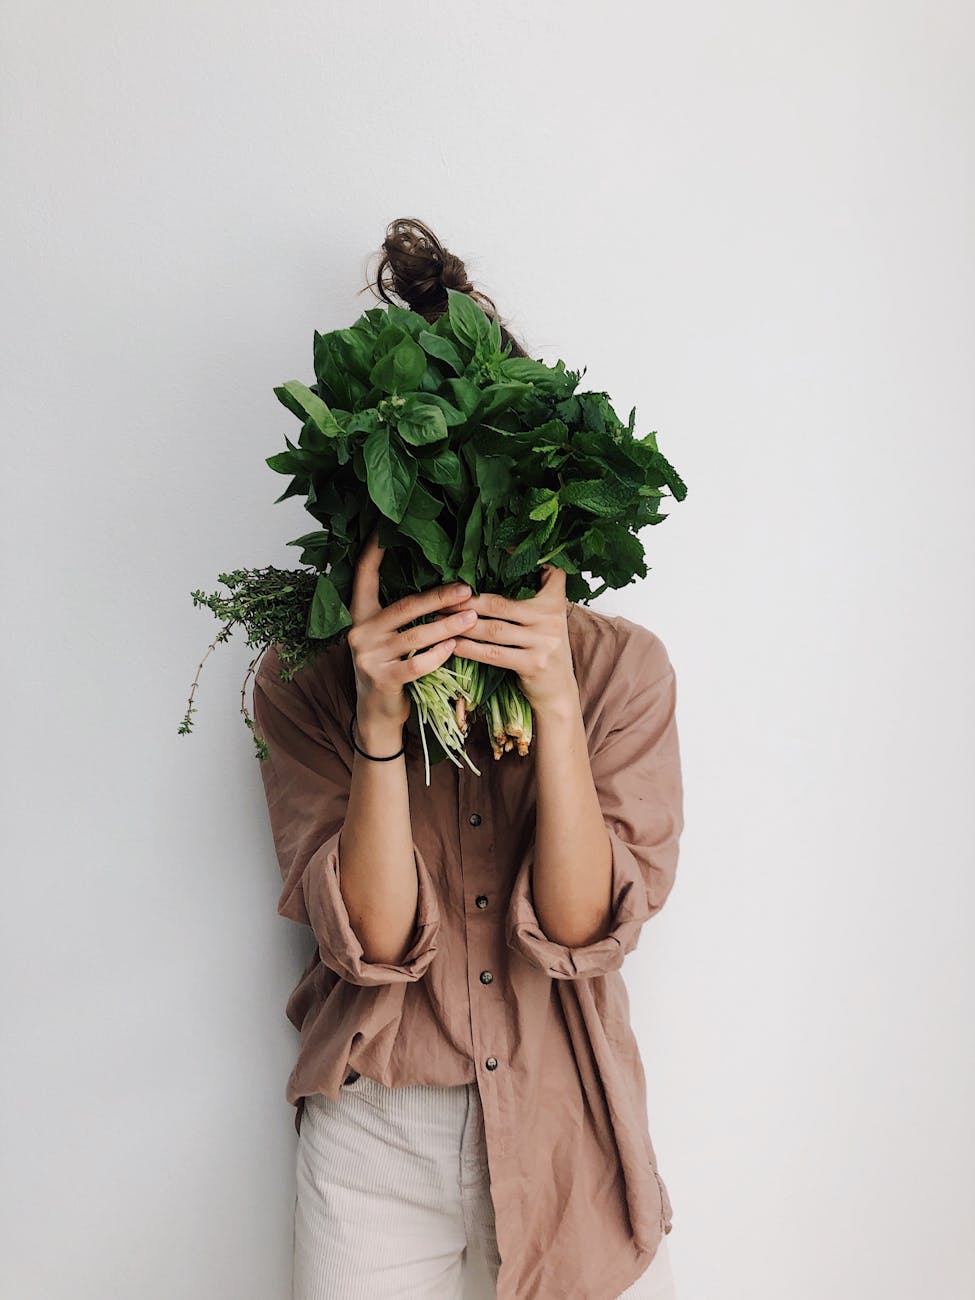
Herbs
Herbs are one of the most overlooked nutrition powerhouses in the plant family. They pack so much punch for such a little plant. But they’re also SO EASY to add in to any dish for extra flavor.
Here are my favorite anti-inflammatory herbs for fall.
Sage
Sage not only adds delicious earthy notes to fall and winter dishes, but also can be used in teas and as an essential oil. Sage is high in Vitamin K and vital minerals, but also contains antioxidants.
What’s so amazing about sage is that it’s been shown to relieve or cure illnesses like obesity, diabetes, heart disease, cancer, depression, dementia, and lupus. But it’s also been used for centuries in traditional medicine for inflammation, bacterial, and viral infections, which makes it high on the list for cold and flu season.
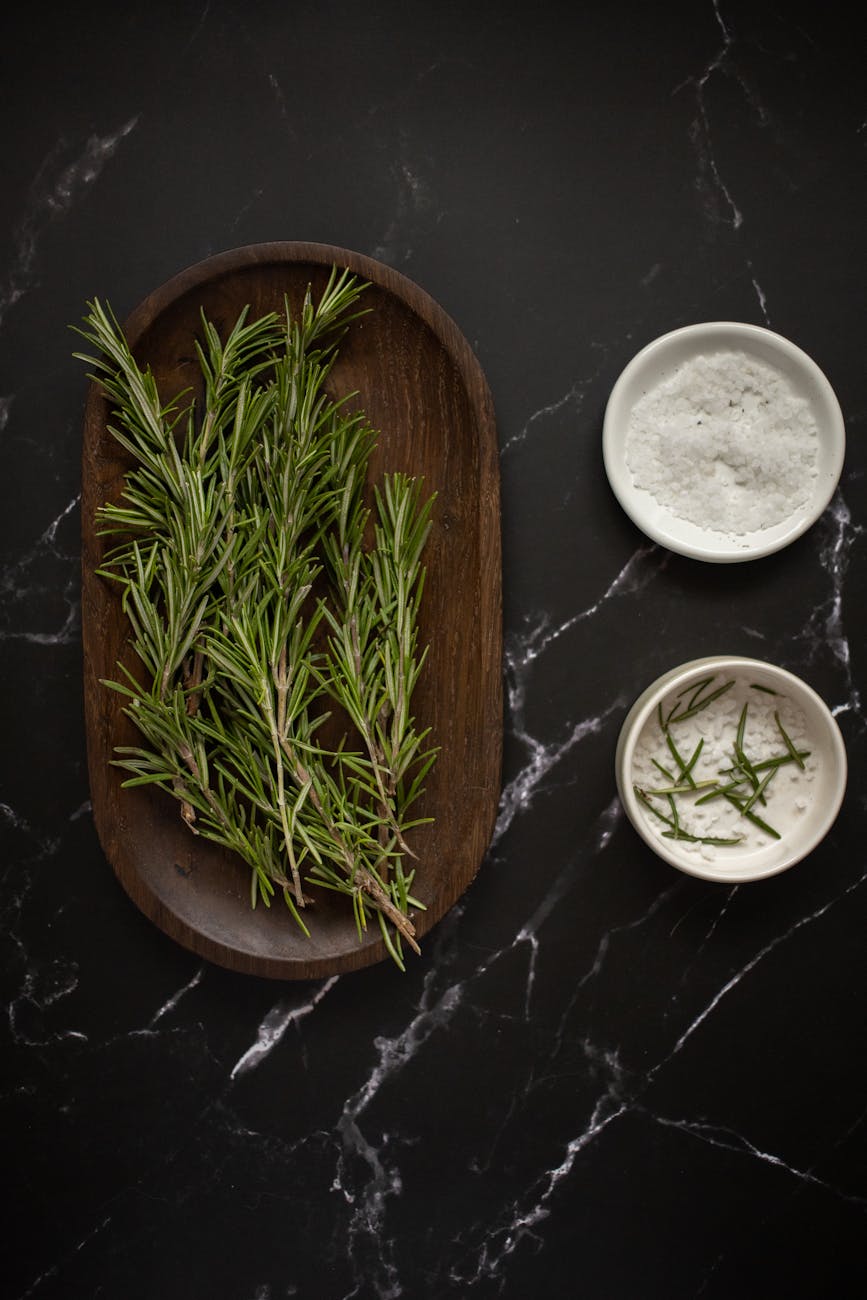
Rosemary
Rosemary is full of iron, calcium, and vitamin B-6, and is also native to the Mediterranean—fitting for an anti-inflammatory diet rooted in the Mediterranean diet. It’s been used for a wide range of ailments including digestion, muscle pain, improved circulation and memory, and a boost to the immune system.
Aside from its fragrant and mouthwatering culinary powers, studies have proven its anti inflammatory, anti-oxidant, and neuroprotective properties. This means that even though it can fight free radicals and harmful bacteria, it can also be used in mood disorders, enhanced learning, anxiety, and sleep disorders.
Thyme
Thyme (another herb native to the Mediterranean) can be used as a treatment for anything from acne to GI disturbances to menstrual cramps (and a ton of stuff in between!) But it’s actually an extremely versatile culinary addition. It has an earthy flavor but can waver back and forth between savory or sweet dishes like stocks and stews, roasted vegetables, teas, and desserts.
Fall Spices
Although spices can generally be used year-round, the warmth of the following three are perfect for the cooling weather.
Ginger
Ginger has been touted to help anything from boosting the immune system, lowering blood sugar, and easing inflammation. Probably it’s most famous claims to fame include taming the GI tract and pulling down inflammation. These benefits are made possible due to the over 400 compounds that ginger contains.
Ginger has a fresh, zingy flavor, and although the dried version (teas and spice shakers) have a milder flavor than fresh, they can still have nearly the same health benefits. It’s best to use fresh, and ginger root can be cut up and put in the fridge or frozen to last even longer.
Cinnamon
There can be a lot of confusion over the type of cinnamon that’s best to use. Ceylon (known as ‘true’ cinnamon) and cassia (what you buy in the grocery store) are equally delicious and contain a compound called cinnamaldehyde that’s thought to be responsible for its health and metabolism benefits.
Honestly my favorite spice for fall is a combination of several spices: Pumpkin pie spice. This mixture obviously enhances pumpkin flavor, but can be used in a variety of recipes in fall and winter.
The components of pumpkin pie spice include cinnamon and ginger, which we already covered. The other ingredients are nutmeg, cloves, allspice, and black pepper.
What’s so great about the blend in pumpkin pie spice is that all the ingredients have powerful anti-inflammatory and antioxidant compounds just like the other spices mentioned.
Fall is the perfect season to reset your plate — but knowing where to start makes all the difference.
My free Anti-Inflammatory Diet Quick-Start Guide walks you through the exact first steps to reduce inflammation, stabilize energy, and feel amazing without the overwhelm. 🍎 Get your free Quick-Start Guide here and start building your anti-inflammatory lifestyle today.
Let me know in the comments: What’s YOUR favorite anti-inflammatory fall food or recipe?
One thing I’ll say till I’m blue in the face is that meal planning is one of the most underrated forms of stress management. Especially when those meals are meant to help you manage or avoid a chronic condition.
So look, meal planning can be tough enough on its own, but when you add in a dietary style that you’re totally new to, that just makes it that much more complicated.
Over the years, I’ve seen clients make the same three mistakes with anti-inflammatory meal planning. These missteps cost them time, money, and energy … and make it way harder to get meals on the table consistently.
So let’s walk through the top 3 mistakes (and how to avoid them) so you can make meal planning feel easy, doable, and sustainable.
And once you’re ready to streamline, don’t miss my free Meal Planning x LIFE Workshop, where I show you how to plan healthy meals using the templating method proven to save you hours each week in the kitchen.
Anti Inflammatory Meal Planning Mistake #1: Being overly ambitious
So I get it–when we get excited about something new (especially if it’s supposed to help us reach our goals like managing a condition, getting your blood sugar under control, or even kick-starting weight loss), we just want to jump all in…
But here’s the problem: being overly ambitious usually leads to burnout. You get overwhelmed, miss a night or two, and then throw in the towel.
✅ Do this instead: Start small. Plan to cook 3–4 dinners a week at first. Cook a little extra each time so you’ve got leftovers for lunch or another dinner. That way, you’re building confidence and consistency without the pressure.
One of the really great strategies for this is when you cook those three to four meals go ahead and cook a little bit more so that you can have extra for other meals… which leads us into mistake number two.
Anti Inflammatory Meal Planning Mistake #2: Not cooking enough food at once
So before you get all up in arms and overwhelmed at that let me just explain.
It takes no extra time to cook 4 servings of a recipe versus 8 servings of a recipe.
You’re simply using double the ingredients so what I want you to think about is that when you’re only cooking one recipe at a time for whatever meal that is you’re missing out on the opportunity to save so much time later.
The reason why that happens is that whenever you cook more you have extra time, you have a fallback, and you have a backup plan.
✅ Do this instead: When you cook dinner, make enough for tomorrow’s lunch or freeze a second batch for later. Bonus points if you schedule one night a week as a “leftovers night.” That’s one less meal you have to cook and clean up.
I know a lot of families who do one night a week for leftovers for dinner, (we absolutely do that because it saves me cooking one night of the week and it also saves all of the other clean up that happens, and it cleans up whatever is left over in the fridge.)
So instead, think about doing one and a half or even doubling up on your recipes. You do also have the option to take one recipe and cook it for your dinner that night and then make a second one at the same time to freeze for later. So I always recommend doing that and or making double at the recipe so that you can have enough for lunch the next day.
I work out of the house but whenever I did not work out of the house I would get into that hangry situation right before lunch because I’d been really busy working and usually forgot to have a snack.
So by the time lunch got there I was just being like in this annoyed, starving state where I really didn’t care what I went to eat, so I would just grab the closest most convenient thing that I could. Which would never work out on this type of dietary style.
So if you make enough for lunch the next day you can be assured that whatever you’re eating for lunch is compliant with the anti-inflammatory diet and that way you’re not even worrying about what you’re eating the next day because you know that it fit in because you made it for your dinner the night before.
Mistake #3: Not setting enough time aside
Mistake number three is not setting enough time aside for meal prep and for actual cooking.
If you’ve ever tried to cook a full meal after work with nothing prepped, you know how stressful it can be. You end up frazzled, kids get to bed late, and it feels like meal planning is a burden.
✅ Do this instead: Schedule 1 hour at the start of the week for meal prep. Chop veggies, cook proteins, or prep sauces ahead of time. Even just pre-chopping produce when you unload groceries can save you loads of stress later.
Here’s why: When you do allow yourself enough time, it just makes your time spent cooking way more relaxing… You just assemble the ingredients cook what needs to be cooked at your own pace, no rush…Instead of frantically running around with your hair on fire just to get dinner ready.
But it also gives you peace of mind during the day because you know that those things are already prepped and ready to go and have the extra time to cook dinner.
I can’t tell you the number of clients that tell me that even though they have meal plans technically done they still have anxiety about getting the meals actually cooked at night because of how long it will take.
✅What to do instead is to make sure that you schedule in an hour maybe on Sunday (or one other day at the start of the week) to meal prep: chop veggies and even go ahead and make some of the meat even sauces.
Sometimes if it’s a casserole a lot of those ingredients are pre-cooked and then you can just assemble them the night of and then just stick them in the oven so that you have as little to do as possible on the day of.
Bonus tip
Shop once, prep once. When you walk in the door from the store, go ahead and wash + chop veggies right then. It’s one less barrier between you and actually cooking the food you bought.
You don’t have to be perfect at meal planning … you just need a system that works for your life.
👉 Start with the free Anti-Inflammatory Diet Quick-Start Guide. (Check it out below!) It gives you a clear list of foods to eat and avoid so you’re not second-guessing your meals.
👉 Then, watch my free Meal Planning x LIFE Workshop where I’ll show you how to build a realistic meal planning routine that fits into real life (without it taking over your Sundays).
Take it one step at a time. You’ll be amazed at how much simpler anti-inflammatory meal planning can feel when you’ve got the right tools in place. 🌿
Discover My Easy 4-Step Approach to the Anti-Inflammatory Diet So You Can Get Started Immediately (Without Getting Overwhelmed or Cleaning Out Your Entire Pantry)
When I first dipped my toe into an anti-inflammatory diet and lifestyle, I wasn’t chasing optimal health. I was a tired mama of three, trying to lose the baby weight and get through the day without turning into Momzilla.
My husband traveled constantly for work, so I’d bounce between solo-parent mode and wife mode. Hormones were all over the place, my blood sugar was up and down, and my energy? Nonexistent.
Like so many women, I thought the answer was low-carb or keto—because that’s what was trendy and what “everyone” said worked. But here’s the truth: that way of eating made me feel worse.
My cycles were irregular, my energy crashed, I couldn’t focus, and the inflammation in my body was screaming at me through allergies, brain fog, and joint pain.
I had just barely started my nutrition journey (formal education-wise.) But even in that capacity, there are a ton of differing opinions on how we should eat.
So I decided to start with trying to lose the baby weight and keep my blood sugar in check, and to do that I would go low-carb and just sort of put that on autopilot in the back of my head because I had so much going on in my life right then, as we all do.
And I knew that it really wasn’t working out in my favor because my hormones were super up and down, my cycles were not regular, (I’d had endometriosis when we were trying to get pregnant the first time) and my energy levels were the same: up and down all day long.
I also couldn’t even concentrate for really long amounts of time. I also had allergic symptoms that were getting worse–I’ve always had environmental allergies.
It was really frustrating because I thought that I had figured out that this diet was the most important thing and that I knew doing low carb or keto would be the best thing for me because of my family’s blood sugar history. I have family members who’ve been diagnosed with type 2 diabetes, and also with prediabetes, and so I’m very conscientious of it because I also had gestational diabetes with two of my pregnancies, which puts me at a higher risk of developing type 2 diabetes down the road.
But the thing was, I literally did not have time to do tons of research on what would be the best for me, or spend thousands of dollars on a specialist or even the wellness centers you go into that do all the testing for you and then sell you a bazillion supplements.
I didn’t have the time or money to do any of that so I really was just at a loss and just completely frustrated because I did not know what to do.
Then one day, sitting in a pharmacy drive-thru, I ran my hand over my leg and felt it covered in welts. No history of food allergies, no detergent changes … just my body waving a giant red flag that something had to change.
That was my wake-up call. And it’s when I began piecing together the real connection between food, lifestyle, and inflammation.
So the really big wake-up call was that I called the doctor’s office got in as soon as possible. And they checked everything out and said, “Hey… you don’t really have any discernible symptoms that would give us answers to what’s happening here. You don’t have a history of food allergies and you haven’t changed anything else like shampoo, body wash, or laundry detergent…”
So the best answer that they could give me is to talk about lifestyle and being stressed and that maybe I had too much on my plate. And that’s when I kind of had to take a step back and thought, “I know that is a good part of it but that’s not the only thing.”
A new plan
So when I decided to really start honing in on what was going on I had three major shifts that make me really understand that did putting in the effort and time into an anti-inflammatory diet and lifestyle–first and foremost–would be the thing that would help me out the most.
Major breakthrough #1: Blood sugar and inflammation are linked
So the first thing is that I noticed that when my blood sugar was on that roller coaster situation with the super highs and then the crashes, I could always tell immediately because of my energy levels and mood.
And what I put together is that when those things would happen the inflammation always felt worse.
💎Lesson 1: Blood sugar is a big deal even if you aren’t diabetic
👉 This is why the first step in my Quick-Start Guide is identifying foods that stabilize blood sugar. When you fix that rollercoaster, your whole body breathes a sigh of relief. (Click HERE to get it free!)
Major breakthrough #2: Food intolerance is real (even without allergies)
So the second thing is that I started seeing patterns in specific foods that I ate.
I already have asthma and I have always had environmental allergies, but when I would eat certain foods I would get a bit of a runny nose, throat congestion, brain fog, and then just this severe drop in energy.
And again–I’ve never had food allergies, but I did notice that I was having these specific reactions to certain foods.
👉 If you suspect foods are sneaking in under the radar, I’ll walk you through how to spot your personal triggers in my free Anti-Inflammatory Foundations Workshop.
💎Lesson 2: Even without food allergies, food intolerance is real
Major breakthrough #3: Lifestyle choices can heal … or hurt
And in the third shift was really taking a step back and understanding that lifestyle factors were making things exponentially worse.
Late nights binge-watching Netflix while my husband was away, stress stacked on stress, no real movement, zero stress management … I was unknowingly fueling the fire.
The aha moment? Your diet is powerful, but your lifestyle multiplies its effects. Sleep, stress, and movement can either amplify healing or make inflammation worse.
I had filled my day so full that I rationalized to myself that I had no time to even think about stress management, practices, or working out, or getting in any type of daily movement.
And what I realized is that every single lifestyle choice was adding up and then either working for me or against me…and at this point in time they were all working against me.
💎Lesson 3: Lifestyle factors stack up to either work for you or against you
I thought I knew what was best for me and doing low carb or the keto just kind of whenever it suited me, but the truth was that I never stuck to one way of eating and then just totally disregarded all of the other factors that were playing into me feeling like garbage everyday.
That’s the foundation of my CORE 4 approach: Calm (stress), Oscillate (movement), Rest (sleep), Eat (nutrition).
Putting the new plan into action
I didn’t overhaul everything at once. Here’s exactly what I did:
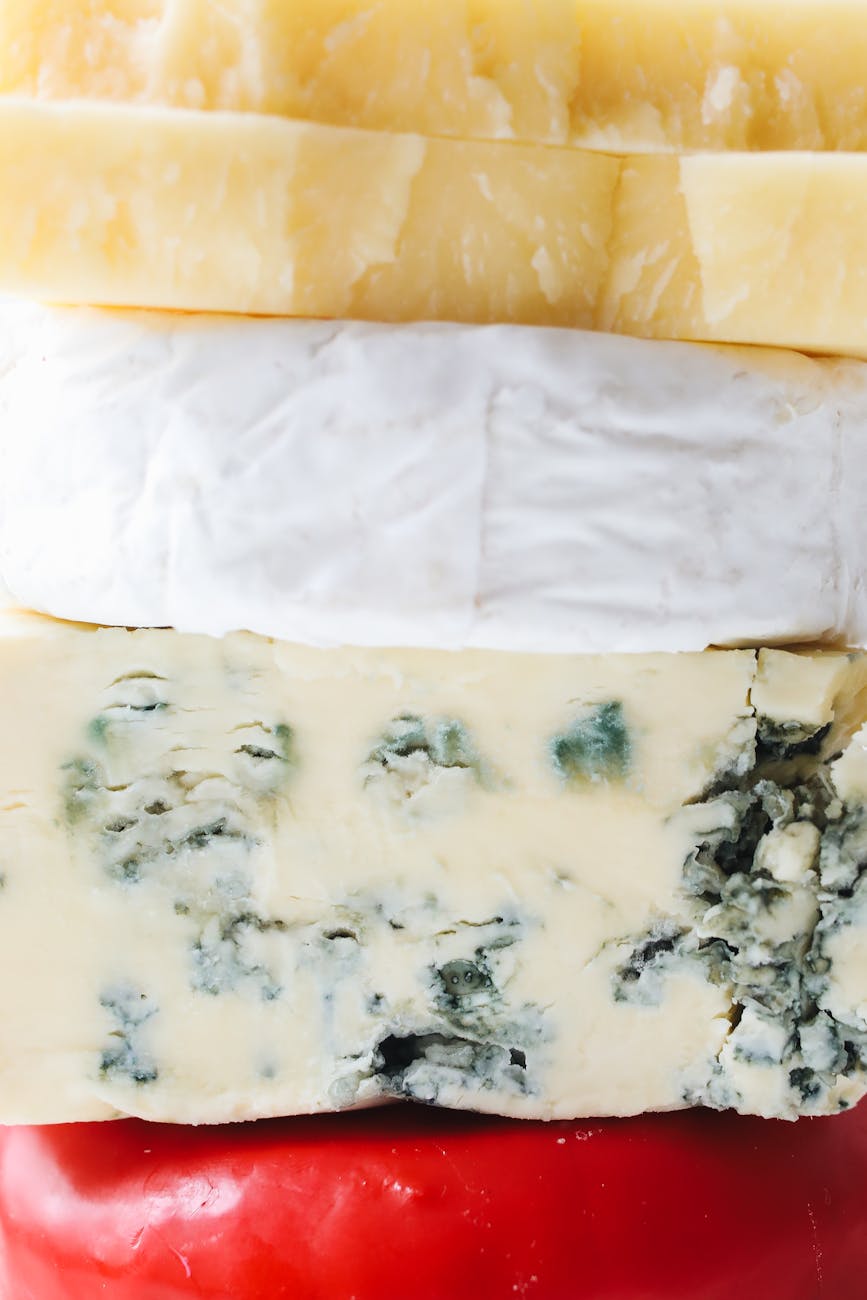
Got honest about my diet. I realized I was basically eating meat + cheese with barely any vegetables. So I shifted toward colorful produce, fiber, and anti-inflammatory staples.
Changed one meal at a time. I started with breakfast—rotating 4 bulk-prep recipes that were quick, delicious, and actually kept my blood sugar stable.
Simplified lunches. Instead of stressing over “Pinterest-perfect” mason jar salads, I doubled dinner and ate leftovers. Stress gone.
Stacked lifestyle habits. More sleep, a little more movement, and daily stress check-ins. One step at a time.
And little by little, everything changed—energy, mood, hormones, digestion, weight. I finally felt like myself again.
💎Takeaways for you
Get real about what you’re eating and how it makes you feel.
Change one daily meal at a time to keep it sustainable.
Layer in lifestyle changes slowly so they stick.
By far the best thing that I started with was getting in tune with myself in an anti-inflammatory diet + lifestyle.
🌟 Ready for Your Breakthroughs?
You don’t need to spend years piecing this together like I did.
👉 Then take the free Anti-Inflammatory Foundations Workshop where I’ll walk you through my step-by-step framework for building an anti-inflammatory lifestyle that lasts.
Because friend, this isn’t just about food … it’s about giving yourself your energy, focus, and joy back. And that’s exactly what’s waiting on the other side. 💛
And this is why TRUEWELL is devoted to helping others just like you get real information about what an anti-inflammatory diet is, and then refine exactly what foods you should cut out to help pull your inflammation down.
And the first place to start is your food.
I can’t wait for an AI Diet to make you feel just as amazing as I do now so you can take on the world.
If you’re ready to get real with yourself and make that change as well, grab the free Anti-Inflammatory Quick-Start Guide. 👇
Discover My Easy 4-Step Approach to the Anti-Inflammatory Diet So You Can Get Started Immediately (Without Getting Overwhelmed or Cleaning Out Your Entire Pantry)
Starting an anti-inflammatory diet can feel overwhelming. Conflicting food lists online, scary “never eat this again” warnings, and confusing rules around grains? It’s enough to make anyone quit before they even start.
But here’s the good news:
The benefits of an anti-inflammatory diet far outweigh the learning curve. Less pain. Better energy. Balanced blood sugar. Clearer thinking. And yes: weight that finally starts to move in the right direction.
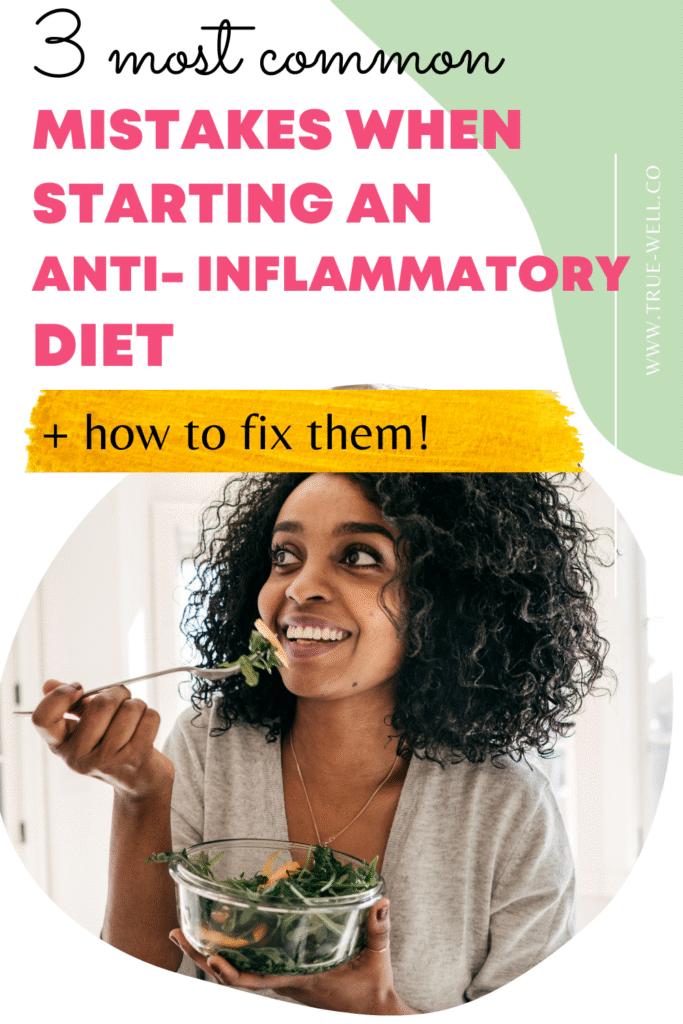
I’ve personally spent the last decade experimenting with this way of eating to heal my own hormone struggles, anxiety, sugar addiction / emotional eating blood sugar rollercoasters, and postpartum weight gain. I’ve also watched countless women make the same three mistakes when trying to “go anti-inflammatory” in my practice.
So let’s get into the top most common mistakes when starting an anti inflammatory diet and what to do instead so you don’t waste time spinning your wheels.
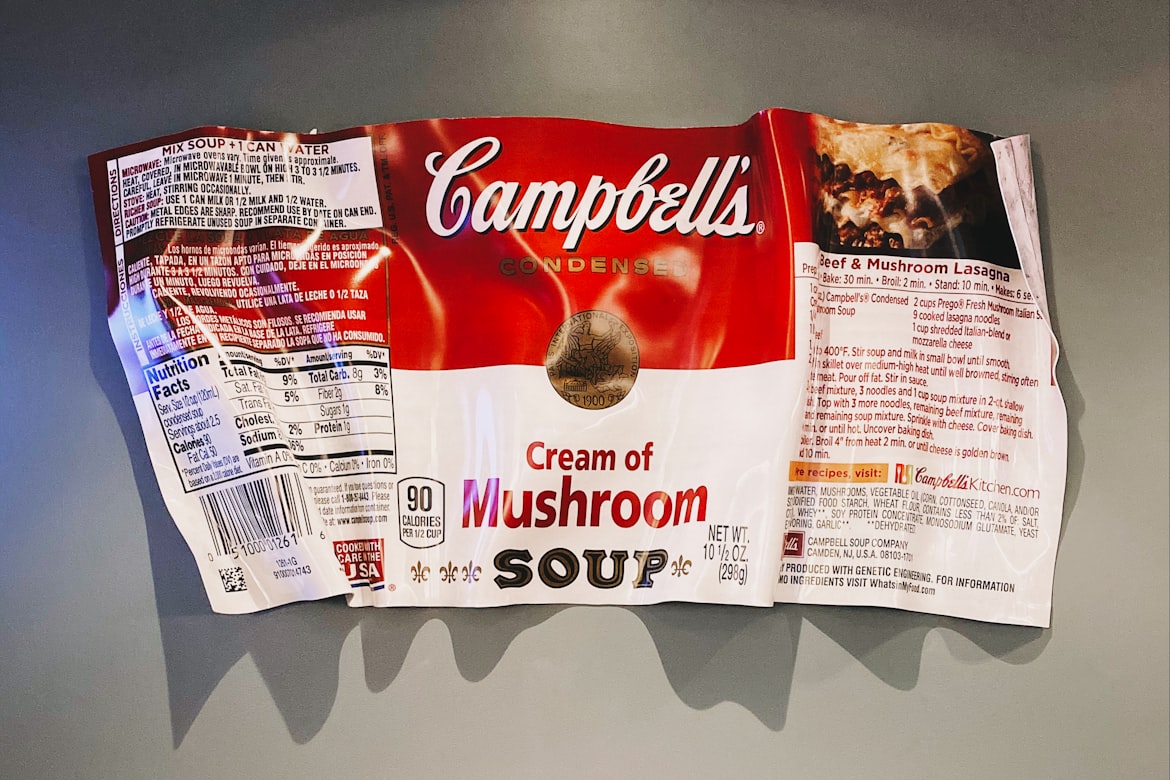
The anti-inflammatory diet isn’t about counting calories or macros—it’s about the quality of your food. And the only way to know what’s really in packaged products is to flip them over and read the label.
The problem? Food companies are really good at sneaky marketing. “Whole grain” on the front often hides refined flour in the ingredients list. “Zero trans fats” may still include partially hydrogenated oils.
What to watch for:
Added sugars (they go by 50+ names—high fructose corn syrup, maltose, brown rice syrup, etc.)
Refined grains (anything with “flour” in the ingredient list)
Hydrogenated oils (trans fats in disguise)
👉 Do this instead: Get familiar with sugar names and learn to skim labels fast. A good rule of thumb? The fewer ingredients, the better.
Yes, you can eat carbs on an anti-inflammatory diet. But not all carbs are created equal.
Here’s the deal: once grains are ground into flour, they act like sugar in your body, spiking blood sugar and fueling inflammation. Even “whole wheat” flour can have this effect.
Grains can be super tricky because food companies list a ridiculous number of ingredients, and they also are very good at finding loopholes in laws regarding labeling.
So for example, if you see a packaged food that says, “Made with 100% whole grains” on the front label, that could very well mean that they used SOME whole grains, and then the rest are refined.
You can verify this by checking the ingredients list on the side or back of the package.
💡Tip: The ingredients are ordered by largest quantity to smallest quantity.
So just start to become very familiar with how to read food labels and understand what’s actually in those foods because I promise you this: Food companies do not have your best interest in mind, and they’re going to do their very best all they care about is their bottom line.
You learn to actually enjoy the process (yes, it happens!)
Start simple: roasted veggies, grain bowls, sheet pan dinners. The more you cook, the less you’ll need to stress about labels.
👉 Do this instead: Aim to cook at least 3–4 dinners at home each week. Batch-prep sauces, grains, or proteins so you’re not scrambling on busy nights.
Quick Takeaways
Learn to read labels, especially sugar and flour names.
Replace flours with truly whole or cracked grains.
Cook more meals at home so you control the ingredients.
🚀 Ready to Start?
The anti-inflammatory diet doesn’t have to feel confusing or overwhelming. You just need a roadmap.
🌿 Want a Step-by-Step Kickoff? 👇
Discover My Easy 4-Step Approach to the Anti-Inflammatory Diet So You Can Get Started Immediately (Without Getting Overwhelmed or Cleaning Out Your Entire Pantry)
Any given Google search can give you a thousand and one list of anti-inflammatory foods. Specific foods here, herbs and teas there, and the occasional supplement thrown in for good measure.
As the Anti-Inflammatory Diet is my jam and I walk the walk, this tends to be frustrating for me, because committing to this type of diet isn’t just for kicks.
If it’s not for the general good health benefits and disease prevention, it’s because you’re trying to control or decrease inflammation in the body. That comes with chronic pain or a condition that you could pay for big time down the road if you don’t manage it now. Neither are fun.
Which is why the half-ass efforts on the parts of those lists give me endless grief.
Instead, let’s delve into the science-backed most anti-inflammatory foods list, why they help, and how to use them in real life.
Let’s start out with what actually causes inflammation.
Your immune system is supposed to fire up when something’s wrong (like an infection or injury). That’s acute inflammation: the swelling, redness, or pain that fades as you heal.
The problem is when poor lifestyle habits (too much sugar, processed foods, fried oils, stress) keep your body in a constant state of “attack.” That’s chronic inflammation, and it’s linked to conditions like:
Heart disease and stroke
Type 2 diabetes and insulin resistance
Autoimmune diseases
Arthritis and joint pain
💡 Bottom line: You can’t avoid every trigger in life, but you can take control of your diet.
How to protect yourself from chronic inflammation
In my practice, teach what I call the CORE 4 lifestyle habits:
Calm: manage stress
Oscillation: daily movement
Rest: quality sleep
Eat: nutrient-rich foods that reduce inflammation + balance blood sugar
Even though these core pillars all work together synergistically, eating is the part you do 3+ times a day … which is why it’s the best place to start.
👉 Get the food swaps and starter meal plan in the free Quick-Start Guide.
The anti-inflammatory foods list: Foods that fight inflammation
As an Anti-Inflammatory Diet at it’s core is based on the Mediterranean Diet, you may notice that this is the first place to start. It’s become one of the most studied diets of the last two decades and has, by far, gained favor by the medical community for its ability to reduce inflammation and manage blood sugar levels, not to mention the plethora of other conditions it can either manage or help prevent.
So let’s get into the list of foods that contain the most anti-inflammatory compounds by category.
(*Note that this is not an all-inclusive list of foods on the Anti-Inflammatory Diet. It is a list of the MOST anti-inflammatory foods from each food category.)
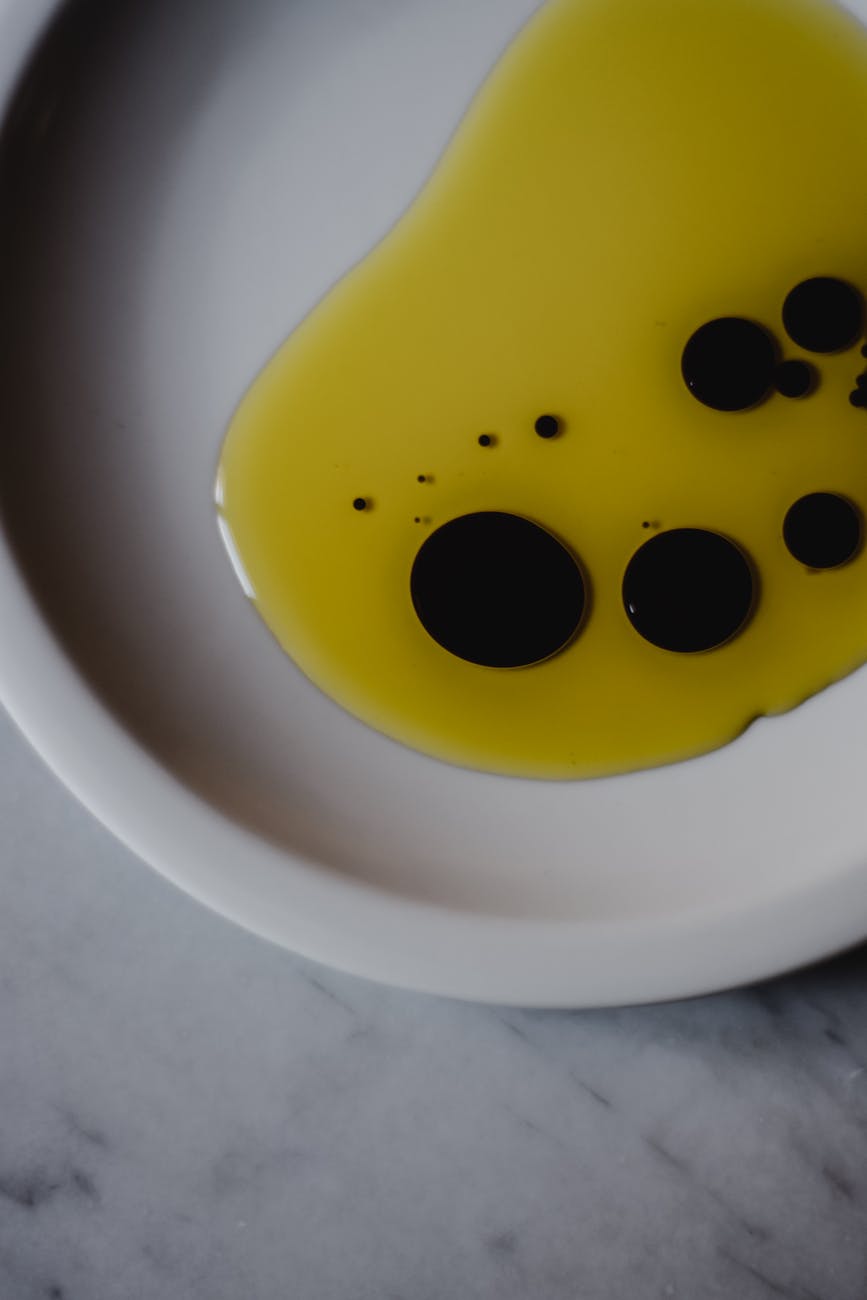
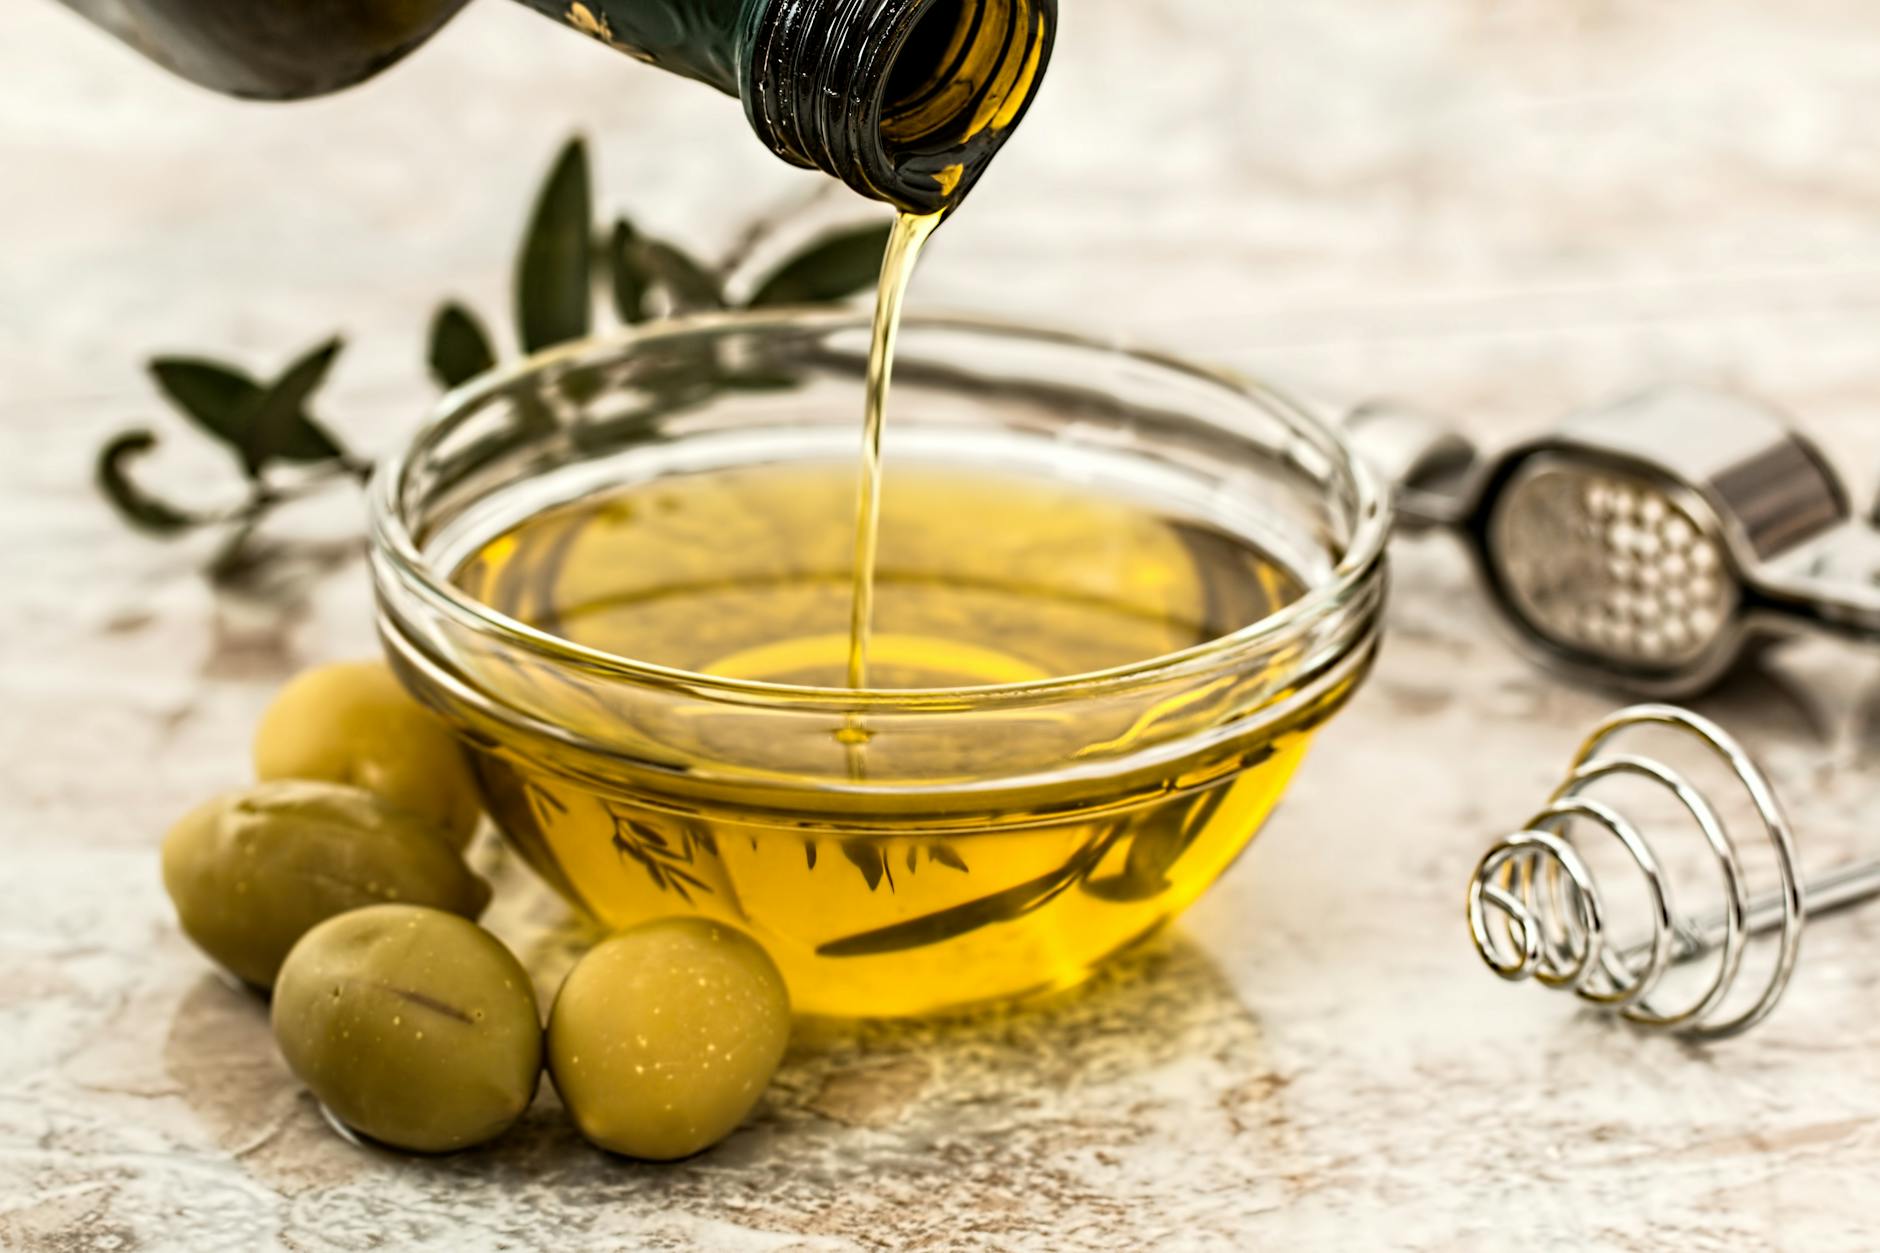
Healthy fats
Olive oil + avocado oil: rich in monounsaturated fats and antioxidants.
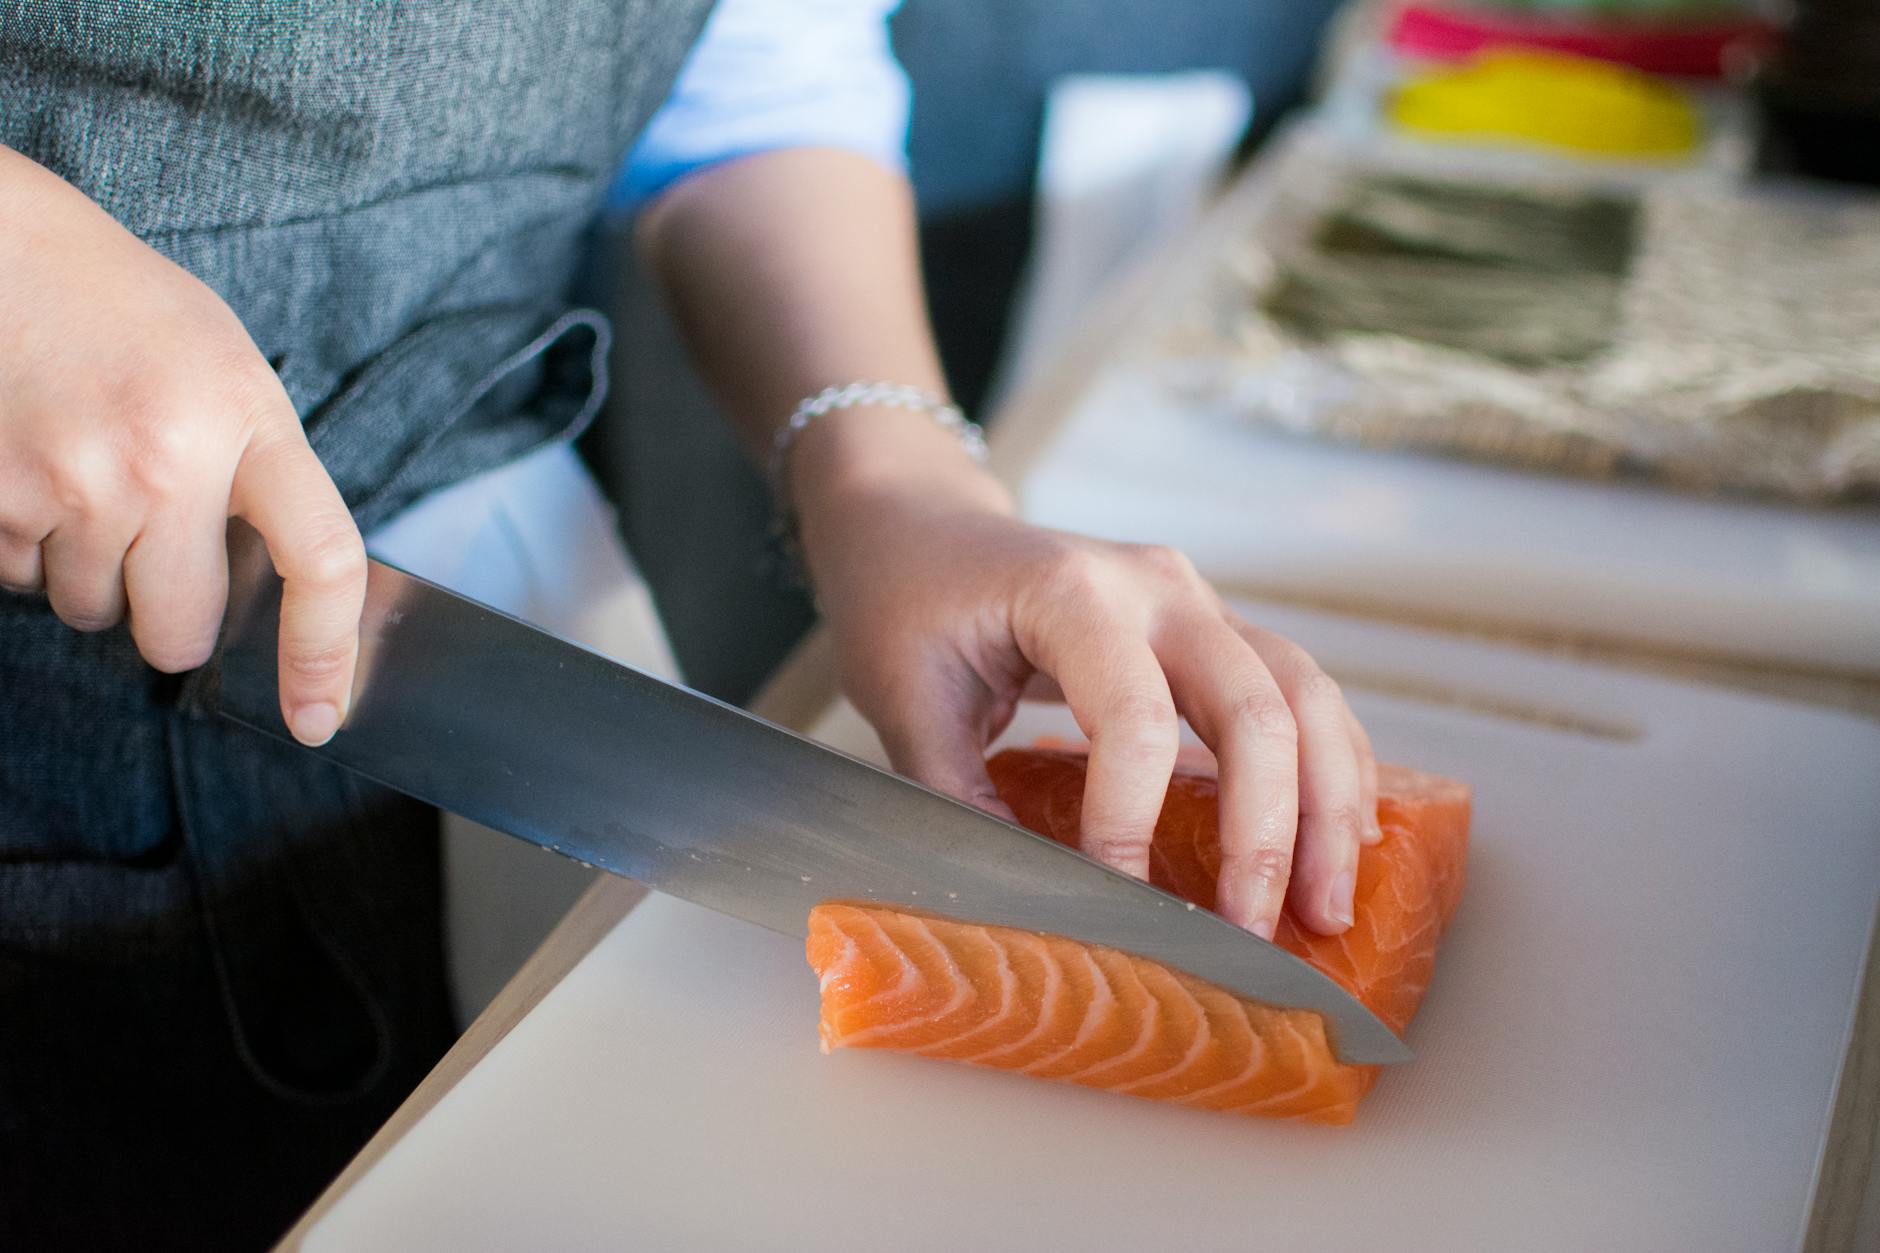
Fatty fish (salmon, mackerel, sardines, tuna): loaded with omega-3s.
*In choosing olive oil and avocado oil, look for expeller-pressed. Extra virgin olive oil is a great choice, and its recommended that you find a brand that is sourced from California.
👉 Action step: Cook with olive oil, snack on nuts, and aim for fish 2–3 times a week.
Anti-inflammatory proteins
Proteins that are anti-inflammatory can come from one of two sources: animal-based or plant-based.
Cold-water, fatty fish: anchovies, tuna, salmon, mackerel (wild-caught, not farmed)
Eggs (organic)
Soy (organic): Non-organic soy is heavily sprayed with glyphosate which has been shown to be toxic and inflammatory.
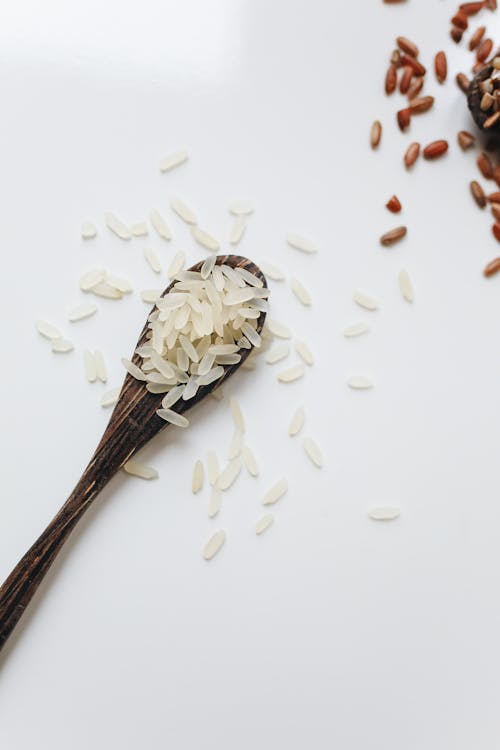
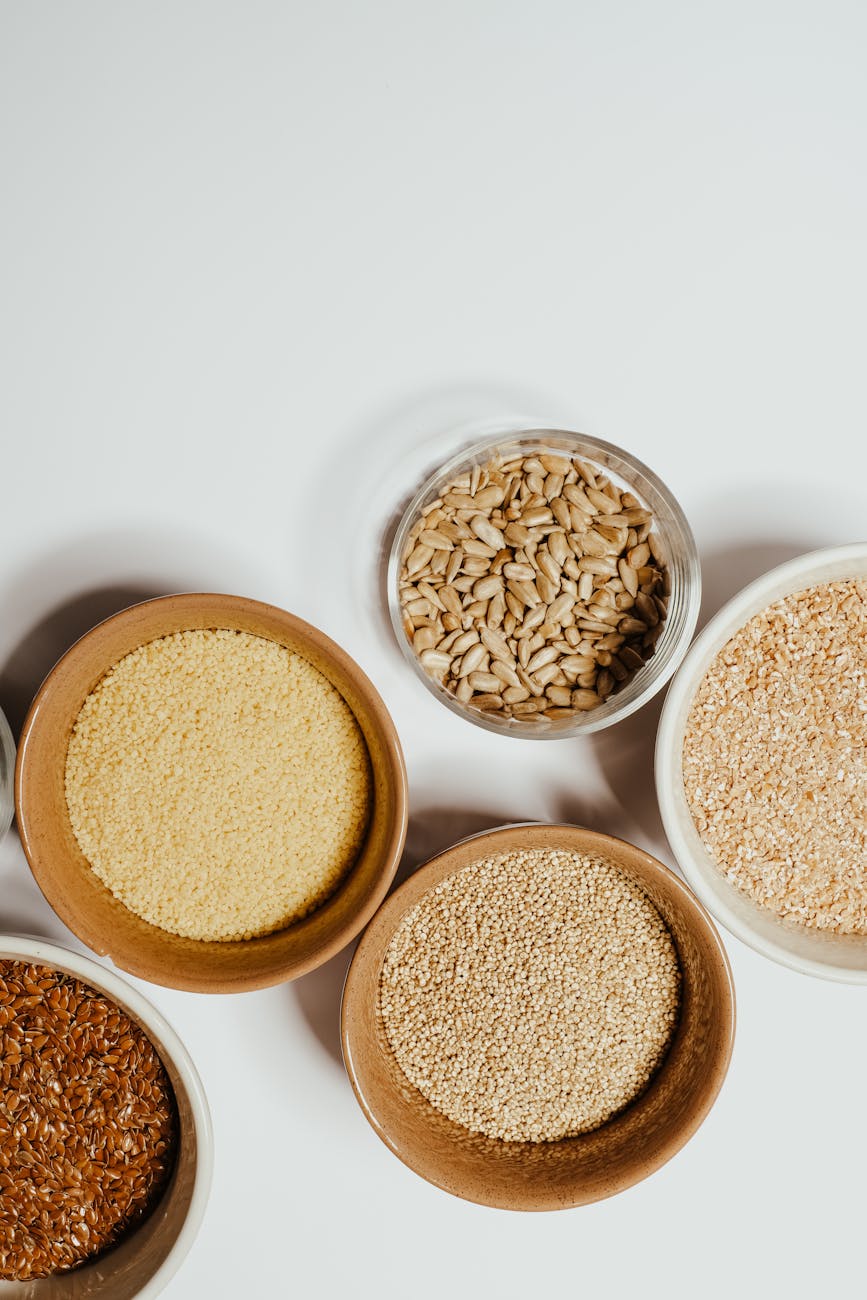
Healthy carbohydrates
There are many sources of carbohydrates that fight inflammation. Listed in the general Anti-Inflammatory Diet you’ll find that whole grains and many other vegetables are included.
Although whole grains do have anti inflammatory benefits, the science is still a bit conflicting of their ability in fighting inflammation. (This is not to say that they promote inflammation.)
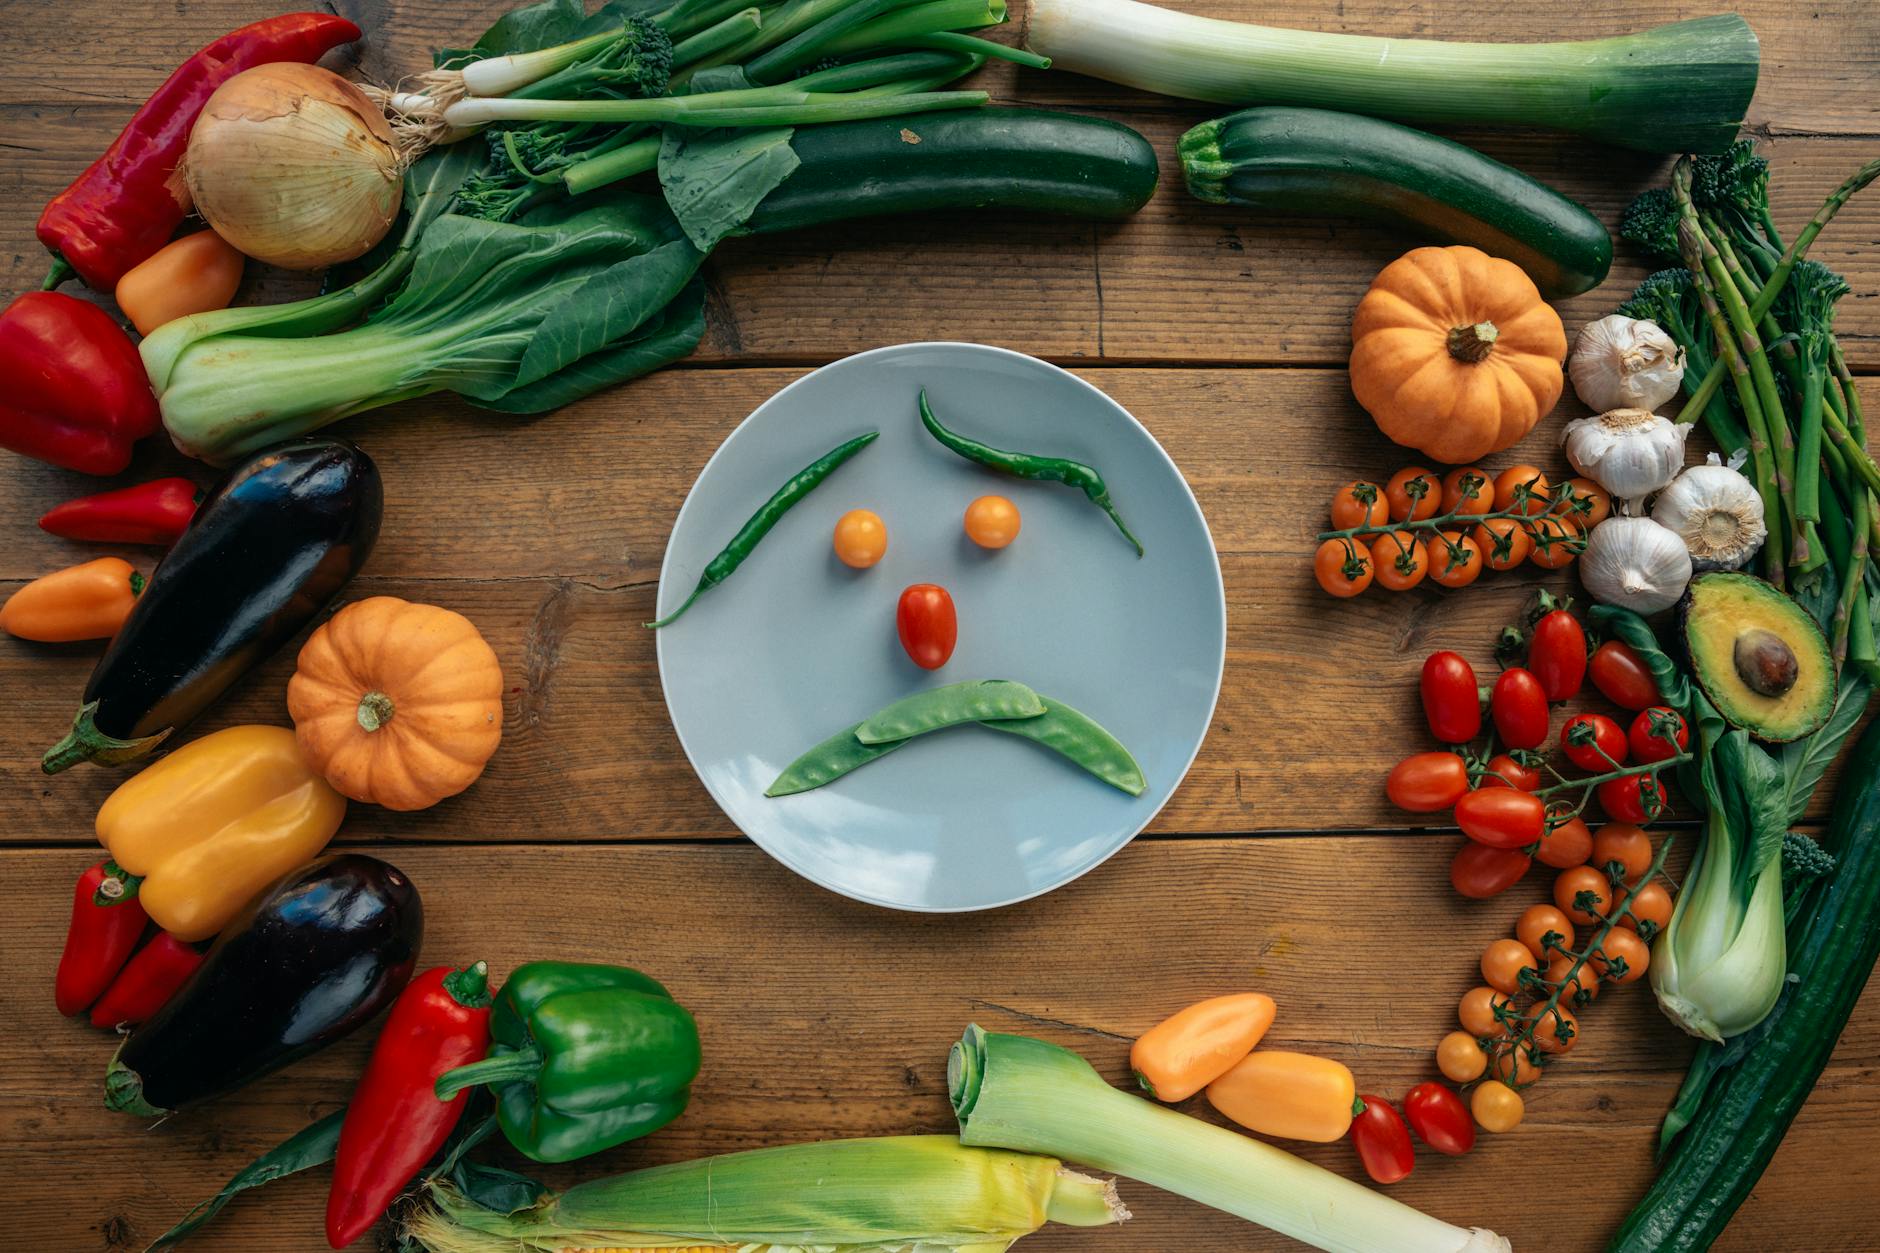
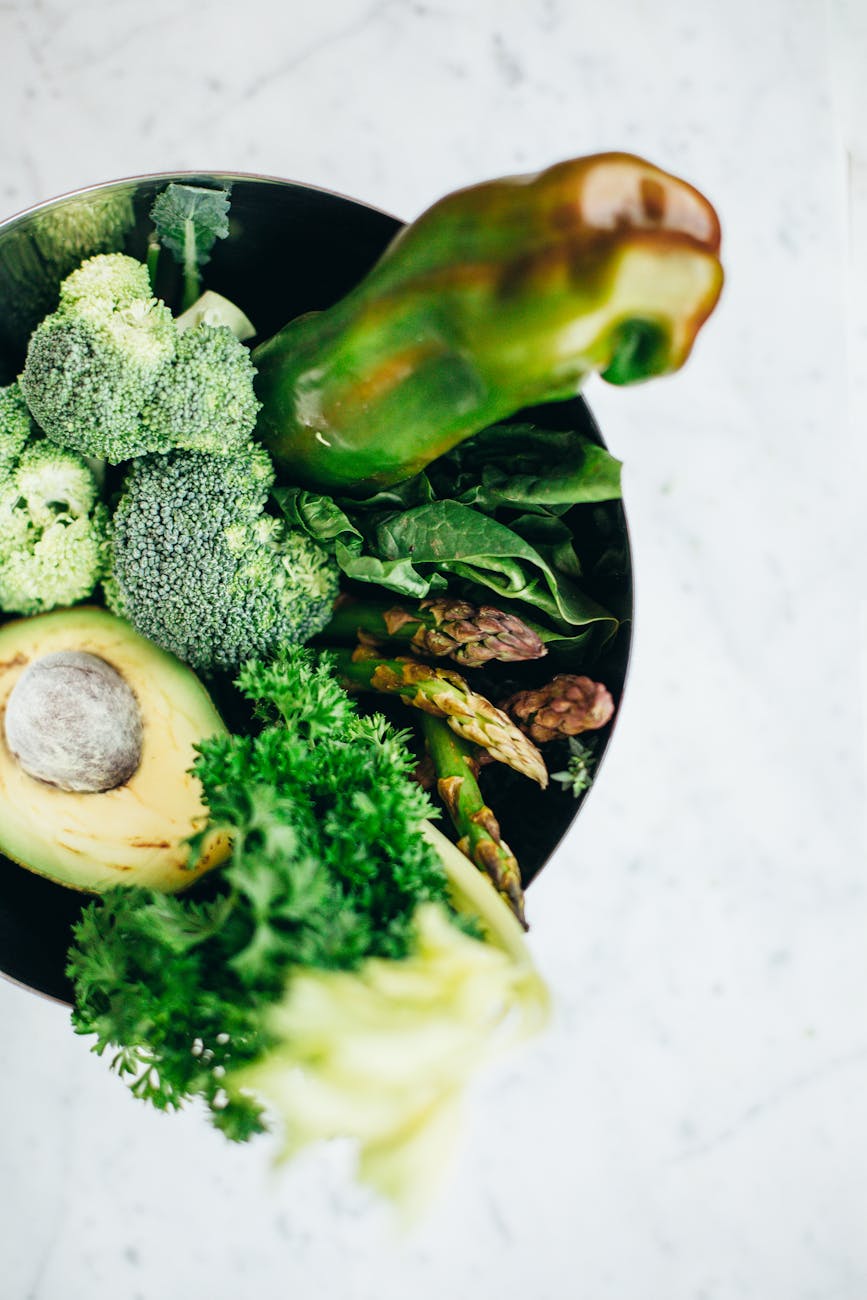
Non-starchy vegetables
As blood sugar levels can affect inflammation in the body, I always advise choosing loads of non-starchy vegetables first when planning meals.
These vegetables are whole foods that have nutrient-rich polyphenols and phytochemicals that are potent antioxidants and fight inflammation.
It’s always recommended to ‘eat the rainbow’ because each color in plants is indicative of different groups of polyphenols. Getting a variety of these helps your body get the different types that it needs to keep your systems healthy.
Here are the top-recommended non-starchy vegetables:
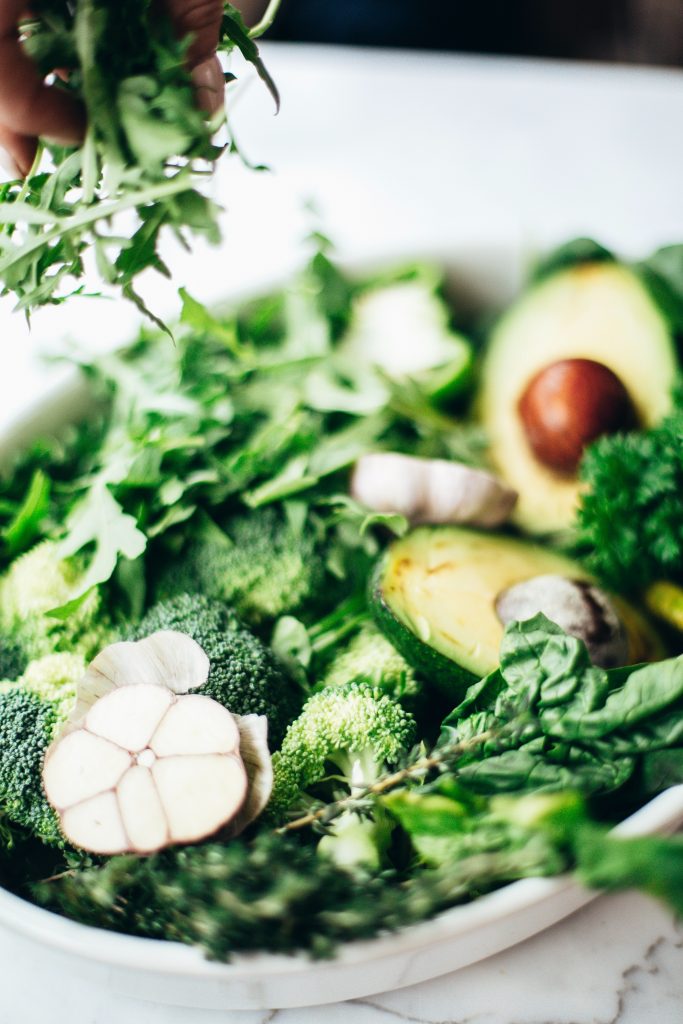
Dark leafy greens: kale, spinach, arugula, collard greens, mustard greens
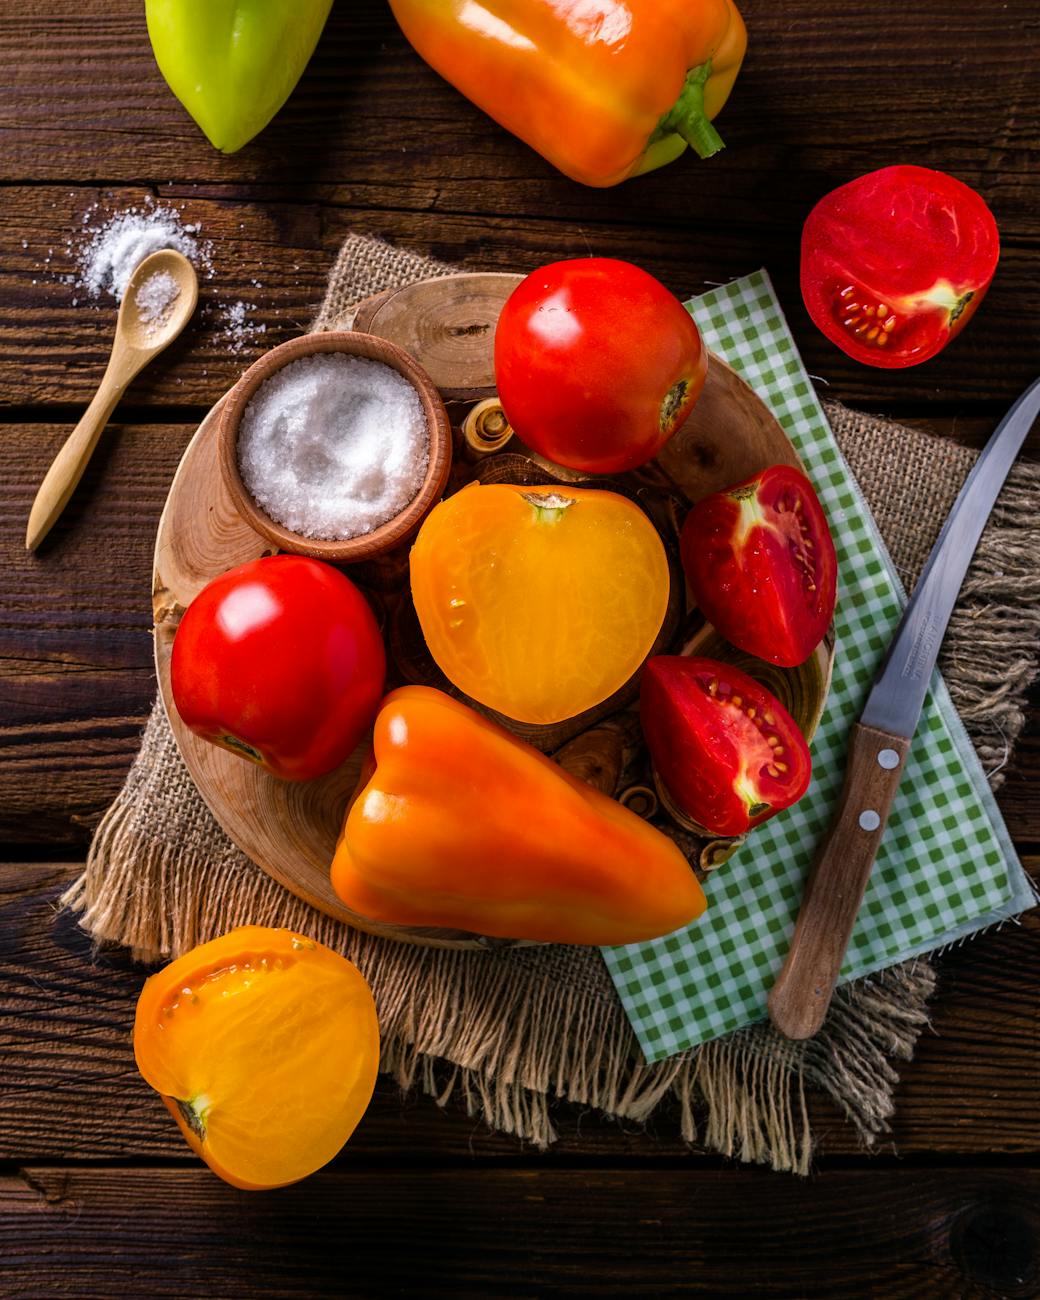
Red vegetables: tomato, red bell pepper, beet, radish
Cruciferous: broccoli, cauliflower, cabbage, brussels sprouts, bok choy
Starchy Plants
Starchy vegetables are ones that contain resistant starches. These food are packed with nutrients and fiber. The fiber combined with resistant starch is what creates this magical environment in the gut that reduces inflammation.
Caution should be given in overdoing it with fruits, though: They do still contain natural sugars that can cause a rise in blood sugar levels.
Higher blood sugar is inflammatory, so it’s important to find a balance of satisfaction while being careful of blood sugar spikes.
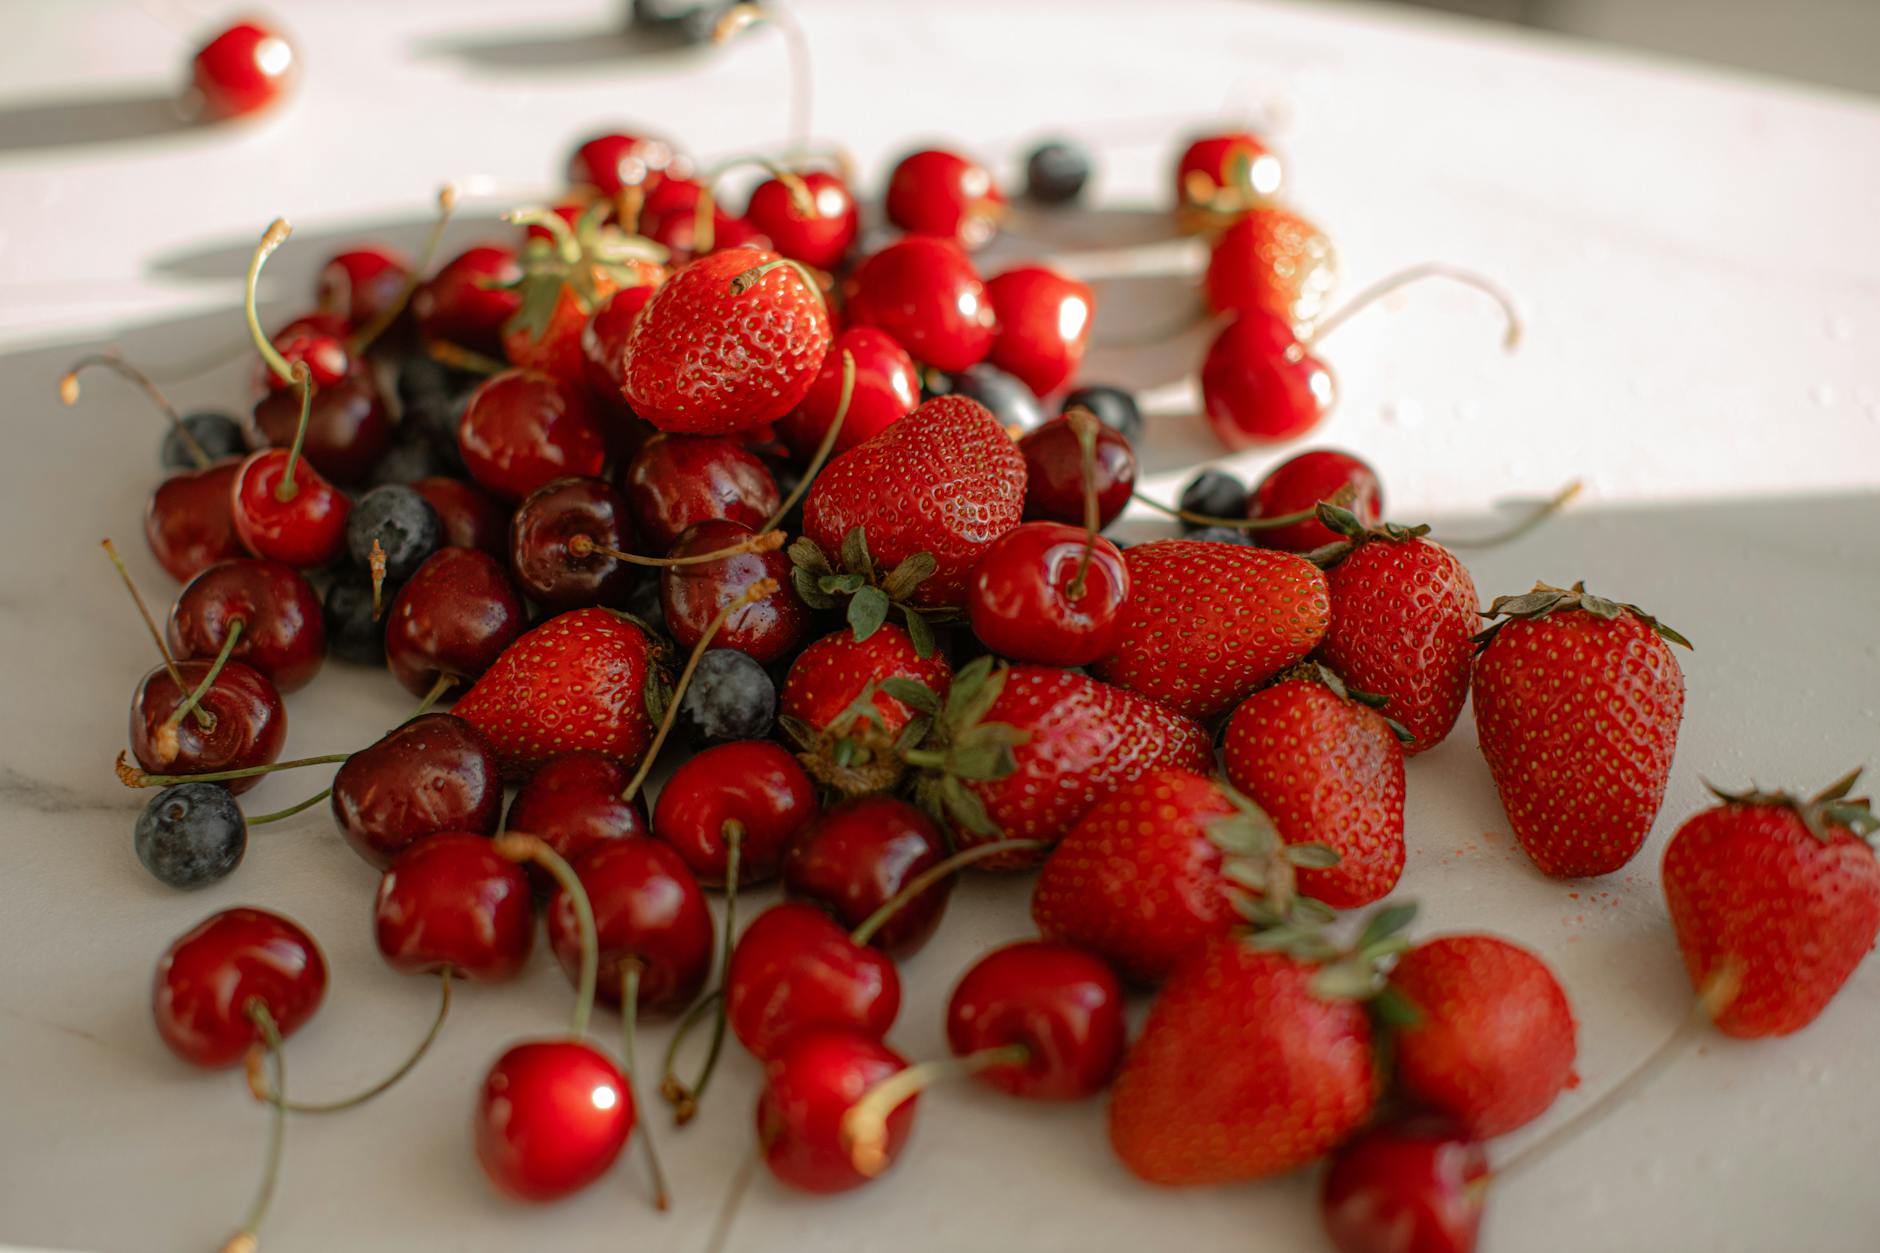
Colorful fresh berries
The antioxidants found in berries help maintain a healthy immune system, and the resistant starches and fiber in fresh berries give an even bigger boost of anti-inflammatory power. The best choices are:
blueberries
strawberries
raspberries
blackberries
tart cherries
pomegranate seeds (not technically a berry, but a fruit with really powerful anti-inflammatory compounds)
💡 Tip: Keep it fresh or frozen — cooking breaks down some of the resistant starches.
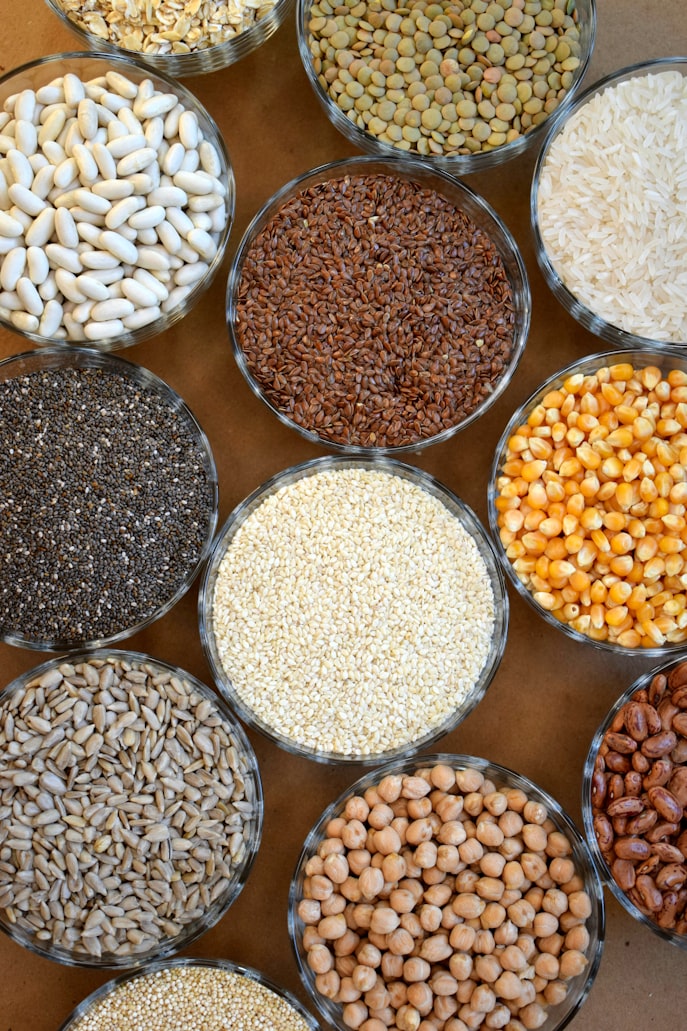
Nuts and seeds
Nuts contain a great deal of nutrition including vitamins and ellagitan (a kind of tannin). They also contain a combination of monounsaturated polyunsaturated fats that decrease inflammation. The best options include:
Walnuts
Almonds
Hazelnuts
Pecans
Pistachios
Seeds like chia and flax (already mentioned)
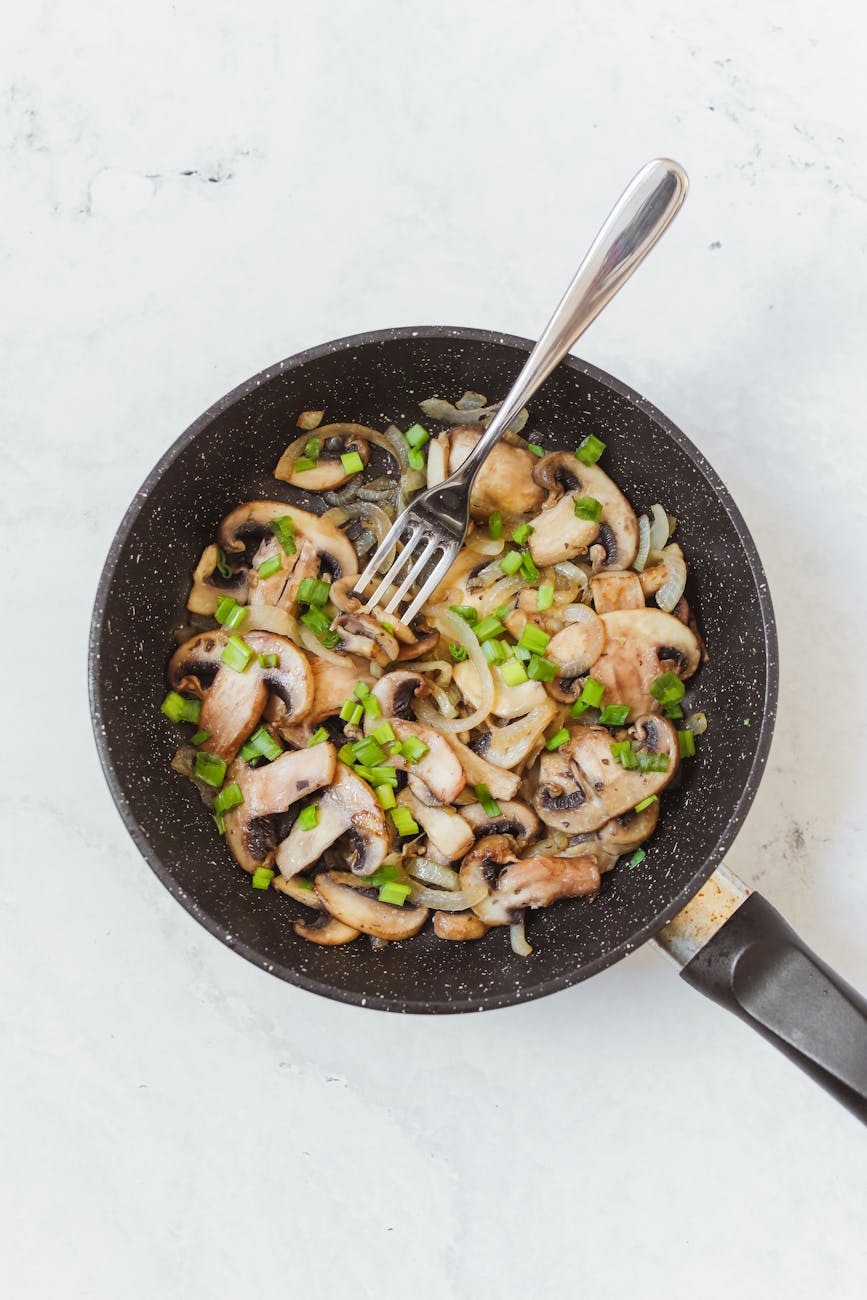
Mushrooms
Mushrooms have antiseptic properties, are full of fiber, and are one of the few dietary sources of Vitamin D. Although chaga mushrooms are thought to be the most anti-inflammatory, they can be difficult to find in the grocery store. If you’re adding mushrooms to a dish, any type at the grocery store will be beneficial.
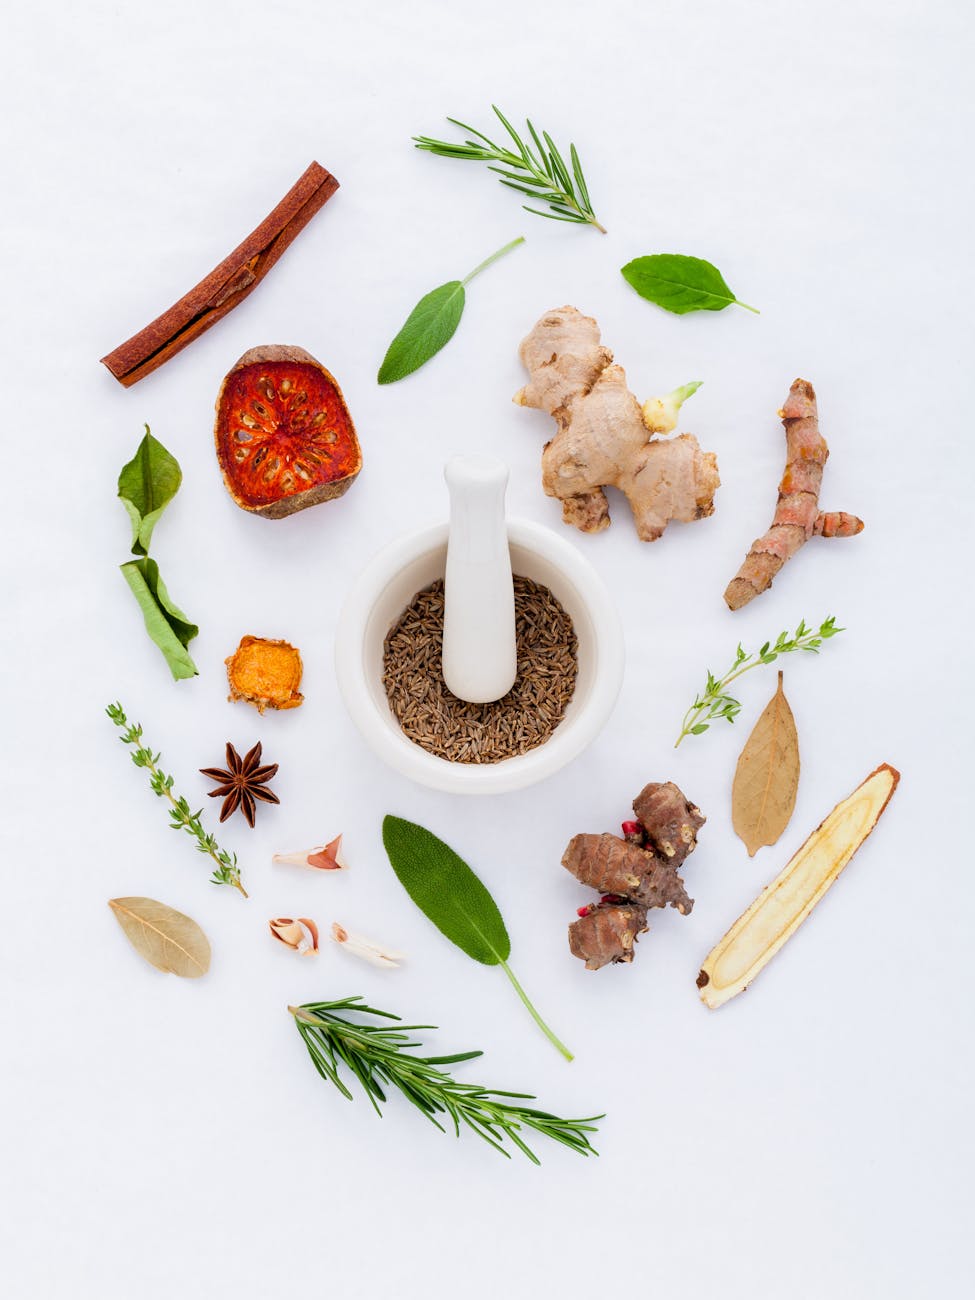
Herbs and spices
Some herbs and spices have anti-inflammatory properties and can block inflammatory cytokine activity. The most anti-inflammatory options are:
Turmeric
Probably the most well-known anti-inflammatory spice, this ingredient contains curcumin, along with over 300 other active compounds, that acts as an anti-inflammatory nutrient.
Holy Basil
Also known as a delicious and fresh herb to cook with, holy basil also has potent anti-inflammatory properties. It has a slightly bitter and spicy flavor, so if that puts you off, it’s also available in supplement or tea form.
Ginseng
Typically considered a more Asian supplement, ginseng has been used for thousands of years for a myriad of health issues, including the reduction of inflammatory markers.
The thing to know about ginseng is that there are two main types: Asian (Panax ginseng) and American (Panax quinquefolius). If you need more energy, Asian ginseng is more beneficial, while the need for relaxation would call for American ginseng.
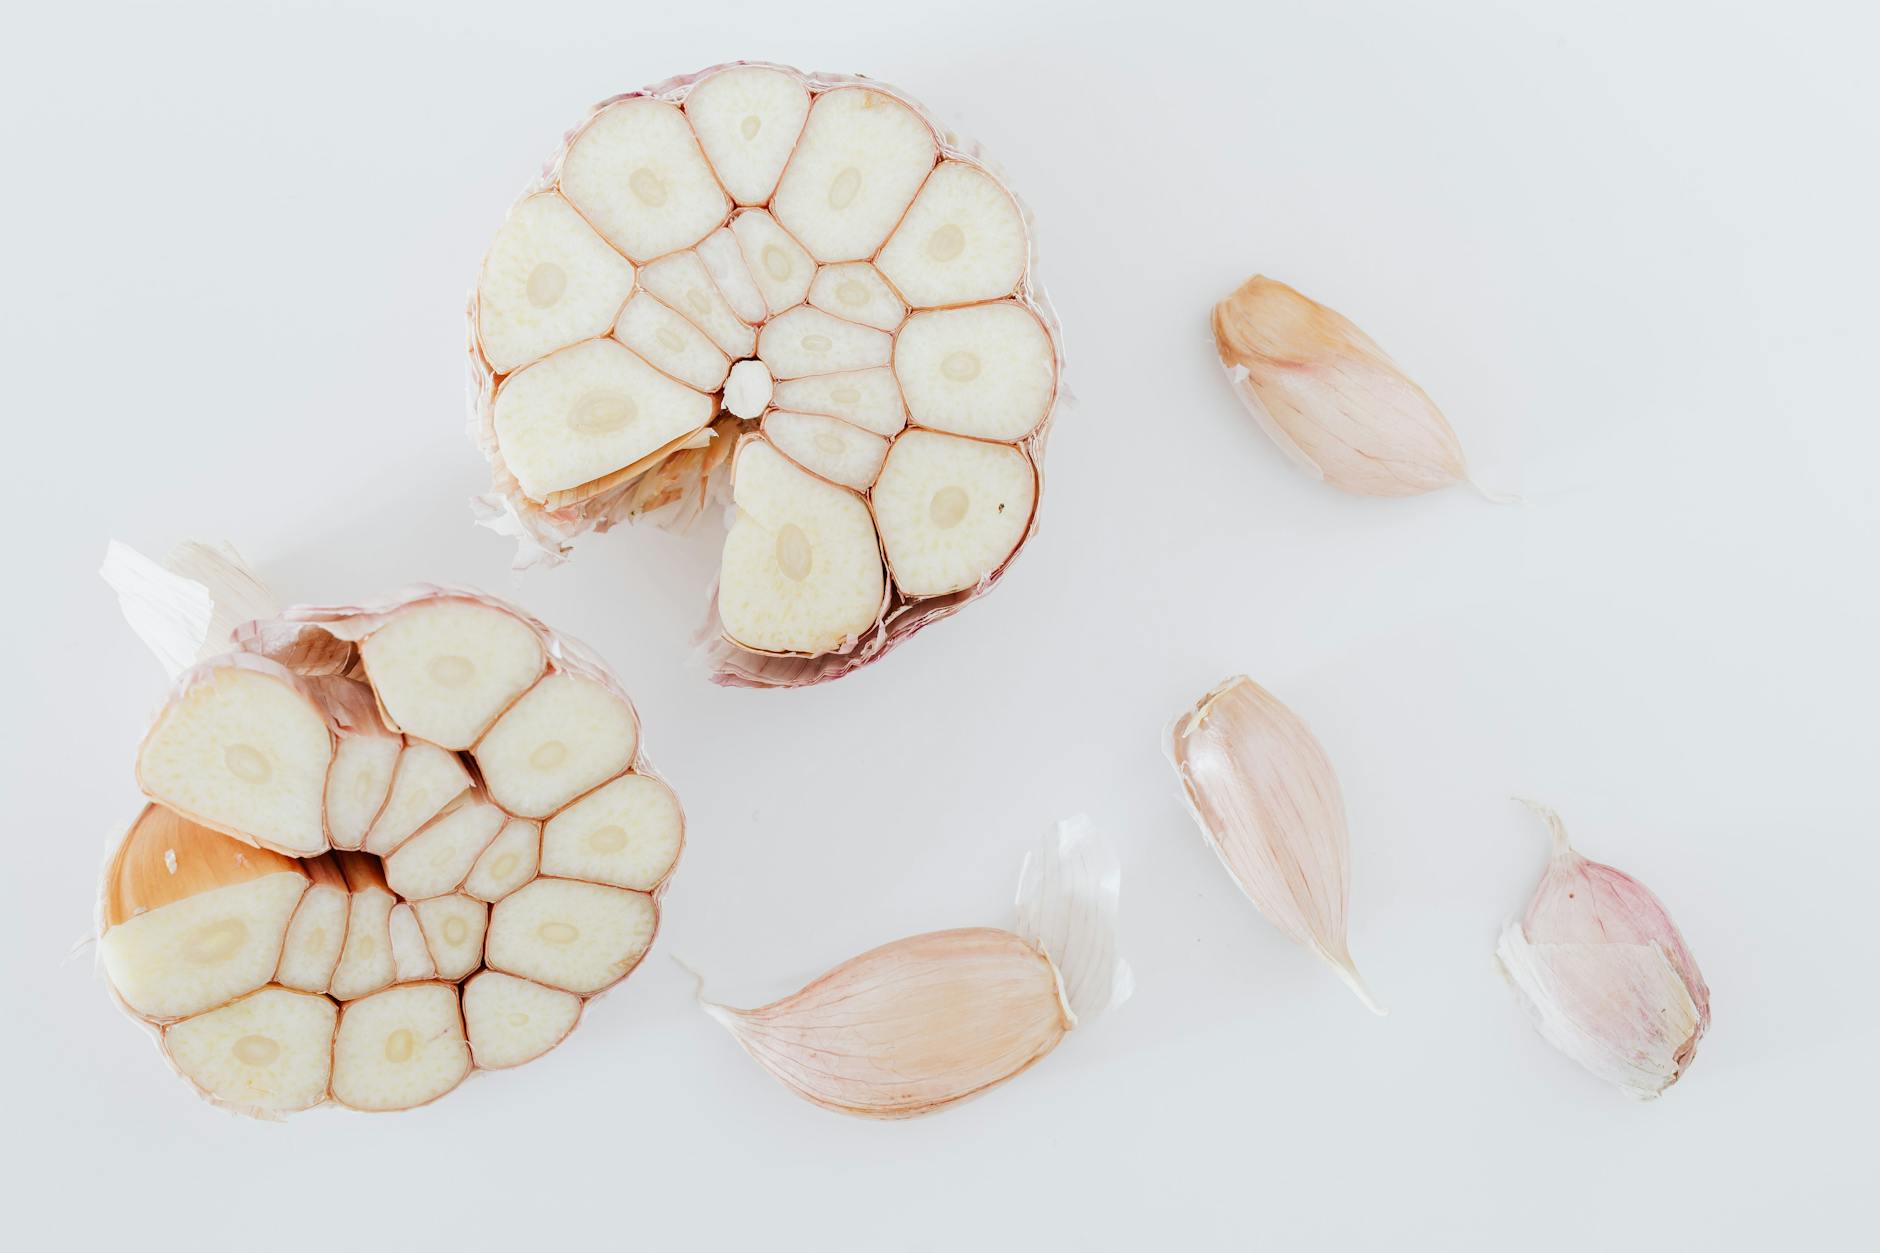
Garlic
Not only is garlic delicious, but its compounds are also highly effective at boosting antioxidants as well as pulling inflammatory markers down.
Cardamom
Cardamom has been shown to be highly antioxidant and anti-inflammatory in multiple studies. Although cardamom is traditionally used in Asian-flavored dishes, it can also be found in supplement form.
Black pepper
Although black pepper is a staple seasoning in most households, it actually holds powers beyond flavor. Its main compound is called piperine, which reduces inflammation in the body. As an added bonus, black pepper also increases the bioavailability of other beneficial supplements, making it a must for every meal.
Rosemary
Delectable fragrance aside, rosemary contains a dense combination of polyphenols shown to be beneficial for many inflammatory conditions (including joint pain and stiffness, asthma, arthritis, and skin conditions) due to its anti-inflammatory properties.
Cinnamon
Although there are two most well-known types of cinnamon (Ceylon and Cassia), only Cassia (the kind you can find in the grocery store) was found to reduce both inflammatory markers CRP and MDA.
Ginger
Last but not least in herbs and supplements is ginger. This spicy but sweet ingredient contains over 100 active compounds that squash inflammation in the body. It’s prevalent in Asian dishes, but can be taken in supplement form as well.
Dark chocolate
Dark Chocolate contains antioxidants compounds. Flavonols are a tasty ingredient that helps to reduce inflammation and can also be useful for brain health. Choose 70% cacao to get the best benefits while avoiding added sugars.
Beverages
Coffee and tea contain many agents known for lowering inflammation, including EGCG (green tea) and chlorophyll. Good options are green tea, oolong, white, and ginger.
When consuming coffee or teas, be wary of turning a beverage with anti inflammatory agents into pro inflammatory compounds by creating sugary beverages. If you need these sweetened, add natural calorie-free sweeteners like stevia, monk fruit, or erythritol.
Some insight on how an Anti-Inflammatory Diet Works
At its core, this style of eating looks a lot like the Mediterranean Diet (plant-heavy, fish, healthy oils) but refined based on your personal needs. That might mean:
Cutting out sugar and processed foods first (everyone benefits from this).
Testing controversial foods like dairy, soy, or grains with an elimination diet if symptoms persist.
Building meals that keep blood sugar steady throughout the day.
👉 Want the full roadmap? Get my Quick-Start Guide. It’s the easiest way to stop guessing and start feeling the difference in just a week.
Discover My Easy 4-Step Approach to the Anti-Inflammatory Diet So You Can Get Started Immediately (Without Getting Overwhelmed or Cleaning Out Your Entire Pantry)
When you’re trying to lower inflammation, it’s not just about adding the “good” foods. It’s about cutting the worst offenders first.
You can eat kale, salmon, and blueberries all day long, but if you’re still flooding your body with sugar, fried oils, or refined grains, you’re not giving your body a fighting chance.
The problem? It’s not always obvious which foods are the culprits. Some are clear, others depend on your body, and a few are downright controversial. Let’s walk through them together so you know exactly where to start.
👉 Want the done-for-you food list? Grab my free Anti-Inflammatory Quick-Start Guide. It lays out the foods to eat, avoid, and swap –> so you can see results faster.
What is chronic inflammation?
Think of inflammation like a fire alarm. Short-term, it’s helpful: your immune system kicks in to fight infection or heal an injury. But when that alarm never turns off (thanks to daily sugar hits, fried foods, and processed snacks) you’re left with chronic inflammation.
That’s when you start seeing:
Plaque buildup in arteries (hello, heart disease + stroke risk)
Worsening of autoimmune conditions
Blood sugar spikes that feed insulin resistance
And it all ties back to what’s on your plate.
How foods cause inflammation
What I’ve determined after years of research is that there is no one-size-fits-all Anti-Inflammatory Diet.
Yes, some foods are universally inflammatory, but others depend on sensitivities, medical conditions, or even how they’re processed.
I like to break them into three buckets:
Known Inflammatory Foods (backed by science)
Your Personal Allergies or Intolerances (unique to you)
Controversial Foods (may or may not cause inflammation depending on your body)
Let’s unpack each.
KNOWN inflammatory foods
These are the foods that the overwhelming majority of scientific studies, trials, and reviews have determined to be inflammatory to the body. If you only do one thing, cut out this list first:
Sugar
Sugar is one of the most inflammatory foods, and I listed it first because there’s a pretty large population of people (especially those trying to get on an Anti-Inflammation Diet) that are hooked on sugar and refined carbohydrates and feel completely stuck and hopeless.
Why sugar is bad
First and foremost, the majority of sugars available at the grocery store and in processed foods is highly refined. Each different form (especially high fructose corn syrup) is dangerous in its own right. Sugar causes a blood sugar spike and then crash, which has been shown to damage our metabolism, leading to weight gain and chronic disease with repeated use. This can also lead to chronic inflammation, cancers, obesity, chronic kidney disease and fatty liver disease.
Hyperglycemia (high blood sugar) has been shown to induce and increase the inflammatory response. What that means is that if you have regular excessive sugar intake, you have a constant rollercoaster of hyperglycemia and then subsequent blood sugar crashes all day long.
Natural Sugars vs Added Sugar
Many people who start an Anti-Inflammation Diet want to know what the difference is between ‘sugar’ and ‘added sugar’.
Added sugar (on a food label) indicates the amount of additional sugar that was added into the packaged food. When you have a food that has natural ingredients that inherently have carbohydrates then it will show ‘sugars’ on the label. Food companies must now distinguish between which of those sugars are natural sugars in the product and which ones have been added.
Be aware that even natural sugars can be inflammatory foods even if they’re in fruits.
Also be wary of natural sugars from maple syrup, honey, and agave. They’re still sugar.
Most common places to find sugar
Honestly anything that’s processed or packed these days will most likely have sugar in it. Obvious foods are breakfast items, snacks, and desserts. Lately several natural food companies have been introducing snack and breakfast bars with minimal ingredients that are promising.
Disguised sugars: This is when they’re listed as the 50-something and growing different variations of sugar on the food label.
Not-so-obvious foods: This is where sugar is getting added into foods that you’d never expect (like bacon, spaghetti sauce, BBQ sauce, etc).
Artificial Sweeteners
Artificial sweeteners have been under fire a lot the last few years, and with good reason. Aside from anecdotal accounts, studies have shown that the compounds in artificial sweeteners wreck gut health and induce pro-inflammatory changes, which is vital to a diet that will reduce inflammation.
**These are NOT the same as natural zero-calorie sweeteners.
Examples of artificial sweeteners are:
saccharin (brand name Sweet N Low- the pink packet)
aspartame (brand name Nutrasweet- the blue packet)
Artificial trans fats are highly inflammatory and should be avoided at all costs. They’ve been connected with hardening of the arteries and heart disease. These are fats that have been chemically altered to stay fresh for longer and are banned in many countries.
Sources of trans fats
Most trans fats are found in bakery-type items but can really be in anything processed.
How to recognize trans fats
On food labels, you’ll know if trans fats are present because the label will use the word ‘hydrogenated’ or ‘partially hydrogenated’ or ‘partially hydrogenated oils’ (something to that effect).
One thing to look out for is labeling on the package that says, “0 grams trans fats per serving”. What that usually means is that they’ve made the serving size on the label so small that they’re using a labeling loophole to be able to state that there are no trans fats when in fact there are. Read the ingredients list always.
Refined grains
Refined carbohydrates in the form of grain flours are inflammatory foods because of the effect on blood sugar levels. In fact, they can raise glycemic levels as much as a candy bar. They also have all the nutrition stripped away, leaving very little in its place except a substance that will put you on the same rollercoaster as sugars.
Where to find refined carbs
Refined grains are in bread, bakery items, cereals, and even things you wouldn’t think about like breaded (and especially breaded and fried) foods.
Alcohol
Alcohol is an interesting inflammatory food because studies have shown that moderate consumption can have a more positive effect depending on the source. Usually this is limited to red wine.
But alcoholic drinks can have a two-fold punch. If the drink is a cocktail full of sugar, you’re getting a double dose of inflammatory foods in a single drink.
CRP is an inflammation-associated marker showing elevated inflammatory levels among people who drink more than safe amounts.
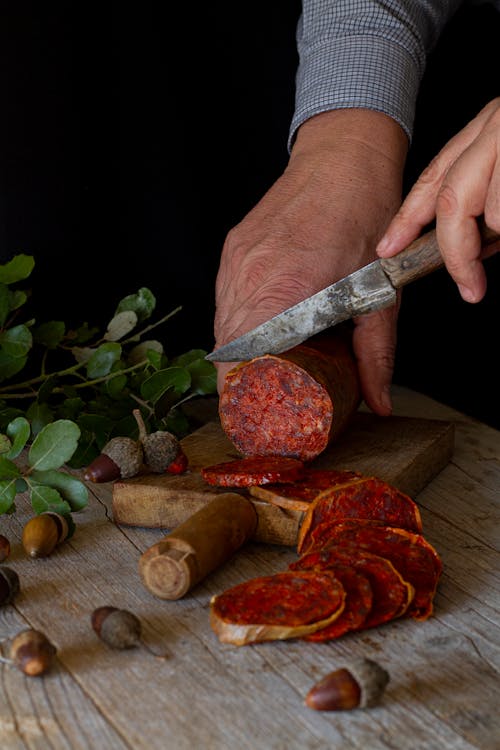
Processed meats
Processed meat refers to meats that have been mechanically ‘put together’. Processed meat consumption has been linked to chronic inflammation and disease, including cancer.
These include deli meats, beef jerky sticks, and other processed meats that you’d expect to find on a charcuterie board.
Vegetable oils and seed oils
These types of oils are highly inflammatory because they’re super refined, and then are usually oxidized by the time they make it into processed foods, or get reheated many times over which also causes oxidation. Oxidation induces the inflammatory response.
Vegetable oils and seed oils to avoid include corn oil, vegetable oil, peanut oil, cottonseed oil, and canola oil that isn’t organic and expeller pressed.
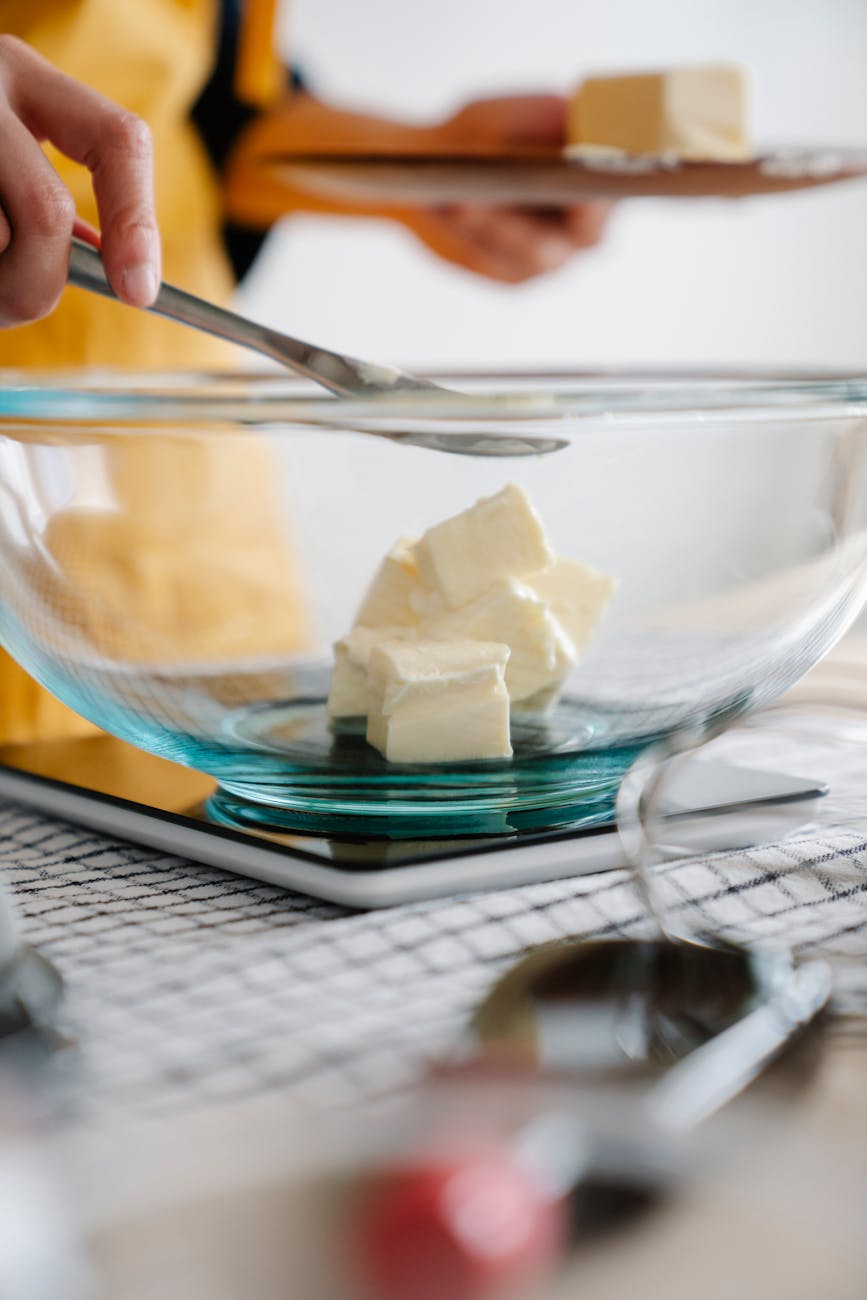
Saturated fats
Although most data until the last few years has indicated saturated fats trigger inflammation, all the studies done (apart from recent ones) never differentiated between sources of the animal saturated fats.
Animal based saturated fats
Saturated fats from animals have different omega 3:6 ratios depending on how they were raised and fed, which can offset the inflammatory response. What this means is that occasional consumption of saturated fat may be ok when the source and quality is taken into account.
Sources of animal-based saturated fat includes meat and dairy products.
Plant based saturated fats
Saturated fat from plant sources includes palm oil and coconut oil. Again- the quality of these is what matters as refined sources have been shown to have inflammatory compounds. (Read more about these below) 👇.
Foods that trigger you personally
These fall into two different categories really: Foods you already know you’re allergic (or sensitive) to, and foods that science has shown you should avoid if you have certain conditions.
Allergies and intolerances
Foods that you know you’re allergic to absolutely promote inflammation in the body. The same goes for foods you have an intolerance or sensitivity to because they induce inflammatory markers when ingested, and you have a subsequent reaction to the food.
If you know you have an allergy (say, peanuts) or an intolerance (like lactose), those foods create an inflammatory response every time you eat them. Even if they’re “healthy” for someone else.
Not sure? An elimination diet or allergy test can help you pinpoint what’s making you feel inflamed, bloated, or foggy.
👉 Action step: Keep a food + symptom journal for a week. If you notice repeat flare-ups (joint pain, rashes, bloating) after certain foods, flag them for elimination.
Foods to avoid based on condition
Depending on your given condition that you’re trying to manage, several have studies backing up avoiding certain foods that cause inflammation. These would include:
metabolic conditions like type 2 diabetes, PCOS, and insulin resistance
GI conditions like IBS and IBD
respiratory conditions like asthma or COPD
rheumatoid arthritis or other inflammatory arthritis
endocrine/hormonal conditions like thyroid or adrenal conditions
That being said, there are specialty subsets of foods that could cause inflammation for some of these conditions. These include lectins, FODMAPS, nightshades, and fructans.
Controversial foods that could cause inflammation
These are the foods where science has studies showing results that are inconclusive.
This could be because the study size was very small, it was done on animals instead of humans, funding of the study creating bias on the outcome, or the data collection methods relied on study participants remembering things versus having a more concrete data collection method (for example).
Whole grains
With the slurry of new dietary styles comes criticism for different food groups for one reason or another. With low carb diets and keto picking up the pace in the last decade or so, this means carbohydrates are getting a lot of flack. Especially whole grains.
Science shows that when in their whole or cracked forms, whole grains are full of nutrients and needed fiber (because gut health is crucial on an Anti-Inflammatory Dietary Style), but that doesn’t mean that any given grain won’t disagree with you.
Also in line with new dietary styles, especially Paleo or the caveman diet, legumes have also come under fire. Again, studies show that these are full of nutrients, protein, and fiber. But legumes can absolutely disagree with some people.
Soy
Soy has come under fire because of the connection to hormones, specifically- estrogen. Soy has been shown to have effects on hormones, but the changes have been fairly small. Again, studies on this go back and forth in that aspect, but in regard to inflammation specifically, the science shows that soy can fight inflammation.
The variable that could make it promote inflammation is for it to NOT be organic (because it is heavily sprayed with glyphosate if not organic), and when it’s in oil form because it’s most likely to also not be organic, and also is heavily refined and oxidated.
Dairy
Historically, studies on dairy products have been heavily criticized because of the amount of lobbying done by the dairy association in the last few decades. Some studies show no change in inflammation when consuming dairy, and others show inflammatory markers increase, especially with GI conditions like IBS.
So here’s the breakdown: milk has lactose (which is a sugar) and should be avoided.
But other dairy foods like plain, unsweetened yogurt have been shown to be beneficial in boosting gut health, and also have a few studies showing anti-inflammatory effects. Especially when they come from organic grass-fed sources as the dairy products from those animals have the same balanced omega 3:6 ratios as red meat that comes from organic grass-fed sources.
This was covered a bit under saturated fats, but red meat has been shown in the past to trigger and affect inflammatory markers. The problem with these studies was that the quality and source of the meat wasn’t considered.
Recent studies have shown that there is a difference based on those factors. When the sources are organic grass-fed, there was an increase in anti-oxidant and anti-inflammatory activity.
Nightshades have been villainized heavily because of claims that they create an inflammatory response. Studies have shown this isn’t actually the case (except in some GI conditions), and in fact, the Arthritis Foundation actually recommends including them in your diet because of their high nutritional value.
Again, saturated fats now have more recent studies backing them up if they come from organic, grass-fed, pastured sources. This is because it balances the omega 3:6 ratios, which controls inflammatory markers.
Really the only way to know for sure if these foods promote inflammation in your body is to do an elimination diet.
This is when you eliminate certain food groups (listed above) all at once, or even if varying chunks, then reintroduce them back one at a time, slowly, to see how you react.
It takes intention, but it’s the most reliable way to build an eating plan that’s personal, sustainable, and actually works.
All in all, you should absolutely eliminate the obvious offenders (the foods shown to induce inflammation and your personal food allergies and intolerances).
But the remainder are up to you. The foods listed in the last category of controversial foods have been shown to have a ton of nutrients, but that’s not to say you won’t personally react to them.
Again, the bottom line recommendation is to adhere to the basic Mediterranean diet guidelines, do an elimination diet if you’re having symptoms still, and then create an eating plan from there.
And don’t worry — you don’t have to do this alone.
👉 Grab my free Anti-Inflammatory Quick-Start Guide 👇 and I’ll show you:
The 10 foods to swap first
A printable shopping list to make it simple
My 4-step method to kickstart your anti-inflammatory lifestyle
You deserve a way of eating that helps you feel good every single day. 🌿
Discover My Simple 4-Step Approach to the Anti-Inflammatory Diet So You Can Get Started Immediately (Without Getting Overwhelmed or Cleaning Out Your Entire Pantry)
Why a full-scale pantry clean out is NOT the best way to start your anti-inflammatory journey, and the steps you can take instead to make sure you’re fueling your body with foods that love you back
The essential foods you MUST add into your diet if you want to nourish and heal your body naturally
My anti-inflammatory shopping list so you can quickly fill your cart with the right foods (no googling in the produce aisle or wasting hours staring at ingredient lists)
If you’ve been hearing about the anti-inflammatory diet everywhere, you’re not alone. It’s not just a trend—it’s one of the most studied (and effective) ways to reduce inflammation, balance blood sugar, and support conditions like prediabetes, diabetes, arthritis, heart disease, IBS, and PCOS.
And the best part? You don’t have to overhaul your entire kitchen to start seeing results.
👉 Start small with my Anti-Inflammatory Quick-Start Guide — it walks you through exactly what to eat (and what to skip) without the overwhelm.
Why an Anti-Inflammatory Diet Matters
Inflammation isn’t always bad—it’s part of your body’s natural defense. But when poor lifestyle habits pile up (smoking, excess alcohol, processed foods, sugar, fried foods–basically a typical Western diet), it turns into chronic inflammation. That’s when trouble starts: fatigue, joint pain, insulin resistance, and increased risk for chronic diseases.
The good news? Food is one of the most powerful tools you have to fight back.
Since blood sugar spikes (hyperglycemia) is inflammatory in the body (and cause weight gain), sugars and refined carbohydrates are one of the first things to go (visit our hub for cutting sugar + emotional eating here).
Alcohol can be inflammatory in high amounts, but there is a bell curve effect– meaning studies have shown no alcohol to have higher inflammatory rates than moderate consumption (1-2 drinks per day), and then higher amounts than this also bring the inflammatory markers back up. Red wine is the preferred drink of the Mediterranean diet.
Oxidated fats (those heated repeatedly) are extremely inflammatory, as well as trans fats (hydrogenated, including margarine), omega 6s, and saturated fats from feed-lot animals.
Processed foods usually contain unhealthy fats, refined carbs and sugar, little to no fiber, and artificial colors and preservatives- meaning they should be eliminated from your eating plan as well.
🥑 What Diets Count as “Anti-Inflammatory”?
The Mediterranean diet is the most famous (and I actually use this as the basic blueprint when starting with clients), but other versions can work depending on your needs:
Keto (done carefully, with clean foods, more fiber + less dairy)
Pescatarian
Plant-based (with tweaks to avoid certain grains)
💎It’s not one-size-fits-all. In fact, elimination diets are one of the best tools to figure out what your body loves vs. hates.
What to Expect When You Start
Week 1–2: You may feel “off” as your body detoxes from sugar (think brain fog, low energy—aka sugar withdrawal). It’s temporary!
Week 2–3: Digestion improves, cravings ease up, and energy begins to steady.
By 12 weeks: You’ll notice a dramatic difference in inflammation, blood sugar, and overall health.
Pro tip: Don’t panic if your gut feels different at first. Extra fiber can stir things up. That’s normal—and it usually settles as your gut bacteria adjust.
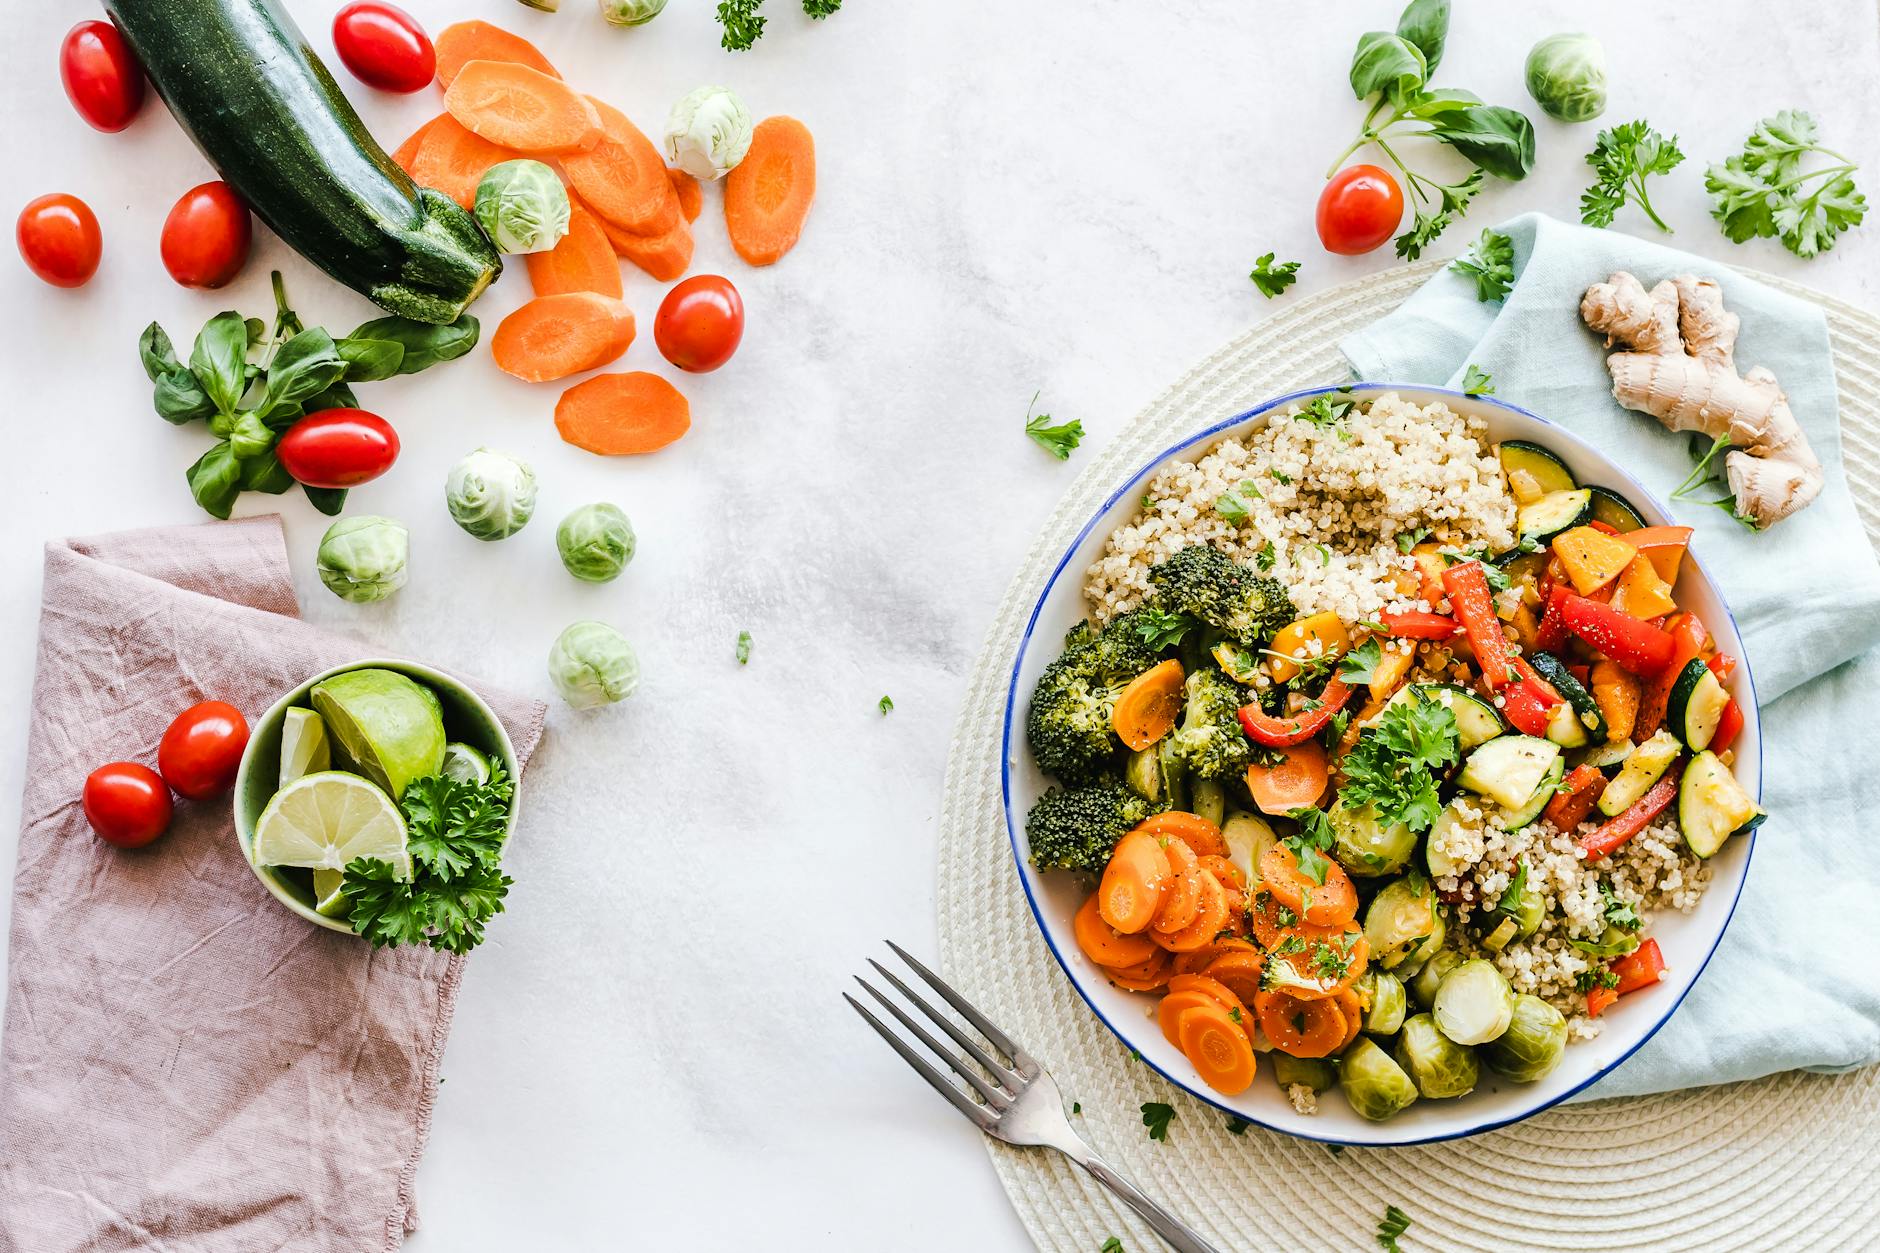
✅ Foods to Eat More Of
Veggies: leafy greens, cruciferous (broccoli, cauliflower, kale): high fiber foods
Fruits: berries, apples, pomegranate, red grapes
Proteins: fish, organic chicken/turkey, eggs, beans, lentils –> if eating red meat, make sure it’s organic and grass-fed
Healthy fats: olive oil, avocado, nuts, seeds, fatty fish (The ideal ratio is 1:1 for omega 6 to omega 3 fatty acids to get anti inflammatory benefits.)
Foods you personally don’t tolerate (dairy, gluten, nightshades, etc.)
🧪 Elimination Diets: The Fast-Track to Clarity
If you’re not sure which foods are triggering inflammation for you, an elimination diet can help uncover hidden sensitivities. Start by removing common culprits (like gluten, dairy, soy, or nightshades), then reintroduce one at a time.
This is the approach I walk my clients through inside my programs—because it’s the single best way to build a diet that’s personalized to you.
🚀 Next Steps
The anti-inflammatory lifestyle isn’t about restriction—it’s about creating meals that actually help you feel better day after day.
You don’t have to clean out your whole pantry to start feeling the difference. Just take the first step. 🌿
Discover My Easy 4-Step Approach to the Anti-Inflammatory Diet So You Can Get Started Immediately (Without Getting Overwhelmed or Cleaning Out Your Entire Pantry)
Overnight oats can be a total game-changer for breakfast — quick, delicious, and perfect for busy mornings.
But here’s the thing: not all overnight oats recipes are created equal. Many recipes are loaded with sugar and fillers that can actually fuel inflammation instead of fighting it.
That’s why this version is different — no added sugar, anti-inflammatory add-ins, and a trick that makes it more blood sugar-friendly, too.
💡 Stop Guessing Which Breakfast Foods Trigger Inflammation.
My Anti-Inflammatory Quick Start Guide shows you:
10 foods to swap first
Simple, ready-to-use shopping list
4-step method to personalize your anti-inflammatory diet
It is, however, a little harder to find one that’s sugar-free, as sugar is inflammatory. That’s why this basic overnight oats recipe is just as yummy, but without any added sugars.
So before I get into the recipe and how to make overnight oats, I want to talk about what exactly makes these overnight oats an anti-inflammatory recipe so you can do the same, no matter which flavor variation you make at home.
What Makes Overnight Oats Anti-Inflammatory?
There are three big factors that turn a basic overnight oats recipe into an anti-inflammatory one.
1. What You Leave Out
Skip the inflammatory extras you’ll find in many instant oat packets:
Added sugars
Artificial colorings and flavors
Preservatives
Low-quality, oxidized oils
By starting with plain, minimally processed oats and no added sugar, you’re already ahead of the game.
For traditional overnight oats, you simply soak them in liquid overnight — but with this tweak, you get even more metabolic benefits.
3. What You Add In
Here’s where you can turn a simple breakfast into an anti-inflammatory powerhouse:
Great add-ins:
Cinnamon (may help lower blood sugar)
Turmeric or ginger (natural anti-inflammatory spices)
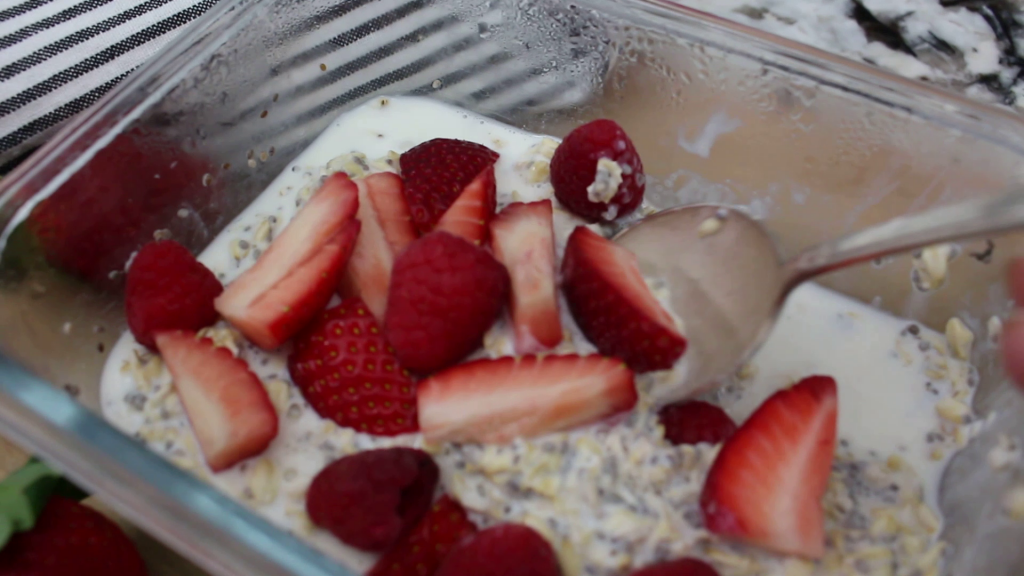
Lower-sugar fruit like berries
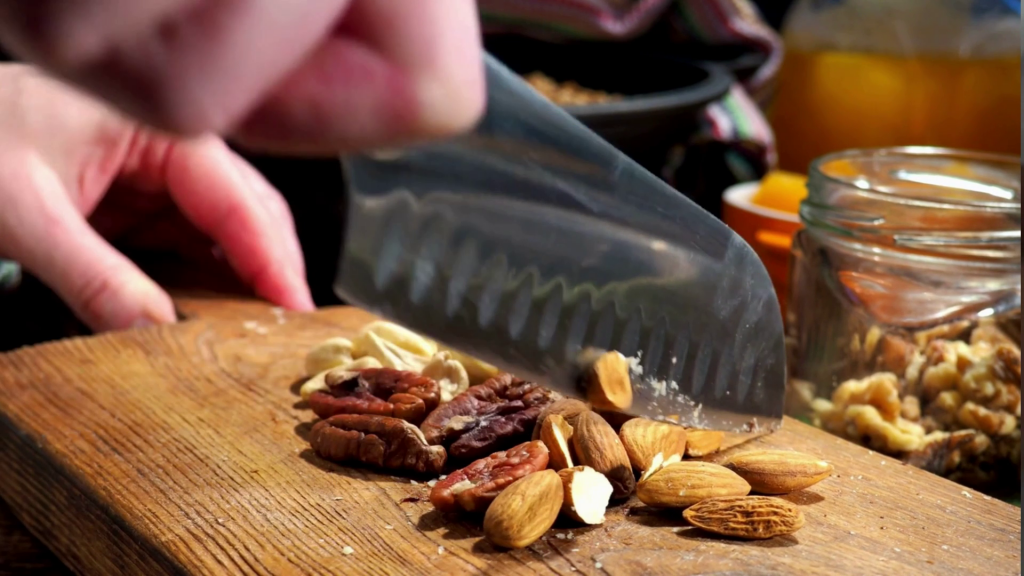
Chopped nuts (almonds, macadamia, walnuts) for healthy fats and crunch
⚡ HealthierMicro-Action: Choose at least one spice and one healthy fat add-in every time you make this recipe.
Discover My Easy 4-Step Approach to the Anti-Inflammatory Diet So You Can Get Started Immediately (Without Getting Overwhelmed or Cleaning Out Your Entire Pantry)
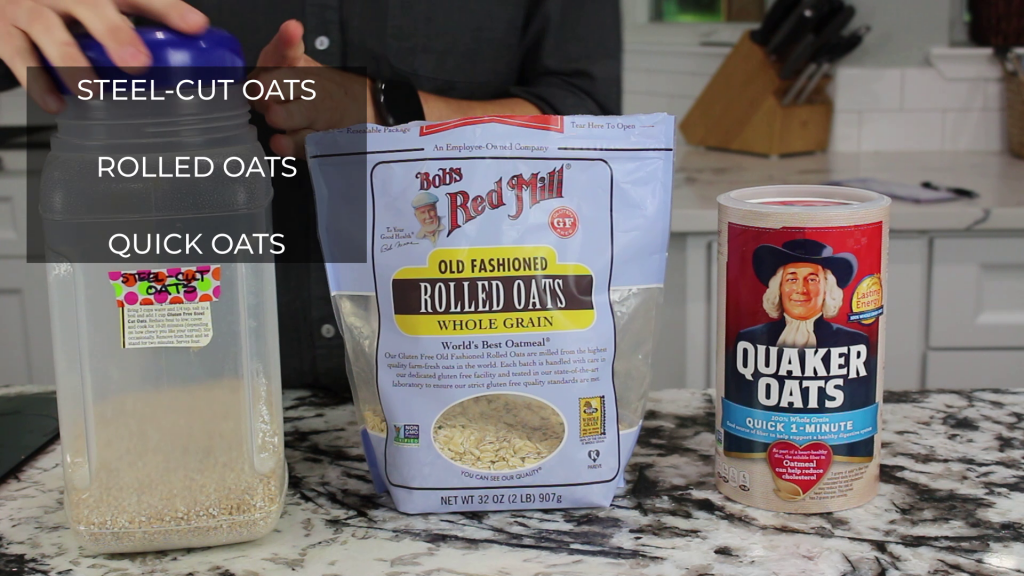
You can see the difference in texture here, and if you’ve had any experience with oats and oatmeal you’ll know that the thinner the cut, the more mushy they can get.
Per anti-inflammatory diet basics, whole or partially cracked grains are acceptable because of those lower blood sugar hits, so I recommend using oat groats, steel-cut, or rolled (in that order).
As far as them being gluten free, oats are inherently gluten free, however, cross contamination is really frequent with oats, so I recommend getting oats that are labeled as gluten-free if you have celiac or a severe gluten intolerance.
Directions for Preparing Anti-Inflammatory Overnight Oats
1. Cook oats first (optional but recommended):
For this overnight oats recipe, we use ½ cup of oats.
**Now one thing to note in CASE you don’t have the correct type of oats and want to use up what you have is that there are different calorie and macro counts for the different types of oats because of the difference in their denseness.
So you want to make sure you match those if you are counting calories or macros for your weight.
2.Combine ingredients
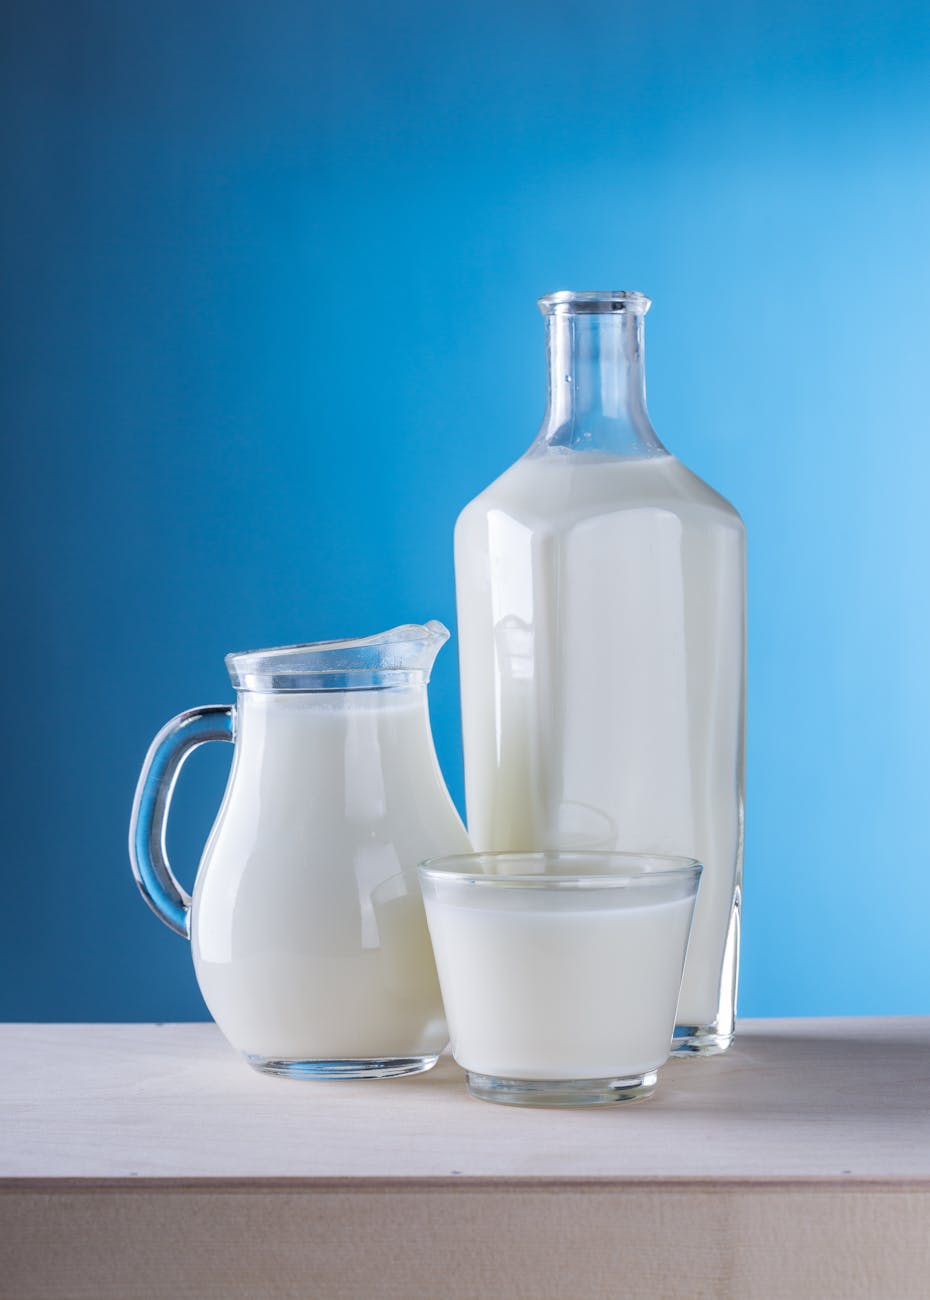
Next, we add milk.
Not everyone *needs* to go dairy-free to follow an anti-inflammatory diet as the guidelines of anti-inflammatory dictate that it’s unique to each person after eliminating foods KNOWN to be inflammatory to all humans.
So, obviously, don’t use cow’s milk if you’re lactose intolerant, If you’re allergic, and if you’re adapting this recipe to be a vegan breakfast.
There are a ton of other non-dairy options.
However, make sure you find one that is sugar-free. The label will say ‘Unsweetened’, and try to find one with as few fillers and thickeners as possible.
Many people react to these and some people even end up making their own nut milks because of this.
We’ll need ½ cup of milk.
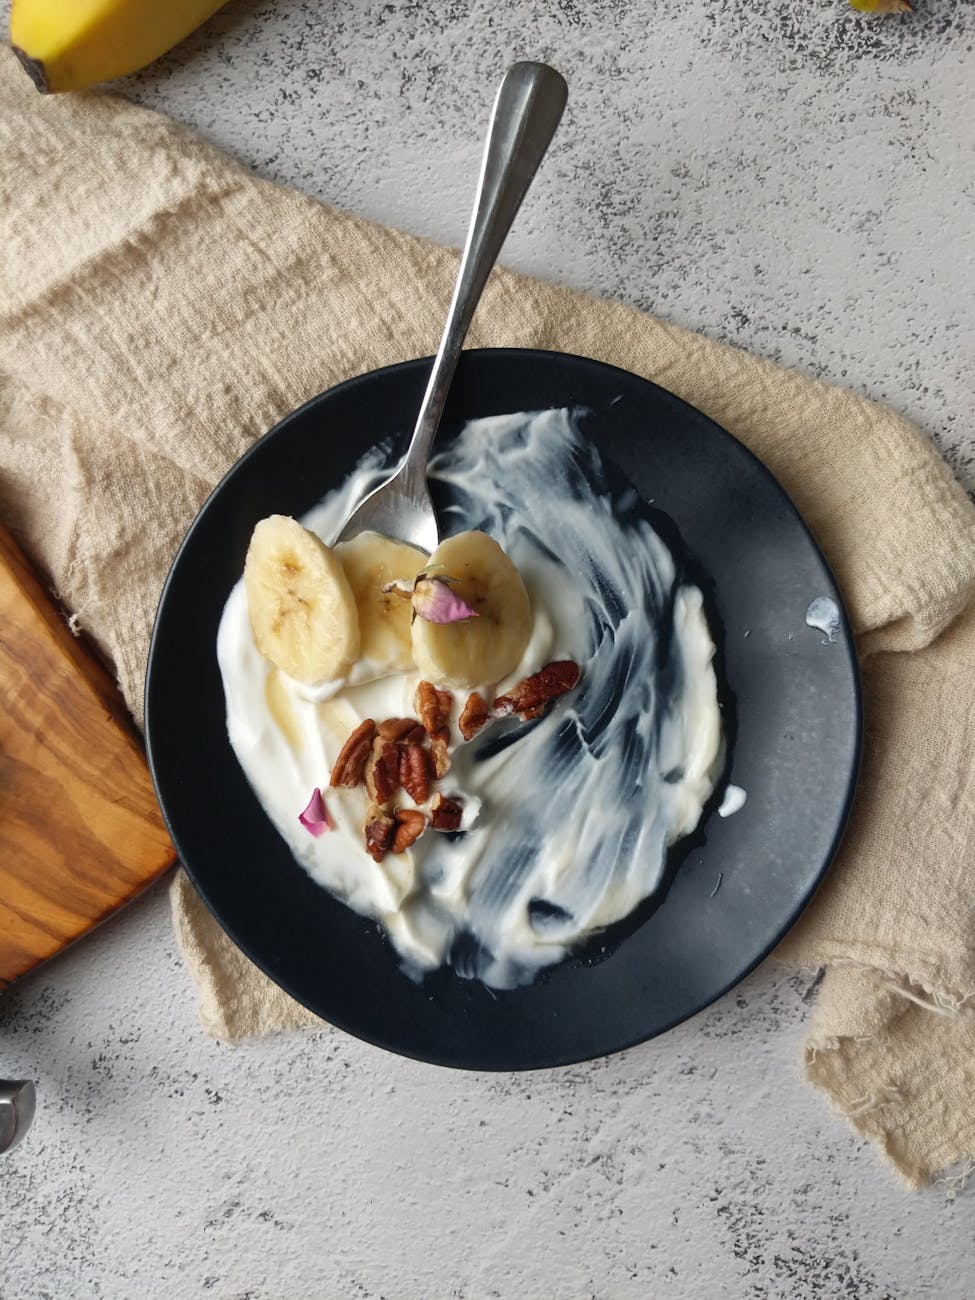
Next we’ll add yogurt. Again—if you’re fine with dairy, choose a plain, unsweetened yogurt (preferably organic).
I prefer Greek, and if you’re dairy-free or vegan, coconut milk yogurt or any other dairy-free option is fine as long as it’s plain and unsweetened.
Chia seeds are our next add-in.Chia seeds are great because they’re high in protein and healthy fat, can help lower LDL cholesterol, and they also help blunt that blood sugar spike.
And when they have moisture, the seed has sort of a gelatinous coating that helps us feel full, they give a tiny bit of a crunch.
Next we’re adding in vanilla extract. Just make sure this is REAL vanilla extract, not imitation as that’s an artificial flavoring.
The vanilla flavor goes with practically any flavor profile that you want to create, unless it’s a savory flavor, and it helps add to the overall sweetness factor.
So speaking of sweetness, let’s talk sweeteners. Although there ARE savory flavors of overnight oats, most recipes are for sweeter versions. Since we’re eliminating sugar per anti-inflammatory diet guidelines, we can use zero calorie natural sweeteners.
Artificial sweeteners are terrible for your gut health, among other things, so we’re gonna steer clear of those.
I know many people will still insist on using natural sweeteners that do have sugar like honey or maple syrup. Those sweeteners are allowed in a Paleo diet, which is considered one type of anti inflammatory diet, so you use your own judgement for your own body.
If you are trying to lose weight or reduce chronic inflammation, I recommend steering clear even of those natural sweeteners daily, and instead using stevia, monk fruit, erythritol, or allulose.
Next we add salt. In all honesty, oats can sometimes taste a little like cardboard if you don’t know how to prepare them.
Salt livens up that plain grain flavor 💃, but it also adds a counter balance to the sweetness. So don’t forget to add in a pinch or two of salt.
And last is the anti-inflammatory add-ins.
Cinnamon has been shown to lower blood sugar, so it’s a perfect add-in if you have insulin resistance or are trying to lose weight.
Turmeric and ginger have a bit of a bite, but are perfect for helping to lower chronic inflammation as well.
And if you want to add a bit more crunch, those chopped almonds, pistachios, macadamia nuts, or walnuts that I mentioned before are perfect here as well.
The flavor combinations are endless, but if you’d like some flavor pairing suggestions, check out the recommendations below.
If you’ve been trying to eat anti-inflammatory, you’ve probably come across a dozen different food lists — and they all seem to say something different about dairy.
Some say it’s a total no-go. Others say yogurt is practically medicine. So, does dairy actually cause inflammation… or not?
I get why you’re confused. For years, the dairy industry has told us milk builds strong bones and yogurt keeps our gut healthy. And truthfully, milk is rich in calcium and vitamin D, and yogurt’s probiotics can help your digestion.
But here’s the problem: the science isn’t black and white. Some studies say dairy reduces inflammation, others say it can make things worse. So how do you know what’s true for your body?
⚡ Stop Guessing Which Foods Fuel Your Inflammation
Dairy might be one of your triggers… but it’s not the only sneaky culprit. My Anti-Inflammatory Quick Start Guide shows you:
The 10 foods to swap first to start feeling better fast
A printable shopping list for easy swaps (no full pantry clean-out required!)
My 4-step method to start your anti-inflammatory journey today
Discover My Simple 4-Step Approach to the Anti-Inflammatory Diet So You Can Get Started Immediately (Without Getting Overwhelmed or Cleaning Out Your Entire Pantry)
Why a full-scale pantry clean out is NOT the best way to start your anti-inflammatory journey, and the steps you can take instead to make sure you’re fueling your body with foods that love you back
The essential foods you MUST add into your diet if you want to nourish and heal your body naturally
My anti-inflammatory shopping list so you can quickly fill your cart with the right foods (no googling in the produce aisle or wasting hours staring at ingredient lists)
Your immune system fires up inflammation whenever it senses a threat — like an infection, injury, or even certain foods your body sees as “trouble.”
Acute inflammation is short-term and visible (like redness or swelling from a cut).
Chronic inflammation is the sneaky one. You can’t always see it, but it quietly contributes to joint pain, fatigue, digestive issues, and even conditions like autoimmune disease, diabetes, and heart disease.
If you’re trying to lower inflammation with food, dairy is one of those “maybe” categories. For some people, it’s perfectly fine. For others, it quietly keeps the fire burning.
Step 2: Understand the Dairy + Inflammation Link
Here’s what makes dairy controversial:
Interestingly, different cows produce different types of casein (A1 vs. A2). A2 milk may be less inflammatory for some people. Also, many studies have also shown decreases in inflammation with dairy intake as well.
A very recent systematic review of these studies says these beliefs are simply not true. That the literature reviewed indicates that dairy has either a neutral effect or beneficial.
Lower-quality, feedlot cow’s milk is higher in pro-inflammatory compounds.
Grass-fed or raw dairy tends to have a healthier omega-3 to omega-6 balance.
3: Proteins: Casein and Whey
These are the main proteins in milk. Some people react to them, triggering bloating, acne, or even joint pain.
Benefits + Considerations for Dairy
We can absolutely get calcium and Vitamin D from other sources than dairy. For example, an 8 oz glass of milk has 300 mg of calcium in it.
You can get the same amount in a glass of soy milk, 3/4 cup of almonds, 1 1/2 cups dried figs, 2 cups of cooked kale, 2 cups of bok choy, or 6 oz of tofu.
There are also many other options for a slightly smaller amount of calcium, but when they’re added up, you can obviously go without dairy to get your RDA of calcium.
As far as Vitamin D sources, from late March to September, you can get your daily dose by spending about 10 minutes a day outdoors. Year-round good sources of Vitamin D include:
Oily fish
Egg yolks
Red meat (that is organic and grass-fed)
Anti-inflammatory foods that are fortified
A Vitamin D3 supplement
A Vitamin D supplement (if you choose not to consume dairy) may be a really good decision since it’s estimated between 59% to 77% of the population is Vitamin D deficient.
So, no, we don’t need dairy, but it has become a staple ingredient across the globe. The surge in dairy-free diets, however, has prompted food companies to step up and start producing many other dairy substitutes that rival taste and texture of traditional dairy products.
💡TRUE-WELL Tip: Our Raw Milk Experiment
When my daughter had stubborn eczema patches, we decided to try raw milk after reading about its potential benefits for some dairy-sensitive people.
The results? Her skin cleared up, and she swore it was the best milk she’d ever tasted. Honestly, she’d get mad if I didn’t grab it for the week!
Raw dairy isn’t for everyone (and safety can depend on sourcing), but in our experience, quality makes a huge difference. Grass-fed, organic, or raw dairy often sits much better than the ultra-processed fat-free cartons from the grocery store.
Step 3: Spot Dairy Inflammation Symptoms
Want to know if dairy could be causing issues for you? Watch for these signs:
Bloating, gas, or bathroom changes
Acne or skin rashes (like eczema or psoriasis)
Morning joint stiffness or flare-ups
Fatigue or brain fog after meals
✅ Micro-Action: Track your dairy intake and these symptoms for the next 3 days. If you notice a pattern, consider removing dairy for 2 weeks to see if things improve.
Step 4: Choose Dairy Wisely (If You Keep It)
If you tolerate dairy, quality and type matter most:
Best Options:
Plain, organic yogurt (probiotics help calm the gut)
Kefir or other fermented dairy
Cottage or ricotta cheese (ideally grass-fed)
Goat cheese or feta (often easier to digest)
Better Quality:
💎Grass-fed, organic, or raw dairy = less inflammatory compounds
Skip or Limit:
Processed cheeses and sugary flavored yogurts
Fat-free milk (heavily processed and missing natural enzymes)
What dairy foods can I have on the Anti-Inflammatory Diet?
Here are your best options for dairy intake:
Yogurt
Yogurt can be a good choice for dairy as long as it’s purchased in plain, unflavored form, and also organic. Yogurt is thought to reduce inflammation by enhancing the impartiality of the intestinal lining via probiotics and also has nearly all the lactose (sugar) removed naturally via the fermentation process.
Probiotics provide several health advantages, including improved immune function and a robust and less porous intestinal gut lining. Consequently, it would reduce the odds of inflammation owing to the entrance of toxins and chemicals into the body through the stomach lining.
Fermented dairy products like yogurt and kefir are the primary sources of probiotics. Studies reported that consuming them frequently may prevent or limit inflammation by strengthening gut health.
Cottage cheese and ricotta cheese
Cottage and ricotta cheese are good choices in their most natural form (these frequently have thickeners added). And the best choice is from organic grass fed cows.
Other cheeses
As with all other dairy choices, cheeses that are organic and from grass fed cows are the best option due to the balanced ratios of omega 3:6. Cheeses also have considerably less lactose than other dairy products, and some that are lactose sensitive have found they can consume some cheeses and not have symptoms.
Goat cheese and feta
Although goat cheese (which includes feta) isn’t from cows, and therefore doesn’t contain the same proteins, it is a good choice to substitute in on recipes when cow’s dairy foods aren’t an option.
Feta doesn’t typically have the same strong flavor that other goat cheeses do, and it’s a staple in Mediterranean fare.
I will also add that per the Mediterranean Diet guidelines (which are like the basic blueprint to an Anti-Inflammatory Diet), dairy is allowed, but in moderation.
Bottom Line
Dairy isn’t automatically “good” or “bad.” It’s about your body + the quality you choose. Test it, track it, and make choices that calm inflammation instead of fueling it.
You’ve got this — and my Quick Start Guide will show you the exact next steps to take.
As always when it comes to questions about allergies, intolerances, or sensitivities to food, the best place to start is with your doctor.
And the combination of anti-inflammatory lifestyle choices and an elimination diet with the guidance of a nutritionist is the best way to get answers for your specific needs when it comes to building your personal Anti-Inflammatory Diet.
Discover My Easy 4-Step Approach to the Anti-Inflammatory Diet So You Can Get Started Immediately (Without Getting Overwhelmed or Cleaning Out Your Entire Pantry)
One of the most important discoveries in terms of health in the last decade or so is that sugar consumption is a huge factor in weight gain as well as a myriad of health conditions and diseases. These include heart disease, prediabetes, type 2 diabetes, and other metabolic syndromes. In fact, our sugar consumption has skyrocketed to 10x what it once was just 100 years ago.
With that comes the next step: pulling oneself off of sugar and sugary foods… which may not be so easy. Many people have a sweet tooth which has led to an extremely high level of sugar intake for long enough that they have no clue where to start.
If you’ve been feeling stuck in a cycle of sugar cravings, fatigue, and frustration, you’re not alone. Many of us have tried to cut back on sugar only to find ourselves back in the pantry, reaching for just one more cookie. And it’s not just about willpower. Detoxing from sugar is about more than just cutting out desserts—it’s about understanding what sugar does to your body and your emotions.
As a nutritionist, it’s really important to help people find easy ways to get from point A to B in their health journey using food, while eliminating excess sugar. And since sugar is inflammatory, it’s literally the first step staring an anti-inflammatory diet and lifestyle.
In fact, what many people call “sugar addiction” is often a form of emotional eating. So if quitting sugar hasn’t worked for you in the past, you might need more than a basic sugar detox—you might need a full emotional eating reset. Let’s dig into what that means.
Why Detox from Sugar in the First Place?
We know sugar contributes to inflammation, weight gain, insulin resistance, and a higher risk of chronic diseases. But even if you’re not facing a medical condition or trying to lose weight, a sugar detox can dramatically improve your energy, focus, and emotional balance.
That said, many people don’t realize that cravings for sugar are often tied to emotions: stress, sadness, boredom, or even joy. That’s why this isn’t just about biology—it’s also about emotional patterns. If you find yourself eating to soothe or escape, you’re likely facing emotional eating.
Through the decades, added sugars have gradually made their way into more and more foods for flavor and sugar’s addictive properties. And now we essentially have a substance that affects the brain in the same way that addictive drugs (like cocaine) do, but it’s put in nearly all processed foods.
This makes it extremely easy to become a sugar addict, especially if you have the genetic tendency toward that. Add in more and more sugar daily, along with years of eating it and you’ve got the perfect storm of sugar addiction.
Many people decide they need to quit because they’ve tried and know how hard it is. Others have had their doctor give them the wake-up call of a condition that requires eliminating it to manage that condition. And yet others either want to or need to lose weight.
So let’s talk about the different reasons for embarking on a sugar detox in the first place.
Blood sugar levels
Current estimates are that 1 out of 3 adults has prediabetes. When you factor in the number of adults that currently do have type 2 diabetes, we’ve got a really huge population that obviously has issues with blood sugar levels.
The thing is, there are also many other conditions that get mega benefits from balanced blood sugar levels. These include PCOS, high blood pressure, and inflammatory conditions like arthritis and autoimmune conditions.
But truth be told, our body’s ability to maintain steady blood sugar levels daily is the marker for a healthy metabolism. That can’t happen if we’re programming it to go haywire with high sugar foods and refined flours (which react like sugar in the body).
Kick-start weight loss
Undoubtedly you’ve heard stories from friends or family members about how much weight they lost when they started keto or low-carb.
The truth is that switching to any dietary style that eliminates sugar and promotes healthy, non-processed foods will inherently cause most people to lose weight. (We happen to be over the moon about the Anti-Inflammatory Diet around here!)
Consumption of too much sugar in the first place
The last scenario is for those who don’t specifically have a weight loss goal in mind and haven’t had a diagnosis to prompt quitting sugar. You just know that sugar is terrible for your body and have committed to being purposeful and respectful about the food you put into your body.
To you I say, “Well done.” And here’s how to go about that practice.
How to Detox Sugar from Your Body (Without Going Cold Turkey)
💡Tip: Be ready for symptoms of sugar withdrawal that may make you want to give up … (again):
Many people experience withdrawal symptoms of coming off high levels of sugar can be rough if you don’t know what to expect! Sugar detox symptoms are very likely and are a major reason people don’t complete their first week or two of a sugar detox.
These can include:
Sugar cravings
Headaches
Severe exhaustion
Severe irritability
Even feeling sort of like you have the flu
Foods TO AVOID When Detoxing From Sugar ❌
Avoiding sugar seems straightforward, but it hides in everything from ketchup to “healthy” granola bars. During your detox, steer clear of:
All added sugars (yes, even honey and maple syrup)
Refined flours (they spike blood sugar just like sugar does)
Processed foods with “natural” or “organic” sweeteners
Also: Watch your emotional cues. Sugar cravings are often triggered by stress, fatigue, or overwhelm.
So let’s get into it.
Sugary beverages
Sodas (regular AND diet!)
Fruit juice
Sports drinks
Coffee/tea with added sugar (this means basically any drink at Starbucks unless straight black coffee)
Milk
Non-dairy milks (unless they specifically say ‘Unsweetened’ on the label)
Bottled tea
Any other sugar-sweetened beverages
All forms of sugar
This will require reading a food label to identify sugar. So the easiest way to avoid these are to not eat anything processed or packaged while on your sugar detox, or else be able to understand the ingredients list and food label.
Ingredients that are sugar:
any type of ‘sugar’ (ie, table sugar, cane sugar, etc)
any type of ‘syrup’
molasses
dextrin
sucanat
caramel
malt
any word ending in ‘-ose’
agave
honey
maple syrup
fructose/ corn syrup/ high fructose corn syrup
fruit juice
concentrated fruit juice
natural sweeteners
Many people are confused about natural sugars or sweeteners like honey, agave, and maple syrup. The bottom line on these is that–yes they can contain healthful compounds and minerals–but they are STILL sugar and counterproductive during a sugar detox.
Artificial sweeteners
Artificial sweeteners have been shown to affect gut health, as well as induce cravings. For both of those reasons, I recommend avoiding these altogether, even when done detoxing from sugar. These are:
Aspartame (in nearly all diet soft drinks)
Neotame
Acesulfame K (blue packets- brand name Nutrasweet)
Although fruits can be part of a healthy diet, eliminating them during this short phase will be a huge help in your metabolism getting reset.
Definitely avoid dried fruits (unless they specifically say no sugar added).
If you feel you must eat fruit, limit it to berries, as fresh fruits or frozen, as long as no sugar is added.
Dairy
Dairy is a really controversial food, I get it. But in this phase, the consensus is that milk should be avoided (because of the amount of lactose–a sugar) in it.
Yogurt should also be avoided as most types are loaded with sugars. Even plain yogurt could be an issue, so it’s best to avoid it during your sugar detox.
Grains and flour
Refined grains and flours are absolutely out of the question. They spike blood sugar levels the same way regular sugar does.
However, even whole grains can cause a huge spike in the same way. For that reason, I recommend avoiding grains and flour altogether until you’re out of your sugar detox diet.
These include:
oats
wheat
rye
barley
farrow
quinoa
corn
Alcohol
Alcohol should be avoided for a few different reasons. First, it can also have an addictive nature. Your goal here is to reprogram your brain and body, and keeping alcohol in the mix is extremely counterproductive.
Second, when we get buzzed, our reason flies out the window. Many people find themselves overeating or even eating things when they’re not even hungry when they’re sippin’ on gin and juice. (Myself included).
Do yourself a favor and get rid of it before starting your sugar detox.
Foods That Help You Detox from Sugar Naturally ✔
You may be thinking that the food you CAN eat on a sugar detox isn’t as important as what you’re eliminating. But that’s really not true.
The reason is that when you load up with sugar and refined flours, you’re displacing nutrient-dense foods that you could have been eating instead. So this detox period is actually giving you a chance to ‘power up’ with healthier food choices while you’re letting your body and brain deprogram from sugar.
High-quality protein
One of the best things you can do when cutting out sugar is to increase your protein intake. This is because protein (as well as good fats, which we’ll get to in a minute) help blunt blood sugar spikes that may still happen from the carbohydrates that ARE allowed on a sugar detox.
In ensuring it’s quality protein, make sure it’s pasture-raised meat (or organic).
This can be from poultry (chicken, turkey, duck), pork, lean cuts of beef, and definitely fatty fish and seafood!
If you’re ok with soy, organic tofu is also a great option.
And lastly, hard-boiled eggs are also an easy way to get in extra protein.
Healthy fats
Good, healthy fats are also a game-changer when doing a sugar detox. Again, this helps blunt the blood sugar spikes but it also helps you feel full longer. This can be a really big help when you’re having those crazy sugar cravings.
A few other sources of healthy fats include avocado and nuts (just make sure you have a small handful or less as these can get out of hand quickly!)
Low glycemic plants + starchy vegetables
I wanted to section out the foods you CAN eat into macros because since carbohydrates primarily come from plants in our diets, it can be tricky to weed through.
During a sugar detox, your focus in the carbohydrate department will be HIGHLY on high fiber foods, with a low glycemic index (sometimes called complex carbs). These will include low glycemic starchy vegetables, leafy greens, beans, and legumes, and they help you keep blood sugar levels stable by avoiding the spike and then sugar crash.
Many people ask about potatoes and sweet potatoes. As a nutrition specialist, I see a ton of people get emotionally wrapped up in these delicious tubers because they’re everywhere.
Here’s the deal: They both have a lot of nutritional value. They both have a fairly high amount of carbs. But one has more sugars (sweet potatoes) while the other has a higher amount of starches (potatoes).
But here’s the kicker when doing a sugar detox:
BOTH potatoes and sweet potatoes can set off those sugar cravings that lead to binges because of the way they can spike your blood sugar. So my advice is to avoid them while coming off sugar.
How Long Does it Take to Detox from Sugar?
When people ask this question, it normally means: How long until my sugar cravings go away and I can control myself to not crave and binge again?
You may see “7-day sugar detox” or “21-day sugar detox” plans online—but the real answer depends on your unique biology and emotional patterns. Genetics, the amount of sugar you’ve been eating, and how long you’ve eaten it all matter.
Here’s a shortcut: Try to quit sugar cold turkey for a week. If it feels impossible, you likely need more support than a simple detox can provide.
My easy way to tell goes like this: Try to eliminate sugar from your diet cold turkey for a week or two.
If you do this easily, or fairly easily, you should be able to transition into a healthy eating style that supports your health and goals from there pretty easily.
If you, instead, feel like this is the worst and hardest thing you’ve ever had to do and couldn’t get through a week, let alone 2, you probably have a sugar addiction problem. In this case, I recommend ‘sugar deprogramming’, which is a much more in-depth approach to getting off sugar for good.
Precautions when Detoxing From Sugar:
If you have type 1 or type 2 diabetes, make sure you speak with your doctor before starting a sugar detox so you have some guidance from the person who oversees your health. Please be smart, and be responsible.
A Few Last Tips to Detox Sugar From Your Body
Meal plan.Meal planning ensures you’re never in the dark about what you can eat and have available to eat. Especially when you’ve relied on packaged and convenience food for a while.
Meal prep. Scheduling in time to meal prep ensures that your hard work planning those meals wasn’t in vain. It also sets up that ‘guilt factor’ to give you a boost of motivation in the event that your strength is waning as the days go on while you’re trying to kick that sugar habit.
Stay hydrated. Drink water or unsweetened tea often. This helps with hydration and training your stomach in feeling full to help prevent overeating.
Don’t worry about counting ANYTHING during this time period. Don’t even get on the scale. Remember that your sole focus is to let your body and brain deprogram from sugar and start learning to get energy from complex carbohydrates.
Don’t start your endeavor 3 days before a birthday party (or holiday, for that matter).
Plan for traveling. Many people are back working in offices, and some professions travel. Make sure you’ve thought ahead for what you can take with you. For example, what are you able to carry in your car or on a plane?
Get enough sleep. When you have quality and enough sleep, it helps balance the stress hormone cortisol as well as hormones that can determine if you feel hungry or full during the day.
Practice mindful eating during this period. This helps your body begin to recognize hunger and fullness signals that have probably been over-ridden for a while.
Extra credit: Find freezer meals and have all your dinners pre-prepped and ready to throw in a slow cooker or sheet pan!
Avoid talking to family or friends unless you trust them and know they care about you and your health. I can’t tell you the number of times I’ve had clients truly upset about the lack of support (and sometimes even ridicule) because they don’t understand or believe in the need to quit sugar. Bottom line is 2-fold: 1-It’s none of their business, and 2-If they cared about you they’d be supportive of your decisions for your health.
What to Do if a Basic Sugar Detox Isn’t Enough?
After sugar detoxing (or attempting it), one of three things will happen:
(1)You’ll stay off sugar successfully and transition into a clean eating dietary style that supports your health. I recommend an anti-inflammatory dietary style because it’s been shown to be beneficial for nearly everyone on the planet and prevents chronic diseases. {Great job, by the way!!}
(2) You’ll feel better and keep at it for a bit, but then slowly progress back to your old way of eating. If this is where you find yourself, you probably have some issues with sticking to habits.
If you truly want to stay off sugar, I recommend revisiting your ‘WHY’ and learning about habits and how to create them in a way that you’ll stick to with little thought.
(3) You didn’t even make it through the first week or two because this felt like the hardest, worst thing you’ve ever tried. (Or possibly a slightly less harrowing version of that, but either way, you couldn’t stick to it because of the cravings.)
When you’re in this category of outcomes, it most likely means you fall into that perfect storm where your body and brain have been programmed for being hooked on sugarand refined carbs.
This is where an Emotional Eating Reset comes in. It’s not about restriction—it’s about:
Understanding your emotional eating patterns
Rewiring your brain’s reward system
Supporting your metabolism with the right foods
Building confidence through small, consistent wins
Ready to find your best next step? Take the quiz now and start your emotional eating reset. 👇
What’s Your Best Strategy for Eliminating Emotional Eating–for Good?
↓ Take the quiz and find out! ↓
👀 Take the quiz to discover your emotional eating profile and get your personalized strategy—designed to match your current habits, root triggers, and readiness for change.
Struggling with sugar cravings, emotional eating patterns, or just want to feel more in control around food?
📖The Cut the Sugar Hub is your go-to library of expert-backed articles, practical tools, and science-made-simple guides. Whether you’re detoxing, breaking the binge cycle, or learning to balance blood sugar the right way—it’s all here.
Is sugar addiction real—or just another buzzword? If you’ve ever joked that you’re “addicted to sugar” but secretly felt controlled by cravings, you’re not imagining things. From energy crashes to hidden binges, sugar has a powerful pull. And for some, it’s more than just a habit—it’s a pattern that mimics emotional eating and addiction.
In this article, we’ll break down what the science says, how it shows up in real life, and why sugar addiction may actually be a form of emotional dependence. I’ll also point you to our Emotional Eating Probability Quiz to help you uncover what’s really driving your cravings—and what to do next.
As a nutrition specialist working with many people hooked on sugar, I chat with many others that are totally clueless on the subject. Some can see the point in wanting to give your body a break from sugar, but others feel like a world without sugar is unbearably dull.
My response to that is that clearly they either:
don’t feel they’re hooked on it,
don’t want to admit it,
or have no medical need to get off it.
The reason getting off sugar and refined carbs matters is that even if you don’t have a chronic condition you’re trying to manage, or need to lose weight, eating an anti-inflammatory diet will help prevent any of those things from happening. It’s one of the most amazing things you can do for your body to keep inflammation at bay.
That being said, quitting sugar and processed junk food is the very first step in going anti-inflammatory. Many people try to skip this step and go right on into eating an anti-inflammatory diet or jump into an elimination diet.
Neither of these options is possible if you can’t quit eating sugar or refined carbs.
Once I realized this, I strived to make healing my own addiction to sugar and carbs my first order of business on my journey to live an anti-inflammatory lifestyle.
One of the lowest moments of self-loathing in my life was being about 25 pounds overweight, constantly ‘saying’ I wanted to lose weight, but hiding out in the pantry, terrified of being caught, while I shoved cupcake after cupcake in my face because I literally could not control myself.
So if you’re asking me, personally… Hell yes, sugar addiction is real. As a professional? Also Yes.
Laura @ www.true-well.co
If you ask my husband, who’s always been able to just have a bite or two and walk away… well, he doesn’t really know. But he can tell you that he feels that way about potato chips.
As a nutrition specialist with a Master of Science in nutrition under my belt, as well as countless hours doing deep dives into the newest peer-reviewed research on sugar addiction, I can confirm the research supporting ‘food’ being addictive, including sugar.
For some, sugar alone is what will get them. For others it could be the salt, or even the combination of the flavors like fat + sugar, or fat + salt. These combos are called ‘hyper palatable foods’. Food companies have spent billions of dollars figuring this out. And make no mistake: their interests lie in making sure you keep coming back for more.
As a nutritionist and recovered sugar addict (and mom), I get asked this question over and over: Is sugar addiction real? Like really real?
And although the answer has taken many forms over the past several years, my answer to the question is a resounding YES, sugar addiction is really real. And I’ll explain why.
My relationship with sugar started as a kid from the south whose family knew no bounds of cooking with sugar and white flour. This meant dessert after many a meal, and the biggest, sugary-est birthday cakes you’ve ever seen. I loved the sugar and butter combination (or sugar and shortening), and from the time I was a kid, I would always request the piece of cake with the absolute most icing flowers on it.
I never knew the damage all the sugar was doing to my gut bacteria, nor that it could have an effect on my moods, hormones, skin, metabolic markers, and definitely not my neurotransmitters or immune system.
I developed asthma around 12 and had terrible hayfever that I never really shook. By my teen years, I had terrible acne, was constantly irritable, and forever anxious.
It wasn’t until adulthood when I started studying nutrition that I really took a step back and thought through my constant depressive symptoms as a teen and young adult, and put a few pieces together for the ups and downs of my moods, skin, and hormones.
But it wasn’t until after having gestational diabetes for 2 out of 3 pregnancies (type 2 diabetes runs in my family) that I noticed that I felt a thousand percent better when I nixed the sugar.
But quitting sugar wasn’t as easy as just saying ‘no thank you’.
Every birthday and holiday was a struggle. I’ve been in the throes of postpartum depression 3x where I would hide in the pantry to stuff as many cupcakes in secret as I could into my face before anyone could see.
I’ve binged for hours, alternating sugary and salty snacks, in secret when my husband was out of town for work.
And I knew that there was never any circumstance that could keep ‘just one bite’ from turning into 75 bites.
So I can attest first-hand what it feels like to be addicted to sugar. No matter what kind of logic your brain tells you about how crappy you’ll feel the next day (physically and emotionally), that addict part of your brain takes over and mutes the logic.
What Is Sugar Addiction—and Is It Even Real?
Sugar addiction isn’t officially listed as a diagnosable condition, but the behavior patterns it causes look eerily familiar to other forms of substance dependence: cravings, loss of control, tolerance, and withdrawal.
And while the term “addicted” might seem extreme to some, the lived experiences of millions say otherwise. Many people experience symptoms that go far beyond a sweet tooth—including intense urges, binge episodes, and shame afterward.
What’s Your Best Strategy for Eliminating Emotional Eating–for Good?
↓ Take the quiz and find out! ↓
👀 Take the quiz to discover your emotional eating profile and get your personalized strategy—designed to match your current habits, root triggers, and readiness for change.
While in my master’s program we had to do many projects on various topics that all require peer-reviewed studies to support our answers (which is how the medical community and medical organizations formulate their recommendations of things for public health.) Part of the studies I sought out revolved around sugar addiction.
At the time one professor pointed out that the only study supporting sugar addiction thus far involved rats that preferred sugar over cocaine. This boggled me, so I veered on a tangent toward addiction itself to try and get more answers.
Addictive behavior toward substances has these criteria:
Strong cravings or desire to use a substance
Failed attempts to quit using the substance or even lessen the frequency
Using that substance even when you know it’s causing harm
Tolerance of the substance (you need more to get the same feeling or effect)
Withdrawal symptoms (if attempts are made to quit using the substance)
At the time I was in my master’s program, the International Classifications of Diseases (one of 2 books used to give diagnostic codes so insurance can decide if they will or will not cover medical services) contained mental health diagnoses for food addiction, but not specifically sugar.
The reasoning was that they, at the time, couldn’t definitively prove that sugar itself was physically addicting, further confusing the ‘Is sugar addiction real?’ question altogether.
I personally have a problem with this, because many people (including myself) have felt the withdrawal symptoms of coming off sugar. These side effects are definitely not imagined, and some have described them as feeling like having a mild case of the flu.
The clincher of sugar is that when consumed, it occupies the same receptors in the brain as drugs like cocaine and heroin. It gives a dopamine hit, which makes you feel good. So it activates those reward systems in the brain and essentially ‘programs’ the brain to want more and make you think you need it.
And once you keep eating it, cravings will start for it.
From that point, it can be very difficult to satisfy the craving and keep yourself from seeking anything to replace it until you completely get off it, and for long enough.
Another thing that happens is that you build tolerance. This is when the brain receptors get a lot of the dopamine hits but eventually adapt and need more to get that reward response. Studies have also proven that the sensation of sweetness builds a tolerance.
There is also evidence of a genetic component to some people feeling addicted to sugar. The gene that controls the dopamine receptors in our brains can have mutations that impair the reward system in the brain, thereby triggering some people to exhibit more addictive behavior toward sugar.
This tends to be one of the hallmarks of a definition of ‘addiction’, but again– the issue is whether it specifically is sugar, or is another component of the food you’re eating, or even a combination of components.
Recently, research has been compiled to compare the criteria of an addictive substance to the proven addictive traits of sugar.
According to the Diagnostic and Statistical Manual of Mental Disorders (DSM), two of the eleven criteria must be met by a patient for that patient to qualify as addicted to a substance. The study done proves that five criteria of addiction to sugar could be met, exceeding the minimum criteria.
How to Break the Sugar Addiction
Without a proper understanding of the truly addictive nature of sugar, many people are at a loss as to how to break their sugar addiction.
Many have tried dieting and quitting cold turkey over and over again, to no avail.
Experience with myself and clients through the years has shown that there are many different factors at play, including:
genetics,
how much sugar (and refined carbs) are consumed on a normal basis,
and for how long.
A popular term that comes up in searches and circulating in ‘wellness’ media is a “sugar detox“. While many may think this concept is a godsend to those trying to quit sugar, it may do more harm than good to those truly addicted.
The reason is that some people can do a sugar detox and are done with sugar, no problem. Those of us that truly have that addictive component to sugar usually can’t manage longer than a week on a sugar detox.
This is where an addiction to sugar (and carbs) veers into what is actually emotional eating.
The cravings will make us give up, and the withdrawal will send us on a binge.
We’ve essentially been ‘programmed’ to be hooked on sugar and refined carbs.
How to Stop Sugar Cravings—Especially If You’re Addicted
Here’s what works (and what doesn’t):
❌ What Doesn’t Work:
Going cold turkey with no support
Shame or self-blame
Cutting out sugar without addressing emotional triggers
✅ What Does Work:
A step-by-step reset that includes brain chemistry and emotional rewiring
Balanced meals with blood sugar–friendly foods
Understanding your sugar addiction probability
The First Step? Understanding Your Patterns
Before you try another sugar detox or trying to go cold turkey again, find out where you land on the emotional eating spectrum.
💡That knowledge can guide your next best step—whether that’s a short detox or a deeper reset that reprograms your emotional patterns and stabilizes your metabolism.
🧠 Take the Emotional Eating Quiz Find out how likely it is that sugar cravings are controlling you—and what to do about it. Take the quiz now and get a personalized roadmap.
🤝More Support Inside the Cut the Sugar Hub
Struggling with sugar cravings, emotional eating patterns, or just want to feel more in control around food?
📖The Cut the Sugar Hub is your go-to library of expert-backed articles, practical tools, and science-made-simple guides. Whether you’re detoxing, breaking the binge cycle, or learning to balance blood sugar the right way—it’s all here.
One of the most frequent questions I get asked privately as a nutritionist is: (1) how to stop sugar cravings and (2) how to break the sugar addiction cycle. People ask for all kinds of reasons, even if it’s “for a friend.”
The thing is, I don’t judge. Because I’m a ‘recovered sugar addict’ and I’ve been in the trenches for years, completely miserable and defeated over and over every time I tried to stay strong.
And every attempt to quit sugar and refined carbs ended up not just giving in to the cravings, but bingeing hard-core in secret.
So if you’ve ever felt powerless against, and want to know how to stop sugar cravings, you’re not alone. The cycle of indulgence and guilt is a common struggle, but breaking free is possible.
I’m living proof. 🎉
In fact, I’ve been an addict since I was a child but didn’t know it until the last few years. Research is finally catching up, but the media can make it really hard for those who truly need help because of hype headlines and articles declaring “sugar addiction” is bogus, “eat what you want”, and that “the body ‘needs’ sugar to operate.”
So many people who feel like they’re chained to sugar are being told that they’re crazy and there’s no need to quit the sugar and refined carbs. This couldn’t be further from the truth, and it sends horribly mixed messages to those who are suffering.
People are desperate for help, and with good reason: It’s estimated that we now consume 60 pounds or more of added sugar every year.
In 2017 the prevalence of diabetes was 451 million. It’s estimated that by the year 2045 that number will increase to 693 million. And that figure didn’t even account for the estimated 374 million with impaired glucose tolerance.
It’s obvious that people are searching for a way to stop sugar cravings and break their sugar addictionthat works.
My practice helps people begin and maintain an anti-inflammatory diet and lifestyle for all sorts of reasons. But when surveyed, 50% of thousands of women who are trying to stick to an anti-inflammatory diet state that they can’t because they’re hooked on sugar and refined carbs.
So let’s get into the breakdown of a true addiction to sugar and carbs so you can determine if you have a mild sugar problem, or a much larger one that requires more in-depth help than a one-week ‘sugar detox‘.
Is Sugar Addiction Real? Here’s What Science Says
Addictions are defined as actions that one keeps repeating over and over regardless of the detriment, and will eventually build tolerance (you need more to get the same effect), and withdrawal when you take it away.
So for people to say that sugar isn’t addictive rubs me seriously the wrong way. I think it’s pretty disrespectful and naive to underestimate the wiring of our brain and physiology in its efforts to make us feel better.
Psychology and physiology are extremely complicated, but they will always operate to try and keep us in homeostasis, even if it means attempts to keep us ‘happy’ with a dopamine hit of glazed donuts. 😃🍩😵💫🍩😃🍩
The other problem I have is people not only dissing the idea of being addicted to sugar, but also maintaining that sugar is essential for energy and that trying to get off it is stupid. Well, to say the least, these people are misinformed and uneducated on the matter.
Not only that, they’ve probably never been on the end of cravings that are so severe that they cause uncontrollable binges that result in a self-berating cycle of guilt and out-of-control weight gain and inflammation. (Not to mention the resulting depression.)
Many people have been told by their doctors to lose weight for a myriad of reasons, which starts with quitting sugar and refined carbs. But going cold turkey just seems to make the cravings worse.
Thus the battle cry of those of us addicted to sugar is this: “If we were able to just ‘take one bite’ and move on with our life, don’t they think we would’ve?? “
Laura @ www.true-well.co
How to Know If You’re Addicted to Sugar + Carbs
Knowing if you’re addicted to sugar really needs to start with knowing a few things behind the mechanics of sugar + carb addiction.
1-There is obviously a chemical component to it that’s known as the ‘reward cycle’.
2-But there is also a genetic component as well.
Then add in:
3-the length of time you’ve been consuming large amounts of sugar and foods that are metabolized like sugar in the body,
4-as well as the total amounts.
5-And yet a fifth MAJOR component is the connection that’s been established over the years between eating those foods and your emotions at the time.
💡This is where we begin to understand that being hooked on sugar and carbs in this way is actually emotional eating.
So when you add all those together, you really have a spectrum of ‘levels’ of not just sugar addiction probability … but emotional eating probability.
This is important because where you fall on the spectrum determines the strategy you’ll need to break the sugar addiction and carb cravings cycle.
Understanding this connection is the springboard to your success in losing weight and living an anti-inflammatory lifestyle.
Recognizing the Signs and Symptoms of Sugar Addiction + Emotional Eating
At the lowest end of the emotional eating probability spectrum, people may feel cravings every once in a while for something sugary, chocolately, or even breads, but they don’t have an issue just having a bite and then moving on. They don’t usually experience guilt about it either.
The mid-level of emotional eating probability looks more like cravings more than they’d like to admit, some emotional eating, and reaching for sugar, caffeine, chocolate, etc during times of the day that they feel dips in energy or emotions. There’s a modest to more intense level of guilt.
At the most severe end of the spectrum is a constant craving for something with sugar or bread, and every meal and snack is full of sugar and usually includes bread.
Severe exhaustion, shakiness, and irritability happen when it’s been longer than about 2 hours after the last meal.
There are frequent binges, especially after 2 events:trying to quit sugar and carbs for a few days in a row, or after (or during) a stressful event.
There is nearly always an intense level of guilt, most especially after the binges happen.
I usually direct clients to answer some questions to help better determine their level of being hooked on sugar and refined carbs before deciding which direction to take.
🤔 Not sure if your cravings are emotional or physical? Take the Emotional Eating Probability Quiz and get your personalized next step to stop sugar cravings—for good.
Why Traditional Sugar Detoxes Often Fail
Many people ask if sugar detox diets really work.
The short answer for that is if you fall in the lower end of the emotional eating probability spectrum, it will probably work to get you off sugar to kickstart weight loss and help control conditions you may have that require lessened inflammation and balanced blood sugar.
If you’re in the mid to high range of probability, a sugar detox will just make things worse.
This is because most sugar detoxes not only go cold turkey, but they don’t allow enough time for the shifts needed to truly reset your body, mind, and emotions from sugar and refined carbs.
What is needed in this case is what I call an “Emotional Eating Reset”.
What’s Your Best Strategy for Eliminating Emotional Eating–for Good?
↓ Take the quiz and find out! ↓
👀 Take the quiz to discover your emotional eating profile and get your personalized strategy—designed to match your current habits, root triggers, and readiness for change.
How to Break the Sugar Addiction and Carb Cravings Cycle with an Emotional Eating Reset
Step 1: Shift your mindset about sugar addiction
When we typically think of sugar addiction, we think it started or keeps going because of weakness. This couldn’t be further from the truth.
Shifting your mindset is the foundation to undoing sugar addiction through sugar deprogramming. You can’t debug a computer program without knowing there’s a bug in the program, right?
Once you know the science and mechanics (biologically and psychologically) you’re able to more clearly see the bird’s eye view of it all and how to fix it.
Addiction has such a negative connotation to it because people largely believe the person addicted has chosen 1- the first dose of the addictive substance, and 2- continues to use it.
The thing is, when it comes to sugar and carb addiction, there is no ‘gateway’ to any of these substances like there is for drugs—they’re literally right there in the grocery store or even the vending machine in the office, readily available.
So there’s no warning sign or message from the Attorney General about the addictive nature of the ingredients in what you’re about to eat.
We’re hooked on something we never thought possible and never had an option.
When you shift your mindset about sugar and carb addiction, you’ll understand where cravings come from, why they happen over and over again, and why you’ve never been able to resist them.
Another mindset shift involves the number of days your recovery will take. So many ‘sugar detox plans’ claim you can be free of cravings in 7 days, 21 days, or even 30 days.
The truth is that everyone is so different that you won’t know this number until you are consistent with a sugar deprogramming program. This consistency will allow your body to accomplish the next two shifts.
This is your starting point for a blueprint to break the sugar addiction and carb cravings cycle for good (aka- eliminate your emotional eating).
Step 2: Rebuild metabolic stability without sugar spikes
If you’re hooked on sugar and refined carbs, your body has become accustomed to getting energy from the quickest form of fuel there is: simple carbs. These don’t need to be broken down any further to harness immediate energy.
By taking simple carbs out of the diet and giving your body complex carbs for sustained fuel, your body will inevitably rebel, because suddenly it has to work for fuel. Your metabolism has gotten lazy.
For many, this alone will create rebound cravings. This is why it’s crucial to understand the types of carbs and how to adjust them in your meals during your healing and recovery period.
And lastly, shifting your metabolism also involves discovering nutritional deficiencies and filling these consistently.
Step 3: Heal the emotional connections driving cravings
So many people are programmed as a child to connect sugar and carbs with rewards. (If you have kids you’ve surely seen this complete nonsense at your kids’ school. Candy is given relentlessly as a reward.)
Our brains then connect the dopamine hit we get from those foods to ‘happy’ things. Then we we’re emotionally triggered, the brain says to eat those things to feel better.
Pinpointing your emotional involvement in the addiction to sugar and carbs is a crucial step to disrupting that cravings cycle.
The next step in the emotional shift is knowing what to do with that information and how to heal emotional traumas, as well as manage daily stressors that are contributing to the cycle.
Step 4: Shifting your confidence
So many clients come into this journey expecting absolute failure. And why not? They’ve failed a thousand times before at quitting sugar and refined carbs.
The truth is that there IS a proven process to breaking the addiction to sugar and carbs. It’s called an Emotional Eating Reset.
And building your confidence in that truth helps keep the momentum going until the full metabolic and emotional shifts can happenthat will free you.
This last step in an emotional eating reset is really the cherry on top where it will all come together to keep you going and know that you have all the tools, gameplan, and confidence to finally kick-start that weight loss, balance your blood sugar, and manage your energy and emotions all day.
This is where you find your truth that allows you to confidently face sugar from now on.
Struggling with sugar cravings, emotional eating patterns, or just want to feel more in control around food?
📖The Cut the Sugar Hub is your go-to library of expert-backed articles, practical tools, and science-made-simple guides. Whether you’re detoxing, breaking the binge cycle, or learning to balance blood sugar the right way—it’s all here.
If you’ve ever wondered if a sugar detox is for you because felt like sugar has a grip on you—whether it’s daily cravings, energy crashes, or a full-blown binge spiral—you’re not alone.
That’s why so many people are turning to a sugar detox or sugar cleanse to reset their health and reclaim control.
But what exactly is a sugar detox? And does everyone need one?
At TRUE-WELL, we see quitting sugar as the first and most important step toward reducing inflammation and rebalancing your body. But that doesn’t mean one-size-fits-all sugar detox plans are the answer for everyone.
And if you’ve tried quitting sugar before and it backfired? That doesn’t mean you failed. It might just mean you’re going about it the wrong way.
But there are several nuances to getting off sugar and defining a legit answer to, ‘what is a sugar detox?’
Definition: What is a sugar detox?
At its core, a sugar detox is exactly what it sounds like: a short-term plan designed to help your body stop relying on sugar for energy, mood regulation, or mental focus.
The goal? To remove added sugars, refined carbohydrates, and ultra-processed foods from your diet—so your blood sugar, brain chemistry, and cravings can stabilize and reset.
Think of it like clearing the slate. A sugar detox gives your metabolism a chance to recalibrate and your taste buds time to unlearn their sugar bias.
📚 Want to Explore More?
This article is part of our Cut the Sugar + Junk Series, a curated collection of expert-backed guides designed to help you:
Understand sugar’s impact on your body and mind
Get off the craving–crash–guilt rollercoaster
Transition to a sustainable, anti-inflammatory lifestyle
Learn how to quit sugar without losing your sanity
Whether you’re detoxing for the first time or breaking up with sugar for good—we’ve got resources to support every step of your journey.
You might also see the term sugar cleanse floating around online. In most cases, it’s just another name for the same thing: cutting out sugar to give your body a reset.
Some “sugar cleanse” programs may include smoothies, juices, or supplements—but here at TRUE-WELL, we’re all about real food, real fuel, and evidence-based strategies.
However, a sugar detox is normally done with one of two goals in mind. If these goals are clearly defined, it’s way more likely you’ll be successful with a sugar detox.
The Goal of a Sugar Detox
The point of the whole process is to get rid of sugars and foods your body metabolizes like sugar so that your brain, taste buds, metabolism, and insulin response can ‘reset’ itself to behave more closely to normal.
What’s interesting about a sugar detox is that every single person going into one has a different goal for doing it.
Aside from FOMO, many people start a sugar detox as a type of ‘reset’ from eating terrible at the holidays, on vacation, or after a long period of ‘falling off the wagon’.
Some people have also found their skin looks terrible or hormones have gone crazy and that sugar is the culprit.
Others need or want to kickstart weight loss, or for personal or medical reasons—especially as more attention is brought to how food industry influence shaped public nutritional policy around sugar.
But the real deep down goals are what determine whether or not someone is actually successful with a sugar detox.
Those goals of a sugar detox are:
To reset because of any reasons above—meaning the end-goal is to simply get off sugar for a week (or however many days the detox is).
To truly quit sugar and refined carbs because of a medical condition they are trying to manage, for weight loss, or simply because they also believe sugar is toxic and want to follow an anti-inflammatory dietary style and lifestyle for amazing health (which is what I recommend).😉
Why Do People Do a Sugar Detox?
Most people don’t do a sugar detox just because they’re curious. They do it because something feels off—and sugar is often the common thread.
Maybe it’s:
Weight gain that won’t budge
Energy crashes every afternoon
A brain that feels foggy no matter how much you sleep
Skin that’s inflamed, breaking out, or looking dull
Insulin resistance or other chronic condition they’ve been diagnosed with
Or just a growing awareness that sugar might be affecting your health more than you realized
Others come to a sugar detox after a stretch of emotional or stress eating—holidays, vacations, burnout, or simply falling back into habits that don’t serve them anymore.
A sugar detox feels like a reset. A fresh start. A way to take your power back.
But here’s the thing…
What If It’s Not Just About Sugar?
If you’ve tried a sugar detox before and it didn’t work—if you started strong, then found yourself bingeing, craving, or right back where you started—it may not be totally about sugar.
It might be an emotional eating pattern. One that’s wired into your brain and body, using sugar to soothe, distract, or survive.
Take the Quiz
🎯 If you’ve ever felt like sugar has more control over you than you’d like, take the Emotional Eating Probability Quiz. Find out whether your cravings are more emotional than physical—and get your personalized next step for finally breaking the cycle (without another failed detox).
Who is a sugar detox for?
The truth? Almost anyone can benefit from a sugar detox—at least temporarily.
If you’ve been eating more processed food, refined carbs, or added sugars than usual, a sugar detox can help you:
Regain control over cravings
Improve energy and mood
Reset your taste buds
Reduce inflammation
And reconnect with how good your body can feel without the sugar highs (and crashes)
It’s also a powerful first step for anyone looking to transition to an anti-inflammatory lifestyle—because sugar is one of the most inflammatory substances in the modern diet.
After years of fighting my own addiction to it in addition to years of formal education and deep dives into peer-reviewed studies on sugar, it’s clear that nobody needs it and the gradual inoculation and acceptance of it into our food system, despite clear global guidelines recommending sugar reduction, is one of the great tragedies of our time.
Who should do a sugar detox:
That being said, a simple sugar detox is a great option for those wanting to do a reset and start making more healthy food choices to improve overall health or even kickstart weight loss (and hopefully follow an anti-inflammatory diet and lifestyle).
A Sugar Detox Is Especially Helpful If You:
Want to kickstart weight loss or reduce belly bloat
Struggle with low energy or afternoon crashes
Feel like you need something sweet after every meal
But—and this is important—a sugar detox isn’t the best approach for everyone.
Let’s talk about when it might not be the right fit.
Who Should Not do a Sugar Detox:
While a sugar detox can be incredibly helpful for many people, there are two specific situations where a traditional sugar detox might not be the best starting point.
If You Feel Truly Hooked on Sugar
If you’ve tried to quit sugar multiple times and always end up back in the cravings–binge–guilt cycle… a standard detox may not work for you.
Why? Because most sugar detox plans are designed for habit change—not emotional dependence.
They focus on recipes, food swaps, and rigid rules. But they ignore the emotional patterns that sugar may be supporting—like using food to cope with stress, numb feelings, or reward yourself after a hard day.
And when those emotional needs aren’t addressed? Most detoxes backfire.
If you feel out of control around sugar—or you start strong and always crash halfway through—what you probably need isn’t just a sugar detox. You need a different approach altogether. One that helps you retrain your brain and soothe your body without sugar.
(We’ll talk about how to do that in just a bit.)
If you are hooked on sugar (+ refined carbs) or addicted to it, you know exactly what I’m talking about. (I’ve been there and done it about 157 times over.)
2. If You Have Certain Blood Sugar Conditions or Take Glucose-Lowering Medications
Removing sugar and refined carbs quickly can cause blood sugar levels to drop—sometimes dramatically.
If you have:
Hypoglycemia (low blood sugar)
Take medications for diabetes or insulin resistance
Are prone to dizziness, lightheadedness, or blackouts with food changes
…you should work with a healthcare provider or nutritionist before starting any sugar detox.
Why? Because going from high-sugar to low-sugar suddenly can trigger hypoglycemic episodes—and those can be dangerous if not managed properly.
How Does a Sugar Detox Work?
A sugar detox works by giving your body a break from the constant blood sugar spikes, crashes, and cravings triggered by added sugars and refined carbs.
The goal isn’t just to cut sugar—it’s to give your metabolism, hormones, brain, and taste buds a chance to recalibrate.
This can range from 7 days to 30 or more, depending on the source of the sugar detox.
What You Remove
Most sugar detoxes recommend cutting out:
Added sugars (in all forms, including “natural” ones like honey or maple syrup)
Sugary drinks (sodas, energy drinks, sweetened coffee/tea, and many smoothies)
Some detoxes also eliminate:
Fruit (depending on the plan and personal goals)
Dairy (especially flavored or sweetened varieties)
What You Eat Instead
Most sugar detox meal plans focus on:
Clean protein (chicken, fish, eggs, plant-based options)
Lots of vegetables
Healthy fats (avocado, olive oil, nuts, seeds)
Optional: Some may include complex carbs like legumes, lentils, or whole grains if tolerated well
📝 Pro tip: The best sugar detox plans aren’t about starvation—they’re about stabilizing your blood sugar and giving your body what it actually needs.
Ready to Take the Next Step?
You’ve learned what a sugar detox is, who it’s for, and how to do it the smart way. But before you dive in, ask yourself this:
Do I just need a reset… or do I need to break a deeper pattern with sugar?
👉 If sugar feels like your emotional crutch, start here:
🎯 Take the Emotional Eating Probability Quiz to find out if cravings are rooted in more than just habit—and get your personalized path to freedom from the cycle.
👉 If you’re ready for a sugar detox and want to start strong, go here next:
Struggling with sugar cravings, emotional eating patterns, or just want to feel more in control around food?
📖The Cut the Sugar Hub is your go-to library of expert-backed articles, practical tools, and science-made-simple guides. Whether you’re detoxing, breaking the binge cycle, or learning to balance blood sugar the right way—it’s all here.

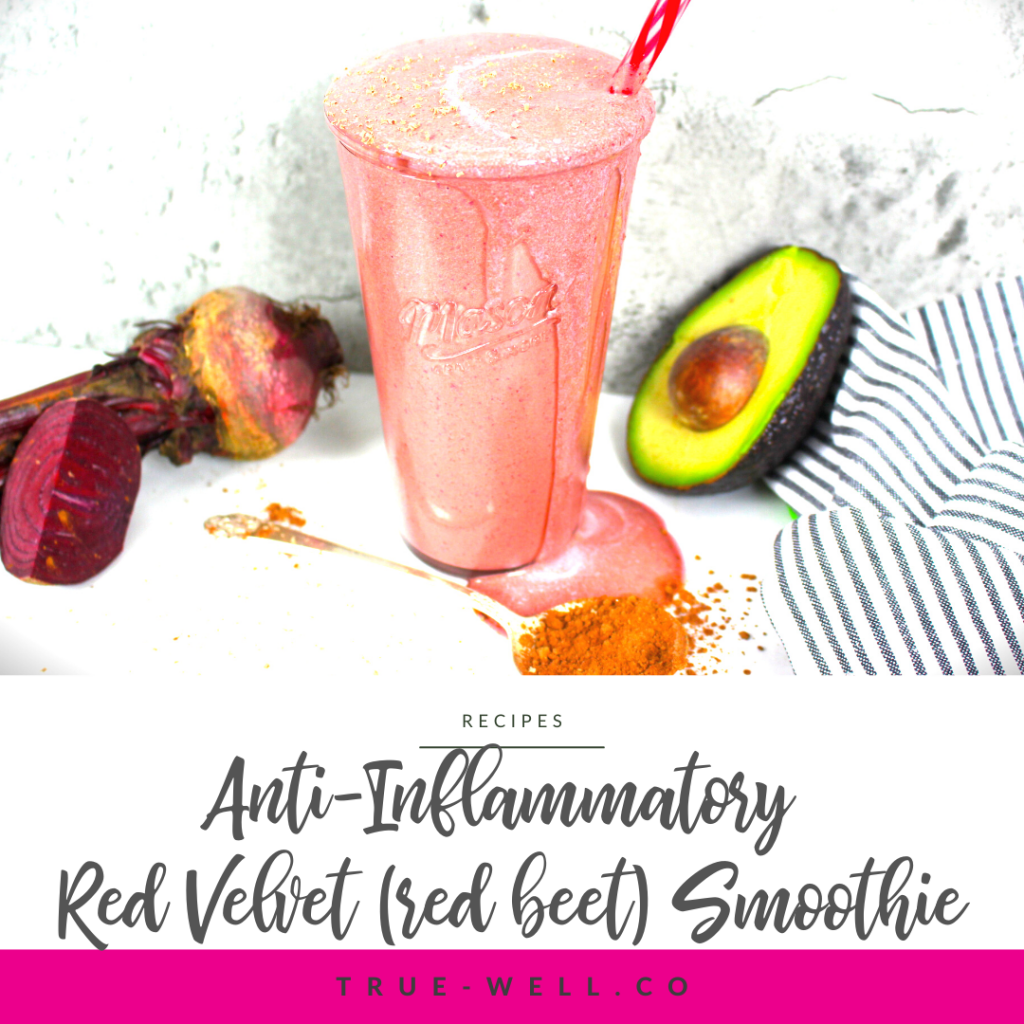
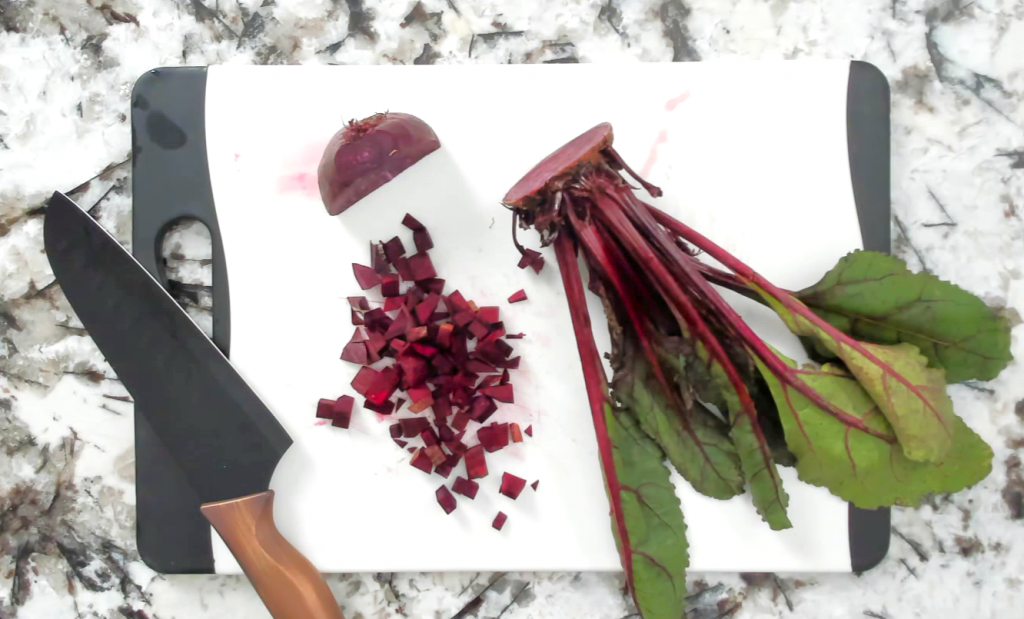


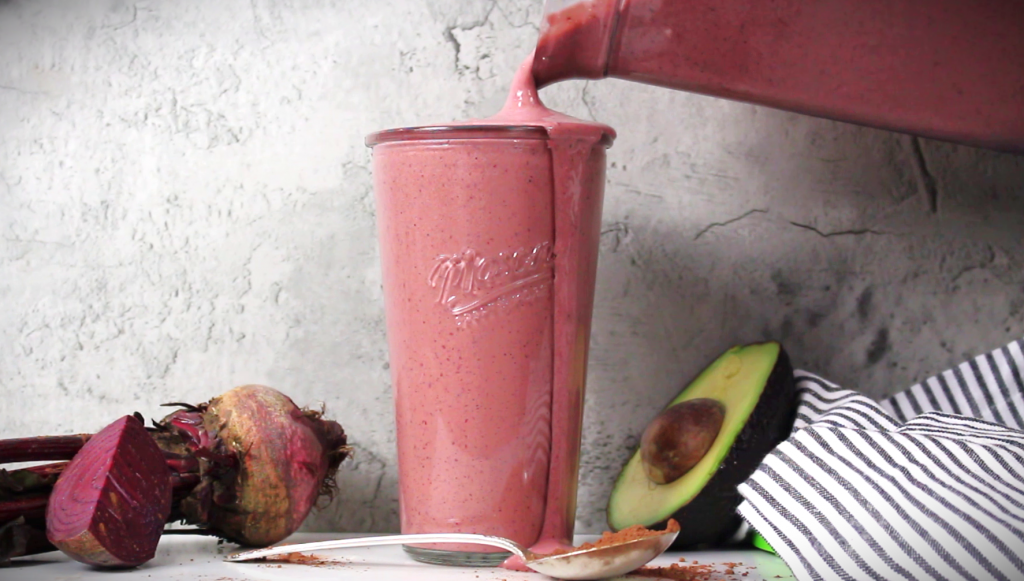


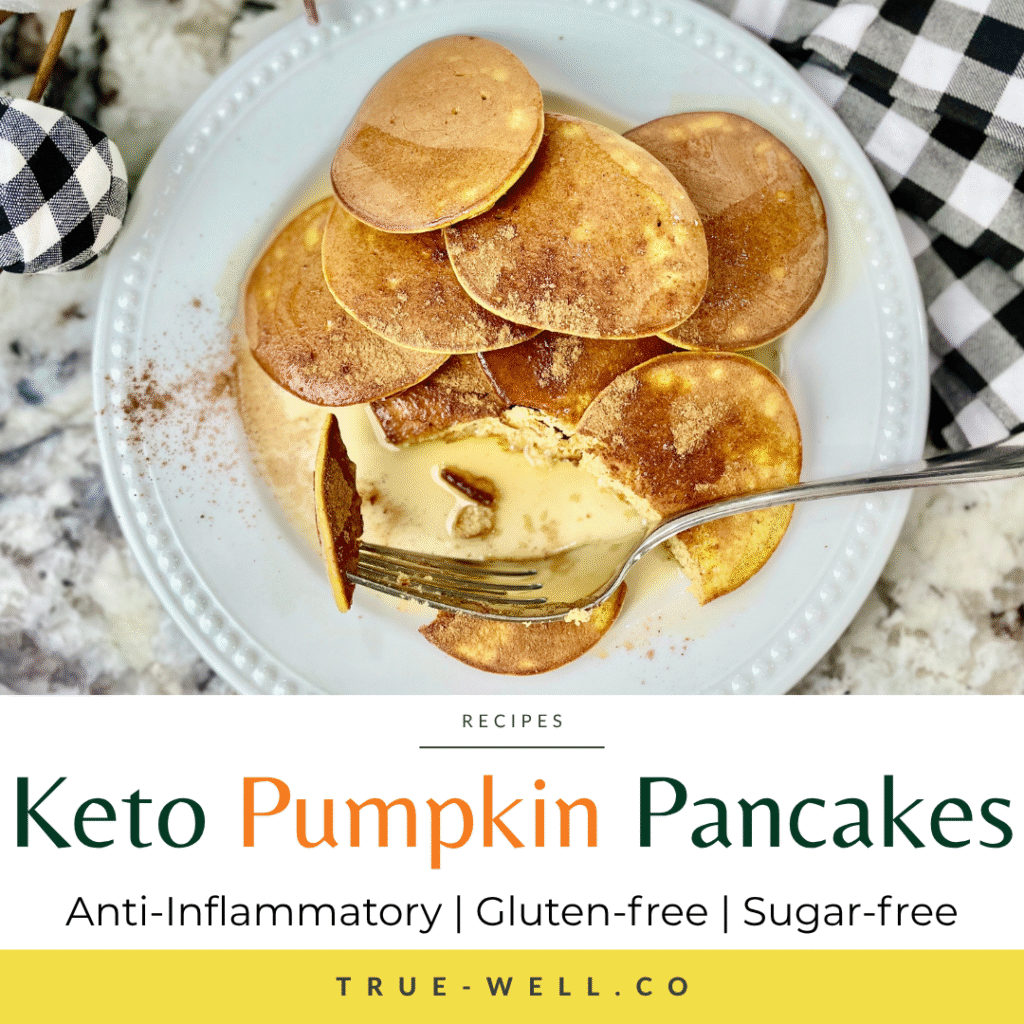
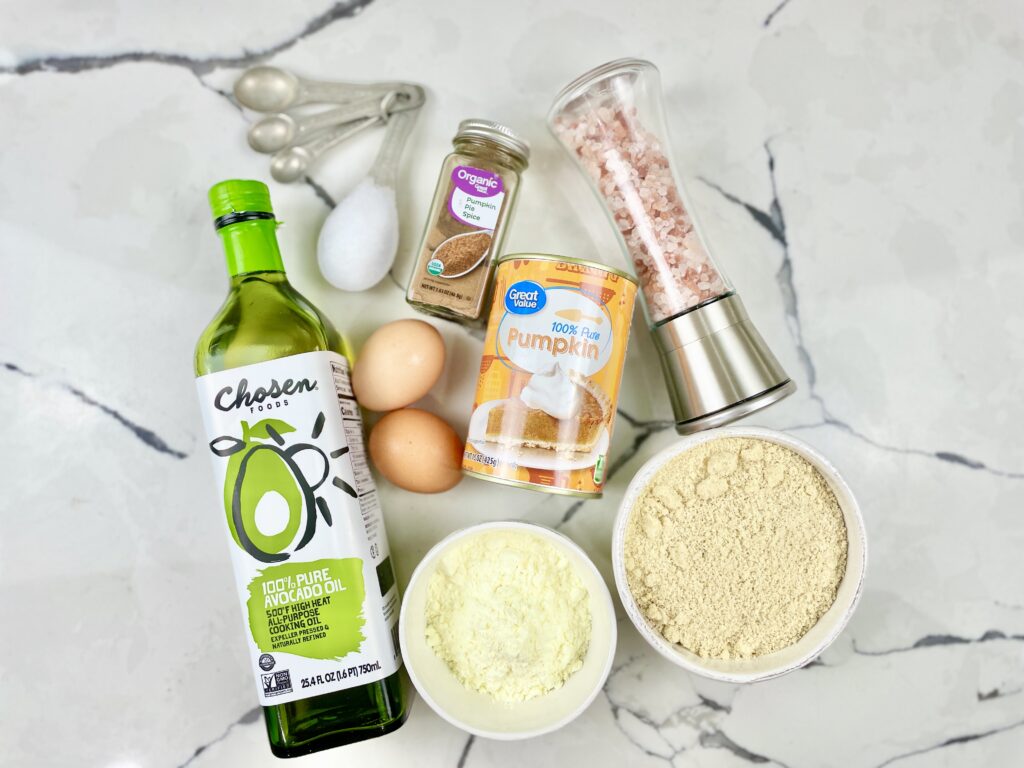
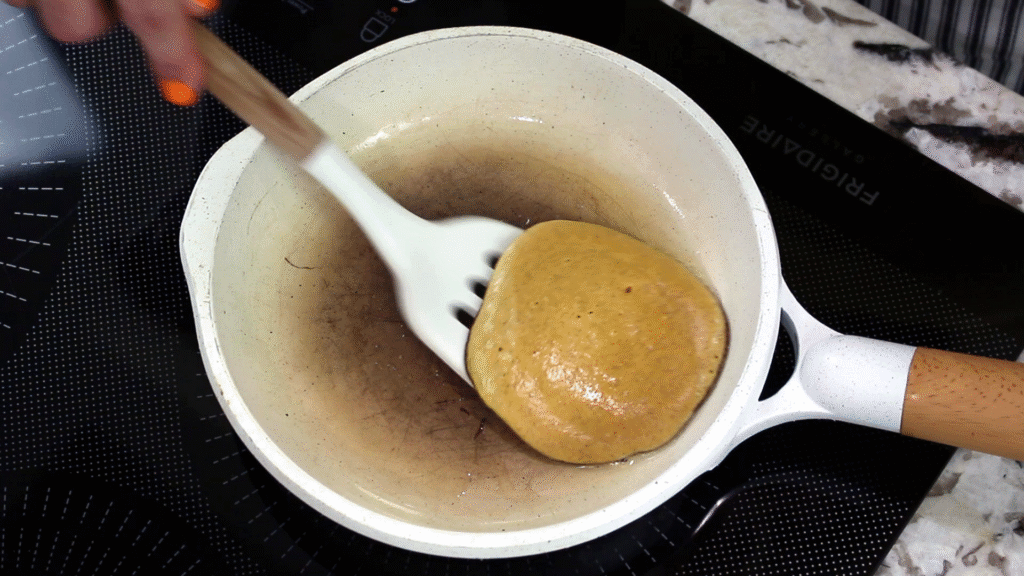

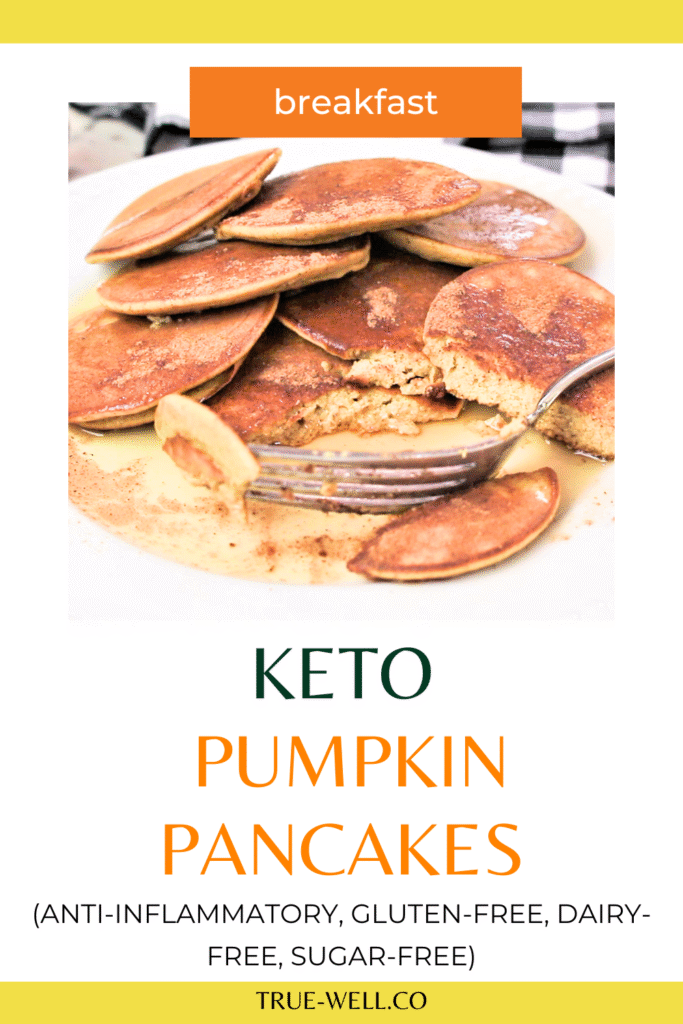


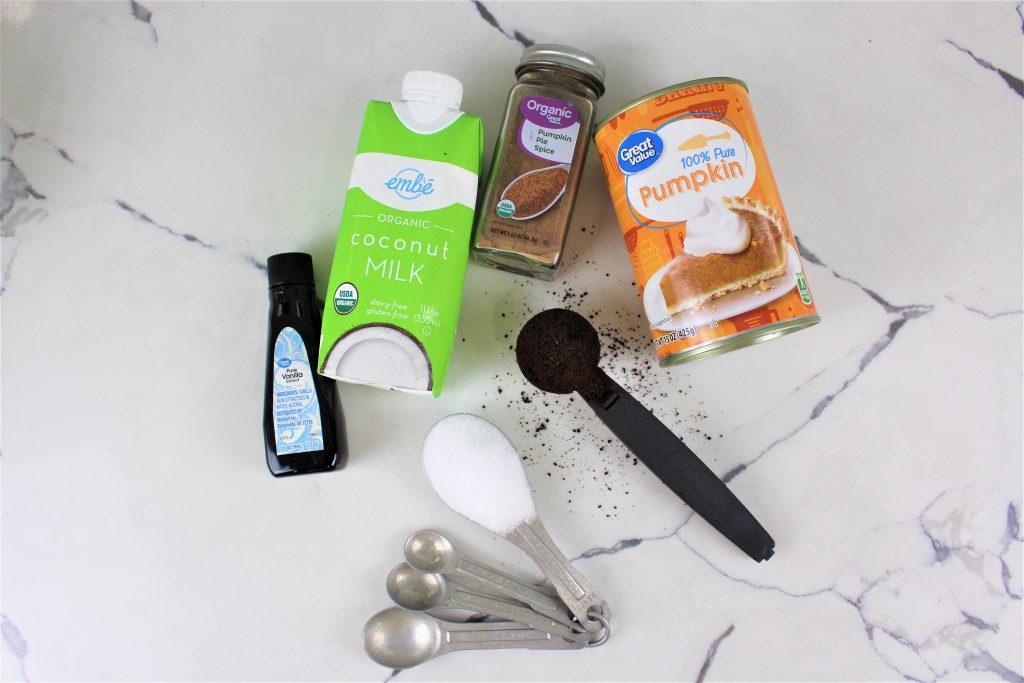
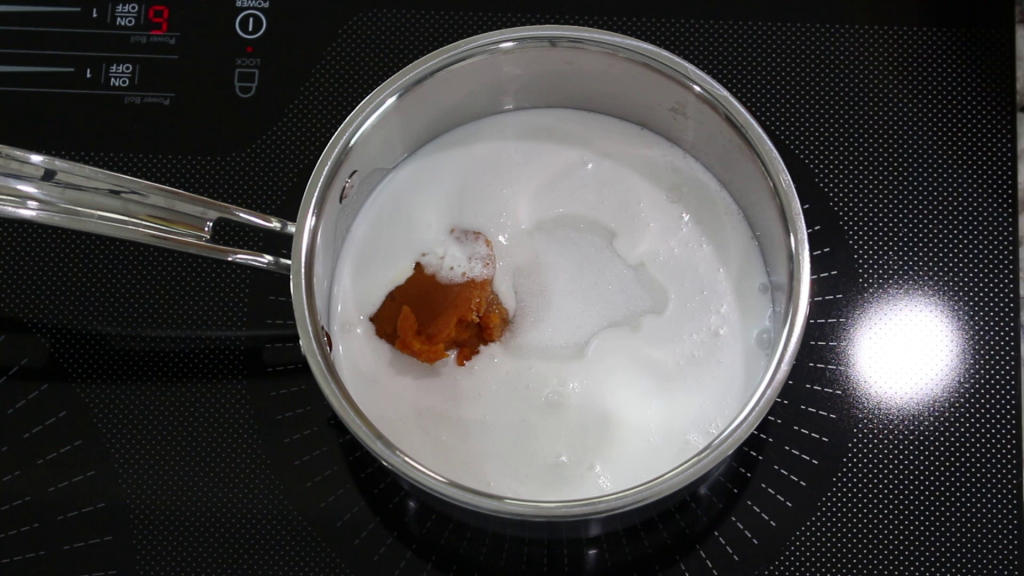


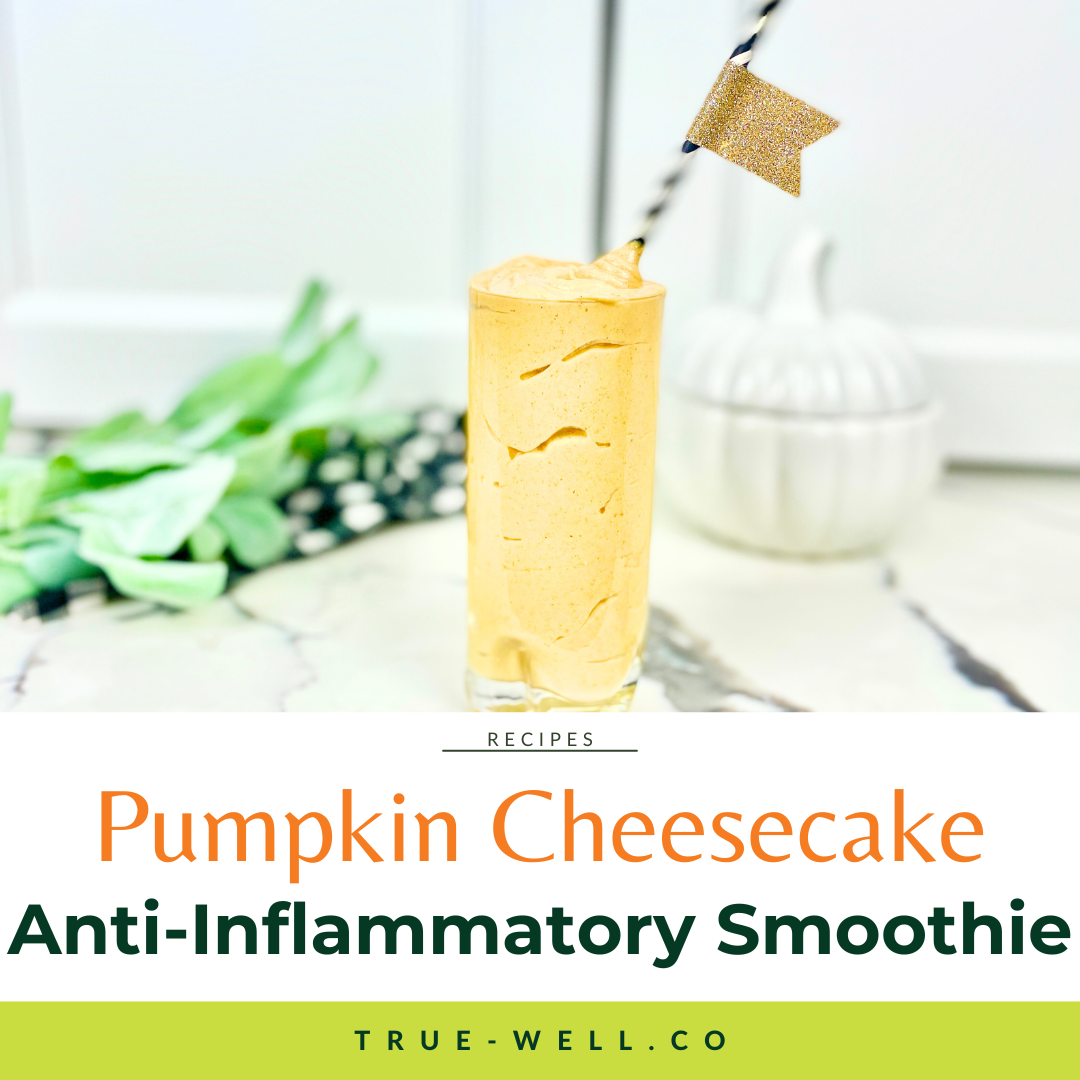
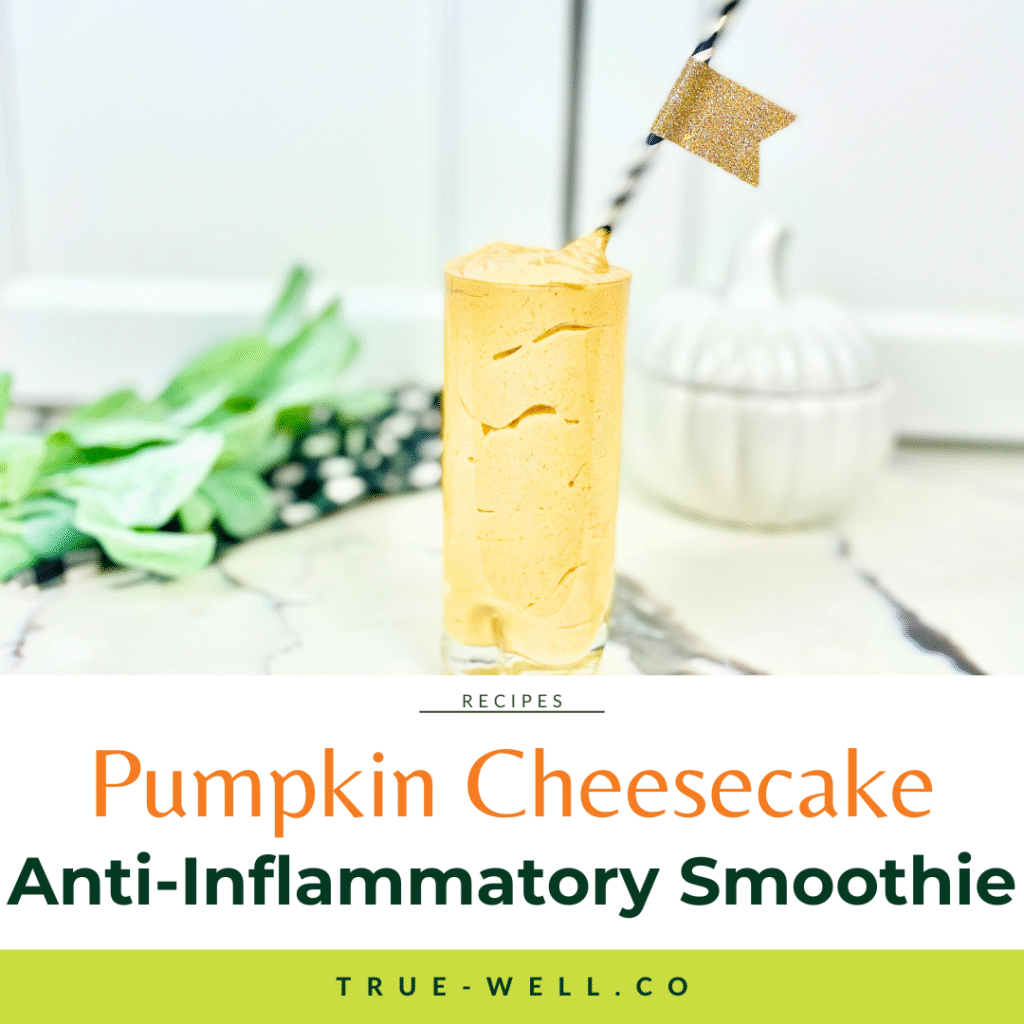


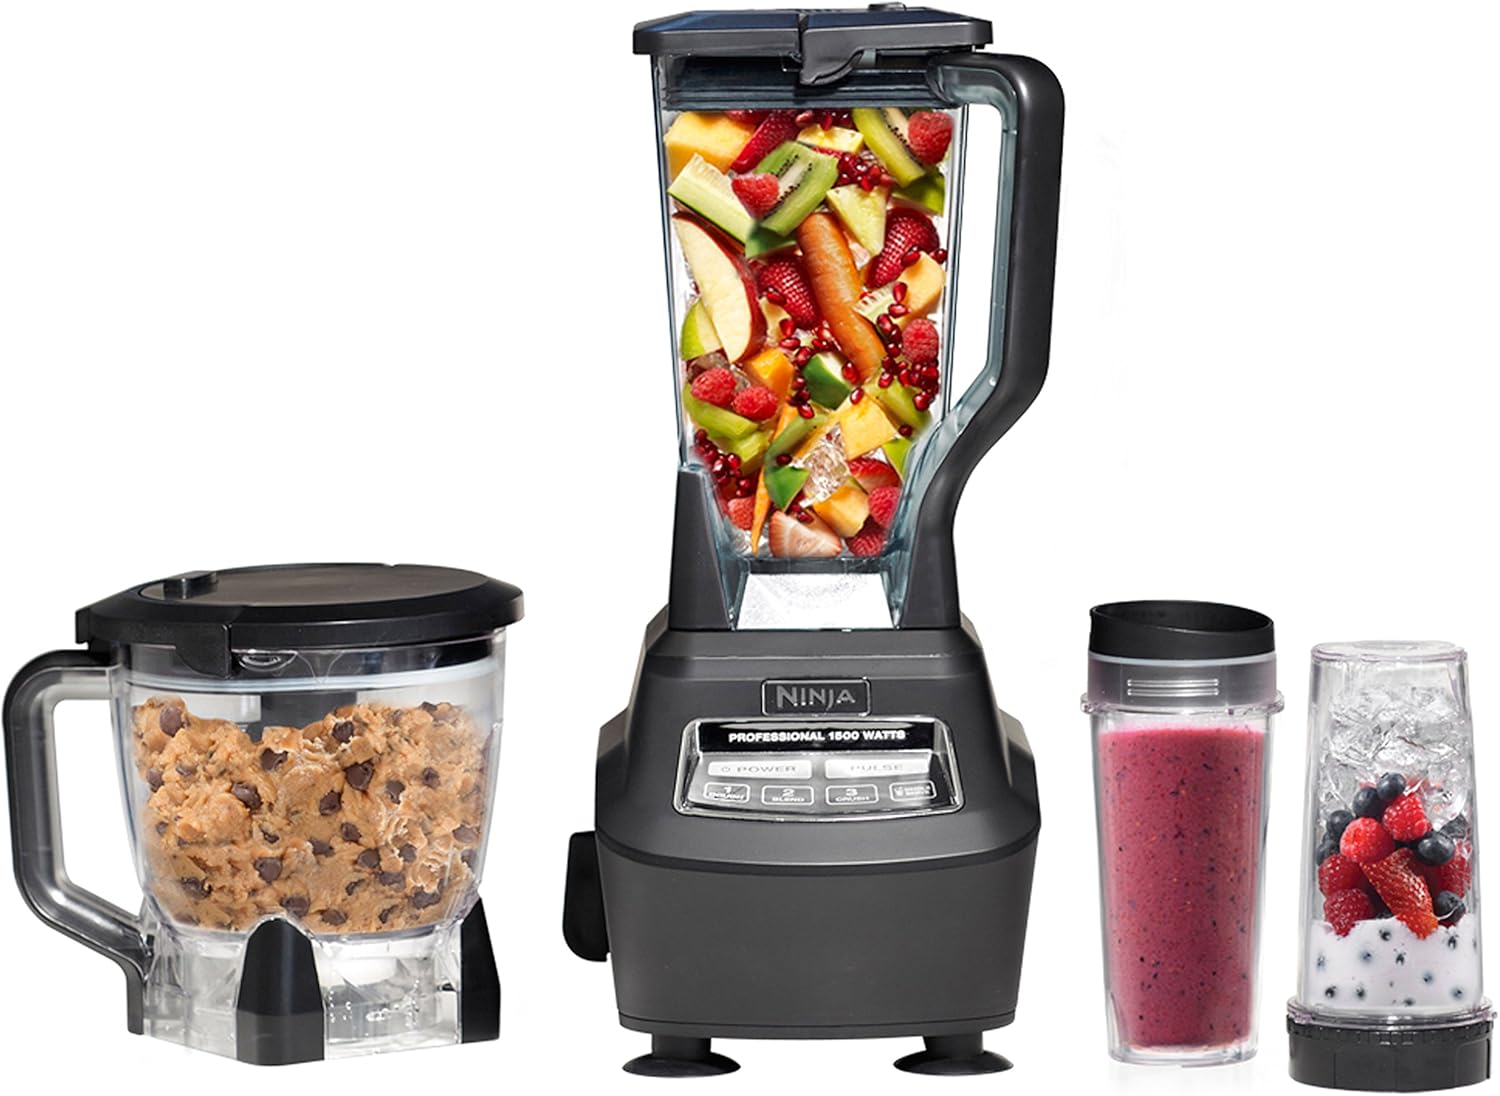


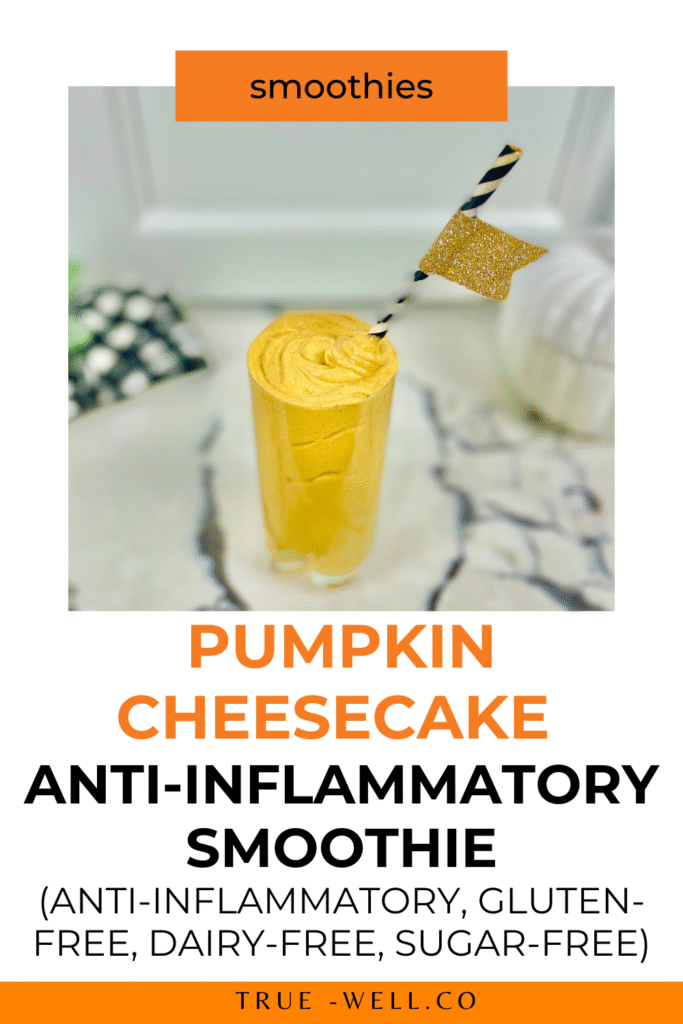
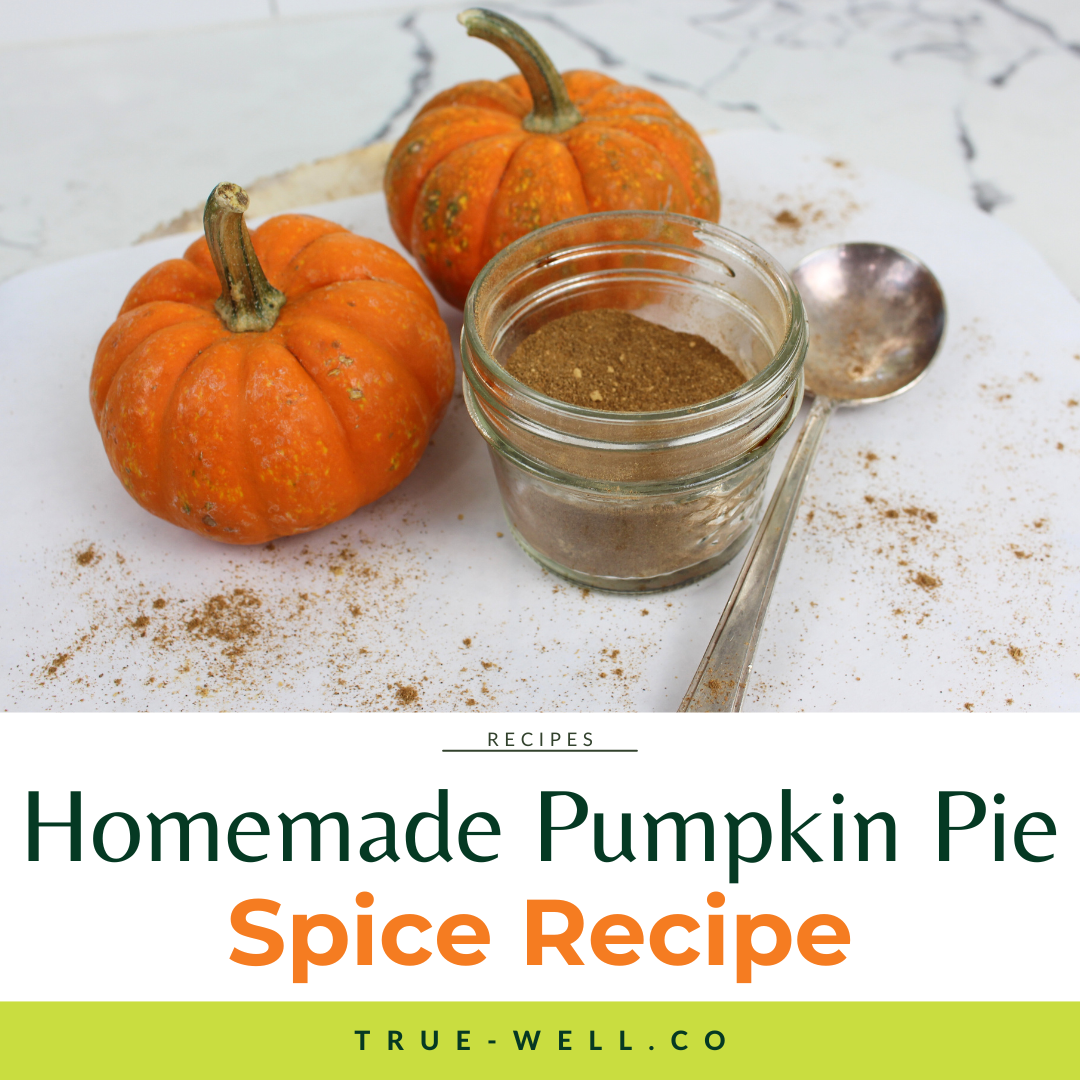
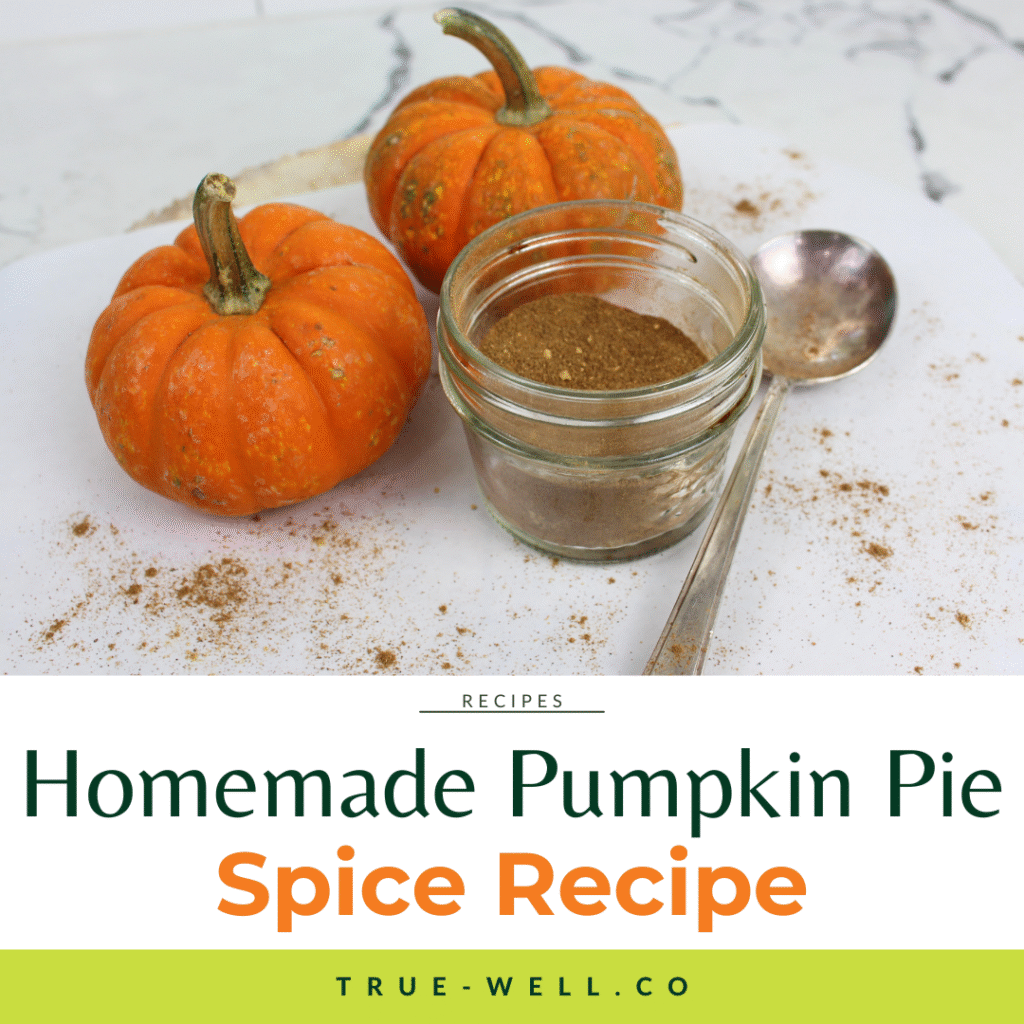
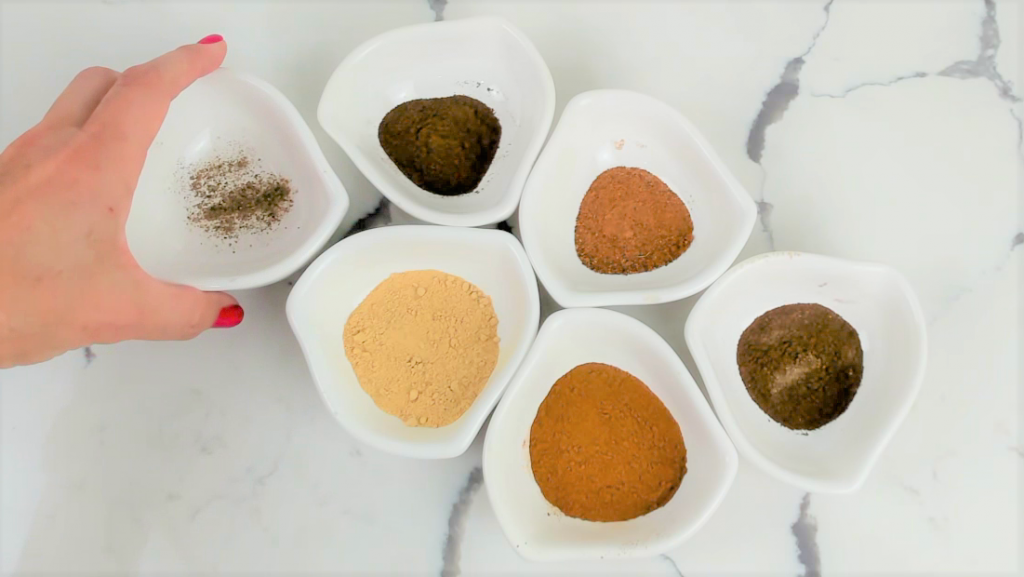


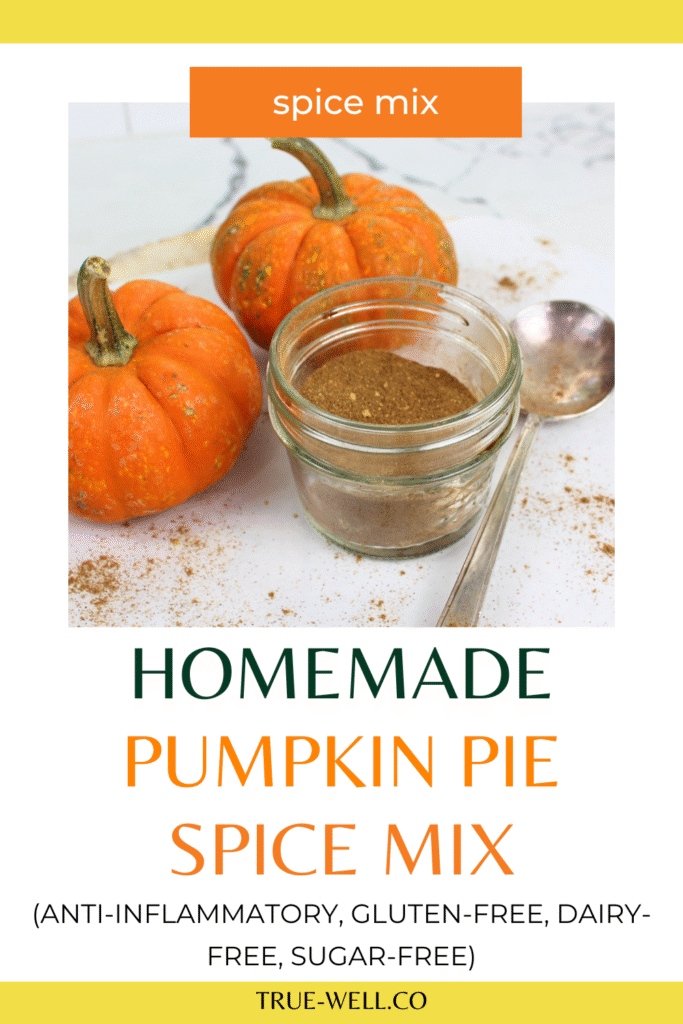

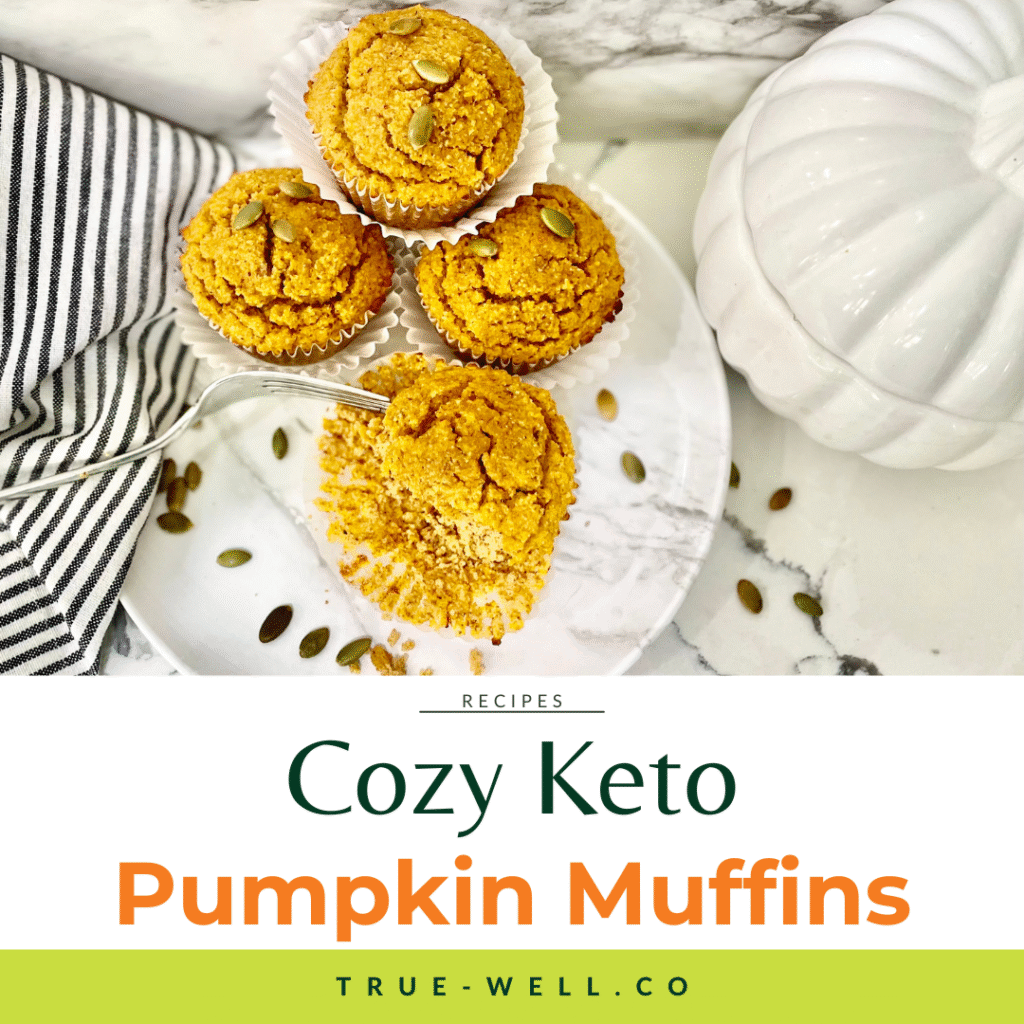


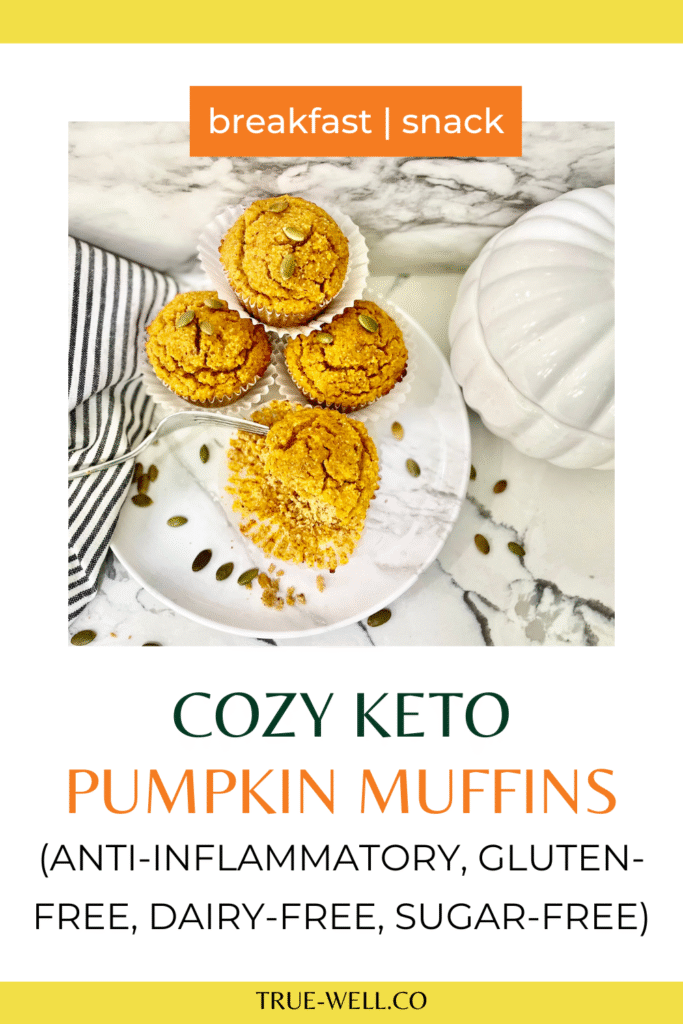
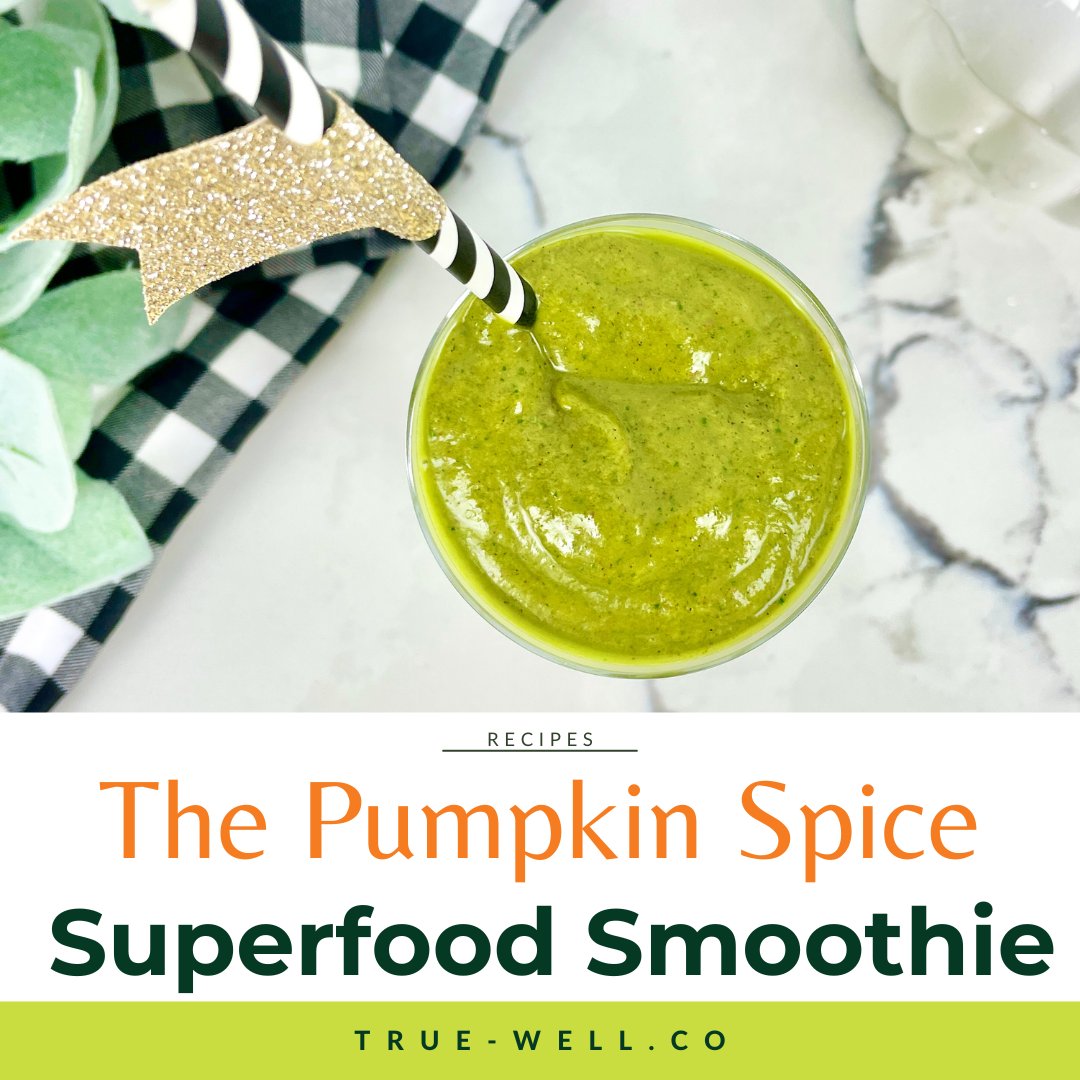

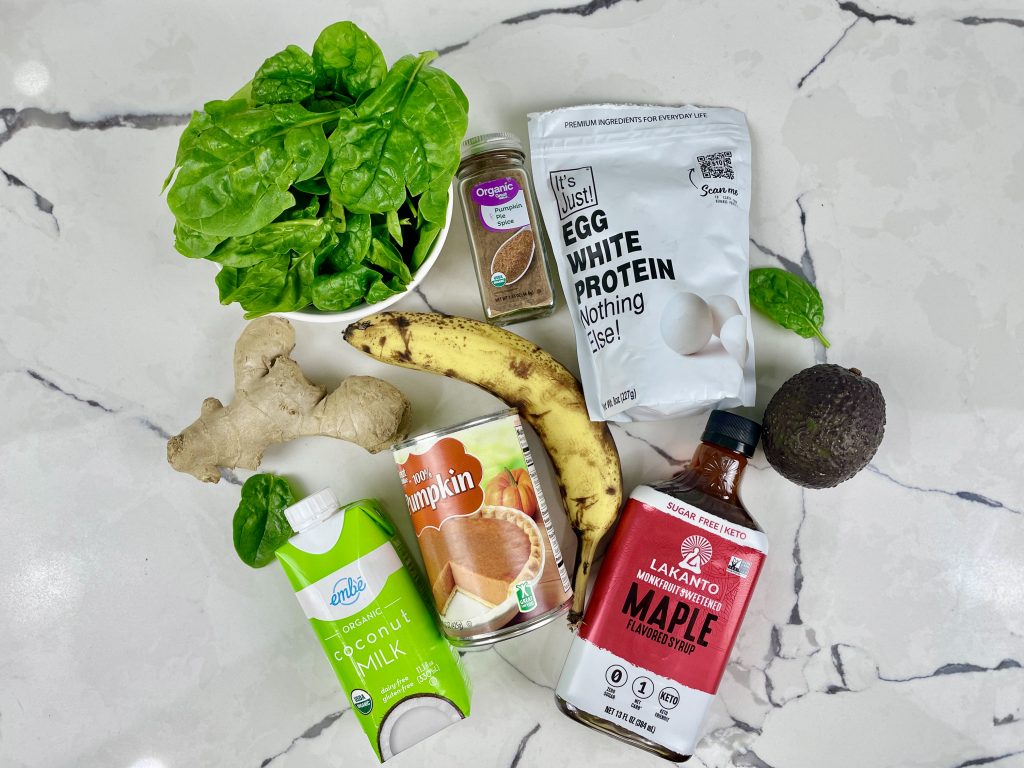

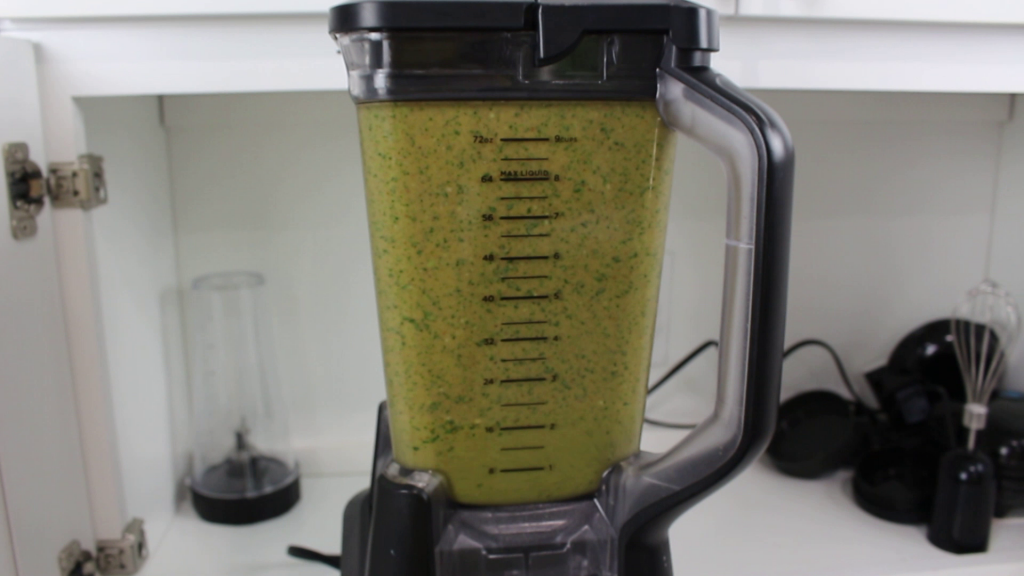
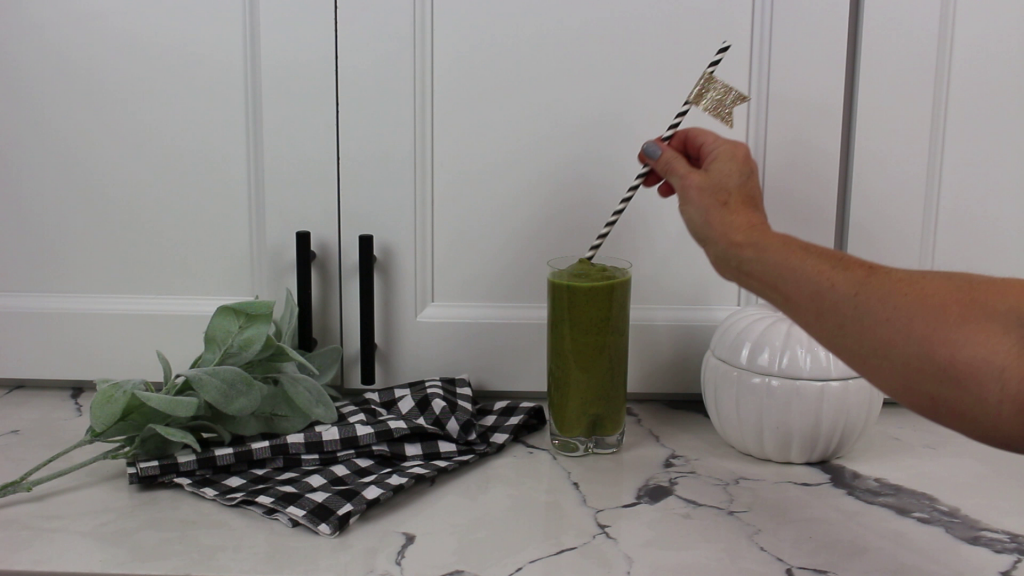
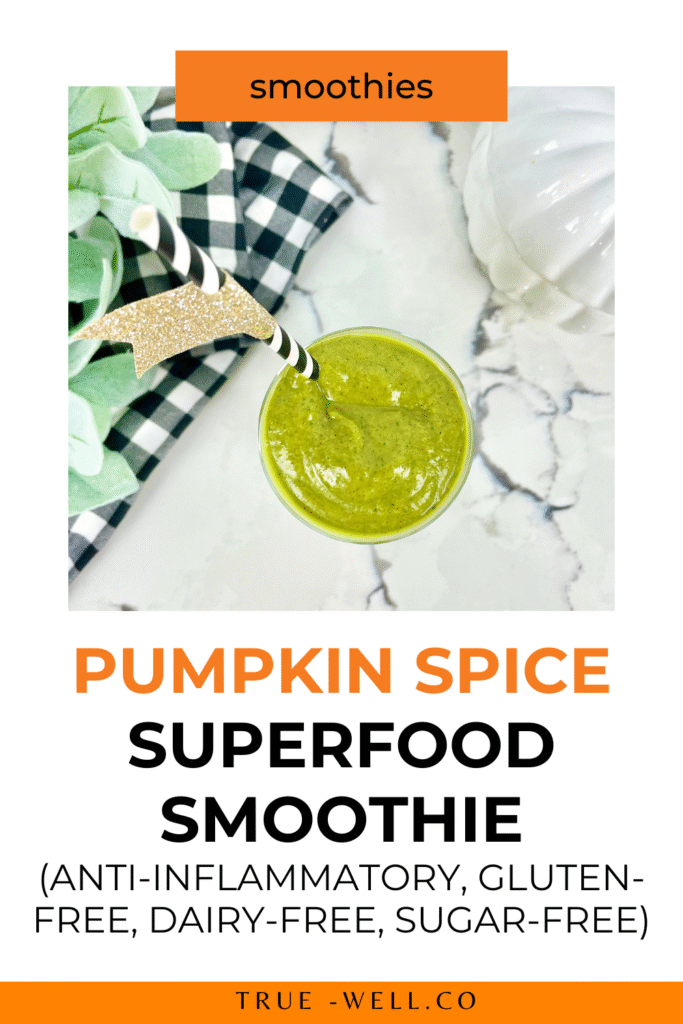


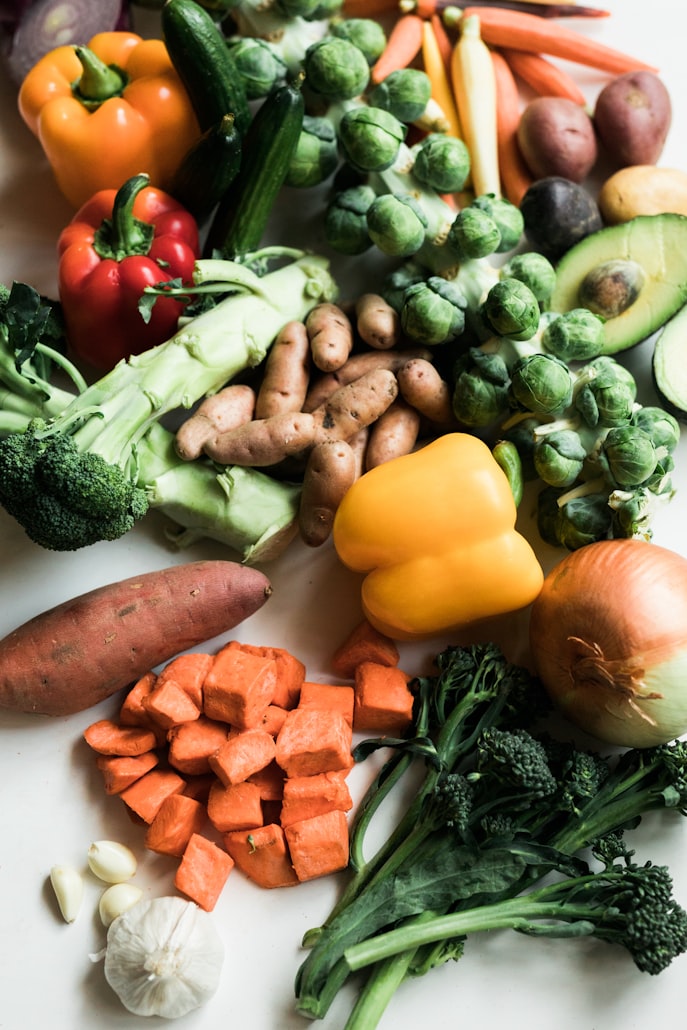
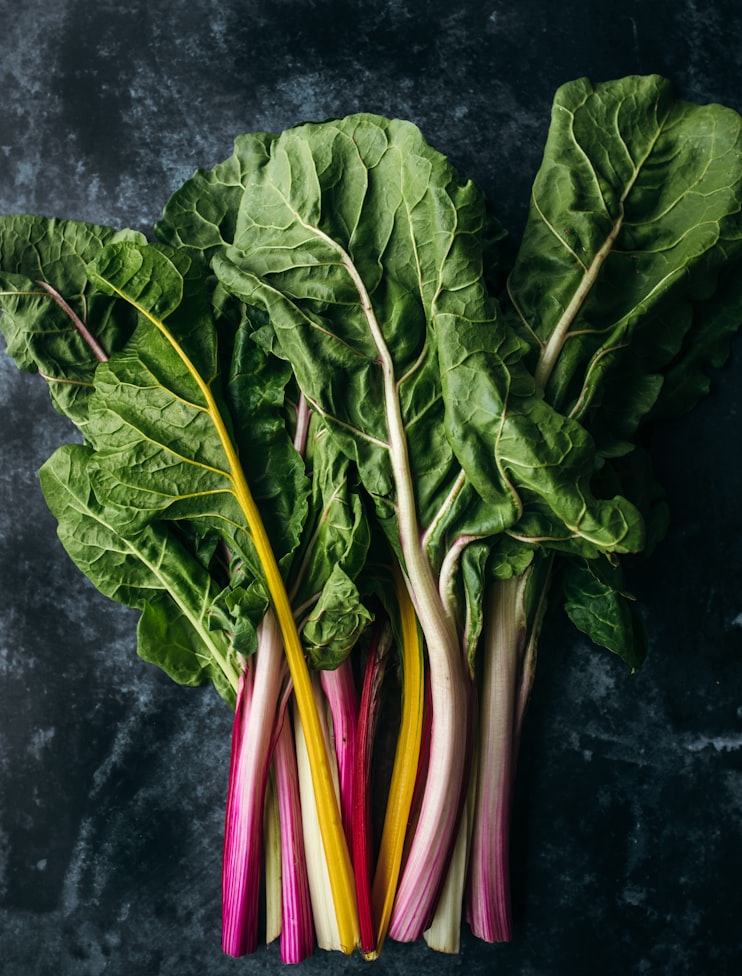
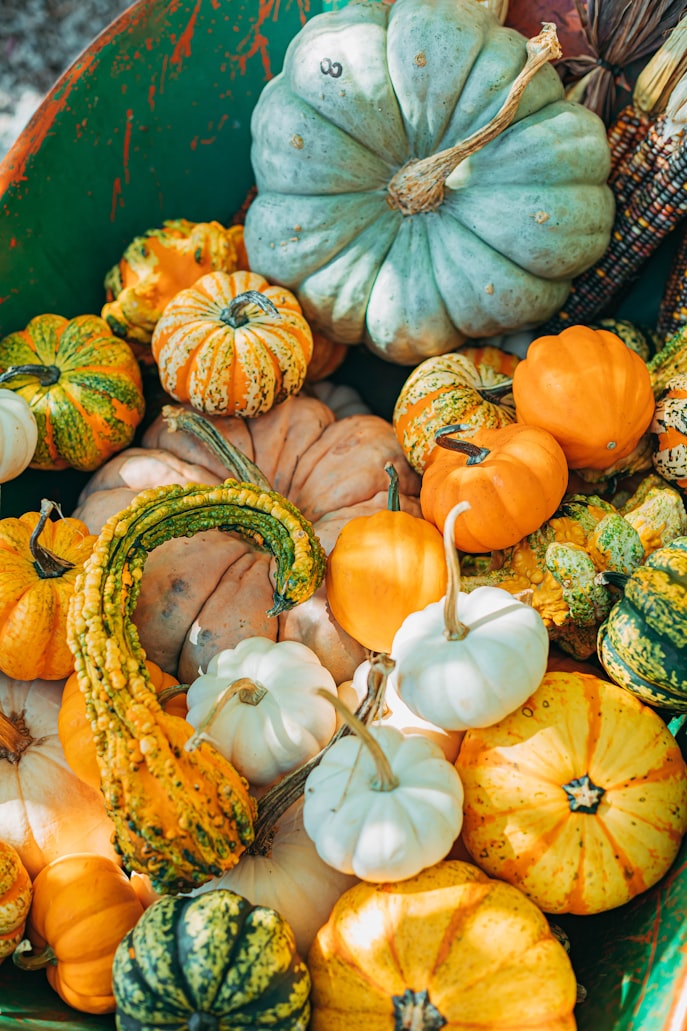
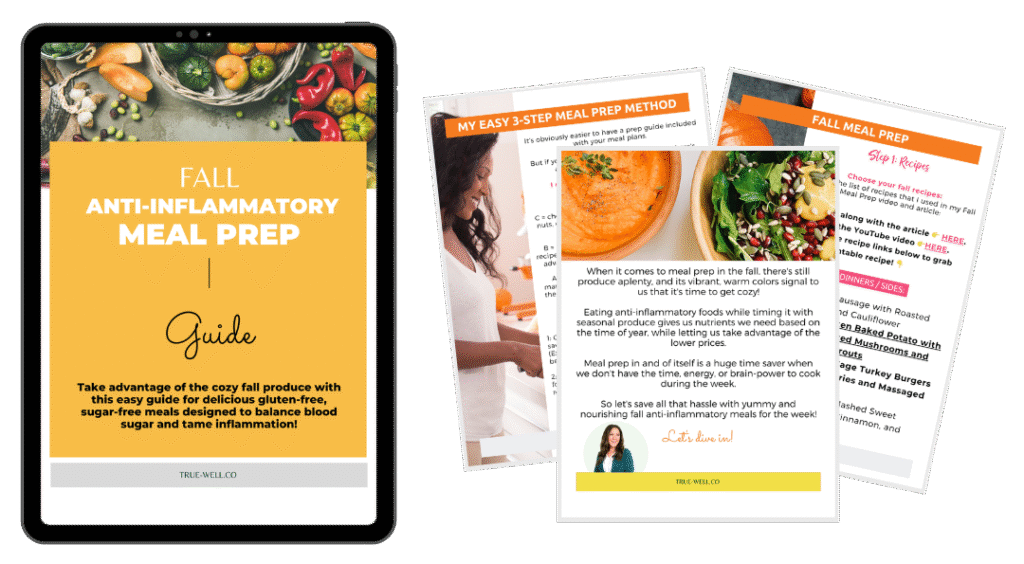
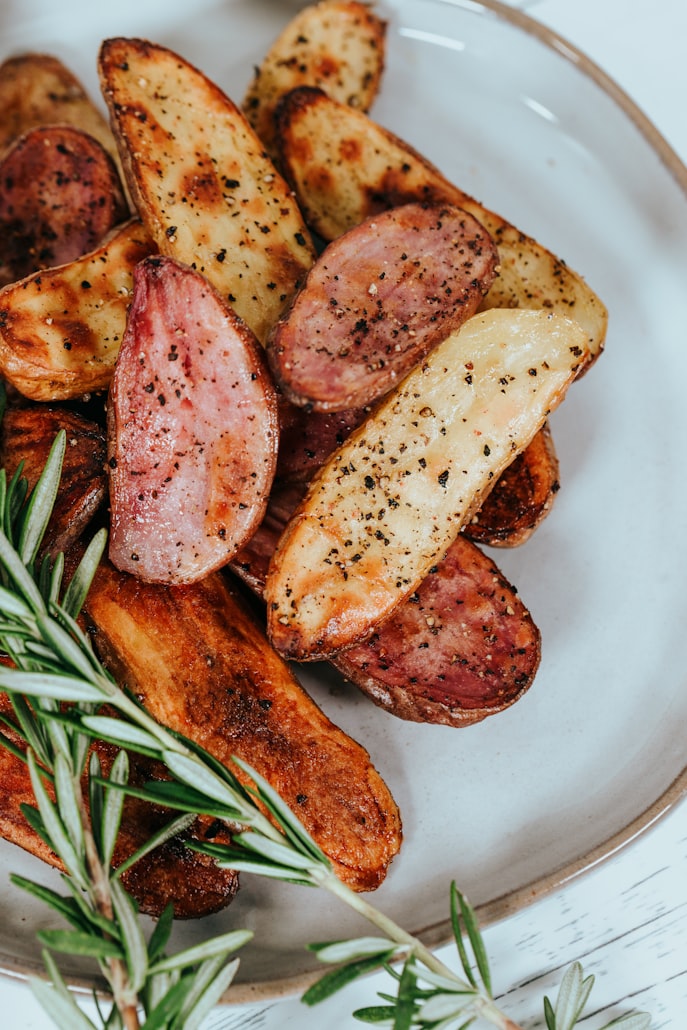


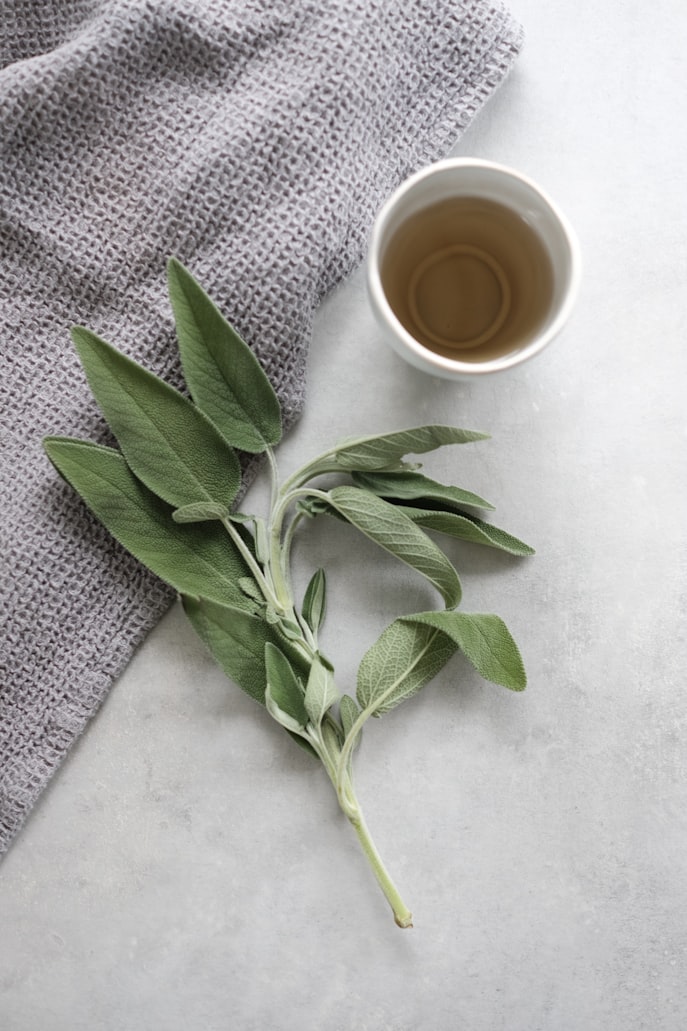

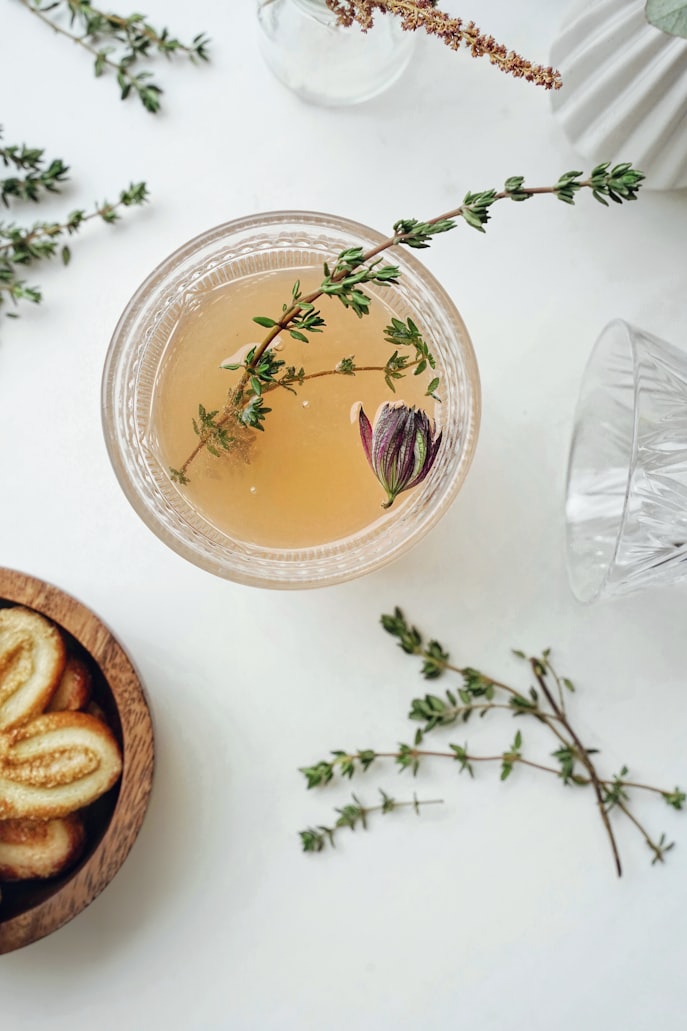
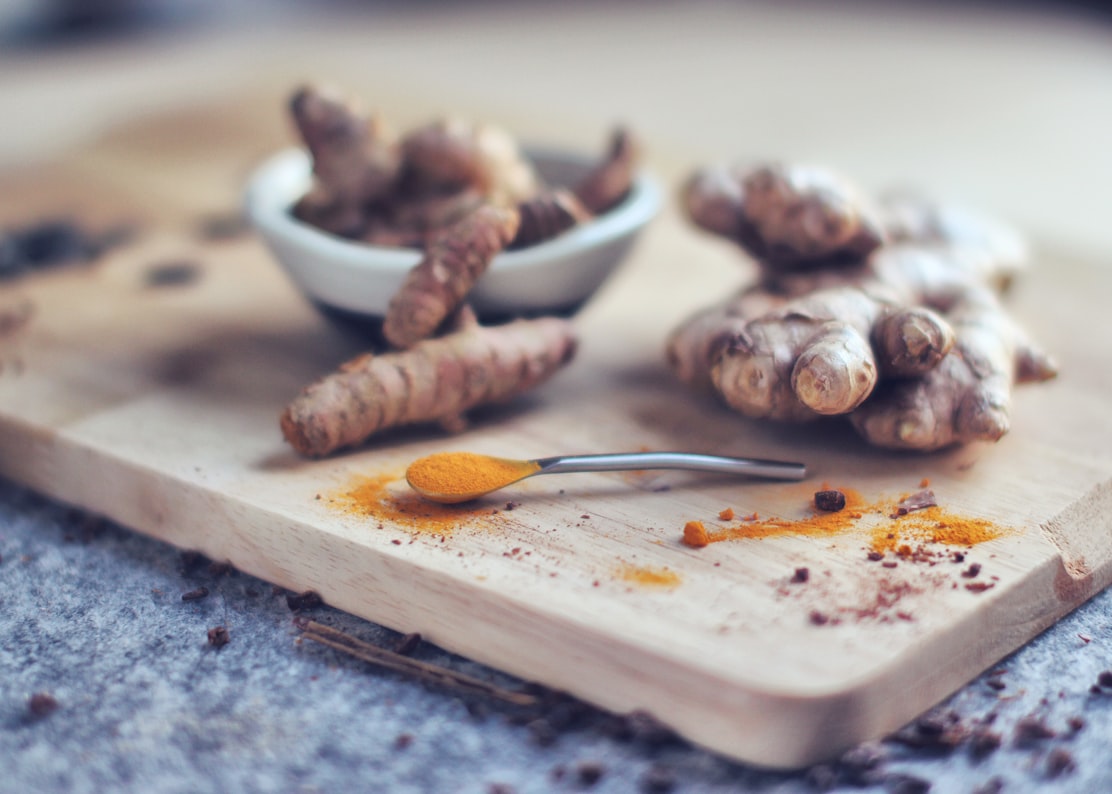
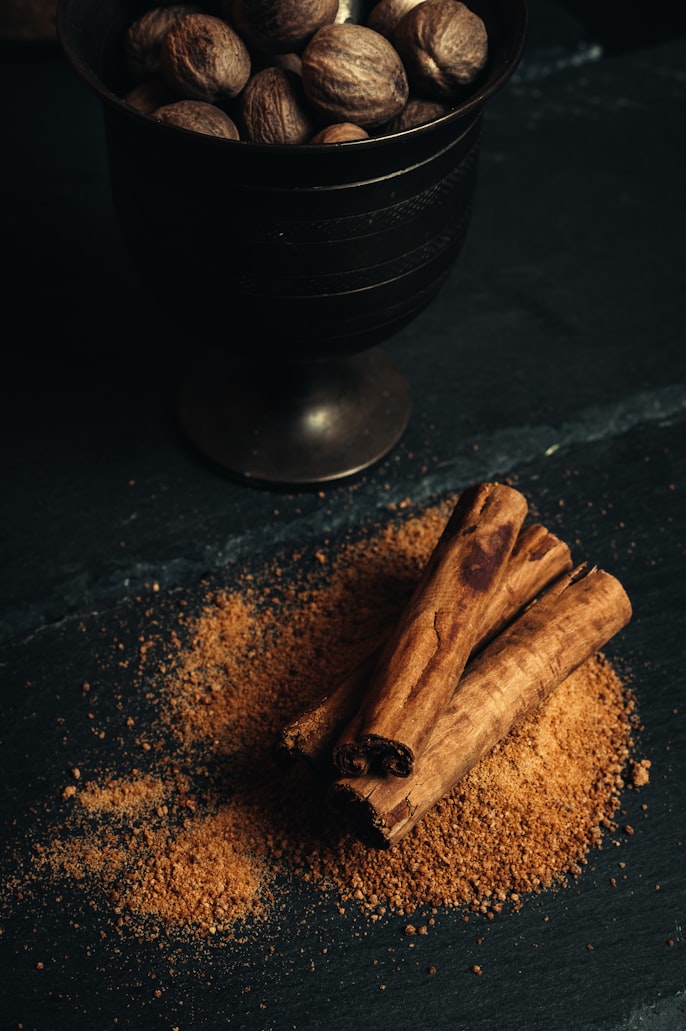
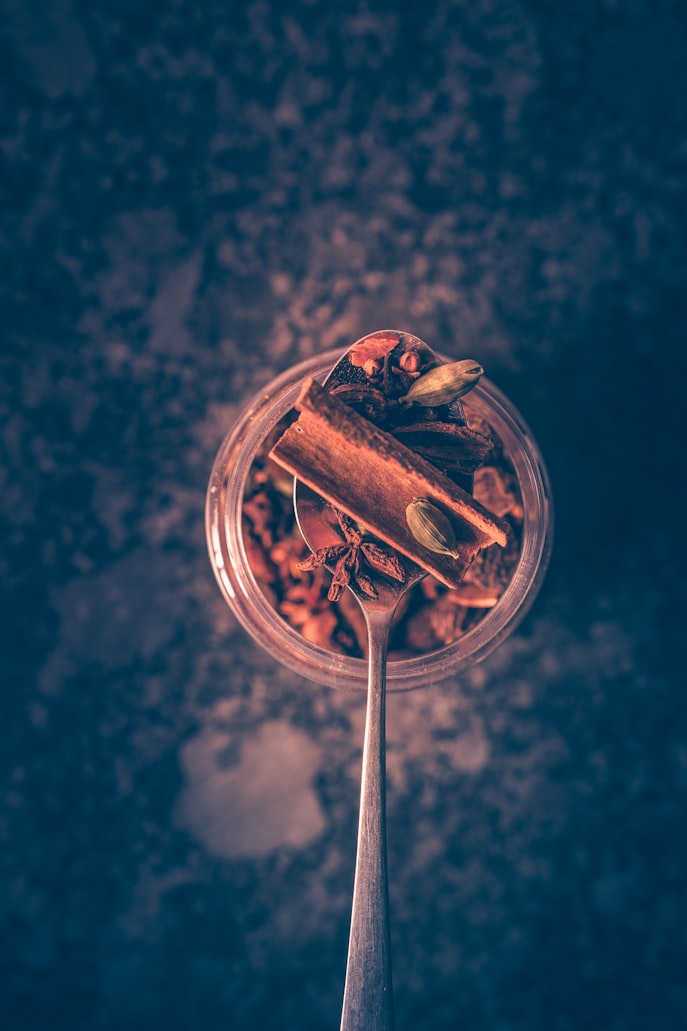
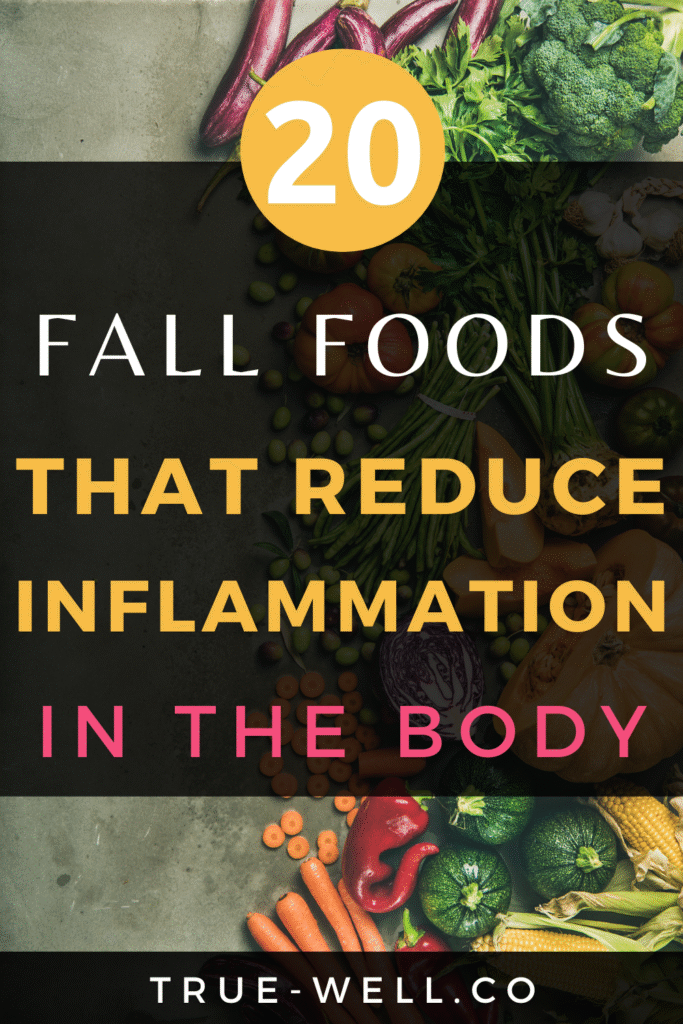


 QUICK-START GUIDE!