Fall anti-inflammatory recipes feature warming, grounding meals that support immunity, digestion, and steady energy as the seasons change. These recipes highlight seasonal vegetables, comforting flavors, and blood sugar–friendly ingredients.
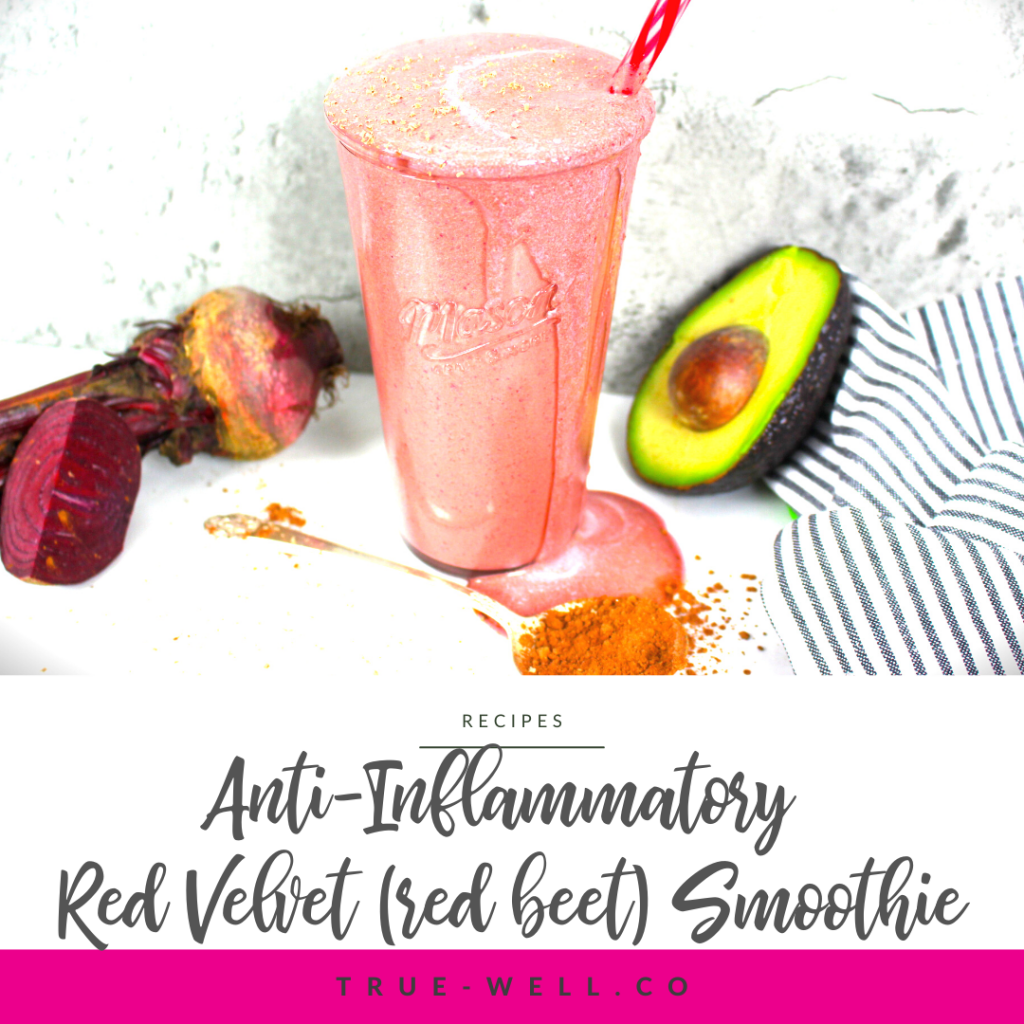
This Red Velvet Smoothie is the BEST red beet smoothie I’ve had, hands down.
Not only is it super easy, it packs in healthy fats plus mega antioxidants with non-peeled red beets. Plus it’s sugar-free, gluten-free, and can be adapted easily to be dairy free.
If you’re all in on healthy anti-inflammatory smoothies that taste like dessert, you HAVE to try this one!
Here’s how to make this divine red velvet smoothie:
You’ll need-
2 cups of milk
2 cups of ice
½ avocado
½ beet
3 TBSP cocoa powder
2 scoops vanilla protein powder (non-sugar sweetened)
2 TBSP granular sweetener
Directions:
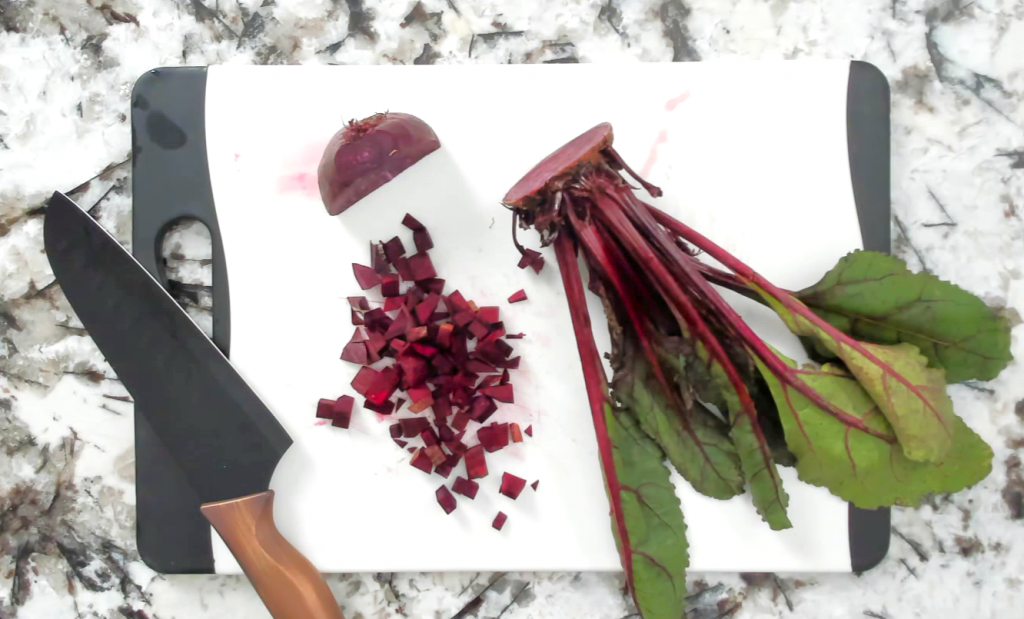
Cut up the beet
So the first thing we’re gonna do is wash the beet really well (these tend to still have a lot of dirt on them) and then cut up the beet.
You can peel the beet if you want, but studies have shown that good bacteria from unpeeled vegetables can help boost the immune system. So I opt NOT to peel mine.
Then cut it up really small. If you don’t have a high-powered blender, boil them first for 20-40 minutes to get them softer and then let them cool.
Those can go right into the blender.
And don’t throw the greens away! You can chop them up and use them in dishes like frittatas, in salads, and even nourish bowls.
Avocado
Cut open your avocado and spoon out ½ of it into the blender.
If you’re not using the other half, seal it in a snack-size baggie and store it in the fridge with the seed in it.
Milk
Add your milk—I say use full-fat whole if you tolerate dairy, if not, choose an unsweetened dairy-free version
Cocoa Powder
Add your Cocoa powder
Vanilla Protein Powder
Make sure you use vanilla flavored protein powder, but one that is not sweetened with sugar. Best bets are sweetened with stevia, monk fruit, or allulose.
Sweetener
Add your natural, zero-calorie sweetener – I prefer stevia, monk fruit, erythritol, or allulose.
Remember, per anti-inflammatory guidelines, we’re steering clear of any sugar, but also artificial sweeteners.
Ice
Add your Ice
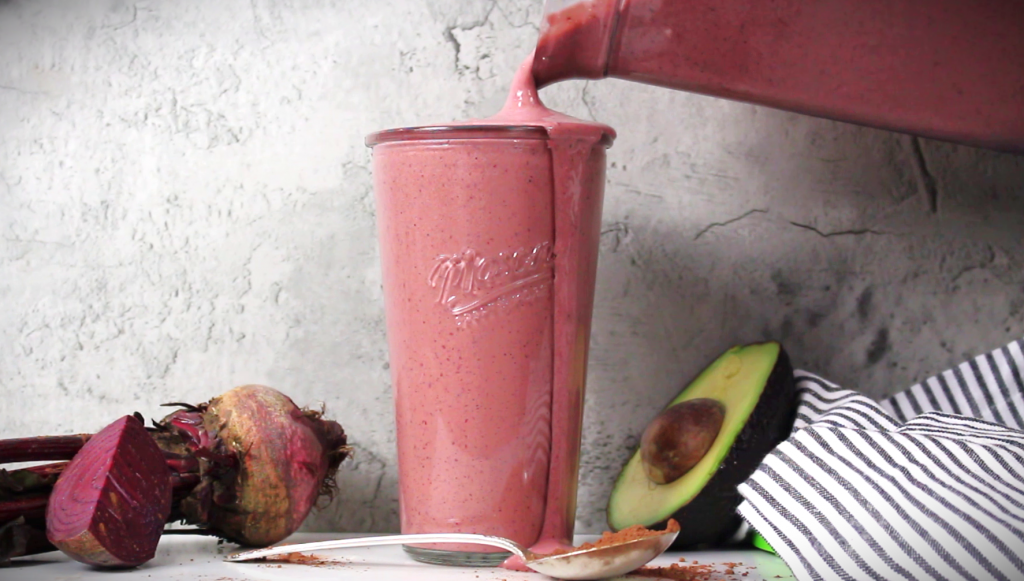
Blend
Blend until it’s super smooth, keeping an eye on the beet chunks.
Tips
Now if you’re watching your blood sugar levels, a good trick is to add in more protein.
Two ways to add a boost of protein to this would be to:
sub in ½ cup of Greek yogurt for ½ of the milk, or
This Red Velvet Smoothie is super easy and packs in healthy fats plus mega antioxidants with red beets. If you’re all in on healthy anti inflammatory smoothies that taste like dessert, you’ll love this red beet smoothie!
Author:Laura Brigance, MS, CHC
Prep Time:5
Total Time:5 minutes
Yield:21x
Ingredients
Scale
2 cups of milk
2 cups of ice
1/2 avocado
1/2 beet
3 TBSP cocoa powder
2 scoops Vanilla protein powder (non-sugar sweetened)
2 TBSP granular sweetener (2-4 TBSP, to taste)
Instructions
Wash the beet really well and cut it up into super small chunks. If you don’t have a high powered blender, you may want to boil the beet for 20-40 minutes to soften it up. Add the beet to the blender.
Cut open your avocado and spoon out ½ of it into the blender.
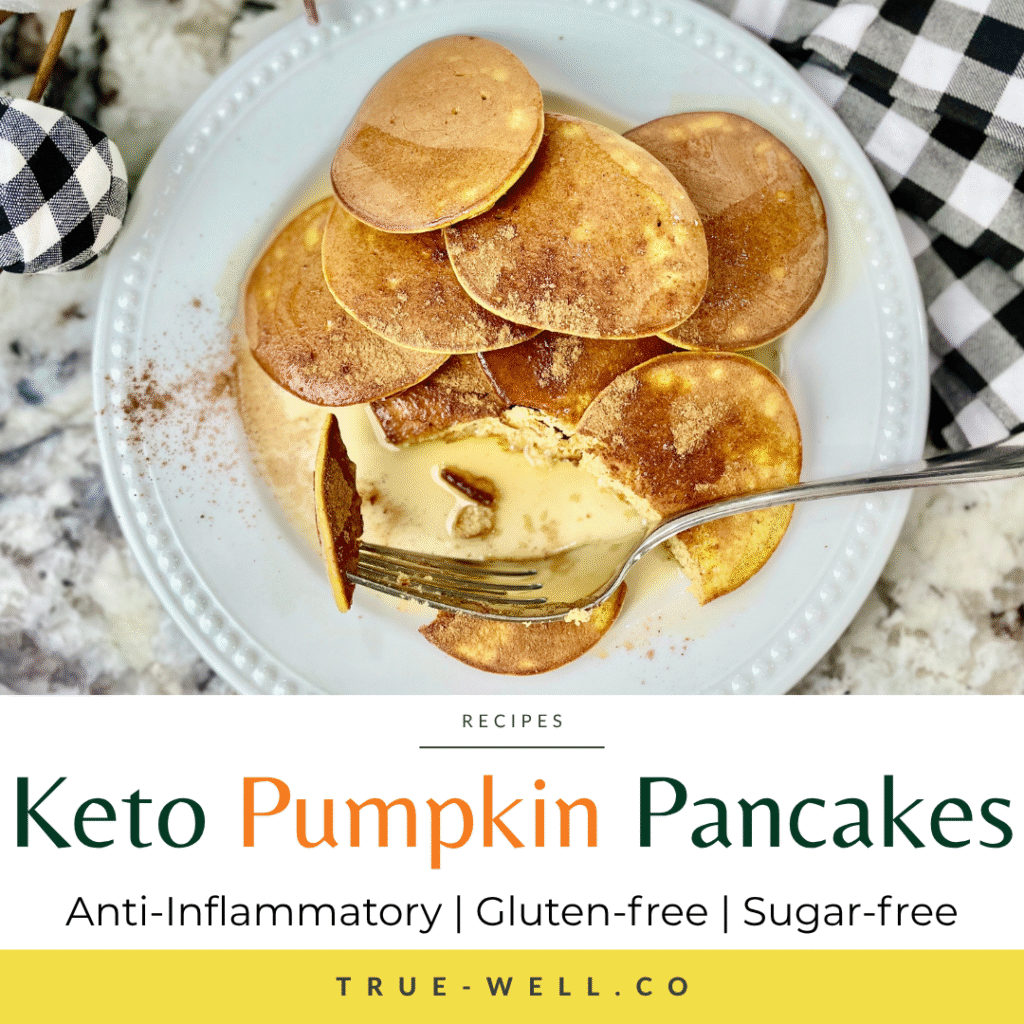
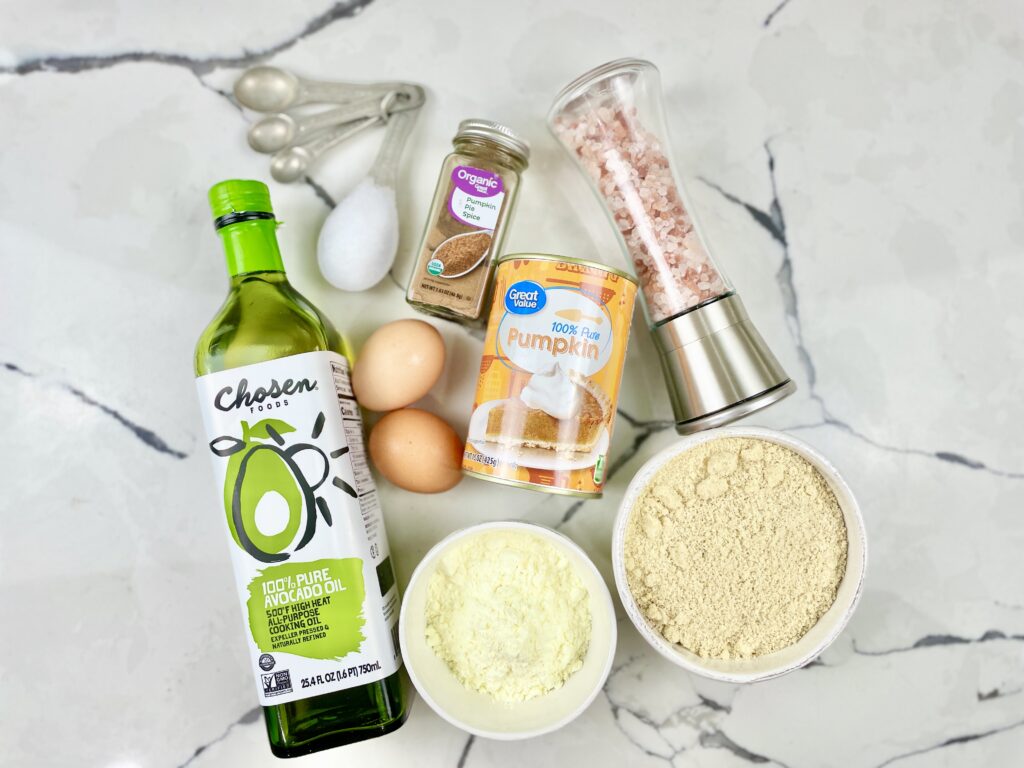
Cooking breakfast for everyone on the weekends is one of my husband’s favorite things to do. And this is seriously one of my favorite anti inflammatory breakfasts for fall.
Because how can you beat pancakes and pumpkin?
And since we’re on a mission to control our blood sugar levels, we’re doing it with an anti-inflammatory keto version of pumpkin pancakes that you’re gonna love!
One thing I wanna highlight for these keto pumpkin pancakes is that they’ve got a good amount of protein in them.
What we’ve found in our house is that the kids tend to veer more towards carbs in the morning, so if I use a higher protein recipe, they’re getting a better balanced meal that leads to less blood sugar spikes (and crashes) and keeps us full longer.
But the norm to accomplish this is to use a protein powder. Instead, I like to use egg white powder for that extra protein. (This trick also keeps it dairy-free.)
One thing to note is that you can store these in the fridge if you have leftovers, and I’ve even frozen them to have for anti-inflammatory breakfast and snacks!
Eating for your health shouldn’t mean skipping breakfast or flavor. These pumpkin pancakes prove you can do both — deliciously. My free Anti-Inflammatory Diet Quick-Start Guide shows you exactly how to get started with blood-sugar-balancing meals like this one. ✨ Download your free Quick-Start Guide and make your mornings both cozy and anti-inflammatory.
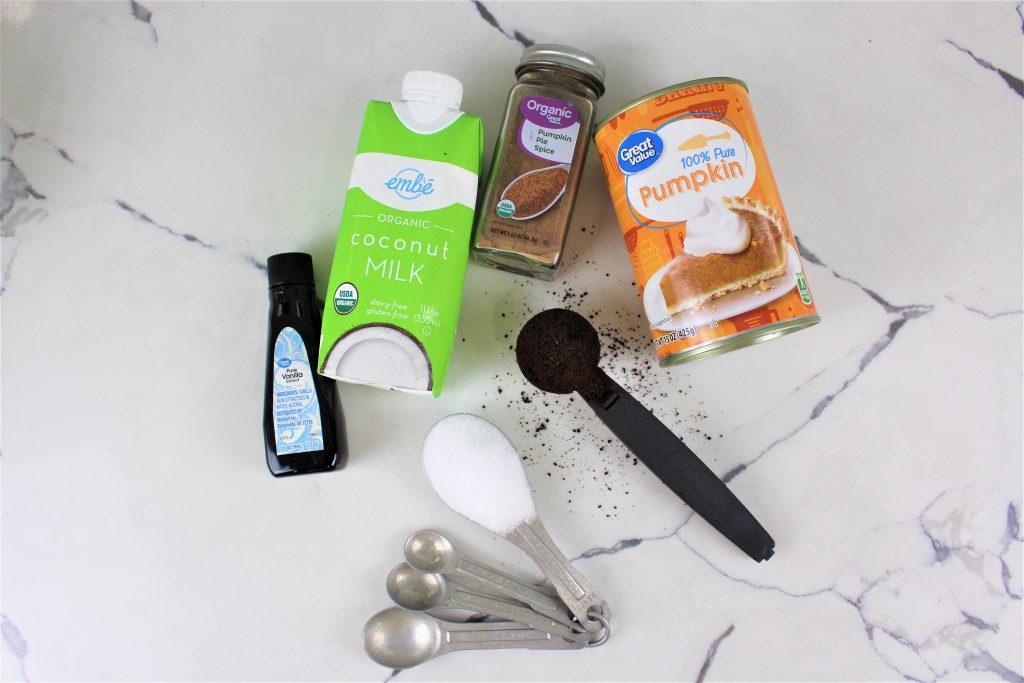
Pumpkin puree, coffee, erythritol or other granulated natural sugar-free sweetener, vanilla extract, unsweetened non-dairy milk of your choice, and pumpkin pie spice.
You don’t have to give up your favorite fall latte to stay anti-inflammatory — you just need the right ingredients. My free Anti-Inflammatory Diet Quick-Start Guide shows you exactly how to swap out sneaky inflammatory foods for blood-sugar-friendly ones (like this version of your PSL!). 🍂 Grab your free Quick-Start Guide and learn how to make every cozy craving work for your health.
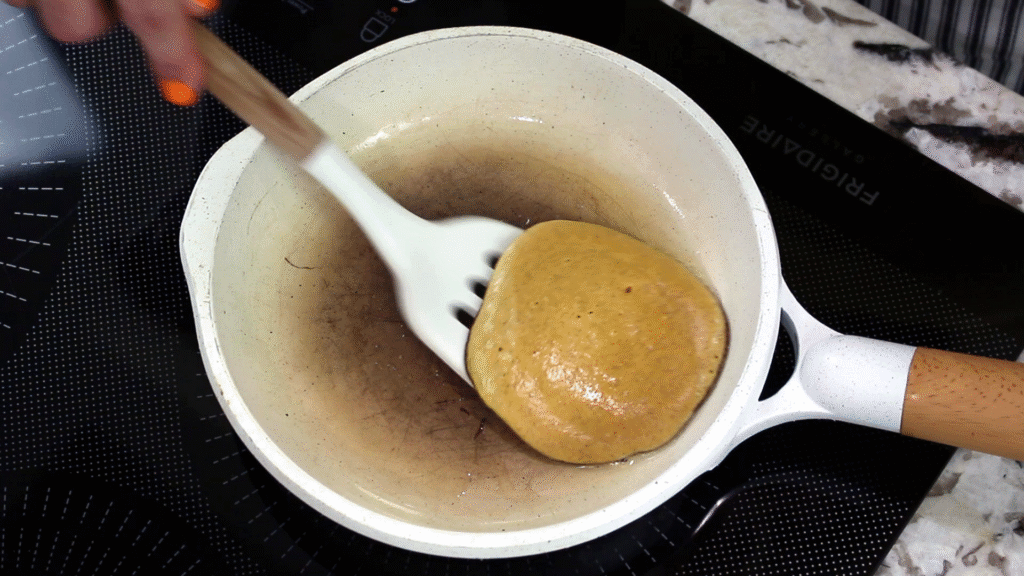
Prepare the 2 parts of your pumpkin spice latte
First, you need to go ahead and start your coffee brewing. This will take a few minutes.
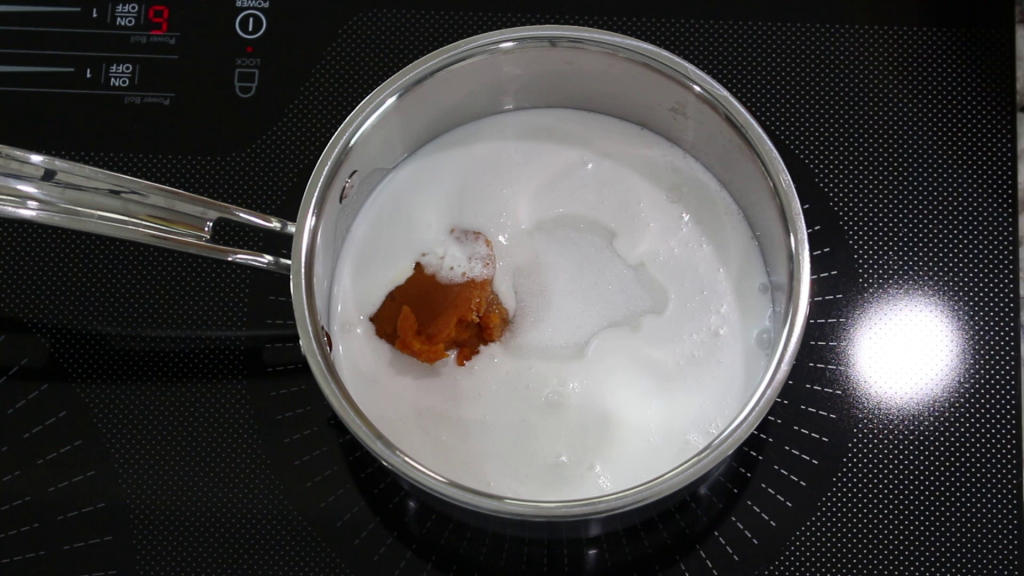
While your coffee is brewing, add that cup of nondairy milk to a small saucepan and turn it to medium heat, then add in your sweetener, and the pumpkin puree.
And then whisk it really well until it’s all mixed together,and let it get really warm.
Then turn off your heat, add the vanilla extract and pumpkin spice, give it another good whisk…
And then you’re ready to pour it up!
Pour it up like a barista
Put the coffee in your mug first, then pour the pumpkin milk mixture into the coffee.
This Healthy Pumpkin Spice Latte proves you can sip something sweet, creamy, and comforting — without the sugar crash or inflammation spike. Want more anti-inflammatory recipes that feel just as indulgent? ✨ Download the free Anti-Inflammatory Diet Quick-Start Guide and start enjoying seasonal favorites that fuel your energy and calm inflammation all year long.
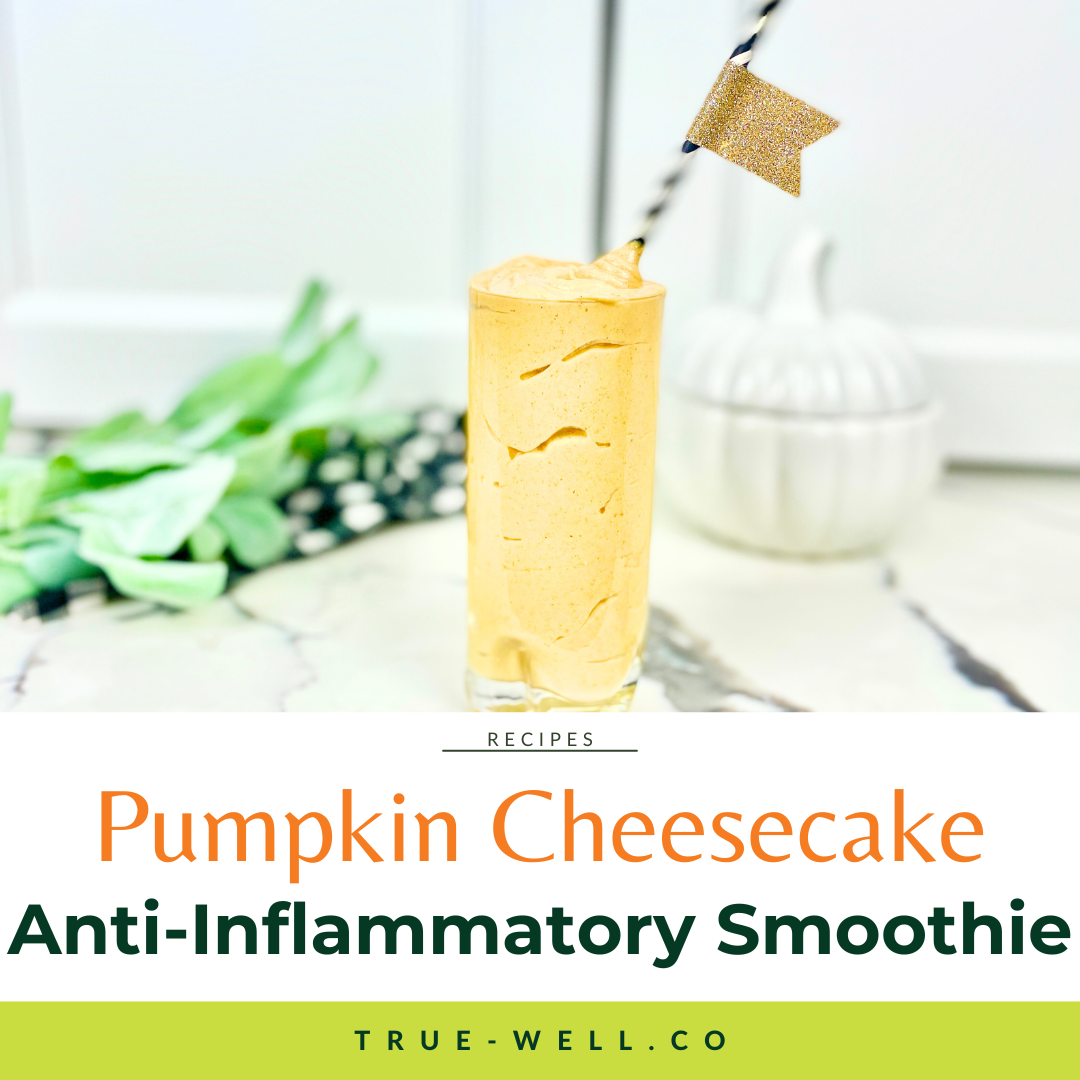
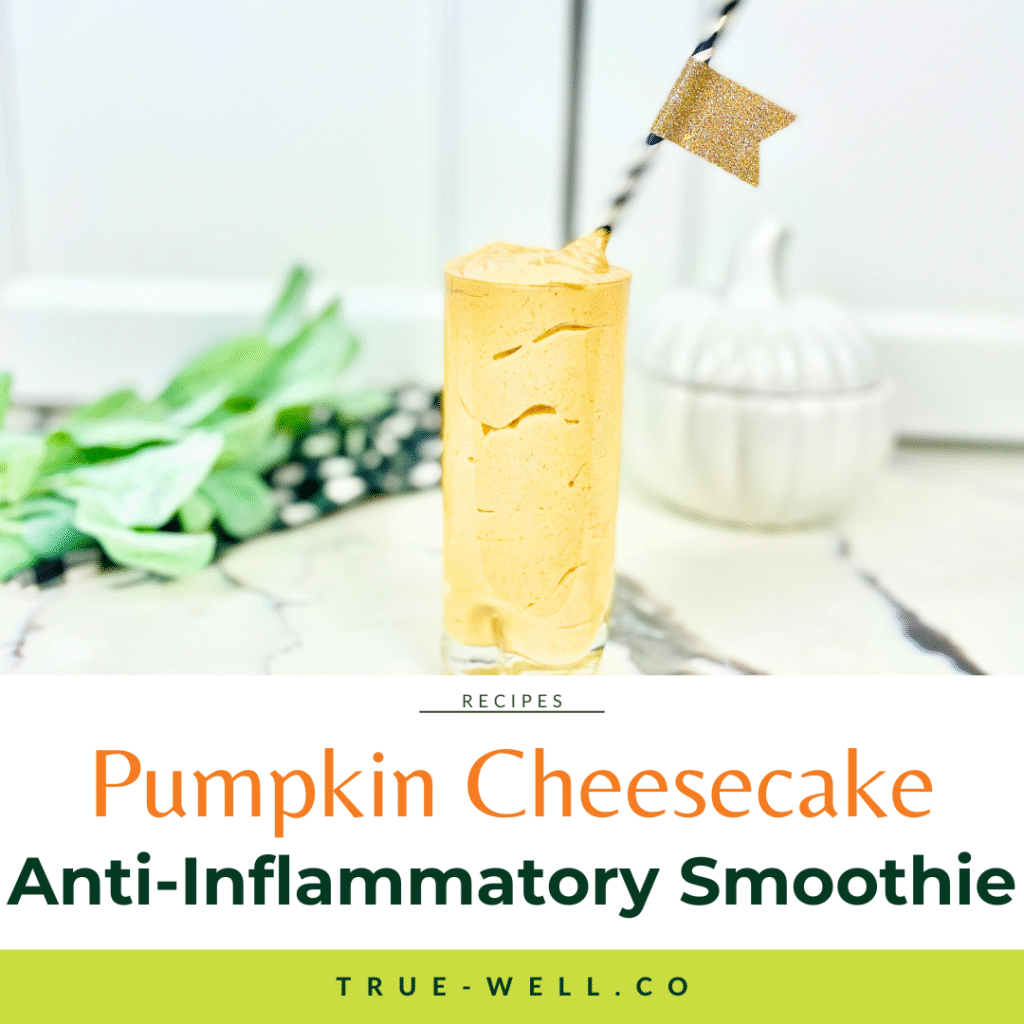
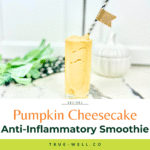
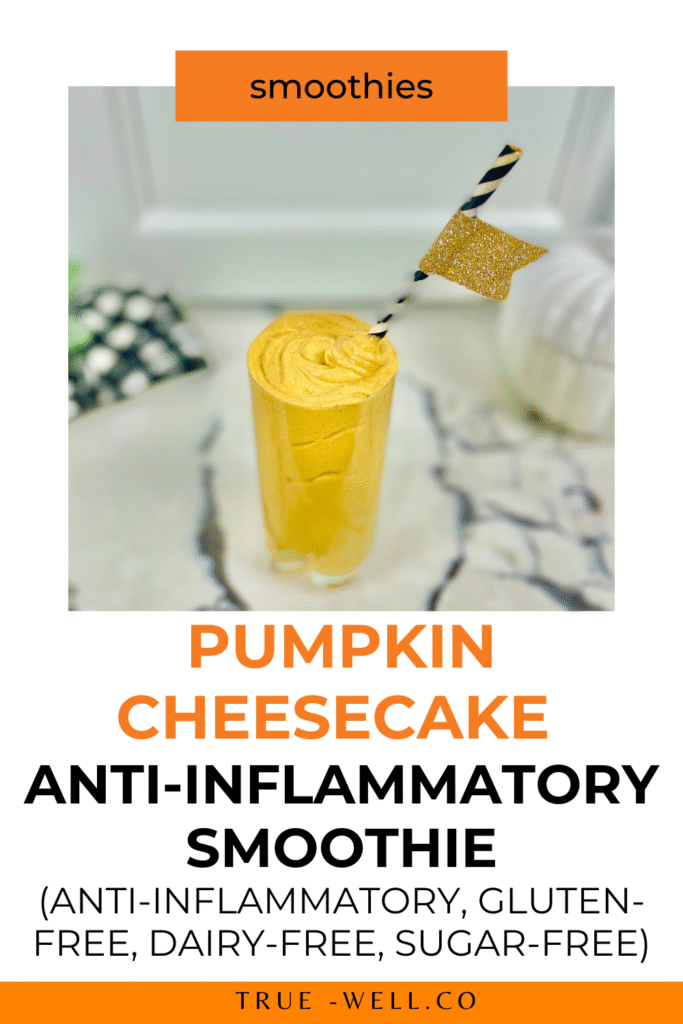
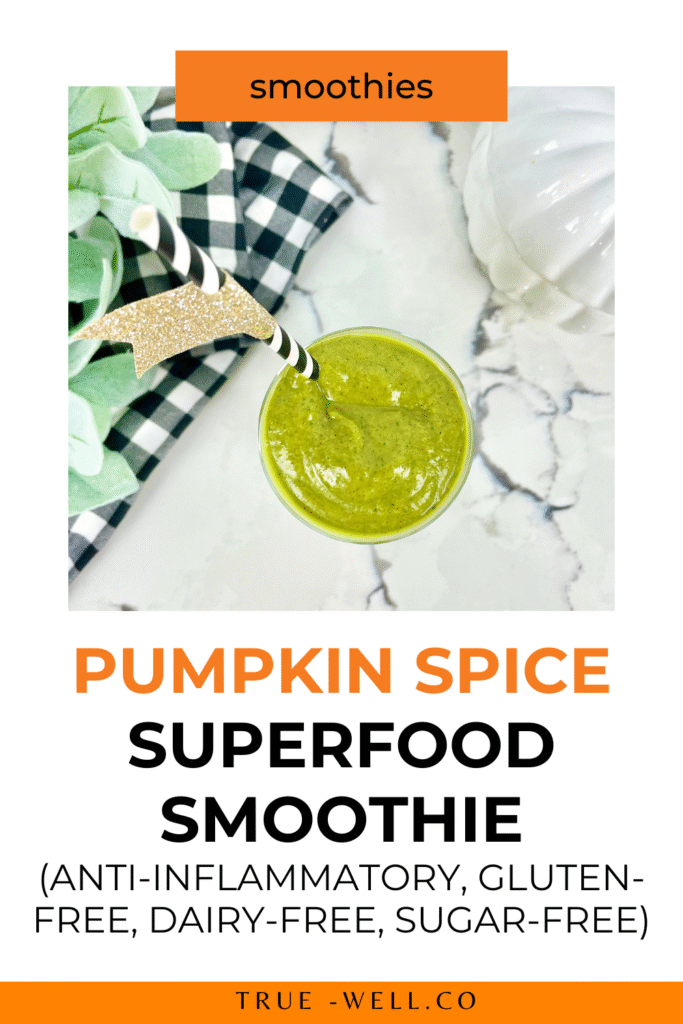
The Anti-Inflammatory Vegan Pumpkin Cheesecake Smoothie You’ve Been Waiting For
Today we’re making what tastes like dessert but is a balanced meal with a fall-inspired yummy twist: Pumpkin Cheesecake Smoothies
So, there’s nothing better than that break in heat from the summer and smelling fall in the air, and when it comes to easy, yummy, FAST meals, you can’t beat a smoothie.
This fall-inspired, anti inflammatory Pumpkin Cheesecake Smoothie owes its anti-inflammatory balanced macro goodness to pumpkin and banana and a surprise ingredient that gives it that creamy cheesecake mouthfeel that keeps us coming back for more. 😋
When you can sip on something this creamy and know it’s anti-inflammatory, that’s a win-win. My free Anti-Inflammatory Diet Quick-Start Guide shows you how to build more everyday meals just like this — balanced, satisfying, and healing from the inside out. ✨ Grab your free Quick-Start Guide and start feeling your best this fall.
And here’s how you make it…
Prep Your Ingredients
Although many smoothies are just ‘dump and blend’, this one needs two ingredients pre-frozen: a banana and the pumpkin puree.
We keep bananas that were about to go bad in a baggie in the freezer so I always have them on hand for smoothies (or ice cream). But the pumpkin puree is a different story.
For this smoothie I measured out the pumpkin puree and placed it on a silmat and put it in the freezer. (This should freeze for about 30 minutes to an hour.)
Dump and Blend
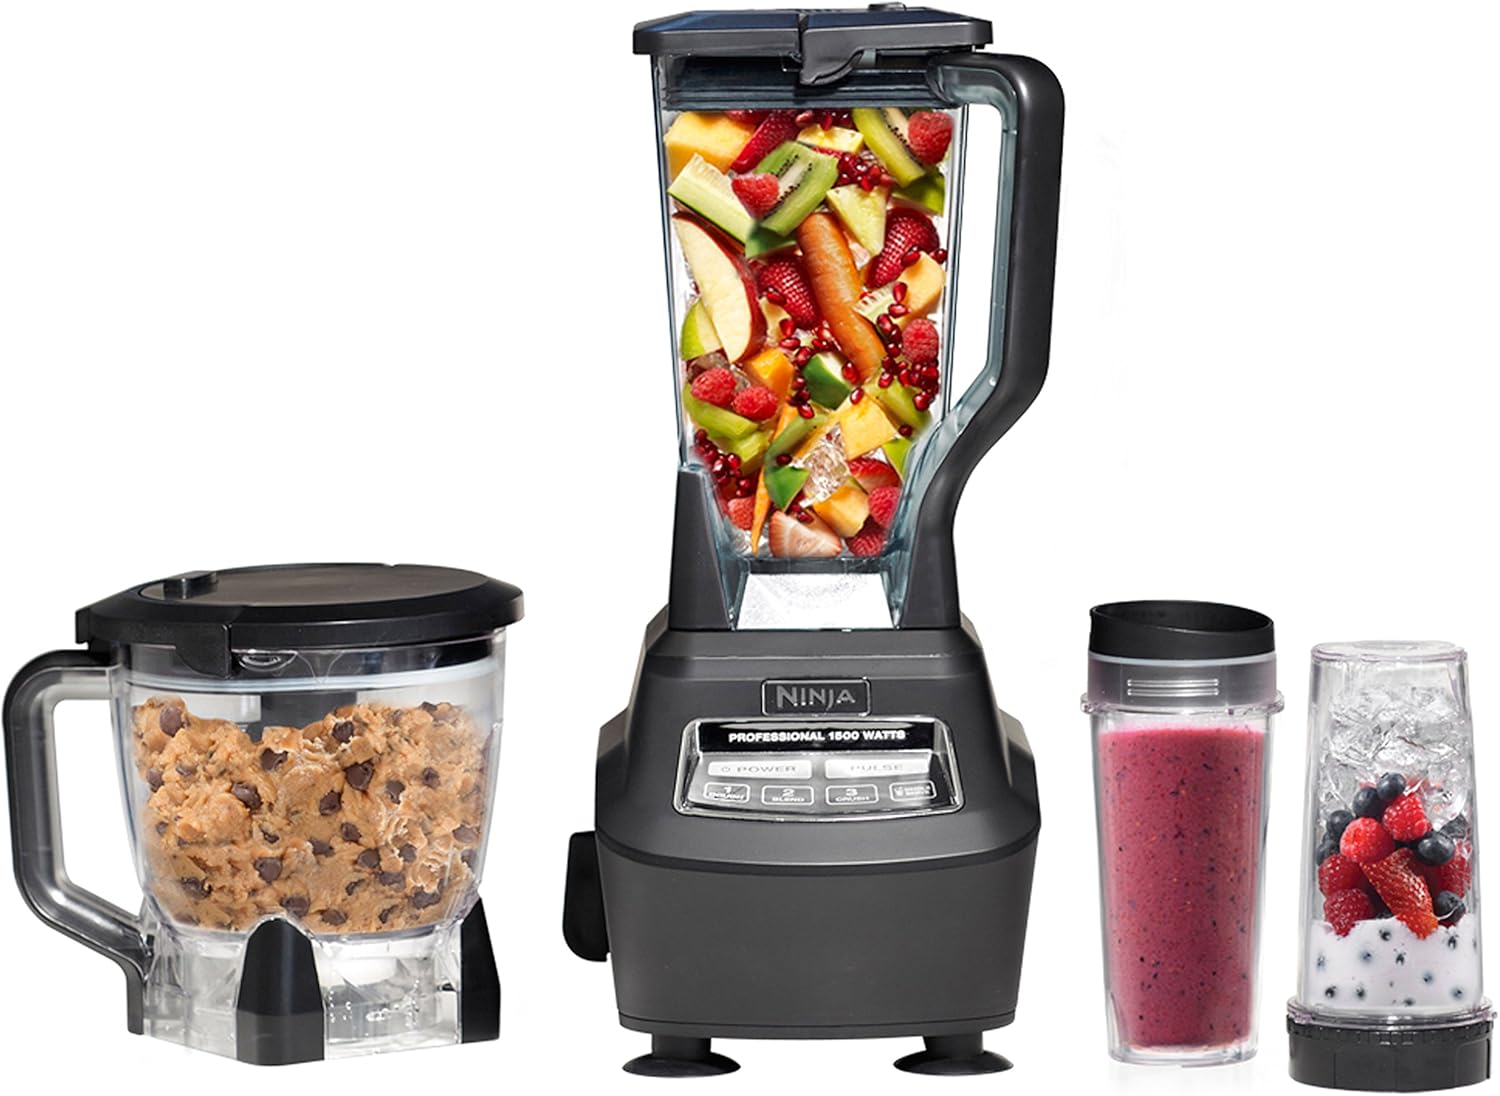
Once those 2 ingredients are frozen you’re free to dump them all in a high-powered blender (my choice is the Ninja), including our secret ingredient that we use instead of cream cheese: Silken tofu.
(Some links may be affiliate links, meaning if you click on and then purchase, I’ll get a portion of the proceeds, at no additional charge to you.) 🙂
Now, if you’ve never eaten or used tofu before, settle down. I used to avoid it like the plague because of all the bad press soy has gotten over the years. The truth is that it’s full of vegan (complete) protein, fiber, and healthy fat.
The reason some soy isn’t considered healthy is because if it’s NOT organic, it’s laden with chemicals, and the soy oil is extremely oxidized.
So choose organic and you’re good to go!
Also, if you can’t find silken (which is a much softer version), you can still use medium or firm, you may just have to add a few TBSP of water and blend longer for it to get super smooth.
Blend all your ingredients until super smooth (scraping the insides of the blender if needed).
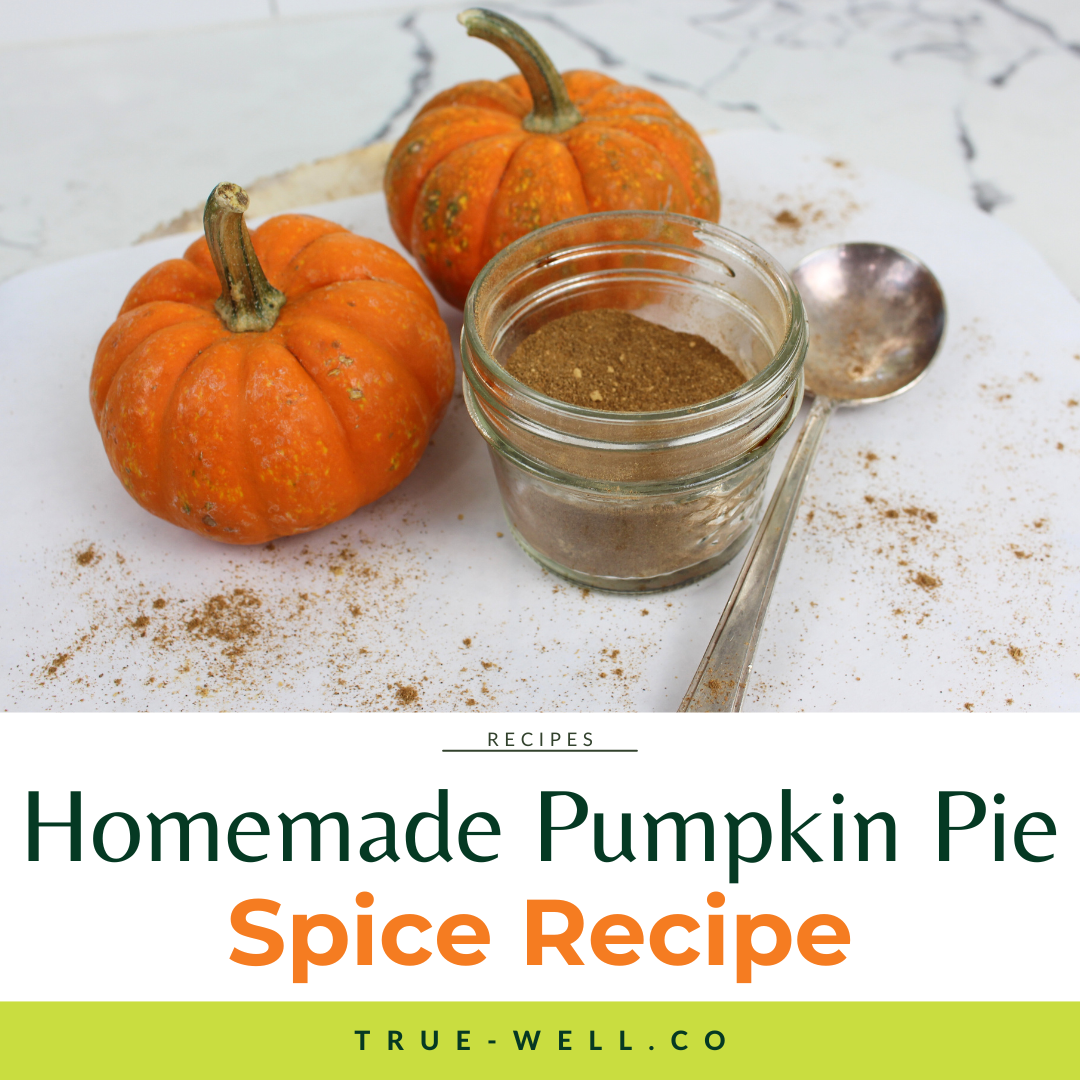
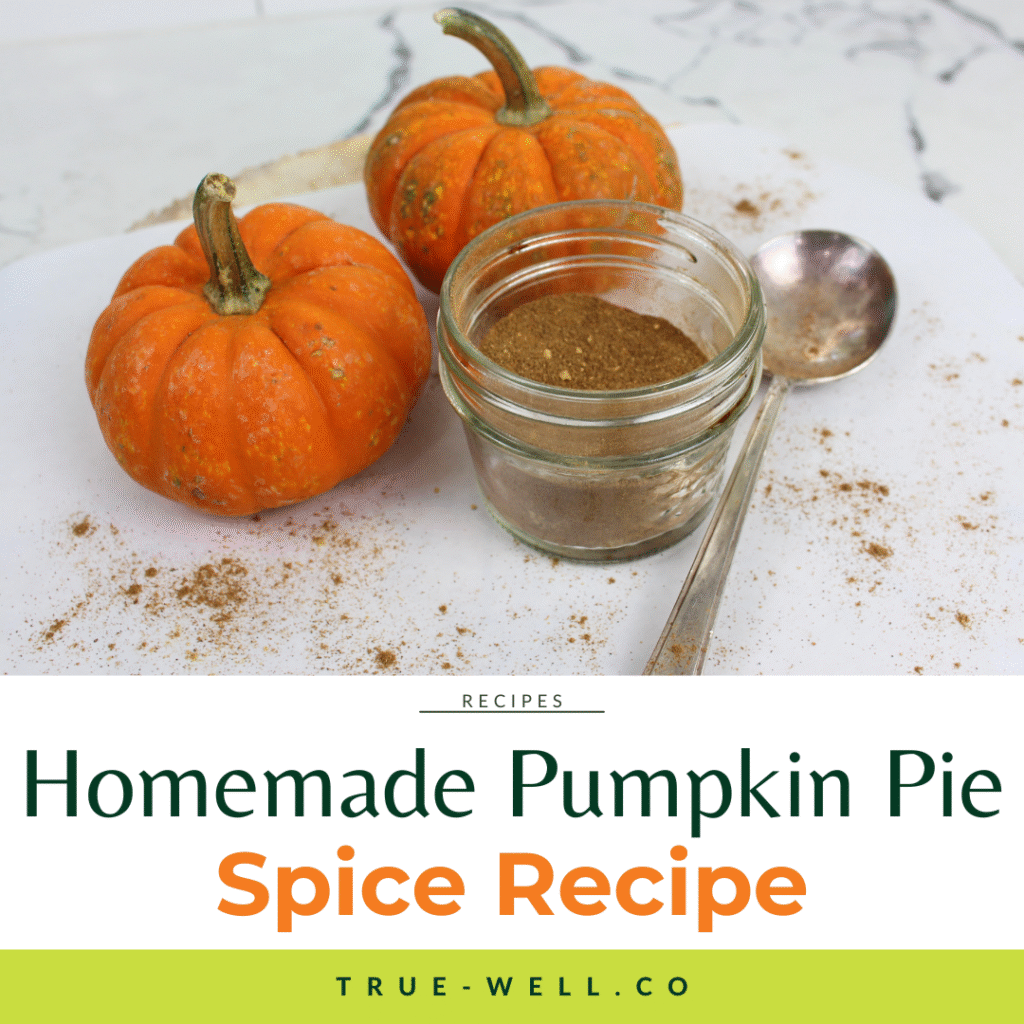
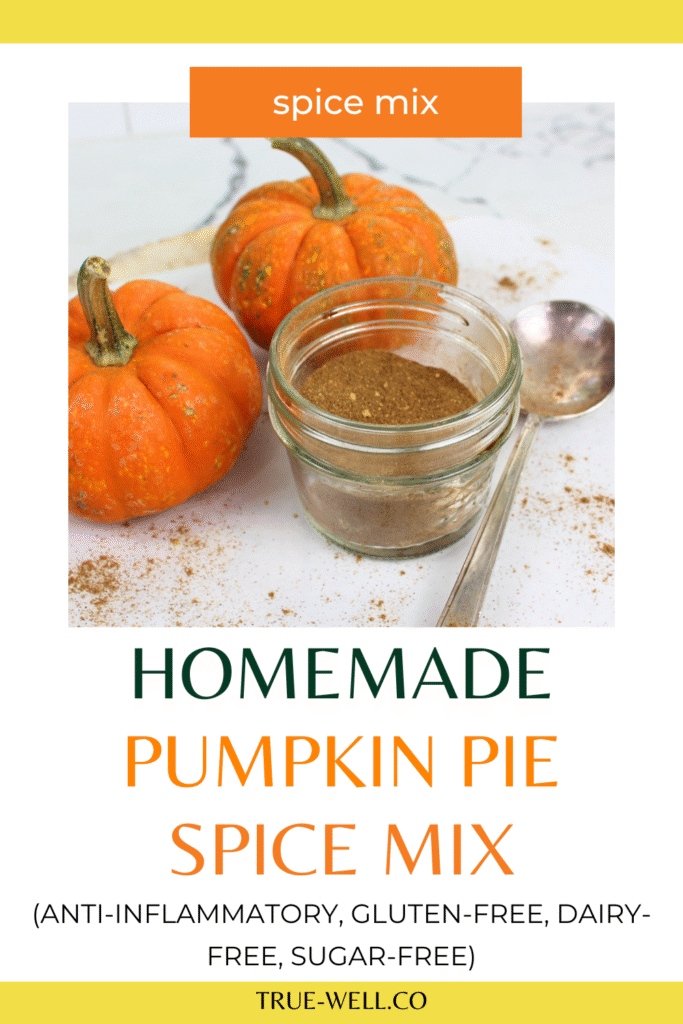
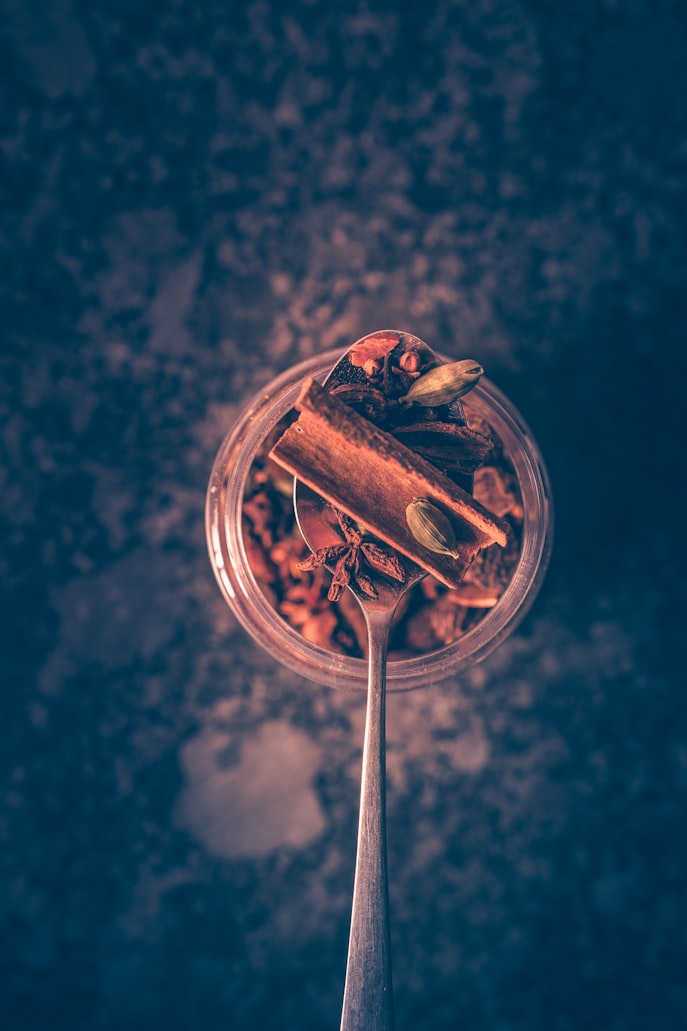
So, what happens regularly around our house is that I’m looking for my spice mix, and…. It’s been all used up by my kids, and they also conveniently forget to tell me we’re out of it.
So I started keeping spice mix recipes so I can make my own any time that happens.
Here’s how to make your own pumpkin spice mix to keep in your pantry.
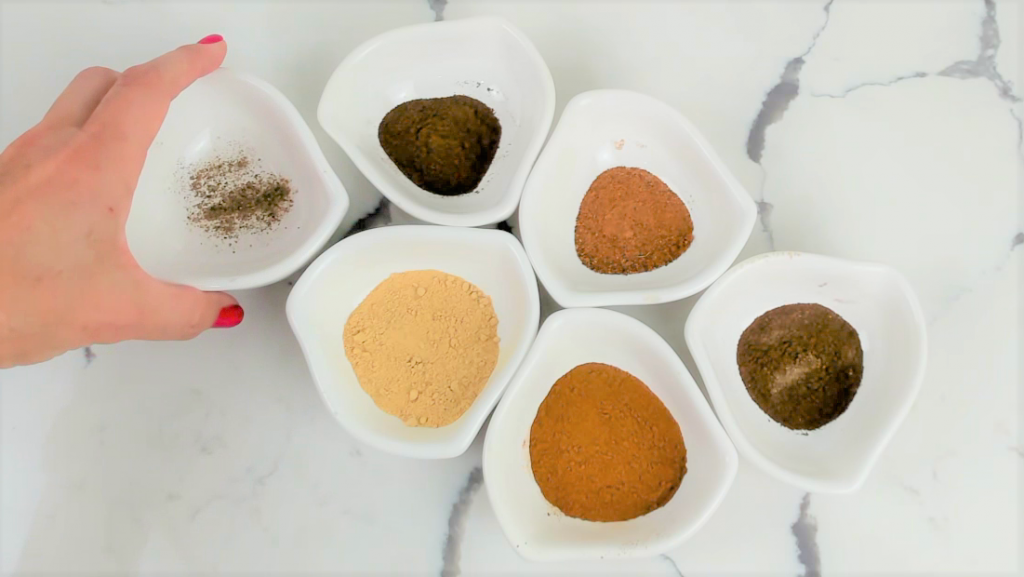
Our ingredients are :
Ground cinnamon
Ground ginger
Ground nutmeg
Ground cloves
Ground allspice
And our last surprise ingredient is a pinch of ground black pepper.
The reason I love adding in ground black pepper is that all the other spices already have mega anti-inflammatory properties, but black pepper has a compound in it that boosts absorption of the nutrients in the other ingredients.
Love that cozy pumpkin spice flavor — but want it to love you back? Grab my free Anti-Inflammatory Diet Quick-Start Guide to learn how to use everyday ingredients (like this spice blend!) to calm inflammation, balance blood sugar, and boost energy naturally. 🍁 Download your free Quick-Start Guide and turn every recipe into a feel-good one.
When I make spice mixes, I like to just use a measuring cup that has a spout so I can pour it into the container without a funnel.
So I add all the spices into the measuring cup, no special order, then stir really well. You want to make sure to get everything mixed really really well, then pour into your storage container.
This spice mix is perfect in any recipe that calls for pumpkin pie spice mix, like pumpkin smoothies, pumpkin seed granola, pumpkin muffins, and even pumpkin pie.
Anti-Inflammatory Recipes I use this Homemade Pumpkin Pie Spice mix in:
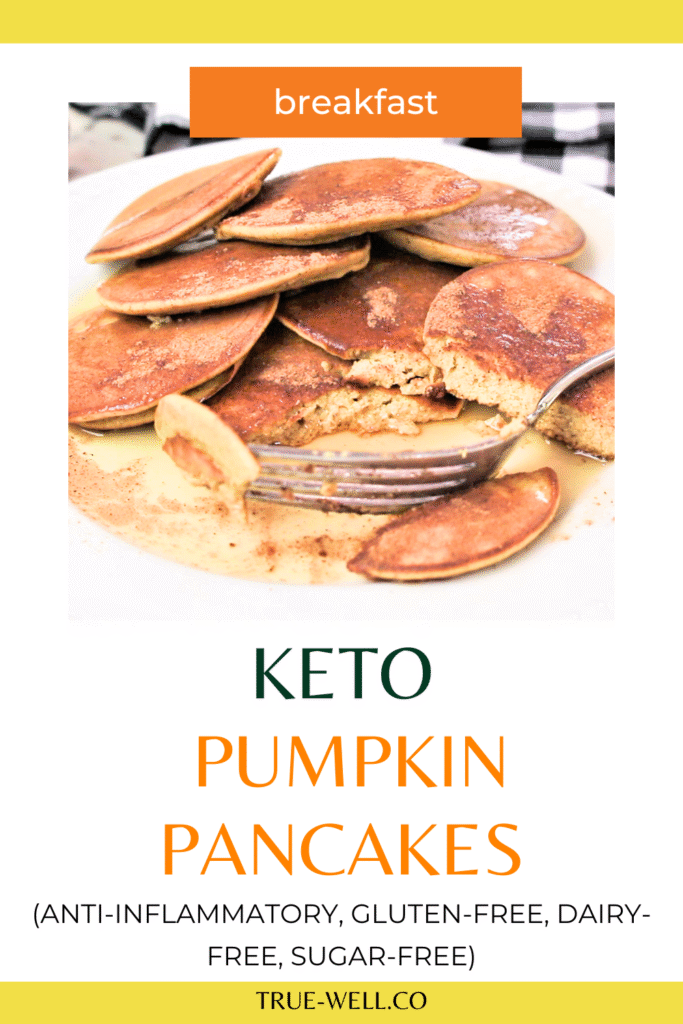
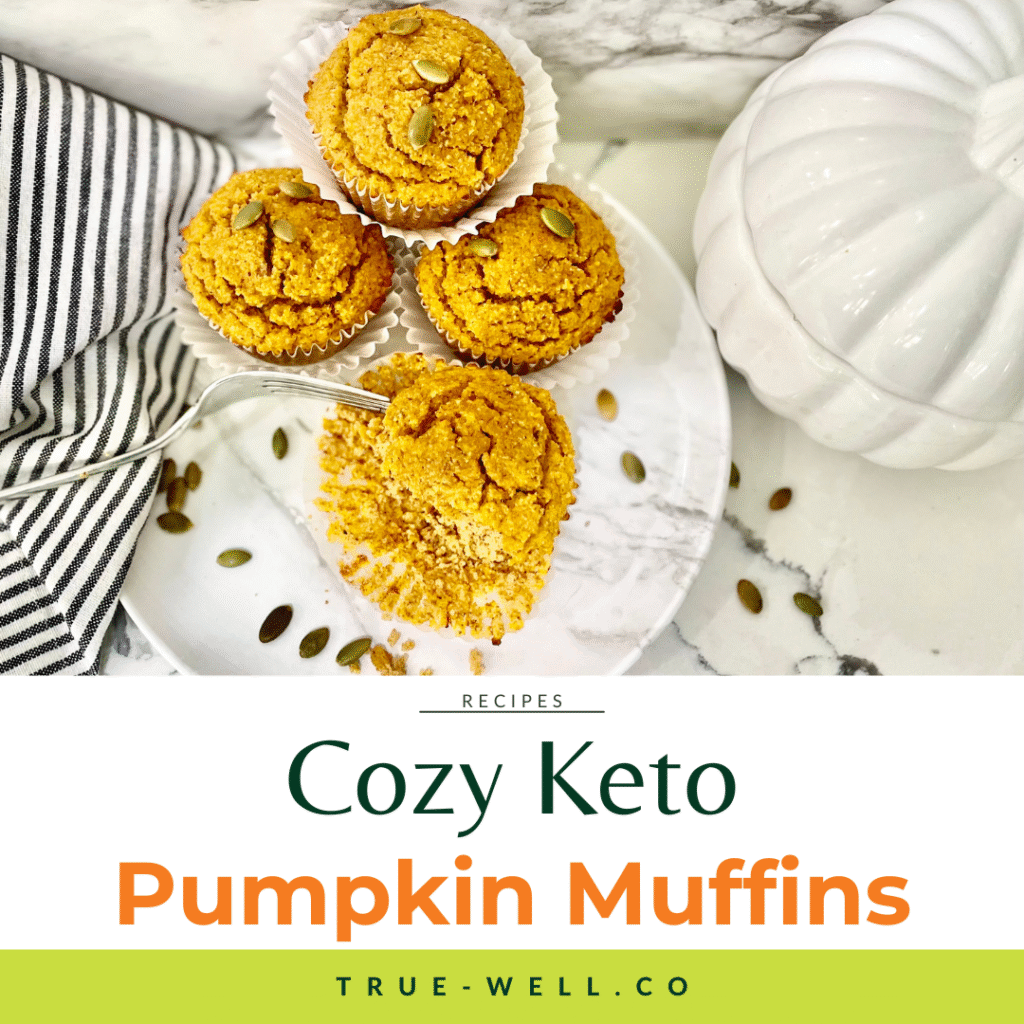
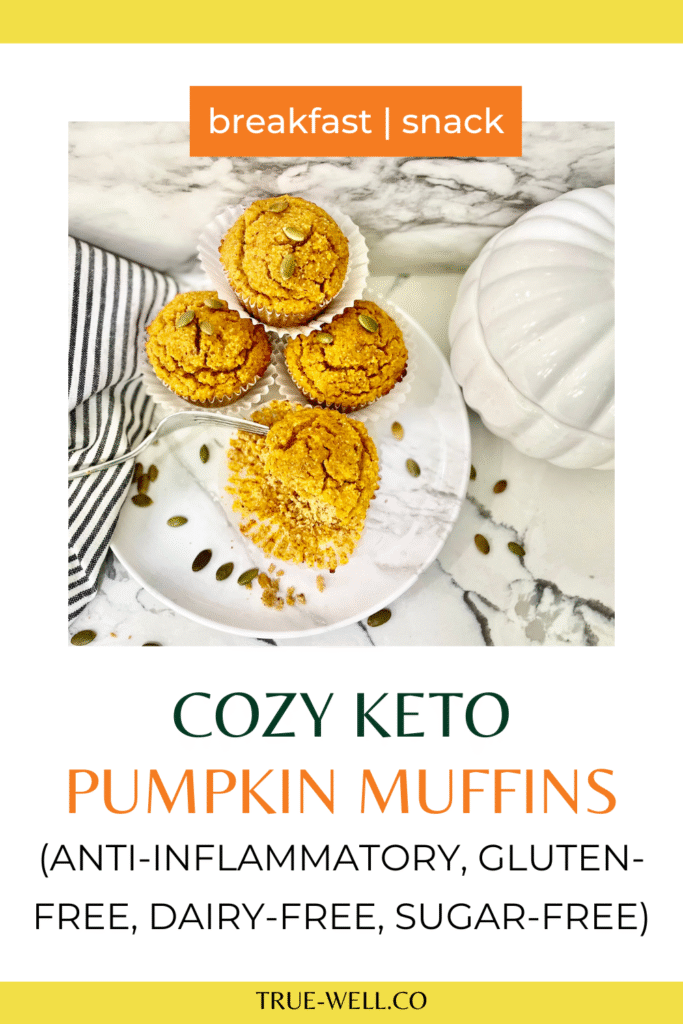
When it’s fall everybody goes bonkers for pumpkin spice, and these keto pumpkin muffins, which are anti-inflammatory, gluten-free, and sugar-free, should definitely be in your saved + often-used recipe collection.
And I get it–it’s (hopefully where you live) starting to cool down for fall, and that crisp snuggly feeling should be crankin’ up!
The only thing is… when we think of ‘cozy’ things, it usually veers in dramatically different directions: Either heavier soups and stews (savory), or warm, sweet breads (sweets direction).
Lucky for you, I’ve got the sweet covered with a fiber-filled, pumpkin-spice loaded muffin that is sugar-free, and also has the added benefit of being a great after-dinner snack (if you add on the pumpkin seeds–they contain melatonin. 😉)
Now, I know some of us like stevia, some prefer erythritol, some like monk-fruit, and on and on. So I put 2 options in the directions to accommodate for either choice, because that one option will determine baking time.
So warm up some unsweetened coconut (or almond) milk and enjoy! 🍂
If you love comfort food but want to keep inflammation and cravings in check, this is your sign. The free Anti-Inflammatory Diet Quick-Start Guide walks you through the exact foods that balance blood sugar, calm inflammation, and still let you enjoy treats like these keto muffins guilt-free. 🌿 Download your free Quick-Start Guide and make cozy anti-inflammatory living easy.
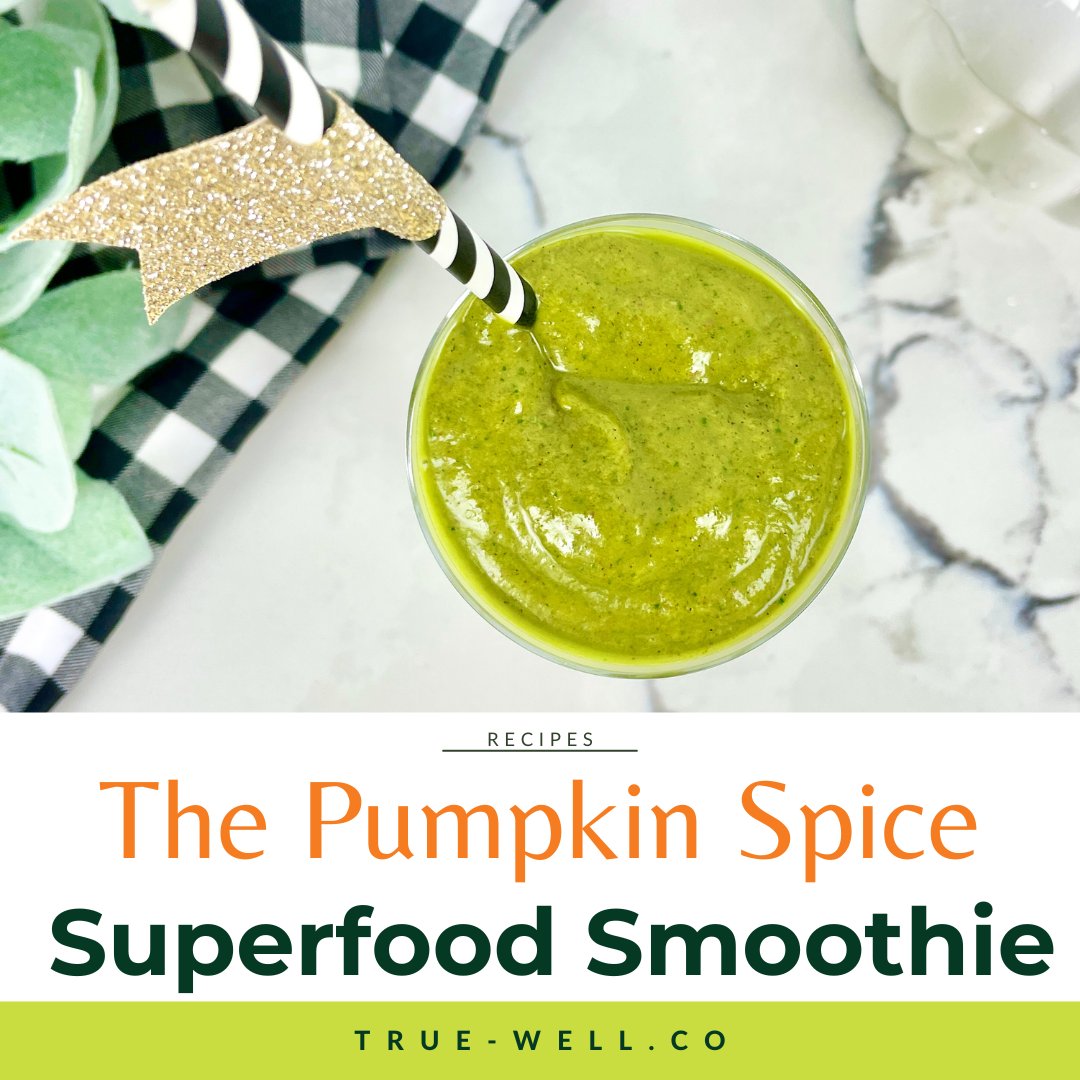
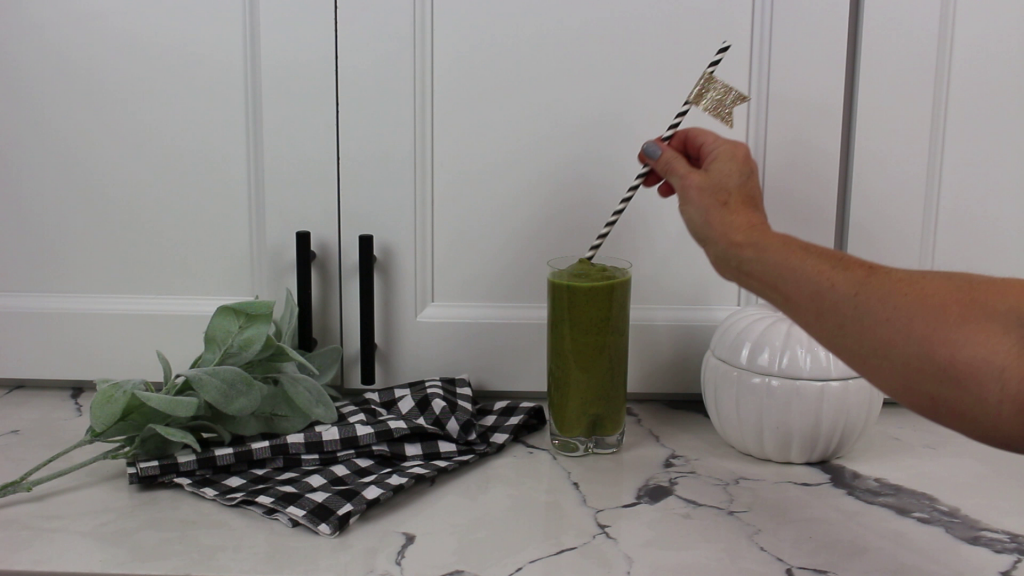
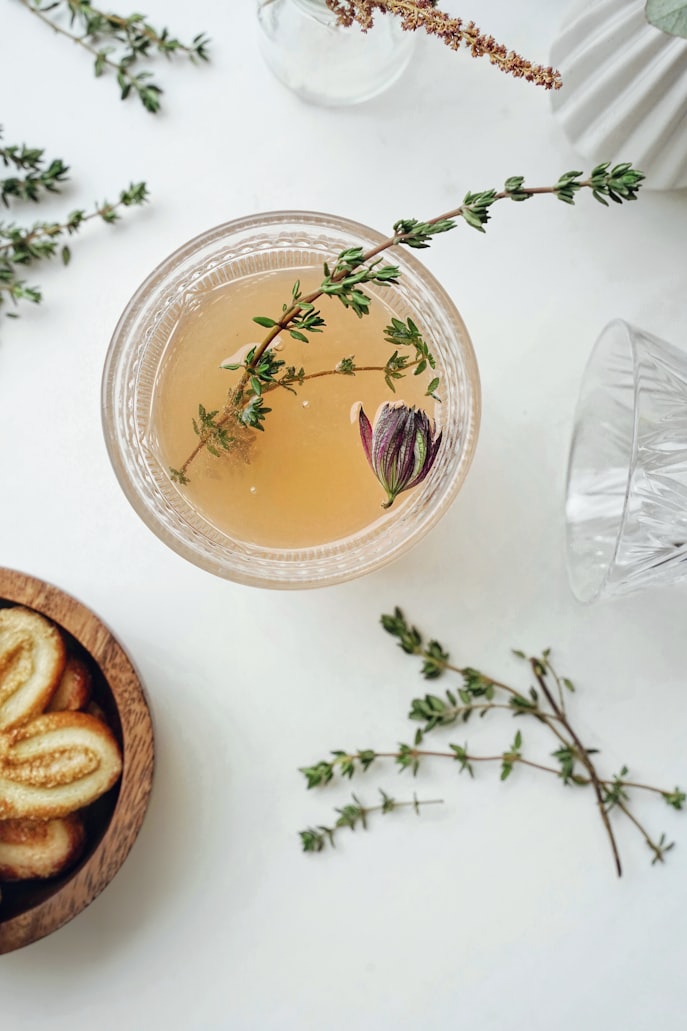
There’s nothing better than that break in heat from the summer and smelling fall 🍂 in the air, and when it comes to easy, yummy, FAST meals, you can’t beat a smoothie— And if you love pumpkin spice as much as I do, you’re gonna love this!
So this fall-inspired, Anti Inflammatory Pumpkin Spice Smoothie (that is a mouthful!)—is packed with anti-inflammatory goodness like pumpkin, avocado, spinach, and ginger, and I have a feeling it’s gonna become your GO TO smoothie for fall from now on.
Now, as much as I’d like this to be a gorgeous pumpkin color, as with all smoothies that have greens added…it’s green. But this absolutely doesn’t detract from it’s yumminess–pinky promise.
And here’s how you make it:
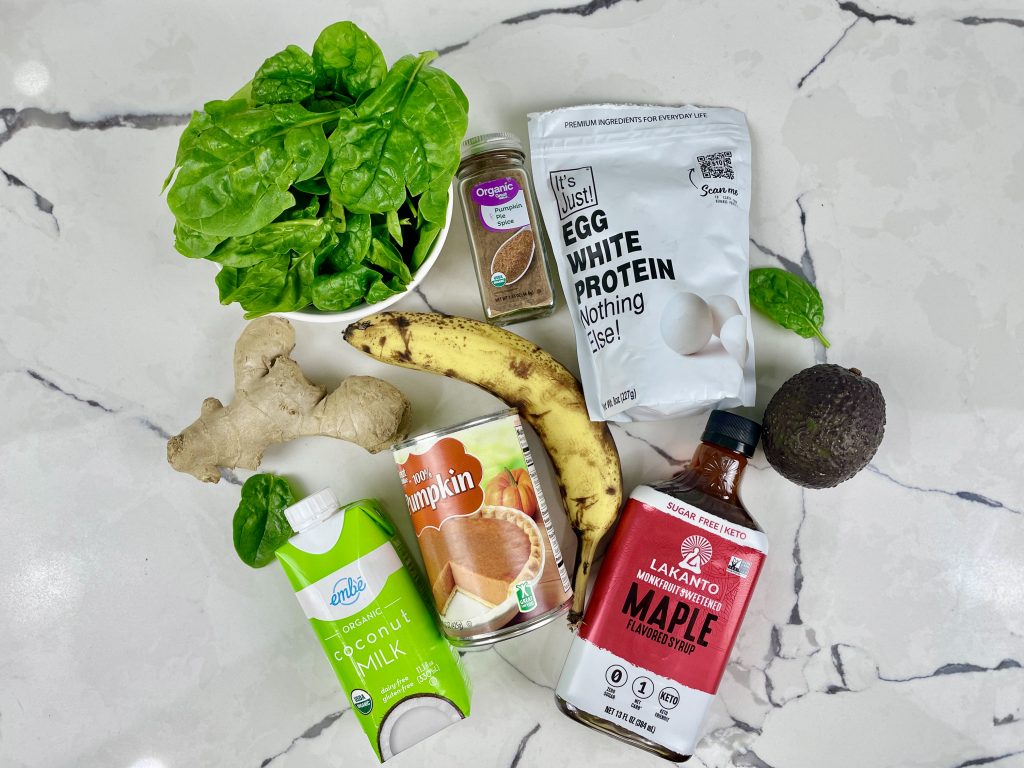
Step 1: Gather your ingredients
This smoothie is made with pumpkin, banana, avocado, spinach, ginger, pumpkin pie spice, ginger, nondairy milk, egg white powder, and keto maple syrup.
Love fall flavors and feeling amazing after you eat? Grab my free Anti-Inflammatory Diet Quick-Start Guide to learn how to turn cozy seasonal favorites (like this pumpkin spice smoothie!) into meals that naturally balance blood sugar and fight inflammation. 🍁 Get your free Quick-Start Guide here and start feeling your best this season.
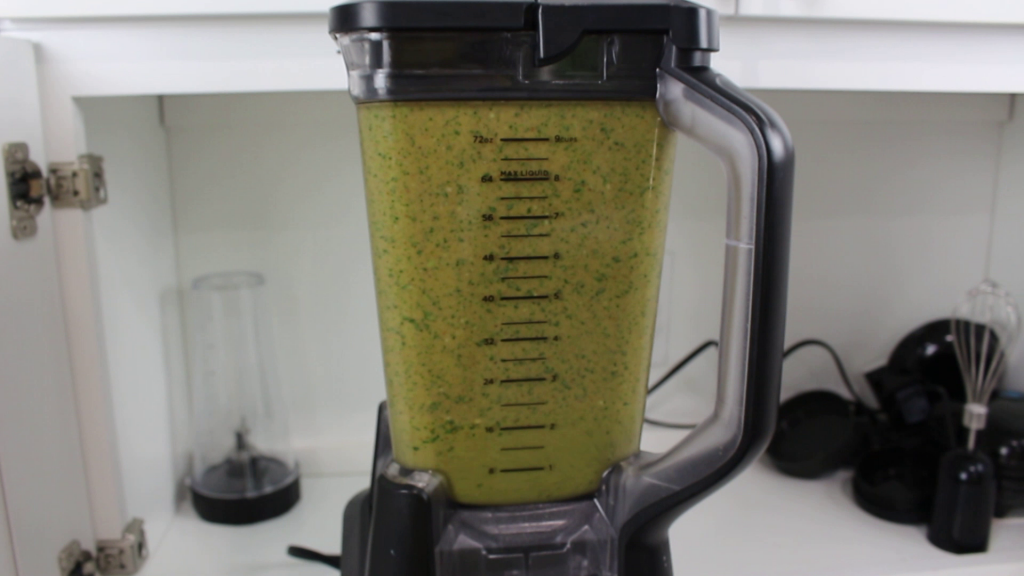
Step 2: Put them all in the blender
Honestly this is why smoothies are so darn easy. You just put them all in the blender at once.
The one caveat for this smoothie (I’d suggest) is to hold off on the egg white powder until everything else is nice and smooth, because it can make it thicker.)
A high-powered blender is always recommended, like this Ninja, or if you want to spend more, the Vitamix is a favorite for a higher price tag.
(Some links may be affiliate links, meaning if you click on and then purchase, I’ll get a portion of the proceeds, at no additional charge to you.) 🙂
If your smoothie is having a hard time blending, you may need to add a little more liquid to it. If it gets too thick it can’t run back down to the bottom where the blades are doing their thang.
Step 4: Assess sweetness
I always like to do a little taste-test and just make sure the sweetness is where I like it. If it needs more, I add a tiny bit at a time. If there’s no sweetener in the recipe, I add a natural zero calorie sweetener like liquid stevia, monk fruit, or erythritol.
Step 5: Pour it up + enjoy!
In all honesty, sometimes smoothies make way more than I can handle in one sitting. So if it’s a bit too much, just store it in the fridge for up to a day.
Love fall anti-inflammatory recipes? Check out my Fall Anti-Inflammatory Meal Prep Session where I prep for 4+ meals in an hour! CLICK HERE to read!
2 TBSP egg white powder (or plant-based plain protein powder)
Instructions
Place all ingredients into a high-powered blender.
Blend until smooth.
If too thick, add a few TBSP of water at a time, or 4-5 ice cubes.
Taste test to determine if sweet enough.
Pour into a large glass and enjoy!
Notes
Per serving:
Fat- 9g
Carbs-40g
Fiber-7g
Protein-12g
Nutrition
Calories:267
Every ingredient you add to your blender can either feed inflammation or fight it. My free Anti-Inflammatory Diet Quick-Start Guide shows you exactly how to choose the right ones — so every smoothie, meal, or snack helps you lower inflammation and boost energy naturally. 🎃 Download your free Quick-Start Guide and start blending smarter today!
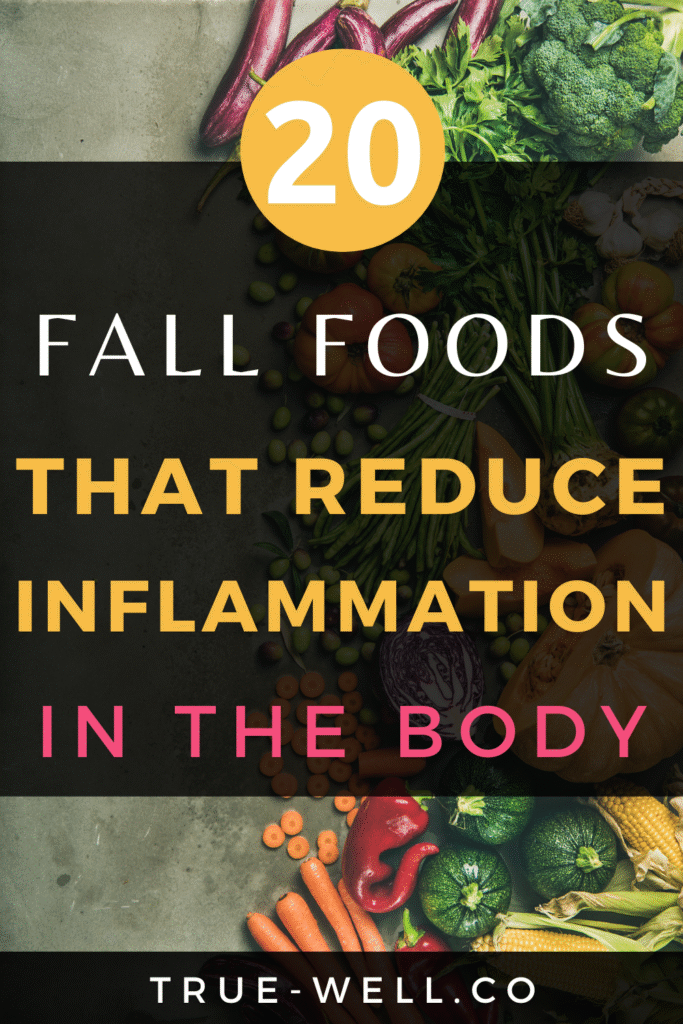
For those of us living with inflammation, the first cool breath of fall can feel like medicine.
After months of heavy heat, the air softens. The light turns golden. Nature seems to exhale … wrapping us in a palette of rust, amber, and cinnamon that reminds us to slow down and root ourselves again.
And just as the world shifts, so does what it offers.
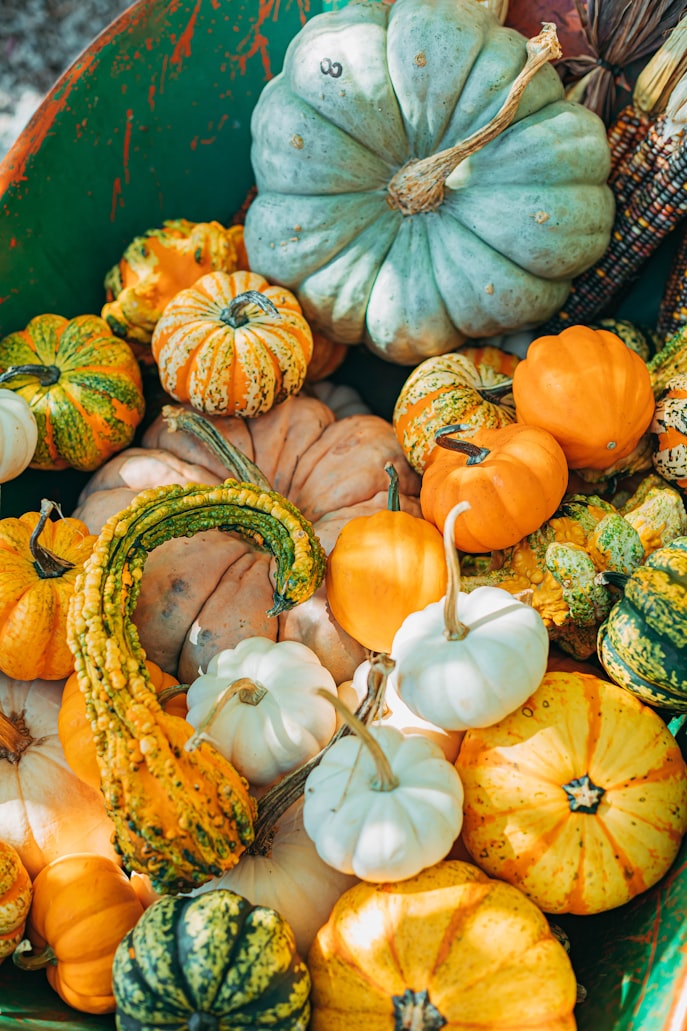
There really is no shortage of sources of superfoods for those of us following an anti-inflammatory diet.
The beauty of this season is that even as summer’s abundance fades, the markets are still overflowing with anti-inflammatory staples. From earthy root vegetables to crisp apples and immune-supporting herbs, it’s a time to eat deeply … to choose warmth, grounding, and color on your plate.
Here are three of my favorite categories to focus on as the temperatures drop:
Veg and Fruits: grounding, fiber-rich, and full of protective antioxidants
Herbs: fragrant plant medicine that supports digestion and immunity
and Spices: warming allies that keep circulation flowing and inflammation quiet
Here are my favorites that make fall feel (and taste) like healing.
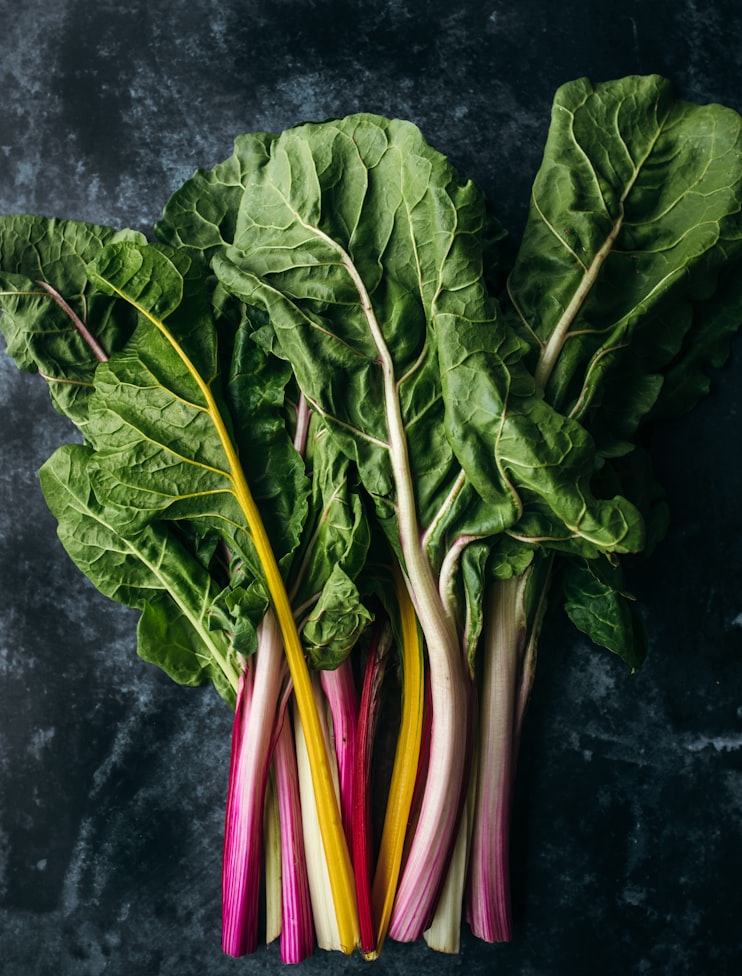
Greens like kale, arugula, collard greens, and swiss chard are packed full of vitamins and antioxidants. And they’re versatile enough that many can be eaten raw, cooked, as a stand-alone side, or even as a soup or casserole component.
Pumpkins
Arguably the most popular fall vegetable, pumpkins provide an amazing source of Vitamin A (the color gives you that hint on beta carotene), balanced polyunsaturated fats, Vitamins C and E, and several other essential minerals.
They’re also packed with fiber and healthy carbs, and can be stored for a long period of time (in a dry pantry or frozen) without going bad.
Butternut Squash
Butternut squash is also packed with Vitamin A, but it’s also an amazing source of Vitamin C as well. Compared to pumpkins, it’s more dense in energy, meaning: per serving it contains more calories, carbs, and fiber.
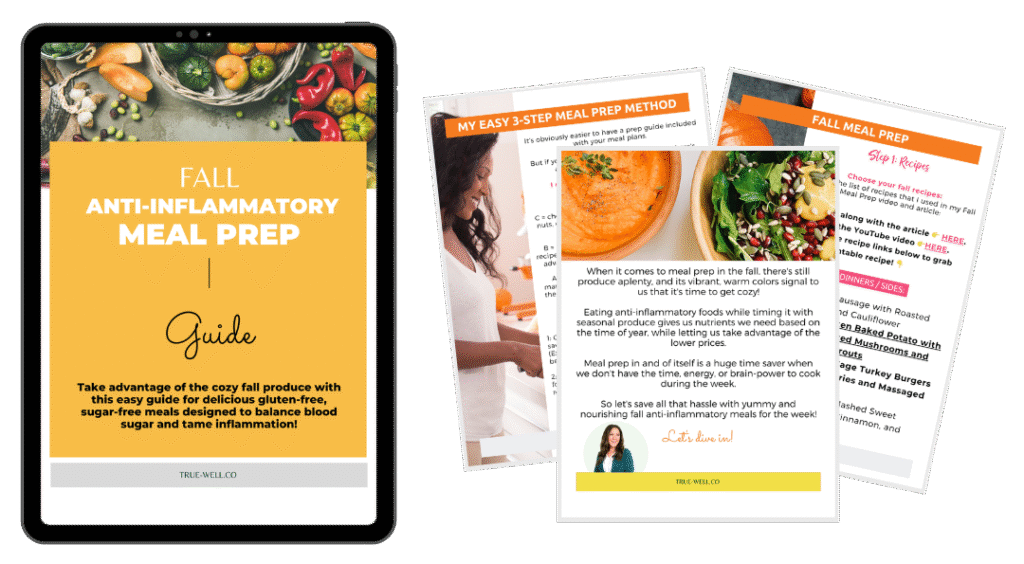
No meal plan this week? No problem! Grab the (free!) FALL ANTI-INFLAMMATORY MEAL PREP GUIDE! Click HERE or the image above!
Sweet Potatoes and White Potatoes
Sweet potatoes also have a ton of Vitamin A. But aside from that, their nutritional value is nearly the same as white potatoes. And even though white potatoes have more carbs, this occurs as starches versus the sugar content in sweet potatoes, which is something to consider if you’re watching your blood sugar levels.
Either are great options for soups or even just sliced and baked as healthier fries.
Beets
One of the most overlooked vegetables (in my opinion) is the beet. Beets are high in folate and manganese, but also contain betalains, which gives it the bright red color, and is associated with reduced cancer risk.
Not only can you eat the beet itself, but the greens are also a fantastic source of nutrition. Beets can be roasted, sauteed, pickled, or boiled; and the greens can be used in salads or saved for soup broths.
Apples
Ahhh…the quintessential fruit for fall! Apples peak season is September, so take advantage of this amazing time of year to get super fresh apples! The best way to eat them is raw, as fresh as possible, and with the skin on.
Not only do apples give tons of fiber, the skin contains quercetin, which is amazing for those with allergies, and it also reduces inflammation.
🌿 Want to know exactly which foods help lower inflammation year-round? Grab the free Anti-Inflammatory Diet Quick-Start Guide. It’s your shortcut to understanding what to eat, what to skip, and how to balance your blood sugar without cutting everything you love. 👉 Download the Quick-Start Guide and start feeling the difference this week.
Herbs
Herbs are one of the most overlooked nutrition powerhouses in the plant family. They pack so much punch for such a little plant. But they’re also SO EASY to add in to any dish for extra flavor.
Here are my favorite anti-inflammatory herbs for fall.
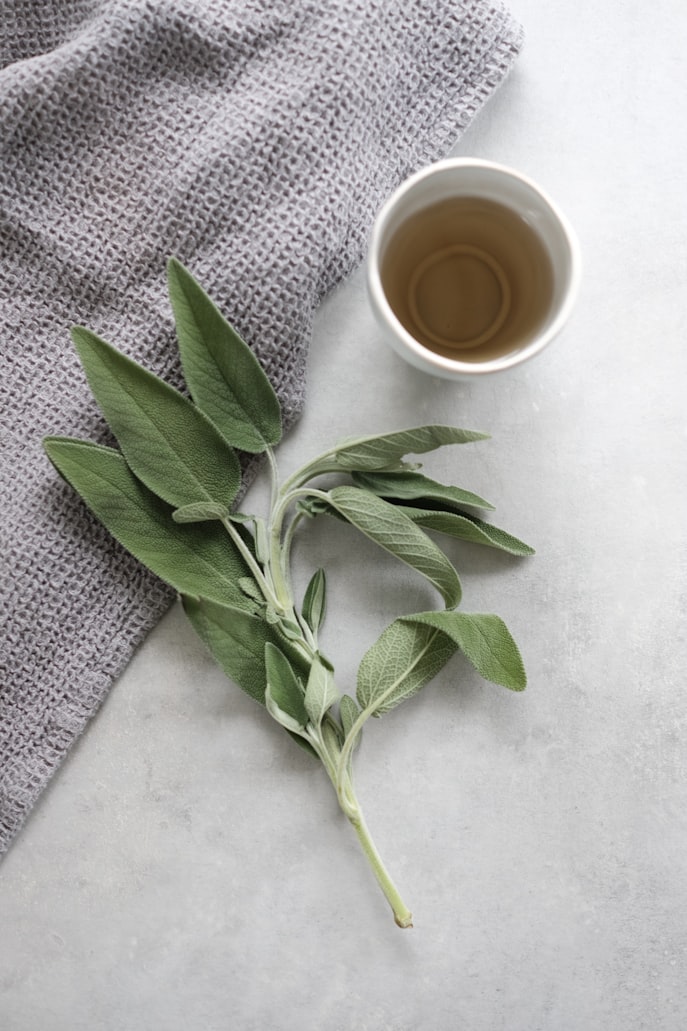
Sage
Sage not only adds delicious earthy notes to fall and winter dishes, but also can be used in teas and as an essential oil. Sage is high in Vitamin K and vital minerals, but also contains antioxidants.
What’s so amazing about sage is that it’s been shown to relieve or cure illnesses like obesity, diabetes, heart disease, cancer, depression, dementia, and lupus. But it’s also been used for centuries in traditional medicine for inflammation, bacterial, and viral infections, which makes it high on the list for cold and flu season.
Rosemary
Rosemary is full of iron, calcium, and vitamin B-6, and is also native to the Mediterranean—fitting for an anti-inflammatory diet rooted in the Mediterranean diet. It’s been used for a wide range of ailments including digestion, muscle pain, improved circulation and memory, and a boost to the immune system.
Aside from its fragrant and mouthwatering culinary powers, studies have proven its anti inflammatory, anti-oxidant, and neuroprotective properties. This means that even though it can fight free radicals and harmful bacteria, it can also be used in mood disorders, enhanced learning, anxiety, and sleep disorders.
Thyme
Thyme (another herb native to the Mediterranean) can be used as a treatment for anything from acne to GI disturbances to menstrual cramps (and a ton of stuff in between!) But it’s actually an extremely versatile culinary addition. It has an earthy flavor but can waver back and forth between savory or sweet dishes like stocks and stews, roasted vegetables, teas, and desserts.
Fall Spices
Although spices can generally be used year-round, the warmth of the following three are perfect for the cooling weather.
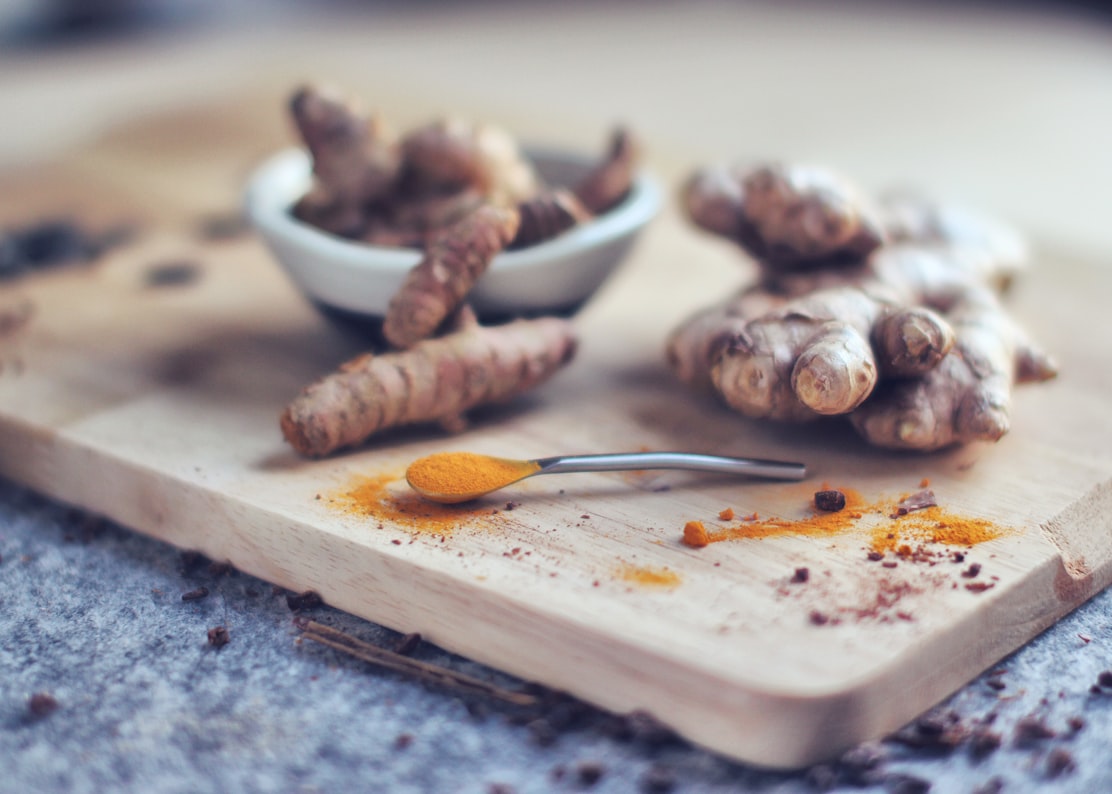
Ginger
Ginger has been touted to help anything from boosting the immune system, lowering blood sugar, and easing inflammation. Probably it’s most famous claims to fame include taming the GI tract and pulling down inflammation. These benefits are made possible due to the over 400 compounds that ginger contains.
Ginger has a fresh, zingy flavor, and although the dried version (teas and spice shakers) have a milder flavor than fresh, they can still have nearly the same health benefits. It’s best to use fresh, and ginger root can be cut up and put in the fridge or frozen to last even longer.
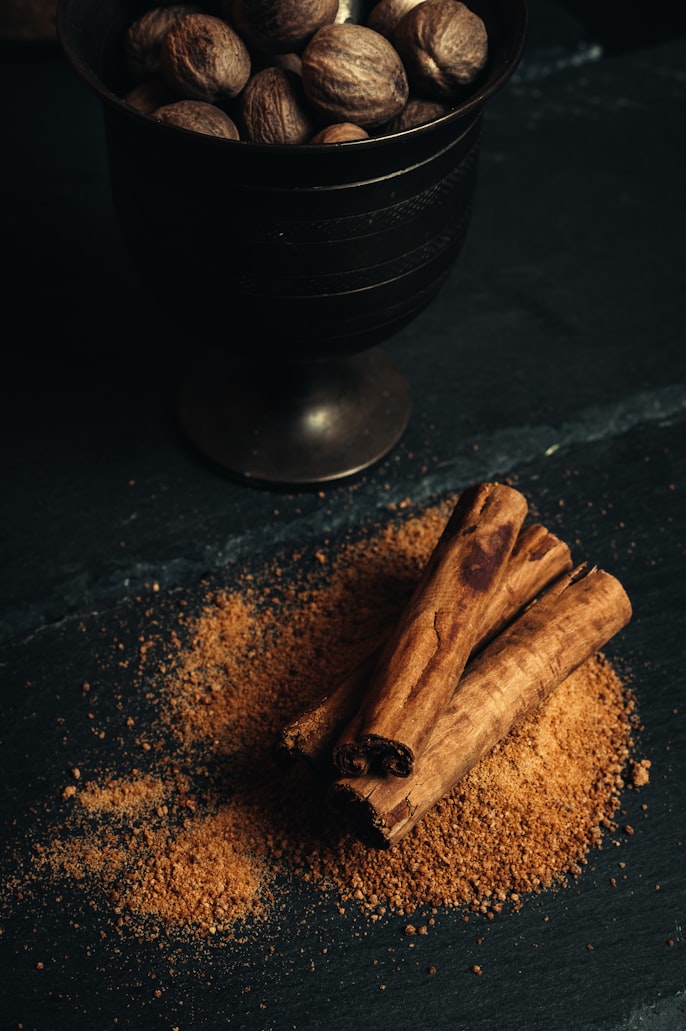
Cinnamon
There can be a lot of confusion over the type of cinnamon that’s best to use. Ceylon (known as ‘true’ cinnamon) and cassia (what you buy in the grocery store) are equally delicious and contain a compound called cinnamaldehyde that’s thought to be responsible for its health and metabolism benefits.
Honestly my favorite spice for fall is a combination of several spices: Pumpkin pie spice. This mixture obviously enhances pumpkin flavor, but can be used in a variety of recipes in fall and winter.
The components of pumpkin pie spice include cinnamon and ginger, which we already covered. The other ingredients are nutmeg, cloves, allspice, and black pepper.
What’s so great about the blend in pumpkin pie spice is that all the ingredients have powerful anti-inflammatory and antioxidant compounds just like the other spices mentioned.
Fall is the perfect season to reset your plate — but knowing where to start makes all the difference.
My free Anti-Inflammatory Diet Quick-Start Guide walks you through the exact first steps to reduce inflammation, stabilize energy, and feel amazing without the overwhelm. 🍎 Get your free Quick-Start Guide here and start building your anti-inflammatory lifestyle today.
Let me know in the comments: What’s YOUR favorite anti-inflammatory fall food or recipe?
Aside from the start of the school year, I would argue that the holidays are the biggest time of year for stress and inflammation. It only makes sense, right? Budgeting, planning, finishing the year strong, school activities, shopping, setting goals for the new year, and then spending time with family that you may not get along with…. it’s a lot.
I used to think I loved the holidays. My husband would constantly talk about how much he loved the holidays. The kids talked about how amazing the holidays were.
But each passing year I’d find I was not only more and more exhausted and irritated, but my health issues were mounting as well.
More blood sugar rollercoasters, more emotional ups and downs, worse allergy issues, worse skin issues, and severe exhaustion. All of this cycled back to being more irritable and depressed than ever.
I finally realized a lot of it was because I was the sole person doing literally all the work. I wanted my family to have an amazing holiday, but I never got to actually enjoy it.
The overwhelm of doing everything and worrying about everything and being so incessantly stressed would lead to stuffing myself with sugar and refined carbs (and lots of processed convenience foods) just to have the energy to keep going. This perfect storm was creating massive amounts of inflammation in my body.
One year I finally snapped. It was too much. It was the year I was working on my master’s in nutrition, which also happened to be the same year my husband started a new job that had him gone 4-5 nights a week, every week, for months.
So after some long heart-to-heart discussions and laying down new expectations (also known as creating boundaries for myself which I’ve always sucked at), things are very different during the holidays in our home.
Not only did I commit to myself that fueling myself properly the whole year –especially during the holidays–would help with stress levels (among a thousand other things), I knew taking control in a different way would help tame the chaos as well.
The connection between stress and inflammation
Many people go into an anti-inflammatory diet and lifestyle not really understanding that even though nutrition and what you eat are extremely important in reducing inflammation in the body, but there are three other core pillars of health that also greatly affect inflammation.
One of those is stress. Stress kicks on our ‘cortisol switch’, which under normal circumstances would be an expected physiological reaction. But chronic stress levels create a situation in the body where there is reduced sensitivity to cortisol (similar to how insulin resistance begins). This creates a constant state of too much cortisol, and thereby, increased inflammation.
What’s crazy to think about is that the connection between excessive inflammation with chronic disease has been so well documented the last few decades that they’re sometimes referred to as ‘stress-related diseases‘: metabolic diseases, cardiovascular diseases, and even psychotic and neurodegenerative diseases.
When our bodies are this stressed, we don’t sleep well or make good dietary choices. When we don’t sleep well, our hunger hormone goes into overdrive, making it even more difficult to make smart food choices. Then our energy levels nosedive and we don’t feel like getting in any kind of movement. We’re exhausted. And still stressed out.
This loop is what I call the CORE 4. And they can work synergistically for you or against you.
Unfortunately, the holidays are prime time for them to work against you, creating a perfect storm of inflammation, if you don’t get a hold on managing your stress levels.
Here are the proven strategies I use now in managing inflammation and stress during the holidays that took it from feeling like an overwhelming nightmare to actually looking forward to and enjoying the end of the year (and the people I choose to spend it with.)
1. Use a planner and checklists for EVERYTHING
I’m a HUGE advocate for checklists. They seem simple and benign, but they have a lot of power in them. Especially during the holidays.
There’s so incredibly much going on at all times that there will always be 3 (or 15) things forgotten without listing them all down.
Not only do I make lists for my daily to-dos in my business, I make checklists for :
home stuff that needs to be done,
chore checklists for the kids,
a ‘honey-do’ list,
packing lists if we’re traveling,
gift budgeting lists,
lists for all activities and school functions to attend,
and lists for any kind of get-togethers we may be hosting or attending.
It sounds silly, but lists are a super simple way to feel a little more in control. You can see everything at a glance without having to try and keep up with it all in your head. (Oh yeah–and being able to see it this way also helps determine who you can delegate things to.) 😉
Checklists alone are the biggest thing that helps me keep my stress in check during the holidays.
Laura, @truewell.co
2. Plan ahead for get-togethers with anti-inflammatory versions
As much as everyone likes to say ‘have a cheat day, it’s the holidays’… for some conditions that’s just not an option. Chronic conditions tend to flare during the holidays already because of stress. Adding on inflammatory foods can just make things worse.
If you’re only eating an anti-inflammatory diet for weight loss, this may an ok time to loosen the reigns to just focus on family and friends. Otherwise, planning ahead will be your best bet.
Ask the host of the get-together what foods are being served. This can help you have a better idea of what you’re up against. You could always offer to bring something that would give you an alternative to an inflammatory dish.
Eat ahead of time and then bring a couple of snacks for you to munch on during the get-together or party.
If you’ll be dining at a restaurant, look up the menu ahead of time. This can give you a better idea of what you can order when you have time to look and think without worrying about pressure from others and can then relax and spend time with friends and family.
3. Schedule in downtime or me-time
Scheduling regular downtime should be a non-negotiable in your calendar. But ESPECIALLY during the holidays. This time of year tends to bring up all sorts of unresolved issues amongst family and friends without fail.
But it’s also super busy and can be exhausting, and can induce sleep issues from every angle. All of these add up to increased inflammation.
Block out time on your calendar to just go do things for yourself. Even if it’s an uninterrupted movie alone or simply bath time.
I personally tend to get stressed with a lot of noise. So get-togethers can be overwhelming for me after a while. (Heck, even restaurants can when they’re really loud or if there are screaming kids.)
{But to be perfectly frank we have a nine-year-old that talks from the time she wakes until the time she goes to bed, so if she’s home I have non-stop noise all day.}
When this happens, I have extra time where I will do some things alone or even take what I call “brain breaks” during the day. This is where my kids and husband know to leave me alone, and I go in the quietest room we have, lie down, and listen to ASMR with sound-canceling headphones on.
I can meditate, take a nap, or just reflect and journal. This blocked-out ‘me-time’ has helped tremendously in reining in the overwhelm.
4. Have meal backups for the crazy weeks ahead
Backup plans for meals is so dang important, and I always say that meal planning is one of the most overlooked form of stress management there is. Aside from regular meal plans, though, I have a few other backups I recommend.
These include freezer meals that have been prepped and frozen previously, super easy crockpot meals, simple 3-5 ingredient meals, or even breakfast for dinner.
I create (yet another) list of freezer meal inventory, and also list these other options and post it on our ‘command central dry-erase board. That way I don’t have to think about what the options are. I just go look and pick one.
5. Get in daily movement
Daily movement (what we call ‘oscillation‘ around here) is critical during this time of year. People start moving less and less the colder it gets outside. But we also have shifted into a new era of so many shopping options being online that the old days of 30,000 steps in a single day of holiday shopping just doesn’t happen anymore.
Daily oscillation, whether that’s total steps, flights of stairs climbed, walking, or a structured workout is so important for managing stress. I’d even argue that we should add some extra time to our daily movement during the holidays.
Movement and workouts have been shown to help us sleep better and manage stress better.
If you don’t have a regular plan for daily movement, get started! If you do, step it up a bit during the holidays–your body and emotional status will thank you!
Laura @true-well.co
6. Have sugar-free options for treats
This one is crazy important because when you’re this busy and overwhelmed, it’s SO easy to just grab the first thing you can find if you’re hungry.
Prep anti-inflammatory snacks and breakfasts that are sugar-free ahead of time so you’ve got no-brainer options to choose from. Especially since we’re out and about so much more during the holidays.
Blood sugar spikes and crashes are prime culprits for stress and emotional rollercoasters. Don’t fall into that trap during the holidays.
7. Use the TRUE-WELL trifecta formula for meals
Making sure you have your macros balanced at each meal will ensure you’re full longer, you don’t overeat, and your blood sugar stays balanced. This means less chance of emotional ups and downs from food.
This is especially true before holiday parties, dinners, and get-togethers as well. If you’re not planning a ‘cheat time’, it can be really easy to just say ‘screw it’ and eat inflammatory junk just because it’s there and you’re tired of wondering what you can eat.
The TRUE-WELL Trifecta includes:
QUALITY PROTEIN about the size of your palm,
1-2 x that in FIBER (ie, vegetables and complex carbs),
and then HEALTHY FATS about the size of your thumb.
8. Meal plan and prep for weeks when you can’t even think straight
Even with my new rules and strategies in place, we still have weeks that are completely nuts. This is when I rely on meal planning and meal prep.
Sometimes all this means is that instead of having a formal meal plan in place, I grab seasonal produce from the store and prep it at the start of the week, and we use those prepped foods to throw together anti-inflammatory meals the nights we’re home and cooking.
Anti-inflammatory recipes are a great addition to a healthy eating pattern as they can help manage, prevent or reverse the effects of inflammation in the body.
Ingredients like dark leafy greens, beets and cauliflower are packed with anti-inflammatory properties which can help reduce chronic pain and prevent age-related illnesses.
Eating anti-inflammatory foods doesn’t have to be bland or boring either, as there are plenty of fresh and healthy recipes to choose from that cater to different dietary needs. Incorporating these recipes into your meal prep routine can help balance your blood sugar and reduce chronic inflammation.
What is an anti-inflammatory diet?
An anti-inflammatory diet focuses on consuming foods that have anti-inflammatory properties, like fruits, vegetables, whole grains, lean proteins, and healthy fats.
It aims to reduce chronic inflammation in the body, which can help prevent chronic diseases and promote overall health and well-being.
What are the benefits of anti-inflammatory meal prep?
No matter the season, your life is probably super busy. We have 4 kids (3 at home), and regardless of whether school is in or it’s summer or even winter break, things are always sorta chaotic.
So this method has actually been a lifesaver for us so that on weeks where I don’t even have the brainpower to put a meal plan together, this is our lifeline.
We have a backup.
No thinking about it all day, no scrambling at the last minute, and definitely no ultra-processed, inflammatory, and overpriced drive-thru or takeout.
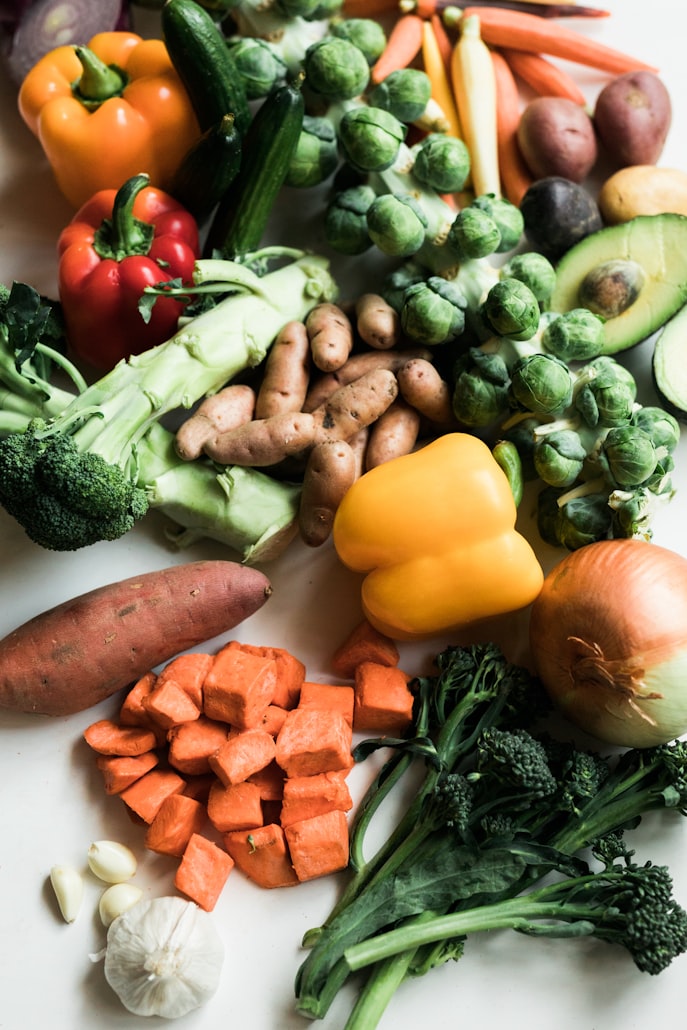
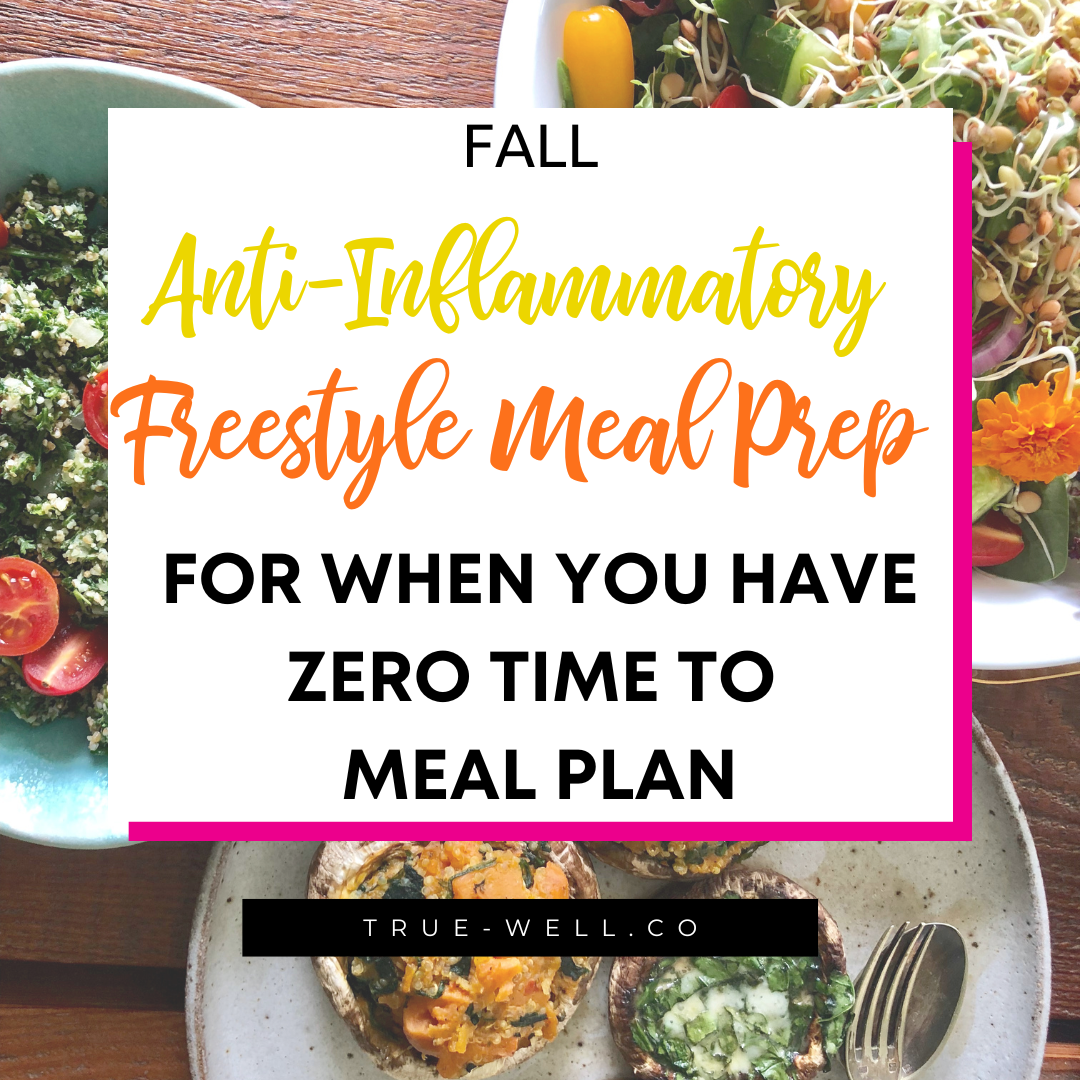
So I’m gonna show you how to meal prep with fall anti-inflammatory foods (meaning: in season for fall in the US).
I’m also linking the example meals that we made for the week with all of the produce that we got.
And if you scroll a bit, you can get the GUIDE that shows you the details for all of this so you can keep it on hand for ANY time you have weeks like this.
And all of this was just random stuff that I know my family will eat and that gave us a pretty good variety for meals this week.
Step 2: Prep your workspace
And after washing all the produce, I pre-heated both ovens for 350 degrees F.
The tools you’ll need for your meal prep session are a large cutting board, good knives, and roasting pans- probably with a lip, and something to line it with so stuff doesn’t stick.
Now I use something I found by accident with is a BBQ grilling mat—I love these because I can cut them to fit perfectly in my pan and NOTHING sticks to them—they come in a pack all rolled up in a box.
(Some links may be affiliate links, meaning if you click on and then purchase, I’ll get a portion of the proceeds, at no additional charge to you.) 🙂
So our base seasoning includes avodado oil to drizzle on, I use this to cook with because it has a high smoke point. Or you can use something like this Misto spray can where you put the oil in, pump air in to build pressure, and spray it on.
Then season with salt, pepper, and garlic powder, and it’s ready to go in the oven.
Click the image below to grab the free Fall Anti-Inflammatory Meal Prep Guide!👇
Step 4: Prep foods that cook the longest first
So, even though I didn’t have full meals planned out when I got all this produce, I had a loose plan for a few things. So I knew I’d want to do baked potatoes one night, so since they take an hour to bake you’ll want to do these first if you’re doing baked potatoes one night.
And for baked potatoes, you just coat each one individually with oil, salt it, wrap it in foil, and then punch some holes with a fork.
Once I’ve got those all set and into the oven for one hour, I get to work chopping everything else.
Step 5: Prep all other foods that cook the same length of time
Broccoli and cauliflower
I started out with broccoli, and just basically cut all the florets off—and if you don’t like to chop you can always buy the bags where it’s pre-chopped. It does save time, but may cost a little more.
Once these were all cut up, I put them all on the pan on one end, because I put the cauliflower on the other end.
Then I started with the cauliflower and removed that large base then cut those into florets as well, breaking some of them apart. And you can also buy these prechopped if you don’t like cutting them up- it does save a lot of time and mess.
Then I placed all those on the second half of the pan where the broccoli was. I cook these on the same pan because cook at right about the same rate.
And then I wanted a bit more flavor than just our base seasoning, so I chopped an onion into chunks and just spread it out evenly on the pan.
Brussels sprouts
Next I prepped brussels sprouts, and the easiest way to do these is chop off the end piece slice them in half and lay them face down on the pan.
I arranged mine with a hole in the middle for all the loose little leaves because they get extra crispy and are a super yummy snack!
Then drizzle or spray with oil, then season with salt, pepper, and garlic powder.—and they’re ready to go!
Mushrooms.
I decided to split the mushrooms and do half chopped pretty small and the other half roasted.
I chopped one half because I like to mix them in with ground meat to give it bulk and really boost the vitamin content-and my kids can never tell! I don’t precook those, so I just put them in a baggie to store in the fridge until the night I needed them.
The other half I just spread out on the pan, and I had a pack of sage I grabbed at the store as well—this is such a fragrant and nutrition-packed herb, and perfect for colder weather.
So I just chopped some of it, sprinkled it on the mushrooms, then added our oil, salt, pepper, and garlic powder and it’s ready to go.
Sweet potatoes
I roughly chopped the sweet potatoes because I had loosely planned mashed sweet potates with cinnamon- my kids love those- and the rest I planned to use in my lunches during the week.
But that meant that all of them needed to be chopped.
Regular potatoes
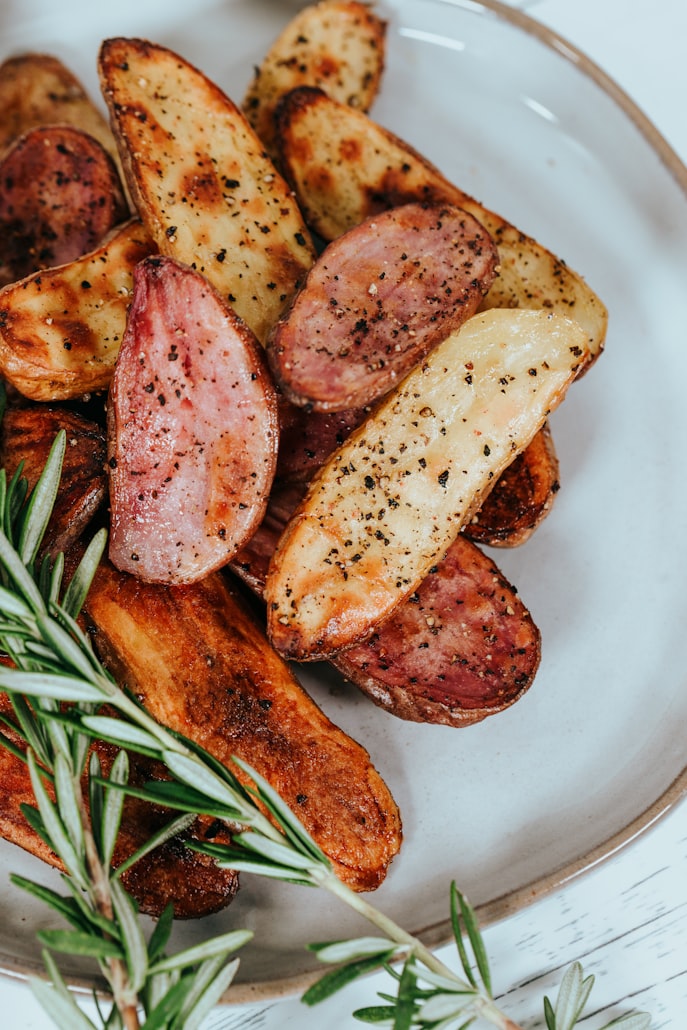
Then I started on the rest of the regular potatoes I had. So for the ones I wasn’t using for a whole baked potato, we like to sometimes do homemade fries and this tool makes it super easy.
It’s a fry cutter and has this grid blade inside to cut the potato in perfectly squared fries.
So how it works is that you take the lid off, place the potato wedge on top of that grid, then put the lid on and push it down to force the potato through the grid. And you have perfectly shaped fries.
So I repeated this process until I got all the rest of the potatoes cut, then put them with the sweet potatoes on a pan, because they cook at about the same rate. I got them all seasoned and ready for the oven.
Step 6: Put all prepped veggies into the oven
All of the veggies go into the oven at that 350 degrees F for 30 minutes- just keep an eye out and take out anything that’s cooking a little too much.
Step 7: Any veg that won’t be pre-cooked
And the last thing I prepped was kale. Since this came in a bag, I picked out any bad pieces since it was already chopped, and planned to wilt some one night for dinner, and then would have a massaged kale salad one night as well.
So once all the bad pieces were picked out I just stored it in a Ziploc in the fridge.
Step 8: Remove veggies from oven
And when they’re done, just take all the pans out, and let them cool…
Step 9: Store prepped veggies
Then start putting them into your storage containers.
I do recommend putting them in separate containers because some veggies do have a higher water content and a lot of times they get a little bit mushy in there and you don’t want that water running into the other vegetables.
And then you’ve got all your veggies prepped for the week! You can store all of these AND your baked potatoes in the fridge until the night you need them.
4+ Meals with pre-prepped fall anti-inflammatory vegetables
The meals we cooked with our freestyle meal prep session were:
One of the best ways to get quality protein in an anti-inflammatory diet is through fish, like this lemon cod recipe. It’s flaky and delicious, and super simple to make dairy-free.
This entire recipe is an anti-inflammatory meal, as we’ve added soft cinnamon-baked sweet potatoes and wilted kale into a perfect fall anti-inflammatory dinner using seasonal ingredients.
Cod is a really light and delicious fish that isn’t overpowering, but is full of healthy fats and protein. Sweet potatoes’ already high nutrient profile gets elevated with cinnamon. And kale rounds out this anti-inflammatory dinner recipe with a punch of vitamins and fiber in a delicious side dish.
1/4 cup unsalted Butter (organic–or sub in avocado oil for dairy-free)
4 Sweet Potatoes (small to medium)
Cinnamon
1 bunch kale
Salt + Pepper
1 tsp Garlic powder
1 TBSP avocado oil
Prep + Instructions
Preheat the oven to 400 F (204 C).
If cod fillets are frozen, thaw them in a bowl of cold water.
Cube the sweet potatoes and place them in a large saucepan or Dutch oven. Add water to the pan until they are covered about 1 inch. Turn the cooktop to medium-high heat until the water is simmering. Reduce the heat so that it’s still simmering and let cook for 9-12 minutes.
While those are cooking…
Pat cod fillets dry with paper towel. Then arrange them on a baking dish lined with foil or a grill mat.
Melt 1/8 cup (half) of the butter, the lemon juice and zest in a microwave or on the cooktop, then brush it onto the fillets.
Sprinkle salt, pepper, and garlic powder on the fillets, and place in the oven for 12-15 minutes depending on thickness. While those are cooking…
Place the kale in a medium to large skillet with 1 TBSP avocado oil on medium heat. Season with salt, pepper, and garlic powder to taste, and stir to coat all the kale.
Place a lid on the skillet and let wilt down while finishing the other parts of the meal.
When the potatoes are tender, drain and return them to the pot. Mash, and add the remaining butter (1/4 cup) and cinnamon, to taste.
Remove the cod from the oven when done and let rest 5 minutes.
Remove the kale from heat once wilted.
Plate all and serve!
Notes + Make it easier
**Any fish is so much better when it’s fresh vs. frozen, but it can be really hard to find fresh fish in many areas. Frozen is fine, just add a few extra minutes to thaw it in a bowl of cold water before cooking.
**Buy the sweet potatoes already cubed.
**If you don’t mind the stems, buy kale already chopped.
1/4cupunsalted Butter (organic–or sub in avocado oil for dairy-free)
4 Sweet Potatoes (small to medium)
Cinnamon
1 bunch kale
Salt + Pepper
1 tsp Garlic powder
1 TBSP avocado oil
Instructions
Preheat the oven to 400 F (204 C).
If cod fillets are frozen, thaw them in a bowl of cold water.
Cube the sweet potatoes and place them in a large saucepan or Dutch oven. Add water to the pan until they are covered about 1 inch. Turn the cooktop to medium-high heat until the water is simmering. Reduce the heat so that it’s still simmering and let cook for 9-12 minutes.
While those are cooking…
Pat cod fillets dry with paper towel. Then arrange them on a baking dish lined with foil or a grill mat.
Melt 1/8 cup (half) of the butter, the lemon juice and zest in a microwave or on the cooktop, then brush it onto the fillets.
Sprinkle salt, pepper, and garlic powder on the fillets, and place in the oven for 12-15 minutes depending on thickness. While those are cooking…
Place the kale in a medium to large skillet with 1 TBSP avocado oil on medium heat. Season with salt, pepper, and garlic powder to taste, and stir to coat all the kale.
Place a lid on the skillet and let wilt down while finishing the other parts of the meal.
When the potatoes are tender, drain and return them to the pot. Mash, and add the remaining butter (1/4 cup) and cinnamon, to taste.
Remove the cod from the oven when done and let rest 5 minutes.
Remove the kale from heat once wilted.
Plate all and serve!
Notes
*Any fish is so much better when it’s fresh vs. frozen, but it can be really hard to find fresh fish in many areas. Frozen is fine, just add a few extra minutes to thaw it in a bowl of cold water before cooking.
*Buy the sweet potatoes already cubed.
*If you don’t mind the stems, buy kale already chopped.
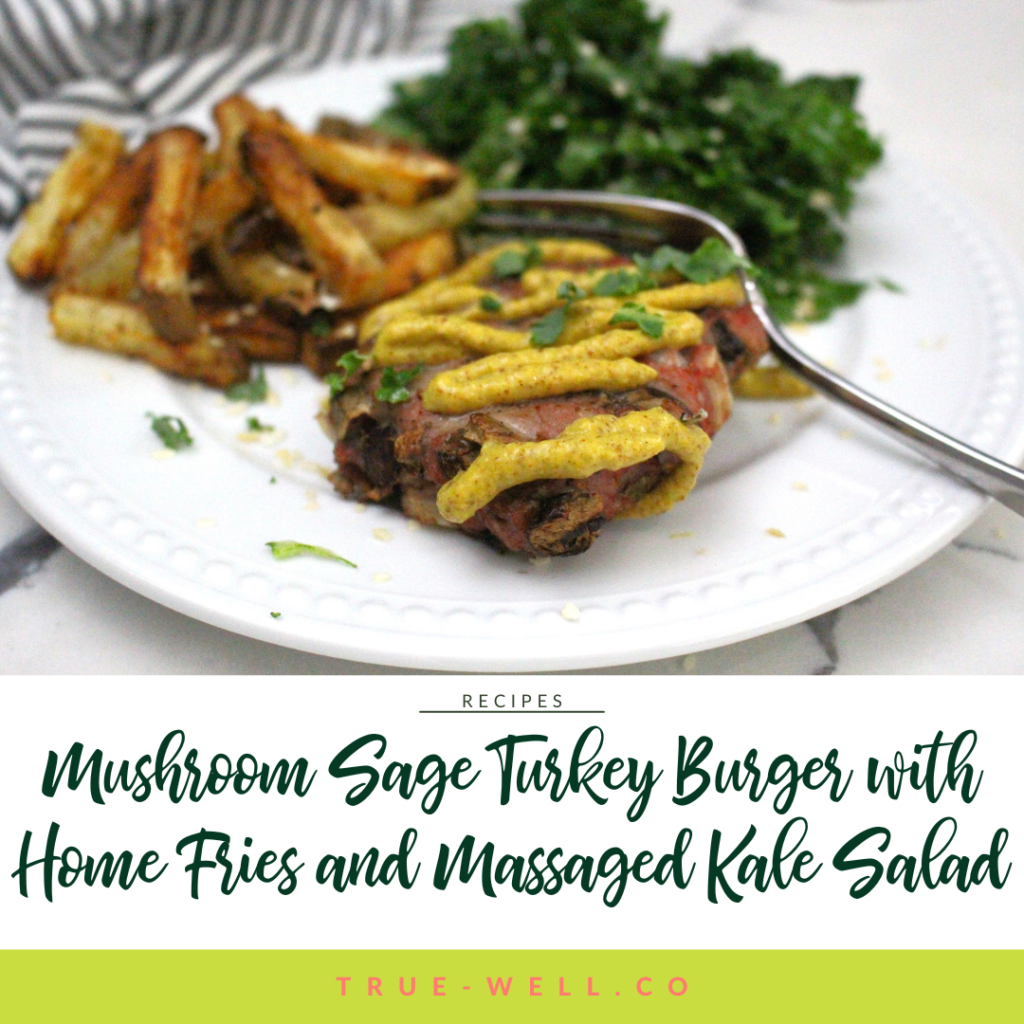
Although these mushroom sage turkey burgers can be eaten with a grain-free bun, they’re absolutely delicious on their own. This turkey burger with home fries and a massaged kale salad always feels like fall 🍂 to me!
Using either a fry-cutter or a large knife, cut the potatoes into fries.
Spread them on a baking sheet lined with foil or a grill mat.
Drizzle the fries with 1 TBSP oil, then season with salt, pepper, and garlic powder.
Put in the oven for 25-30 minutes until golden. (You can stir halfway through if you like.)
Finely chop the sage and add it to a large bowl.
Finely chop the onion and mushrooms (or chop them in a food processor). Place in the bowl with the sage. Add the ground turkey, and salt, pepper, and garlic powder to taste.
Mix the turkey mixture until all is incorporated. Pat into burgers.
Heat a skillet on medium (unless you’re grilling the burgers). Cook burgers until cooked through. Remove from skillet and let rest.
Cut the stems out of the kale leaves, and chop them into small-medium pieces.
Place the kale in a medium bowl. Drizzle with the remaining 1 TBSP avocado oil, then season with salt, pepper, and garlic powder. Massage kale, while folding the oil and seasoning in until the entire bowl has softened and is coated with oil and seasoning.
Remove fries from the oven when done and plate.
Enjoy!
Notes + Make it easier
*Having to cut the fries is an extra step, but I do it because I have yet to find frozen pre-cut fries that weren’t loaded with inflammatory oils and other unnecessary (but inflammatory) ingredients.
*Although fries are typically made from white potatoes, colored potatoes have more polyphenols that snatch up free radicals. The skins have more nutrients as well. 🙂
*If you don’t have an onion, onion flakes will do for flavor, but since turkey can be a bit more dry than other fattier meats, the fresh onion really adds some moisture.
*If you don’t mind the stems being in it, you can buy kale already pre-chopped to save a little time.
👇Grab the free Fall Anti-Inflammatory Meal Prep Guide by clicking the image below!
Using either a fry-cutter or a large knife, cut the potatoes into fries.
Spread them on a baking sheet lined with foil or a grill mat.
Drizzle the fries with 1 TBSP oil, then season with salt, pepper, and garlic powder.
Put in the oven for 25-30 minutes until golden. (You can stir halfway through if you like.)
Finely chop the sage and add it to a large bowl.
Finely chop the onion and mushrooms (or chop them in a food processor). Place in the bowl with the sage. Add the ground turkey, and salt, pepper, and garlic powder to taste.
Mix the turkey mixture until all is incorporated. Pat into burgers.
Heat a skillet on medium (unless you’re grilling the burgers). Cook burgers until cooked through. Remove from skillet and let rest.
Cut the stems out of the kale leaves, and chop them into small-medium pieces.
Place the kale in a medium bowl. Drizzle with the remaining 1 TBSP avocado oil, then season with salt, pepper, and garlic powder. Massage kale, while folding the oil and seasoning in until the entire bowl has softened and is coated with oil and seasoning.
Remove fries from the oven when done and plate
Enjoy!
Notes
*Having to cut the fries is an extra step, but I do it because I have yet to find frozen pre-cut fries that weren’t loaded with inflammatory oils and other unnecessary (but inflammatory) ingredients.
*Although fries are typically made from white potatoes, colored potatoes have more polyphenols that snatch up free radicals. The skins have more nutrients as well. 🙂
*If you don’t have an onion, onion flakes will do for flavor, but since turkey can be a bit more dry than other fattier meats, the fresh onion really adds some moisture.
*If you don’t mind the stems being in it, you can buy kale already pre-chopped to save a little time.
This sugar-free BBQ Chicken Baked Potato with Sage Roasted Mushrooms and Brussels Sprouts is absolutely delicious, easy, and anti-inflammatory!
I have to give props to my husband, who came up with this main recipe. He wanted something different and easy, so he decided on BBQ chicken (shredded) topped on a baked potato. It’s quick, super yummy, and the kids love it!
I added in these perfect fall sides to get our vegetables in: Sage-Roasted Mushrooms and Brussels Sprouts.
Although baked potatoes aren’t low-carb, they can still fit into an anti-inflammatory diet. They’re full of vitamins, minerals, and fiber.
Plus when you cook them (like with meal prep), let them cool in the fridge, then reheat them for dinner, it increases the resistant starches (which are amazing for your gut health!)
Place the chicken on the top rack, veggies on the middle rack. Roast for approximately 25-35 minutes at 350 F.
Once the potatoes are done, let them cool on the counter while either shredding the chicken or cubing it. We shred it in the food processor and add the BBQ sauce right into it.
Wrap the potatoes in foil, coated with oil, salt and pepper.
Bake at 350 F for one hour.
Place the chicken breast in a baking dish and salt + pepper it.
Chop the veggies and sage.
Place mushrooms on one end of a baking sheet that’s covered in foil (or a baking/grilling mat) and Brussels sprouts on the other end.
Drizzle with oil, then lightly salt, pepper, and garlic powder all the veggies.
Sprinkle sage all over the mushrooms.
Place the chicken on the top rack, veggies on the middle rack. Roast for approximately 25-35 minutes at 350 F.
Once the potatoes are done, let them cool on the counter while either shredding the chicken or cubing it. We shred it in the food processor and add the BBQ sauce right into it.
Assemble toppings onto potatoes, and serve the roasted fall vegetables on the side.
Notes
Make it easier:
Buy shredded chicken from the deli (try your hardest for organic!)
When it comes to easy anti-inflammatory dinners, this Chicken Sausage with Roasted Broccoli and Cauliflower couldn’t be easier.
Chicken sausage is one of my favorite ways to eat chicken because it’s a little different than our same ole’, same ole’ chicken, and you can find it with delicious add-ins like feta and sundried tomato.
Broccoli and cauliflower are cold-weather staples, but an important part of an anti-inflammatory diet for their phytochemicals.
This entire meal is super simple and low carb, which is important for keeping blood sugar under control, thereby controlling chronic inflammation.
This meal is so simple because the ingredients are very straightforward, with no complex prep or cooking.
Preheat the oven to 350 F.
Chop florets from broccoli and cauliflower, as well as the onion.
Place them on a sheet pan lined with foil or a grill mat.
Drizzle oil, then season with salt, pepper, and garlic powder.
Place broccoli and cauliflower pan into the oven for 25-30 minutes.
Cut the chicken sausage links into bite-sized pieces.
In a skillet, heat the sausage until warm and golden.
Remove the skillet from heat; plate the chicken sausage.
Remove the broccoli and cauliflower from the oven when done; plate with the chicken sausage.
Enjoy!
Notes + Make it easier
*Most chicken sausage is already pre-cooked, you need only heat it up. But CONFIRM this, as the sausage will need to cook much longer to ensure it’s fully cooked if it doesn’t specify ‘precooked’ or ‘fully cooked’ on the label.
*Save time by buying broccoli and cauliflower pre-chopped.
*If you’ve prepped/roasted the broccoli and cauliflower ahead of time, reheat it in the microwave while warming the chicken sausage in a skillet.
👇Click the image below to grab the free Fall Anti-Inflammatory Meal Prep Guide! 👇
Chop florets from broccoli and cauliflower, as well as the onion.
Place them on a sheet pan lined with foil or a grill mat.
Drizzle oil, then season with salt, pepper, and garlic powder.
Place broccoli and cauliflower pan into the oven for 25-30 minutes.
Cut the chicken sausage links into bite-sized pieces.
In a skillet, heat the sausage until warm and golden.
Remove the skillet from heat; plate the chicken sausage.
Remove the broccoli and cauliflower from the oven when done; plate with the chicken sausage.
Enjoy!
Notes
*Most chicken sausage is already precooked, you need only heat it up. But CONFIRM this, as the sausage will need to cook much longer to ensure it’s fully cooked if it doesn’t specify ‘precooked’ or ‘fully cooked’ on the label.
*Save time by buying the broccoli and cauliflower pre-chopped.
*If you’ve prepped/roasted the broccoli and cauliflower ahead of time, reheat it in the microwave while warming the chicken sausage in a skillet.
Even though brussels sprouts alone are one of my all-time faves for veggies (which is saying something since we never had them growing up!), merging a basic roasted brussels sprouts recipe with the added protein of ground turkey, a spicy crunch of sliced radishes, and topping it off with a caesar flair is an amazingly simple and downright delicious upgrade!
Ingredients
Ground turkey
Ground turkey is a perfect way to add in lean protein. It can also be a great way to reduce the consumption of red meat as a substitute. Just keep in mind that the lower fat content means it will be a bit more dry.
Brussels sprouts
Part of the cruciferous family, Brussels sprouts contain compounds that help protect against cancer, as well as phytochemicals that help reduce inflammation. They’re also packed with fiber and super simple to cook.
Radishes
Radishes are low in calories, but full of antioxidants and fiber. They’re a great way to pack in more nutrients and have the versatility of being eaten raw or cooked.
Pumpkin seeds
Packing in more protein than nuts, pumpkin seeds also contain fiber and are full of minerals like manganese, phosphorus, and magnesium.
Garlic
Garlic is one of my favorite ingredients to use in the fall and winter. This is because it’s cold and flu (and COVID) season, and garlic helps boost the immune system.
It’s also been shown to reduce high blood pressure, pull down chronic inflammation, reduce cholesterol levels, and even help prevent cancer. It also has antibiotic properties, so I’d say this is an amazing staple to use all fall and winter long!
Dijon mustard
Dijon mustard (and yellow) are my favorite condiment to use in an anti-inflammatory diet. This is because they’re sugar-free, low-calorie, and give an amazing boost of acidic flavor.
Instructions
Preheat oven to 400 degrees F.
In a large bowl, toss brussels sprouts with a splash of olive oil and season with salt and pepper. Toss well and place on baking sheet lined with parchment paper or foil.
Place in oven and bake for 30 minutes.
Brown the ground turkey.
Add olive oil, lemon juice mustard, garlic, and salt and pepper to taste into a blender. Blend until creamy.
Once brussels sprouts are finished cooking, remove from oven and let cool a few minutes.
Then place brussels sprouts, turkey, and radish into large mixing bowl. Add dressing and toss well.
Notes
*Save time by buying the Brussels sprouts already halved.
*This is a great meal prep meal! Just store the dijon separately from the rest and reheat and toss before eating.
*Add in even more fiber and bulk by plating this on top of a bed of romaine leaves.
👇Click the image below to grab the free Fall Anti-Inflammatory Meal Prep Guide!
This delicious anti-inflammatory twist on a Caesar salad merges roasted Brussels sprouts + ground turkey and a spicy crunch of radishes.
Prep Time:15 minutes
Cook Time:30 minutes
Total Time:45 minutes
Yield:41x
Category:Main Course
Method:Oven + Cooktop
Ingredients
UnitsScale
1lbground turkey (extra lean )
5cupsbrussels sprouts (halved)
1/2cupradishes (sliced)
1/2cuppumpkin seeds
1/3cupextra virgin olive oil
3 tsp minced garlic
1/4cuplemon juice (or 1/2 lemon)
2 TBSP Dijon mustard
1 tsp salt/pepper (to taste)
Instructions
Preheat oven to 400 degrees F.
In a large bowl, toss brussels sprouts with a splash of olive oil and season with salt and pepper. Toss well and place on baking sheet lined with parchment paper or foil.
Place in oven and bake for 30 minutes.
Brown the ground turkey.
Add olive oil, lemon juice mustard, garlic, and salt and pepper to taste into a blender. Blend until creamy.
Once brussels sprouts are finished cooking, remove from oven and let cool a few minutes.
Then place brussels sprouts, turkey, and radish into large mixing bowl. Add dressing and toss well.
Notes
*Save time by buying the Brussels sprouts already halved.
*This is a great meal prep meal! Just store the dijon separately from the rest and reheat and toss before eating.
*Add in even more fiber and bulk by plating this on top of a bed of romaine leaves.
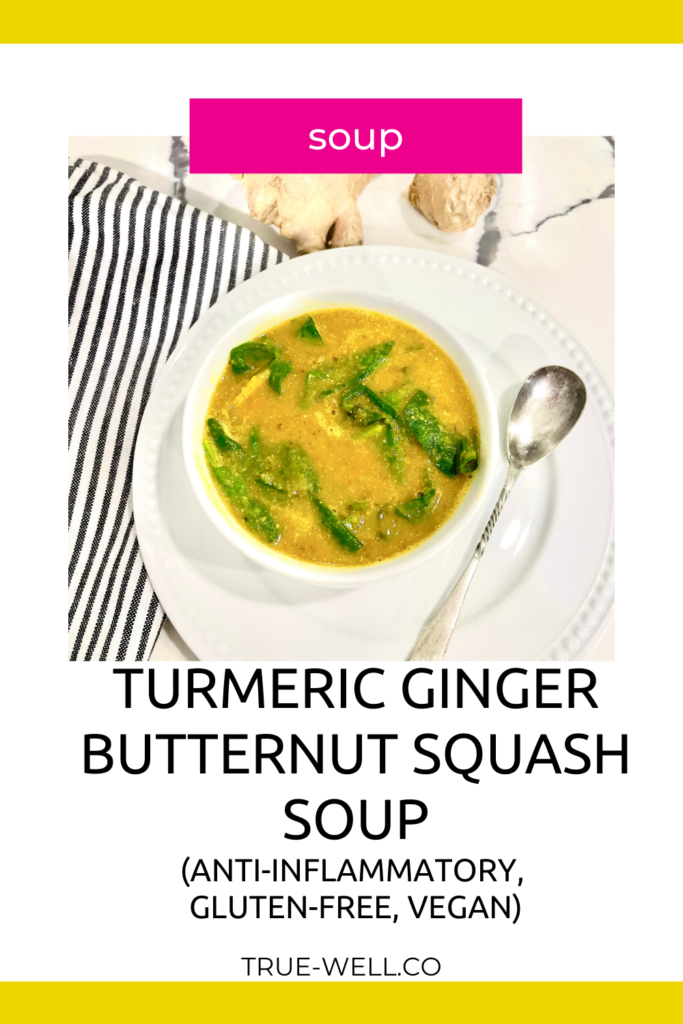
When it comes to Anti-Inflammatory soups, this Turmeric Ginger Butternut Squash one is 💯! Packed with anti-inflammatory ingredients and vegan (unless you want to add some shredded chicken!), this will warm you right up in those cold fall and winter months and keep you cozy!
Ingredients
Butternut squash
This fall and winter squash has a creamy texture when pureed, and is packed full of phytochemicals. They can be a little intimidating to cook the first time, but once you’ve done it, you’ll see it’s no problem.
Baby Spinach
Baby greens like this are amazing ways to get in your calcium, folate, iron, and other minerals and vitamins. Also, since it’s cooked in this butternut squash soup, you’ll absorb more calcium and iron.
Turmeric and Ginger
Both of these ingredients are well known for their anti-inflammatory properties.
Lentils
Lentils are a staple of the Mediterranean diet, and I love the use of them in this recipe because they add some plant-based protein and fiber. This helps prevent blood sugar spikes, which also helps stave off chronic inflammation.
Instructions
Preheat oven to 400 F, cut butternut squash in half and lay it facing downward on a pan covered in foil. Cook for 40 minutes.
In a large pot, drizzle oil and add onion, garlic, and ginger. Cook until the onions are clear, stirring often.
Pour in the milk, broth, and lentils, and stir. Bring to a boil over medium-high heat and then reduce heat, cover and simmer for 20 minutes, until lentils are cooked through.
When the squash is finished cooking, remove from oven, spoon out and discard seeds. Then scoop out the flesh and place in a high-powered blender.
Add half of the soup mixture into blender and puree until smooth. Pour back into the soup pot.
Stir in the baby spinach and simmer until the spinach is wilted.
Divide into bowls, serve, and enjoy!
Notes
*Save some time by buying butternut squash already cubed and steaming it to get it soft enough to puree.
*Kale can be subbed in for the baby spinach.
*If you like your soup to feel ‘chunkier’, cook the lentils and add them AFTER you puree the other ingredients. This may also help to have an even lower blood sugar response.
Click the image to grab the free Fall Anti-Inflammatory Meal Prep Guide ! 👆
This delicious and cozy anti-inflammatory soup really should be a staple in your household in the fall and winter months. Chock full of anti-inflammatory ingredients, this butternut squash soup will also give you an injection of vitamins and minerals.
Preheat oven to 400 F, cut butternut squash in half and lay it facing downward on a pan covered in foil. Cook for 40 minutes.
In a large pot, drizzle oil and add onion, garlic, and ginger. Cook until the onions are clear, stirring often.
Pour in the milk, broth, and lentils, and stir. Bring to a boil over medium-high heat and then reduce heat, cover and simmer for 20 minutes, until lentils are cooked through.
When the squash is finished cooking, remove from oven, spoon out and discard seeds. Then scoop out the flesh and place in a high-powered blender.
Add half of the soup mixture into blender and puree until smooth. Pour back into the soup pot.
Stir in the baby spinach and simmer until the spinach is wilted.
Divide into bowls, serve, and enjoy!
Notes
*Save some time by buying butternut squash already cubed and steaming it to get it soft enough to puree.
*Kale can be subbed in for the baby spinach.
*If you like your soup to feel ‘chunkier’, cook the lentils and add them AFTER you puree the other ingredients. This may also help to have an even lower blood sugar response.
I’m SOOOO ready to be inflamed, in pain, and on a blood sugar and energy rollercoaster for weeks because of all the holiday foods that cause inflammation that I’m ’bout to stuff my face with!!! … said no one ever.
Honestly, the holidays can be so chaotic and stressful, I don’t understand the loads of inflammatory foods being added into the mix.
I get that there’s a lot of ‘give yourself a break and enjoy the holidays without feeling guilty’ mantras and advice floating around this time of year. But to be honest, those people don’t usually have (or acknowledge) inflammatory, blood sugar, or metabolic issues that wreak havoc when we binge on inflammatory foods.
So it isn’t really about the guilt. It’s about an entire month (or three) of our bodies and brains being completely out of balance just for the sake of a couple of meals.
On the other hand, it’s nice to feel some semblance of tradition during the holidays (and avoid irritating questions from Aunt Edna about why we’re not eating).
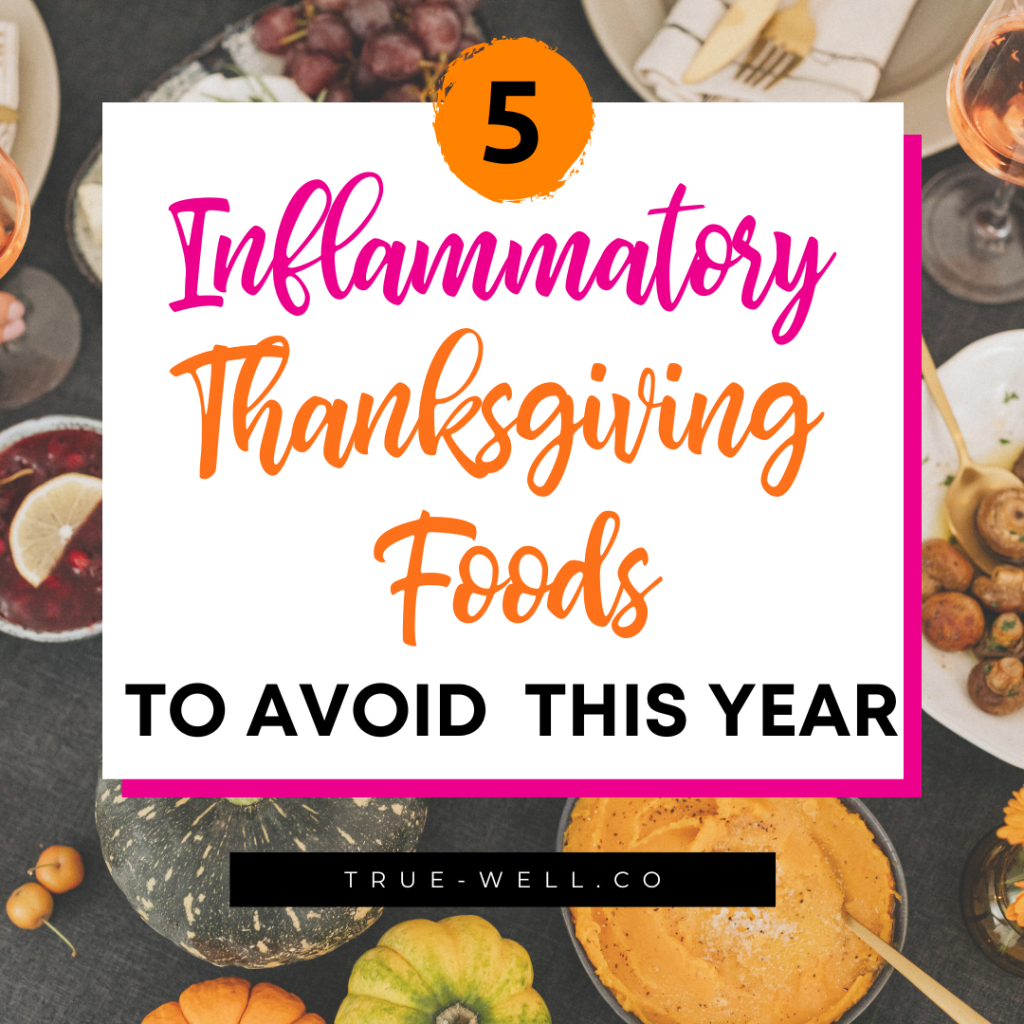
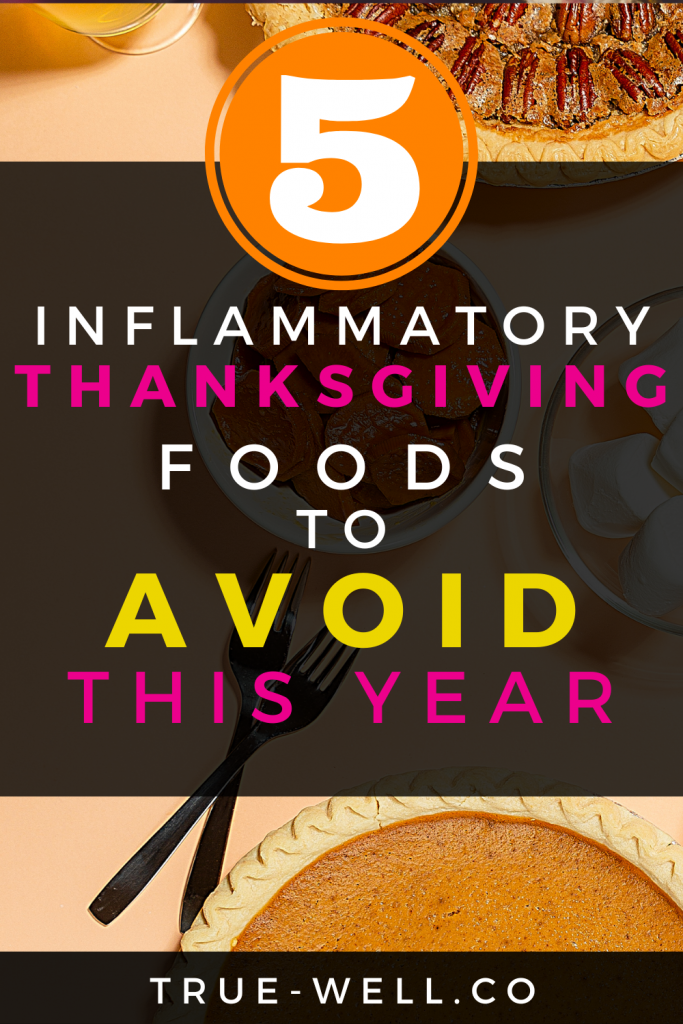
So here are the top 5 inflammatory holiday foods to avoid this year, with swap suggestions. {Click the image below to grab it!}
(1) Vegetable and seed oils
Not only are these types of oils extremely inflammatory due to the refining process, but they also contain omega-6 fats which are inflammatory.
To make matters worse, some holiday foods are fried. When oils– especially ones that are already inflammatory– are heated to super high temps and reheated, you’re adding a hefty amount of inflammatory free radicals to the mix.
It can be really difficult to avoid these when you’re using already processed foods in recipes. And you can guarantee these types of oils are used in pre-made foods and recipes.
👉 Instead, make recipes from scratch and opt for oils like avocado, extra virgin olive oil (only for non-heated foods), or coconut oil (organic, unrefined).
(2) Trans fats
These fats are in nearly any ultra-processed food you can find. They’ve been shown to contribute to heart disease and LDL cholesterol (bad cholesterol). And although the US is in the process of banning trans fats (like other countries have), labeling laws still dictate that foods can have 0.5 grams or less per serving.
For now, all this means is that companies are using this loophole to make their serving size small enough that the trans fat amount is 0.5 or less.
👉 So check the ingredients list to make sure there are no trans fats. You’ll know if they are present because the ingredients will include ‘hydrogenated’ or ‘partially hydrogenated’ oil. If it says this, find a different option.
(3) Refined carbohydrates
Refined carbs seem to be a staple in holiday cuisine. From fried things to bread to desserts, they’re in a ton of sweet and savory recipes.
The biggest culprits of refined carbohydrate savory dishes at holiday meals are bread, rolls, breading, pasta, and corn-based foods.
👉 Instead, focus on proteins and veggies that aren’t covered in glazes, gravies, and dressings.
👉 In desserts, since these go hand in hand with sugar, unless you can guarantee they’re sugar-free, it’s best to steer clear of the dessert table, unless fresh fruit that’s not covered in sugar is available.
👉 A good tip is to plan ahead and bring your own sugar-free, refined-flour-free dessert.
(4) Sugar
Sugar is extremely inflammatory, and has about a thousand different names and forms these days. It’s being added more and more to savory dishes to balance flavors and sometimes make it more addicting.
What’s even worse is high fructose corn syrup. Both are added to nearly all ultra-processed foods these days. And you can guarantee all the desserts are loaded with some kind of sugar.
👉 Check ingredient labels! Ingredients have to be listed in order from most to least, so you can tell the general amount of sugar in a package– the best bet is to avoid any with sugar altogether. This may mean foregoing sweet potato souffle and the pink salad (or jello salad) and the dessert table.
Another source of sugar at holiday meals is also beverages. Sweet tea (mostly in the South), sodas, hydration drinks, and alcoholic drinks are huge culprits of sugar during the holidays.
👉 Opt for water or unsweetened tea, and create your own cocktail with the suggestions below.
(5) Alcoholic beverages
Alcohol seems to be a staple at the holidays for most. The problem is, being off work – and especially if you’re not the designated driver- tend to make many feel like they have a free pass to indulge to the max during the holidays.
Beer can drive up uric acid levels, which creates inflammation, wines can have sugars in them, and mixed drinks are normally loaded with sugar and preservatives from the mixer base.
👉 To enjoy alcohol and still find a balance, alternate each drink with water. Hydration is extremely helpful in flushing inflammatory foods from the body.
👉 Choose dry red wines instead of beer or white wine.
👉 Mix liquor with sparkling water and a couple of drops of liquid stevia.
Tips for creating a more balanced holiday meal:
💎If you’re the one cooking the meal or contributing, it can be a lot easier to have control over what’s being served.
What we’ve learned through the years is that my husband’s and I’s families have only like two staple holiday recipes that are the same. The rest are recipes with super-inflammatory processed ingredients that the kids don’t even like.
That makes it much easier to eliminate inflammatory recipes and replace them with something much better for us.
💎We focus first on the protein and choose quality meats, and then prepare them with healthier options (ie- NOT frying an entire turkey).
💎Our second focus is on vegetables. We decide what dishes we can convert into healthier options from the old-school versions, and how we can make them taste amazing.
💎 If you’re not confident in altering recipes, search up options with the words, ‘Paleo’, ‘low-carb’, or ‘keto’ at the front, and make sure they’re sugar-free and refined-flour-free.
💎One thing my husband and I have discovered over the years is that when you experience nice restaurants- not chains- but ones with true chefs, is that they take a lot of pride in the flavor profiles and combinations of ingredients.
They also use very fresh ingredients and cook from scratch (for the most part). The result of that is incredibly delicious meals that aren’t processed, and – if the correct ingredients are used- aren’t inflammatory. The same holds true for the holidays.
Consider revamping some of your old-school recipes that use processed junk and challenge yourself to see how you can improve the health profile while maximizing the flavor profile.
Then save those in a binder for the next holiday season!
An amazing resource for doing this is a book called The Flavor Bible. We use this all the time to create new recipes or even add more pizzazz to existing ones.
{This is an affiliate link, which means if you click through and purchase, I’ll receive a small portion of the proceeds, at no extra charge to you.}
And as promised… Grab our free Healthy Holiday Swap-out Planning Sheet! 👇👇👇{Click the image below to grab it!}
I’m SOOOO ready to be inflamed, in pain, and on a blood sugar and energy rollercoaster for weeks because of all the Thanksgiving foods that cause inflammation that I’m ’bout to stuff my face with!!! … said no one ever.
Honestly, the holidays can be so chaotic and stressful, I don’t understand the loads of inflammatory foods being added into the mix.
I get that there’s a lot of ‘give yourself a break and enjoy the holidays without feeling guilty’ mantras and advice floating around this time of year. But to be honest, those people don’t usually have (or acknowledge) inflammatory, blood sugar, or metabolic issues that wreak havoc when we binge on inflammatory foods.
So it isn’t really about the guilt. It’s about an entire month (or three) of our bodies and brains being completely out of balance just for the sake of a couple of meals.
On the other hand, it’s nice to feel some semblance of tradition during the holidays (and avoid irritating questions from Aunt Edna about why we’re not eating) as well.
So here are the top 5 inflammatory Thanksgiving foods to avoid this year, with swap suggestions.
Feel GOOD this holiday! Grab our Healthy Holiday Swap-Out Planner!
Not only are these types of oils extremely inflammatory due to the refining process, but they also contain omega-6 fats which are inflammatory.
To make matters worse, some Thanksgiving foods are fried. When oils– especially ones that are already inflammatory– are heated to super high temps and reheated, you’re adding a hefty amount of inflammatory free radicals to the mix.
It can be really difficult to avoid these when you’re using already processed foods in recipes. And you can guarantee these types of oils are used in pre-made foods and recipes.
👉 Instead, make recipes from scratch and opt for oils like avocado, extra virgin olive oil (only for non-heated foods), or coconut oil (organic, unrefined).
(2) Trans fats
These fats are in nearly any ultra-processed food you can find. They’ve been shown to contribute to heart disease and LDL cholesterol (bad cholesterol). And although the US is in the process of banning trans fats (like other countries have), labeling laws still dictate that foods can have 0.5 grams or less per serving.
For now, all this means is that companies are using this loophole to make their serving size small enough that the trans fat amount is 0.5 or less.
👉 So check the ingredients list to make sure there are no trans fats. You’ll know if they are present because the ingredients will include ‘hydrogenated’ or ‘partially hydrogenated’ oil. If it says this, find a different option.
(3) Refined carbohydrates
Refined carbs seem to be a staple in holiday cuisine. From fried things to bread to desserts, they’re in a ton of sweet and savory recipes.
The biggest culprits of refined carbohydrate savory dishes at Thanksgiving are bread, rolls, breading, pasta, and corn-based foods.
👉 Instead, focus on proteins and veggies that aren’t covered in glazes, gravies, and dressings.
👉 In desserts, since these go hand in hand with sugar, unless you can guarantee they’re sugar-free, it’s best to steer clear of the dessert table, unless fresh fruit that’s not covered in sugar is available.
👉 A good tip is to plan ahead and bring your own sugar-free, refined-flour-free dessert.
(4) Sugar
Sugar is extremely inflammatory, and has about a thousand different names and forms these days. It’s being added more and more to savory dishes to balance flavors and sometimes make it more addicting.
What’s even worse is high fructose corn syrup. Both are added to nearly all ultra-processed foods these days. And you can guarantee all the desserts are loaded with some kind of sugar.
👉 Check ingredient labels! Ingredients have to be listed in order from most to least, so you can tell the general amount of sugar in a package– the best bet is to avoid any with sugar altogether. This may mean foregoing sweet potato souffle and the pink salad (or jello salad) and the dessert table.
Another source of sugar is also beverages. Sweet tea (mostly in the South), sodas, hydration drinks, and alcoholic drinks are huge culprits of sugar during the holidays.
👉 Opt for water or unsweetened tea, and create your own cocktail with the suggestions below.
(5) Alcoholic beverages
Alcohol seems to be a staple at the holidays for most. The problem is, being off work – and especially if you’re not the designated driver- tend to make many feel like they have a free pass to indulge to the max during the holidays.
Beer can drive up uric acid levels, which creates inflammation, wines can have sugars in them, and mixed drinks are normally loaded with sugar from the mixer base.
👉 To enjoy alcohol and still find a balance, alternate one drink with water. Hydration is extremely helpful in flushing inflammatory foods from the body.
👉 Choose dry red wines instead of beer or white wine.
👉 Mix liquor with sparkling water and a couple of drops of liquid stevia.
Tips for creating a more balanced Thanksgiving meal:
💎If you’re the one cooking the meal or contributing, it can be a lot easier to have control over what’s being served.
What we’ve learned through the years is that my husband’s and I’s families have only like two staple holiday recipes that are the same. The rest are recipes with super-inflammatory processed ingredients that the kids don’t even like.
That makes it much easier to eliminate inflammatory recipes and replace them with something much better for us.
💎We focus first on the protein and choose quality meats, and then prepare them with healthier options (ie- NOT frying an entire turkey).
💎Our second focus is on vegetables. We decide what dishes we can convert into healthier options from the old-school versions, and how we can make them taste amazing.
💎 If you’re not confident in altering recipes, search up options with the words, ‘Paleo’, ‘low-carb’, or ‘keto’ at the front, and make sure they’re sugar-free and refined-flour-free.
💎One thing my husband and I have discovered over the years is that when you experience nice restaurants- not chains- but ones with true chefs, is that they take a lot of pride in the flavor profiles and combinations of ingredients.
They also use very fresh ingredients and cook from scratch (for the most part). The result of that is incredibly delicious meals that aren’t processed, and – if the correct ingredients are used- aren’t inflammatory. The same holds true for the holidays.
Consider revamping some of your old-school recipes that use processed junk and challenge yourself to see how you can improve the health profile while maximizing the flavor profile.
Then save those in a binder for the next holiday season!
An amazing resource for doing this is a book called The Flavor Bible. We use this all the time to create new recipes or even add more pizzazz to existing ones.
{This is an affiliate link, which means if you click through and purchase, I’ll receive a small portion of the proceeds, at no extra charge to you.}
And as promised… Grab our free Healthy Holiday Swap-out Planning Sheet! 👇👇👇 {click the image}
When it comes to easy and nutritious, nothing comes closer than this simple roasted tomato soup. Not only is it full of phytonutrients from tomatoes, onion, and bell peppers, it’s also a great warm weather soup or cold-weather comfort food.
When it comes to bulk recipes that are easy to grab-and-go, you can’t get much more balanced than these Green Smoothie Protein Muffins!
Not only do these powerhouse muffins have spinach in them (hence, the green color), but they’re also packed with fiber and a boost of protein to make these perfectly balanced.
3/4cup whole milk (organic, or non-dairy unsweetened milk of choice))
2 eggs
2cupsoats (rolled or steel-cut or old-fashioned)
1 TBSP baking powder
Instructions
Preheat your oven to 350ºF (177ºC) and line a muffin tin with liners. Brush the liners with coconut oil or use silicone cups to prevent the muffins from sticking.
In your blender, combine the baby spinach, bananas, protein powder, dates, and milk. Blend until smooth, then add the eggs, oats, and baking powder. Blend again until a batter is formed.
Scoop the muffin batter into the cups. Bake for 18 to 20 minutes, or until a toothpick inserted into the middle of a muffin comes out clean.
Let cool and enjoy!
Notes
Recommended Protein Powder
This recipe was developed and tested with a plant-based protein powder. If using a different type of protein powder, results may vary.
Leftovers
Store in an airtight container in the fridge for 4 days, or freeze for two months or more.
Add-Ins
After blending, stir in chocolate chips, fresh berries, walnuts, or anything else you like to add to banana muffins!