8 Proven Ways for Managing Inflammation and Stress During the Holidays

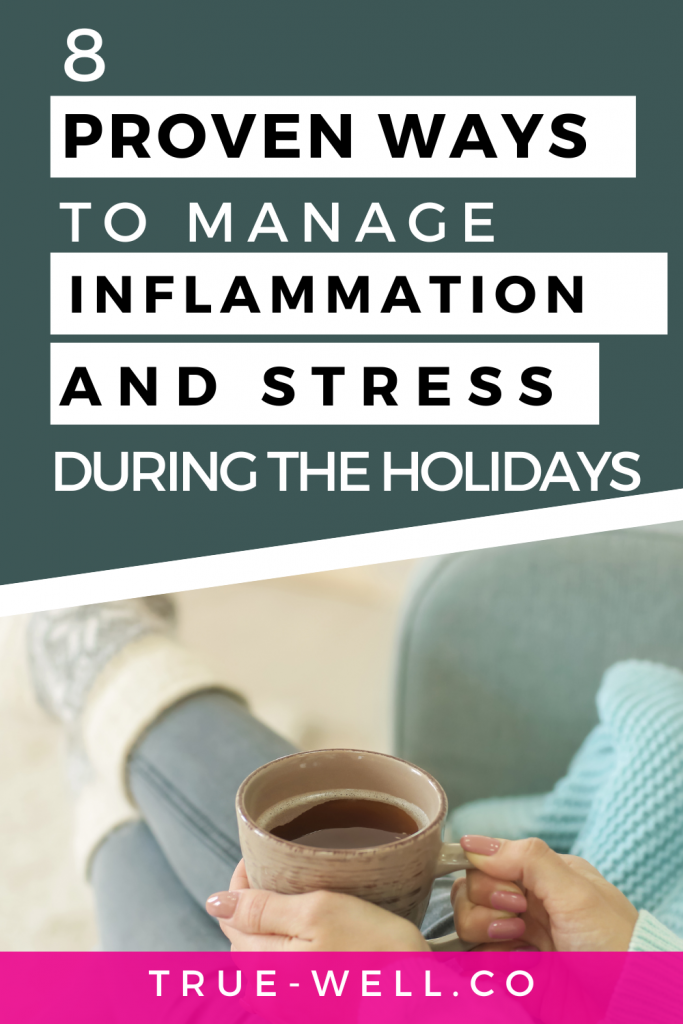
Aside from the start of the school year, I would argue that the holidays are the biggest time of year for stress and inflammation. It only makes sense, right? Budgeting, planning, finishing the year strong, school activities, shopping, setting goals for the new year, and then spending time with family that you may not get along with…. it’s a lot.

ways to manage inflammation and stress during the holidays

I used to think I loved the holidays. My husband would constantly talk about how much he loved the holidays. The kids talked about how amazing the holidays were.

But each passing year I’d find I was not only more and more exhausted and irritated, but my health issues were mounting as well.

More blood sugar rollercoasters, more emotional ups and downs, worse allergy issues, worse skin issues, and severe exhaustion. All of this cycled back to being more irritable and depressed than ever.

I finally realized a lot of it was because I was the sole person doing literally all the work. I wanted my family to have an amazing holiday, but I never got to actually enjoy it.

The overwhelm of doing everything and worrying about everything and being so incessantly stressed would lead to stuffing myself with sugar and refined carbs (and lots of processed convenience foods) just to have the energy to keep going. This perfect storm was creating massive amounts of inflammation in my body.

a woman stressed and inflamed during the holidays

One year I finally snapped. It was too much. It was the year I was working on my master’s in nutrition, which also happened to be the same year my husband started a new job that had him gone 4-5 nights a week, every week, for months.

So after some long heart-to-heart discussions and laying down new expectations (also known as creating boundaries for myself which I’ve always sucked at), things are very different during the holidays in our home.

Not only did I commit to myself that fueling myself properly the whole year –especially during the holidays–would help with stress levels (among a thousand other things), I knew taking control in a different way would help tame the chaos as well.

The connection between stress and inflammation

Many people go into an anti-inflammatory diet and lifestyle not really understanding that even though nutrition and what you eat are extremely important in reducing inflammation in the body, but there are three other core pillars of health that also greatly affect inflammation.

One of those is stress. Stress kicks on our ‘cortisol switch’, which under normal circumstances would be an expected physiological reaction. But chronic stress levels create a situation in the body where there is reduced sensitivity to cortisol (similar to how insulin resistance begins). This creates a constant state of too much cortisol, and thereby, increased inflammation.

What’s crazy to think about is that the connection between excessive inflammation with chronic disease has been so well documented the last few decades that they’re sometimes referred to as ‘stress-related diseases: metabolic diseases, cardiovascular diseases, and even psychotic and neurodegenerative diseases.

When our bodies are this stressed, we don’t sleep well or make good dietary choices. When we don’t sleep well, our hunger hormone goes into overdrive, making it even more difficult to make smart food choices. Then our energy levels nosedive and we don’t feel like getting in any kind of movement. We’re exhausted. And still stressed out.

This loop is what I call the CORE 4. And they can work synergistically for you or against you.

Unfortunately, the holidays are prime time for them to work against you, creating a perfect storm of inflammation, if you don’t get a hold on managing your stress levels.

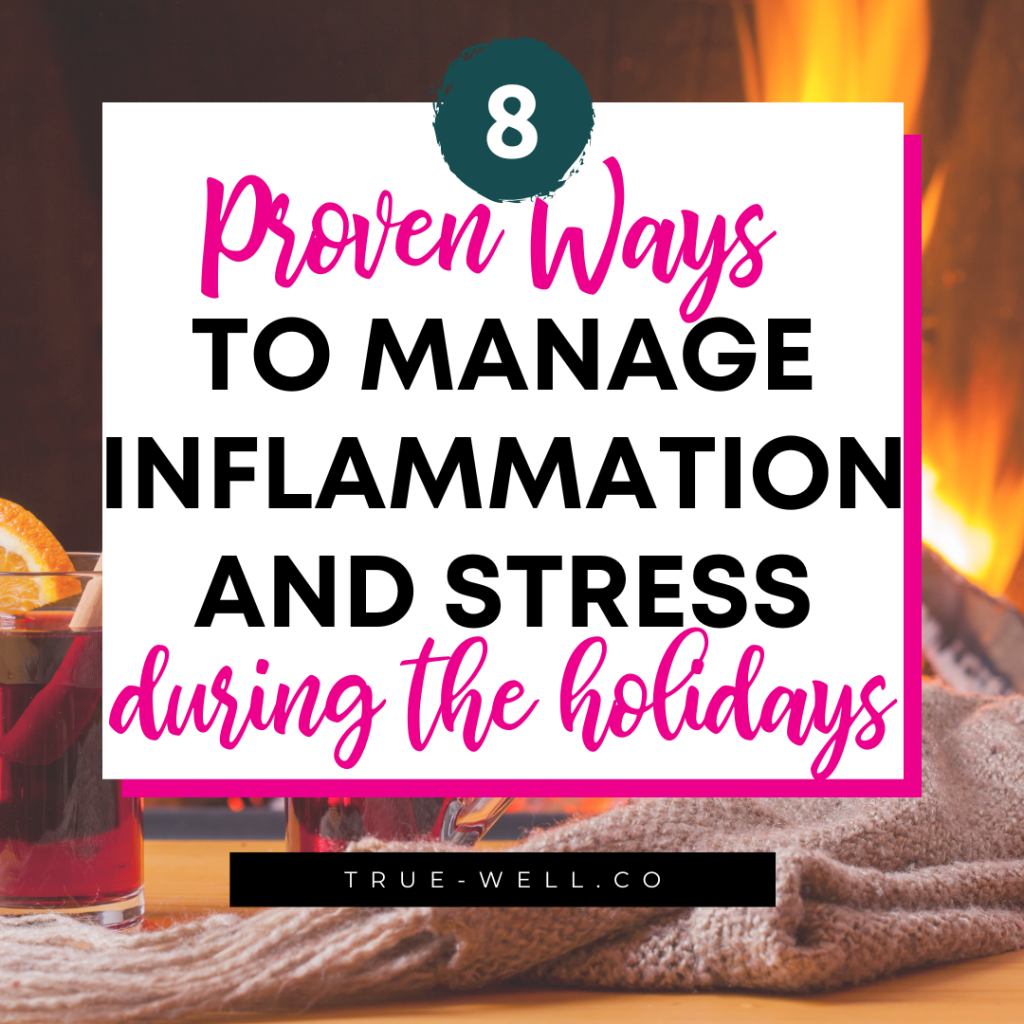
Here are the proven strategies I use now in managing inflammation and stress during the holidays that took it from feeling like an overwhelming nightmare to actually looking forward to and enjoying the end of the year (and the people I choose to spend it with.)

1. Use a planner and checklists for EVERYTHING

I’m a HUGE advocate for checklists. They seem simple and benign, but they have a lot of power in them. Especially during the holidays.

There’s so incredibly much going on at all times that there will always be 3 (or 15) things forgotten without listing them all down.

Not only do I make lists for my daily to-dos in my business, I make checklists for :

  • home stuff that needs to be done,
  • chore checklists for the kids,
  • a ‘honey-do’ list,
  • packing lists if we’re traveling,
  • gift budgeting lists,
  • lists for all activities and school functions to attend,
  • and lists for any kind of get-togethers we may be hosting or attending.

It sounds silly, but lists are a super simple way to feel a little more in control. You can see everything at a glance without having to try and keep up with it all in your head. (Oh yeah–and being able to see it this way also helps determine who you can delegate things to.) πŸ˜‰

Checklists alone are the biggest thing that helps me keep my stress in check during the holidays.
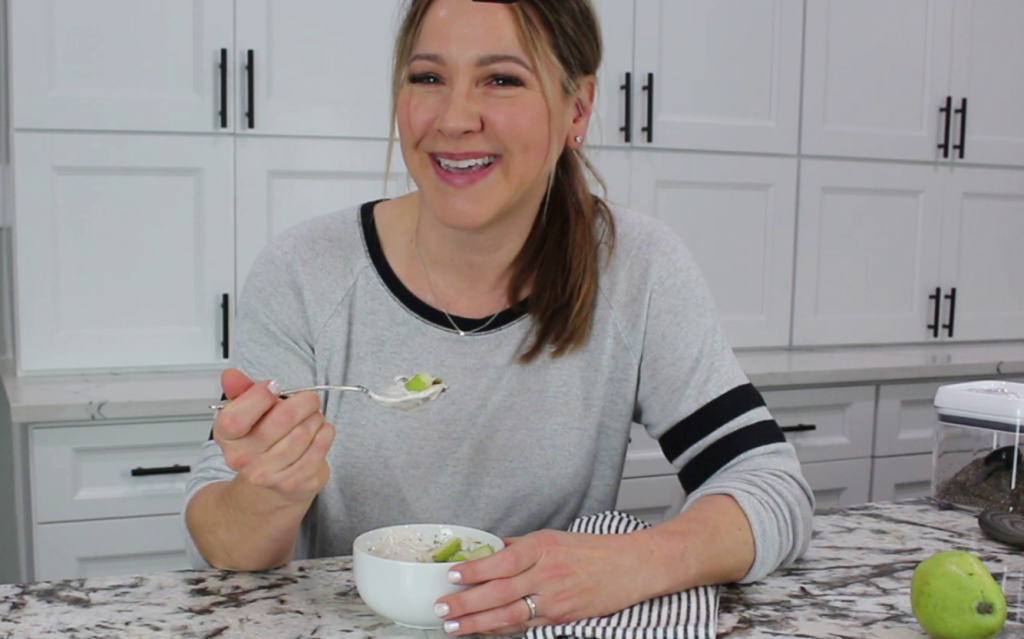
Laura, @truewell.co

2. Plan ahead for get-togethers with anti-inflammatory versions

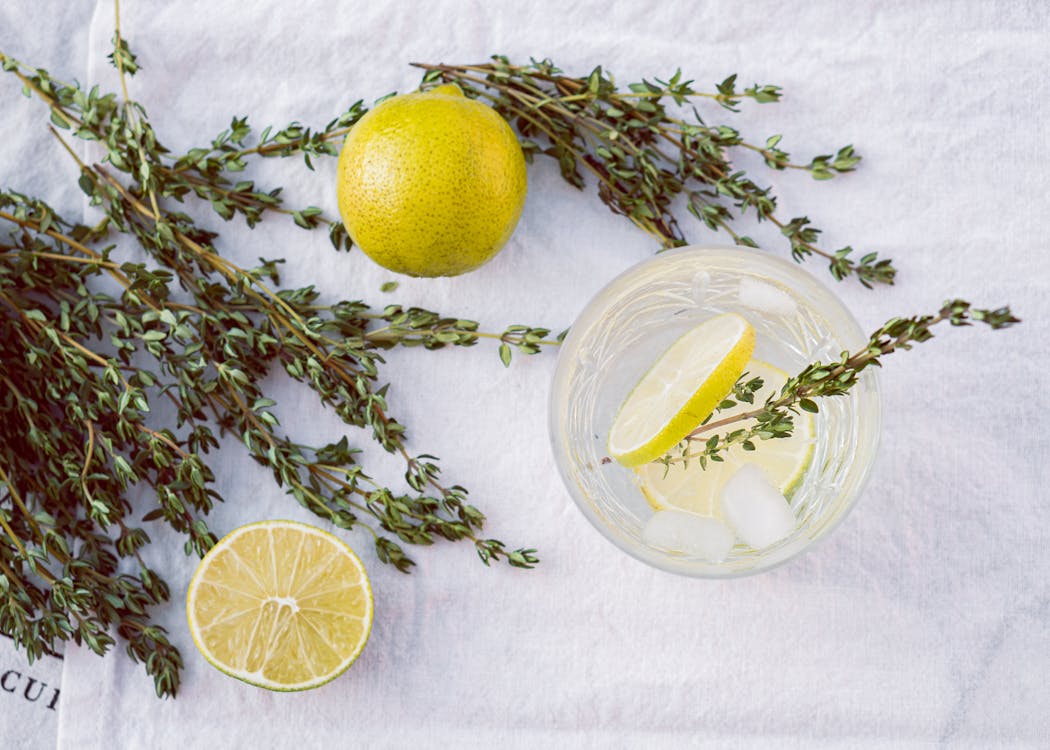
As much as everyone likes to say ‘have a cheat day, it’s the holidays’… for some conditions that’s just not an option. Chronic conditions tend to flare during the holidays already because of stress. Adding on inflammatory foods can just make things worse.

If you’re only eating an anti-inflammatory diet for weight loss, this may an ok time to loosen the reigns to just focus on family and friends. Otherwise, planning ahead will be your best bet.

people enjoying a holiday dinner
  1. Ask the host of the get-together what foods are being served. This can help you have a better idea of what you’re up against. You could always offer to bring something that would give you an alternative to an inflammatory dish.
  2. Eat ahead of time and then bring a couple of snacks for you to munch on during the get-together or party.
  3. If you’ll be dining at a restaurant, look up the menu ahead of time. This can give you a better idea of what you can order when you have time to look and think without worrying about pressure from others and can then relax and spend time with friends and family.

3. Schedule in downtime or me-time

Scheduling regular downtime should be a non-negotiable in your calendar. But ESPECIALLY during the holidays. This time of year tends to bring up all sorts of unresolved issues amongst family and friends without fail.

But it’s also super busy and can be exhausting, and can induce sleep issues from every angle. All of these add up to increased inflammation.

Block out time on your calendar to just go do things for yourself. Even if it’s an uninterrupted movie alone or simply bath time.

woman relaxing to reduce stress and inflammation during the holidays

I personally tend to get stressed with a lot of noise. So get-togethers can be overwhelming for me after a while. (Heck, even restaurants can when they’re really loud or if there are screaming kids.)

{But to be perfectly frank we have a nine-year-old that talks from the time she wakes until the time she goes to bed, so if she’s home I have non-stop noise all day.}

When this happens, I have extra time where I will do some things alone or even take what I call “brain breaks” during the day. This is where my kids and husband know to leave me alone, and I go in the quietest room we have, lie down, and listen to ASMR with sound-canceling headphones on.

I can meditate, take a nap, or just reflect and journal. This blocked-out ‘me-time’ has helped tremendously in reining in the overwhelm.

4. Have meal backups for the crazy weeks ahead

Backup plans for meals is so dang important, and I always say that meal planning is one of the most overlooked form of stress management there is. Aside from regular meal plans, though, I have a few other backups I recommend.

These include freezer meals that have been prepped and frozen previously, super easy crockpot meals, simple 3-5 ingredient meals, or even breakfast for dinner.

I create (yet another) list of freezer meal inventory, and also list these other options and post it on our ‘command central dry-erase board. That way I don’t have to think about what the options are. I just go look and pick one.

5. Get in daily movement

Daily movement (what we call ‘oscillation‘ around here) is critical during this time of year. People start moving less and less the colder it gets outside. But we also have shifted into a new era of so many shopping options being online that the old days of 30,000 steps in a single day of holiday shopping just doesn’t happen anymore.

Daily oscillation, whether that’s total steps, flights of stairs climbed, walking, or a structured workout is so important for managing stress. I’d even argue that we should add some extra time to our daily movement during the holidays.

woman exercising to reduce inflammation and stress during the holidays

Movement and workouts have been shown to help us sleep better and manage stress better.

If you don’t have a regular plan for daily movement, get started! If you do, step it up a bit during the holidays–your body and emotional status will thank you!

Laura @true-well.co

6. Have sugar-free options for treats

This one is crazy important because when you’re this busy and overwhelmed, it’s SO easy to just grab the first thing you can find if you’re hungry.

Prep anti-inflammatory snacks and breakfasts that are sugar-free ahead of time so you’ve got no-brainer options to choose from. Especially since we’re out and about so much more during the holidays.

Blood sugar spikes and crashes are prime culprits for stress and emotional rollercoasters. Don’t fall into that trap during the holidays.

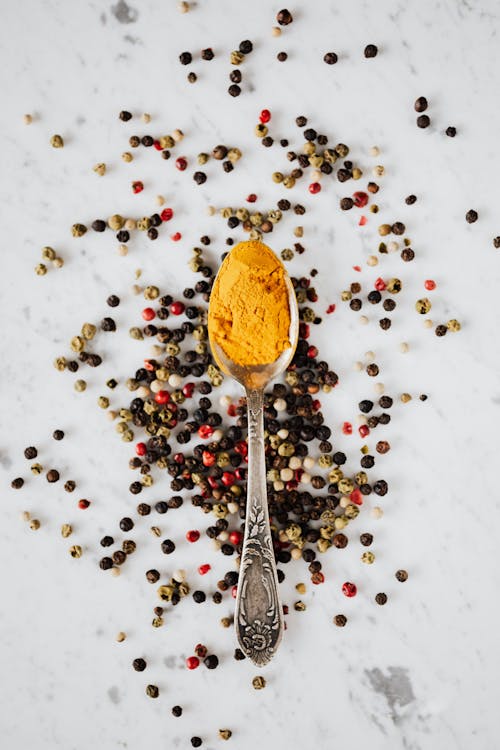
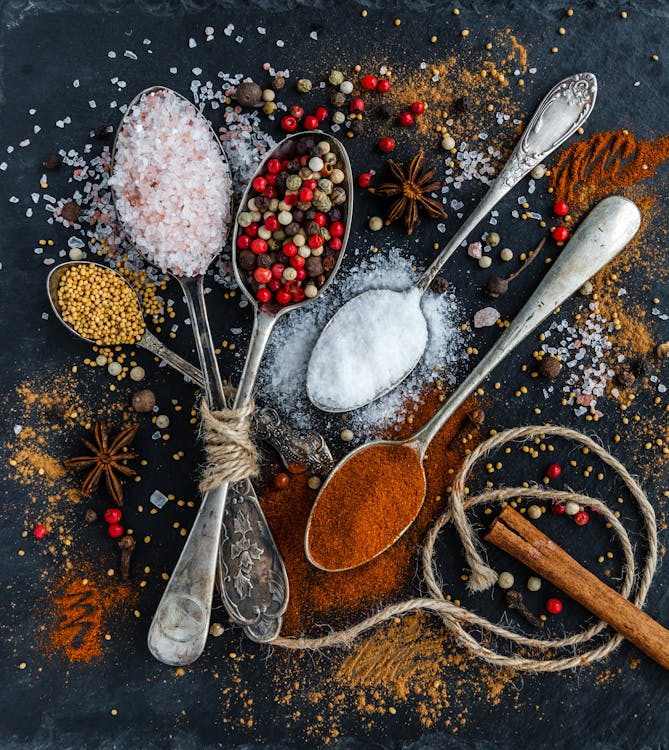
7. Use the TRUE-WELL trifecta formula for meals

Making sure you have your macros balanced at each meal will ensure you’re full longer, you don’t overeat, and your blood sugar stays balanced. This means less chance of emotional ups and downs from food.

This is especially true before holiday parties, dinners, and get-togethers as well. If you’re not planning a ‘cheat time’, it can be really easy to just say ‘screw it’ and eat inflammatory junk just because it’s there and you’re tired of wondering what you can eat.

The TRUE-WELL Trifecta includes:

  • QUALITY PROTEIN about the size of your palm,
  • 1-2 x that in FIBER (ie, vegetables and complex carbs),
  • and then HEALTHY FATS about the size of your thumb.

8. Meal plan and prep for weeks when you can’t even think straight

Even with my new rules and strategies in place, we still have weeks that are completely nuts. This is when I rely on meal planning and meal prep.

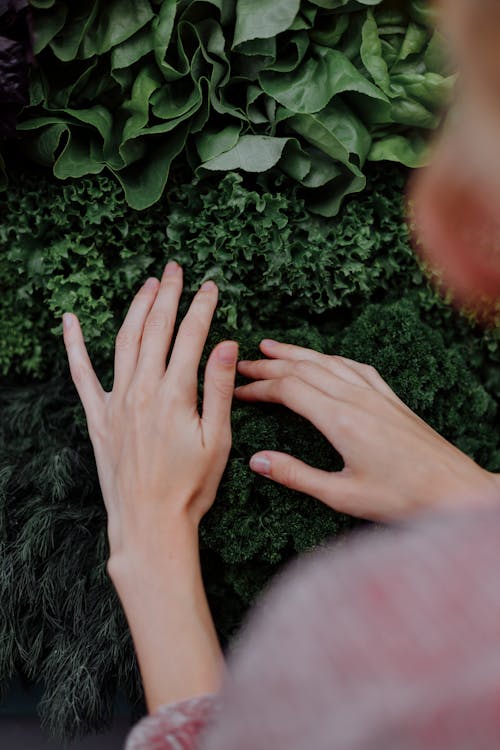
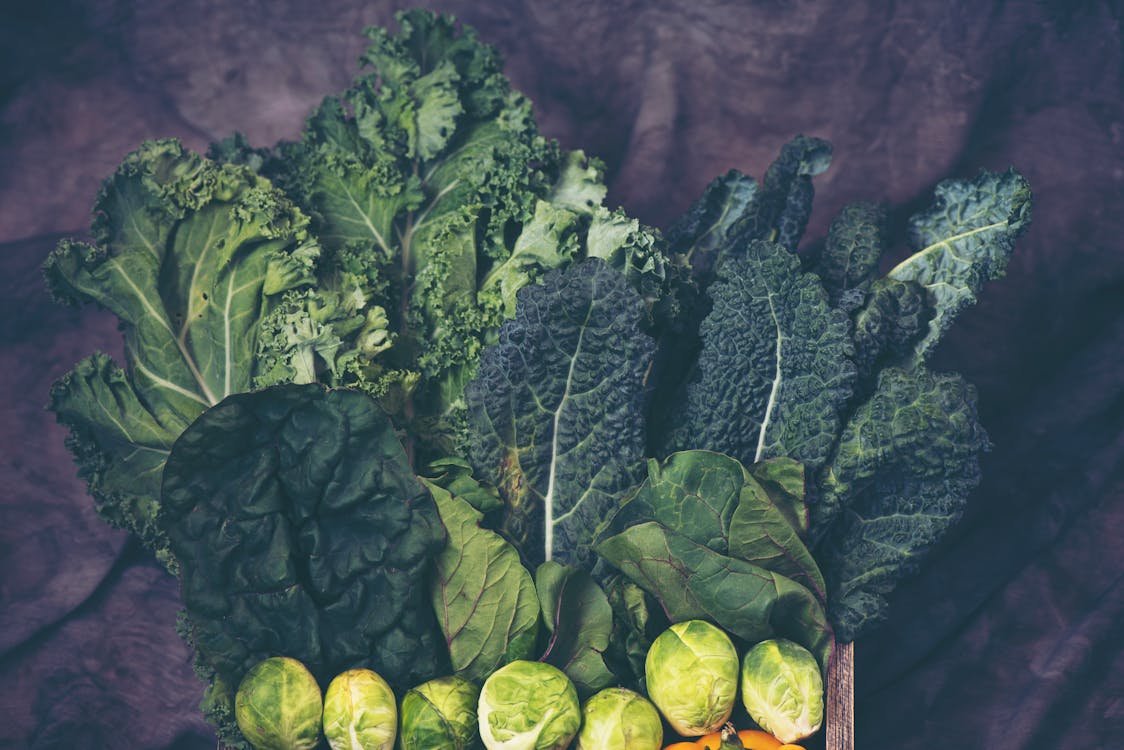
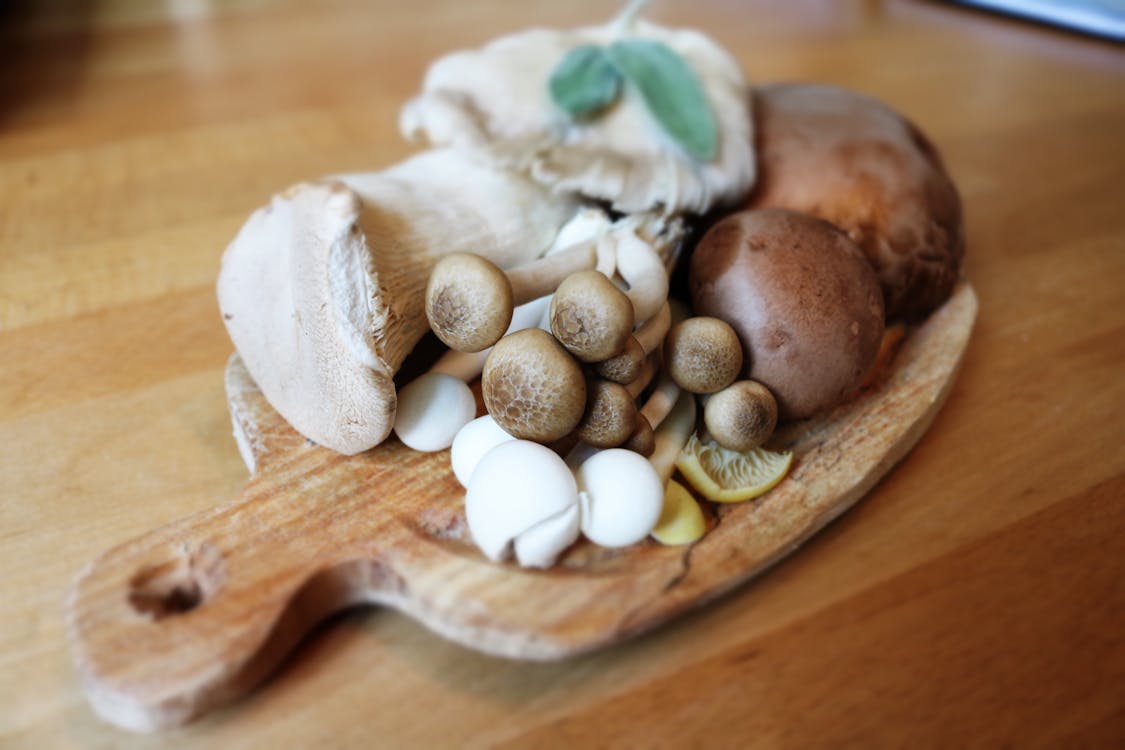
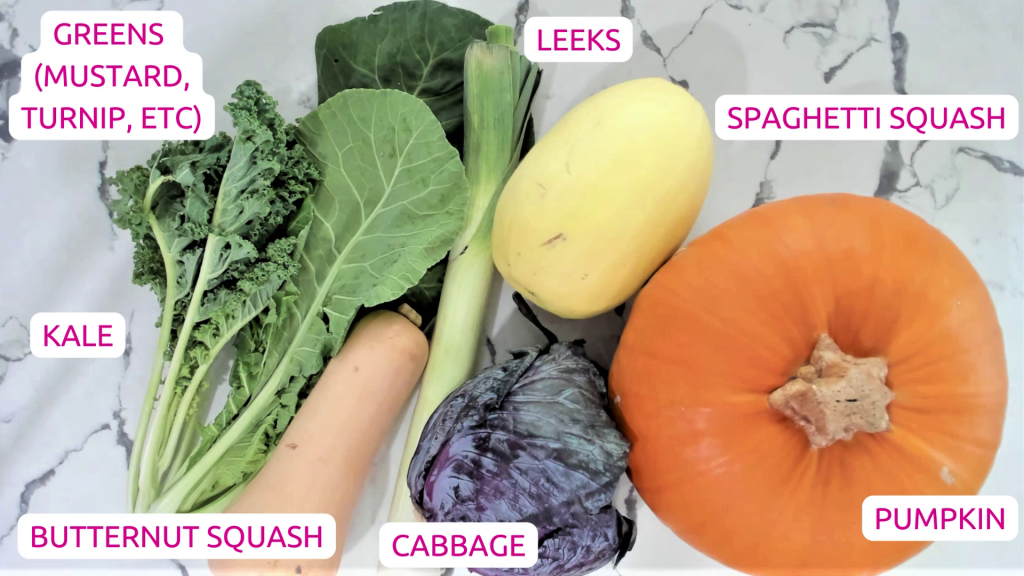
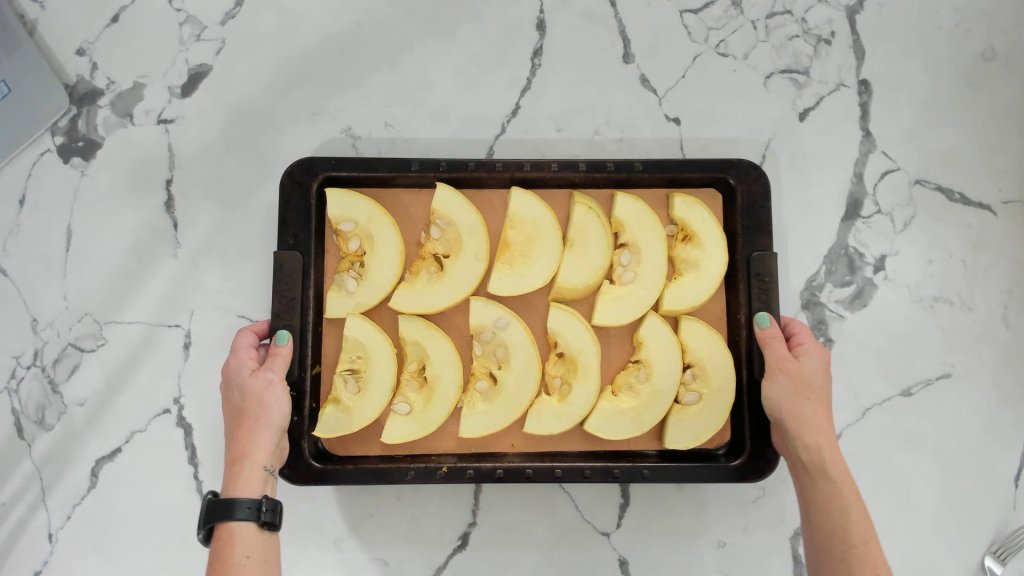
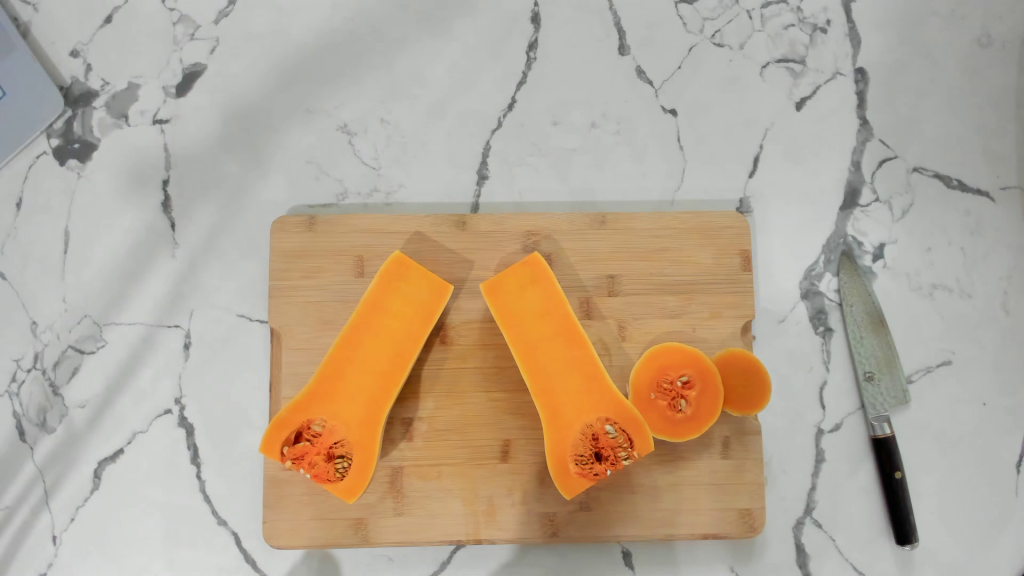
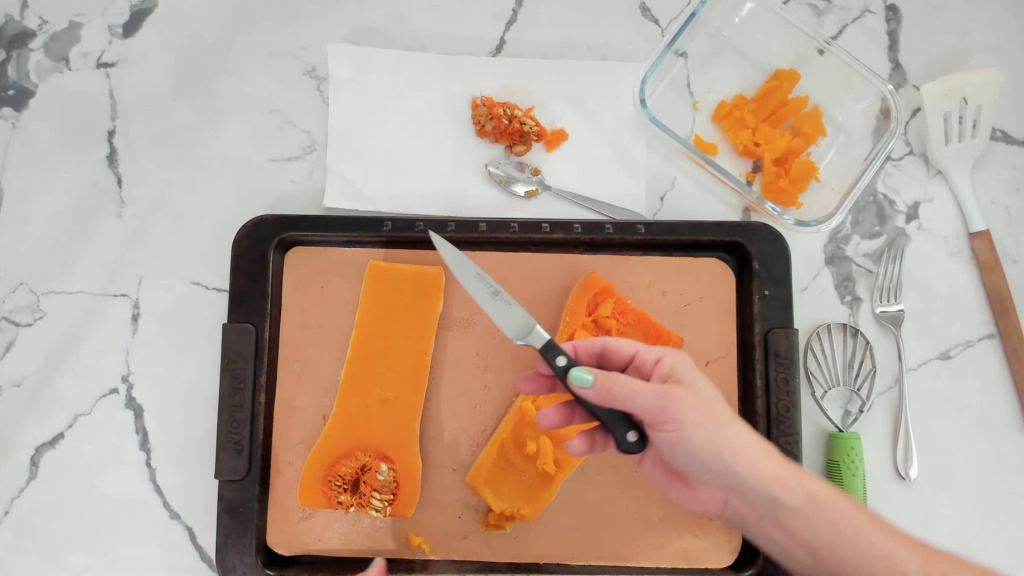
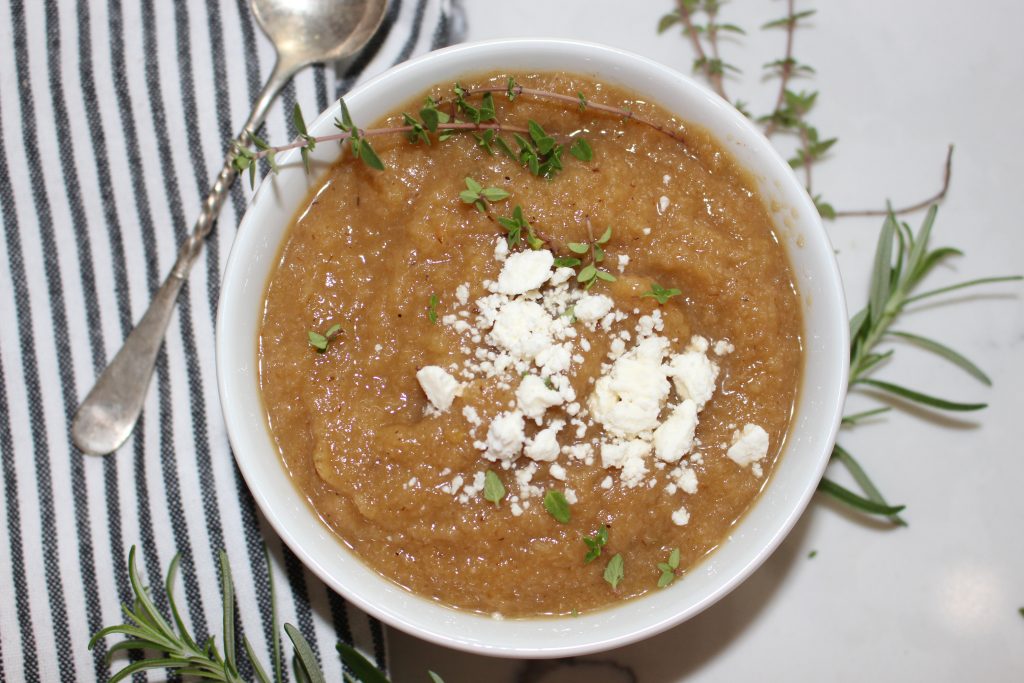
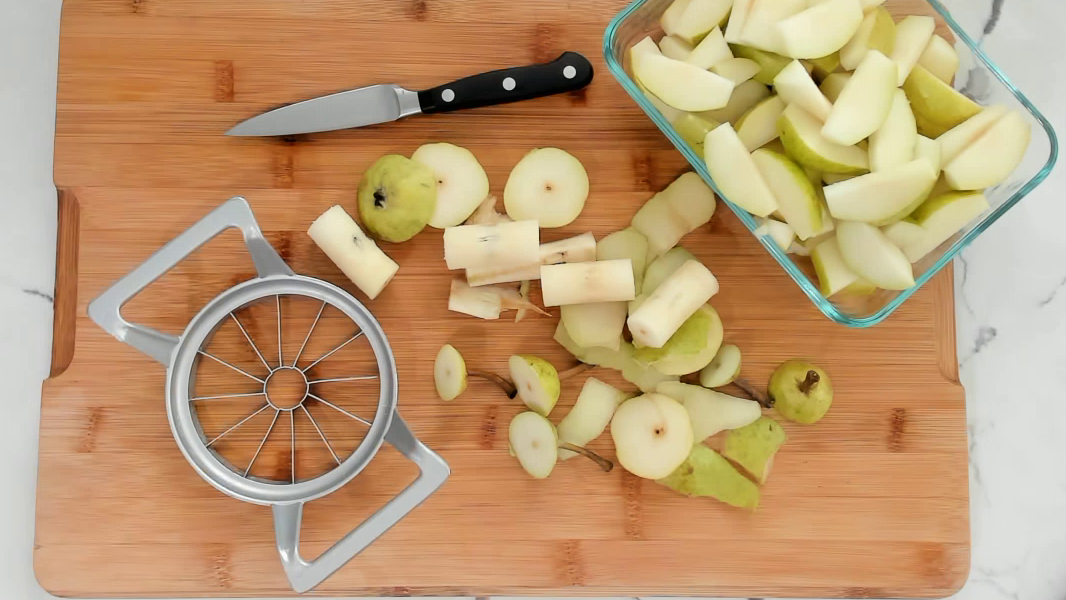
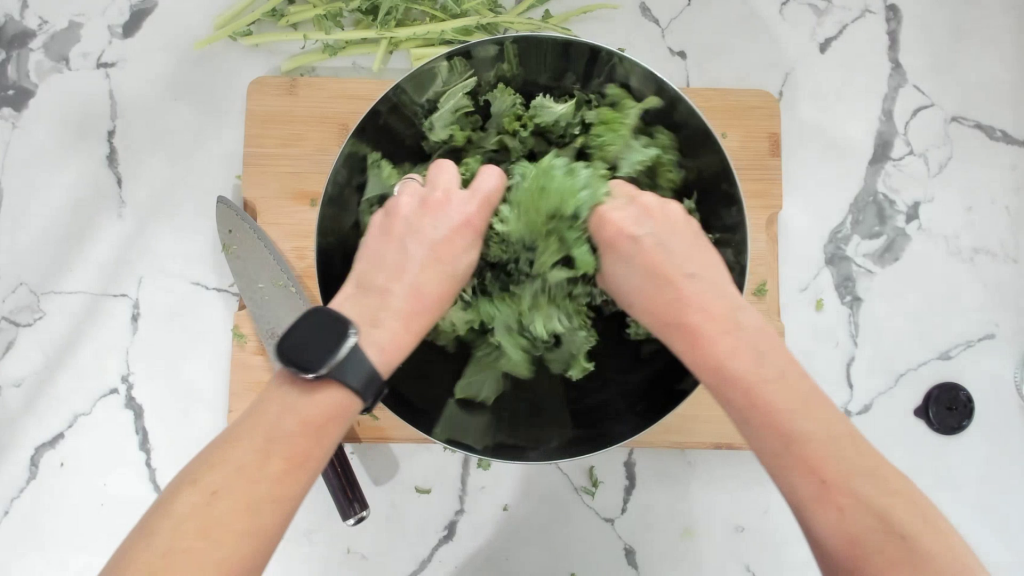
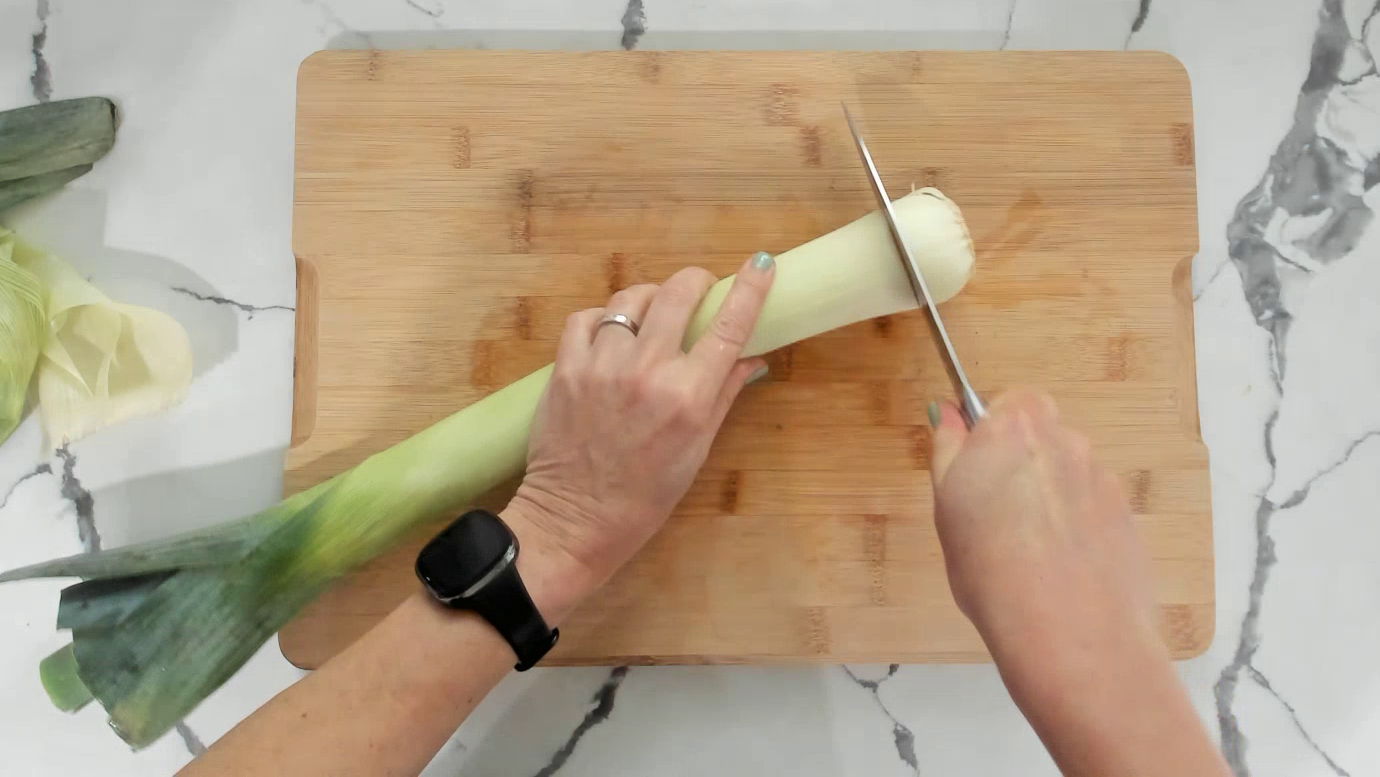
Sometimes all this means is that instead of having a formal meal plan in place, I grab seasonal produce from the store and prep it at the start of the week, and we use those prepped foods to throw together anti-inflammatory meals the nights we’re home and cooking.

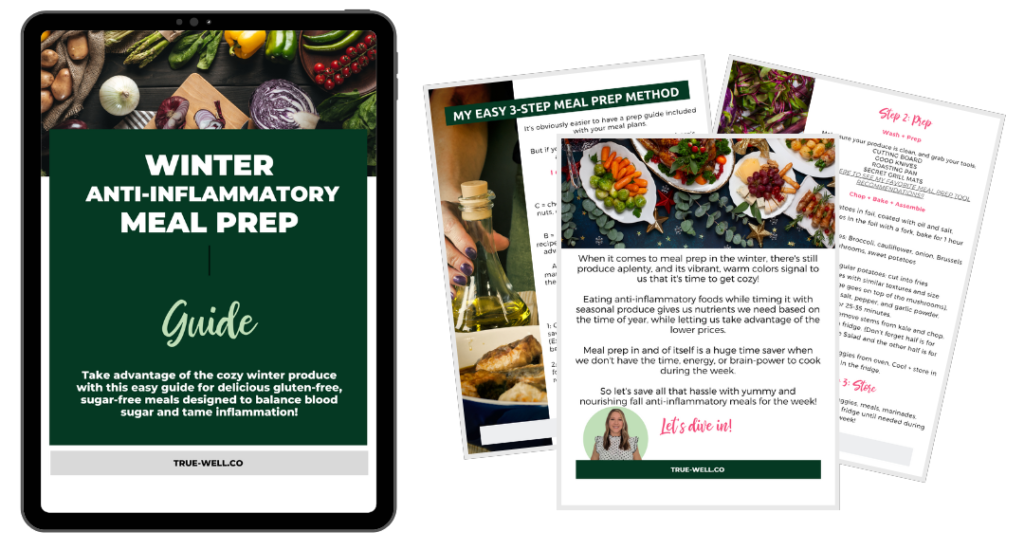
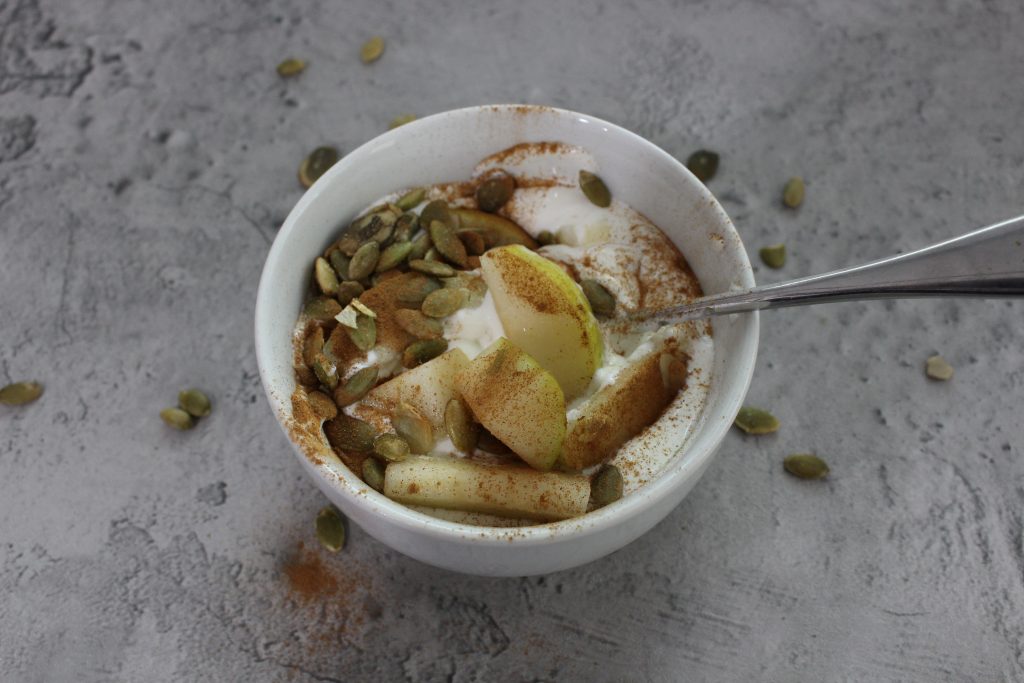
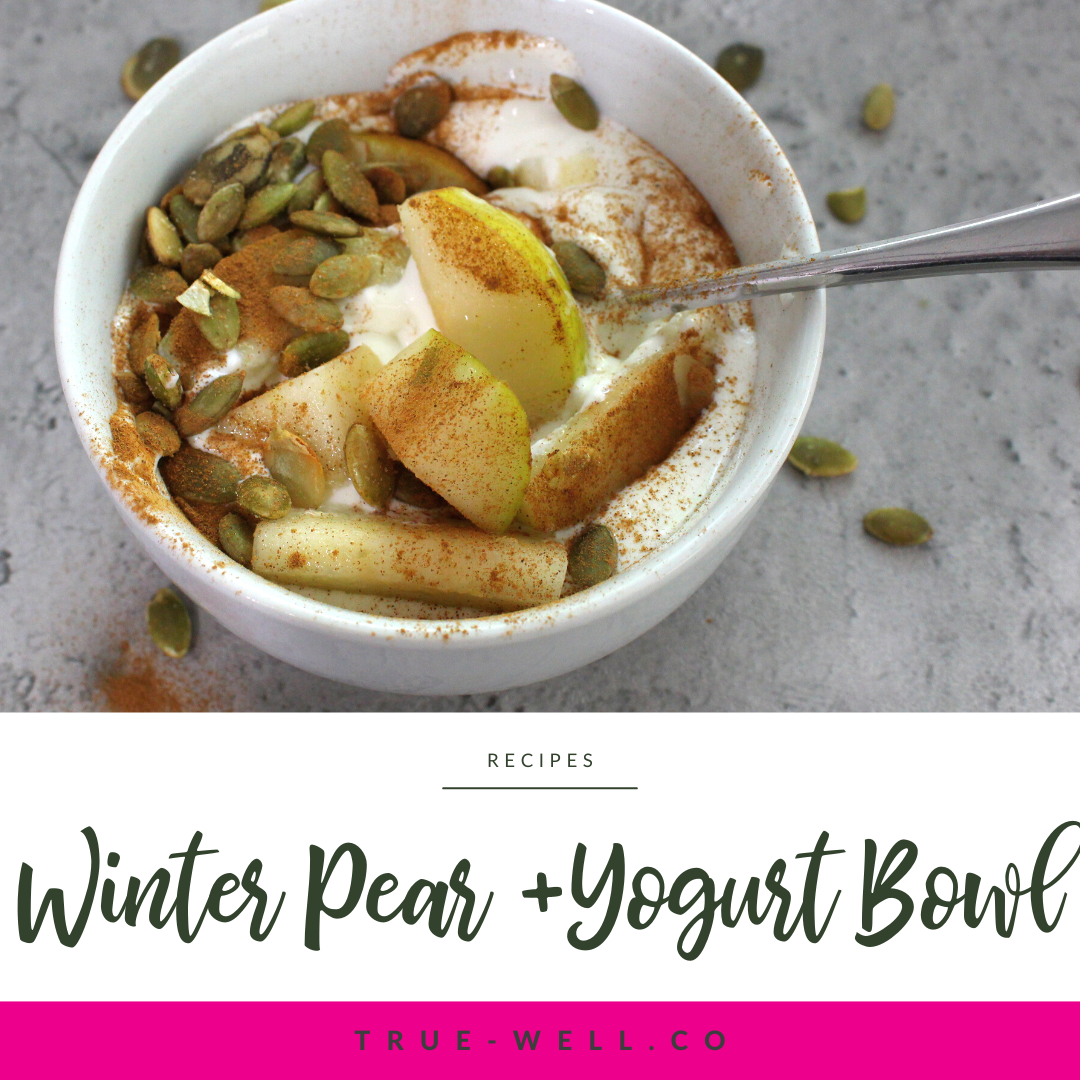
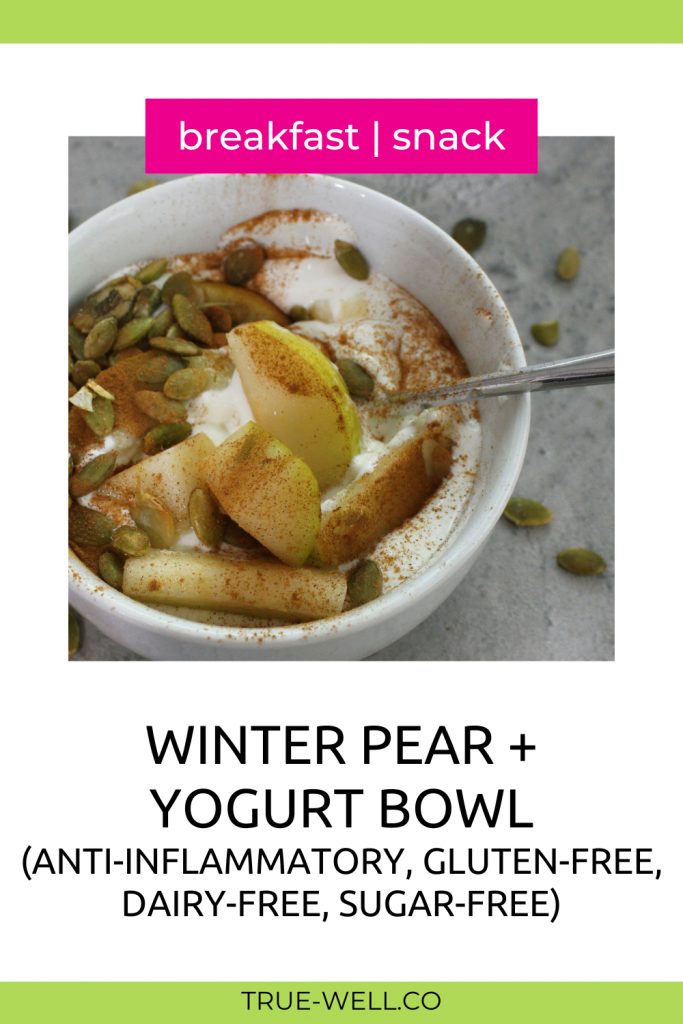
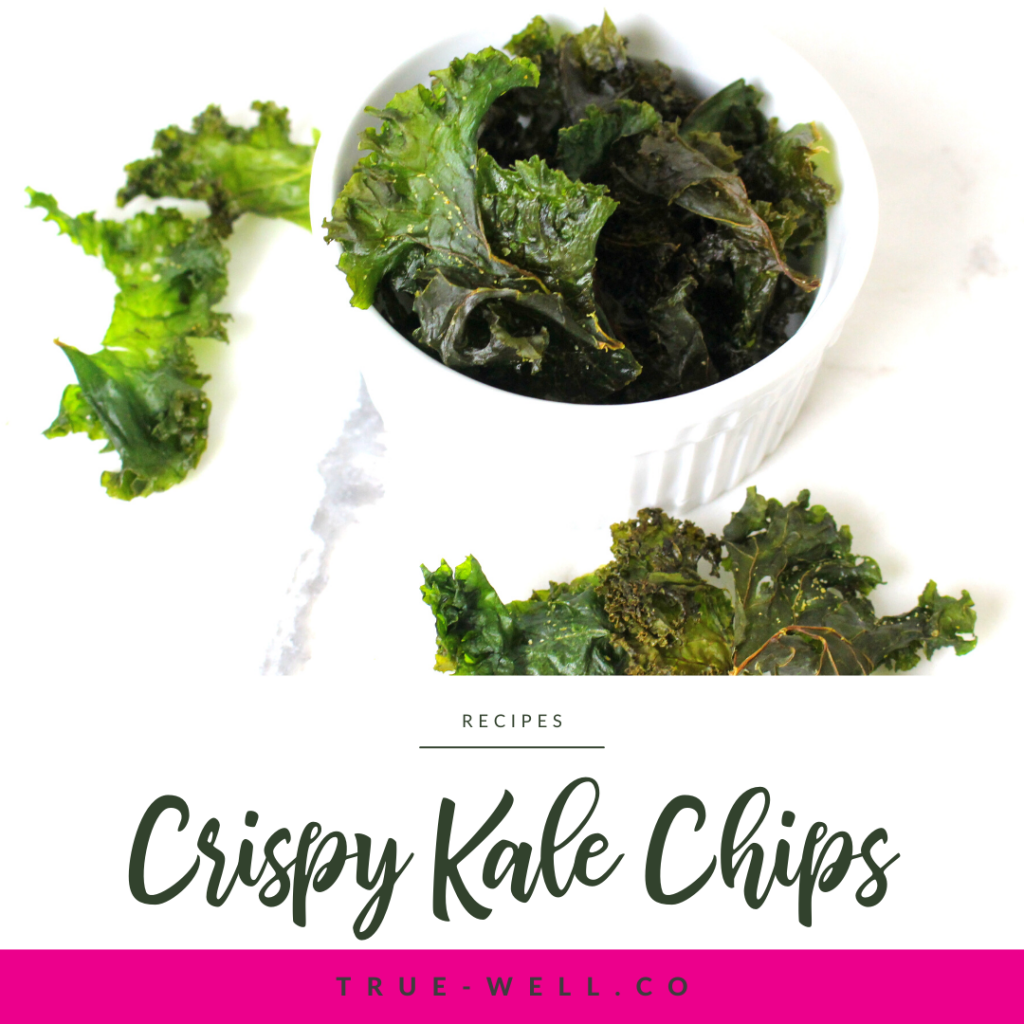
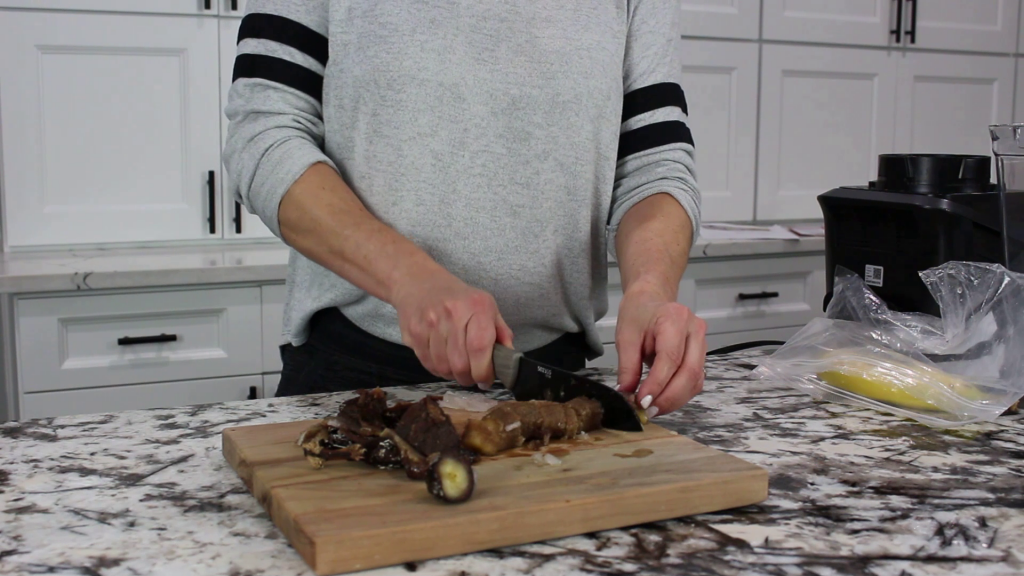
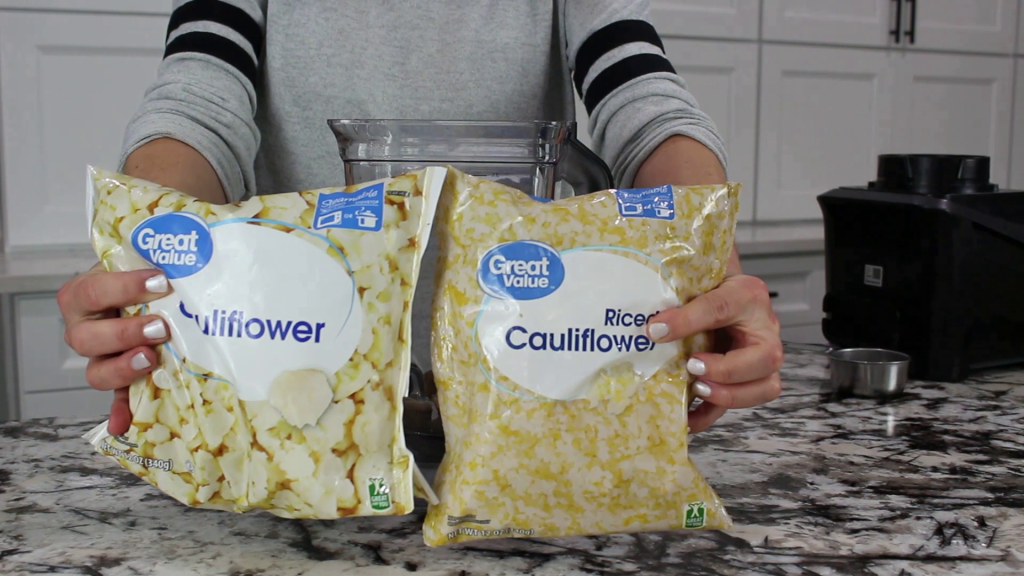
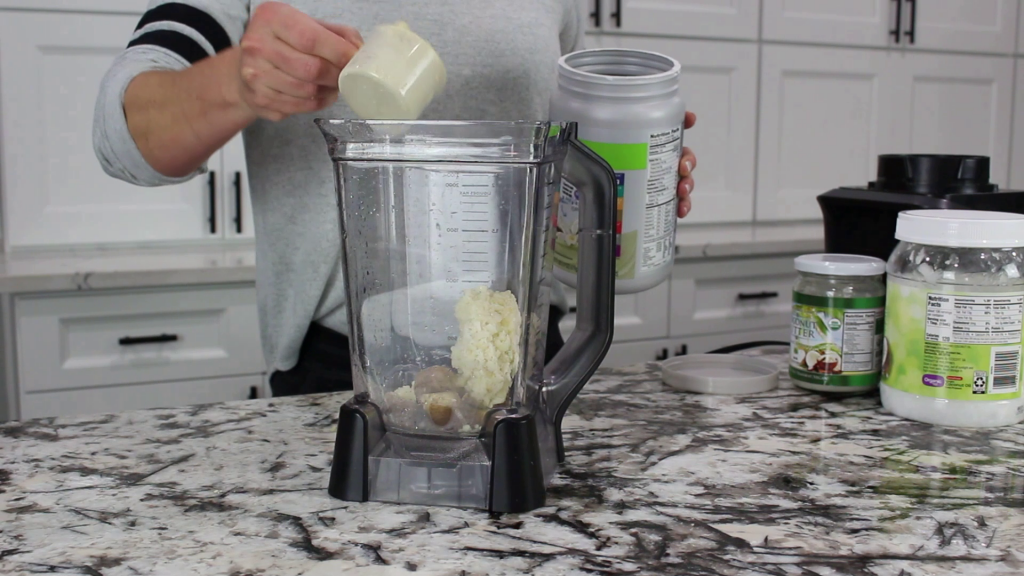
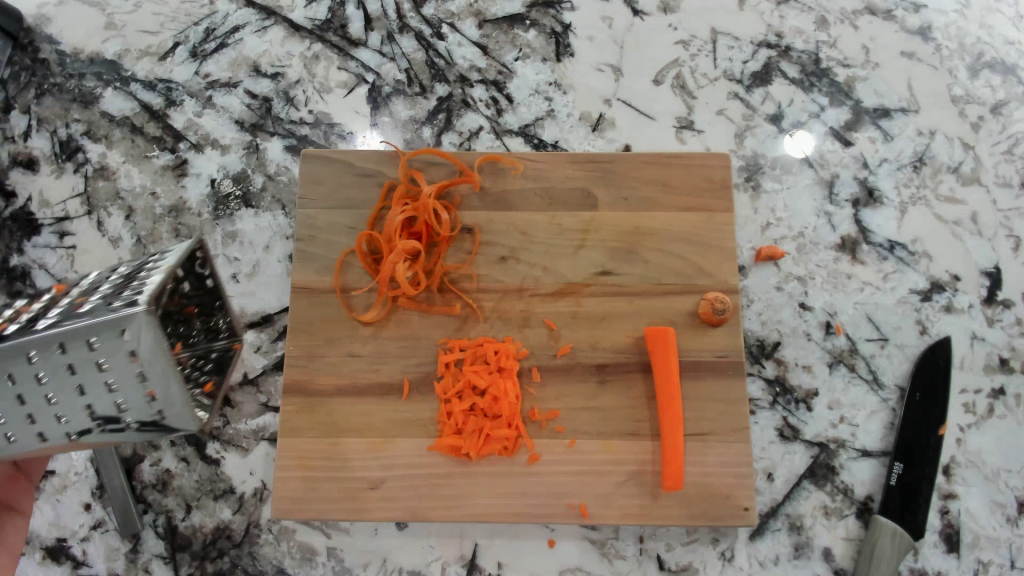
Get a free printable guide by checking out the blog post (and watch the video while you’re there!): Anti-Inflammatory Winter Meal Prep in About an Hour.

Get the (free) Winter Anti-Inflammatory

Meal Prep Guide!

winter meal prep anti inflammatory diet

Cozy up with this 1-week gluten-free, sugar-free meal plan and prep guide! Featuring delicious anti-inflammatory recipes from fresh winter produce!

Wishing you the happiest, most stress-free, and anti-inflammatory holiday ever!

xo, Laura

Know someone who could use some help managing stress and inflammation during the holidays? SHARE or PIN this post! πŸ‘‡

ways to manage inflammation and stress during the holidays

20 Winter Foods that Decrease Inflammation in the Body

For those with chronic inflammatory conditions, the transition to winter can either be a happy prelude to the holidays, or it can harbor an increased need for winter foods that decrease inflammation in the body. Freezing temperatures have a gift for making some inflammation worse.

winter foods that reduce inflammation in the body

It also drives most people indoors, which can hamper daily walks and outdoor activity altogether, which is a key component of managing inflammation.

Combine that with rising stress and loads of inflammatory foods around the holidays and you have a perfect storm of chaos in the body for those trying to manage blood sugar and inflammation.

The good news is that there’s still a ton of winter produce that are amazing sources of antioxidants with anti-inflammatory superpowers.

There really is no shortage of sources of winter superfoods to help nourish and heal for those of us following an anti-inflammatory diet.

There are three main categories of anti-inflammatory winter foods that decrease inflammation that I want to highlight:

  1. Veg and Fruits,
  2. Herbs,
  3. and Spices.

Here are my favorites.

Anti-inflammatory Winter Vegetables and Fruits

WANT MORE WINTER ANTI-INFLAMMATORY MEALS? CHECK OUT THE WINTER ANTI-INFLAMMATORY MEAL PREP SESSION! (4+ MEALS WITH FRESH WINTER PRODUCE! –> PERFECT FOR CRAZY WEEKS WITH NO TIME TO MEAL PLAN!) CLICK HERE TO READ MORE

Leafy Greens

Even though leafy greens start their appearance in the summer, winter leafy greens follow with even more flavor since many greens are significantly less bitter during cold weather. This means their warm, earthy flavors really shine during the winter.

Greens like kale, collard greens, and swiss chard are packed full of vitamins A, C, and K, as well as folate, other minerals, and antioxidants. And they’re versatile enough that many can be eaten raw (don’t knock a winter salad!), cooked, as a stand-alone side, or even as a casserole or soup component.

woman touching winter greens

Cruciferous Vegetables

Vegetables in the cruciferous family include Brussels sprouts, cauliflower, and cabbage, and are chock full of vitamins like folate, K, C, and A, as well as phytonutrient compounds that lower inflammation. And they also have the benefit of less bitterness during colder weather, like the leafy greens of winter.

What’s great about cauliflower is that in addition to its vitamins, fiber, and phytonutrients, it’s very low in carbohydrates. This makes it an amazing substitution for anything from rice to pizza dough to mashed potatoes.

anti inflammatory winter leafy greens

Cabbage’s brilliant colors are due to its anthocyanins which help pull down inflammation and are super antioxidants. Not only is it a great way to have a winter version of tacos with slaw, but it goes spectacularly raw in salads or cooked in soups or casseroles. If you’re not sure which color to choose, just know that purple cabbage’s vitamin A content is eleven times higher than green cabbage.

Brussels sprouts are what we call β€˜baby cabbage’ at our house. They’re full of fiber, vitamins C, K, and folate, and are super easy to cook. Simply sliced in half and roasted is how we usually cook them. But they can also be shredded and included in salads, soups, or casseroles as well.

Pumpkins

Pumpkins provide an amazing source of Vitamin A (the color gives you that hint on beta carotene), balanced polyunsaturated fats, Vitamins C and E, and several other essential minerals.

They’re also packed with fiber and healthy carbs, and can be stored for a long period of time (in a dry pantry or frozen) without going bad.  

mushrooms on a wooden cutting board

Mushrooms

One of the most warming foods during winter, mushrooms should top your list of required eating during the cold weather. Mushrooms are full of B vitamins, potassium, and the only vegetable that contains vitamin D (which is already in demand during winter months.)

Its nutrient-dense properties qualify it as a superfood with antibacterial, antioxidant, and anti-inflammatory properties that also happens to add that coveted β€˜umami’ flavor to any culinary dish.

Beans

Beans are an amazing add-in for winter meals for several reasons. First, they’re bursting with fiber and resistant starches, and they’re full of antioxidantsβ€”both of which give them anti-inflammatory superpowers. Although their carb content is higher than other vegetables, they’re considered a β€˜slow carb’, which means they absorb at a much slower rate. This helps prevent a blood sugar spike and gives healthy carbohydrate energy over a longer period.

Beans are also super hearty and perfect to add on as a side dish, or in soups, stews, or chilis.

HAVE A DINNER PLAN IN PLACE FOR THOSE CRAZY WINTER WEEKS, WHILE ENJOYING THE FRESH WINTER PRODUCE WITH THE (free!) WINTER ANTI-INFLAMMATORY MEAL PREP GUIDE!Β {Click the image below!}πŸ‘‡

winter anti inflammatory meal plan

Colored Potatoes

Although white potatoes are full of fiber, resistant starches, and essential minerals, studies have shown that their colored versions pack way more of a punch when it comes to inflammation and blood sugar levels.

Studies have shown that purple and yellow potatoes contain higher levels of antioxidants including phenols, anthocyanins, and carotenoids that lower inflammatory markers and improve blood sugar and insulin levels.

Purple potatoes were shown to have the greatest benefit, possibly due to the higher levels of polyphenols, which are indicated by the darker color.

What’s great about these is there’s no special preparation aside from how you would prepare regular white potatoes (except don’t fry them!). Baked, roasted, steamed, and added into soups is great. But I wonder how fun it would be to have purple mashed potatoes!

beets on a wooden cutting board

Beets

One of the most overlooked vegetables (in my opinion) is the beet. Beets are high in folate and manganese, but also contain betalains, which gives it the bright red color, and is associated with reduced cancer risk.

Not only can you eat the beet itself, but the greens are also a fantastic source of nutrition. Beets can be roasted, sauteed, pickled, or boiled; and the greens can be used in salads or saved for soup broths.

Cranberries

One of the most popular fruits during the holidays, cranberries owe their deep red color to their huge supply of antioxidants, including vitamin C. Their bioactive compounds have been shown to reduce risk factors of a multitude of chronic diseases, including lowering inflammatory markers.

Although cranberries are pretty tart, they can be cooked into a sauce (using zero-calorie natural sweeteners), added into baked breakfasts and snacks, or even blended into a vinaigrette. If you opt for dried cranberries, just make sure they’re unsweetened.

Citrus

Probably the most well-known sources of vitamin C, citrus fruits are aplenty during winter. Vitamin C is an especially potent antioxidant that fights free radicals and inflammation. They also contain flavonoids and fiber, which also fight inflammation.

Citrus like lemons, limes, organges, and grapefruit are super versatile and can be used in anything from flavoring water and cut up in salads, to being used as a dressing, in a snack, or as dessert. They also do an amazing job complimenting flavors of meats while tenderizing as marinades, as well as pairing beautifully with herbs in dishes and cocktails!

oranges, grapefruits, and pomegranates

Pears

Pears have always felt like the lesser-valued cousin of apples, but I’ve come love pears just as much. They’re packed full of fiber and are rich in antioxidants that reduce inflammation. The skin of pears contains quercetin, which is amazing for those with allergies, and it also reduces inflammation.

But they also can be much easier to slice, core, and eat as the skin can be much softer than an apple’s. This makes them super easy snacks (like this Winter Pear and Yogurt Bowl), and super yummy desserts.

Pomegranates

These little jewels may be small in size, but they’re big on flavor and nutrition. Their antioxidants have been shown to reduce inflammation and oxidative stress in the gut, brain, and body.

Anti-Inflammatory herbs for winter

Herbs are one of the most overlooked nutrition powerhouses in the plant family. They pack so much punch for such a little plant. But they’re also SO EASY to add into any dish for extra flavor, including throwing fresh sprigs into salads.

Here are my favorite anti-inflammatory herbs for fall.

Tarragon

Although tarragon is more commonly used in French and English cooking, it’s a delicious herb thatβ€”like mostβ€”contain powerful flavonoids that fight inflammatory cytokines. It also contains B vitamins, folate, and vitamins A and C. As with most fresh herbs, it’s best to wait until a dish is almost completely finished cooking before adding it in for maximum flavor.

herbs and garlic on a marble countertop

Rosemary

Rosemary is full of iron, calcium, and vitamin B-6, and is also native to the Mediterraneanβ€”fitting for an anti-inflammatory diet rooted in the Mediterranean diet. It’s been used for a wide range of ailments including digestion, muscle pain, improved circulation and memory, and a boost to the immune system.

Aside from its fragrant and mouthwatering culinary powers, studies have proven its anti inflammatory, anti-oxidant, and neuroprotective properties. This means that even though it can fight free radicals and harmful bacteria, it can also be used in mood disorders, enhanced learning, anxiety, and sleep disorders.

Sage

Sage not only adds delicious earthy notes to fall and winter dishes, but also can be used in teas and as an essential oil. Sage is high in Vitamin K and vital minerals, but also contains antioxidants.

What’s so amazing about sage is that it’s been shown to relieve or cure illnesses like obesity, diabetes, heart disease, cancer, depression, dementia, and lupus. But it’s also been used for centuries in traditional medicine for inflammation, bacterial, and viral infections, which makes it high on the list for cold and flu season.

thyme and lemons

Thyme

Thyme (another herb native to the Mediterranean) can be used as a treatment for anything from acne to GI disturbances to menstrual cramps (and a ton of stuff in between!) But it’s actually an extremely versatile culinary addition. It has an earthy flavor but can waver back and forth between savory or sweet dishes like stocks and stews, roasted vegetables, teas, and desserts.

Anti-Inflammatory winter spices

Although spices can generally be used year-round, the warmth of the following five are perfect for the freezing weather.

Black Pepper

Being a staple ingredient in most kitchens, black pepper can blend into the background and largely be overlooked. However, studies on the compound piperine in black pepper have shown that it can increase absorption of curcumin (the compound in turmeric) by up to 2,000%!

It’s also been shown to increase absorption of other key minerals and antioxidants, making it an absolute must in literally any savory dish you cook from now on.

This alkaloid compound gives a distinct bite flavor and has been shown to reduce insulin resistance as well as exhibit anti-inflammatory effects.

black pepper and turmeric with a spoon

Ginger

Ginger has been touted to help anything from boosting the immune system, lowering blood sugar, and easing inflammation. Probably it’s most famous claims to fame include taming the GI tract and pulling down inflammation. These benefits are made possible due to the over 400 compounds that ginger contains.

Ginger has a fresh, zingy flavor, and although the dried version (teas and spice shakers) have a milder flavor than fresh, they can still have nearly the same health benefits. It’s best to use fresh, and ginger root can be cut up and put in the fridge or frozen to last even longer.

Turmeric

Turmeric is used traditionally in Asian dishes, but has been widely recognized the last few years because of its media coverage as an amazingly effective nutritional supplement. Turmeric contains curcumin, which is a powerful antioxidant and anti-inflammatory compound.

Studies have shown that the best way to harness the power of turmeric is to combine it with black pepper, which increases its bioavailability up to 2,000%.

Turmeric is obviously fantastic in Asian dishes like curries, but it’s skyrocket in popularity means there are tons of recipes now for drinks, smoothies, and all kinds of dinner dishes.

fresh ginger and dried ginger in a canister on a countertop

Cinnamon

There can be a lot of confusion over the type of cinnamon that’s best to use. Ceylon (known as β€˜true’ cinnamon) and cassia (what you buy in the grocery store) are equally delicious and contain a compound called cinnamaldehyde that’s thought to be responsible for its health and metabolism benefits.

Cinnamon has been shown to contain more antioxidant activity than any other in a study against 26 other spices, is a potent anti-inflammatory, and has been shown to reduce insulin resistance (among other benefits).

winter spices in spoons

Pumpkin pie spice

Honestly  my favorite spice for winter is a combination of several spices: Pumpkin pie spice. This mixture obviously enhances pumpkin flavor, but can be used in a variety of recipes in fall and winter (usually around the holidays.)

The components of pumpkin pie spice include cinnamon and ginger, which we already covered. The other ingredients are nutmeg, cloves, allspice, and black pepper.

What’s so great about the blend in pumpkin pie spice is that all the ingredients have powerful anti-inflammatory and antioxidant compounds just like the other spices mentioned.

So as long as you use healthy sweeteners and anti-inflammatory ingredients for whatever pumpkin spice recipe you’re making, you essentially have a superfood recipe with powerhouse ingredients for winter!

Let me know in the comments: What’s YOUR favorite anti-inflammatory winter food or recipe?

Grab the Winter Anti-Inflammatory Meal Prep Kit! {Click the image below!}πŸ‘‡

Know someone that might like this post? SHARE it or PIN it! πŸ“Œ

winter foods that reduce inflammation in the body

Quick and Easy Anti-Inflammatory Meal Prep for Winter

This winter anti-inflammatory meal prep isn’t just packed with nutritious and delicous seasonal winter produce– it’s a pretty darn quick and easy meal plan. I started out doing meal prep sort of on the fly by just shopping seasonal produce, and prepping it ahead of time to just make meals on the fly throughout the week. But I do also need a structured meal plan a lot of times as well.

anti-inflammatory meal prep for winter

But doing either way is a great way to make sure you’ve got anti-inflammatory meals through the week (especially when you’ve got those chaotic dumpster fire weeks when you need nourishing meals to keep you calm and collected even when nothing else in your life is.)

Click the image below to grab the free Winter Anti-Inflammatory Meal Prep Guide! πŸ‘‡

winter anti inflammatory meal prep guide

The basic steps of anti-inflammatory meal prep are:

  1. Shop
  2. Chop
  3. Roast
  4. Store
  5. Create meals

Shopping for your anti-inflammatory meal prep session

For this winter meal prep session I grabbed a pumpkin, spaghetti squash, butternut squash, purple cabbage, kale, and collard greens.

We promote eating seasonally at TRUEWELL for a few reasons:

  1. Eating seasonally costs less
  2. You’re not getting produce that came from halfway around the world (in other words–you’re getting produce more local which means much more flavor, less transport and less chance of it getting harvested before it’s ripe), and
  3. Studies have shown produce that’s grown IN SEASON actually has substantially greater values of vitamins and phytonutrients than those out of season.
anti-inflammatory meal prep for winter

(And just to be clear on why I didn’t roast the pumpkin in my video… my kids freaked out about me roasting the pumpkin–cause they wanted to decorate it, and I had canned pumpkin in the pantry, so I used that for the meal that week…Long story short, kids ruin everything. πŸ˜‚ Kidding. sort of)

Chopping veggies for your anti-inflammatory meal prep

So I started out with the spaghetti squash because it needs to be roasted, then needs to cool before you can scrape out the insides.

anti-inflammatory meal prep for winter

These used to intimidate the heck out of me but they’re actually pretty cool. For this session I cut the squash in half lengthwise, then cut strips; but I think it’s actually easier to just roast the halves and then scrape the insides out from those large pieces.

anti-inflammatory meal prep for winter

I have also learned that even scraping the seeds out is much easier when they’ve been roasted first.

anti-inflammatory meal prep for winter

So lay the pieces out evenly on a pan.

I use a BBQ grill mat liner, which I’ve learned is amazing, nothing sticks to it, which you can grab here:

{Some of the links are affiliate links, meaning I earn a small portion of the proceeds if you purchase it, with no additional charge to you.}

BBQ Grill Mats

BBQ Grill Mats

Next I started on the butternut squash. Cut the ends off, then cut it in half vertically.

anti-inflammatory meal prep for winter

Lay each half on the pan face down.

anti-inflammatory meal prep for winter

Then I started on the leeks. I peeled a few of the outside leaves, cut the end of the bulb off, then cut a slit down the center before chopping it. The dark green ends usually get pretty tough, so cut the white part and some of the lighter green part, then put it on the pan to roast as well.

anti-inflammatory meal prep for winter

Some of this produce is really best cooked right before eaten, as it’s sauteed or put into soups. But the squash always needs to be cooked anyway, and I also knew I wanted to put the leeks into a soup. So for sure these all needed to be roasted.

Roasting vegetables for anti-inflammatory meal prep

My normal base seasoning is salt, pepper, and garlic powder, which you can add or wait until you make your dishβ€”And then roast it at 350 degrees F for about 25-30 minutes.

(For squash, it may take a bit longer to get it soft enough. You want to be able to scoop and scrape easily or else it will take forever…)

Then I got to work on the kale, and I knew I just wanted it for kale chips. You would think the bags of it already chopped would be more convenient, but I’ve found it takes longer to pick out all the stems than to just buy a bunch of it and trim them off myself.

anti-inflammatory meal prep for winter

I do a sort of scraping motion with the knife to get the leaves off, but you can also fold it in half and do just one cut to get the stems out.

Once all the leaves are torn and in a bowl, add oil, and massage it to soften the fibers.

For kale chips, don’t salt it until they’re out! They shrink and can turn out way too salty.

anti-inflammatory meal prep for winter

Kale chips go in the oven for about 20 minutes at 300 F.

anti-inflammatory meal prep for winter

Storing your anti-inflammatory meal prep vegetables

While that was cooking, I started cutting the greens.

I started on the collard greens. I wanted these to go in a soup, so I just washed them, trimmed them up the same way as kale, then store them in a baggie in the fridge until I need them that night.

anti-inflammatory meal prep for winter

πŸ‘‰ A method I’ve found useful is using a large 4-cup measuring cup to hold the baggie in place to put food into during meal prep if you don’t have the baggie stands.

anti-inflammatory meal prep for winter

The mustard greens got trimmed up the same way, and I wanted to sautΓ© them later in the week, so I just store them in a baggie in the fridge as well.

anti-inflammatory meal prep for winter

Then I started on the cabbage. Peel those tough and usually dirty outer leaves, then chop it into slices, then into smaller pieces. I wanted to sautΓ© it later in the week, so it goes into a baggie as well to store in the fridge.

I also grabbed some pears as a last minute add-on.

anti-inflammatory meal prep for winter

These can be peeled, but the skins are usually actually less tough than apples, so eating the skins is pretty yummy. Make sure you get the core out, it does have seeds like apples.

I chunked it up because I wanted to add it as a snack on top of Greek yogurt.

anti-inflammatory meal prep for winter

One trick is to cut the bottom off so it sits flat, then the top small part, then use an apple corer and slicer to slice it just like you would apples.

If you’re going to pre-cut them, they do also turn brown like apples, so add a bit of lemon juice to keep that from happening and store them in a container in the fridge.

anti-inflammatory meal prep for winter

Lastly we take the roasted veggies out of the oven and let them cool.

I put the leeks into a container to go in the fridge.

Then I started on the butternut squash. I’ve found using a grapefruit spoon with a serrated edge make scooping the seeds and flesh out really easy.

But I also sometimes use an avocado slicer to scoop it out. You can also use a paring knife to slice around the edges before scooping the flesh out.

Serrated Edge Grapefruit Spoons

Serrated Edge Grapefruit Spoons

Avocado Slicer Tool

Avocado Slicer Tool

Henckels Paring Knife

Henckels Paring Knife

>>> Check out ALL my Best Kitchen Tools for Meal Prep HERE!

I put it all in a container and seal it to store in the fridge.

Spaghetti squash can be a bit tricky. It definitely needs to be soft enough. But you can use a fork to scrape the spaghetti parts out into a container. Then store in the fridge.

And lastly, I pulled the kale chips out. Then I season with garlic and salt so it doesn’t get oversalted before because it shrinks. Scoop them into a container and enjoy as a snack.

anti-inflammatory meal prep for winter

Create anti-inflammatory dinners for the week

The meals for this winter anti-inflammatory meal prep session were…

anti-inflammatory meal prep for winter

Pumpkin alfredo on spaghetti squash with grilled chicken…

anti-inflammatory meal prep for winter

Leek and cauliflower soup

anti-inflammatory meal prep for winter

Sauteed chicken sausage and red cabbage

anti-inflammatory meal prep for winter

Creamy Collard Greens Soup (with butternut squash)…

anti-inflammatory meal prep for winter

And for a snack I had a Winter Pear and Yogurt Bowl.

And as promised, to grab the FREE Winter Anti-Inflammatory Meal Prep printable guide, just click the image below! πŸ‘‡

winter anti-inflammatory meal plan

πŸ“Œ Know someone that would love to learn Anti-Inflammatory Meal Prep? SHARE this post or PIN IT for LATER! πŸ’–

anti-inflammatory meal prep for winter

Winter Pear and Yogurt Bowl

When apples are done for the fall, pears move right on in to take center stage! And this Winter Pear and Yogurt Bowl is super versatile, macro balanced, and oh so yummy!

pear and yogurt bowl breakfast

This recipe is also featured in the Winter Anti-Inflammatory Meal Prep session (check it out and get your free guide!)

The thing that’s so great about nourishing yogurt bowls like this is that you can add whatever you feel like adding (like as long as it’s anti-inflammatory and falls in your macros if you’re trying to lose or gain weight.)

And although we used Greek yogurt for this bowl, if you’re dairy-free, you can simply sub that out for coconut or almond yogurt.

winter pear and yogurt bowl breakfast

Another reason these are so easy is that you can just throw it together in 3 minutes.

But the yogurt mixture can be portioned out, and the toppings can separately be portioned out so you can meal prep them ahead of time for the week. (Win!)

woman eating a winter pear and yogurt bowl breakfast

Now, I really used to not like pears that much. Even though we had a pear tree as a kid, they were the variety that big food companies use to can (you know–the ones that sit on the grocery store shelves?) I don’t like the grittiness.

But if you get the winter varieties that are a bit smaller, the skin is actually very soft and the inside texture isn’t gritty. Which is why I now love pears. 🍐

Since I keep the skins on (they’re full of nutrients like apple skins are!) I use a trick to quickly and easily slice and core them.

How to quickly and easily cut and core a pear:

  1. Cut off a thin slice from the bottom of the pear so it sits flat
  2. Cut the top skinny part off
  3. Use an apple corer/slicer the same way you would an apple
pear and yogurt bowl

Here’s what I put into my creamy and nourishing Winter Pear and Yogurt Bowl:

Print

Winter Pear and Yogurt Bowl

5 Stars 4 Stars 3 Stars 2 Stars 1 Star

No reviews

  • Prep Time: 5 minutes
  • Total Time: 5 minutes
  • Yield: 1 1x
  • Category: Breakfast, Snack

Ingredients

Units Scale
  • 1 cup Greek yogurt, Plain and unsweetened (or coconut or almond yogurt for dairy-free or vegan)
  • 1/2 pear (halved and cored)
  • 1/4 tsp cinnamon
  • 23 drops liquid stevia
  • 1/8 tsp vanilla extract
  • 1/8 cup pepitas ((pumpkin seeds))

Instructions

  1. Dip yogurt into a bowl. Add the stevia and vanilla extract, then stir till completely mixed.
  2. Top with pear slices. Sprinkle with cinnamon.
  3. Enjoy!

Did you make this recipe?

Share a photo and tag us @truewell.co β€” we can’t wait to see what you’ve made!

Like this recipe? Prep it and 5 others with the Winter Anti-Inflammatory Meal Prep Guide! {Click the image to grab it!}πŸ‘‡

winter anti inflammatory  meal plan
pear and yogurt bowl

Crispy Kale Chips

If you’re looking for a super easy and healthy winter snack, Crispy Kale Chips are a super easy choice! They’re the ‘savory cotton candy’ of the snack world. Each bite is lightly crisp but dissolves in each addictive bite.

The other plus is that these Crispy Kale Chips are crazy easy to make.

crispy kale chips

The printable recipe is below, and it’s also featured in our Winter Meal Prep session (check it out and get the printable guide!)

Step 1: Choose your kale

First of all, opt for organic if you can. Greens easily soak up pesticides, especially since the part you eat isn’t protected by a shell or a pod cover or skin. Pesticides are inflammatory to all bodies, so it’s best to be safe. If that’s not an option, make sure you wash it well when you get home.

Second, I know it can be tempting to grab a bag of the pre-chopped kale, but that’s a huge mistake. The reason is that they don’t remove the stems, and you’ll be left for an hour just trying to trim out all the mini stems.

crispy kale chips

Instead, get a bundle of whole kale leaves.

Step 2: Trimming kale for kale chips

One method I’ve found to trim kale leaves is to hold the end of the stem, and use a paring knife to sort of scrape the leafy part away from the stem.

crispy kale chips

You do have to be careful that you don’t cut through the stem, especially if your knife is super sharp.

The other option would be to lay the whole leaf flat and just cut out the stem. Or, you could fold the leaf in half and just make a single cut to remove the stem of the kale.

crispy kale chips

Once the stems are removed, simply tear the pieces in medium to large chunks and place in a bowl.

Step 3: Massaging kale for kale chips

Adding oil is going to help with the crispness, so drizzle some avocado, warmed coconut oil, or MCT oil on the kale leaves in the bowl.

Some people don’t think it’s necessary, but I do like to massage the leaves to loosen the fibers. Also this allows the oil to get evenly distributed.

You’ll literally just stick your hands in, massage the leaves, and turn over chunks as you’re working to get the oil on everything.

*DON’T SEASON YET!

crispy kale chips

Step 4: Cooking kale for kale chips

Cooking the kale is super easy. You simply place the contents of the bowl on a large baking pan.

crispy kale chips

Kale cooks at 300 degrees F for about 20 minutes or so. Keep an eye out and make sure they’re getting browned (this is how they get crispy) without getting burned.

Step 5: Cool, season, and enjoy!

Let them cool to finish crisping, and then add sea salt or any other seasonings you wish. It’s best to wait until they’re cooked to season because they shrink and it’s really easy to over-season your kale chips.

Kale Chips flavor options

Some flavor options are:

  • Ranch (nutritional yeast + lemon juice + salt)
  • Chili Lime (chili powder + lime juice + salt)
  • Salt and Vinegar (vinegar + salt)
crispy kale chips

And enjoy! They can be stored in a baggie or container on the counter for a few days.

Print

Crispy Kale Chips

5 Stars 4 Stars 3 Stars 2 Stars 1 Star

No reviews

  • Prep Time: 5 minutes
  • Cook Time: 20 minutes
  • Total Time: 25 minutes
  • Yield: 4 1x
  • Category: Snack

Ingredients

Scale
  • 1 bunch kale leaves (organic)
  • 1 TBSP avocado oil (or warmed coconut, or MCT)

Instructions

  1. Prehead the oven to 300 degress F.
  2. Wash and trim all kale leaves.
  3. Tear leaves into medium to large chunks and place in a large bowl.
  4. Drizzle the oil, and massage to evenly distribute the oil.
  5. Spread the entire bowl of kale on a baking sheet, spreading out as much as possible.
  6. Cook for about 20 minutes, making sure the leaves are getting browned without burning to ensure crispness.
  7. Remove from oven and let cool.
  8. Season with sea salt or any other seasoning of choice.
  9. Enjoy! (Can be stored on counter in a container for a few days)

Did you make this recipe?

Share a photo and tag us @truewell.co β€” we can’t wait to see what you’ve made!

Like this recipe? Prep it and 5 others with the Winter Anti-Inflammatory Meal Prep Guide! Click the image below to grab it! πŸ‘‡

winter anti inflammatory diet meal plan
crispy kale chips

Sauteed Cabbage and Chicken Sausage One-Pan Meal

Cold winter nights call for warm and easy one-pan meals like this SautΓ©ed Cabbage and Chicken Sausage.

sauteed cabbage and chicken sausage one-pan meal

Even though I’ve been averse to cabbage for a long time (from having my parents and grandparents tell me to eat some cabbage non-stop growing up), I’ve come back around to it.

Mainly because I know it’s chock-full of needed nutrients for winter and has anti-inflammatory properties. But also because when it’s cooked right, it’s actually really delicious. And that’s exactly what this dish is. Delicious. And easy.

Here’s how to make it:

sauteed cabbage and chicken sausage one-pan meal

Step 1: Chop the cabbage

Cabbage almost always has dirt on it, even if it looks clean at first. Make sure you peel the outer few layers and wash all the dirt off really good. (Gritty cabbage is unpleasant cabbage.)

Cut the cabbage into slices, then chop the slices into medium to smallish chunks. (This depends on what your preference is.)

*If you’re prepping this for later in the week, store it in a baggie until the night of.

sauteed cabbage and chicken sausage one-pan meal

Step 2: Sautee the cabbage

Next, add the avocado oil to a sautee pan and turn the heat to medium warm. Add the cabbage and salt, and sautee it until it’s on the verge of being soft.

Then add the dijon mustard and lemon juice.

Step 3: Add the sausage

Slice the chicken sausage into chunks or rounds and add it to the pan. Keep stirring until the chicken is warmed through.

Plate and enjoy!

Don’t be afraid to add a spinach or kale salad on the side! πŸƒ

The printable recipe is below, and it’s also featured in our Winter Meal Prep session (check it out and get the printable guide!)

Print

Sauteed Cabbage and Chicken Sausage Pan

5 Stars 4 Stars 3 Stars 2 Stars 1 Star

No reviews

  • Prep Time: 5 minutes
  • Cook Time: 10 minutes
  • Total Time: 15 minutes
  • Yield: 4 1x
  • Category: lunch, Main Course

Ingredients

Scale
  • 16 oz chicken sausage (Make sure there's no cheese inside for dairy-free)
  • 1 head purple cabbage (sliced and chopped)
  • 2 TBSP avocado oil
  • 2 tsp lemon juice
  • 1 tsp dijon mustard
  • 1/4 tsp salt

Instructions

  1. Heat a cast-iron skillet over medium heat. Once hot, add the sausage and cook for six to eight minutes, until cooked through. Then remove and set aside.
  2. Add the cabbage wedges to the skillet and cook until browned and slightly charred on both sides, about five minutes total.
  3. In a small bowl, mix together the olive oil, lemon juice, mustard, and salt. Add the sausage and cabbage to plates. Drizzle the dressing over the cabbage and enjoy!

Notes

Per serving:

Fat: 16g

Carbs: 11 g

Fiber: 3 g

Sugar: 5 g

Protein: 23 g

Nutrition

  • Calories: 279

Did you make this recipe?

Share a photo and tag us @truewell.co β€” we can’t wait to see what you’ve made!

Like this recipe? Prep it and 5 others with the Winter Anti-Inflammatory Meal Prep Guide! {Click the image below to grab it} πŸ‘‡

winter anti inflammatory meal plan
sauteed cabbage and chicken sausage one-pan meal

Creamy Pumpkin Alfredo with Spaghetti Squash Noodles

If you like alfredo sauce on anything you’ll LOVE this Creamy Pumpkin Alfredo with Spaghetti Squash Noodles!

pumpkin alfredo sauce

Honestly, my kids have made an Olympic sport of turning up their noses at dinners I make, then retracting their comments once they taste it.

This is one of those dinners. They loved it.

The thing that’s cool about this recipe, if you’re worried about the pumpkin taste, is that you actually can’t even taste the pumpkin. It makes the sauce a slightly more orange color, but adds a nutritional boost without even affecting the flavor hardly at all.

We like to use it on top of spaghetti squash because the seasonal winter produce is anti-inflammatory goodness that provides tons of fiber and vitamins like A, B6, and C. (All of which are amazing for cold and flu season!)

pumpkin alfredo sauce

The pumpkin in the alfredo sauce gives it an additional boost of those nutrients as well. Plus, the healthy fats in the alfredo sauce base are used to absorb alllll that Vitamin A. (Healthy triple whammy!)

The printable recipe is below, and it’s also featured in our Winter Anti-Inflammatory Meal Prep session (check it out and get the printable guide!)

Print

Creamy Pumpkin Alfredo Sauce on Spaghetti Squash Noodles

pumpkin alfredo sauce

5 Stars 4 Stars 3 Stars 2 Stars 1 Star

No reviews

  • Prep Time: 10 minutes
  • Cook Time: 30 minutes
  • Total Time: 40 minutes
  • Yield: 4 1x
  • Category: Main Course

Ingredients

Units Scale
  • 1 spaghetti squash
  • 2 TBSP avocado oil (or butter)
  • 5 tsp minced garlic
  • 1 cup pumpkin puree (canned)
  • 2 1/2 cups heavy cream (organic)
  • 1/2 cup parmesan cheese (organic, grated from the block)

Instructions

  1. Preheat the oven to 350 degrees F. Cut the squash in half lengthwise. Place on a pan covered in foil. Roast for 30-40 minutes.
  2. Remove squash from oven and let cool enough to touch.
  3. Flip halves over, then use a fork to scrape the spaghetti 'noodles' out of the middle into a bowl.
  4. For the sauce (don't make ahead of time, you want this to be made immediately before serving): Heat the avocado oil and garlic over medium heat. Add the pumpkin and cream, stirring. Simmer until lightly thickened, then add the parmesan cheese and stir until combined.
  5. Plate the squash noodles, then top with pumpkin alfredo sauce.
  6. This is also great topped with organic crumbled bacon or grilled chicken.
  7. Enjoy!

Did you make this recipe?

Share a photo and tag us @truewell.co β€” we can’t wait to see what you’ve made!

Like this recipe? Prep it and 5 others with the Winter Anti-Inflammatory Meal Prep Guide! Click the image below to grab it!πŸ‘‡πŸ‘‡πŸ‘‡

pumpkin alfredo sauce

Roasted Leek and Cauliflower Soup

Truthfully, in the past I’d never tried leeks–even in something as yummy as this Roasted Leek and Cauliflower Soup.

roasted leek and cauliflower soup

I’m embarrassed to admit that every time I thought of leeks, I remembered the scene in Bridget Jones’ Diary where she tried to make leek soup and left the blue rubber band in it and the entire soup was blue. 😝 😹

But thankfully I got over it and now absolutely love the taste of leeks! Which is why this soup is so great. It truly embodies the anti-inflammatory winter produce with a warm, creamy, and filling soup.

roasted leek and cauliflower soup

Try it out, and don’t forget to top it with organic crumbled bacon or even some sharp cheddar and chives!

The printable recipe is below, and it’s also featured in our Winter Freestyle Meal Prep session (check it out and get the printable guide!)

Print

Roasted Leek and Cauliflower Soup

5 Stars 4 Stars 3 Stars 2 Stars 1 Star

No reviews

  • Prep Time: 35 minutes
  • Cook Time: 20 minutes
  • Total Time: 55 minutes
  • Yield: 4 1x
  • Category: Main Course

Ingredients

Units Scale
  • 1 head cauliflower (About 2 cups chopped)
  • 2 leeks (medium to small)
  • 2 TBSP minced garlic
  • 2 TBSP avocado oil (or melted coconut oil)
  • 1/4 cup almond butter (or cashew)
  • 3 tsp thyme leaves (fresh)
  • 3 cups water
  • 1/8 tsp paprika
  • 1 TBSP lemon juice
  • 1 tsp salt and pepper (to taste)

Instructions

  1. Preheat oven to 350 degrees F. Spread the cauliflower florets and leeks on a baking sheet. Drizzle with 1 TBSP avocado oil and lightly season with salt and pepper.
  2. Roast for 25 minutes, turning pan halfway through. Let it get lightly browned but not burned.
  3. Let cool about 5-10 minutes, then, into a high-powered blender add all the roasted vegetables, almond butter, thyme leaves, lemon juice and half the water (1 1/2 cups).
  4. Blend until pureed, then add the remaining ingredients and pulse a few more times.
  5. Pour into a saucepan and let the soup heat until warmed up completely. Adjust seasonings to taste.
  6. You may add more water or even broth if the soup is too thick.
  7. Top with a dollop of sour cream or organic bacon crumbles. Enjoy

Did you make this recipe?

Share a photo and tag us @truewell.co β€” we can’t wait to see what you’ve made!

Like this recipe? Prep it and 5 others with the Anti-Inflammatory Winter Freestyle Meal Prep Guide! {Click the image to grab it!}πŸ‘‡

roasted leek and cauliflower soup

Creamy Collard Greens Soup

Being from the South, I’ve had my fair share of collard greens as a kid–but never collard greens soup. Well, I’ve had my fair share of adults trying to get me to eat my collard greens as a kid. I was never a huge fan (being more of the ‘addicted to sugar‘ type).

creamy collard greens soup recipe anti-inflammatory vegan

But as an adult? Not only do I know the superpower of greens, I’ve experimented through the years to see what works, what doesn’t, and what I can tolerate in the name of getting needed nutrients and fiber into my body. (Cause my body does so much better when I’m taking care of it this way!)

creamy collard greens soup recipe anti-inflammatory vegan

This Creamy Collard Greens Soup recipe is not only right up there with ‘what works’, but my kids didn’t even know the difference between this and the broccoli-potato soup they regularly order at the steakhouse down the road. (Win for Mama!!)

So technically potatoes aren’t necessarily ‘frowned upon’ in an anti-inflammatory diet (unless you have to avoid nightshades). But what does happen is that they’re such a high-glycemic vegetable that it can raise blood sugar levels. High blood sugar is inflammatory.

That being said, I’ve been able to sub in butternut squash repeatedly on recipes (like this one) and my kids didn’t even know! They thought they were orange-y potatoes!

creamy collard greens soup recipe anti-inflammatory vegan

So without further ado, the collard green soup that my kids think is full of potatoes… (and other greens they think are NOT collards)… 😁

The printable recipe is below, and it’s also featured in our Winter Freestyle Meal Prep session (check it out and get the printable guide!)

Print

Creamy Collard Greens Soup

creamy collard greens soup recipe anti-inflammatory vegan

5 Stars 4 Stars 3 Stars 2 Stars 1 Star

2 from 1 review

  • Prep Time: 25 minutes
  • Cook Time: 10 minutes
  • Total Time: 35 minutes
  • Yield: 6 1x
  • Category: Main Course

Ingredients

Scale
  • 1 butternut squash
  • 1 yellow onion
  • 1 TBSP garlic (freshly chopped)
  • 4 cups chicken broth (low-sodium)
  • 8 oz collard greens (1 bunch, stemmed and chopped)
  • 2 tsp salt (to taste)
  • 1/2 tsp pepper (to taste)
  • 2 TBSP avocado oil
  • 1 TBSP hot sauce (optional, to taste)
  • 1/2 cup dairy-free sour cream (optional)
  • 5 slices bacon (organic, uncured, (optional!))

Instructions

  1. Preheat oven to 400 degrees F.
  2. Cut butternut squash in half lengthwise and place face down on rimmed baking pan lined with foil. Once oven is preheated, place in oven for 30-40 mimutes, until squash is cooked through.
  3. Stem and chop onions and collard greens.
  4. Heat a large pot on medium high and place avocado oil and onions in the pot. Saute until clear.
  5. Add the collard greens and cook down until tender. Add the garlic and stir often.
  6. When squash is cooked, remove from oven and flip the pieces over. Spoon out seeds and discard.
  7. Spoon out chunks of squash into a high-powered blender. Add the collard mixture and 1 cup of broth.
  8. Blend until super creamy. Pour back into pot.
  9. Add the remaining 3 cups of broth.
  10. Simmer on cooktop until time to eat.
  11. Top with dairy-free sour cream. {And if using bacon bits, cook bacon, chop, and sprinkle on top.}
  12. Enjoy!

Did you make this recipe?

Share a photo and tag us @truewell.co β€” we can’t wait to see what you’ve made!

Like this recipe? Prep it and 5 others with the Winter Anti-Inflammatory Meal Prep Guide! πŸ‘‡{Click the image to grab it!}

creamy collard greens soup recipe anti-inflammatory vegan

Lemon Tart Smoothie

This lemon tart smoothie is full of protein and healthy fats, making it a perfect anti-inflammatory smoothie for breakfast, snacks, or even a meal replacement!

In this winter anti-inflammatory smoothie recipe we’re gonna be taking advantage of cauliflower and, obviously, lemon.

anti inflammatory lemon tart smoothie

This smoothie recipe includes:

  • 1 lemon, juiced
  • 1 frozen banana
  • 1 cup of frozen cauliflower
  • 2 tbsp of coconut butter
  • 1/4 cup of vanilla protein powder
  • And 1 Β½ cups of unsweetened milk
anti inflammatory lemon tart smoothie for breakfast

Frozen bananas

Now if you don’t have a bag of frozen bananas and just toss bananas into the freezer when they’re about to go bad like I do, the easiest way to use them is to put in the microwave for about 20 seconds, then just slice the skin off the banana and slice the banana up. I know it looks super gross, but bananas naturally brown in the freezer like that, so no worries.

Frozen cauliflower

frozen cauliflower in bags

For the cauliflower, you can find this in the freezer section at your grocery store, but just know that they should have cauliflower florets, and riced cauliflower. You can use either, but I prefer the riced because that’s just that much less blending you’ll need to get the chunks out of your smoothie.

Coconut butter

coconut butter

Now for the coconut butter, this can sometimes be tricky to find. Basically, coconut butter is the coconut meat ground down into butter, the same way that peanut butter or any other nut butter is made.

So for this recipe if you can’t find coconut butter, you can do one of 2 things:

  1. Either make your own coconut butter with coconut flakesβ€”but you’ll need to make sure they’re free of any type of coating,
  2. Or you can use coconut oil.

The difference in the two lies in the fact that the fat is all extracted from the coconut butter, which is the oil. So on these containers you can see that they have the same servings size, and per 1 TBSP, the coconut butter has 100 calories, 10 grams of fat, 3 grams of carbs, and 2 grams of fiber.

Coconut oil, on the other hand, is 120 calories of only fat. No carbs and no fiber.

coconut butter and coconut oil jars

If you’re counting calories and/or macros, this is something to be aware of if you need to sub out the coconut butter.

Protein powder

putting protein powder into a blender

For the protein powder, I recommend checking the label and making sure there’s no sugar added. A lot of reputable protein powders are now using stevia or monk fruit to sweeten the powder.

If you can handle dairy, a whey protein powder is great. If you need non-dairy or vegan, pea protein powder is really great.

Milk

pouring milk into a measuring cup

And lastly, the milk can either be dairy if you can tolerate it or any other non-dairy unsweetened milk. Make sure it’s unsweetened so it doesn’t have added sugar.

I really don’t like using oat milk either because it has so many carbs straight from grains with no fiber.

Directions

So into the blender, we juice our whole lemon, add in the frozen banana, 1 cup of frozen cauliflower, 2 TBSP coconut butter, ΒΌ cup of vanilla protein powder, and 1 Β½ cups of unsweetened milk.

Then blend or pulse it in a high-powered blender until it’s super smooth, pour, and enjoy!

Grab the free Winter Anti-Inflammatory Meal Prep Guide: Click the image below! πŸ‘‡

anti inflammatory meal plan
Print

Lemon Tart Smoothie

5 Stars 4 Stars 3 Stars 2 Stars 1 Star

No reviews

This anti inflammatory smoothie is packed with protein, fiber, and healthy fat, making it perfect for a winter breakfast, snack, or even meal replacement.

  • Author: Laura Brigance, MS, CHC
  • Prep Time: 5 minutes
  • Total Time: 5 minutes
  • Yield: 1 smoothie 1x

Ingredients

Scale
  • 1 lemon, juiced
  • 1 frozen banana
  • 1 cup of frozen cauliflower
  • 2 tbsp of coconut butter
  • 1/4 cup of vanilla protein powder
  • And 1 1/2 cups of unsweetened milk

Instructions

Place all ingredients in a high powered blender.

Pulse or blend on high until super smooth.

Enjoy!

Did you make this recipe?

Share a photo and tag us @truewell.co β€” we can’t wait to see what you’ve made!

Don’t forget to SHARE this or PIN IT for later!

Carrot Cake Smoothie

This carrot cake smoothie takes advantage of our winter root vegetables while packing an anti-inflammatory smoothie punch that’s filling and satisfies the sweet tooth!

anti inflammatory carrot cake smoothie

So let’s talk ingredients.

carrot cake smoothie ingredients

Carrot

Our carrot is gonna be raw so the smaller the pieces you can put in your blender, the easier it will be to get smooth.

Frozen bananas

cutting a frozen banana on a cutting board

If you don’t have a bag of frozen bananas and just toss bananas into the freezer when they’re about to go bad like I do, the easiest way to use them is to put in the microwave for about 20 seconds, then just slice the skin off the banana and slice the banana up.

I know it looks super gross, but bananas naturally brown in the freezer like that, so no worries.

Milk

pouring milk into a measuring cup over a blender

The milk can either be dairy if you can tolerate it (organic, full fat) or any other non-dairy unsweetened milk. Make sure it’s unsweetened so it doesn’t have added sugar.

I really don’t like using oat milk either because it has so many carbs straight from grains with no fiber.

Yogurt

2 containers of yogurt on a counter top

I personally prefer Greek yogurt, so if you can tolerate dairy- I’ve got 2 options for you that abide by anti-inflammatory diet guidelines.

  1. The first is just plain unsweetened Greek yogurt.
  2. The second is the Oikos brand called Oikos Pro.

I always prefer for any dairy to be organic, but if it’s not available, these options will do. The Oikos Pro has no sugar added, and no artificial sweeteners, but has added whey protein to bump up the protein content.

If you’re dairy free you can use coconut yogurt or any other dairy-free yogurt as long as it’s unsweetened.

Cinnamon

holding a bottle of cinnamon forward

Cinnamon is a beautiful spice that adds that perfect complimentary carrot cake spice, and not only is anti-inflammatory, but it also helps control blood sugar levels.

Fresh ginger

grating fresh ginger over a blender

Lastly, fresh ginger is an amazing add-in whenever you’re able. It’s got anti-inflammatory properties and gives this smoothie recipe the bite that it needs to be fresh, zingy, and satisfy your sweet tooth.

Directions

So once we’ve got the carrot chopped or grated, add it into the blender with the bananas, milk, yogurt, cinnamon, and grated ginger.

Then blend it in your high-powered blender, pour up your anti-inflammatory Carrot Cake Smoothie, and enjoy!

Click the image below to grab the Free Winter Anti-Inflammatory Meal Prep Guide! πŸ‘‡

winter anti inflammatory meal plan
Print

Carrot Cake Smoothie

5 Stars 4 Stars 3 Stars 2 Stars 1 Star

No reviews

This carrot cake smoothie takes advantage of our winter root vegetables while packing an anti-inflammatory smoothie punch that’s filling and satisfies the sweet tooth!

  • Author: Laura Brigance, MS, CHC
  • Yield: 1 smoothie 1x

Ingredients

Scale

1 medium carrot, chopped or grated

2/3 of a frozen banana (or 2/3 cup frozen banana)

1/2 cup of unsweetened milk

1/2 cup Greek yogurt

1/4 tsp cinnamon

1 tsp grated ginger (fresh)

Instructions

  1. Grate or finely chop the carrot.
  2. Grate the fresh ginger.
  3. Combine all ingredients into a high-powered blender. Blend on high until super smooth, taking care to ensure all the carrot chunks are broken down.
  4. Pour and enjoy!

Did you make this recipe?

Share a photo and tag us @truewell.co β€” we can’t wait to see what you’ve made!

Don’t forget to SHARE this or PIN IT for later!

Citrus Pear Smoothie

This Citrus Pear Smoothie is a green anti-inflammatory smoothie that combines signature winter flavors to create an absolutely refreshing snack or breakfast smoothie.

citrus pear smoothie

So let’s talk ingredients.

citrus pear smoothie ingredients

Frozen avocado

So, first off, if you’re not using frozen avocado chunks, which you can buy at the grocery store, you can either freeze your own avocado ahead of time, or use it at room temperature.

Just know that if you use it at room temperature, that’s the only ingredient that was frozen, so we’ll need to use some ice in the place of part of the water so your smoothie is cold and slushie.

Pear

cutting a pear into wedges with an apple corer

We start out cutting up the pear and parsley. Pear is so delicious when it’s in season in the winter, and the skin is usually softer than an apple.

The skin is also full of antioxidants, and one in particular is quercetin, which has been shown to reduce inflammation, plus it has lots of fiber.

So I keep the skin on. You can cut the top and bottom off so it stands on its own, then use an apple corer get perfect wedges while taking the core out.

Parsley

chopping parsley on a cutting board

Parsley is full of vitamins K, C, A, and Bs. It’s also been shown to help reduce blood pressure and bloating, so I love to use parsley in any recipe I can. It just needs to be roughly chopped for this smoothie.

Lemon juice

juicing a lemon into a blender

Lemon juice adds just a bit of tang to this smoothie, as well as a bit more Vitamin c. Fresh is always best since most lemon juice in the bottle has added preservatives.

Water

pouring water into a blender for an anti inflammatory citrus pear smoothie

Make sure you use filtered water, and if your avocado isn’t frozen, use Β½ cup of water and about ΒΎ to 1 cup of ice to replace the 1 cup of water.

Instructions

And then we just add all the ingredients to the high-powered blender, blend really well until all smoothβ€”remember it’s chopping up pear skin if you kept it on, so you may need to let it go for a bit.

Then pour up and enjoy!

πŸ‘‡Grab the free Winter Anti-Inflammatory Meal Prep Guide! Click the image below! πŸ‘‡

winter anti inflammatory meal plan
Print

Citrus Pear Smoothie

5 Stars 4 Stars 3 Stars 2 Stars 1 Star

No reviews

This smoothie combines the winter flavors of pear and citrus with anti-inflammatory greens to create a refreshing combo that will keep you full.

  • Author: Laura Brigance, MS, CHC
  • Prep Time: 5 minutes
  • Total Time: 5 minutes
  • Yield: 1 smoothie 1x

Ingredients

Scale

1/2 avocado (or 1/2 cup frozen avocado chunks)

1 pear

1 cup of spinach

1 handful of parsley (fresh)

1/2 of a lemon, juiced

1 cup of water

Notes

If you don’t have frozen avocado, you can freeze your own, or substitute 3/4 cup ice and 1/2 cup of water for the full cup of water in the recipe.

Did you make this recipe?

Share a photo and tag us @truewell.co β€” we can’t wait to see what you’ve made!

Don’t forget to SHARE this recipe or PIN IT for later!

3 Anti-Inflammatory Smoothies Perfect for Winter

Even though winter produce is less abundant than our other 3 seasons, there’s still plenty of goodness availableβ€”especially for anti-inflammatory smoothies.

So today I’m got 3 anti-inflammatory smoothie recipes to take advantage of the winter produce and give you a balanced anti-inflammatory breakfast smoothie, or snack.

We’ve got an anti-inflammatory green smoothie, which we call Citrus Pear Smoothie, a Lemon Tart Smoothie chock full of protein, and a Carrot Cake Smoothie that will satisfy your sweet tooth without the sugar.

Grab the Winter Anti-Inflammatory Meal Prep Guide: Click the image below!πŸ‘‡

anti inflammatory smoothies

Citrus Pear Smoothie

First up is our citrus pear smoothie. This green smoothie tastes clean and refreshing and is super yummy with the combination of pear and lemon.

green anti-inflammatory smoothie in glass

Grab the printable Citrus Pear Smoothie recipe HERE.

Lemon Tart Smoothie

This anti-inflammatory smoothie definitely has the tart flavor down. But it’s also packed with protein and healthy fat, which would make it a perfect meal replacement as well.

lemon tart smoothie on counter with lemons and straw

Grab the printable Lemon Tart Smoothie recipe HERE.

Carrot Cake Smoothie

And last, we have our Carrot Cake Smoothie which satisfies the sweet tooth while still being crazy healthy! I love to be able to use root vegetables from the winter, so this smoothie is perfect!

carrot cake smoothie

Grab the printable Carrot Cake Smoothie recipe HERE.

Let me know in the comments what your favorite is!

πŸ‘‡Don’t forget to SHARE this or PIN IT for later!πŸ‘‡

5 Inflammatory Holiday Foods to Avoid this Year

I’m SOOOO ready to be inflamed, in pain, and on a blood sugar and energy rollercoaster for weeks because of all the holiday foods that cause inflammation that I’m ’bout to stuff my face with!!! … said no one ever.

inflammatory holiday foods to avoid

Honestly, the holidays can be so chaotic and stressful, I don’t understand the loads of inflammatory foods being added into the mix.

I get that there’s a lot of ‘give yourself a break and enjoy the holidays without feeling guilty’ mantras and advice floating around this time of year. But to be honest, those people don’t usually have (or acknowledge) inflammatory, blood sugar, or metabolic issues that wreak havoc when we binge on inflammatory foods.

So it isn’t really about the guilt. It’s about an entire month (or three) of our bodies and brains being completely out of balance just for the sake of a couple of meals.

On the other hand, it’s nice to feel some semblance of tradition during the holidays (and avoid irritating questions from Aunt Edna about why we’re not eating).

So here are the top 5 inflammatory holiday foods to avoid this year, with swap suggestions. {Click the image below to grab it!}

inflammatory holiday foods to avoid

(1) Vegetable and seed oils

Not only are these types of oils extremely inflammatory due to the refining process, but they also contain omega-6 fats which are inflammatory.

To make matters worse, some holiday foods are fried. When oils– especially ones that are already inflammatory– are heated to super high temps and reheated, you’re adding a hefty amount of inflammatory free radicals to the mix.

It can be really difficult to avoid these when you’re using already processed foods in recipes. And you can guarantee these types of oils are used in pre-made foods and recipes.

πŸ‘‰ Instead, make recipes from scratch and opt for oils like avocado, extra virgin olive oil (only for non-heated foods), or coconut oil (organic, unrefined).

(2) Trans fats

These fats are in nearly any ultra-processed food you can find. They’ve been shown to contribute to heart disease and LDL cholesterol (bad cholesterol). And although the US is in the process of banning trans fats (like other countries have), labeling laws still dictate that foods can have 0.5 grams or less per serving.

For now, all this means is that companies are using this loophole to make their serving size small enough that the trans fat amount is 0.5 or less.

πŸ‘‰ So check the ingredients list to make sure there are no trans fats. You’ll know if they are present because the ingredients will include ‘hydrogenated’ or ‘partially hydrogenated’ oil. If it says this, find a different option.

inflammatory holiday foods to avoid

(3) Refined carbohydrates

Refined carbs seem to be a staple in holiday cuisine. From fried things to bread to desserts, they’re in a ton of sweet and savory recipes.

The biggest culprits of refined carbohydrate savory dishes at holiday meals are bread, rolls, breading, pasta, and corn-based foods.

πŸ‘‰ Instead, focus on proteins and veggies that aren’t covered in glazes, gravies, and dressings.

πŸ‘‰ In desserts, since these go hand in hand with sugar, unless you can guarantee they’re sugar-free, it’s best to steer clear of the dessert table, unless fresh fruit that’s not covered in sugar is available.

πŸ‘‰ A good tip is to plan ahead and bring your own sugar-free, refined-flour-free dessert.

inflammatory holiday foods to avoid

(4) Sugar

Sugar is extremely inflammatory, and has about a thousand different names and forms these days. It’s being added more and more to savory dishes to balance flavors and sometimes make it more addicting.

What’s even worse is high fructose corn syrup. Both are added to nearly all ultra-processed foods these days. And you can guarantee all the desserts are loaded with some kind of sugar.

πŸ‘‰ Check ingredient labels! Ingredients have to be listed in order from most to least, so you can tell the general amount of sugar in a package– the best bet is to avoid any with sugar altogether. This may mean foregoing sweet potato souffle and the pink salad (or jello salad) and the dessert table.

Another source of sugar at holiday meals is also beverages. Sweet tea (mostly in the South), sodas, hydration drinks, and alcoholic drinks are huge culprits of sugar during the holidays.

πŸ‘‰ Opt for water or unsweetened tea, and create your own cocktail with the suggestions below.

inflammatory holiday foods to avoid

(5) Alcoholic beverages

Alcohol seems to be a staple at the holidays for most. The problem is, being off work – and especially if you’re not the designated driver- tend to make many feel like they have a free pass to indulge to the max during the holidays.

Beer can drive up uric acid levels, which creates inflammation, wines can have sugars in them, and mixed drinks are normally loaded with sugar and preservatives from the mixer base.

πŸ‘‰ To enjoy alcohol and still find a balance, alternate each drink with water. Hydration is extremely helpful in flushing inflammatory foods from the body.

πŸ‘‰ Choose dry red wines instead of beer or white wine.

πŸ‘‰ Mix liquor with sparkling water and a couple of drops of liquid stevia.

inflammatory holiday foods to avoid

Tips for creating a more balanced holiday meal:

πŸ’ŽIf you’re the one cooking the meal or contributing, it can be a lot easier to have control over what’s being served.

What we’ve learned through the years is that my husband’s and I’s families have only like two staple holiday recipes that are the same. The rest are recipes with super-inflammatory processed ingredients that the kids don’t even like.

That makes it much easier to eliminate inflammatory recipes and replace them with something much better for us.

πŸ’ŽWe focus first on the protein and choose quality meats, and then prepare them with healthier options (ie- NOT frying an entire turkey).

πŸ’ŽOur second focus is on vegetables. We decide what dishes we can convert into healthier options from the old-school versions, and how we can make them taste amazing.

πŸ’Ž If you’re not confident in altering recipes, search up options with the words, ‘Paleo’, ‘low-carb’, or ‘keto’ at the front, and make sure they’re sugar-free and refined-flour-free.

πŸ’ŽOne thing my husband and I have discovered over the years is that when you experience nice restaurants- not chains- but ones with true chefs, is that they take a lot of pride in the flavor profiles and combinations of ingredients.

They also use very fresh ingredients and cook from scratch (for the most part). The result of that is incredibly delicious meals that aren’t processed, and – if the correct ingredients are used- aren’t inflammatory. The same holds true for the holidays.

Consider revamping some of your old-school recipes that use processed junk and challenge yourself to see how you can improve the health profile while maximizing the flavor profile.

Then save those in a binder for the next holiday season!

An amazing resource for doing this is a book called The Flavor Bible. We use this all the time to create new recipes or even add more pizzazz to existing ones.

{This is an affiliate link, which means if you click through and purchase, I’ll receive a small portion of the proceeds, at no extra charge to you.}

And as promised… Grab our free Healthy Holiday Swap-out Planning Sheet! πŸ‘‡πŸ‘‡πŸ‘‡{Click the image below to grab it!}

inflammatory holiday foods to avoid

SAVE or SHARE this post! πŸ‘‡

inflammatory holiday foods to avoid

Turkish Red Lentil Soup

When it comes to creamy soups for fall and winter, this Turkish Red Lentil Soup is just the thing to warm you up AND fill you up!

The lentils and rice give a ton of fiber and complex carbs while the tomatoes give a boost of vitamin c and lycopene.

And with a vague mint and spicy note, it’s perfect!

*Serve with gluten-free whole-grain crackers and a dollop of organic sour cream (or dairy-free sour cream) to finish it off!

Print

Turkish Red Lentil Soup

turkish red lentil soup anti-inflammatory

5 Stars 4 Stars 3 Stars 2 Stars 1 Star

No reviews

  • Prep Time: 15 minutes
  • Cook Time: 45 minutes
  • Total Time: 1 hour
  • Yield: 6 1x
  • Category: Main Course

Ingredients

Units Scale
  • 2 TBSP olive oil
  • 1/2 onion (diced)
  • 1 clove garlic (minced)
  • 1/4 cup diced tomatoes (canned, drained)
  • 5 cups chicken stock (vegetable for vegan option)
  • 1/2 cup red lentils
  • 1/2 cup basmati rice (or wild or brown)
  • 2 TBSP tomato paste
  • 1 tsp paprika
  • 1/2 tsp red pepper flakes (optional)
  • 1 TBSP mint leaves (dried or fresh)
  • 1/2 tsp salt (to taste)
  • 1/2 tsp black pepper (to taste)

Instructions

  1. Heat olive oil in a large pot over medium-high heat. Cook onion until clear, then add the garlic and cook about 2 minutes.
  2. Add the tomatoes, chicken stock, lentils, rice, tomato paste, paprika, red pepper flakes, and mint. Bring to a boil, then reduce heat to medium-low and cook until the lentils and rice are cooked through (this will take approximately 30 minutes).
  3. Pour entire pot into a high-powered blender and pulse into a puree.
  4. Pour soup back into pot and simmer, adding salt and pepper to taste, until time to serve.

Did you make this recipe?

Share a photo and tag us @truewell.co β€” we can’t wait to see what you’ve made!

Red lentil soup vegan gluten free healthy easy

Egg Broccoli + Turkey Muffins

These little savory muffins are full of comfort, without the carbs. They’re gluten-free, dairy-free, low-carb, and amazing as a batch-prepped breakfast or snack!

Print

Egg Broccoli + Turkey Muffins

5 Stars 4 Stars 3 Stars 2 Stars 1 Star

No reviews

  • Prep Time: 5 minutes
  • Cook Time: 15 minutes
  • Total Time: 20 minutes
  • Yield: 6 1x
  • Category: Breakfast, lunch, Snack

Ingredients

Units Scale
  • 1/2 head broccoli
  • 5 eggs (medium to large)
  • 1 clove garlic (minced)
  • 1 pinch chili flakes (optional)
  • 4 slices turkey (from deli)
  • 1/3 cup cheddar (shredded)

Instructions

  1. Preheat the oven to 360Β°F(180Β°C).
  2. Place the broccoli in a pot of boiling water and cook for approx. 3 minutes. Strain and cut into small pieces.
  3. Beat the eggs in a medium-size bowl, add the minced garlic and season with salt and pepper, and chili flakes if using.
  4. Grease a 6 muffin tray with oil or butter, and fill the muffin tin with evenly divided broccoli, ham, and grated cheese. Pour the beaten eggs into the muffin tin and bake in the oven for 10-15 minutes, or until eggs have set.

Notes

Per muffin nutrition:

6 g fat

4 g carb

10 g protein

*For vegan option, replace cheese with plant-based cheese + replace turkey with meat-free option.

Nutrition

  • Calories: 102

Did you make this recipe?

Share a photo and tag us @truewell.co β€” we can’t wait to see what you’ve made!