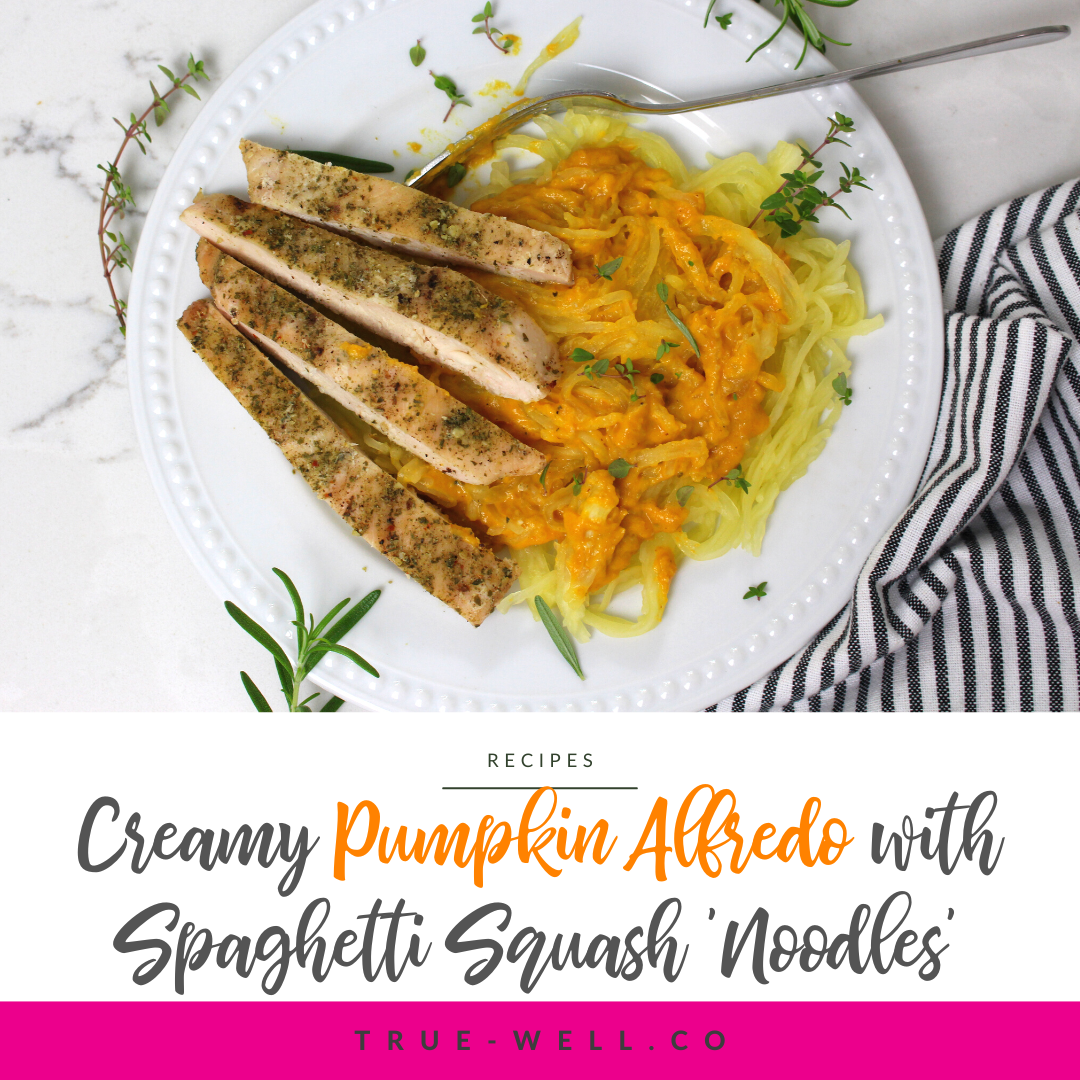
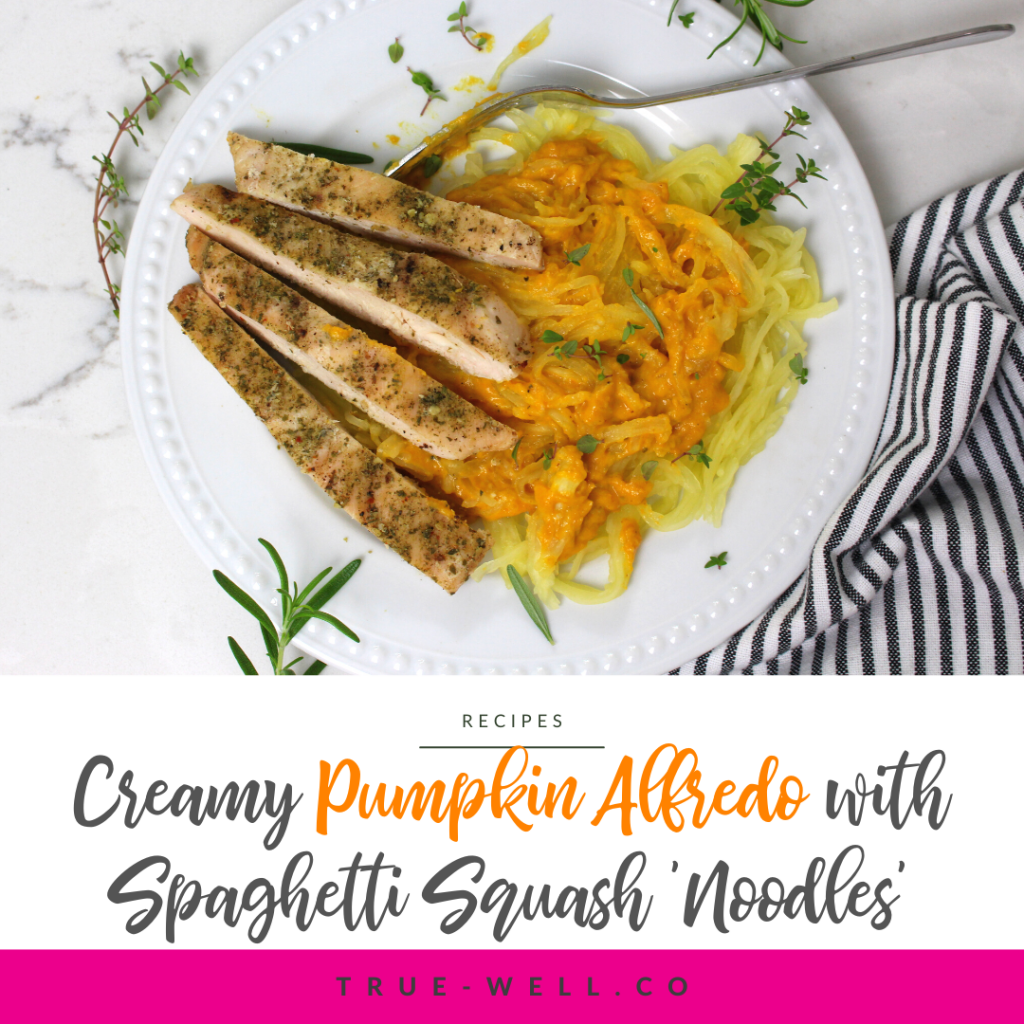
If you like alfredo sauce on anything you’ll LOVE this Creamy Pumpkin Alfredo with Spaghetti Squash Noodles!
Honestly, my kids have made an Olympic sport of turning up their noses at dinners I make, then retracting their comments once they taste it.
This is one of those dinners. They loved it.
The thing that’s cool about this recipe, if you’re worried about the pumpkin taste, is that you actually can’t even taste the pumpkin. It makes the sauce a slightly more orange color, but adds a nutritional boost without even affecting the flavor hardly at all.
We like to use it on top of spaghetti squash because the seasonal winter produce is anti-inflammatory goodness that provides tons of fiber and vitamins like A, B6, and C. (All of which are amazing for cold and flu season!)
The pumpkin in the alfredo sauce gives it an additional boost of those nutrients as well. Plus, the healthy fats in the alfredo sauce base are used to absorb alllll that Vitamin A. (Healthy triple whammy!)
1/2cupparmesan cheese (organic, grated from the block)
Instructions
Preheat the oven to 350 degrees F. Cut the squash in half lengthwise. Place on a pan covered in foil. Roast for 30-40 minutes.
Remove squash from oven and let cool enough to touch.
Flip halves over, then use a fork to scrape the spaghetti 'noodles' out of the middle into a bowl.
For the sauce (don't make ahead of time, you want this to be made immediately before serving): Heat the avocado oil and garlic over medium heat. Add the pumpkin and cream, stirring. Simmer until lightly thickened, then add the parmesan cheese and stir until combined.
Plate the squash noodles, then top with pumpkin alfredo sauce.
This is also great topped with organic crumbled bacon or grilled chicken.
Enjoy!
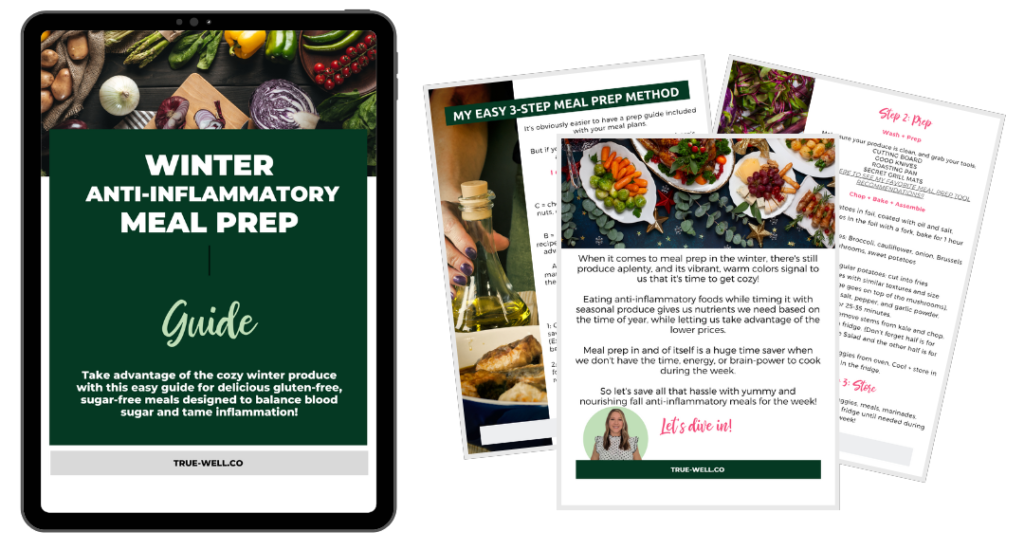
Like this recipe? Prep it and 5 others with the Winter Anti-Inflammatory Meal Prep Guide! Click the image below to grab it!👇👇👇
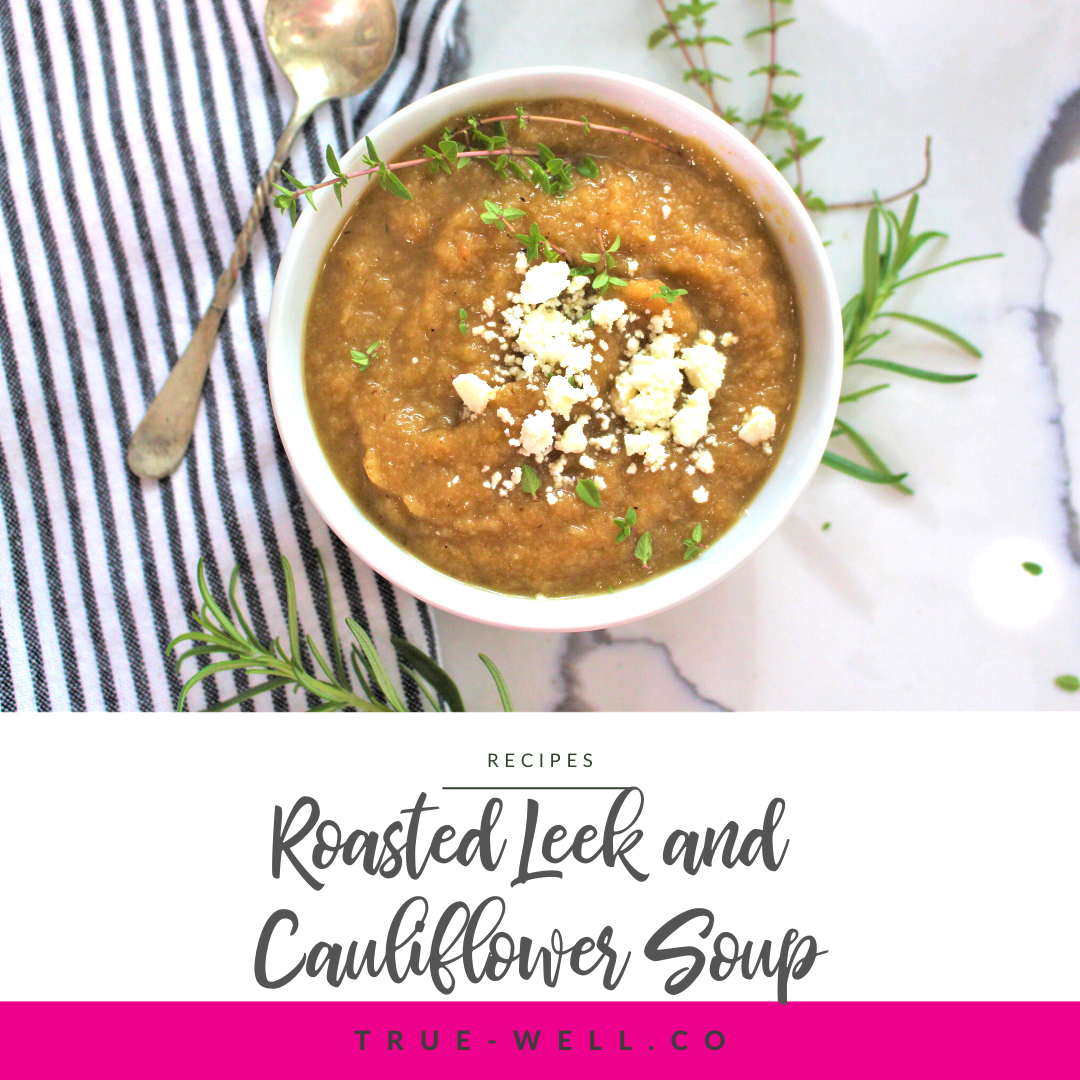
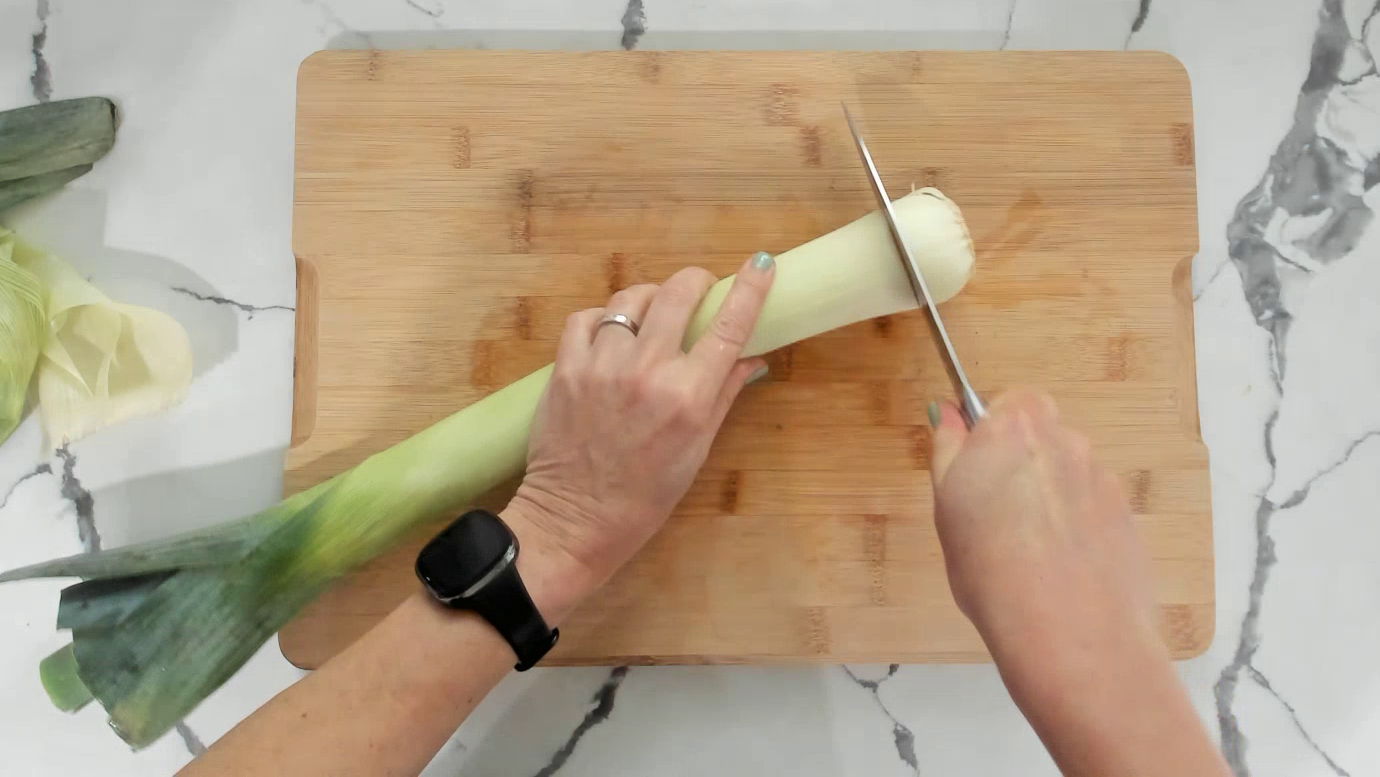
Truthfully, in the past I’d never tried leeks–even in something as yummy as this Roasted Leek and Cauliflower Soup.
I’m embarrassed to admit that every time I thought of leeks, I remembered the scene in Bridget Jones’ Diary where she tried to make leek soup and left the blue rubber band in it and the entire soup was blue. 😝 😹
But thankfully I got over it and now absolutely love the taste of leeks! Which is why this soup is so great. It truly embodies the anti-inflammatory winter produce with a warm, creamy, and filling soup.
Try it out, and don’t forget to top it with organic crumbled bacon or even some sharp cheddar and chives!
Preheat oven to 350 degrees F. Spread the cauliflower florets and leeks on a baking sheet. Drizzle with 1 TBSP avocado oil and lightly season with salt and pepper.
Roast for 25 minutes, turning pan halfway through. Let it get lightly browned but not burned.
Let cool about 5-10 minutes, then, into a high-powered blender add all the roasted vegetables, almond butter, thyme leaves, lemon juice and half the water (1 1/2 cups).
Blend until pureed, then add the remaining ingredients and pulse a few more times.
Pour into a saucepan and let the soup heat until warmed up completely. Adjust seasonings to taste.
You may add more water or even broth if the soup is too thick.
Top with a dollop of sour cream or organic bacon crumbles. Enjoy
Like this recipe? Prep it and 5 others with the Anti-Inflammatory Winter Freestyle Meal Prep Guide! {Click the image to grab it!}👇
One of the best ways to get quality protein in an anti-inflammatory diet is through fish, like this lemon cod recipe. It’s flaky and delicious, and super simple to make dairy-free.
This entire recipe is an anti-inflammatory meal, as we’ve added soft cinnamon-baked sweet potatoes and wilted kale into a perfect fall anti-inflammatory dinner using seasonal ingredients.
Cod is a really light and delicious fish that isn’t overpowering, but is full of healthy fats and protein. Sweet potatoes’ already high nutrient profile gets elevated with cinnamon. And kale rounds out this anti-inflammatory dinner recipe with a punch of vitamins and fiber in a delicious side dish.
1/4 cup unsalted Butter (organic–or sub in avocado oil for dairy-free)
4 Sweet Potatoes (small to medium)
Cinnamon
1 bunch kale
Salt + Pepper
1 tsp Garlic powder
1 TBSP avocado oil
Prep + Instructions
Preheat the oven to 400 F (204 C).
If cod fillets are frozen, thaw them in a bowl of cold water.
Cube the sweet potatoes and place them in a large saucepan or Dutch oven. Add water to the pan until they are covered about 1 inch. Turn the cooktop to medium-high heat until the water is simmering. Reduce the heat so that it’s still simmering and let cook for 9-12 minutes.
While those are cooking…
Pat cod fillets dry with paper towel. Then arrange them on a baking dish lined with foil or a grill mat.
Melt 1/8 cup (half) of the butter, the lemon juice and zest in a microwave or on the cooktop, then brush it onto the fillets.
Sprinkle salt, pepper, and garlic powder on the fillets, and place in the oven for 12-15 minutes depending on thickness. While those are cooking…
Place the kale in a medium to large skillet with 1 TBSP avocado oil on medium heat. Season with salt, pepper, and garlic powder to taste, and stir to coat all the kale.
Place a lid on the skillet and let wilt down while finishing the other parts of the meal.
When the potatoes are tender, drain and return them to the pot. Mash, and add the remaining butter (1/4 cup) and cinnamon, to taste.
Remove the cod from the oven when done and let rest 5 minutes.
Remove the kale from heat once wilted.
Plate all and serve!
Notes + Make it easier
**Any fish is so much better when it’s fresh vs. frozen, but it can be really hard to find fresh fish in many areas. Frozen is fine, just add a few extra minutes to thaw it in a bowl of cold water before cooking.
**Buy the sweet potatoes already cubed.
**If you don’t mind the stems, buy kale already chopped.
1/4cupunsalted Butter (organic–or sub in avocado oil for dairy-free)
4 Sweet Potatoes (small to medium)
Cinnamon
1 bunch kale
Salt + Pepper
1 tsp Garlic powder
1 TBSP avocado oil
Instructions
Preheat the oven to 400 F (204 C).
If cod fillets are frozen, thaw them in a bowl of cold water.
Cube the sweet potatoes and place them in a large saucepan or Dutch oven. Add water to the pan until they are covered about 1 inch. Turn the cooktop to medium-high heat until the water is simmering. Reduce the heat so that it’s still simmering and let cook for 9-12 minutes.
While those are cooking…
Pat cod fillets dry with paper towel. Then arrange them on a baking dish lined with foil or a grill mat.
Melt 1/8 cup (half) of the butter, the lemon juice and zest in a microwave or on the cooktop, then brush it onto the fillets.
Sprinkle salt, pepper, and garlic powder on the fillets, and place in the oven for 12-15 minutes depending on thickness. While those are cooking…
Place the kale in a medium to large skillet with 1 TBSP avocado oil on medium heat. Season with salt, pepper, and garlic powder to taste, and stir to coat all the kale.
Place a lid on the skillet and let wilt down while finishing the other parts of the meal.
When the potatoes are tender, drain and return them to the pot. Mash, and add the remaining butter (1/4 cup) and cinnamon, to taste.
Remove the cod from the oven when done and let rest 5 minutes.
Remove the kale from heat once wilted.
Plate all and serve!
Notes
*Any fish is so much better when it’s fresh vs. frozen, but it can be really hard to find fresh fish in many areas. Frozen is fine, just add a few extra minutes to thaw it in a bowl of cold water before cooking.
*Buy the sweet potatoes already cubed.
*If you don’t mind the stems, buy kale already chopped.
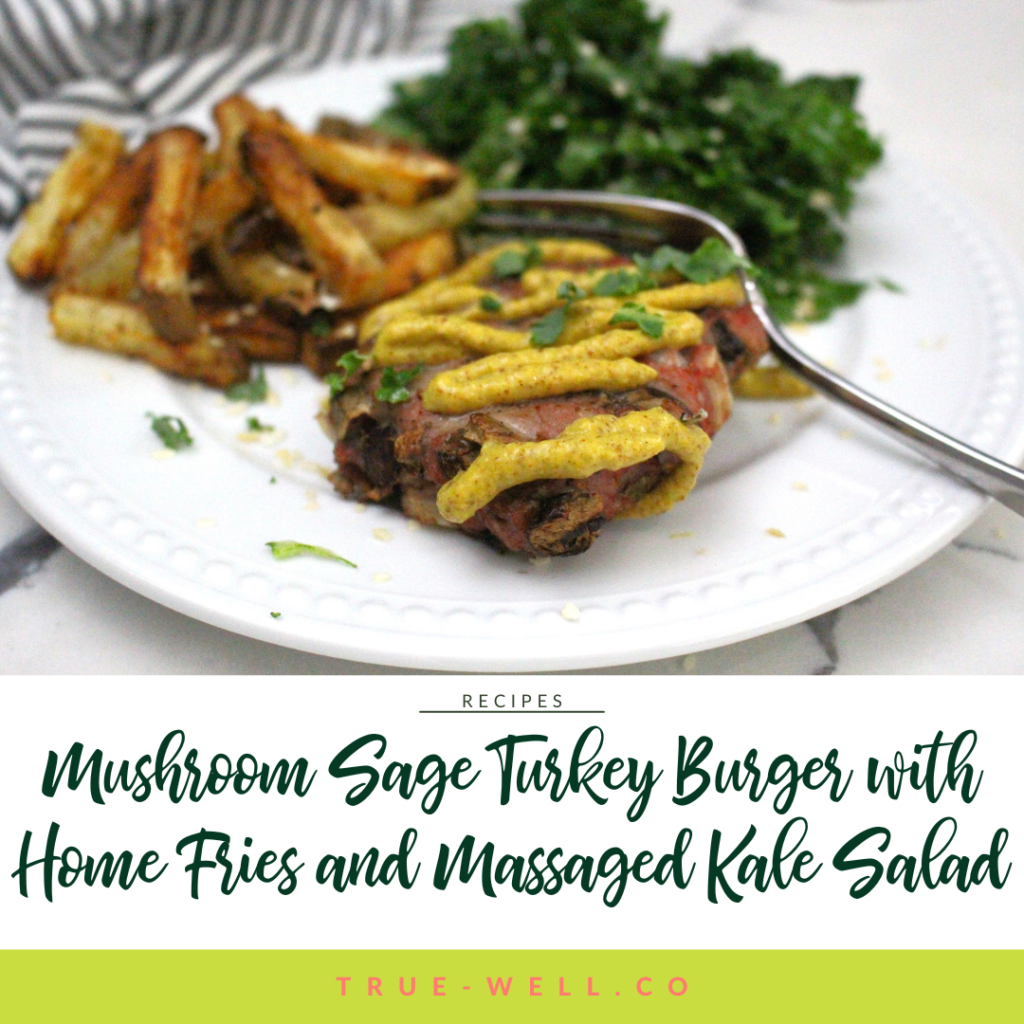
Although these mushroom sage turkey burgers can be eaten with a grain-free bun, they’re absolutely delicious on their own. This turkey burger with home fries and a massaged kale salad always feels like fall 🍂 to me!
Using either a fry-cutter or a large knife, cut the potatoes into fries.
Spread them on a baking sheet lined with foil or a grill mat.
Drizzle the fries with 1 TBSP oil, then season with salt, pepper, and garlic powder.
Put in the oven for 25-30 minutes until golden. (You can stir halfway through if you like.)
Finely chop the sage and add it to a large bowl.
Finely chop the onion and mushrooms (or chop them in a food processor). Place in the bowl with the sage. Add the ground turkey, and salt, pepper, and garlic powder to taste.
Mix the turkey mixture until all is incorporated. Pat into burgers.
Heat a skillet on medium (unless you’re grilling the burgers). Cook burgers until cooked through. Remove from skillet and let rest.
Cut the stems out of the kale leaves, and chop them into small-medium pieces.
Place the kale in a medium bowl. Drizzle with the remaining 1 TBSP avocado oil, then season with salt, pepper, and garlic powder. Massage kale, while folding the oil and seasoning in until the entire bowl has softened and is coated with oil and seasoning.
Remove fries from the oven when done and plate.
Enjoy!
Notes + Make it easier
*Having to cut the fries is an extra step, but I do it because I have yet to find frozen pre-cut fries that weren’t loaded with inflammatory oils and other unnecessary (but inflammatory) ingredients.
*Although fries are typically made from white potatoes, colored potatoes have more polyphenols that snatch up free radicals. The skins have more nutrients as well. 🙂
*If you don’t have an onion, onion flakes will do for flavor, but since turkey can be a bit more dry than other fattier meats, the fresh onion really adds some moisture.
*If you don’t mind the stems being in it, you can buy kale already pre-chopped to save a little time.
👇Grab the free Fall Anti-Inflammatory Meal Prep Guide by clicking the image below!
Using either a fry-cutter or a large knife, cut the potatoes into fries.
Spread them on a baking sheet lined with foil or a grill mat.
Drizzle the fries with 1 TBSP oil, then season with salt, pepper, and garlic powder.
Put in the oven for 25-30 minutes until golden. (You can stir halfway through if you like.)
Finely chop the sage and add it to a large bowl.
Finely chop the onion and mushrooms (or chop them in a food processor). Place in the bowl with the sage. Add the ground turkey, and salt, pepper, and garlic powder to taste.
Mix the turkey mixture until all is incorporated. Pat into burgers.
Heat a skillet on medium (unless you’re grilling the burgers). Cook burgers until cooked through. Remove from skillet and let rest.
Cut the stems out of the kale leaves, and chop them into small-medium pieces.
Place the kale in a medium bowl. Drizzle with the remaining 1 TBSP avocado oil, then season with salt, pepper, and garlic powder. Massage kale, while folding the oil and seasoning in until the entire bowl has softened and is coated with oil and seasoning.
Remove fries from the oven when done and plate
Enjoy!
Notes
*Having to cut the fries is an extra step, but I do it because I have yet to find frozen pre-cut fries that weren’t loaded with inflammatory oils and other unnecessary (but inflammatory) ingredients.
*Although fries are typically made from white potatoes, colored potatoes have more polyphenols that snatch up free radicals. The skins have more nutrients as well. 🙂
*If you don’t have an onion, onion flakes will do for flavor, but since turkey can be a bit more dry than other fattier meats, the fresh onion really adds some moisture.
*If you don’t mind the stems being in it, you can buy kale already pre-chopped to save a little time.
This sugar-free BBQ Chicken Baked Potato with Sage Roasted Mushrooms and Brussels Sprouts is absolutely delicious, easy, and anti-inflammatory!
I have to give props to my husband, who came up with this main recipe. He wanted something different and easy, so he decided on BBQ chicken (shredded) topped on a baked potato. It’s quick, super yummy, and the kids love it!
I added in these perfect fall sides to get our vegetables in: Sage-Roasted Mushrooms and Brussels Sprouts.
Although baked potatoes aren’t low-carb, they can still fit into an anti-inflammatory diet. They’re full of vitamins, minerals, and fiber.
Plus when you cook them (like with meal prep), let them cool in the fridge, then reheat them for dinner, it increases the resistant starches (which are amazing for your gut health!)
Place the chicken on the top rack, veggies on the middle rack. Roast for approximately 25-35 minutes at 350 F.
Once the potatoes are done, let them cool on the counter while either shredding the chicken or cubing it. We shred it in the food processor and add the BBQ sauce right into it.
Wrap the potatoes in foil, coated with oil, salt and pepper.
Bake at 350 F for one hour.
Place the chicken breast in a baking dish and salt + pepper it.
Chop the veggies and sage.
Place mushrooms on one end of a baking sheet that’s covered in foil (or a baking/grilling mat) and Brussels sprouts on the other end.
Drizzle with oil, then lightly salt, pepper, and garlic powder all the veggies.
Sprinkle sage all over the mushrooms.
Place the chicken on the top rack, veggies on the middle rack. Roast for approximately 25-35 minutes at 350 F.
Once the potatoes are done, let them cool on the counter while either shredding the chicken or cubing it. We shred it in the food processor and add the BBQ sauce right into it.
Assemble toppings onto potatoes, and serve the roasted fall vegetables on the side.
Notes
Make it easier:
Buy shredded chicken from the deli (try your hardest for organic!)
When it comes to easy anti-inflammatory dinners, this Chicken Sausage with Roasted Broccoli and Cauliflower couldn’t be easier.
Chicken sausage is one of my favorite ways to eat chicken because it’s a little different than our same ole’, same ole’ chicken, and you can find it with delicious add-ins like feta and sundried tomato.
Broccoli and cauliflower are cold-weather staples, but an important part of an anti-inflammatory diet for their phytochemicals.
This entire meal is super simple and low carb, which is important for keeping blood sugar under control, thereby controlling chronic inflammation.
This meal is so simple because the ingredients are very straightforward, with no complex prep or cooking.
Preheat the oven to 350 F.
Chop florets from broccoli and cauliflower, as well as the onion.
Place them on a sheet pan lined with foil or a grill mat.
Drizzle oil, then season with salt, pepper, and garlic powder.
Place broccoli and cauliflower pan into the oven for 25-30 minutes.
Cut the chicken sausage links into bite-sized pieces.
In a skillet, heat the sausage until warm and golden.
Remove the skillet from heat; plate the chicken sausage.
Remove the broccoli and cauliflower from the oven when done; plate with the chicken sausage.
Enjoy!
Notes + Make it easier
*Most chicken sausage is already pre-cooked, you need only heat it up. But CONFIRM this, as the sausage will need to cook much longer to ensure it’s fully cooked if it doesn’t specify ‘precooked’ or ‘fully cooked’ on the label.
*Save time by buying broccoli and cauliflower pre-chopped.
*If you’ve prepped/roasted the broccoli and cauliflower ahead of time, reheat it in the microwave while warming the chicken sausage in a skillet.
👇Click the image below to grab the free Fall Anti-Inflammatory Meal Prep Guide! 👇
Chop florets from broccoli and cauliflower, as well as the onion.
Place them on a sheet pan lined with foil or a grill mat.
Drizzle oil, then season with salt, pepper, and garlic powder.
Place broccoli and cauliflower pan into the oven for 25-30 minutes.
Cut the chicken sausage links into bite-sized pieces.
In a skillet, heat the sausage until warm and golden.
Remove the skillet from heat; plate the chicken sausage.
Remove the broccoli and cauliflower from the oven when done; plate with the chicken sausage.
Enjoy!
Notes
*Most chicken sausage is already precooked, you need only heat it up. But CONFIRM this, as the sausage will need to cook much longer to ensure it’s fully cooked if it doesn’t specify ‘precooked’ or ‘fully cooked’ on the label.
*Save time by buying the broccoli and cauliflower pre-chopped.
*If you’ve prepped/roasted the broccoli and cauliflower ahead of time, reheat it in the microwave while warming the chicken sausage in a skillet.
Even though brussels sprouts alone are one of my all-time faves for veggies (which is saying something since we never had them growing up!), merging a basic roasted brussels sprouts recipe with the added protein of ground turkey, a spicy crunch of sliced radishes, and topping it off with a caesar flair is an amazingly simple and downright delicious upgrade!
Ingredients
Ground turkey
Ground turkey is a perfect way to add in lean protein. It can also be a great way to reduce the consumption of red meat as a substitute. Just keep in mind that the lower fat content means it will be a bit more dry.
Brussels sprouts
Part of the cruciferous family, Brussels sprouts contain compounds that help protect against cancer, as well as phytochemicals that help reduce inflammation. They’re also packed with fiber and super simple to cook.
Radishes
Radishes are low in calories, but full of antioxidants and fiber. They’re a great way to pack in more nutrients and have the versatility of being eaten raw or cooked.
Pumpkin seeds
Packing in more protein than nuts, pumpkin seeds also contain fiber and are full of minerals like manganese, phosphorus, and magnesium.
Garlic
Garlic is one of my favorite ingredients to use in the fall and winter. This is because it’s cold and flu (and COVID) season, and garlic helps boost the immune system.
It’s also been shown to reduce high blood pressure, pull down chronic inflammation, reduce cholesterol levels, and even help prevent cancer. It also has antibiotic properties, so I’d say this is an amazing staple to use all fall and winter long!
Dijon mustard
Dijon mustard (and yellow) are my favorite condiment to use in an anti-inflammatory diet. This is because they’re sugar-free, low-calorie, and give an amazing boost of acidic flavor.
Instructions
Preheat oven to 400 degrees F.
In a large bowl, toss brussels sprouts with a splash of olive oil and season with salt and pepper. Toss well and place on baking sheet lined with parchment paper or foil.
Place in oven and bake for 30 minutes.
Brown the ground turkey.
Add olive oil, lemon juice mustard, garlic, and salt and pepper to taste into a blender. Blend until creamy.
Once brussels sprouts are finished cooking, remove from oven and let cool a few minutes.
Then place brussels sprouts, turkey, and radish into large mixing bowl. Add dressing and toss well.
Notes
*Save time by buying the Brussels sprouts already halved.
*This is a great meal prep meal! Just store the dijon separately from the rest and reheat and toss before eating.
*Add in even more fiber and bulk by plating this on top of a bed of romaine leaves.
👇Click the image below to grab the free Fall Anti-Inflammatory Meal Prep Guide!
In a large bowl, toss brussels sprouts with a splash of olive oil and season with salt and pepper. Toss well and place on baking sheet lined with parchment paper or foil.
Place in oven and bake for 30 minutes.
Brown the ground turkey.
Add olive oil, lemon juice mustard, garlic, and salt and pepper to taste into a blender. Blend until creamy.
Once brussels sprouts are finished cooking, remove from oven and let cool a few minutes.
Then place brussels sprouts, turkey, and radish into large mixing bowl. Add dressing and toss well.
Notes
*Save time by buying the Brussels sprouts already halved.
*This is a great meal prep meal! Just store the dijon separately from the rest and reheat and toss before eating.
*Add in even more fiber and bulk by plating this on top of a bed of romaine leaves.
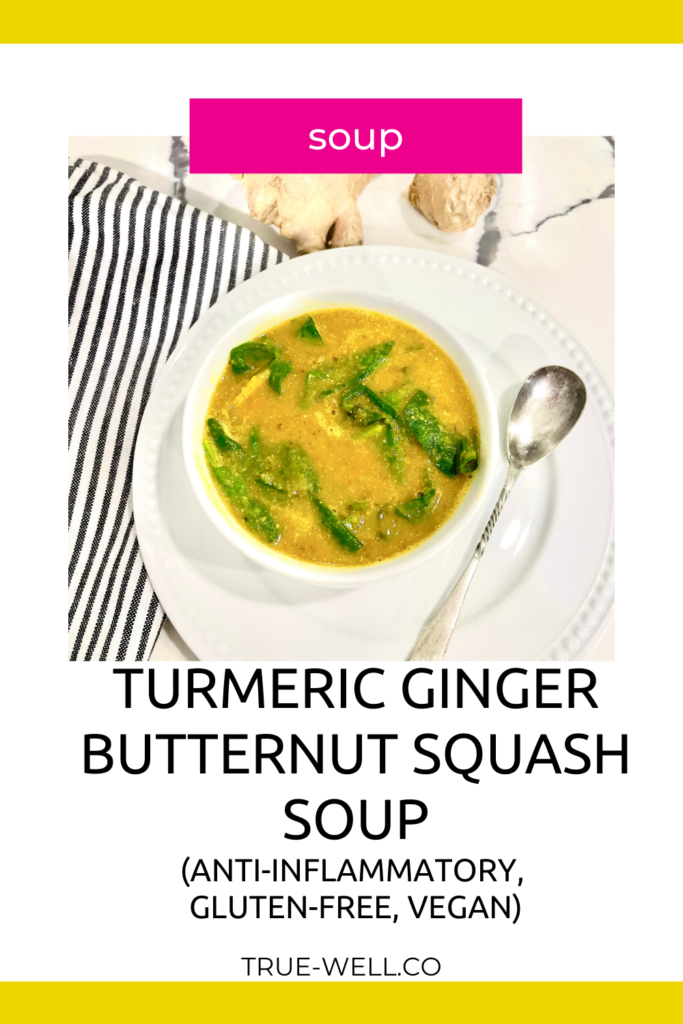
When it comes to Anti-Inflammatory soups, this Turmeric Ginger Butternut Squash one is 💯! Packed with anti-inflammatory ingredients and vegan (unless you want to add some shredded chicken!), this will warm you right up in those cold fall and winter months and keep you cozy!
Ingredients
Butternut squash
This fall and winter squash has a creamy texture when pureed, and is packed full of phytochemicals. They can be a little intimidating to cook the first time, but once you’ve done it, you’ll see it’s no problem.
Baby Spinach
Baby greens like this are amazing ways to get in your calcium, folate, iron, and other minerals and vitamins. Also, since it’s cooked in this butternut squash soup, you’ll absorb more calcium and iron.
Turmeric and Ginger
Both of these ingredients are well known for their anti-inflammatory properties.
Lentils
Lentils are a staple of the Mediterranean diet, and I love the use of them in this recipe because they add some plant-based protein and fiber. This helps prevent blood sugar spikes, which also helps stave off chronic inflammation.
Instructions
Preheat oven to 400 F, cut butternut squash in half and lay it facing downward on a pan covered in foil. Cook for 40 minutes.
In a large pot, drizzle oil and add onion, garlic, and ginger. Cook until the onions are clear, stirring often.
Pour in the milk, broth, and lentils, and stir. Bring to a boil over medium-high heat and then reduce heat, cover and simmer for 20 minutes, until lentils are cooked through.
When the squash is finished cooking, remove from oven, spoon out and discard seeds. Then scoop out the flesh and place in a high-powered blender.
Add half of the soup mixture into blender and puree until smooth. Pour back into the soup pot.
Stir in the baby spinach and simmer until the spinach is wilted.
Divide into bowls, serve, and enjoy!
Notes
*Save some time by buying butternut squash already cubed and steaming it to get it soft enough to puree.
*Kale can be subbed in for the baby spinach.
*If you like your soup to feel ‘chunkier’, cook the lentils and add them AFTER you puree the other ingredients. This may also help to have an even lower blood sugar response.
Click the image to grab the free Fall Anti-Inflammatory Meal Prep Guide ! 👆
This delicious and cozy anti-inflammatory soup really should be a staple in your household in the fall and winter months. Chock full of anti-inflammatory ingredients, this butternut squash soup will also give you an injection of vitamins and minerals.
Preheat oven to 400 F, cut butternut squash in half and lay it facing downward on a pan covered in foil. Cook for 40 minutes.
In a large pot, drizzle oil and add onion, garlic, and ginger. Cook until the onions are clear, stirring often.
Pour in the milk, broth, and lentils, and stir. Bring to a boil over medium-high heat and then reduce heat, cover and simmer for 20 minutes, until lentils are cooked through.
When the squash is finished cooking, remove from oven, spoon out and discard seeds. Then scoop out the flesh and place in a high-powered blender.
Add half of the soup mixture into blender and puree until smooth. Pour back into the soup pot.
Stir in the baby spinach and simmer until the spinach is wilted.
Divide into bowls, serve, and enjoy!
Notes
*Save some time by buying butternut squash already cubed and steaming it to get it soft enough to puree.
*Kale can be subbed in for the baby spinach.
*If you like your soup to feel ‘chunkier’, cook the lentils and add them AFTER you puree the other ingredients. This may also help to have an even lower blood sugar response.
The thing I love about charcuterie boards is that they’re like edible works of art. I’m a very visual person, so even if food tastes good, if the presentation is beautiful, it makes it that much better– kinda like how the same gift feels so much more if it’s beautifully wrapped vs presented in a paper bag.
Presentation goes a long way.
Now to go one step further and get that perfect trifecta for food– it also needs to be healthy. And since we’re all about an anti-inflammatory diet that’s sugar-free and gluten-free, I’m gonna show you how to create a gorgeous summer charcuterie board that’s also anti-inflammatory.
What is a Charcuterie Board?
We really need to start this conversation out with defining what qualifies a board as “charcuterie”, and how you can make your board anti-inflammatory.
So the word ‘charcuterie’ is actually French and it means “cured meat”.
And if you know anything about an anti-inflammatory diet, you know that cured and processed meats are a big no-no because they’re usually highly inflammatory.
This obviously poses a challenge when you want to make an anti-inflammatory version of a charcuterie board.
So when you’re making an anti-inflammatory charcuterie board, you have two options:
1-You can find meats that would be great on a board that are NOT cured and don’t have nitrates, OR- you can skip the meats, but just know that this will technically not be a charcuterie board at that point.
Instead, it would technically be like a veggie or veggie, fruit, and cheese board or any combination of those.
You can also include any of the meats and then just not partake in those meats in sticking to an anti-inflammatory way of eating.
Or you can purposely decide you’re gonna have a little cheat/treat meal.
You’re a grown adult and I leave it to you to make that decision on your own 😁, but choosing the CORRECT meats per the guidelines I just gave are what will keep the meat-part anti-inflammatory.
2- If you’ve found that you need to be dairy-free to reduce inflammation as well, you can either skip the cheeses, or go for any of the same options I gave for meats.
Per anti-inflammatory guidelines, choose organic cheese if at all possible, because the fats in the cheese will have better omega 3 to 6 ratios.
If you want the FULL How to video on creating charcuterie boards, check that out by clicking here: 👇
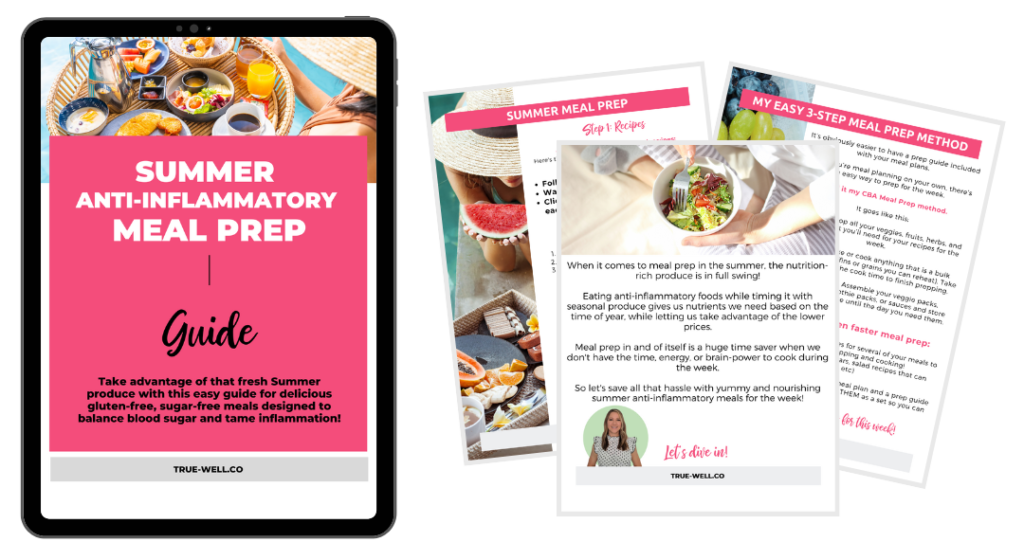
Click the image below to grab the Summer Anti-Inflammatory Meal Prep Guide! 👇
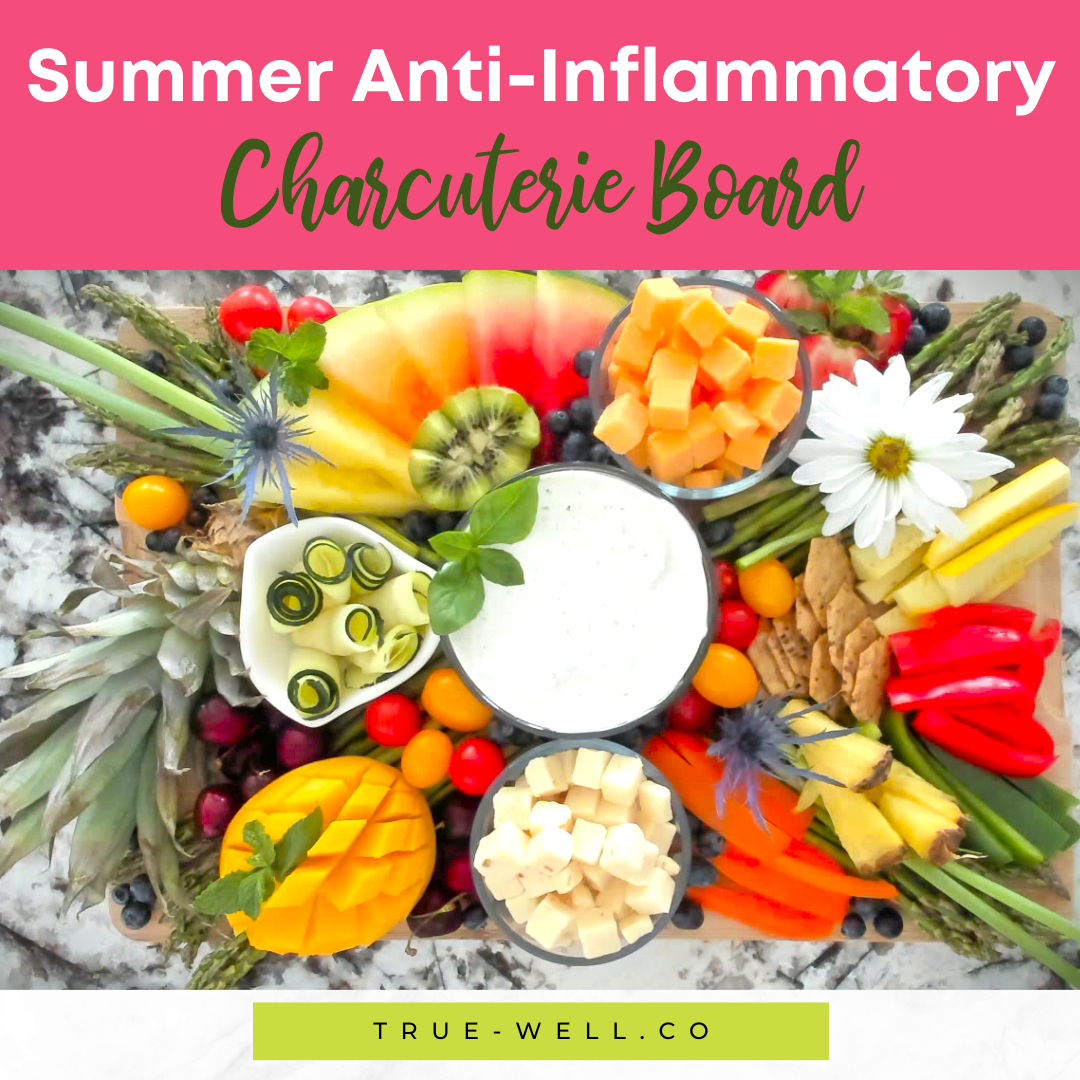
Placing ingredients on the summer anti-inflammatory charcuterie board
So for this board I started out with putting my containers on the board, and I placed the dip right in the middle.
Then I added in the asparagus in a sort of ‘X’ pattern to create some delineation on the board.
Sometimes just placing little groupings of stuff randomly all over the board can be really pretty, and sometimes creating a pattern or sections can also be really pretty.
So from there, I started with the vegetables and sort of spread them in different sections, trying to balance out the colors all over the board.
Next, I just flanked the ranch dip with the containers of cheese cubes. You want to get containers on the board first and then work around them.
Next, I added grain-free crackers, and then zucchini, which I rolled from really thin slices, and added some summer squash sticks.
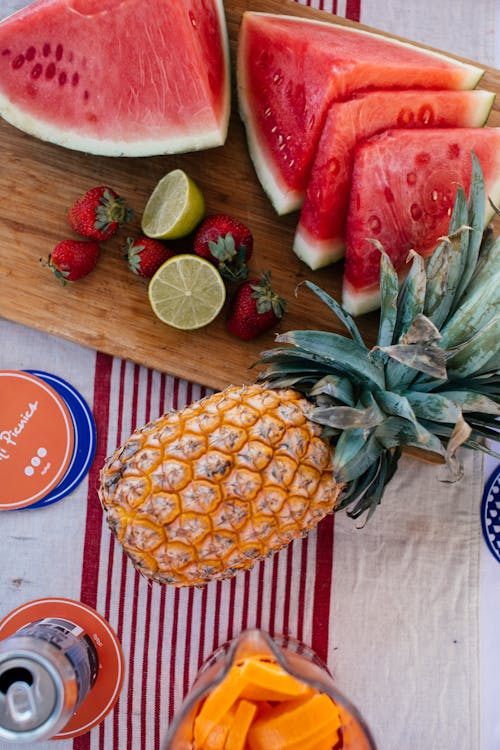
Next, I put part of the topper of a pineapple in to beef up the decor factor,
And then added in little watermelon triangles that I cut from three different colors of watermelon. (If you’ve never tried yellow or orange watermelon, I highly recommend it! We were leary because they weren’t the bright pink of traditional watermelon, but they were absolutely delicious!)
Then I added in all three colors of bell peppers, some strawberries, cherries, and tomatoes. These were carefully spread throughout the board to make sure the colors were dispersed enough to make the eye move around.
I placed the kiwi and mango, which were cut into these cute patterns, then placed the green onions to give a bit more wow factor on the corners.
Next, I added a few little pineapple spears and then filled in all the blank spots with blueberries.
You don’t want the board showing anywhere if possible.
And then the very last thing that really gives it a wow factor is to add in sprigs of herbs, so I added my mint on the fruit and the basil in the ranch dip.
And lastly, I had a bouquet of summer flowers I got from the grocery store and I snipped off a few of the flowers to give the final perfect touches.
What’s so great about this board is that it’s perfect whether you’re entertaining or just want an easy summer dinner.
Grab the Summer Anti-Inflammatory Meal Prep Guide {click the image below!} 👇
With only a handful of simple ingredients, this Low Carb Eggplant Parmesan Casserole (without breadcrumbs) is easy to make and perfect for busy weeknights or summer meal prep.
We’re covering step-by-step instructions for the perfect eggplant casserole every time, and even give you ideas for customizing the flavors to your liking. So, let’s get started and satisfy those cravings!
Why This Eggplant Casserole Recipe is a Game Changer
This eggplant casserole recipe is a game-changer for several reasons:
First, it’s made with simple and flavorful ingredients that are easy to find at any grocery store. I especially love that it’s full of anti-inflammatory summer produce.
Second, it’s a low-carb and gluten-free option that doesn’t compromise on taste. Instead of using simple carb packed gluten-free flour or breadcrumbs, we just omit the breadcrumbs altogether.
Finally, it has a larger number of servings, so it can be meal prepped and served for more than one meal.
Let’s explore the ingredients that make this dish so delicious.
Simple and Flavorful Ingredients
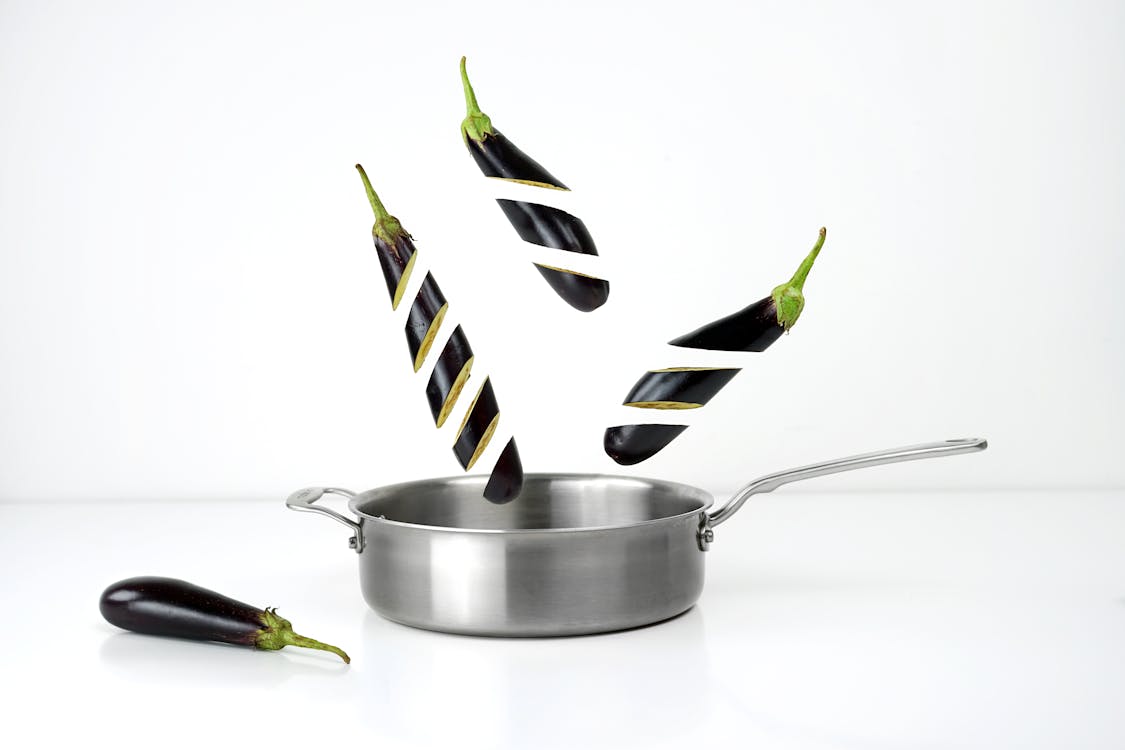
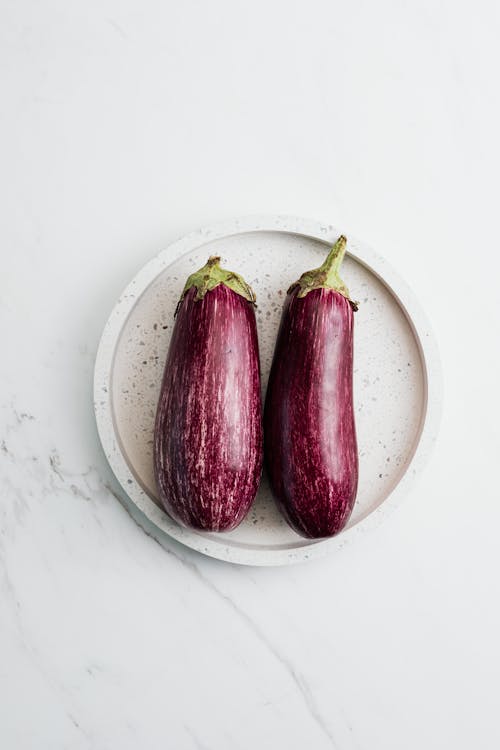
Eggplant
Eggplant is one of my favorite anti-inflammatory summer vegetables! Not only is it packed with antioxidants, vitamins, and fiber, it’s also a great substitute for meat. Oh yeah–and it’s low-carb!
Low Carb Marinara
As most things on the grocery store shelf these days… marinara or any other kind of tomato-based sauce most likely has (completely unnecessary) added sugar.
If you’re buying your marinara, check the ingredient label and make sure it’s sugar-free as sugar is extremely inflammatory.
If you can’t find any, make our Low-Carb Marinara sauce for this recipe instead.
Cheeses
The best way to keep as anti-inflammatory as possible with any cuisine (like Italian) that has loads of dairy is to buy organic.
Extra virgin olive oil
This oil is a staple in Italian cooking, and is also an anti-inflammatory staple. It’s loaded with monounsaturated fats and has been used in Mediterranean cuisine for centuries.
If you can’t find an EVOO oil spray, try out a Misto. You can fill it with any kind of oil you like and pump it to get the can pressurized so you can spray oil onto your food.
And if you don’t have EVOO on hand, you can use avocado oil, butter, ghee, or coconut oil.
Step-by-Step Instructions for Perfect Eggplant Casserole Every Time
If you don’t have jarred sauce, make the Low-Carb Marinara first.
Preheat your oven to 450°F. Line 2 baking sheets with a grill mat, or with foil, and spray the foil with avocado oil.
While the sauce is cooking, slice the eggplant into 1/4 inch thick slices. Place the slices on the prepared pans. Season with salt and bake for 20 minutes.
Meanwhile combine ricotta, egg, parsley and 1/4 cup of grated cheese in a medium bowl.
Pour 1/2 cup sauce on the bottom of a 9×12 baking dish, add 1/3 of eggplant to cover the bottom of the dish. Top with 1/3 of the ricotta cheese mixture, 3/4 cup of the mozzarella cheese and 3/4 cup of the sauce. Then repeat the process two more times, reserving the third layer of mozzarella for the topping. Finish with 2 tablespoons of grated cheese.
Push the oven temp up to 400F.
Cover the baking dish with foil and bake approximately 40 min, until cheese is melted and bubbling.
Remove the foil and bake an additional 10 minutes.
Remove from the oven and let it set and cool about 10 minutes before serving.
Ideas for Customizing Your Eggplant Casserole to Your Tastes
Now that you have the basics of the low-carb eggplant parmesan casserole down, it’s time to get creative and add your own twist to the recipe. One idea is to switch up the cheese by using cheddar or feta instead of mozzarella.
You can also add in different vegetables such as zucchini or spinach, or even some ground beef or turkey for a heartier dish.
For those who like a little kick in their meals, try adding some red pepper flakes or cayenne pepper to the tomato sauce. And if you’re a fan of herbs, consider throwing in some basil or oregano to give the casserole a fresh and flavorful taste.
Want more protein? Add a pound of cubed or shredded chicken breast into the layering process.
With so many possibilities for customization, you can make this low-carb eggplant parmesan casserole a staple in your meal rotation by switching up the ingredients and flavors to your liking.
Frequently Asked Questions About Eggplant Casserole
With its hearty combination of vegetables and savory spices, eggplant casserole is a versatile and satisfying dish that’s easy to tweak to your taste. Here are some of the most frequently asked questions about this eggplant casserole:
How do I prepare the eggplant?
To prepare the eggplant for the casserole, you’ll need to slice it into rounds or long strips, depending on your preference. Sprinkle some salt on the slices and let them sit for about 30 minutes to draw out any bitterness. Then rinse the eggplant and pat it dry before proceeding with the recipe.
Can I use other vegetables besides eggplant?
Absolutely! Eggplant casserole is a great dish for using up whatever vegetables you have on hand. Some popular additions include zucchini, bell peppers, mushrooms, and onions. You can also experiment with different cheeses, herbs, and spices to create your own unique flavor profile.
Can I remove the eggplant skin or do I leave it on?
Most recipes for eggplant parmesan will have you leave the skins on. This helps maintain the structure of the slices, but cooking will actually soften the skins. There are a ton of phytonutrients in the skin, so I say leave it on!
Can I make this dish ahead of time?
Yep! Eggplant casserole is a great dish for meal prep, as it can be made ahead of time and reheated later.
Simply assemble the casserole according to the recipe,
Then cover it tightly with plastic wrap and store it in the fridge for up to 2 days.
When you’re ready to eat, simply remove the plastic wrap and pop the casserole in the oven for about 30 minutes, or until heated through.
Whether you’re pressed for time or looking for a flexible meal prep option, this recipe is your new go-to. And with tips for customizing the flavors, you can enjoy it again and again, every summer.
With only a handful of simple ingredients, this Low Carb Eggplant Parmesan Casserole (without breadcrumbs) is easy to make and perfect for busy weeknights or meal prep.
If you don’t have jarred sauce, make the Low-Carb Marinara first.
Preheat your oven to 450°F. Line 2 baking sheets with a grill mat, or with foil, and spray the foil with EVOO. Use a Misto and fill with extra virgin olive oil if you can’t find avocado cooking spray at the store.
While the sauce is cooking, slice the eggplant into 1/4 inch thick slices. Place the slices on the prepared pans. Season with salt and bake for 20 minutes.
Meanwhile combine ricotta, egg, parsley and 1/4 cup of grated cheese in a medium bowl.
Pour 1/2 cup sauce on the bottom of a 9×12 baking dish, add 1/3 of eggplant to cover the bottom of the dish. Top with 1/3 of the ricotta cheese mixture, 3/4 cup of the mozzarella cheese and 3/4 cup of the sauce. Then repeat the process two more times, reserving the third layer of mozzarella for the topping. Finish with 2 tablespoons of grated cheese.
Push the oven temp up to 400F.
Cover the baking dish with foil and bake approximately 40 min, until cheese is melted and bubbling.
Remove the foil and bake an additional 10 minutes.
Remove from the oven and let it set and cool about 10 minutes before serving.
Notes
Make this recipe up to 2 days ahead of time and store it in the fridge covered.
To meal prep this, prepare your Low-Carb Marinara ahead of time, as well as the eggplant. Bake it and store in the fridge in a sealed container until you need to assemble the casserole.
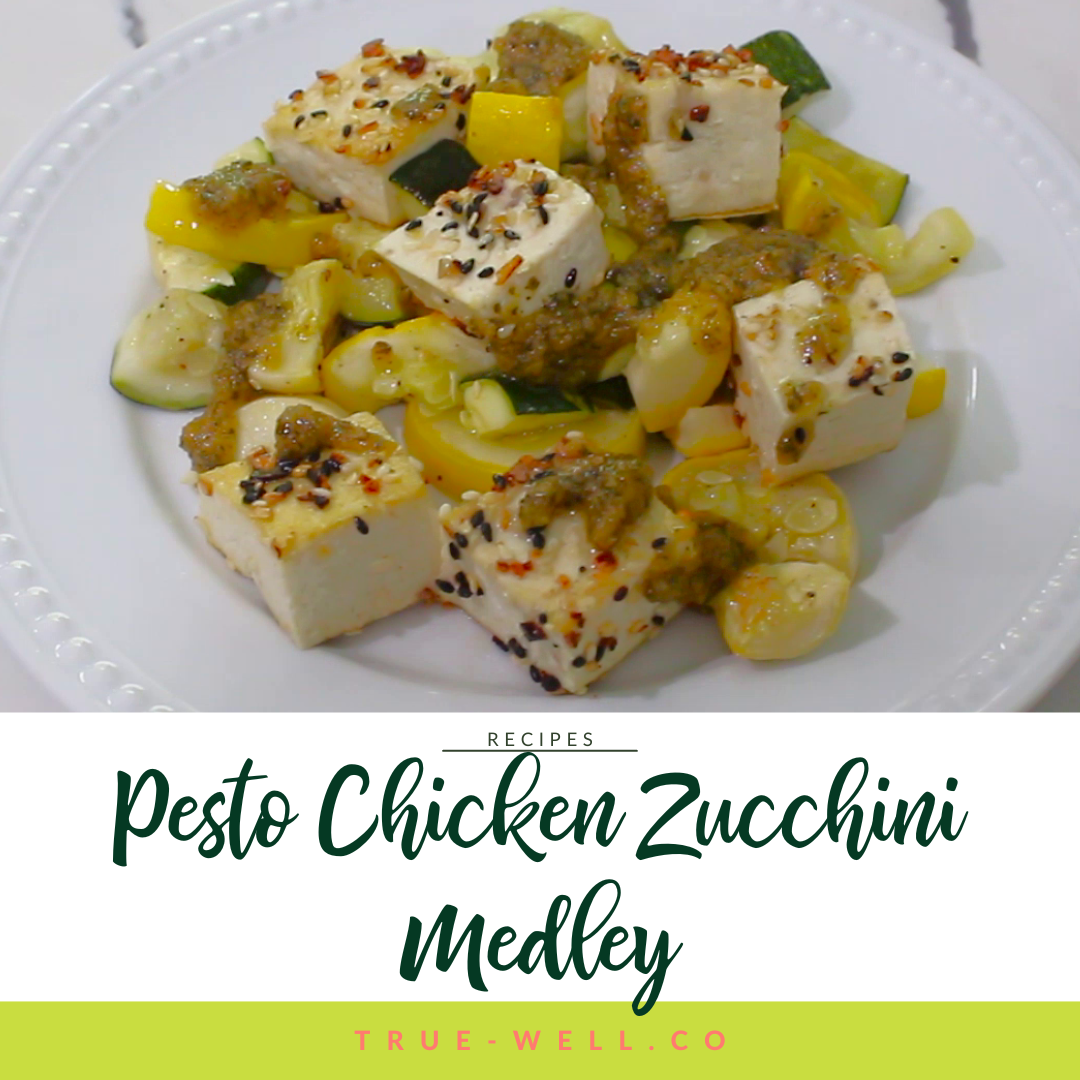
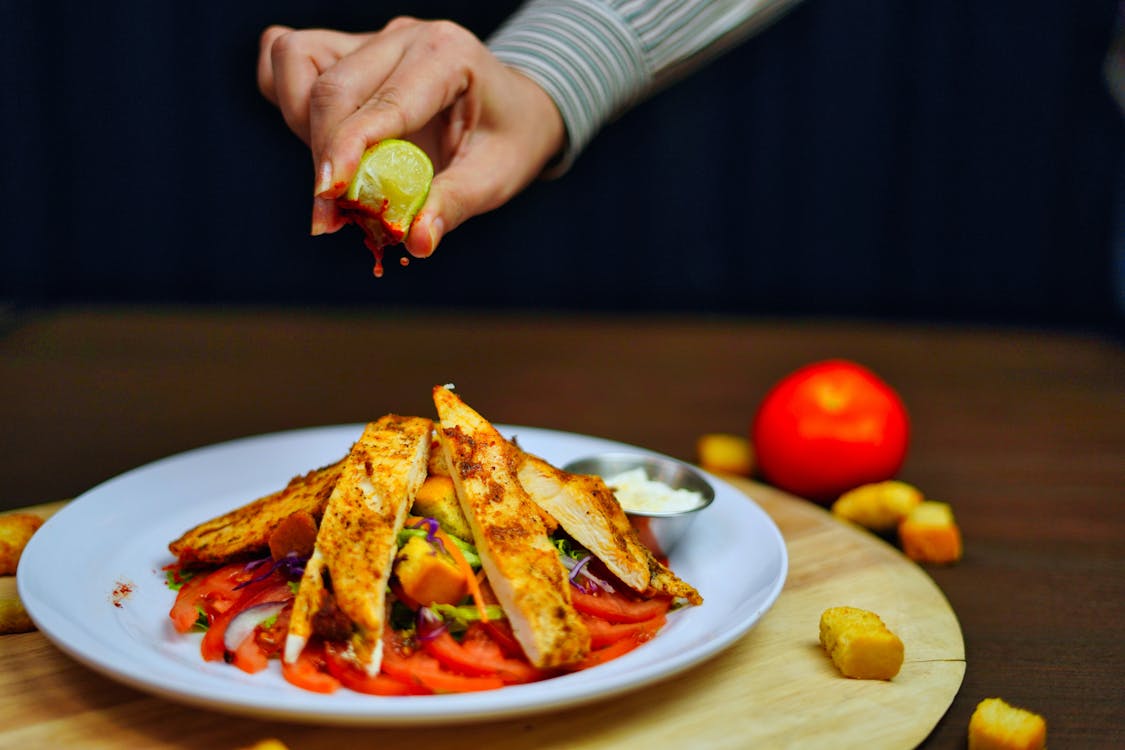
When it comes to fresh and easy for anti-inflammatory summer dinners, this Pesto Chicken with Zucchini and Squash Medley are at the top of the list!
This fresh recipe takes advantage of the anti-inflammatory summer produce, while giving a super yummy, balanced, and low carb dinner in no time. Plus it’s super easy to meal prep!
I LOVE recipes that use several seasonal and fresh produce options like this one. I grew up on a farm, so we always had a ton of fresh vegetables during the summer. But… we didn’t make pesto, like…ever.
It took until I was a real grownup before I started venturing in Italian cuisine beyond spaghetti and meatballs. And boy was I missing out!
Pesto is the perfect dressing for this dish, as the ingredients for it are in season during summer as well.
Make sure to use the freshest zucchini and summer squash you can. And during the summer you may find several different varieties. They’re pretty much all delicious and cook about the same, so get creative if you want!
The chicken can be subbed out for firm tofu or even white beans if you’d like this to be plant-based or vegan.
This fresh recipe takes advantage of the anti-inflammatory summer produce, while giving a super yummy, balanced, and low carb dinner in no time. Plus it’s super easy to meal prep!
Cut the chicken breast into cubes, then toss into a large pan with the avocado oil. Cook until mostly cooked through.
Wash and cut the zucchini and squash into cubes. When chicken is nearly done, add the zucchini and squash, and season everything with salt and pepper. Saute until the zucchini and squash are soft and cooked.
Make sure to use the freshest zucchini and summer squash you can. And during the summer you may find several different varieties. They’re pretty much all delicious and cook about the same, so get creative if you want!
The chicken can be subbed out for firm tofu or even white beans if you’d like this to be plant-based or vegan.
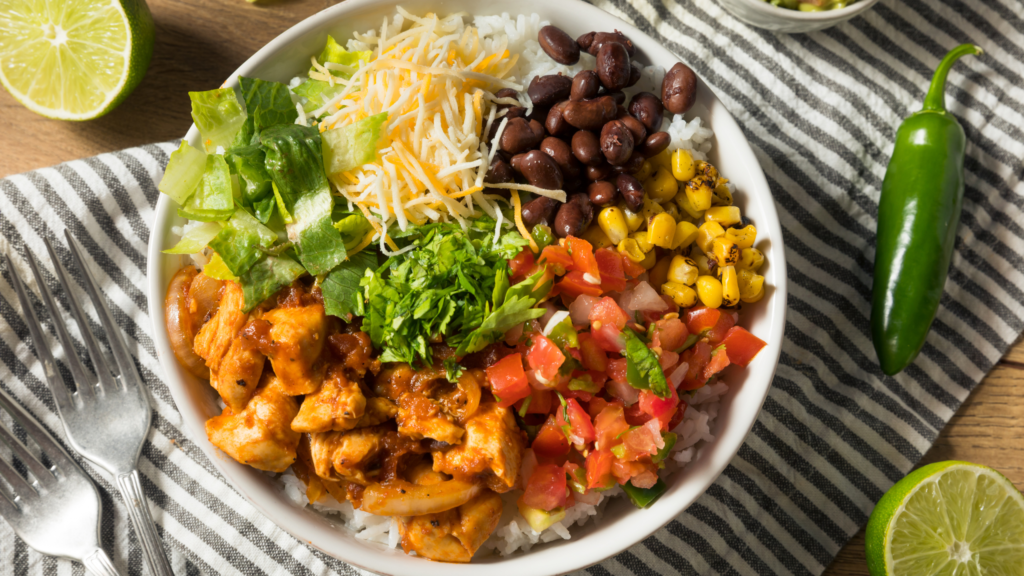
When it comes to easy anti-inflammatory meal prep dinners that are also crowd-pleasers, these Paleo Chicken Fajita Bowls with fresh cilantro lime dressing take the prize.
What’s so great about fajita bowls is that they’re so easy to personalize. We normally just cook the ingredients and set it out assembly line to let the kids create their own chicken fajita bowls.
Another thing about these versatile meal prep chicken bowls is that you really can adjust the veggies to whatever season it is. This recipe is perfect for summer as we use lettuce and bell peppers that are in season during summer.
Also to note is that–again, speaking to the versatility of these bowls–they can be made dairy-free and grain-free. (See notes below.)
Ingredients
Boneless, skinless chicken breasts (organic are best)
Bell peppers (any color, but organic is best as peppers are on the Dirty Dozen list)
Onion (red, yellow, or whatever you have on hand)
Lime (the juice really kicks up the flavor of chicken fajita!)
Brown rice (or cauliflower rice for Paleo, low-carb/keto)
Salt and pepper (to taste)
Fajita seasoning (make sure this is sugar-free)
1 can of black beans, drained and rinsed (omit if sticking to Paleo)
Cheddar cheese or feta for topping (omit if sticking to Paleo)
Avocado oil (for cooking-if you don’t have any, you can use butter, ghee, or coconut oil)
Instructions
Chicken
To begin preparing these tasty Paleo Chicken Fajita Bowls, start by slicing your chicken breasts into thin strips and season with the fajita seasoning. Next, slice up your onions and bell peppers, taking care to remove all seeds and stems.
Once that’s done, heat up your skillet and add some avocado oil, then toss in your chicken and stir until cooked through. Then squeeze the lime juice all over your chicken.
Next, add your sliced onions and bell peppers to the skillet and stir-fry until they are slightly softened.
Rice
While the onions and peppers are cooking, make your rice (or cauliflower rice) according to package instructions.
Beans
Black beans or pinto beans are traditional for Latin fare. If you’re following Paleo guidelines these can be omitted.
Otherwise, make sure to drain the beans from the can, then rinse them really well. This helps minimize bloating if you’re sensitive to beans.
You can warm them a little in a pot on the cooktop with a little water, salt, and chopped cilantro. (Sometimes I’ll throw in some dried onion flakes to give them a bit more flavor.)
Toppings
Choose your toppings based on whether or not you’re going true Paleo (dairy-free) or not.
Then it’s time to layer your bowls. The base is usually rice or other whole grain, then layer in your fajita chicken, peppers, and onions. Top with black beans, cheese, and avocado. Then drizzle the fresh cilantro lime dressing on top!
Additional Tips
These are super easy to meal prep for the week:
Just make the chicken, peppers, and onions; and rice ahead of time, then layer into meal prep containers.
Store up to 5 days in the fridge. Heat up when you’re ready to eat it, then drizzle the dressing on top before serving.
When it comes to easy anti-inflammatory meal prep dinners that are also crowd-pleasers, these Paleo Chicken Fajita Bowls with fresh cilantro lime dressing take the prize.
Start by slicing your chicken breasts into thin strips.
Next, slice up your onions and bell peppers, taking care to remove all seeds and stems.
Heat up your skillet and add some avocado oil, then toss in your chicken and stir until cooked through.
Next, add your sliced onions and bell peppers to the skillet and stir-fry until they are slightly softened.
If you’re following Paleo guidelines these can be omitted. Otherwise, make sure to drain the beans from the can, then rinse them really well.
Warm them a little in a pot on the cooktop with a little water, salt, and chopped cilantro. (Sometimes I’ll throw in some dried onion flakes to give them a bit more flavor.)
Choose your toppings based on whether or not you’re going true Paleo (dairy-free) or not.
Layer your bowls starting with the rice, then layer in your fajita chicken, peppers, and onions.
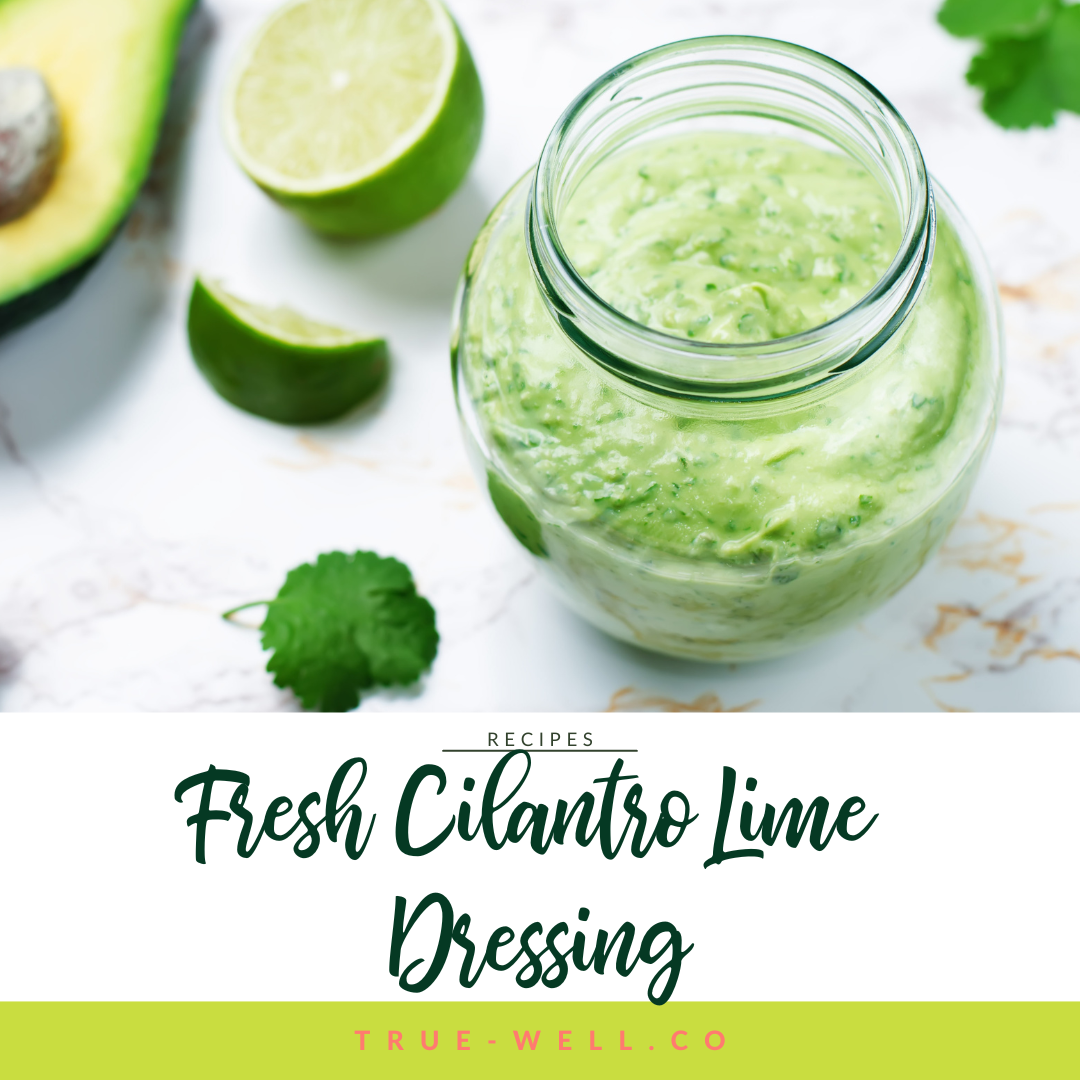
Crafted with a handful of wholesome and fresh summer ingredients, this Anti-Inflammatory Cilantro Lime Dressing is a simple yet powerful addition to your kitchen repertoire.
By incorporating this dressing into your meals, you can effortlessly infuse your dishes with health-enhancing benefits, promoting well-being from within.
Ingredients
1 bunch of fresh cilantro
1 TBSP minced garlic
3 TBSP lime juice
1/4 cup extra virgin olive oil
1 avocado
1/2 tsp salt (or to taste)
Instructions
This sauce is so easy. You literally throw everything in a high-powered blender and pulse into a sauce. Done.
*If your blender isn’t blending this, it’s perfectly ok to add a few more TBSP lime juice and/or EVOO until the blender can do its thing.
Notes
Store up to 3 days in the fridge (the sauce will naturally start to brown due to the avocado.)
Packed with vibrant flavors and anti-inflammatory ingredients, this Low-Carb Marinara Sauce is a delicious way to keep inflammation at bay and blood sugar balanced.
Say goodbye to traditional marinara sauces loaded with sugars and unhealthy additives, and say hello to a healthier, low-carb alternative that doesn’t compromise on taste.
Each spoonful of this delightful sauce boasts a harmonious blend of antioxidant-rich tomatoes, aromatic herbs, and a hint of garlic, providing a burst of flavor that will leave you craving for more. (Seriously- my kids would rather have this than the store-bought kind.)
We don’t add any sugar like so many of the store-bought brands do. Sugar is highly inflammatory, as well as addictive, so we eliminate that right off the bat. Tomatoes are already slightly sweet so there’s no reason to add it in the first place.
Instead of extra virgin olive oil, we use avocado oil (see ingredients below for more details.)
Ingredients
Tomatoes
Tomatoes, the star ingredient, are bursting with lycopene—an antioxidant known to reduce inflammation and protect against chronic diseases.
Garlic
Alongside tomatoes, we’ve added a touch of garlic, known for its immune-boosting and anti-inflammatory properties, enhancing both the taste and health benefits of this sauce.
Italian seasoning
Dried Italian seasonings add a burst of flavor to this low-carb marinara sauce, but also have antioxidant properties. They’re added right in with all other ingredients at the same time so the flavors can meld as the herbs are rehydrated.
If you happen to have fresh herbs (like oregano, rosemary, and thyme), it’s absolutely fine to add these, but don’t do it until right before the sauce is ready.
Fresh herbs don’t need long to inject their flavors, and shouldn’t be overcooked.
Extra virgin olive oil
Extra virgin olive oil is the quintessential ingredient for Mediterranean fare, so it’s no surprise that it’s the oil of choice for this recipe. My tip for buying EVOO is to check the label and try to find one that comes out of California.
Tests were done several years back and they found that olive oils that come from other countries weren’t 100% olive oil. They were being mixed with cheaper oils, and it was considered legal because of the labeling and import laws in other countries.
In the US they’re strict about that, so buying your EVOO from California ensures you’re actually getting olive oil and not a mix.
Instructions
Peel and smash your garlic, then sautee it right in the pot you’ll be making your sauce in, with the avocado oil in the bottom.
After 1-2 minutes, add all the rest of the ingredients and stir really well.
Let the sauce simmer 15-20 minutes and you’re done!
Packed with vibrant flavors and anti-inflammatory ingredients, this Low-Carb Marinara Sauce is a delicious way to keep inflammation at bay and blood sugar balanced.
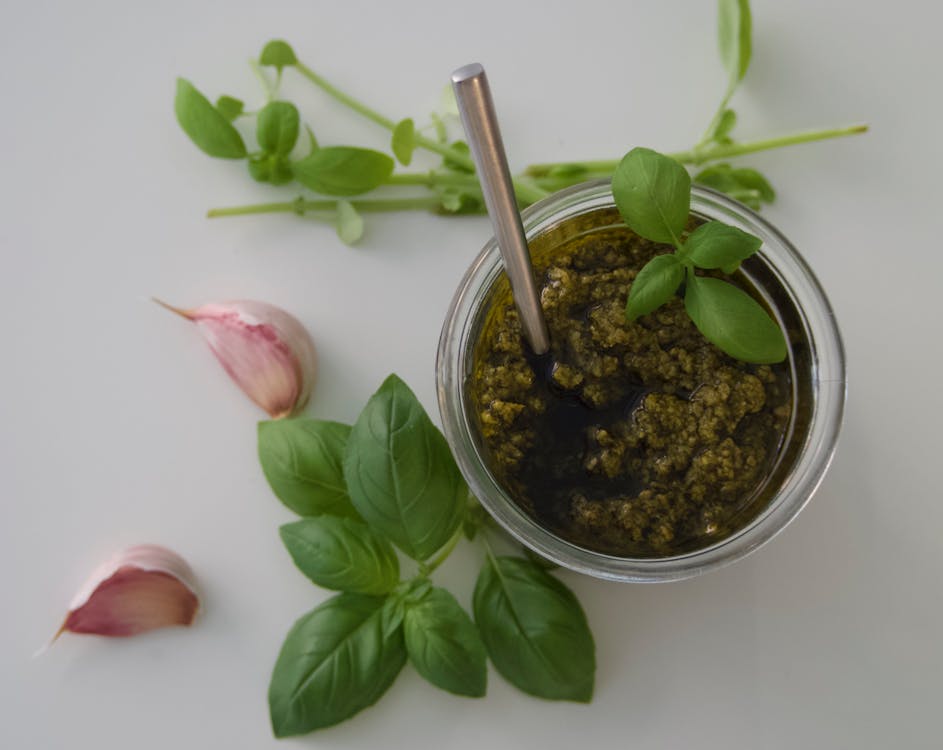
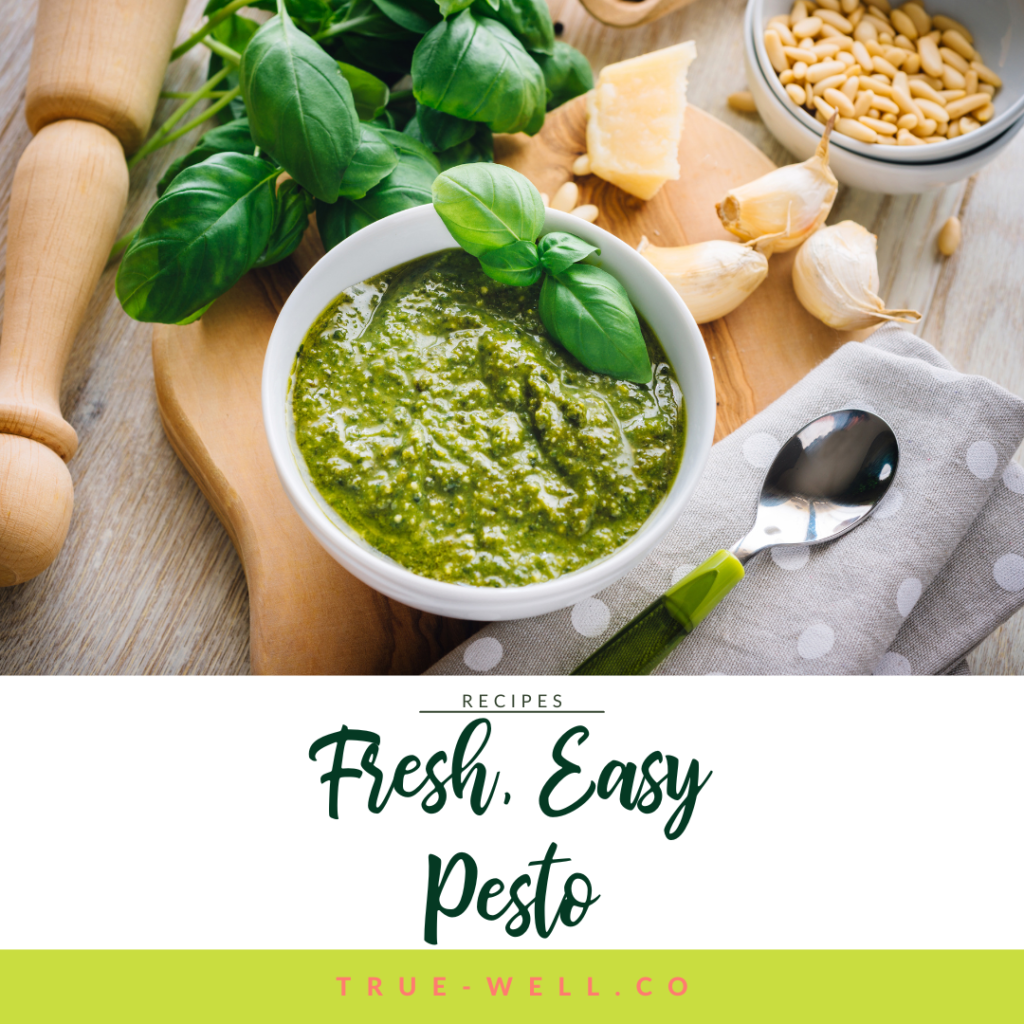
Our Fresh Easy Pesto boasts a vibrant blend of aromatic basil leaves, rich extra virgin olive oil, toasted nuts, and zesty garlic. It’s super simple to make and takes a boring dish to amazing in, like, 5 minutes!
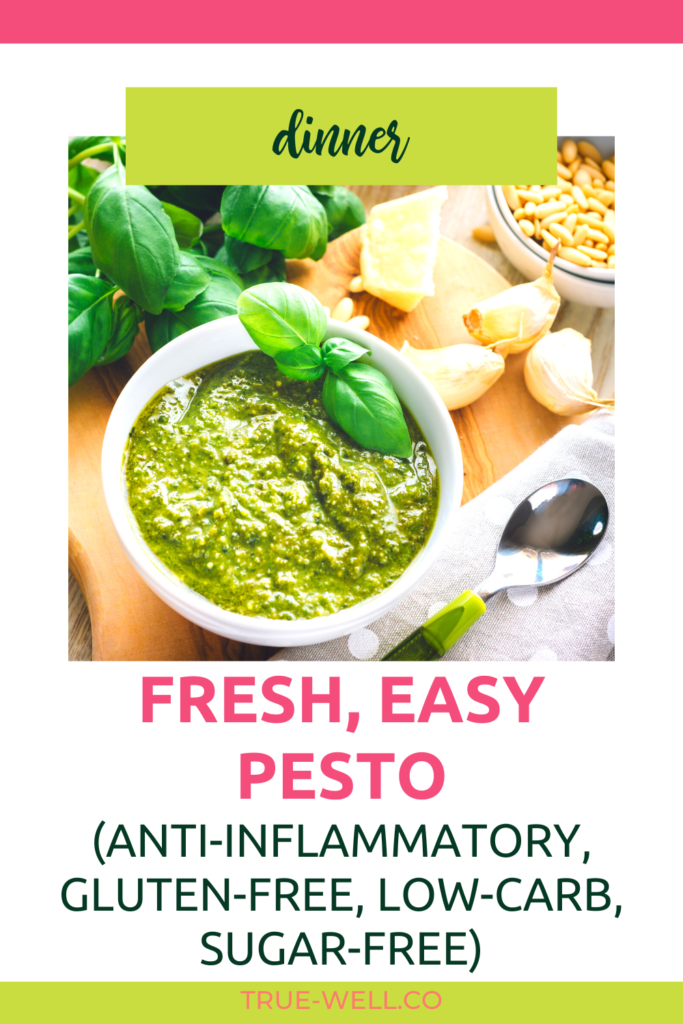
Not only does this Fresh Easy Pesto recipe provide an explosion of flavors, but it also offers a myriad of health advantages. The basil leaves contain essential oils that have been found to possess anti-inflammatory properties, helping to reduce swelling and pain.
The extra virgin olive oil is packed with heart-healthy monounsaturated fats, known for their anti-inflammatory effects, while also providing a luscious texture to the pesto.
Ingredients
Basil
Basil is such an aromatic herb, and summer dishes are perfect with it! Honestly, herbs like this can get so expensive that we just grow them on our back patio. I even have friends who grow them in their kitchen window boxes to enjoy the health and flavor benefits.
I know you may be tempted to buy the chopped basil at the grocery store, but I beg you to use super fresh, it makes such a difference!
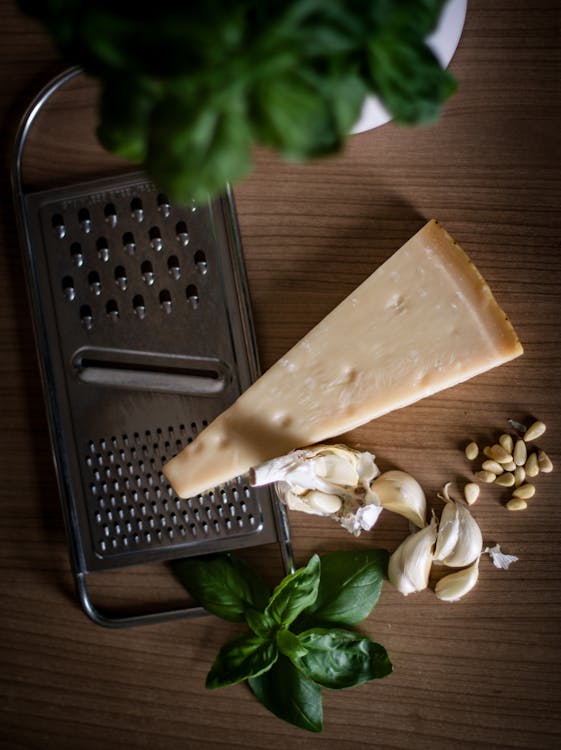
Parmesan
Parmesan is another ingredient that can get real pricey, real quick. Grating your own is always the best option, because when a manufacturer does it, they add some type of starch to keep it from clumping. This can affect any recipe you’re making. So I always advise buying a block of parmesan and grating it yourself.
Extra virgin olive oil
Extra virgin olive oil is the perfect oil for this recipe, because you’re not cooking it. SO many food bloggers and cooking websites have it wrong on this! EVOO has a very low smoke point, which means if you cook with it, it will burn and oxidize easily.
That’s why fresh sauces and dressings like this recipe are perfect for the bold flavor of extra virgin olive oil. If you don’t have any on hand, you can sub avocado oil.
Minced garlic
Garlic can be tricky to keep on hand because it tends to dry out really fast if it’s not super fresh. And it can be tricky to find super fresh. Even though it’s super convenient to keep a jar of minced garlic on hand in the fridge, I don’t always advise it because they add preservatives to keep it from going bad.
That being said, if I’ve had a run of our grocery store giving me dried-out old garlic cloves, I’ve been guilty of throwing my hands up and buying a jar of minced. Do what’s best for your household. 🙂
Pine nuts
Pine nuts are really thought of as essential to classic pesto recipes. But many people are allergic to nuts, and they can also get really expensive. There’s been a huge trend in using different types of nuts in leu of pine nuts, so it’s absolutely ok to sub out a different type of nut, or just omit them altogether.
I will say I love experimenting with different flavors, so if you’re a curious cook like me, try some walnuts or cashews!
Instructions
Literally the only prep you need for this is to throw it into the blender in the order the recipe says. Done and done!
Notes
Make sure to store this in a sealed container, and you can even double or triple this to make sure you have enough on hand for a couple of weeks!
Our Fresh Easy Pesto boasts a vibrant blend of aromatic basil leaves, rich extra virgin olive oil, toasted nuts, and zesty garlic. It’s super simple to make and takes a boring dish to amazing in, like, 5 minutes!
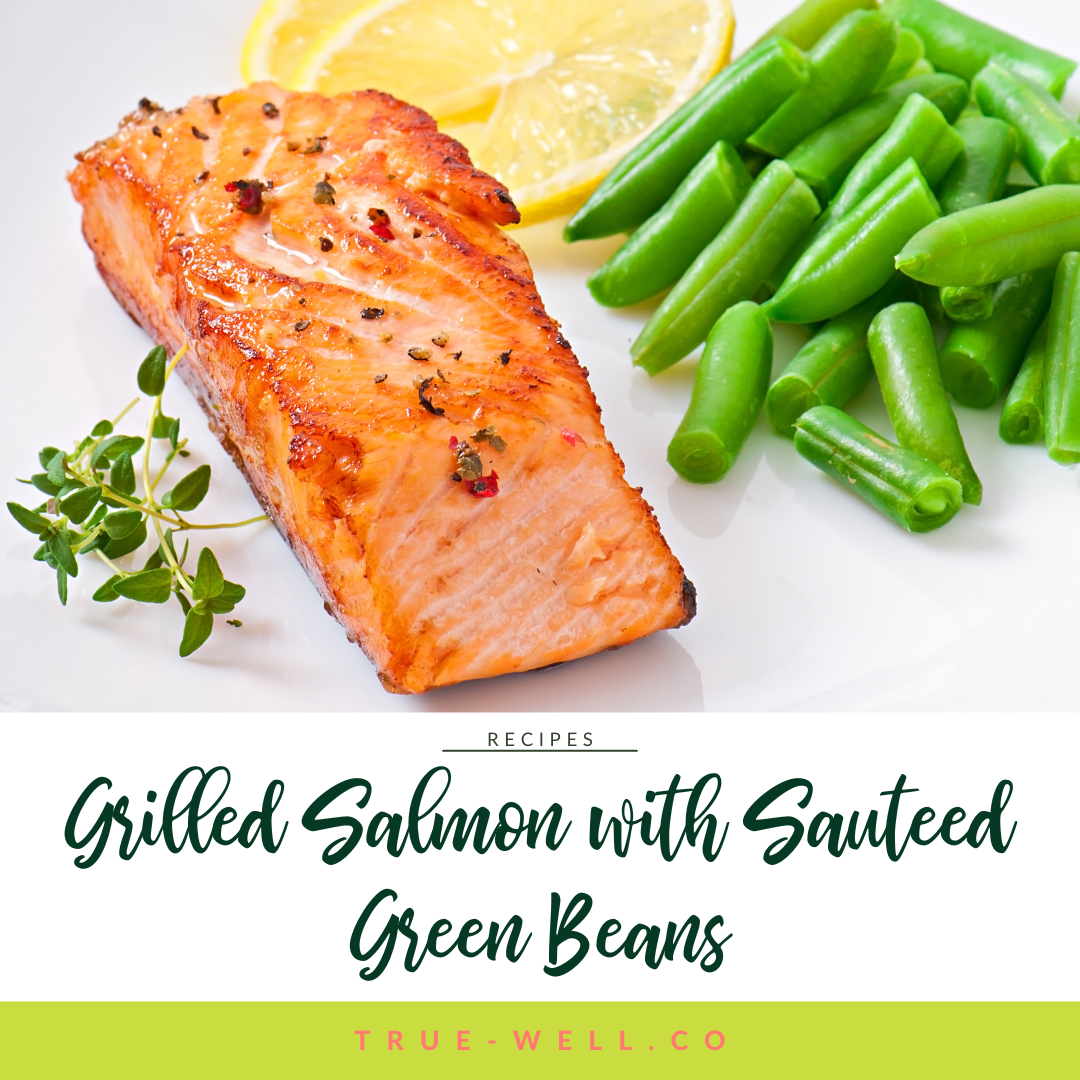
Summer is in full swing, and there’s nothing quite like a sizzling grill to usher in the season. (Not that my husband needs summer as an excuse.)
Grilled salmon and sautéed green beans make for a wholesome, flavorful meal that’s perfect for any weeknight meal. Get ready to elevate your grilling game and enjoy a healthy, mouthwatering meal that’s sure to impress even your pickiest eaters.
To reap the health benefits of these dishes, it’s important to understand why salmon and green beans are a nutritional powerhouse.
Salmon is a great source of omega-3 fatty acids, which have been shown to reduce inflammation, protect against heart disease and stroke, and potentially even improve brain function.
Similarly, green beans are packed with vitamins and nutrients like vitamin C, vitamin K, and iron, all of which contribute to healthy bones, skin, and immune function.
Plus, both dishes are high in protein and low in calories, making them a great choice for an anti-inflammatorydinner that won’t spike blood sugar.
Salmon
To create the perfect grilled salmon, you need to start with a good cut of fish.
Look for fresh salmon fillets with firm, pink flesh and no signs of discoloration or strong odor. Choose wild-caught salmon over farm-raised for the healthiest option.
Green Beans
When you’re picking out the best summer green beans, there are a few things you should look for. First, go for beans that are bright green and feel nice and firm when you touch them.
Avoid beans that look dull or have any yucky spots on them. You want the beans to be crispy and make a snapping sound when you bend them.
Also, try to find beans that are skinny and smooth because they’re tastier and easier to cook. If you can, get beans that are all about the same size so they cook evenly.
Instructions
This meal is a bit of a back-and-forth dance, so be patient but have your ingredients ready to go.
Grilling salmon to perfection
Before grilling, remove the skin from the salmon fillets. To do this, use a sharp knife to make a small incision between the flesh and skin at one end of the fillet. Hold the skin with one hand and use a back-and-forth motion with the knife to separate the skin from the flesh, pulling the skin away as you go.
Next, season your salmon fillets with the dry seasonings.
When grilling, preheat your grill to medium-high heat and lightly oil the grates. Place the salmon fillets on the grill, skin-side down if left on, and cook for 6-8 minutes per side or until the flesh is opaque and flakes easily with a fork.
Grilling is a great way to prepare salmon, as it highlights the natural flavors of the fish and adds a smoky touch to it. Before grilling, make sure to preheat your grill to medium-high heat and lightly oil the grates to prevent the fish from sticking.
The key to grilling salmon is to avoid overcooking it, as it can quickly become dry and lose its delicate texture.
Creating Flavorful Sauteed Green Beans
These sautéed green beans will add a delicious pop of flavor to your grilled salmon dish, making it a complete and satisfying meal for a summer day.
To create flavorful sautéed green beans, start by heating up a pan with a little bit of avocado oil. You want just enough oil to coat the bottom of the pan. Once the pan is hot, add the green beans, salt, and onion flakes. Stir the green beans to ensure they are evenly coated with the oil and seasoning.
Cook the green beans until they are tender but still slightly crispy, which should take around 8-10 minutes. You want to be sure not to overcook them as they can turn mushy and lose their flavor.
Other sides to pair it with
This simple meal really is very low-carb. For some this is perfect. But if you’d like to add more complex carbs, a small serving of brown rice or quinoa are perfect sides to pair it with. These whole grains give some healthy carbohydrates and fiber to keep you feeling full.
Notes
Make sure fish reaches an internal temperature of 145 F (63 C) using a food thermometer.
To prevent the salmon from sticking to the grates, make sure the grill is super clean, and that the grill is super hot. (You can use tongs and a paper towel coated in oil to get the grates well-oiled.)
With a (sugar-free) sweet soy sauce marinade and hints of lemon and garlic, this Grilled Salmon pairs beautifully with sauteed green beans for the perfect quick and delicious summer dinner!
Season the salmon fillets with the lemon pepper, garlic powder, and salt. Place the salmon in a large baggie.
Stir together soy sauce (or liquid aminos), brown erythritol, water, and avocado oil in a small bowl until the brown erythritol has dissolved.
Pour the mixture into the baggie of the salmon fillets. Seal, then turn to coat the fillets.
Let them marinate for at least 2 hours in the fridge.
When it’s time to cook dinner, preheat the grill to medium heat and make sure the grate is very clean and oiled.
While the grill is heating, trim the ends off the green beans.
In a large skillet, heat the avocado oil over medium high heat. Add the green beans.
After about 3 minutes sprinkle the green beans with sea salt and onion flakes. Turn them to coat with oil and the seasonings. Then let them saute for another 5-7 minutes, turning once.
While the green beans are cooking, place the salmon fillets on the grill and discard the remaining marinade.
Cook the salmon until it easily flakes with a fork, approximately 6-8 minutes per side.
Check the green beans are sauteed to personal preference.
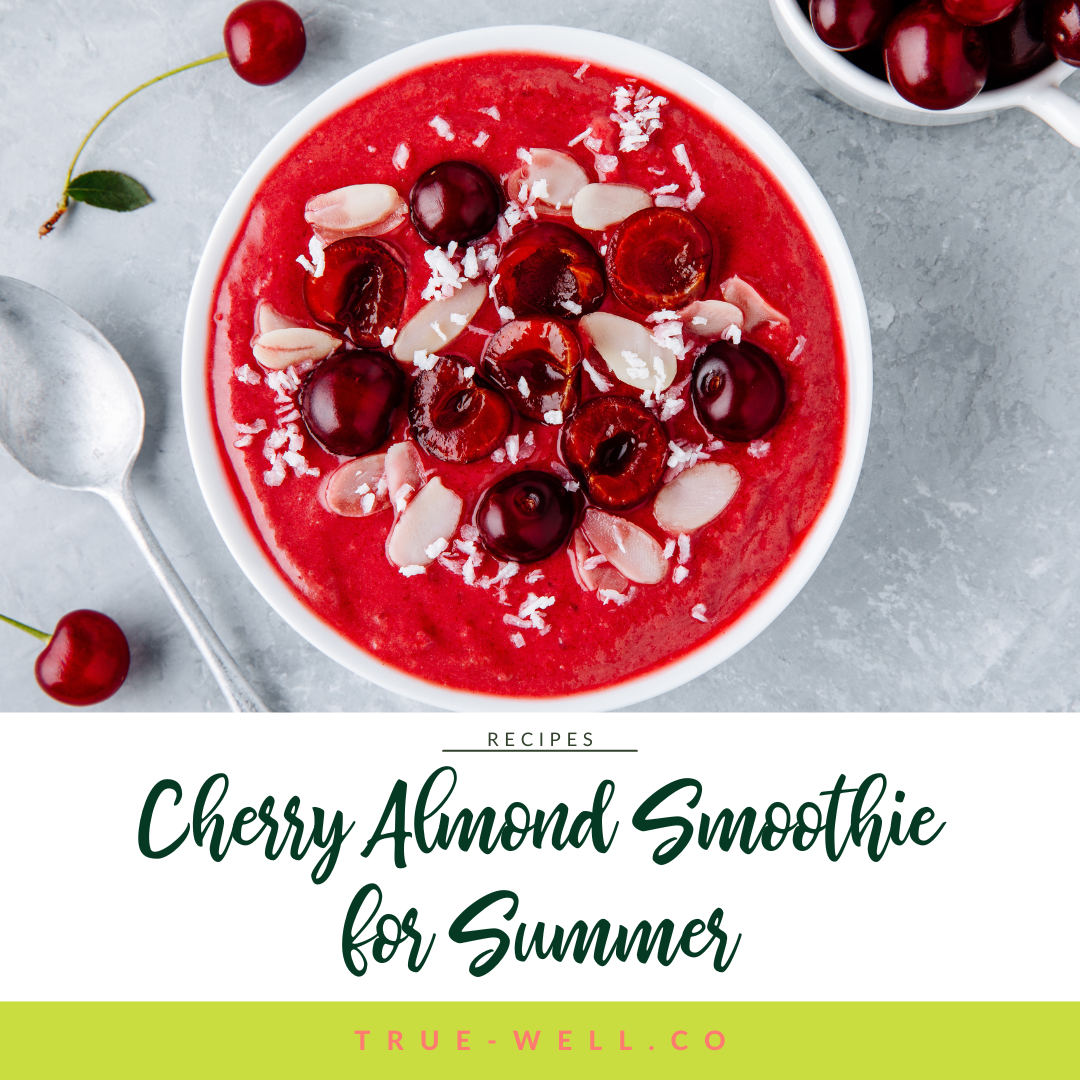
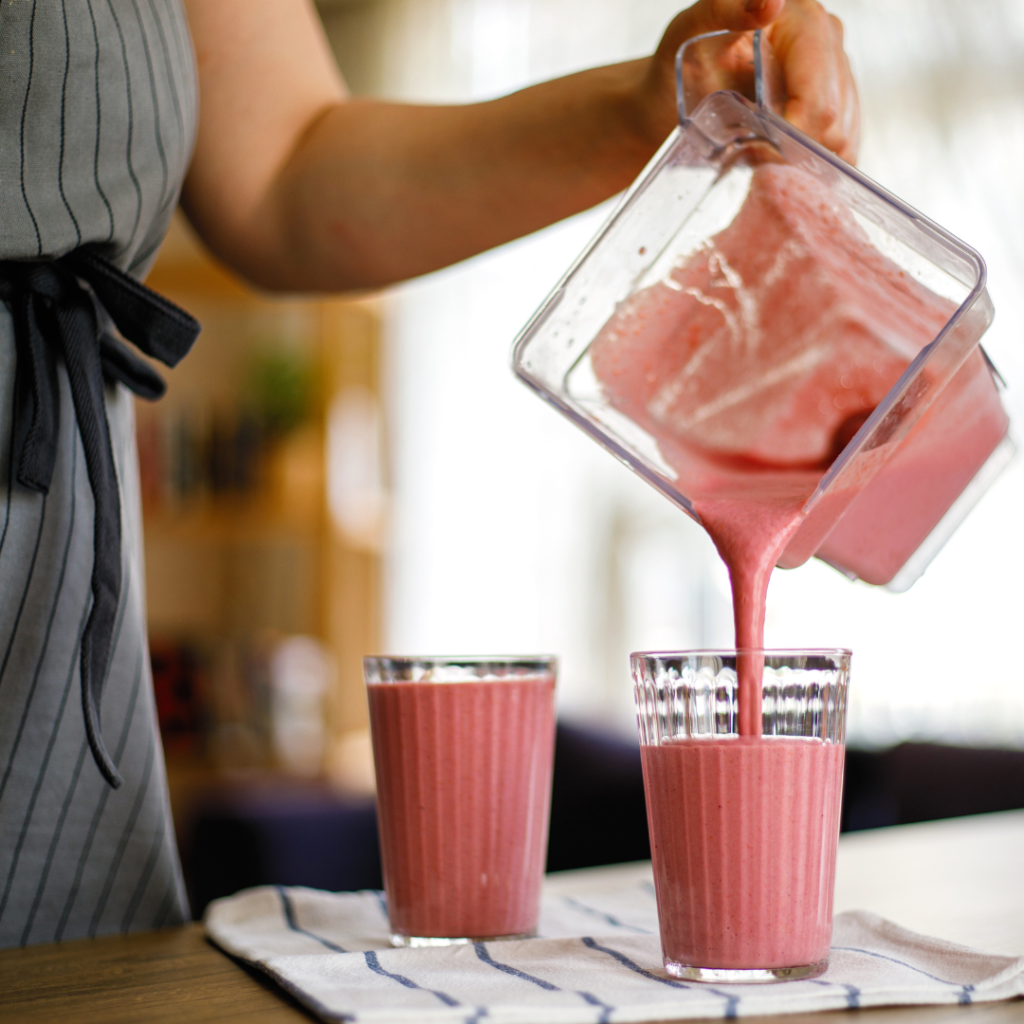
As summer heats up, there’s nothing quite as refreshing as this Cherry Almond Smoothie to help you cool down and nourish your body–and takes less than 5 minutes to make!
This Anti-Inflammatory Cherry Almond Smoothie is especially great since it harnesses the power of anti-inflammatory ingredients that packs a punch of flavor while promoting your overall well-being.
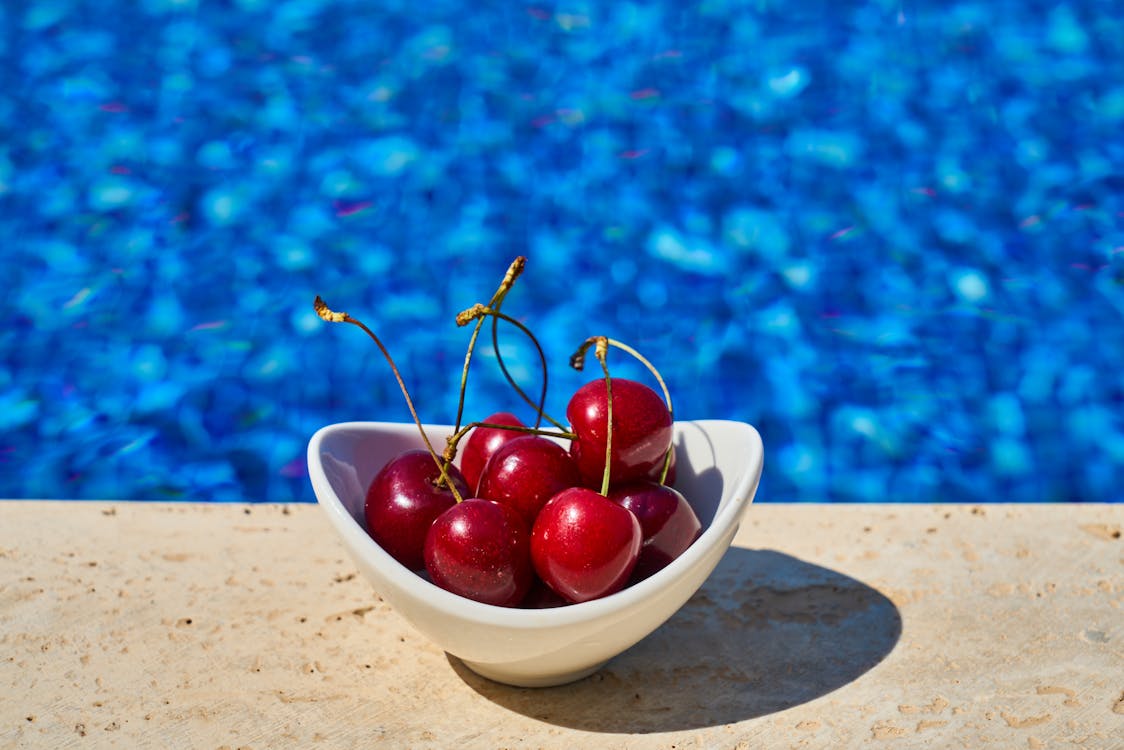
Cherries, the star ingredient of this vibrant smoothie, are not only a delectable summer fruit but also a nutritional powerhouse. Bursting with antioxidants and phytochemicals, cherries boast potent anti-inflammatory properties.
By incorporating these luscious berries into your diet, you can help combat inflammation and potentially reduce the risk of chronic diseases.
But- another lesser-known fact is that tart cherries have specifically been studied for their ability to boost sleep. So if you’re having trouble sleeping, maybe opt for this smoothie as your dinner or after-dinner snack on those hot summer nights!
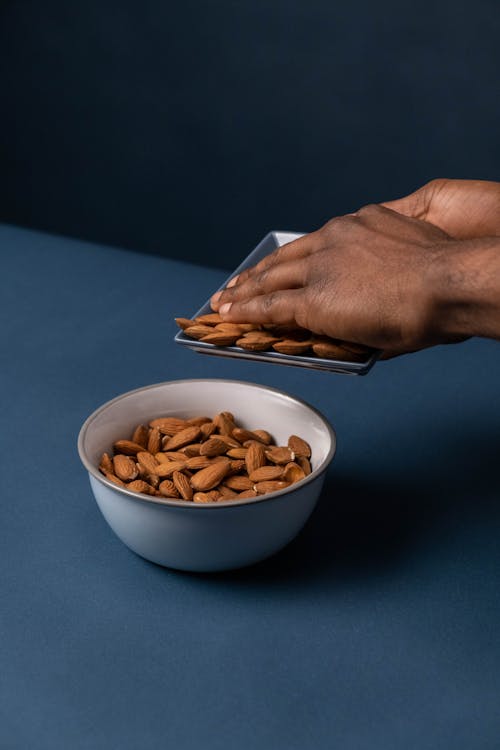
Almonds
Almonds not only add a delightful nutty flavor but also offer a wealth of nutrients. Packed with healthy fats, fiber, and vitamin E, almonds have been known to reduce inflammation and support heart health.
What makes this smoothie even more appealing is that it’s sugar-free. This is important since sugar is one of the most inflammatory foods you can eat.
Substitutions and additions
Milk
The almond milk should be unsweetened and with as few thickeners as possible. If you don’t have almond milk, you can easily sub regular cow’s milk if dairy isn’t inflammatory to you, unsweetened coconut milk, or any other unsweetened non-dairy milk.
I don’t recommend oat milk because it’s straight simple carbs, and raising blood sugar levels is inflammatory.
Protein powder
Don’t skip this ingredient!
Protein in smoothies is SO important because of the usually high carb content from fruits. The protein (and healthy fats) are what complete the ‘trifecta’ of macros to create this balanced and anti-inflammatory Cherry Almond Smoothie.
Many people prefer whey protein powder because of the studies showing it’s more beneficial at muscle assimilation than other proteins. However, it is derived from dairy. If you’re dairy-free, you can absolutely use a plant-based protein powder or even egg white protein powder.
If you opt for plant-based, it can get thicker than whey protein powder, so keep in mind you may need to add a little more milk.
If you opt for egg white powder, keep in mind that it may not come with the vanilla flavoring. You may need to test and see if this means you add a couple drops of vanilla extract as well, or if the almond and cherry flavors are beautiful on their own.
On ANY protein powder substitution, be aware of the sweetener component. Many protein powders contain some type of sweetener. So make sure it’s not an artificial sweetener.
If you choose a protein powder that doesn’t have a sweetener, keep reading for what sweeteners you can add.
Sweetener
If you do add sweetener because the protein powder isn’t sweetened or just want it sweeter, make sure you use an anti-inflammatory option. This means aiming for natural zero-calorie sweeteners like stevia, monk fruit, allulose, or erythritol.
Almond butter
Although the almond butter really helps kick up the almond flavor in this recipe, if you don’t have any, you can easily substitute a different nut. Pistachios, coconut, hazelnuts, or pecans are amazing flavor pairings with cherries. You can sub in the same amount of nuts as nut butter.
If you’re avoiding nuts, use a seed like sunflower, pumpkin, or tahini (sesame).
Peanut butter is also an option!
Almond extract
Although the almond butter gives a small amount of flavoring overall, almond extract can really boost that popular almond punch that pairs so beautifully with cherries for this healthy smoothie. (Especially if you’re using a different type of nut butter and still want that almond flavor to shine through.)
Instructions
For any smoothie, the best way to make sure it isn’t easily clumped is to add the liquid in first, then everything else. Blenders need a lot of moisture to help blend and chop at the same time, while ensuring proper movement of the whole smoothie.
I have to say, every time we make this smoothie the kids are in love. I’ve found that it’s definitely cheaper to buy frozen tart cherries than fresh in the summer (which is a total bummer), but we do still buy fresh and make some seriously yummy summer creations (like this Cherry Almond Smoothie!)
What makes it super fun is adding shaved dark chocolate on top and a fun straw! 😋
Summer is here, and it’s the perfect time to savor the flavors of the season with these 20 foods that reduce inflammation in the body.
Regardless of the season, the foods we choose can have a significant impact on how well our blood sugar is balanced which directly helps in reducing inflammation in our bodies and promoting overall well-being.
Today we’re exploring 20 mouthwatering summer foods that not only refresh your taste buds but also pack a powerful anti-inflammatory punch.
So today we’re gonna cover vegetables, herbs and spices, and everybody’s favorite: fruit.
First, let’s start with summer vegetables:
Anti-inflammatory summer vegetables
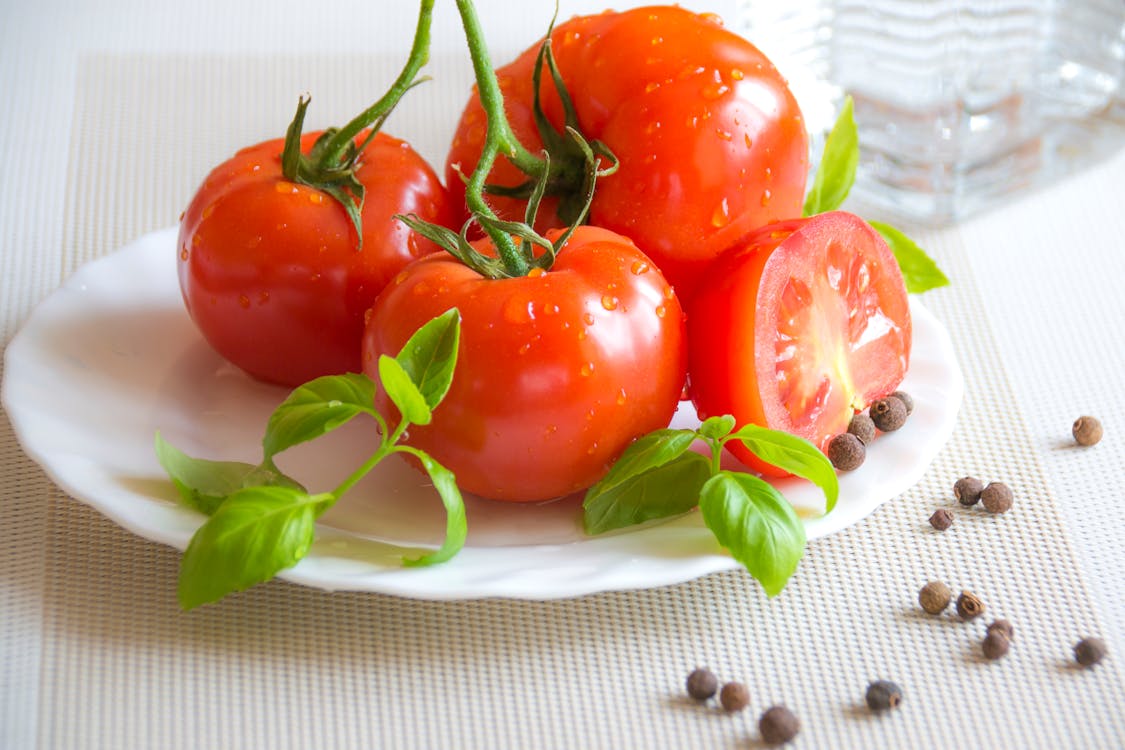
Tomatoes
Tomatoes are rich in lycopene, a potent antioxidant that helps neutralize free radicals and reduce inflammation. They also provide vitamins A and C, as well as potassium, all essential for maintaining good health.
Bell peppers come in a rainbow of colors, adding vibrancy and crunch to your summer meals. These colorful gems are abundant in vitamin C, an essential nutrient for reducing inflammation.
Capsaicin, a compound found in bell peppers, may also help alleviate pain and inflammation—double the goodness!
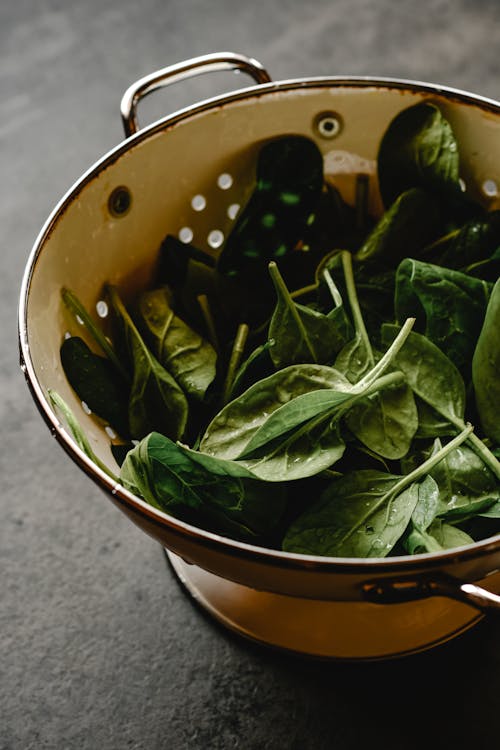
This mighty leafy green is a nutritional powerhouse, packed with vitamins A, C, and K, as well as folate and iron. Spinach also boasts antioxidants that do wonders in combatting inflammation.
Cucumbers
With their high water content and refreshing crunch, cucumbers keep you hydrated during those scorching summer days.
They also provide anti-inflammatory benefits, thanks to their antioxidants and flavonoids.
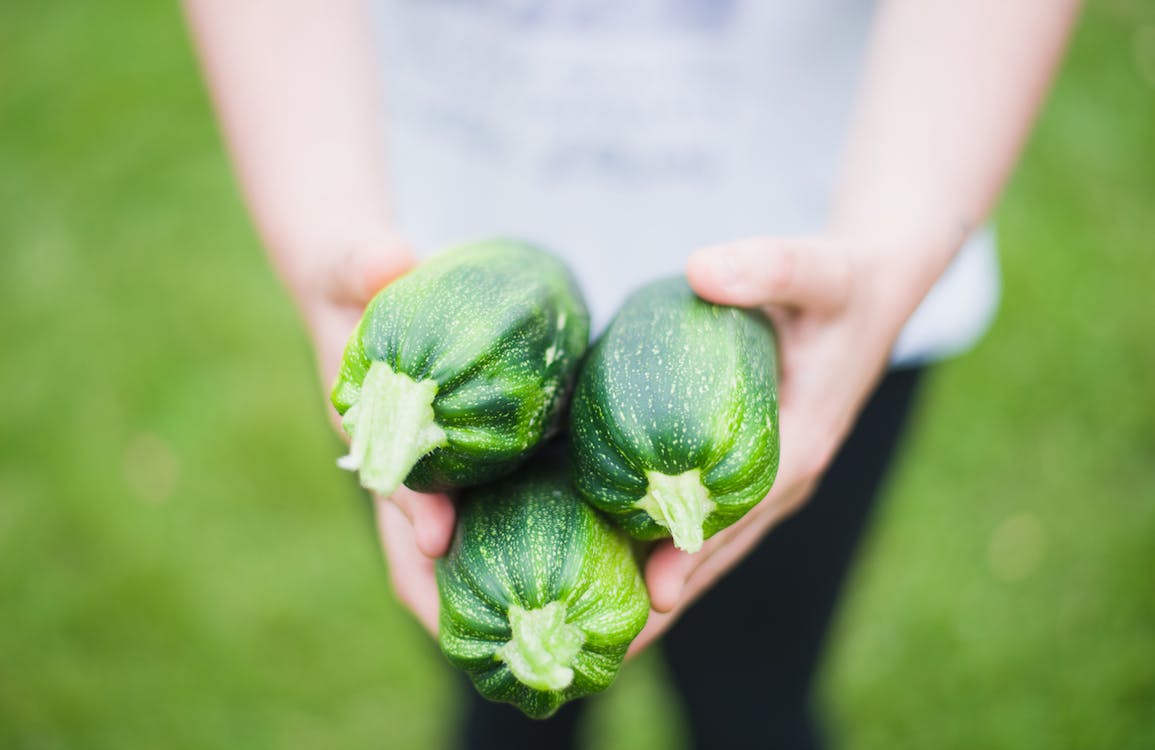
Zucchini
Zucchini is a versatile summer squash that deserves a special place on your plate. This low-calorie vegetable is rich in fiber, antioxidants, like vitamins A and C, as well as manganese, a mineral with anti-inflammatory properties.
Spiralize it, grill it, or add it to your stir-fries—the possibilities are endless!
Eggplant is a versatile vegetable that contains nasunin, an antioxidant with anti-inflammatory properties. It also provides fiber and essential nutrients like potassium and manganese.
An easy way to use any of the summer anti-inflammatory vegetables is to make colorful salads with tomatoes, bell peppers, spinach, cucumbers, and zucchini.
Add a sprinkle of flaxseeds and a vinaigrette made from avocado or extra virgin olive oil for an extra anti-inflammatory boost.
Another way to get anti-inflammatory, gluten-free, sugar-free meals quick and easy is to grab our Summer Anti-Inflammatory Meal Prep Guide 👇. {Click the image!}
Summer anti inflammatory Herbs + Spices
Now we’ve got several herbs and spices because SO much stuff grows during the summer.
Ginger
Ginger has long been cherished for its soothing properties, and it plays a significant role in reducing inflammation in the body. It contains gingerol, a compound known for its anti-inflammatory and antioxidant effects.
Whether you add it to your stir-fries, brew it into a refreshing iced tea, or grate it into your salad dressings, ginger adds a zing of flavor and inflammation-fighting power.
Basil
The aroma of fresh basil is enough to transport you to a summer garden. This fragrant herb not only enhances the flavor of your dishes but also provides anti-inflammatory benefits.
Basil contains essential oils with antioxidant properties, such as eugenol, linalool, and rosmarinic acid, helping to reduce inflammation in the body.
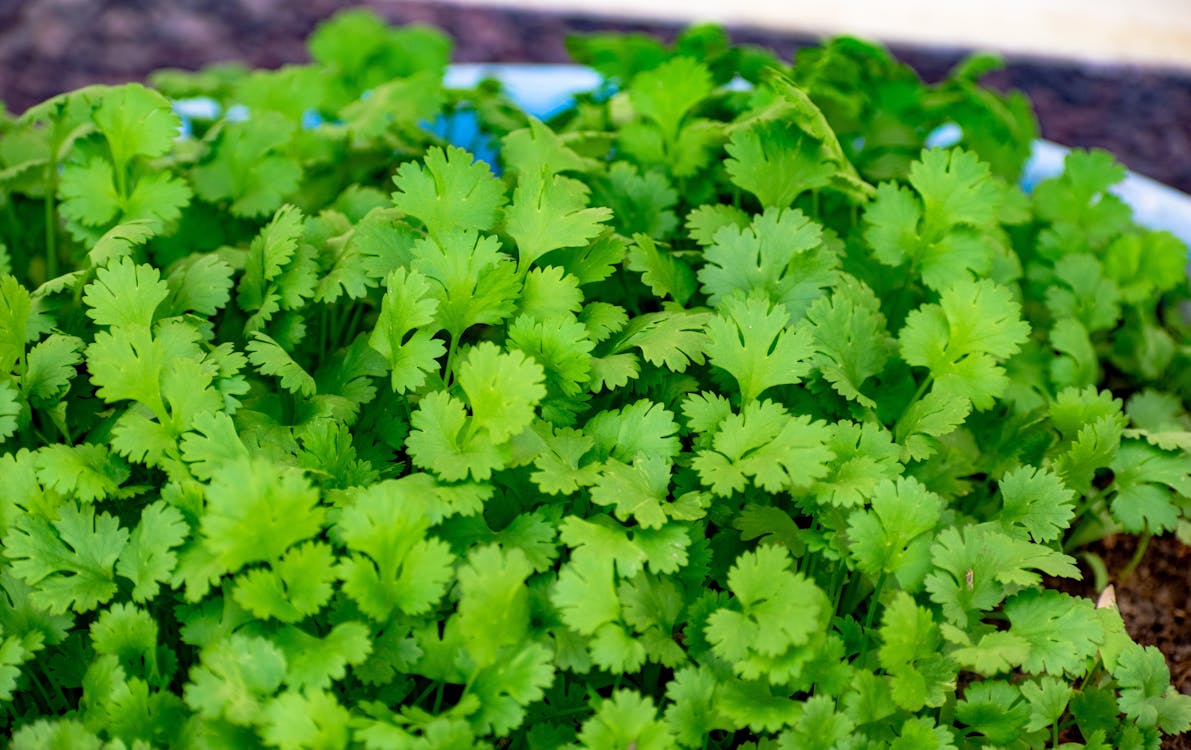
Cilantro, also known as coriander leaves, is an herb with a distinctive flavor that adds a burst of freshness to your summer recipes.
This herb contains antioxidants that help reduce inflammation, and it may also aid in detoxification by supporting the body’s natural cleansing processes.
Mint leaves are a summer staple known for their cooling and soothing properties. Mint leaves contain menthol, a compound known for its cooling and soothing properties.
They can provide relief from sinus and congestion issues, digestive issues, and help reduce inflammation. Enjoy a refreshing glass of mint-infused water or add it to your salads and summer beverages for a burst of flavor and inflammation-fighting benefits.
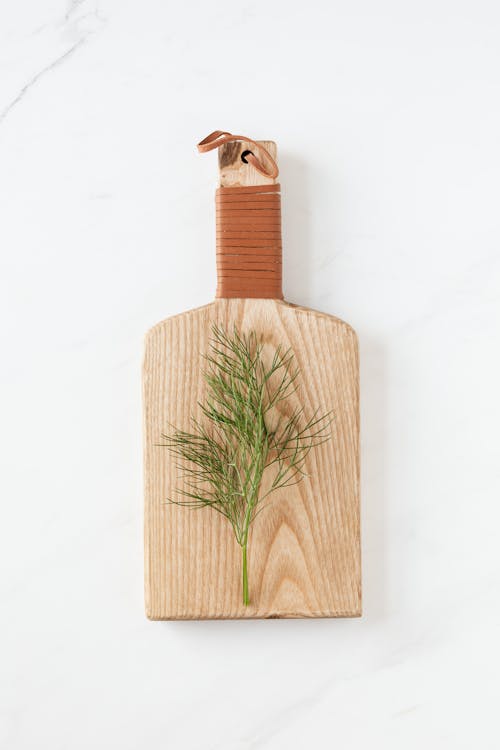
Dill
Known for its feathery leaves and distinct taste, dill is often associated with pickles. However, its flavor complements a wide range of dishes, including fish, salads, and sauces.
Dill is an herb with potent anti-inflammatory properties due to its high content of flavonoids and other beneficial compounds. This offers potential benefits for conditions such as arthritis and digestive disorders as well as combatting oxidative stress.
Parsley
Parsley is a versatile herb that comes in two varieties: flat-leaf (Italian) and curly. It adds a fresh and bright flavor to salads, soups, and sauces.
Parsley contains several compounds that contribute to its anti-inflammatory properties. These compounds work synergistically to combat inflammation, neutralize free radicals, and support the body’s natural defense mechanisms.
Chives
Chives have a mild onion-like flavor and are often used as a garnish for their vibrant green color.
Chives contain several compounds that contribute to their anti-inflammatory properties, including allicin, quercetin, and vitamin C. They can be added to salads, dips, and creamy dressings.
Sage
While sage is available year-round, it thrives in the summer months. Sage contains flavonoids and essential oils that exhibit anti-inflammatory effects.
Its earthy and slightly minty flavor pairs well with poultry and roasted summer vegetables.
Oregano
Oregano is a robust herb with a peppery and slightly bitter taste. It contains flavonoids and terpenes which help modulate the immune response and reduce inflammation in the body.
Oregano is a key ingredient in Italian and Greek cuisines, commonly used in pasta sauces, pizzas, and grilled meats.
How to use summer anti-inflammatory herbs
Experiment with fresh herbs like basil, cilantro, and mint in your recipes to enhance the flavor and add anti-inflammatory benefits.
This can be as simple as chopping them up and adding them to your salad or veggies.
Grab the Summer Anti-Inflammatory Meal Prep Guide below! {Click the image}👇
Summer Anti-inflammatory fruit
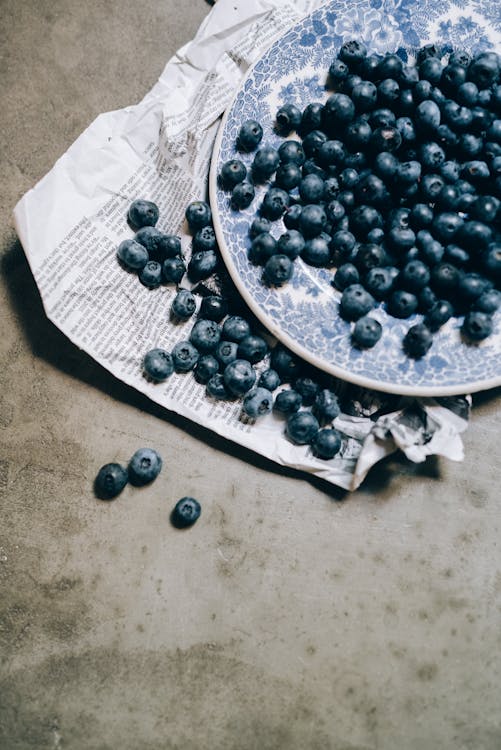
Blueberries
These little bursts of sweetness are not only delightful to eat but also loaded with antioxidants called anthocyanins which help fight inflammation and protect against oxidative stress.
Plus, blueberries are packed with vitamins C and E and fiber, which promotes a healthy digestive system, making them a fantastic choice for a healthy summer snack.
Besides quenching your thirst, watermelon is a fantastic source of lycopene—an antioxidant that helps combat inflammation and fight off those pesky free radicals.
Also, since it is a high-water-content fruit, it’s a really great option to help stay hydrated during these hot summer months.
Pineapple
Besides being a tropical treat, pineapple contains bromelain, a powerful enzyme with anti-inflammatory properties.
It’s like a natural superhero fighting joint pain, reducing swelling, and even soothe allergenic airways, making it the perfect addition to your summer fruit salad.
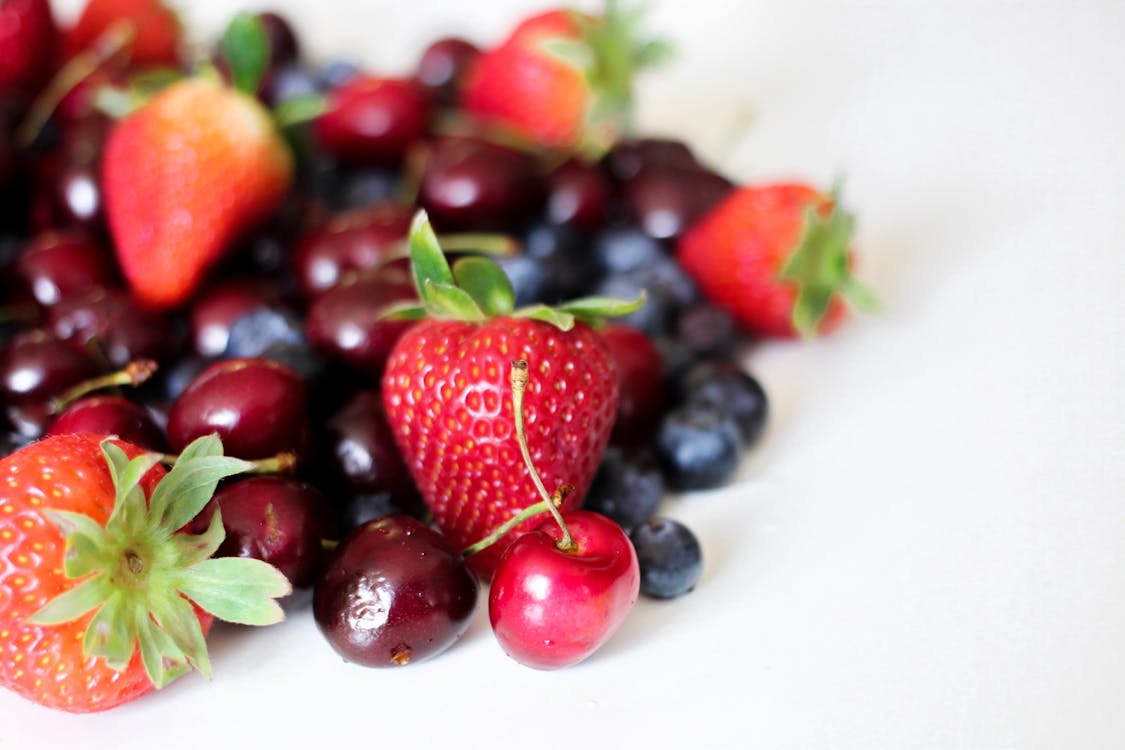
Cherries
These delightful little fruits are rich in anthocyanins and other antioxidants, which have been shown to reduce inflammation and ease symptoms of arthritis.
They are also a natural source of melatonin, helping you enjoy better sleep during those warm summer nights.
Oranges are packed with vitamin C—a superstar vitamin that not only supports your immune system but also acts as an antioxidant, fighting off inflammation in the body.
And let’s not forget the flavonoids present in oranges, which provide additional anti-inflammatory benefits.
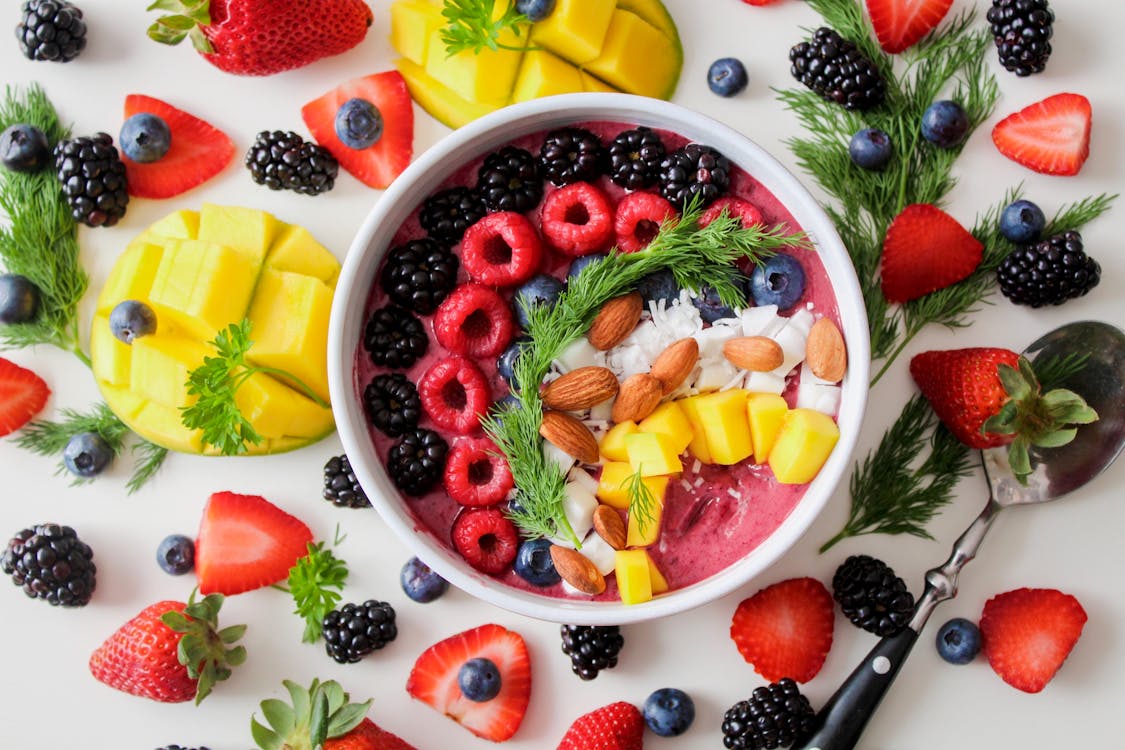
How to use summer anti-inflammatory fruits
Create refreshing fruit salads or smoothies by combining blueberries, watermelon, pineapple, and cherries for a flavorful and anti-inflammatory treat.
Embrace the flavors of summer and nourish your body with these powerful anti-inflammatory foods.
Remember, small dietary changes can make a big difference in your journey toward better health.
Stay hydrated, savor the season’s abundance, and enjoy the benefits of an anti-inflammatory summer diet.
Take the guesswork out with our 1-week Summer Meal Prep here 👇{Click the image below.}
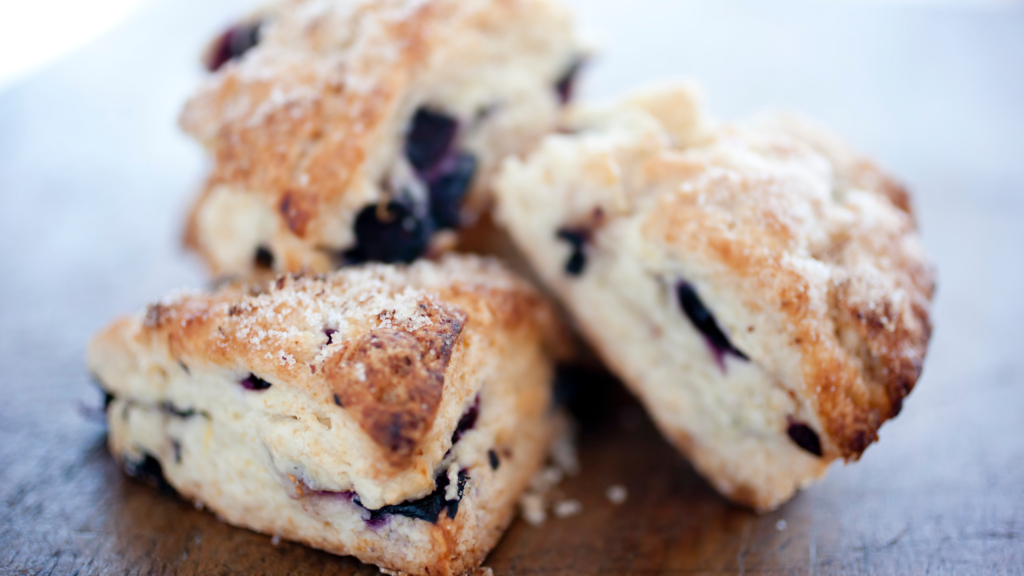
Not only are these Low-Carb Blueberry Scones grain-free and sugar-free, they’re also super delicious and the perfect summer bulk recipe to bake to have a quick + easy breakfast or snack on hand anytime!
What’s even better about this low-carb scone is that it’s bursting with juicy blueberries. So each bite is infused with antioxidants that combat inflammation, supporting your body’s natural healing processes.
The other beautiful thing about this anti-inflammatory breakfast recipe is that these scones are low in carbs, making them a fantastic option for those following a low-carbohydrate lifestyle.
These ingredients provide a delightful balance of flavors, while keeping the carb count in check– which means your blood sugar stays balanced as well.
Ingredients
Sounds silly, but I love when summer is here simply for the large selection in berries. Blueberries are notorious for their low-sugar qualities and anti-inflammatory superpowers, so I love using them fresh as much as possible!
1 1/3 cups almond flour (blanched)
1/4 cup arrowroot flour (the package may say ‘arrowroot powder’
Pinch of sea salt
1 tsp baking powder
1 cup fresh blueberries (make sure to wash them first and let them dry)
1/4 cup avocado oil
3 TBSP keto maple syrup (if you don’t have this, you may try another sugar-free natural sweetener that’s granulated. Usually erythritol or allulose are good choices for baking; Swerve brand is great!)
2 tsp vanilla extract (pure, not the fake stuff!)
1 egg (large, organic)
Instructions
Preheat oven to 350 F (177 C) and line a metal baking pan with parchment paper.
Whisk the dry ingredients together in a medium mixing bowl. Then stir in the blueberries.
Whisk the wet ingredients together in a small mixing bowl, then stir into the dry ingredients until a batter is formed.
Pour the batter into the baking pan, shaping into a circle if you wish.
Bake for approximately 30 minutes.
Let cool for at least 10 minutes, cut into eight servings, and enjoy!
Tips + Notes
Any other nut flour (except tiger nut as it’s not really a nut) should be able to be subbed in this recipe.
Letting the scones completely cool down after baking is *really* important as it’s grain-free, and the cooling process helps the other binder ingredients in the recipe set.
You can also sub any other fresh berry! (We make this recipe with raspberries and cherries as well!)
When keeping blood sugar balanced by avoiding grains and sugar is necessary, it’s a sure hit to have a recipe on hand like these Low-Carb Blueberry Scones.
Preheat oven to 350 F and line a metal baking pan with parchment paper.
Whisk the dry ingredients together in a medium mixing bowl. Then stir in the blueberries.
Whisk the wet ingredients together in a small mixing bowl, then stir into the dry ingredients until a batter is formed.
Pour the batter into the baking pan, shaping into a circle if you wish.
Bake for approximately 30 minutes.
Let cool for at least 10 minutes, cut into eight servings, and enjoy!
Notes
*Any other nut flour (except tiger nut as it’s not really a nut) should be able to be subbed in this recipe.
*Letting the scones completely cool down after baking is *really* important as it’s grain-free, and the cooling process helps the other binder ingredients in the recipe set.
So if you’re like me, and you feel way more inspired during spring to do new years resolutions like eating healthy for less inflammation and better blood sugar balance, you’re gonna love this list of 20 delicious spring foods that reduce inflammation in the body that you should be filling your plate with every day.
The reason we want to prevent chronic inflammation is that it’s been linked to numerous health conditions like heart disease, diabetes, and cancer. Eating a diet rich in anti-inflammatory foods is an effective way to reduce and prevent that chronic inflammation.
So let’s start out with anti-inflammatory vegetables that are in season in spring:
Vegetables
Asparagus
Asparagus contains a unique combination of antioxidants and anti-inflammatory compounds that work together to reduce inflammation throughout the body. Asparagus also contains other important nutrients, such as vitamins C and E, which also have anti-inflammatory effects.
If you’ve never tried it before, asparagus can be eaten raw, like on a veggie platter—but it’s also super yummy roasted or even blanched. If you’ve never blanched veggies like this—trust me—you’re gonna wanna try it!
Spring into feeling fabulous with this 1-week gluten-free, sugar-free meal plan and prep guide! Featuring delicious anti-inflammatory recipes from fresh spring produce!
Spring leafy greens, like arugula, watercress, Bibb lettuce, mesclun mix, and spinach, are rich in vitamins, minerals, and antioxidants, which help to reduce inflammation and prevent oxidative stress in the body. Greens are perfect for spring salads, which I also include a recipe for in that Spring Meal Prep video.
Brassicas
Spring brassicas, including broccoli, cauliflower, and cabbage, are nutrient-dense vegetables that offer a ton of health benefits, including powerful anti-inflammatory properties. These vegetables are rich in vitamins, minerals, and phytochemicals that all work together to reduce inflammation throughout the body by inhibiting the activity of pro-inflammatory enzymes.
And just like asparagus, the brassicas are great raw, steamed, or roasted.
Root vegetables
Spring root vegetables like carrots, new potatoes, and radishes are not only delicious but also offer numerous health benefits, including anti-inflammatory properties. These vegetables are high in fiber and resistant starches, which are also known to have anti-inflammatory effects on the body.
Another root vegetable that’s very popular for its anti-inflammatory properties is ginger. It contains numerous bioactive compounds which have powerful anti-inflammatory and antioxidant effects.
These compounds have been shown to help reduce nausea, alleviate pain and soreness, improve digestion, and boost immune function. Those compounds can also help to reduce the risk of chronic diseases such as heart disease, cancer, and diabetes.
Ginger can be eaten fresh, dried, or in taken supplement form.
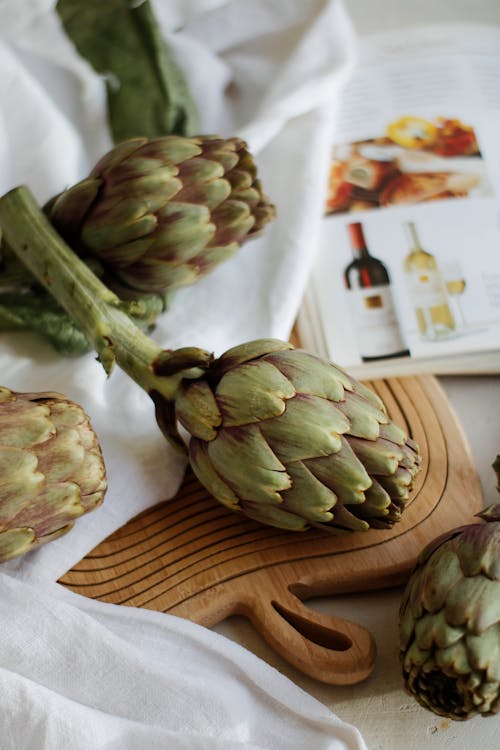
Artichokes
Artichokes are rich in antioxidants that help to protect the liver. They’re also high in fiber, which can help to promote feelings of fullness, regulate blood sugar levels, and support healthy digestion.
Alliums
Allium vegetables, such as green onions and leeks, offer a variety of health benefits due to their unique combination of vitamins, minerals, and phytochemicals. Both green onions and leeks are rich in flavonoids and sulfur-containing compounds, which have been shown to have anti-inflammatory and antioxidant effects, as well as being good sources of vitamin C, vitamin K, and folate.
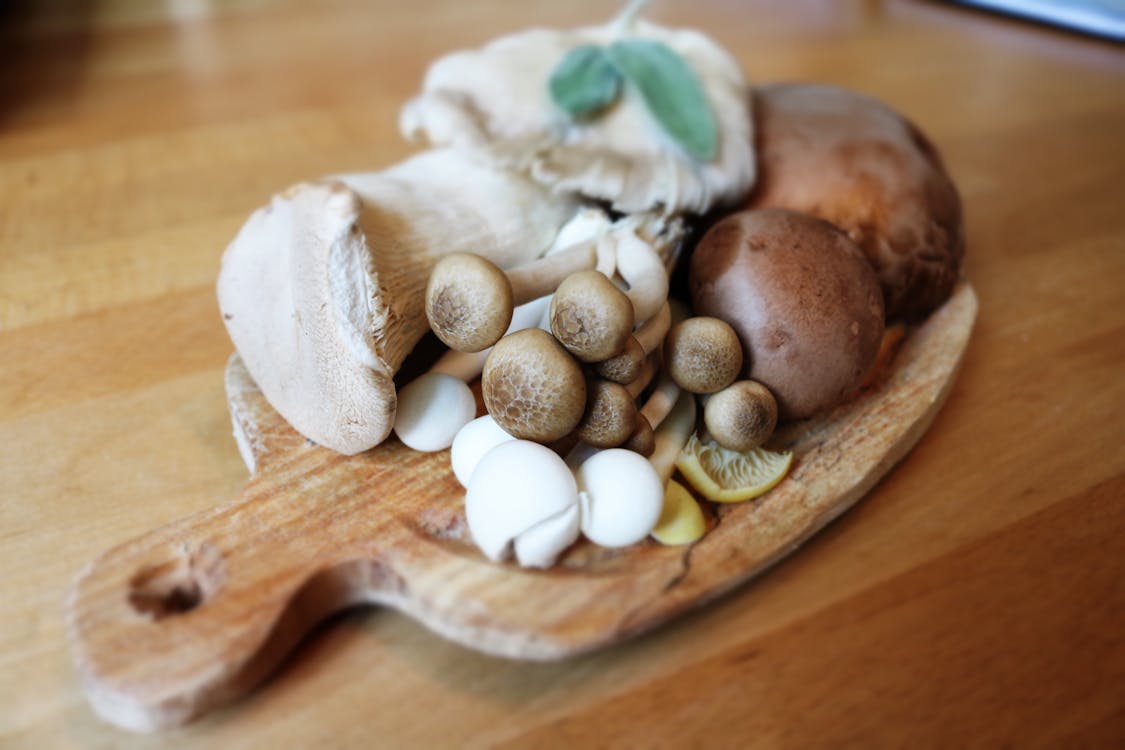
Mushrooms
These little fungi contain beta-glucans, which are compounds that have been shown to have powerful immune-boosting effects and can help to reduce inflammation throughout the body.
Additionally, mushrooms are a good source of antioxidants, which can protect the body against cellular damage and inflammation, which can help to reduce the risk of chronic diseases like heart disease and cancer. So, next time you’re making a stir-fry or salad, consider adding some mushrooms to reap these anti-inflammatory benefits!
Peas
Spring peas aren’t just a tasty addition to your meals, they also offer a range of health benefits. These sweet little pods are packed with fiber, and are also a good source of vitamins and minerals, including vitamin C, vitamin K, and folate. Additionally, peas are rich in antioxidants, and are super easy to cook as a stand-alone side dish, add to casseroles, or use blanched or raw on a veggie board.
Rhubarb
Rhubarb is a unique and flavorful vegetable that offers antioxidants, fiber, vitamin K, and calcium.
Rhubarb is pretty unique in that it can be used in sweet or savory dishes like rhubarb crumble or chutney. You can also add it to smoothies or use it to make a tangy sauce for grilled meats or veggies.
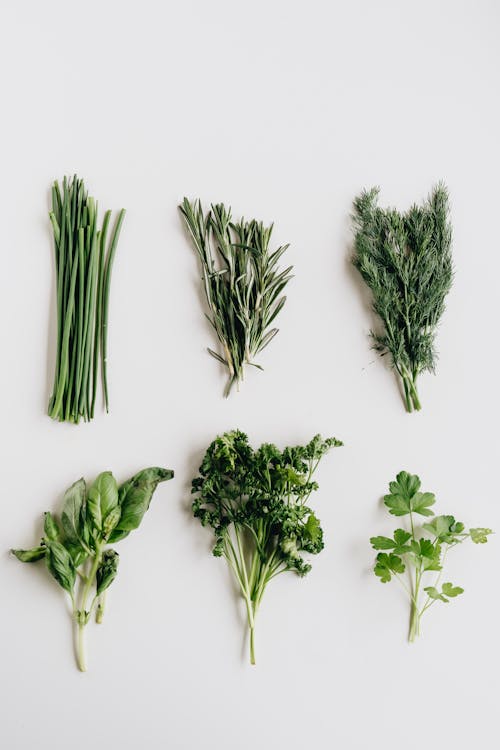
Anti-inflammatory spring herbs
My favorite spring herbs are chives, parsley, and dill – all three of which are great sources of vitamin C, K, and flavonoids that help reduce inflammation.
Chives
Chives contain prebiotic fibers that can help to improve gut health;
Parsley
Parsley contains chlorophyll, which has been shown to have detoxifying properties.
Dill
Dill has been shown to have antimicrobial properties, which can help to fight off harmful bacteria and reduce inflammation in the body.
All three of these spring anti-inflammatory herbs are super easy to just chop up and have on hand in the fridge to toss into salads at any meal, as well as throw into other dishes for a flavor boost.
So let’s round this out with the best spring fruits to reduce chronic inflammation:
Spring anti-inflammatory fruits
Strawberries
Strawberries are not only delicious, but they also are rich in antioxidants including vitamin C, which is important for immune function and skin health.
Try slicing them up and adding them to your breakfast yogurt or oatmeal, blending them into a smoothie, or tossing them in a salad with some spinach and almonds. You can also enjoy them as a healthy snack on their own or dipped in a little dark chocolate for an extra treat.
Cherries
Cherries are also rich in antioxidants that protect against cellular damage, and are a good source of fiber, vitamin C, and potassium. Cherries are great for snacking, blending them into a smoothie, or adding them to your morning yogurt or oatmeal. Additionally, tart cherries have been shown to be particularly effective in reducing inflammation associated with conditions like arthritis and gout, and also have studies backing them as being effective in helping you get better sleep.
Kiwi
Kiwi is rich in antioxidants, such as vitamin C and polyphenols, fiber, potassium, and folate. A great way to use these yummy little fruits is by slicing it up and adding it to your yogurt, blending it into a smoothie, or using it as a topping for your favorite dessert. You can also use kiwi to make a yummy spring fruit salsa to serve with grilled chicken or fish. Kiwi has also been shown to have digestive benefits and can help to improve gut health, as well as improve sleep.
Citrus
Citrus fruits that include lemons, limes, grapefruits, and oranges offer a range of health benefits, including anti-inflammatory properties. They are rich in vitamin C, a good source of fiber, folate, and potassium. A super easy way to get citrus every day is by squeezing some lemon or lime juice over your salad or fish, adding slices of grapefruit to your morning yogurt, or enjoying an orange as a healthy snack. You can also use citrus fruits to make a refreshing and nutritious smoothie or juice. Additionally, the flavonoids found in citrus fruits have been shown to have heart-protective benefits and can help to lower cholesterol levels.
Tropical Fruits
Mango and pineapple are -just like pretty much all the foods we’ve already talked about–rich in antioxidants, and are also a good source of fiber, potassium, and other important nutrients. Research that pineapple may have digestive benefits and can help to improve gut health.
Just keep in mind that some of these fruits are little higher on the glycemic index and it is really important to keep blood sugar from spiking, as that’s a prime cause of chronic inflammation.
So when you’re eating fruit, make sure you pair it with healthy fat and some protein.
So now that you have these amazing and yummy ideas for spring anti-inflammatory foods, head on over to my: