These healthy Salmon Burgers with Lemon Dill Sauce are super easy and perfect for spring or summer. Serve on a grain-free bun or just with a salad or fresh vegetable sides (like our Roasted Spring Vegetables) for a filling and yummy anti-inflammatory dinner!
These healthy Salmon Burgers with Lemon Dill Sauce are super easy and perfect for spring or summer. Serve on a grain-free bun or just with a salad or fresh vegetable sides (like our Roasted Spring Vegetables) for a filling and yummy anti-inflammatory dinner!
One thing that always makes me super happy in spring is to have already meal prepped roasted spring vegetables ready to add to any meal.
In this guide, we’ll show you how to effortlessly roast your favorite spring vegetables with maximum flavor and minimal effort. From choosing the right vegetables to testing for doneness, we’ve got you covered. So, grab your sheet pan, and let’s get roasting!
Before you start roasting your spring vegetables, it’s important to choose the right ones. Not all vegetables are created equal when it comes to roasting. Some may become too mushy, while others may not cook through evenly.
Also, we’re going for in-season vegetables because of their natural nutrient content and also price. So, how do you choose the right spring vegetables for roasting?
In-season spring vegetables
Since choosing veg that are in season is the name of the game, just know that we’re in North America (just outside Houston), so our spring may be different than yours.
If you’re in the same hemisphere, here are some great spring vegetables to roast (that I’m using in these photos):
First and foremost, consider the size of the vegetable. Vegetables that are too big, such as large broccoli or cauliflower florets, may take longer to cook and may not roast evenly.
It’s super easy to just cut up larger vegetables or buy it already cut and bagged. Or you can stick to smaller and more uniform vegetables like baby carrots and thin green beans.
Next, consider the texture of the vegetable. Vegetables with a firm texture, like Brussels sprouts or cauliflower, will hold up well during roasting and won’t become too mushy. On the other hand, softer vegetables like zucchini or yellow squash may become too tender and fall apart during roasting.
Finally, think about the flavor profile of the vegetable. Roasting can bring out the natural sweetness of vegetables, so choose vegetables that will complement each other. For example, try roasting a mix of sweet bell peppers and red onions for a delicious and colorful side dish.
Prepping your spring vegetables
Before you can start roasting your spring vegetables, it’s important to properly prep them.
Start by washing and drying the vegetables thoroughly. Then, cut them into evenly sized pieces to ensure they cook uniformly.
Seasoning for Flavor
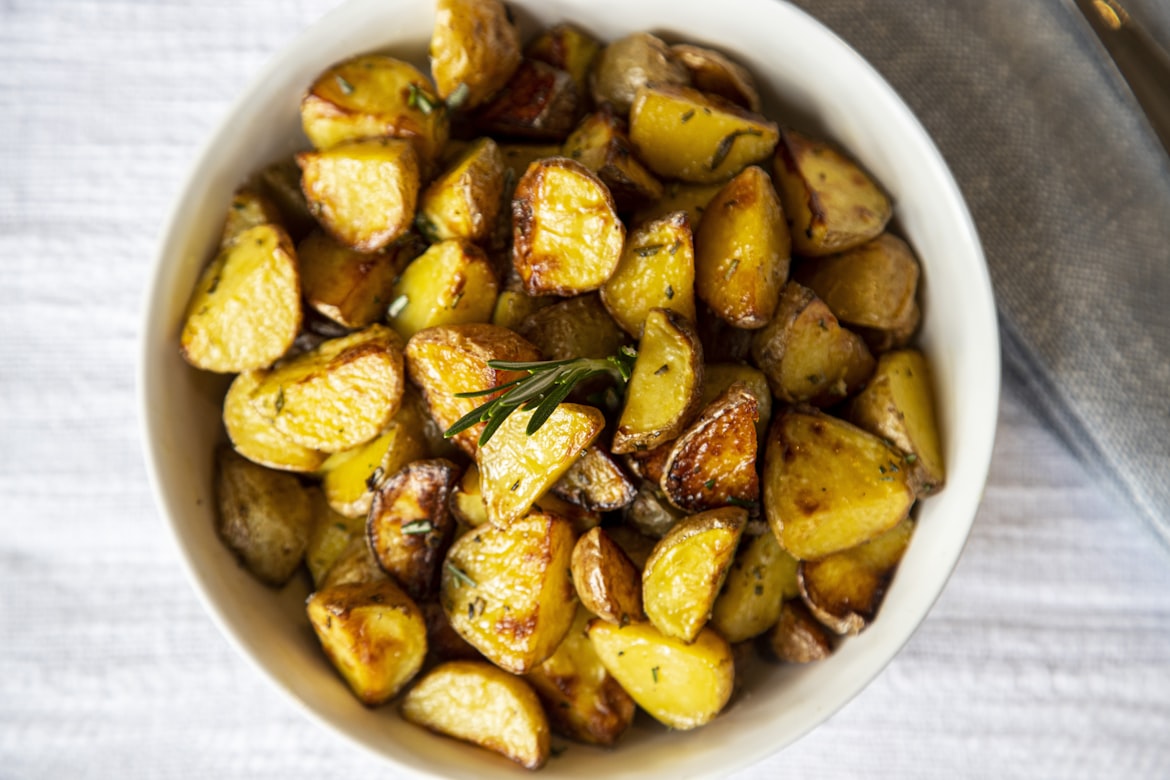
With your vegetables prepped and ready to go, it’s time to move on to seasoning them for maximum flavor. Salt and pepper are essential, but don’t be afraid to experiment with other spices that complement your vegetables. For example, rosemary and thyme are perfect for hearty spring root vegetables like potatoes and carrots.
For a more exotic flavor, consider using cumin and coriander on cauliflower or turmeric on Brussels sprouts. To add a little kick, try a pinch of red pepper flakes on your asparagus or broccoli.
When seasoning your vegetables, be sure to coat them evenly with (an appropriate) oil or butter to help the spices stick. This will also help them crisp up in the oven.
Roasting techniques
To ensure that your roasted vegetables come out perfectly, it’s important to use the right roasting techniques. Here are a few tricks to keep in mind:
First, preheat your oven to 325 degrees F (163 C). This ensures that your veggies cook evenly and don’t dry out. Next, chop your vegetables into evenly-sized pieces so that they roast uniformly. Spread them out in a single layer on a baking sheet before adding oil or butter and seasonings.
Make sure to toss your vegetables halfway through the cooking process. This helps them cook evenly on both sides and ensures that they’re crispy on the outside and tender on the inside. Finally, let your vegetables rest for a few minutes after cooking to allow the flavors to meld together.
Testing for Doneness
Roasting vegetables can be a breeze, as long as you know when they’re done cooking. Overcooking can result in a mushy or burned, unappetizing mess while undercooking can leave them tough and lacking in flavor. Here are a few tips for testing for doneness when roasting your favorite spring veggies.
First, use a fork or a skewer to test the texture of your vegetables. You should be able to pierce them easily without too much resistance. If they’re still hard or crunchy, they need more time in the oven. On the other hand, if they’re too soft or mushy, they may be overcooked.
Second, check the color of your vegetables. They should be evenly browned and caramelized, with no raw or uncooked areas. If they’re still pale or green, they need more time in the oven. Conversely, if they’re starting to char or blacken, they may be overcooked.
Third, use your senses to determine if your vegetables are ready. They should smell fragrant and delicious, with a slightly sweet and nutty aroma. They should also sound crispy and crackly when you move them around in the pan.
Once you’re confident that your vegetables are done, take them out of the oven and let them rest for a few minutes before serving. This allows the flavors to mingle and intensify, resulting in a more delicious and satisfying dish.
If you’re cooking your spring veg for meal prep, let them cool completely before putting them into storage containers and into the fridge. I recommend separating them out as some vegetables have more liquid in them than others.
Roasting spring vegetables doesn’t have to be a daunting task. With the right techniques and a little bit of patience, you can achieve crispy and delicious veggies every time to take advantage of the seasonal anti-inflammatory produce!
How to effortlessly make your favorite roasted spring vegetables with maximum flavor and minimal effort. Perfect for side dishes during the week or meal prep!
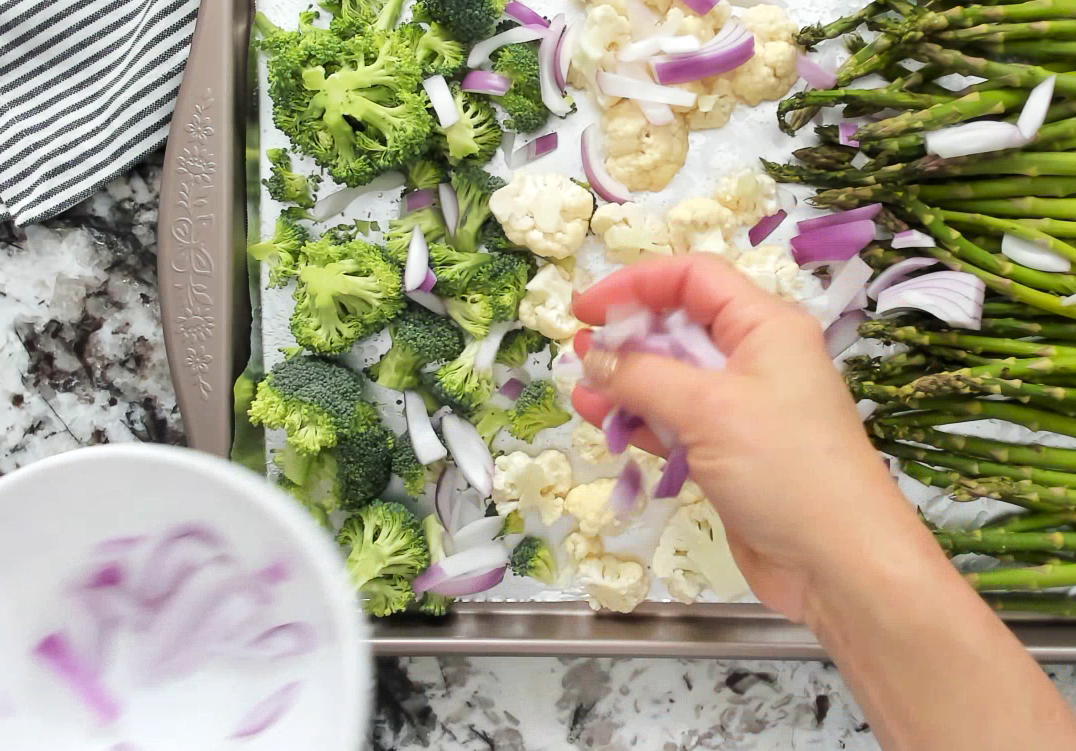
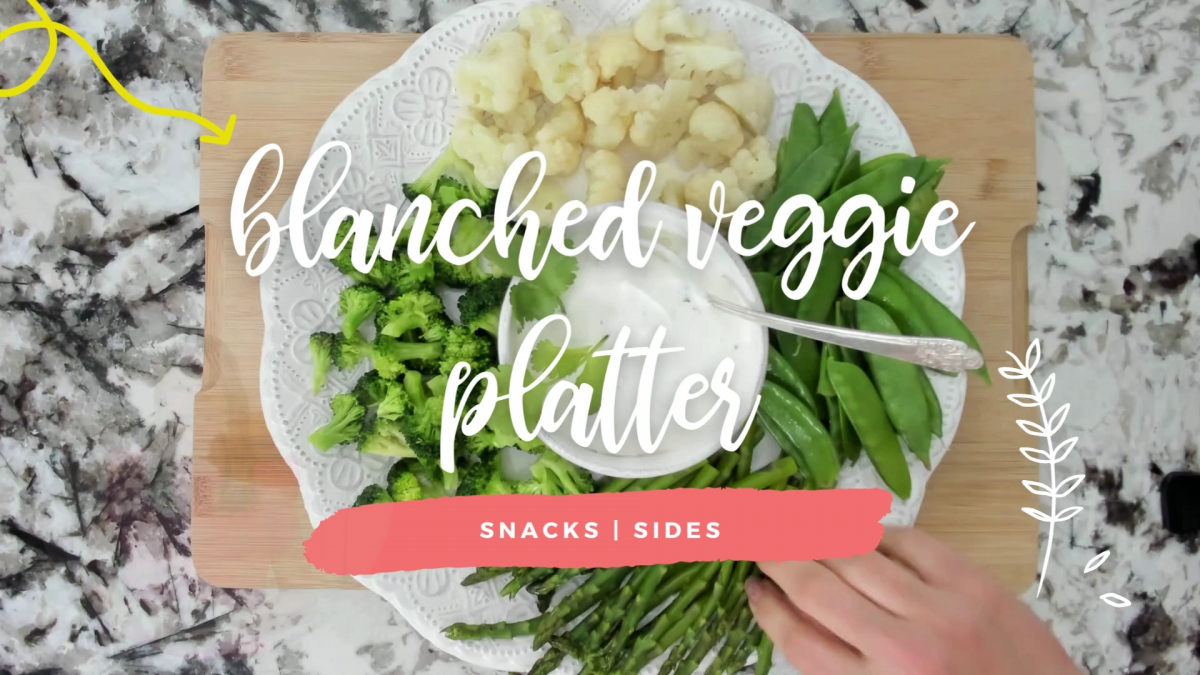
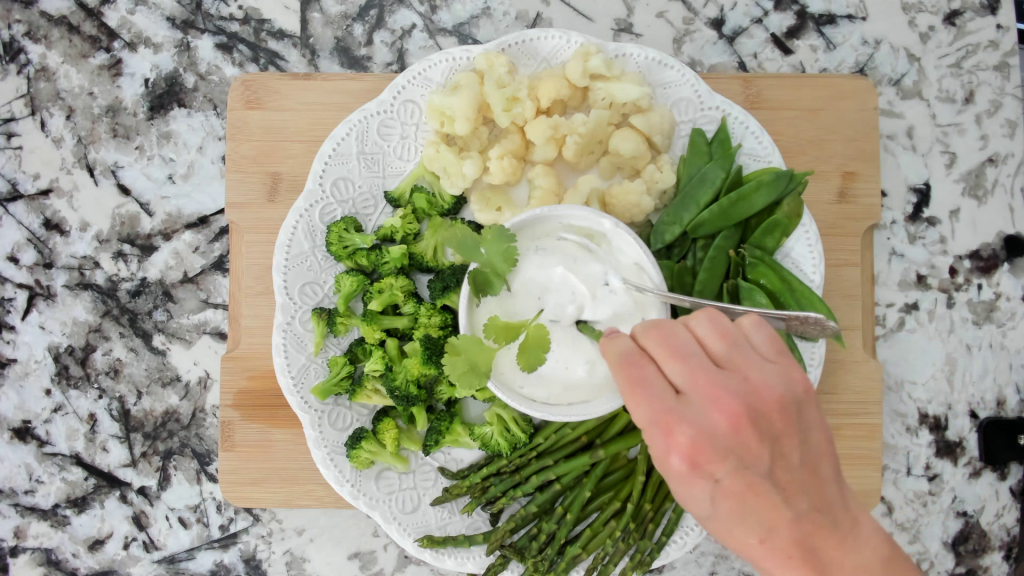
This Spring Blanched Vegetable Platter takes a veggie board to the next level! Not only does blanching bring out even more flavor in veggies, it also brightens their colors, making an even more gorgeous spring vegetable board.
Steamer basket or colander insert that will sit inside the pot, but low enough for water to reach the vegetables inside
If you don’t have a steamer basket or colander insert, you can still blanch the veggies in the pot of water. It’s just much easier with the insert.
Also, many people would rather simply steam the veggies with this basket to lose as few nutrients as possible in the boiling water. Either method works.
Difference between Steaming and Blanching
So let’s talk about the difference between steaming and blanching really quick…
Blanching is actually fully submerging the veggies in the water, then putting in an ice-bath to stop the cooking process;
While Steaming is letting the hot water boil below the veggies, enough to create steam, and that steam is actually what’s cooking the vegetables.
Many people like steaming over boiling because you can cook a lot of the nutrients out of vegetables if you boil them, and they’re left in the water.
Blanching is sort of the compromise between the two because you’re only cooking the vegetables for 3-5 minutes, not longer times like is typical with longer cooking in boiling water.
Instructions
Make sure to watch the video at the top to see this in action! 😉
Bring a large pot of water to a boil. Add salt.
Fill an extra large bowl halfway with ice, and fill to 3/4 full with cold water. Keep near the pot of water.
Put your first vegetables into the steamer basket or colander insert.
Lower the steamer basket into the pot of boiling water.
Cook about 3-5 minutes, then lift the steamer basket out of the water.
Dump veggies into the bowl of ice water to immediately stop the cooking process.
While those veggies are cooling, move on to the next set of vegetables.
While that set is cooking, spoon the first veggies out of the cold water with a slotted spoon and place in a bowl for the water to drain.
Keep this going until all vegetables are blanched, cooled, and into a bowl to rest.
The vegetables can be stored a few days in the fridge, or plated on a platter.
This Spring Blanched Vegetable Platter takes a veggie board to the next level! Not only does blanching bring out even more flavor in veggies, it also brightens their colors, making an even more gorgeous spring vegetable board.
Author:Laura Brigance, MS, CHC
Prep Time:5 minutes
Cook Time:15
Total Time:20 minutes
Yield:61x
Ingredients
UnitsScale
4 quarts of water
2 TBSP kosher salt
1 bunch asparagus, ends trimmed
1 head of broccoli, chopped into florets
1 head of cauliflower, chopped into florets
8ozsnow peas
Instructions
Bring a large pot of water to a boil. Add salt.
Fill an extra large bowl halfway with ice, and fill to 3/4 full with cold water. Keep near the pot of water.
Put your first vegetables into the steamer basket or colander insert.Lower the steamer basket into the pot of boiling water.
Cook about 3-5 minutes, then lift the steamer basket out of the water.
Dump veggies into the bowl of ice water to immediately stop the cooking process.
While those veggies are cooling, move on to the next set of vegetables.
While that set is cooking, spoon the first veggies out of the cold water with a slotted spoon and place in a bowl for the water to drain.
Keep this going until all vegetables are blanched, cooled, and into a bowl to rest.
The vegetables can be stored a few days in the fridge, or plated on a platter.
Pair with our Anti-Inflammatory Homemade Ranch Dip for the ultimate healthy, delicious, and gorgeous crowd-pleaser!
Notes
If you’re not using the vegetables immediately, you can store them in the fridge for a few days in a sealed container.
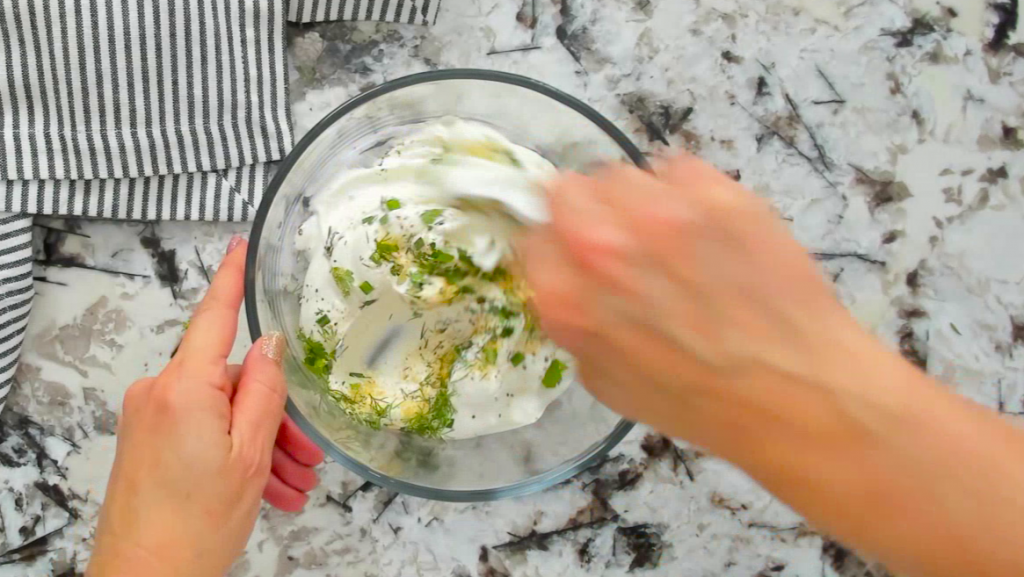
This anti-inflammatory Homemade Ranch Dip is great for weeknight veggies, meal prep to-go boxes, or even weekend get-togethers! It’s free of artificial anything, making it a healthy and easy crowd-pleaser.
Place all dry ingredients in a small bowl and stir to combine well.
Place sour cream in a medium bowl, or keep it in the container it came in to store easily.
Pour dry ingredients into the sour cream and stir really well until all are combined.
Chill for approximately 1 hour to let flavors meld.
Serve and enjoy!
Notes
*Dairy-free: I’m not sure how to make this dairy-free other than using a dairy-free sour cream substitute. You could possibly try this with coconut yogurt or almond yogurt, but the consistency won’t be as thick.
*Salt: Everyone has different taste preferences for saltiness, especially with dips. I found that this recipe isn’t super salty, and my kids asked me to add more. (Although I personally like the saltiness as the recipe is listed.)
-If you’re pairing this with the Spring Blanched Vegetable Platter, remember that the recipe for those includes salt in the water, so if you’re sensitive to sodium, keep this in mind when adding salt to this recipe.
This anti-inflammatory Homemade Ranch Dip is great for weeknight veggies, meal prep to-go boxes, or even weekend get-togethers! It’s free of artificial anything, making it a healthy and easy crowd-pleaser.
Author:Laura Brigance, MS, CHC
Prep Time:5 minutes
Total Time:5 minutes
Yield:61x
Ingredients
UnitsScale
1/2 tsp parsley, dried
1/2 tsp chives, dried
1/2 tsp dill, dried
1/4 tsp onion powder
1/2 tsp garlic powder
1/4 tsp salt
1/4 tsp pepper
16ozorganic sour cream
Instructions
Place all dry ingredients in a small bowl and stir to combine well.
Place sour cream in a medium bowl, or keep in container it came in to store easily.
Pour dry ingredients into sour cream and stir really well until all combined.
Chill for approximately 1 hour to let flavors meld.
Serve and enjoy!
Notes
*Dairy-free: I’m not sure how to make this dairy-free other than using a dairy-free sour cream substitute. You could possibly try this with coconut yogurt or almond yogurt, but the consistency won’t be as thick.
*Salt: Everyone has different taste preferences for saltiness, especially with dips. I found that this recipe isn’t super salty, and my kids asked me to add more. (Although I personally like the saltiness as the recipe is listed.)
-If you’re pairing this Homemade Ranch Dip with the Spring Blanched Vegetable Platter, remember that the recipe for those includes salt in the water, so if you’re sensitive to sodium, keep this in mind when adding salt to this recipe.
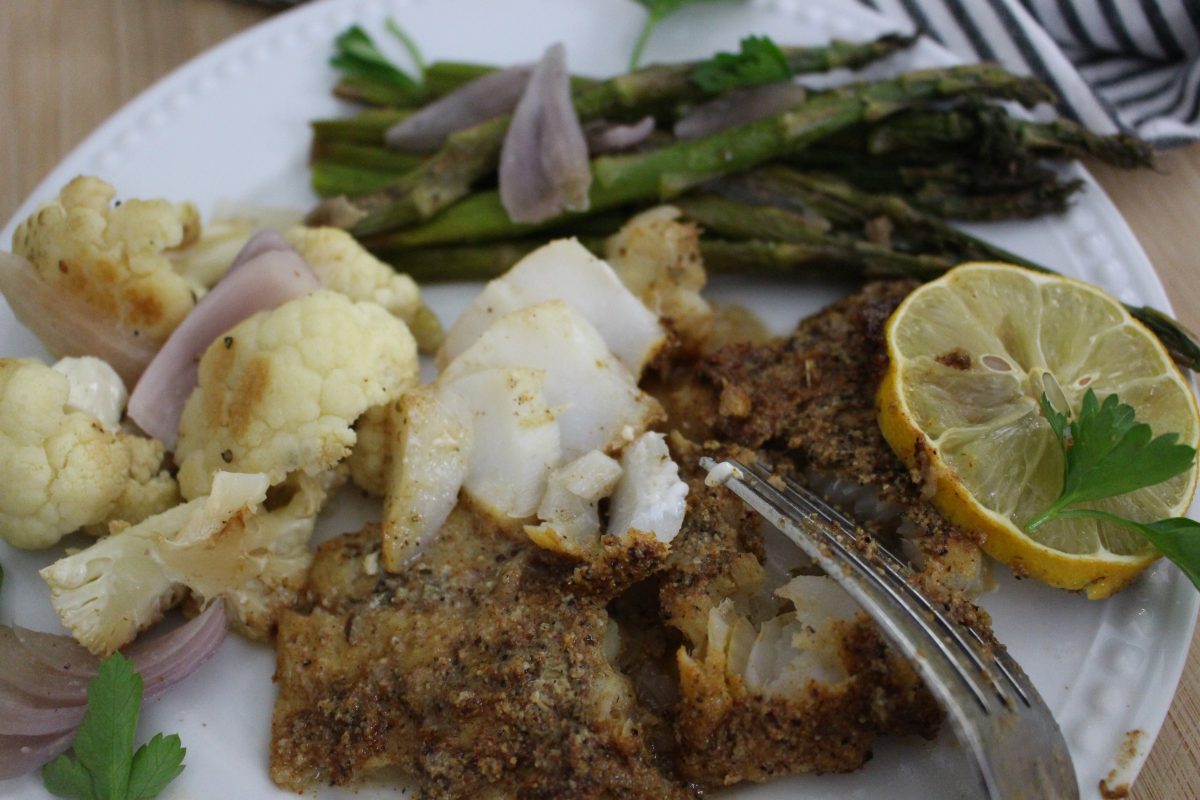
This delicious Flaky Lemon Pepper White Fish is packed with flavor, and is a super easy anti-inflammatory dinner to make! It’s amazing paired with seasonal spring veggies but can truly be enjoyed year-round.
Preheat oven to 425F. Cover a sheet pan with foil.
Place fish on pan. Drizzle with oil, then sprinkle all seasonings on top evenly.
Place lemons on top of fish, then bake for 12-15 minutes. The fish should be flaky and done, but not dry.
Serve with parsley sprinkled over fish.
Notes
*To meal prep this dish, simply close the foil into a pouch, sealed on all sides so no liquid leaks out, and store in the fridge until the night needed.
This delicious Flaky Lemon Pepper Fish is packed with flavor, and is a super easy anti-inflammatory dinner to make! It’s amazing paired with seasonal spring veggies but can truly be enjoyed year-round.
Preheat oven to 425F. Cover a sheet pan with foil.
Place fish on pan. Drizzle with oil, then sprinkle all seasonings on top evenly.
Place lemons on top of fish, then bake for 12-15 minutes. The fish should be flaky and done, but not dry.
Serve with parsley sprinkled over fish
Notes
*To meal prep this dish, simply close the foil into a pouch, sealed on all sides so no liquid leaks out, and store in the fridge until the night needed.
This Greek Lemon Chicken and Potatoes isn’t just a super easy one-pan dinner. It’s a delicious anti-inflammatory and gluten-free healthy dinner that also happens to be super easy to prep ahead using whole food ingredients that are fresh for spring!
This Greek Lemon Chicken and Potatoes isn’t just a super easy one-pan dinner. It’s a delicious anti-inflammatory and gluten-free healthy dinner that also happens to be super easy to prep ahead using whole food ingredients that are fresh for spring!
Author:Laura Brigance, MS, CHC
Prep Time:15 minutes
Cook Time:25-30 minutes
Total Time:0 hours
Yield:41x
Ingredients
UnitsScale
8 boneless chicken thighs
1 tsp salt, divided
1 tsp pepper, divided
1 TBSP avocado oil
2lbsfingerling potatoes, halved
1 bunch of asparagus, with ends cut off
1/2 red onion, thinly sliced
2 lemons, zested and juiced
1 garlic clove, minced
1 can of black olives, drained and sliced
1 TBSP oregano, fresh and chopped
1/2 TBSP thyme, fresh and chopped
Instructions
Preheat oven to 400 F. Cover a large sheet pan with foil, and lightly coat with avocado oil.
Cut the potatoes, onions, asparagus, garlic, and herbs.
In a large bowl, place the potatoes, onions, herbs, lemon zest and juice, and 1/2 TBSP avocado oil. Stir really well to combine.
Place the chicken on one end of the pan, leaving about 2/3 for the veggies.
Place the asparagus on the pan and sprinkle the olives around. Drizzle with oil.
Fill in the rest of the pan with the potato mixture.
Salt and pepper the entire pan.
Bake for 25-30 minutes, until the chicken is done. Remove from oven.
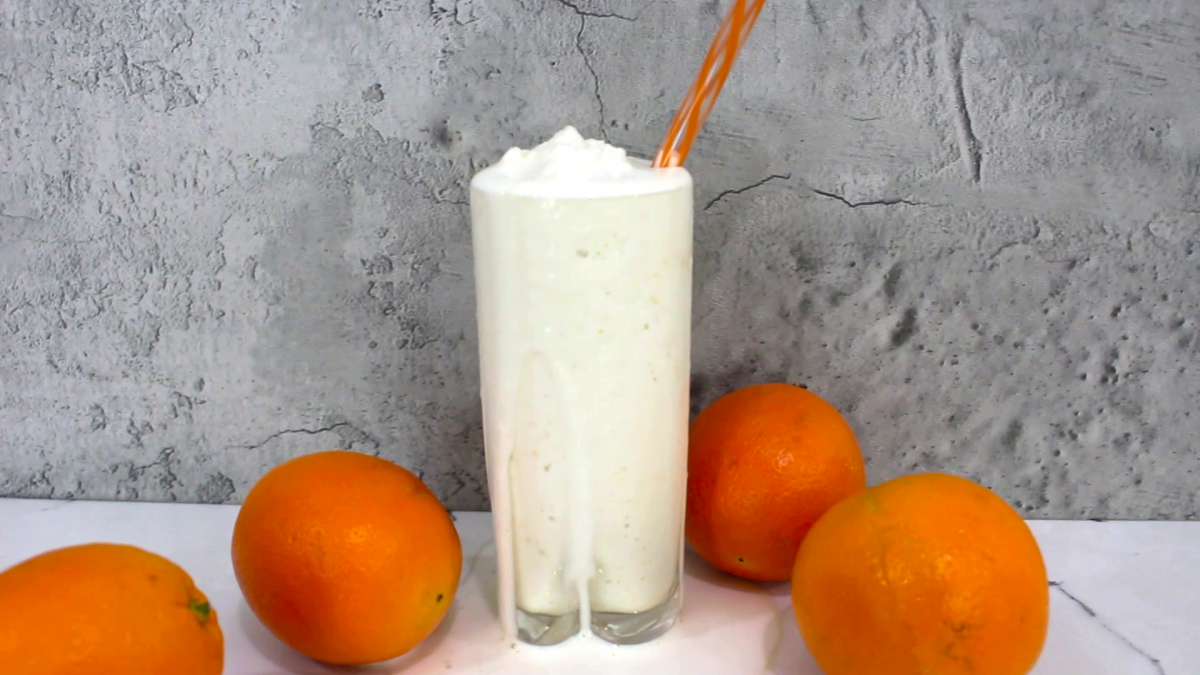
The anti-inflammatory breakfast smoothie offers the fun spring flavor of orange creamsicles but without the sugar. It’s creamy but with the familiar sweet and tangy hints of orange and vanilla, while keeping you full with a serving of protein.
1/4 cup heavy cream (or coconut cream for dairy free)
3/4 cup unsweet almond milk
1/4 vanilla protein powder
zest from 1/2 large orange
1/4 tsp real vanilla extract
5-7 drops liquid stevia (to taste)
4 ice cubes
Notes
*For a creamier texture, you can add 1 tsp chia seeds or 1 TBSP of almond or cashew butter. Cashew butter will give a milder flavor than almond butter.
*Make in bulk by placing all ingredients except ice cubes into a container and save in the fridge for 2-3 days until needed.
The anti-inflammatory breakfast smoothie offers the fun spring flavor of orange creamsicles but without the sugar. It’s creamy but with the familiar sweet and tangy hints of orange and vanilla, while keeping you full with a serving of protein.
Author:Laura Brigance, MS, CHC
Prep Time:5 minutes
Total Time:5 minutes
Yield:1 smoothie 1x
Ingredients
UnitsScale
1/4 cup heavy cream (or coconut cream for dairy free)
3/4cupunsweet almond milk
1/4 vanilla protein powder
zest from 1/2 large orange
1/4 tsp real vanilla extract
5–7 drops liquid stevia (to taste)
4 ice cubes
Instructions
Add all ingredients into a high-powered blender.
Blend on high until smooth.
Adjust sweetness, if desired.
Pour into glass and enjoy immediately!
Notes
*For a creamier texture, you can add 1 tsp chia seeds or 1 TBSP of almond or cashew butter. Cashew butter will give a milder flavor than almond butter.
*Make in bulk by placing all ingredients except ice cubes into a container and save in the fridge for 2-3 days until needed.
Making bulk breakfast and snack recipes like these anti-inflammatory Strawberry Breakfast Muffins is one of my favorite ways to save time and brainpower cooking for the week during meal prep.
Not only are these anti-inflammatory breakfast muffins gluten-free and sugar free, they’re also packed with flavor and fresh seasonal berries!
1/4 cup allulose (or other granulated natural zero-calorie sweetener for baking)
1/8 tsp salt
1 TBSP coconut oil (melted)
3 eggs (medium)
1 TBSP ghee (melted)
1 TBSP lemon juice
1 cup strawberries (sliced)
1 tsp vanilla extract
Instructions
Preheat oven to 325 F (163 C) and grease muffin tin or line with baking cups.
Combine all the dry ingredients into a large bowl: almond flour, baking soda, cardamom, allulose, and salt. Stir until well combined.
Combine all wet ingredients in a separate medium bowl: coconut oil, eggs, ghee, lemon juice, and vanilla. Whisk together until well combined.
Pour wet ingredients into large bowl with dry ingredients and mix well.
Fold in strawberries.
Divide batter into all 12 muffin cups.
Bake 20-25 minutes until golden on top. A toothpick inserted should come out clean.
Let cool and enjoy!
Notes
*You can chop up strawberries really small and fold in, or keep them halved to quartered and place a few on top like I did in the video.
*If I make a batch of muffins like these and realize I won’t be able to eat them all before they go bad, I’ll cut them into quarters and pop them into the freezer in a freezer bag– instant Frozen Muffin Bites! (Great with yogurt or as an ice cream topper!)
Making bulk breakfast and snack recipes like these Strawberry Breakfast Muffins is one of my favorite ways to save time and brainpower cooking for the week. Not only are these anti-inflammatory breakfast muffins free of sugar and gluten, they’re also packed with flavor and fresh seasonal berries!
Author:Laura Brigance, MS, CHC
Prep Time:10 minutes
Cook Time:20-25 min
Total Time:30 – 35 minutes
Yield:12 1x
Ingredients
UnitsScale
2 cups Amond flour
1/2 tsp baking soda
1 dash cardamom, ground
1/4cupallulose (or other granulated natural zero-calorie sweetener for baking)
1/8 tsp salt
1 TBSP coconut oil (melted)
3 eggs (medium)
1 TBSP ghee (melted)
1 TBSP lemon juice
1cupstrawberries (sliced)
1 tsp vanilla extract
Instructions
Preheat oven to 325 F (163 C) and grease muffin tin or line with baking cups.
Combine all the dry ingredients into a large bowl: almond flour, baking soda, cardamom, allulose, and salt. Stir until well combined.
Combine all wet ingredients in a separate medium bowl: coconut oil, eggs, ghee, lemon juice, and vanilla. Whisk together until well combined.
Pour wet ingredients into large bowl with dry ingredients and mix well.
Fold in strawberries.
Divide batter into all 12 muffin cups.
Bake 20-25 minutes until golden on top. A toothpick inserted should come out clean.
Let cool and enjoy!
Notes
*You can chop up strawberries really small and fold in, or keep them halved to quartered and place a few on top like I did in the video.
*If I make a batch of muffins like these and realize I won’t be able to eat them all before they go bad, I’ll cut them into quarters and pop them into the freezer in a freezer bag– instant Frozen Muffin Bites! (Great with yogurt or as an ice cream topper!)
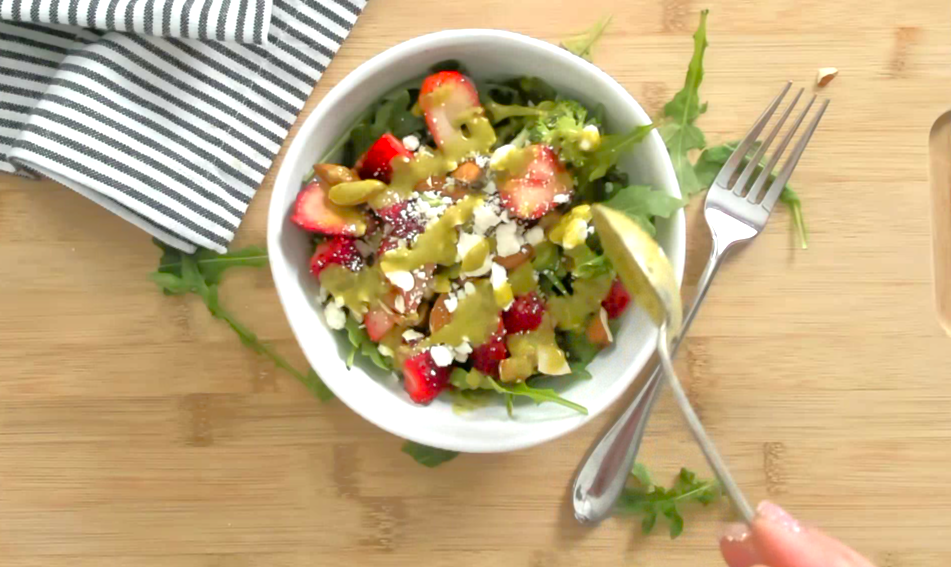
This Broccoli Strawberry Salad is the perfect spring anti inflammatory meal prep lunch or dinner side. It’s full of color, flavor, and fresh spring produce!
*We love to premake these salads for meal prep for the week! Simply chop the veggies and store in separate containers until you want to assemble them.
OR you can choose the mason jar method where you put the dressing in the bottom of the jar, then layer the veggies. When you’re ready to eat, just shake the jar to mix all the ingredients and enjoy!
This Broccoli Strawberry Salad is the perfect spring anti inflammatory meal prep lunch or dinner side. It’s full of color, flavor, and fresh spring produce!
Author:Laura Brigance, MS, CHC
Prep Time:5 minutes
Total Time:5 minutes
Yield:41x
Ingredients
UnitsScale
2 cups of broccoli florets
1cup of strawberries (cut in half or chopped)
1/4cupred onion (finely chopped)
1/4cupfeta cheese
1/4cup chopped almonds (or sliced)
3 TBSP Green Goddess Dressing
5ozmixed spring salad greens (arugula or mesclun mix)
Instructions
Chop all the veggies and almonds if not purchased that way; crumble the feta.
Mix the broccoli, onion, strawberries, almonds, and feta in a bowl.
Portion out the salad greens into bowls, top with the broccoli and strawberry mixture.
Drizzle with Green Goddess Dressing. Enjoy!
Notes
*We love to premake these salads for meal prep for the week! Simply chop the veggies and store in separate containers until you want to assemble them.
OR you can choose the mason jar method where you put the dressing in the bottom of the jar, then layer the veggies. When you’re ready to eat, just shake the jar to mix all the ingredients and enjoy!
This Green Goddess Chicken is full of flavor and will quickly become a weeknight favorite. Use your favorite cuts of chicken for a healthy, anti-inflammatory dinner that’s quick, juicy, and delicious!
Make the Green Goddess Dressing first, as it will be the marinade. The recipe is for way more than is needed for this chicken recipe, so either use the rest for salads all week, or cut the recipe into 1/3 to fit this recipe.
Place the chicken into a bowl or baggie and pour enough dressing to coat the chicken. (If only making enough for this recipe, make sure to reserve around 2-3 TBSP for drizzling on the finished chicken.)
Toss the chicken to coat, then place in the fridge for at least 2 hours to marinate.
Set your cooktop to medium-high heat and let a large non-stick skillet get warm. Add the oil, then the chicken to the pan. (Don’t save any of the marinade from the bowl or baggie!)
Cook the chicken for 5-6 minutes on each side, then remove from the skillet.
Drizzle the reserved dressing over the top and serve!
Notes
*To prep this for the week, simply leave the chicken to marinate in a baggie or container in the fridge until the night it is needed.
This Green Goddess Chicken is full of flavor and will quickly become a weeknight favorite. Use your favorite cuts of chicken for a healthy, anti-inflammatory dinner that’s quick, juicy, and delicious!
Author:Laura Brigance, MS, CHC
Prep Time:2 hours, 5 minutes
Cook Time:15
Total Time:2 hours, 20 minutes
Yield:41x
Ingredients
Scale
8 boneless chicken thighs (or equivalent of favorite chicken cuts)
Make the Green Goddess Dressing first, as it will be the marinade. The recipe is for way more than is needed for this chicken recipe, so either use the rest for salads all week, or cut the recipe into 1/3 to fit this recipe.
Place the chicken into a bowl or baggie and pour enough dressing to coat the chicken. (If only making enough for this recipe, make sure to reserve around 2-3 TBSP for drizzling on the finished chicken.)
Toss the chicken to coat, then place in the fridge for at least 2 hours to marinate.
Set your cooktop to medium-high heat and let a large non-stick skillet get warm. Add the oil, then the chicken to the pan. (Don’t save any of the marinade from the bowl or baggie!)
Cook the chicken for 5-6 minutes on each side, then remove from the skillet.
Drizzle the reserved dressing over the top and serve!
Notes
*To prep this for the week, simply leave the chicken to marinate in a baggie or container in the fridge until the night it is needed.
*I’ve always loved chicken thighs better than breasts for their extra flavor. However, you can still use the equivalent in weight in chicken breasts if you prefer those over thighs.
When it comes to fresh and tasty dressings–this anti-inflammatory Green Goddess Dressing can’t be beat! Not only is it super yummy on salads, but it can also easily be used as a marinade or topping for fish or chicken (like our Green Goddess Chicken recipe!)
The ingredients are whole and fresh, kicking this dressing up a level!
Author:Laura Brigance, MS, CHC
Ingredients
UnitsScale
1cup packed fresh parsley
3 TBSP chopped green onion
3 cloves of garlic
6 TBSP extra virgin olive oil
4 1/2 TBSP water
3 tsp sesame oil
2 TBSP coconut aminos (or liquid aminos)
4 1/2 TBSP apple cider vinegar
4 1/2 TBS nutritional yeast
Instructions
Place all ingredients into a high-powered blender.
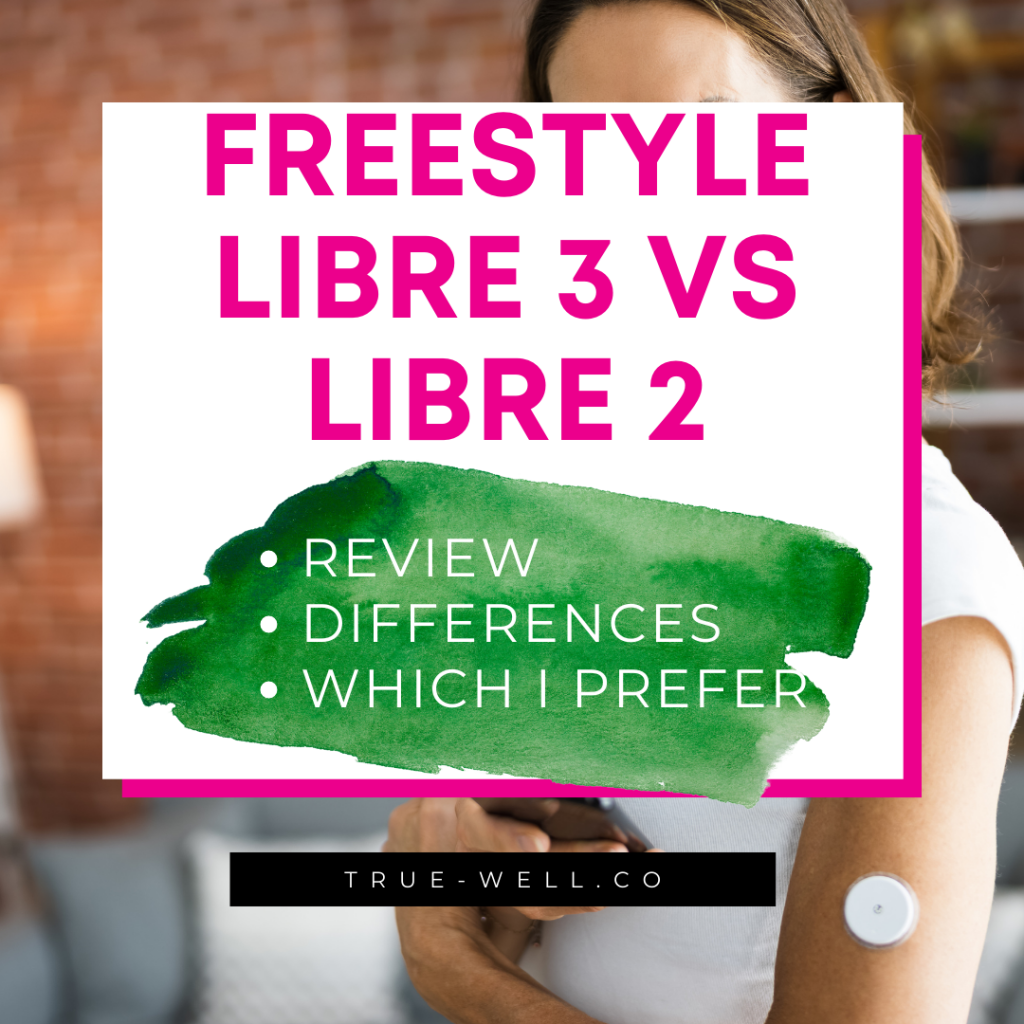
Today we’re talking differences between the Freestyle Libre 3 and Libre 2 (by Abbott), as well as the features, the cost, and which one I prefer after trying both.
So, there are 2 big things happening in the world of metabolic health:
Number two is the growing interest in metabolic health even without insulin resistance.
Both require monitoring of blood glucose levels. But only one regularly uses a continuous glucose monitor system.
Can you guess which one? Sadly, it’s not the one with a medical need.
Since TRUEWELL is all about an anti-inflammatory diet and lifestyle, I like to focus on specific conditions that would benefit from this.
And pretty much all insulin resistance conditions fall under that category.
When insulin resistance is present, it’s extremely helpful to know what your blood glucose or blood sugar levels are at all times, and especially after meals. Stress, sleep, and exercise can absolutely affect blood sugar levels as well.
All these factors make wearing a continuous glucose monitor really handy and convenient to keep an eye on how your body responds to these environmental and lifestyle factors, but also to your food.
So, when I got diagnosed with prediabetes I asked my doctor if I could get a prescription for a continuous glucose monitor. For more information on continuous glucose monitors, how they work, how they can benefit you, and how you can get one, catch this post: BENEFITS OF CONTINUOUS GLUCOSE MONITORS AND HOW TO GET ONE.
So starting with the Freestyle Libre 2
I was prescribed the Freestyle Libre 2 continuous glucose monitor, which was the newest available at the time.
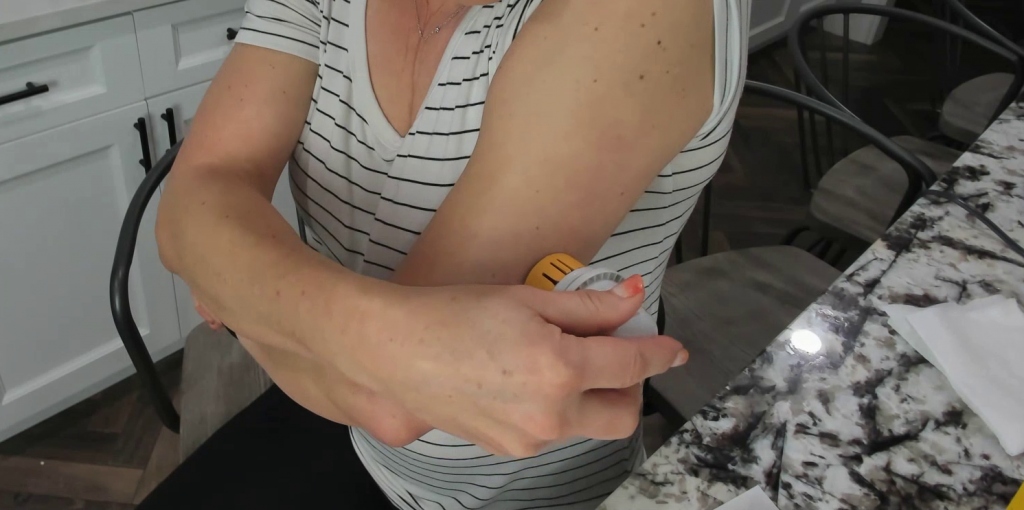
So, these things are pretty small, stick to the back of your arm, and track your blood sugar levels in your interstitial fluid.
What I was interested in was that the Libre 3 had been advertised a lot but I had to wait 6 or 8 months for it to actually be released and available at the pharmacy.
So now that I’ve actually used both, I want to share what the main differences are and which I prefer using.
Pros of the Libre 2
So first off, the Libre 2 really is small, it’s about the size of a quarter, maybe, and I believe you can wirelessly attach it to a monitor, but I feel like connecting it to the app you can get on your phone is way more convenient because that’s just one less thing you have to keep up with and most people have their phone on them at all times anyway.
To use the Libre 2, you open the app and tap the Check Glucose or Scan Sensor button and then hold your phone close to the sensor. My phone does a little vibration thing when it’s scanned.
It’s super convenient to be able to see your blood sugar levels at any time, and then keep an eye on them in almost real-time, instead of having to do a finger stick every time.
So this thing makes it really convenient to monitor what food is doing to your body. But if you keep track of even your sleep, stress levels, and exercise as well, you’ll be able to easily start seeing trends in how your blood sugar levels are responding to all those things.
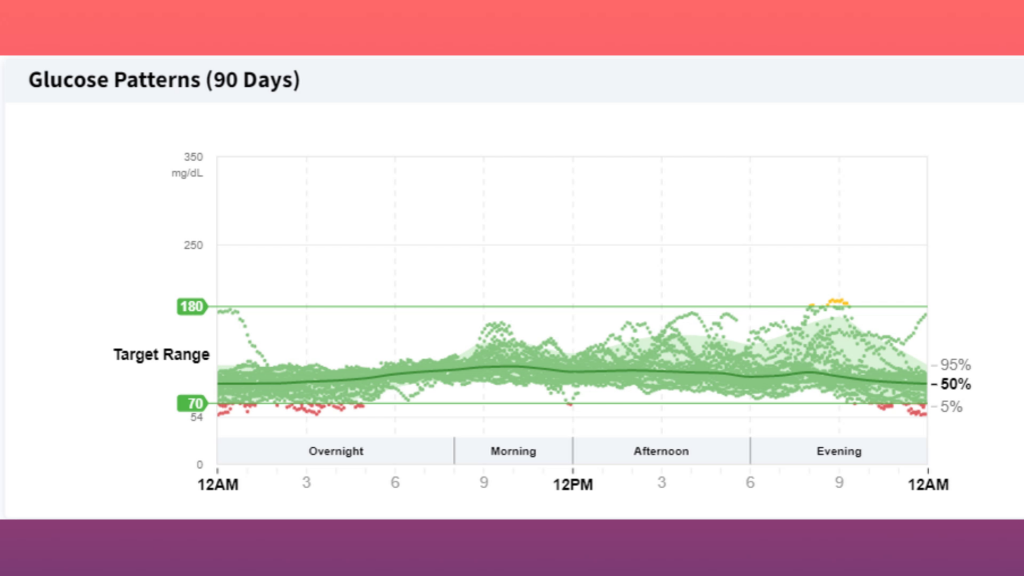
The app allows you to make notes every time you scan for a reading, as well as enter the number of carbs you’re eating or any other notes. I would regularly log exactly what I ate and the order I ate the food so I could see, for example, if eating my protein, fat, and fiber before my carbs mattered.
I have a lot of videos of these types of experiments if you’re interested. Once they’re ready I’ll have them listed in the TRUEWELL channel, so make sure to subscribe to get notifications for these types of videos.
You can also enter a manual blood sugar reading in the log book so you can compare what the sensor is reading and the actual manual readings.
All of this information is available in the portal if you sign up for an account (which is free) on the Freestyle Libre website.
Cons of the Libre 2
What I noticed about the Libre 2 is that there are a LOT of error scans, so sometimes you have to keep doing it until it scans correctly.
Another thing is that if you put it in a bad place on your arm, it may not even work. I had at least 3 that either were way off in their readings, or wouldn’t scan at all.
This becomes a big inconvenience when you then have to call Abbott and speak to someone for 30 minutes, giving them loads of info on the sensor, just for them to send you a replacement.
I also had a TON of false critical readings with alarms blaring several times during the night. I read up on a few forums and the reviews in the app store and others said the same.
They did an update at one point that I believe allowed you to choose which alarms you wanted, but you can never turn off the most critical alarm. That alarm woke me and my husband up a ton of times before I disabled the app completely every night before bed, so that was super annoying.
Especially when I needed to continue it reading through the night to check on the dawn phenomenon situation.
There were also a LOT of alarms for getting too far away from my phone for it to read. I think there may be a way to disable that as well, I think there were enough complaints about the alarms that they did an update in the app so you have more control over the alarms.
The Libre 2 also comes in the package with 2 separate pieces that you have to line up and put together before you apply the sensor. I’m guessing a lot of people have trouble with this because when I’ve had to call them to have mine replaced, they asked several questions to ensure I didn’t do something other than exactly what the instructions say for putting the applicator together and the actual application process.
And lastly, if you don’t scan the sensor for 8 hours, there’s a gap in data. That means you MUST scan it immediately before you go to bed, and if you sleep longer than 8 hours there will be a gap.
Same for during the day.
Summary of the Libre 2
All in all, to get started with a continuous glucose monitor, the Libre 2 gave me a ton of information and has made me super aware of how my blood sugar is affected by what I eat.
It’s surprised me many times that things like chips and salsa, or even seed crackers would make my blood sugar spike. And I was eating those things regularly, so it’s no wonder I’ve had a high A1C.
Review of the Freestyle Libre 3
I was super excited for the Libre 3 to come out because it’s got better features than the 2, it’s even smaller, and back last year in 2022 they advertised that it would also monitor ketone levels.
Now that I’ve gotten one and they’ve released it, the part about the ketones is completely missing. The information I read sort of indicated that the next version may have it so my thought is they couldn’t get it accurate or whatever to just get this thing released so they took it out of the description and the app.
The Libre 3 has a totally different app than the Libre 2, but if you have that account online through the Freestyle Libre site, it will connect the two and put all your data in there.
What I love about the Libre 3 is that it’s even smaller than the 2, here you can see the size difference.
This might not seem like a big difference, but I can’t tell you how many times just a millimeter or two of height has caused the Libre 2 to get stuck on bra straps or even the car seat when I’m moving around.
I also love that there’s only one piece in the package. You don’t have to make sure it’s all lined up and then put it together before applying it. They took that component out completely so that applying the sensor is more seamless.
The biggest thing I like about the Libre 3 is the fact that you don’t have to keep scanning it. You do your initial scan when you apply the sensor, then you don’t have to scan it again as long as you stay within about 30 ft of your phone.
This means there are no weird gaps in data like there were with the Libre 2.
This was a big deal for me because I’m constantly trying to figure out what’s affecting my blood sugar at night. I’ve had differences based on types of alcohol and how much I’ve had, plus I had one type of CBD that made it drop really low at night as well.
All of this is important to get to know your body better and be able to make more informed and better choices for your health.
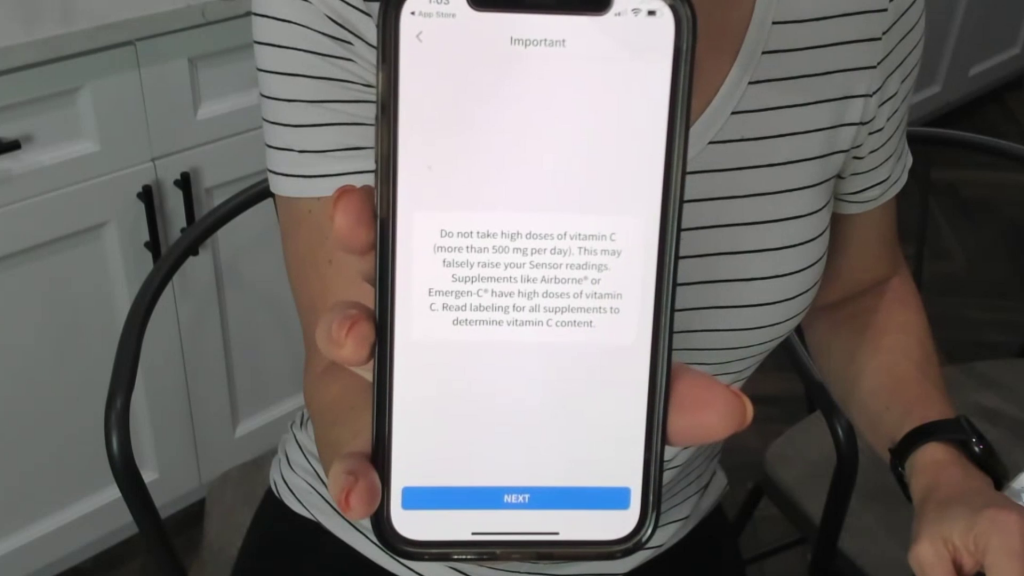
As far as I know, the same disclosures hold true about high doses of Vitamin c and putting a lot of pressure on the sensor.
I also feel like the readings have been more accurate with the Libre 3 than the Libre 2. That’s a big deal because you don’t want to be worried about readings that aren’t really true. Especially when you have to correct with either insulin or glucose.
I don’t really have any cons to list here on the Libre 3.
The one thing that I’ve seen people complain about is they took out the ability to log manual blood sugar checks from the logbook. BUT—I personally don’t really feel like it’s a big deal because at any given time you can add a note like you could in the Libre 2 app and can just enter the manual blood sugar reading there.
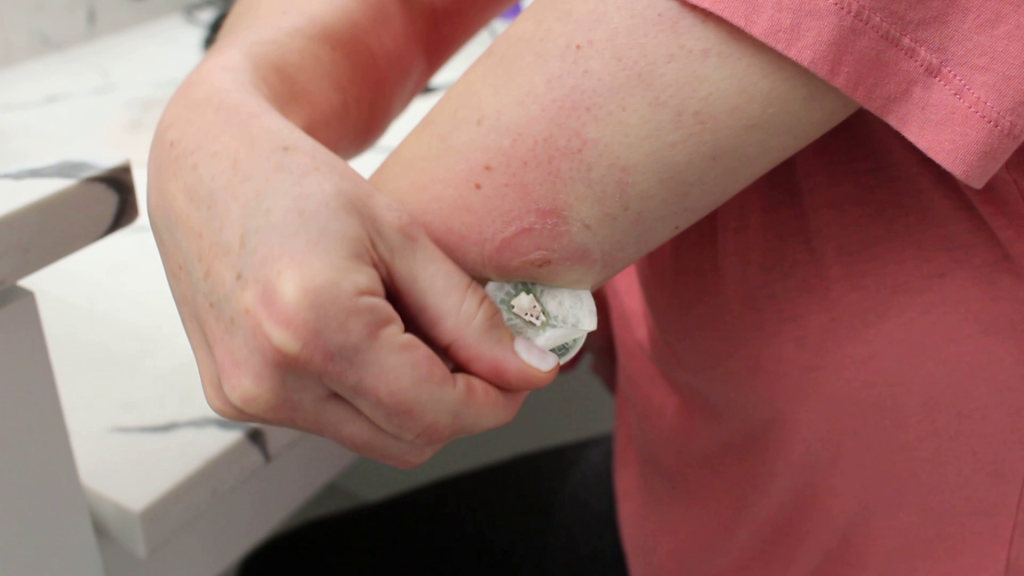
Both have super sticky adhesive, so when you take it off, it feels like peeling a band-aid, so there’s no comparison really on that one.
Price of the Freestyle Libre 3 vs Libre 2
The price is nearly the same for the Libre 3 as it was for the Libre 2.
My insurance doesn’t cover mine because my diagnosis was prediabetes, so I pay out of pocket. For one month it comes out to around $78. If you’d like to know more about how to get one, check out my article that talks all about continuous glucose monitors.
So… all this to say… until a newer better version comes out, I think I’m convinced that the Freestyle Libre 3 is the best option, and that’s absolutely the one I’ll continue to use.
Got more questions? Leave them in the comments below or DM me at: m.me/truewell.co
One of the biggest health crazes lately is to monitor blood glucose levels with a continuous glucose monitor– even when you don’t have insulin resistance. But with the statistics now standing that 1 in 3 adults has prediabetes, there’s definitely a need for more ways to understand our blood sugar levels in the battle to reverse insulin resistance.
These little devices are a vast advancement in awareness around and management of daily blood glucose. This is huge if you do have prediabetes, type 1 or 2 diabetes, PCOS, or other insulin resistance conditions.
So what is this little device, and how can it help? Well, in more ways than you’d think!
What is a continuous glucose monitor?
So first of all, a continuous glucose monitor is a little disc that attaches to your skin with super strong adhesive, and has a really strong filament that goes into your skin. It monitors your blood glucose levels, or blood sugar levels, and either has a device that connects wirelessly, or many can actually connect to an app on your phone.
Over the last few years a lot of advancement has been made in not just the capability of cgms, but also the ease of use.
So how does a continuous glucose monitor work?
Like I said, the continuous glucose monitor is a little disc with adhesive to hold it firm to your skin. It has a little filament in the center that will essentially puncture your skin so it can stay in the tissue the entire time you’re wearing the device. Some monitors will last a week, many last 2 weeks at a time.
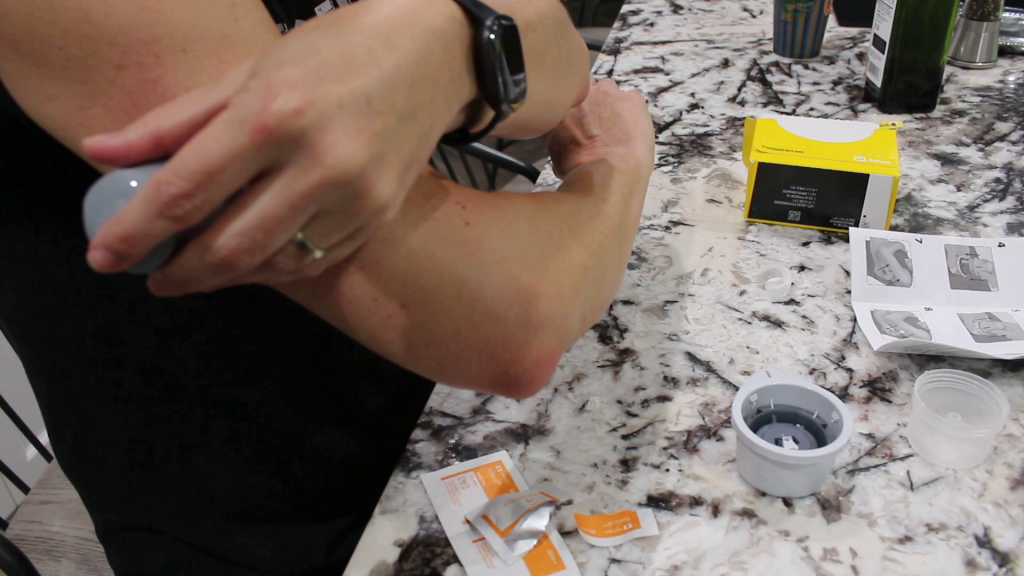
I know it sounds like it would hurt or be uncomfortable, but I assure you, it doesn’t. It really doesn’t even hurt when you apply it.
Manufacturers put them into an installation device and honestly, the only discomfort I’ve felt is if I didn’t let the alcohol dry completely it stung a little, but really the edges of the applicator pushing in around it was more uncomfortable than the filament puncture.
A continuous glucose monitor is different from manual blood sugar monitors in that they measure blood glucose levels from the interstitial fluid, while manual glucose monitors take an actual blood sample.
What this means is that manual glucose monitors can give you accurate on-the-spot readings, while continuous glucose monitors have a lag, usually about 10-15 minutes.
How to benefit from a continuous glucose monitor
How to use a continuous glucose monitor to your benefit lies in a few different factors. The first is if you have insulin resistance or hypoglycemia, which is low blood sugar episodes where you need to monitor your blood sugar to ensure there’s no emergency situation with your health.
Those with type 1 diabetes almost always need this because their bodies don’t produce much, if any, insulin. They’re required to take insulin, but sometimes calculations aren’t 100% accurate, and there’s always the risk of going into severe hypoglycemia, which can cause coma and death.
Those with hypoglycemia episodes pose the same risk, so it’s really essential for them to always know what their blood glucose levels are.
Those with type 2 diabetes sometimes have hypoglycemic episodes as well, but it’s more common for them to have hyperglycemia, which is blood glucose levels that are too high.
Those with other metabolic issues like prediabetes or PCOS can use continuous glucose monitors to get a handle on what foods affect their blood glucose in different ways to get their blood sugar levels under control in an effort to lower their A1C levels.
Many are also trying to reverse insulin resistance. Having a constant monitor on lets you know how things like food, sleep, stress, and exercise either help or hinder your blood glucose levels.
Then there is another subgroup of those that don’t have insulin resistance but are interested in how all these factors affect their glucose levels. This starts veering into what’s called biohacking. Many people are getting on board with research showing that lower continuous glucose levels are better for metabolic health as a whole.
What you need to consider when using a glucose monitor
There are few things to consider when using a glucose monitor.
Accuracy of continuous glucose monitors
The first is that sometimes it’s not always super accurate. The reason is that even though these units are calibrated by the company before they’re packaged, where you place it can have an affect.
For example, I’ve tried them on my right arm, and no matter where it gets applied, it’s not close to accurate. On my left arm, I only have one or two spots that show accurate results. Usually the more fatty areas are said to be more accurate than more muscular areas, and that’s held true for me.
Reporting time of continuous glucose monitors
The second thing is that there is a lag in reporting. That’s usually 10-15 minutes, so if you’re using one for hyper or hypoglycemia, you may need to act quickly and constantly monitor with a manual blood glucose monitor.
The good news is that you can usually set a threshold on the device or within the app so that if it does start heading too high or too low you’ll get an alarm so you can correct the situation.
Other reasons a continuous glucose monitor may not be accurate
The third thing to know is there are a few other situations which would render a continuous glucose monitor as inaccurate. One is taking high doses of vitamin C, which the package contains a warning about.
The other is that sometimes – seemingly for no reason- you could get super low or high random readings. This has only happened to me during the night, and I’ve read on a few forums from others that it can happen if you put heavy pressure on the sensor, like if you roll over and have that arm under you while you are sleeping.
The 4th thing is that it can take a day, sometimes 2, to get really accurate on readings. It’s important to still check with a manual blood glucose monitor in those times to ensure you’re getting accurate readings and can make sure they coincide.
Why I am wearing a continuous glucose monitor ; why I decided to try out a continuous glucose monitor
I’m wearing a continuous glucose monitor for a few reasons.
The first is that I’ve been diagnosed as prediabetic. This alone does not warrant my insurance company paying for a continuous glucose monitor. But I’ve opted to initially pay out of pocket because I’m in the age bracket where my hormones are going wacky and I was waking up in sweats every night.
This can be from hormones, or it could be due to the dawn phenomenon. This is when your blood sugar drops very low in the middle of the night, then your body kicks in glucagon to bring it back up, and many times this can create more body heat and sweating. Many people have strange or even bad dreams when this happens, but it usually results in waking up frequently.
Once I wore my sensor for 2 weeks and saw that trend, my doctor advised that it proved that my situation was genetic. I wanted to know that for sure because I maintain an anti-inflammatory diet and lifestyle, and very rarely eat sugar or bread, and have eaten low-carb for years.
He confirmed to me that if you have the genetics for it, it can be really hard to still keep your A1C under control, but that if I *hadn’t* been eating healthy and low carb as I had, I probably would’ve been diagnosed with type 2 diabetes years ago.
Now I’m using it to see how different foods affect my blood glucose levels, but also different things like:
What order of macros do to my blood sugar levels– if I eat protein first, then carbs, what happens, or if I eat fat with carbs, or reverse the order.
I also want to know the effect of exercise, sleep, and stress. For example, I had a really stressful day and night of New Year’s Eve because we had company the entire week before, then had a lot of people over that night, then stayed up late for the ball to drop. My blood glucose levels were much higher than normal all day long, then the next day stayed elevated as well.
Wearing this sensor has been extremely eye-opening for me, and I’ll continue to use them until I feel comfortable with how I’m managing my blood sugar with lifestyle and dietary changes.
How to get acontinuous glucose monitor
So for some this can be tricky—here’s why.
If you’ve been diagnosed with type 1 diabetes, your health insurance should pay for these, absolutely. If you’re diagnosed with type 2 diabetes, hypoglycemia, PCOS or other insulin resistance conditions, they *may* pay for them.
If you’re diagnosed as prediabetic, they probably won’t. And if you don’t have any of these conditions they won’t.
However—what I’ve learned is that even though my insurance company won’t pay for it, there are still 2 ways you can get them:
1: Ask your doctor
The first is simply to ask your doctor if he or she will write a prescription for one. Tell them you’re really interested in your metabolic health and would like to trial a sensor for a month or so. Many doctors have no problem doing this.
Just know that you’ll have to pay for it out of pocket. My out-of-pocket runs around $78 a month, and that includes 2 sensors that each last 2 weeks. I am currently wearing the Freestyle Libre 3. I have another post that compares the Freestyle Libre 2 and Libre 3 and the features of the 3 if you’re interested.
2: Private continuous glucose monitor companies
There are companies that offer sensors and a membership that will help you interpret the data and have coaches on staff as well. Although these can get pricey, they do give a ton of information as well as support if you’re really into your metabolic health and haven’t been diagnosed with a condition that warrants a prescription.
I hope this gave you enough information to make a better decision about using a continuous glucose monitor, and let me know if you have any more questions in the comments!
When it comes to healthy tricks- knowing how to increase resistant starches in foods should definitely be in your health toolbox.
So, in case you don’t know already– Resistant starches are a type of carbohydrate that can resist digestion in the small intestine and reach the large intestine, where they can feed the good bacteria in your gut.
Benefits of resistant starches
Now both of these two things are really important, especially for those with insulin resistance. This is because resistant starches, since they’re not digested in the small intestine, can help keep blood sugar from spiking.
Short-chain fatty acids
The second reason resistant starches are really important is that they help produce short-chain fatty acids in the large intestine by becoming food for the good gut bacteria through fermentation. They’re really good at this because they’re not absorbed in the small intestine and can reach the colon intact.
Short-chain fatty acids play a crucial role in maintaining gut health and have been linked to various health benefits, such as reducing inflammation, promoting satiety, and improving insulin sensitivity.
Short-chain fatty acids can reduce inflammation in the gut and the body, which can help prevent chronic diseases like inflammatory bowel disease and type 2 diabetes.
Discover My Unique 4-Pronged Approach to the Anti-Inflammatory Diet So You Can Get Started Immediately (Without Getting Overwhelmed or Cleaning Out Your Entire Pantry)
Why a full-scale pantry clean out is NOT the best way to start your anti-inflammatory journey, and the steps you can take instead to make sure you’re fueling your body with foods that love you back
The essential foods you MUST add into your diet if you want to nourish and heal your body naturally
My anti-inflammatory shopping list so you can quickly fill your cart with the right foods (no googling in the produce aisle or wasting hours staring at ingredient lists)
Short-chain fatty acids can also improve insulin sensitivity, which can help regulate blood sugar levels and reduce the risk of developing diabetes.
Short-chain fatty acids are believed to support the immune system and protect against certain types of cancer.
And, as a bonus, Short chain fatty acids also play a role in regulating hunger and satiety, which can help with weight loss or maintenance.
Overall, Short chain fatty acids are an important component of a healthy gut and a healthy body.
Foods that Contain Resistant Starches
One way to increase your intake of resistant starches is to add foods that naturally contain them to your diet.
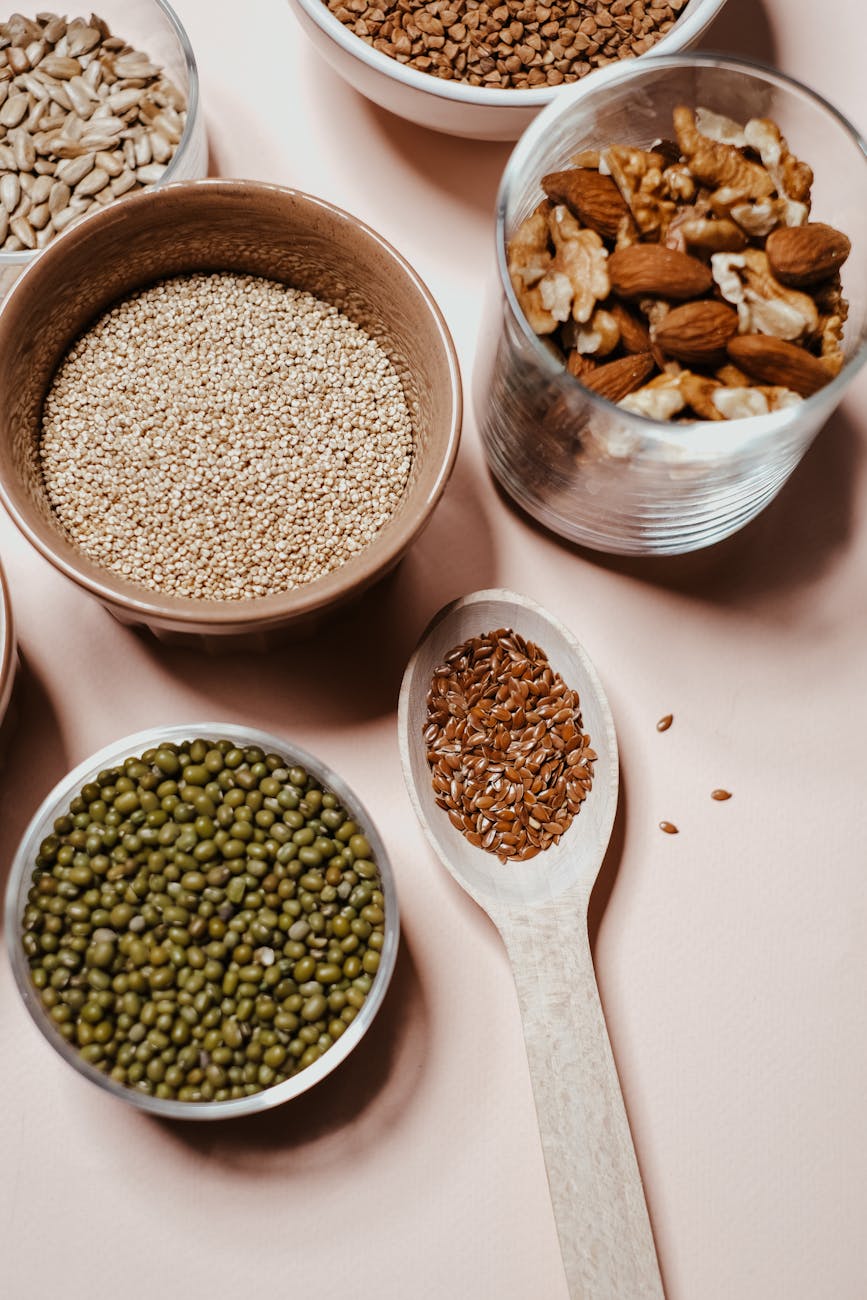
There are many foods that contain high amounts of resistant starches. Some examples include:
Green bananas: Unripe bananas are a great source of resistant starch. Just remember that as the banana ripens, the starch is converted into simple sugars.
Beans and legumes: Foods like lentils, chickpeas, black beans, and navy beans are all great sources of resistant starches.
Oats: Oats are not only high in fiber, but they also contain resistant starches.
Whole grains: Whole grains like barley, rye, and quinoa contain high amounts of resistant starches.
Nuts and seeds: Some nuts and seeds, such as almonds and pumpkin seeds, contain resistant starches.
How to Increase Resistant Starches
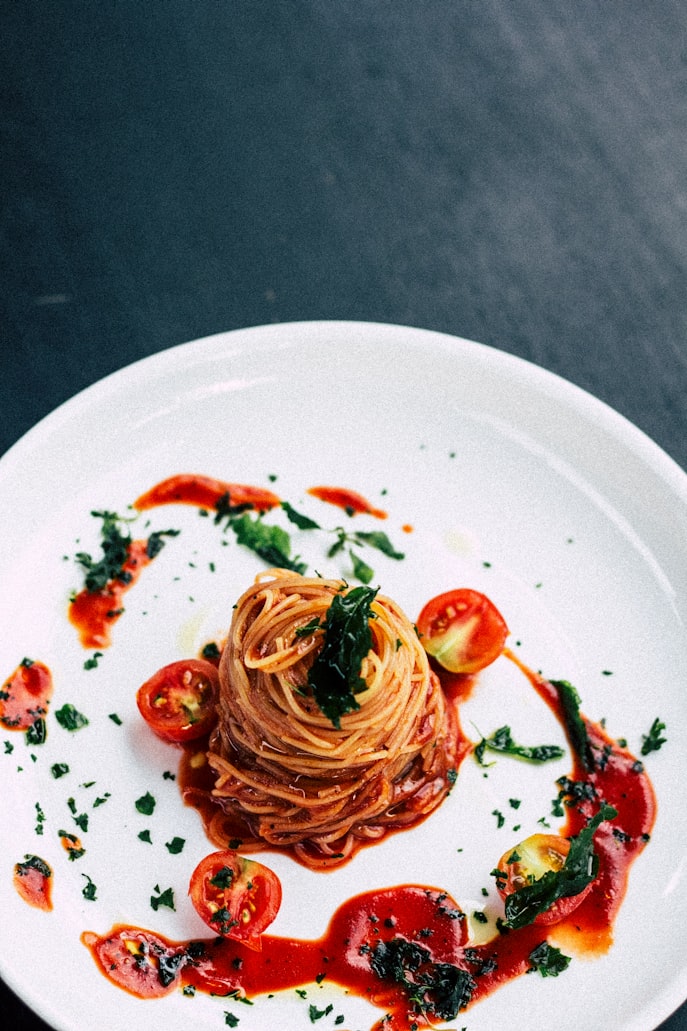
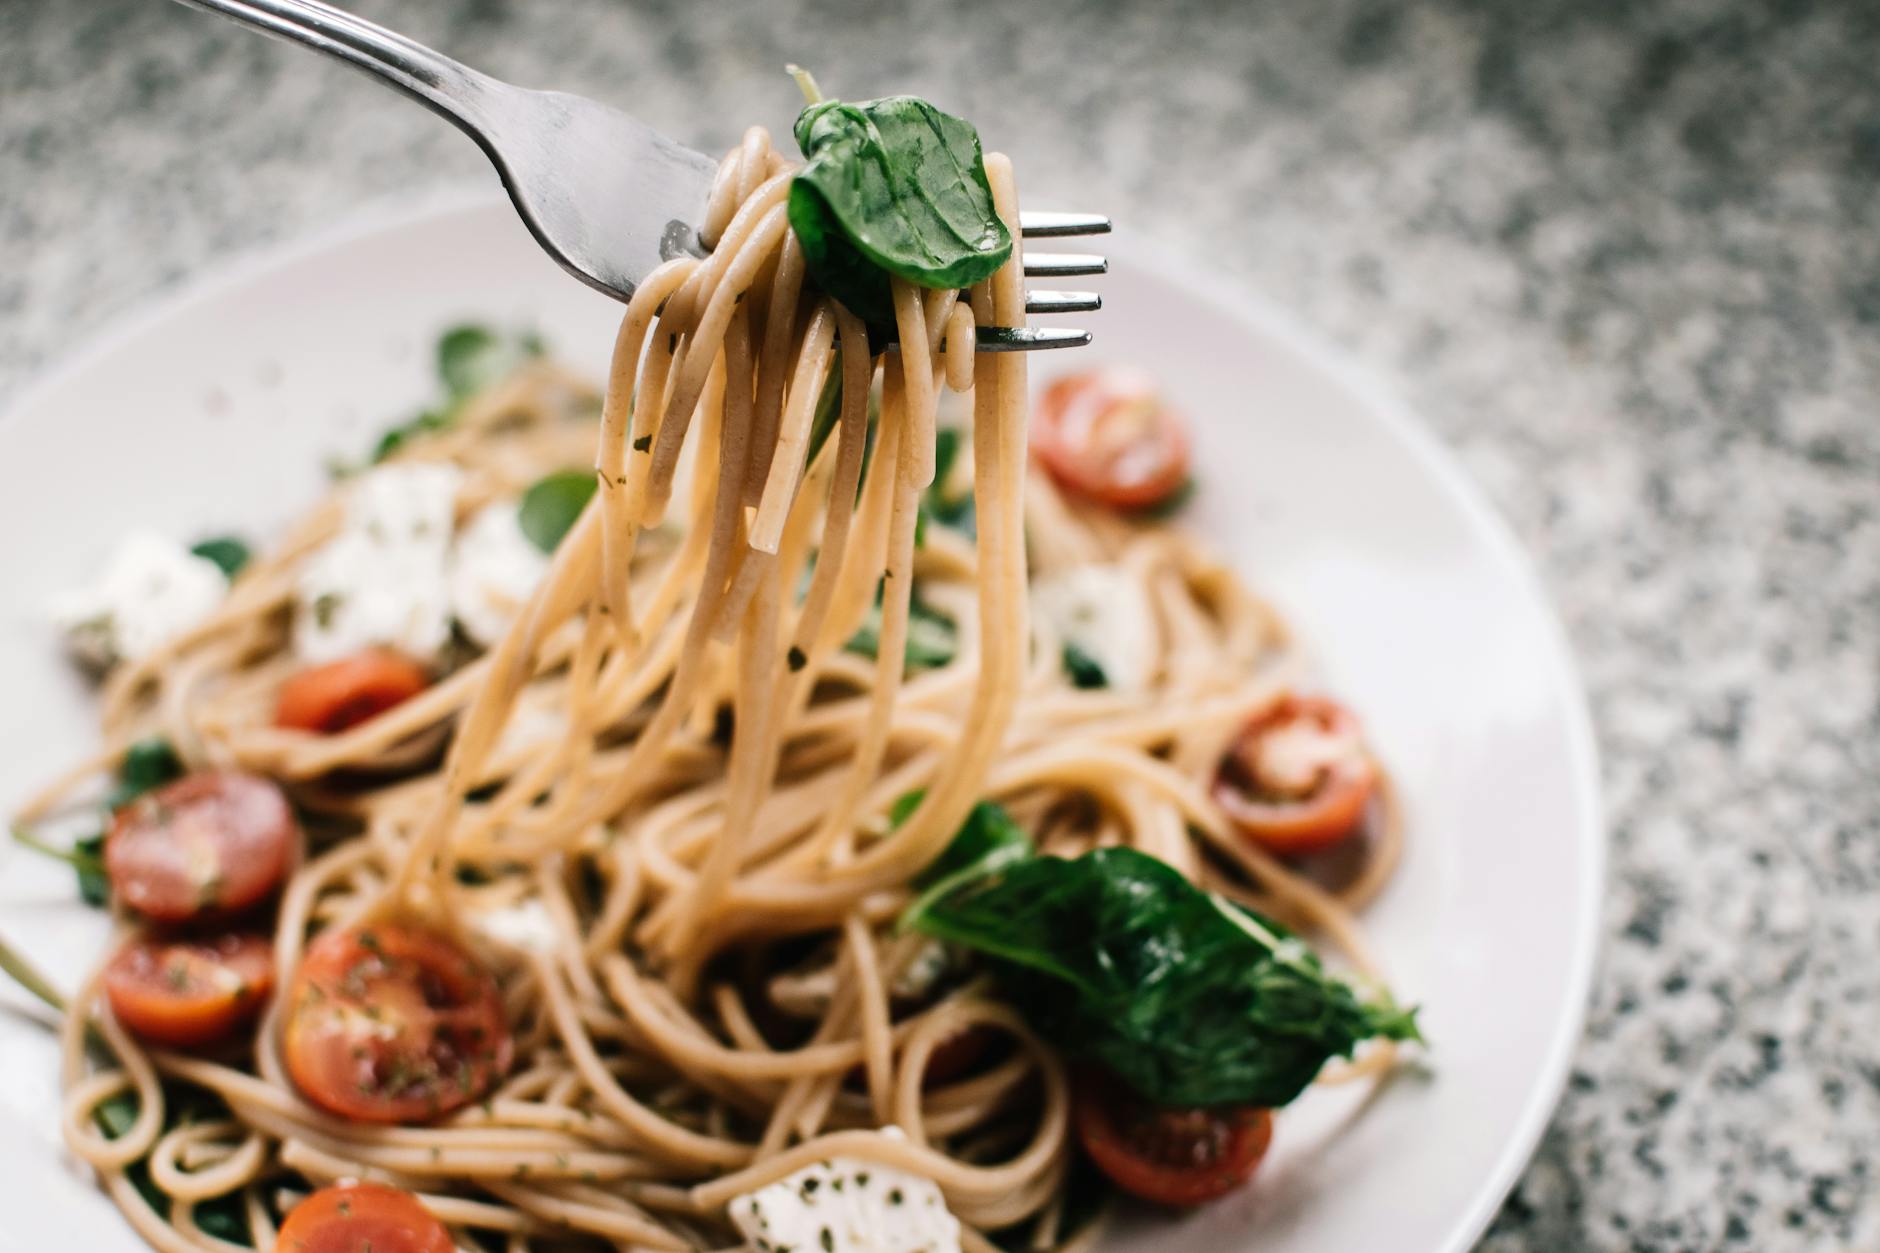
One thing we’ve learned in the last couple of decades is that foods made with refined flour like pasta are really bad for blood sugar levels because they cause spikes. This is something even those without insulin resistance want to avoid for metabolic health but truly needs to be avoided for those with insulin resistance conditions like prediabetes, type 2 diabetes, and PCOS, among others.
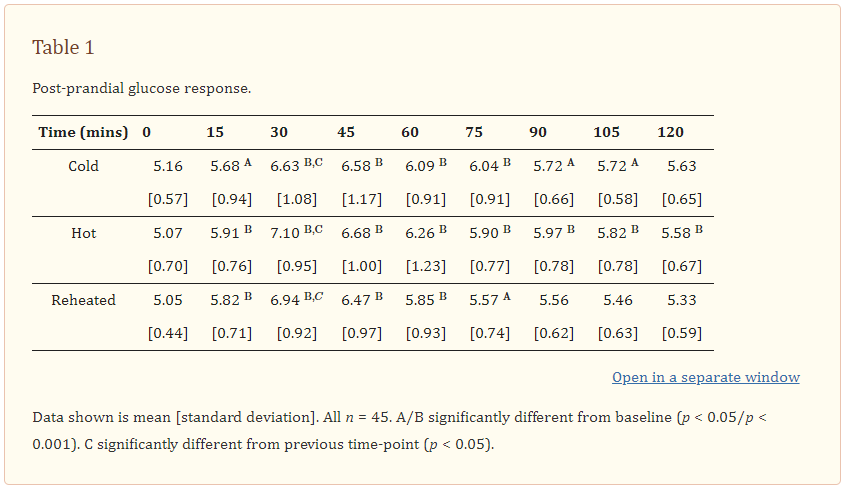
A few years ago, some researchers from the University of Surrey were curious about what happens to pasta when you cook it and cool it in terms of resistant starches. What they found is that the starches actually increase when the pasta was cooked and then cooled, which helped blunt the blood sugar response.
Then they went a step further and cooked it, cooled it, then reheated it—and what they found is that this next step reduced blood sugar spikes by 50%!
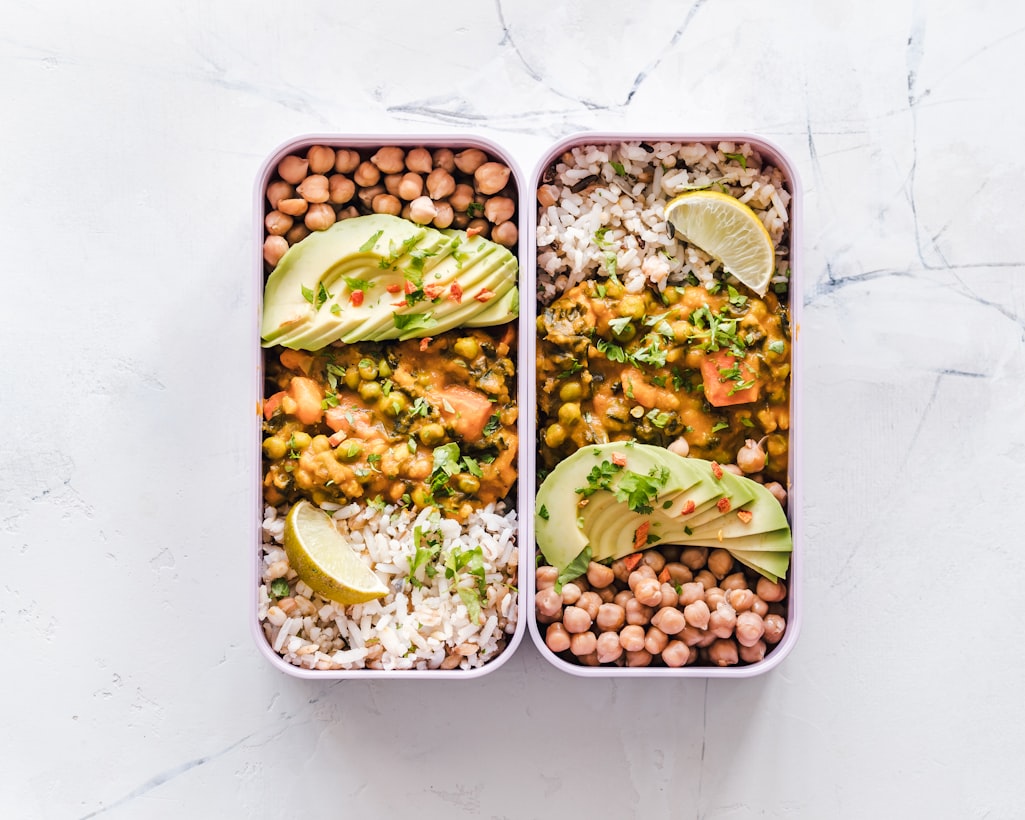
This study cites that other reviews also showed the same results with rice, potatoes, and maize porridge.
This is important, not only because of the difference in blood sugar response but also because increasing the resistant starches decreases the number of calories absorbed. This matters for weight loss, gain, or maintenance.
Just know that this isn’t permission to go crazy with pasta and rice if you’re insulin resistant—you still need to manage the total amount of carbohydrates. But it does give a few more options in terms of better carbohydrates.
Guidelines for increasing resistant starches in foods:
One thing to note about anything with nutrition is that results from studies and trials give an average—meaning that things don’t react the exact same way for every single person. So just know that you could have a different response in some way than even someone you’re related to.
That being said, the only way to know is just to Test it!
You can do this using a manual blood glucose monitor or a continuous glucose monitor.
How to test your blood sugar levels to determine the effects of food:
Check blood sugar immediately before eating;
Check @ 1 hour and 2 hours after, which is called the postprandial blood glucose level;
Test it against the food when you didn’t cook and then cool to truly see the difference.
Now when you’re doing this—think of it as a science experiment- (make sure to use as few variables and same conditions—same recipe, same time of day, same meal, same order of macros, etc) to get as accurate a result as possible.
If you’re ready to start feeling amazing with an anti-inflammatory diet, grab the free Anti-Inflammatory Quick-Start Guide below! 👇
Discover My Unique 4-Pronged Approach to the Anti-Inflammatory Diet So You Can Get Started Immediately (Without Getting Overwhelmed or Cleaning Out Your Entire Pantry)
Why a full-scale pantry clean out is NOT the best way to start your anti-inflammatory journey, and the steps you can take instead to make sure you’re fueling your body with foods that love you back
The essential foods you MUST add into your diet if you want to nourish and heal your body naturally
My anti-inflammatory shopping list so you can quickly fill your cart with the right foods (no googling in the produce aisle or wasting hours staring at ingredient lists)
When it comes to carbohydrates for an Anti-Inflammatory diet, confusion abounds–so I’m here to answer the question: What is a resistant starch, is it anti-inflammatory, and is resistant starch good for me?
I think this is a really important topic to cover in this dietary style because there’s a lot of confusion over whole grains and carbs in general when it comes to reducing inflammation in the body.
A lot of this is because of the constant battle regarding carbs in the last two decades. People have a hard time distinguishing between sugars and complex carbohydrates and what they should or shouldn’t be eating. This becomes especially complicated when you’re trying to manage a condition that really relies on an anti-inflammatory diet as a basis for controlling the symptoms and pain of that condition.
So let’s start out with answering what a resistant starch is first.
What is the difference between starch and resistant starch?
The three forms of carbohydrates that we consume are (1) sugar, (2) starches, and (3) resistant starch.
Sugar is pretty obvious, besides the limitless disguises it’s given on food labels. But let’s take a look at the difference between starch and resistant starch.
Starch
Starches are long chains of sugar molecules, and come from those plant foods that we consider refined carbohydrates that are not straight sugar. Those would be refined flours that are used to made breads, crackers, pasta, and bakery items.
Even though these foods aren’t straight sugar, they’ve been broken down and have so much starch degradation that they are absorbed extremely fast into the bloodstream to have the same effect of straight sugar.
The foods that contain these non-resistant starches usually contain no fiber and are frequently paired with sugar and unhealthy fats to create a trifecta of inflammatory triggers in the body.
Most starchy foods in this category are ones that should be avoided for a variety of negative effects on human health. Alongside sugar, they’ve been shown to induce insulin resistance, inflammatory conditions, and contribute to heart disease.
Resistant starch
Resistant starches are still considered starches and carbohydrates, but they are slowly digested starch and also act as a prebiotic. Instead of breaking down into sugar for energy, they resist digestion and pass through the small intestine and into the large intestine.
Once they’re in the large intestine bacterial fermentation occurs and assists the colon in producing short-chain fatty acids, including butyrate.
Short-chain fatty acids matter because they help blood flow and absorption of minerals while blocking the growth of harmful bacteria and toxins. And butyrate suppresses colonic inflammation.
This nifty job is what helps generate a posh home for our good gut bacteria, which is why we should promote an increase in resistant starch intakes while eliminating regular starch and sugars.
Various varieties of resistant starch is found within many foods, and the addition of these into the diet is beneficial to digestive health.
Resistant starches also contain less calories than normal starchy food: we extract approximately 2 calories per gram of resistant starch, while regular starch is absorbed at approximately 4 calories per gram. That’s DOUBLE!
This means that the higher resistant starch is in food the less calories it contains. This helps tremendously if trying to lose weight or maintain it but have problems with appetite and feeling full.
These types of resistant starch do, however, still contain vitamins and minerals that are available for absorption.
(Note that this is not permission to go crazy with pasta. It’s still a good idea to reduce calories from these types of foods and increase your vegetable intake when your goal is weight loss or increasing insulin resistance.)
Is resistant starch good for you?
The resistant starch is also known as soluble starch and is considered an insoluble dietary fiber. These varieties of resistant starch offer many health benefits and have lower calories than non-resistant starch.
Several human studies show resistant starch can improve insulin sensitivity and blood pressure, decrease hunger and can help support a healthy digestive system, which has many health benefits in and of itself, including:
Prevention or treatment of inflammatory bowel diseases
All of these factors, individually and cumulatively, add up to anti-inflammatory effects in the body.
Is resistant starch good for diabetics?
Although those with type 2 diabetes, prediabetes, and PCOS (and other conditions with poor insulin sensitivity) are generally told to shift into a low-carb or even ketogenic diet which severely limit all starch including resistant starch, studies have shown numerous health benefits of resistant starch intake for these conditions by following and Anti-Inflammatory Diet in the form of the Mediterranean Diet.
Since resistant starch (especially when fiber is paired) helps blunt a blood sugar spike, improves gut health, and triggers short chain fatty acids, it can be especially helpful at improving overall health, including increasing insulin sensitivity.
Since many people with metabolic issues like type 2 diabetes are also overweight, including more resistant starch in their diet will also help with feeling full and satisfied to assist in weight loss (which is what many doctors recommend to those who are diagnosed with these conditions.)
What are types of resistant starch?
There are five types of resistant starch (a fifth category was added to include those produced by food manufacturers), aptly named, “Type 1”, “Type 2”, “Type 3”, and “Type 4”, and “Type 5”. Let’s discuss where you can find each one and what their pros and cons are.
Resistant Starch Type 1:
This refers to starchy food that has a seed or germ as its outer coating.
Can be found in grains, seeds and legumes. Type 1 resistant starch is unable to broken down by our digestive enzymes. This means our digestive system does not absorb its nutrients due to them being attached to fibrous tissue walls, as long as it is intact or just cracked (ie, not ground down into flour.)
Resistant Starch Type 2:
This type of resistant starch is naturally found within the starches of certain foods. The more raw these foods are, the more resistant the starches are. Once they are heated, the starch is more easily digested. These include:
raw fruits
potato starch from raw potatoes
corn
some legumes
hi-maize resistant starch products
green (unripe) bananas
plantains
Resistant Starch Type 3
Type 3 resistant starch is referred to as retrograded starch. This is starchy food that is cooked, then cooled. This heat and cooling application increases the resistant starch content.
These would include foods like sushi rice, and pasta or potatoes that are cooked and then cooled for a salad (for example.)
Resistant Starch Type 4
This type of resistant starch is chemically modified starch created by food manufacturers from starchy foods. The end products are resistant to digestion, but start out as rice, raw potatoes, or corn. These are created so that food companies can increase thickness or improve texture by adding resistant starch.
Resistant Starch Type 5
This is a new category that was recently added. This is another type of resistant starch that manufacturers also produce, but they heat and cool the starchy foods with fatty acids, waxes, or other lipids.
What is the best source of resistant starch?
Although types 2 and 4 have been shown to increase levels of good bacteria in the gut, the types of bacteria are different. This, along with the fact that each person is so different, makes it difficult to determine which would be better from a gut health perspective.
Aside from that, the most feasible options we have come from types 1-3. These include the resistant starches we can cook whole intact (or cracked) grains like:
rice,
farro,
oats,
amaranth,
barley,
quinoa,
teff, and
wheat berries
Also lentils; soybeans; and legumes.
And lastly, this includes raw fruit, green bananas, and plantains.
How do you increase resistant starch in food?
A great way to increase resistant starches if you’re not able to find whole or cracked grains (like the ones listed above), but must make do with whole grain pastas or even potatoes in a recipe is to plan ahead.
If you start out with whole grains (or even lentil pasta), you can create dietary resistant starch in those foods if it’s cooked and cooled.
Further research done on resistant starch at the University of Surrey showed that blood sugar levels can be even further controlled when those foods are then reheated again.
Their study showed that it reduced blood sugar spikes by a whopping 50% when food was then reheated again! This has been confirmed with a study published by researchers in 2019 in the journal Foods.
All in all, resistant starches and the fiber that’s present in these types of foods have been shown to be immensely beneficial to gut health, prevention of certain diseases, blood sugar control, and assist in weight loss. Based on the data we have, resistant starches’ ability to do all these things has mega anti-inflammatory benefits.
That being said, as long as there are no food allergies or sensitivities to any of the foods listed as resistant starches or those where resistant starch could be made or increased, these are definitely foods that are recommended on the Anti-Inflammatory Diet.
Discover My Unique 4-Pronged Approach to the Anti-Inflammatory Diet So You Can Get Started Immediately (Without Getting Overwhelmed or Cleaning Out Your Entire Pantry)
Why a full-scale pantry clean out is NOT the best way to start your anti-inflammatory journey, and the steps you can take instead to make sure you’re fueling your body with foods that love you back
The essential foods you MUST add into your diet if you want to nourish and heal your body naturally
My anti-inflammatory shopping list so you can quickly fill your cart with the right foods (no googling in the produce aisle or wasting hours staring at ingredient lists)
One of the belles of the ball when it comes to anti-inflammatory beverages (and coffee alternatives) is definitely turmeric milk (or golden milk or turmeric latte–depending on your choice of names).
One thing I’ve noticed, however, is that even though most recipes have the intent of helping to lower inflammation, they still have sugar in them. Usually maple syrup.
That’s why this sugar-free version is just as yummy, with just as much inflammation-busting power, but without the added sugar.
So whether you call it golden milk or turmeric milk this winter recipe is super yummy, smells amazing, and is full of anti-inflammatory superfoods—Here’s how to make easy turmeric golden latte.
The ingredients you’ll need are:
2 cups of coconut milk
1 tsp of ground turmeric
½ tsp ground cinnamon
1/8 tsp black pepper
1-2 TBSP keto maple syrup or granulated natural zero-calorie sweetener
And ¼ tsp pure vanilla extract
Directions:
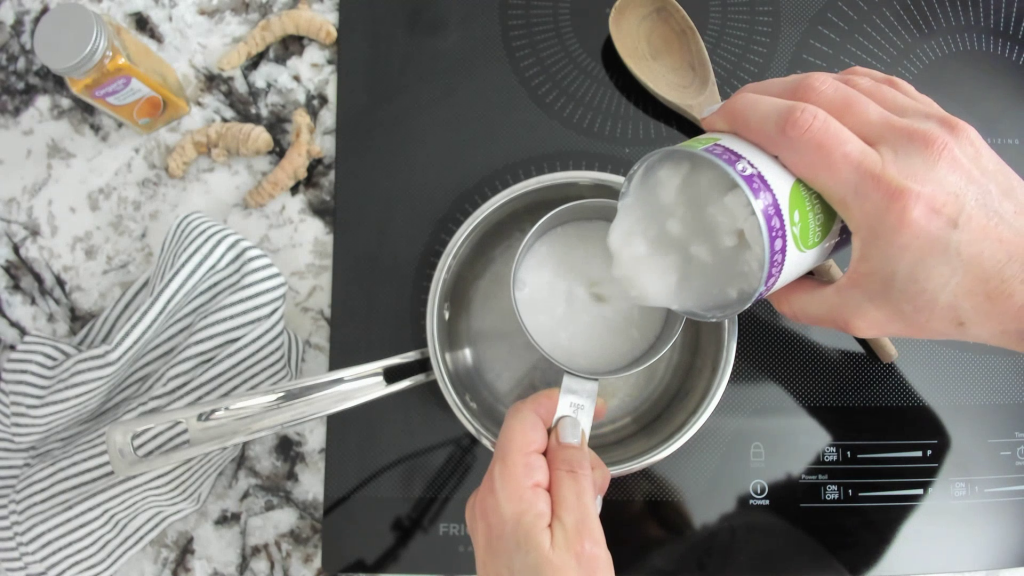
Start out with a small to medium-sized pot, and add 2 cups of coconut milk
Turn your heat onto low to medium
Then add the ground turmeric,
The ground cinnamon,
Freshly ground black pepper – this is to increase the absorption of the turmeric
1-2 TBSP keto maple syrup or granulated natural zero-calorie sweetener
And the pure vanilla extract
So next you’ll stir these together as they get warm, and you may have to smash the little clumps of the dried ingredients. I also get my little frother out and get it really mixed together and frothy.
Simmer this up to 10 minutes, then pour into 2 mugs and enjoy!
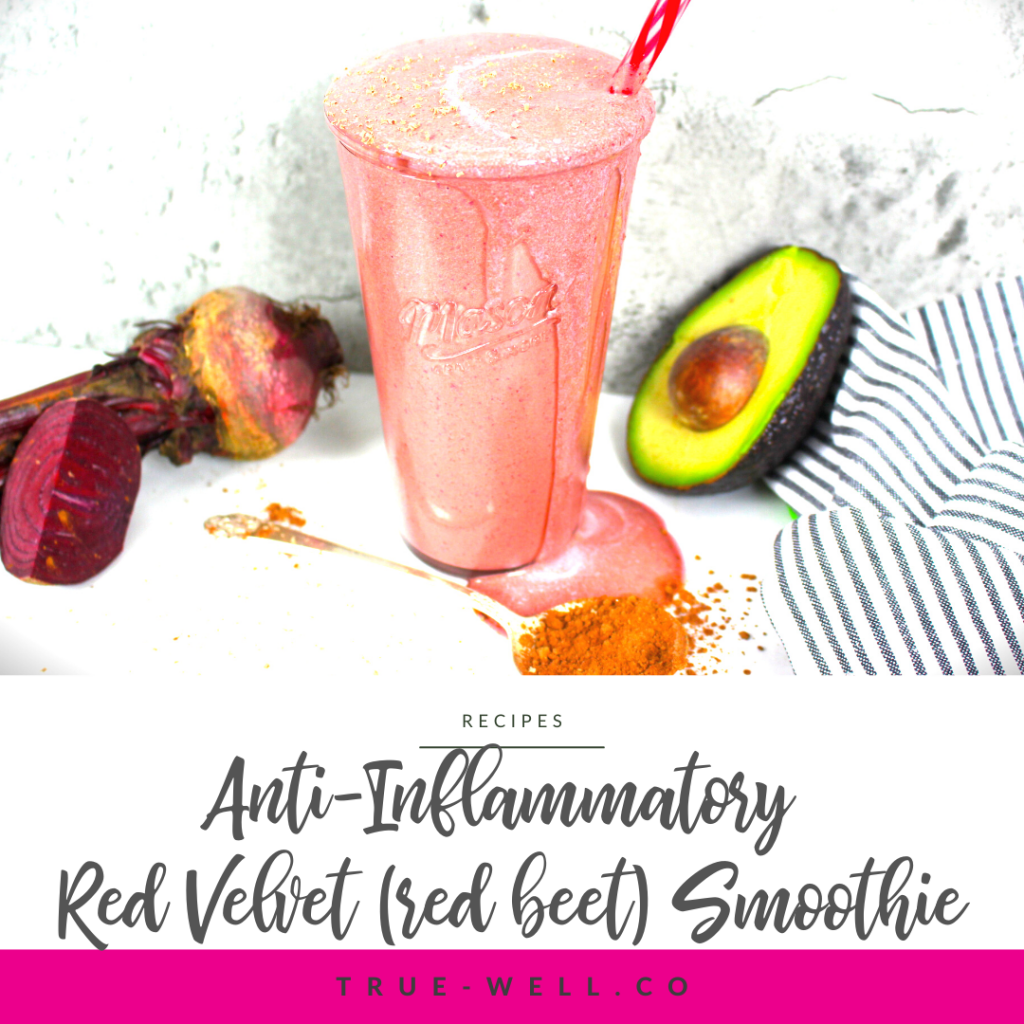
This Red Velvet Smoothie is the BEST red beet smoothie I’ve had, hands down.
Not only is it super easy, it packs in healthy fats plus mega antioxidants with non-peeled red beets. Plus it’s sugar-free, gluten-free, and can be adapted easily to be dairy free.
If you’re all in on healthy anti-inflammatory smoothies that taste like dessert, you HAVE to try this one!
Here’s how to make this divine red velvet smoothie:
You’ll need-
2 cups of milk
2 cups of ice
½ avocado
½ beet
3 TBSP cocoa powder
¼ tsp vanilla
2 TBSP granular sweetener
Directions:
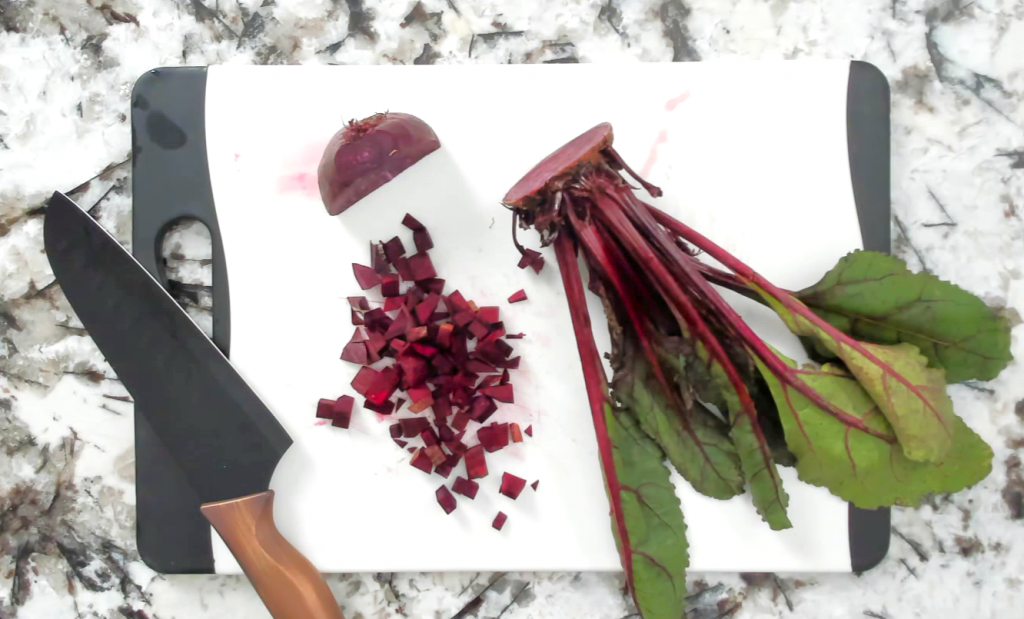
Cut up the beet
So the first thing we’re gonna do is wash the beet really well (these tend to still have a lot of dirt on them) and then cut up the beet.
You can peel the beet if you want, but studies have shown that good bacteria from unpeeled vegetables can help boost the immune system. So I opt NOT to peel mine.
Then cut it up really small. If you don’t have a high-powered blender, boil them first for 20-40 minutes to get them softer and then let them cool.
Those can go right into the blender.
And don’t throw the greens away! You can chop them up and use them in dishes like frittatas, in salads, and even nourish bowls.
Avocado
Cut open your avocado and spoon out ½ of it into the blender.
If you’re not using the other half, seal it in a snack-size baggie and store it in the fridge with the seed in it.
Milk
Add your milk—I say use full-fat whole if you tolerate dairy, if not, choose an unsweetened dairy-free version
Cocoa Powder
Add your Cocoa powder
Vanilla
Add the Vanilla – make sure it’s pure vanilla extract and not imitation to avoid artificial flavorings.
Sweetener
Add your natural, zero-calorie sweetener – I prefer stevia, monk fruit, erythritol, or allulose.
Remember, per anti-inflammatory guidelines, we’re steering clear of any sugar, but also artificial sweeteners.
Ice
Add your Ice
Blend
Blend until it’s super smooth, keeping an eye on the beet chunks.
Tips
Now if you’re watching your blood sugar levels, a good trick is to add in more protein.
Two ways to add a boost of protein to this would be to:
sub in ½ cup of Greek yogurt for ½ of the milk, or
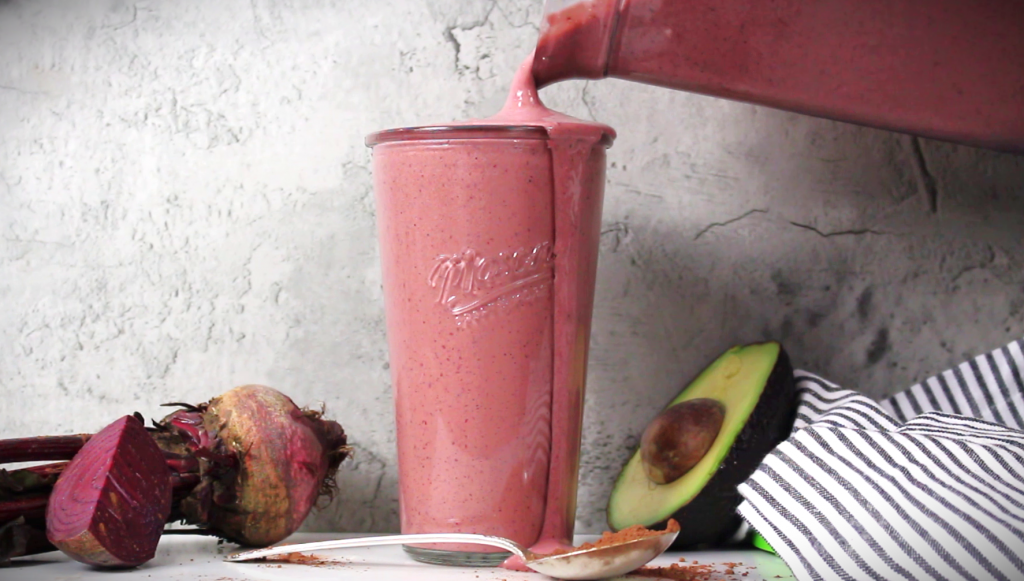
This Red Velvet Smoothie is super easy and packs in healthy fats plus mega antioxidants with red beets. If you’re all in on healthy anti inflammatory smoothies that taste like dessert, you’ll love this red beet smoothie!
Author:Laura Brigance, MS, CHC
Ingredients
Scale
2 cups of milk
2 cups of ice
1/2 avocado
1/2 beet
3 TBSP cocoa powder
1/4 tsp vanilla
2 TBSP granular sweetener (2-4 TBSP, to taste)
Instructions
Wash the beet really well and cut it up into super small chunks. If you don’t have a high powered blender, you may want to boil the beet for 20-40 minutes to soften it up. Add the beet to the blender.
Cut open your avocado and spoon out ½ of it into the blender.
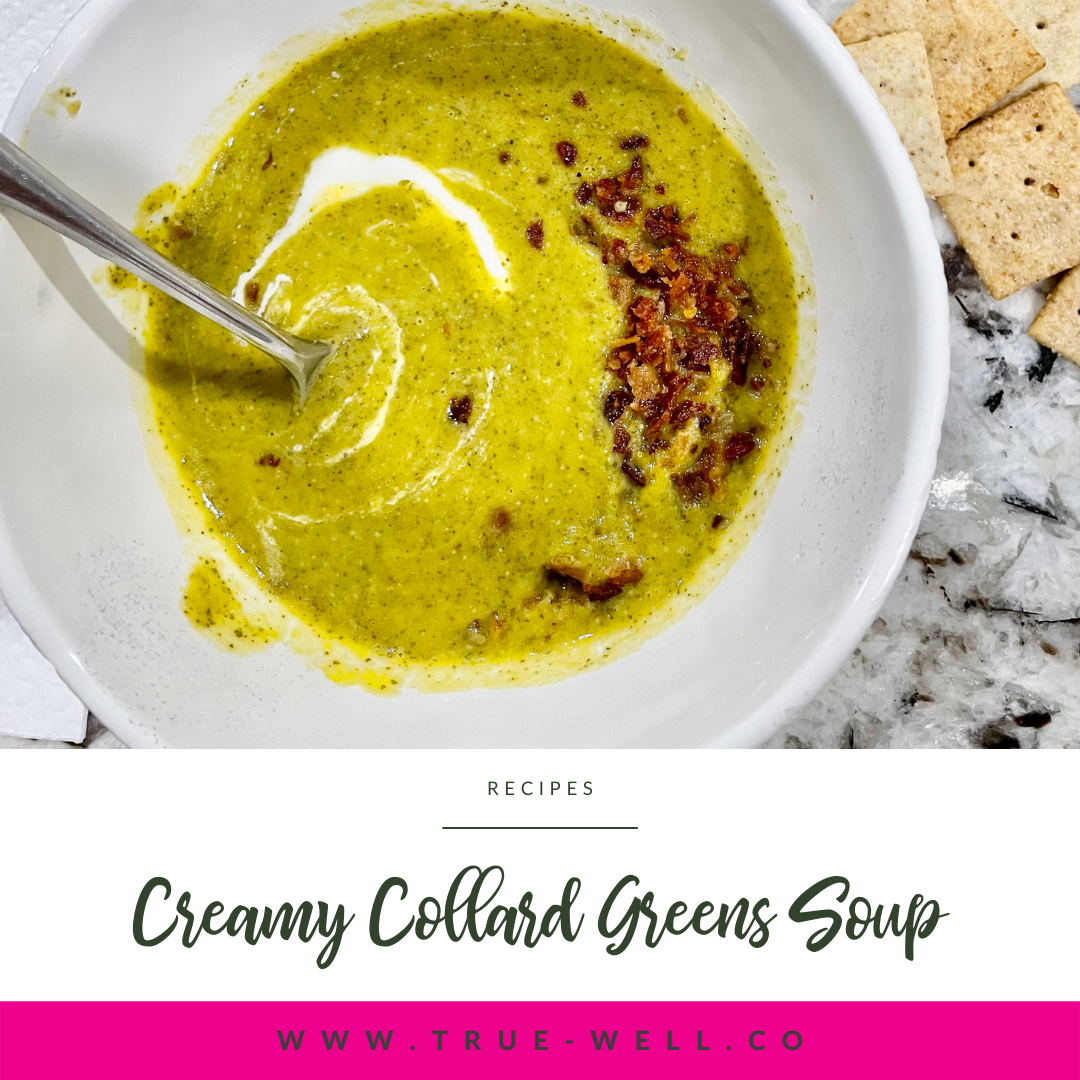
Being from the South, I’ve had my fair share of collard greens as a kid–but never collard greens soup. Well, I’ve had my fair share of adults trying to get me to eat my collard greens as a kid. I was never a huge fan (being more of the ‘addicted to sugar‘ type).
But as an adult? Not only do I know the superpower of greens, I’ve experimented through the years to see what works, what doesn’t, and what I can tolerate in the name of getting needed nutrients and fiber into my body. (Cause my body does so much better when I’m taking care of it this way!)
This Creamy Collard Greens Soup recipe is not only right up there with ‘what works’, but my kids didn’t even know the difference between this and the broccoli-potato soup they regularly order at the steakhouse down the road. (Win for Mama!!)
So technically potatoes aren’t necessarily ‘frowned upon’ in an anti-inflammatory diet (unless you have to avoid nightshades). But what does happen is that they’re such a high-glycemic vegetable that it can raise blood sugar levels. High blood sugar is inflammatory.
That being said, I’ve been able to sub in butternut squash repeatedly on recipes (like this one) and my kids didn’t even know! They thought they were orange-y potatoes!
So without further ado, the collard green soup that my kids think is full of potatoes… (and other greens they think are NOT collards)… 😁
8 oz collard greens (1 bunch, stemmed and chopped)
2 tsp salt (to taste)
1/2 tsp pepper (to taste)
2 TBSP avocado oil
1 TBSP hot sauce (optional, to taste)
1/2 cup dairy-free sour cream (optional)
5 slices bacon (organic, uncured, (optional!))
Instructions
Preheat oven to 400 degrees F.
Cut butternut squash in half lengthwise and place face down on rimmed baking pan lined with foil. Once oven is preheated, place in oven for 30-40 mimutes, until squash is cooked through.
Stem and chop onions and collard greens.
Heat a large pot on medium high and place avocado oil and onions in the pot. Saute until clear.
Add the collard greens and cook down until tender. Add the garlic and stir often.
When squash is cooked, remove from oven and flip the pieces over. Spoon out seeds and discard.
Spoon out chunks of squash into a high-powered blender. Add the collard mixture and 1 cup of broth.
Blend until super creamy. Pour back into pot.
Add the remaining 3 cups of broth.
Simmer on cooktop until time to eat.
Top with dairy-free sour cream. {And if using bacon bits, cook bacon, chop, and sprinkle on top.}
Enjoy!
Like this recipe? Prep it and 5 others with the Winter Anti-Inflammatory Meal Prep Guide! 👇{Click the image to grab it!}
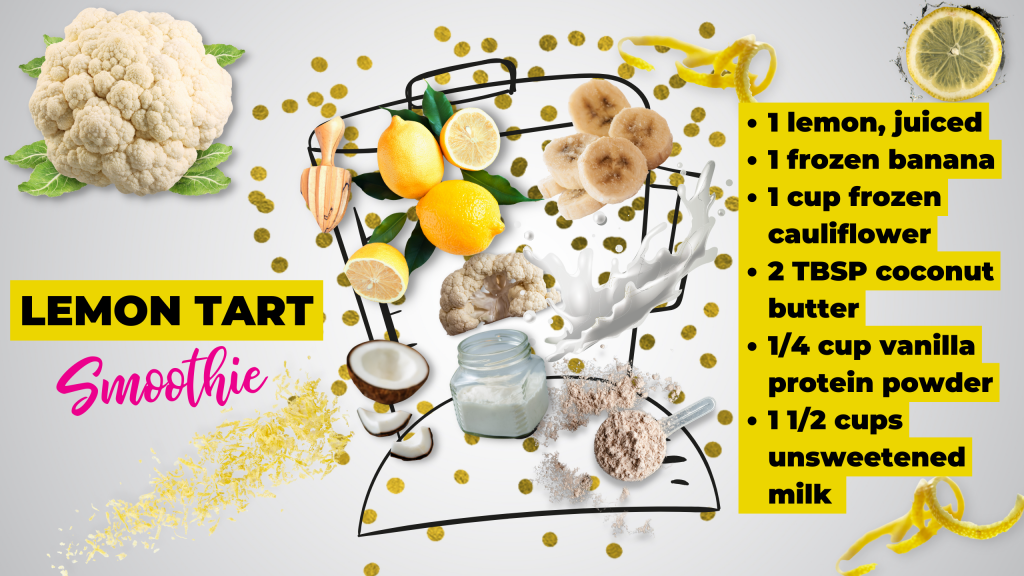
This lemon tart smoothie is full of protein and healthy fats, making it a perfect anti-inflammatory smoothie for breakfast, snacks, or even a meal replacement!
In this winter anti-inflammatory smoothie recipe we’re gonna be taking advantage of cauliflower and, obviously, lemon.
This smoothie recipe includes:
1 lemon, juiced
1 frozen banana
1 cup of frozen cauliflower
2 tbsp of coconut butter
1/4 cup of vanilla protein powder
And 1 ½ cups of unsweetened milk
Frozen bananas
Now if you don’t have a bag of frozen bananas and just toss bananas into the freezer when they’re about to go bad like I do, the easiest way to use them is to put in the microwave for about 20 seconds, then just slice the skin off the banana and slice the banana up. I know it looks super gross, but bananas naturally brown in the freezer like that, so no worries.
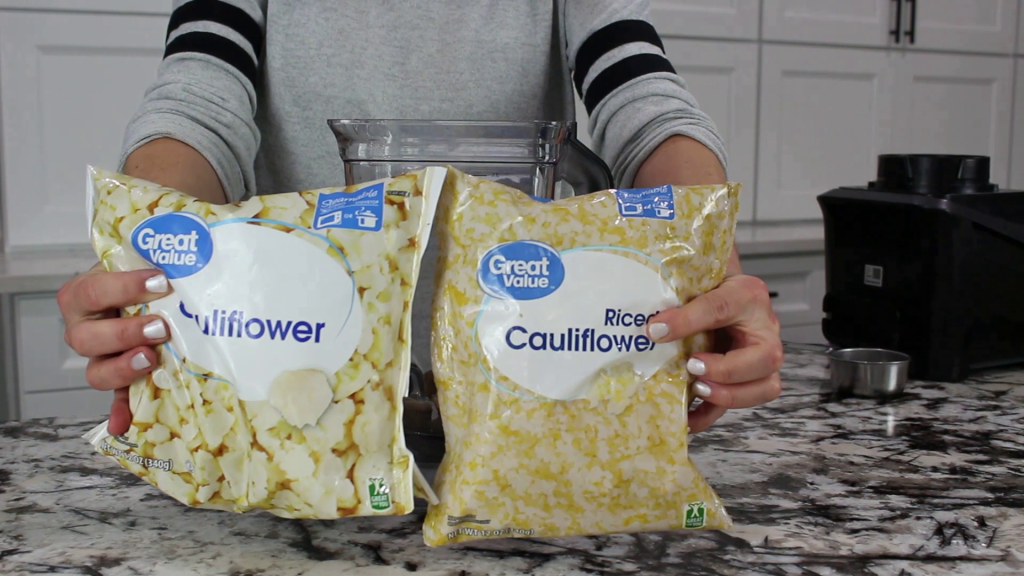
Frozen cauliflower
For the cauliflower, you can find this in the freezer section at your grocery store, but just know that they should have cauliflower florets, and riced cauliflower. You can use either, but I prefer the riced because that’s just that much less blending you’ll need to get the chunks out of your smoothie.
Coconut butter
Now for the coconut butter, this can sometimes be tricky to find. Basically, coconut butter is the coconut meat ground down into butter, the same way that peanut butter or any other nut butter is made.
So for this recipe if you can’t find coconut butter, you can do one of 2 things:
Either make your own coconut butter with coconut flakes—but you’ll need to make sure they’re free of any type of coating,
Or you can use coconut oil.
The difference in the two lies in the fact that the fat is all extracted from the coconut butter, which is the oil. So on these containers you can see that they have the same servings size, and per 1 TBSP, the coconut butter has 100 calories, 10 grams of fat, 3 grams of carbs, and 2 grams of fiber.
Coconut oil, on the other hand, is 120 calories of only fat. No carbs and no fiber.
If you’re counting calories and/or macros, this is something to be aware of if you need to sub out the coconut butter.
Protein powder
For the protein powder, I recommend checking the label and making sure there’s no sugar added. A lot of reputable protein powders are now using stevia or monk fruit to sweeten the powder.
If you can handle dairy, a whey protein powder is great. If you need non-dairy or vegan, pea protein powder is really great.
Milk
And lastly, the milk can either be dairy if you can tolerate it or any other non-dairy unsweetened milk. Make sure it’s unsweetened so it doesn’t have added sugar.
I really don’t like using oat milk either because it has so many carbs straight from grains with no fiber.
Directions
So into the blender, we juice our whole lemon, add in the frozen banana, 1 cup of frozen cauliflower, 2 TBSP coconut butter, ¼ cup of vanilla protein powder, and 1 ½ cups of unsweetened milk.
Then blend or pulse it in a high-powered blender until it’s super smooth, pour, and enjoy!
This anti inflammatory smoothie is packed with protein, fiber, and healthy fat, making it perfect for a winter breakfast, snack, or even meal replacement.
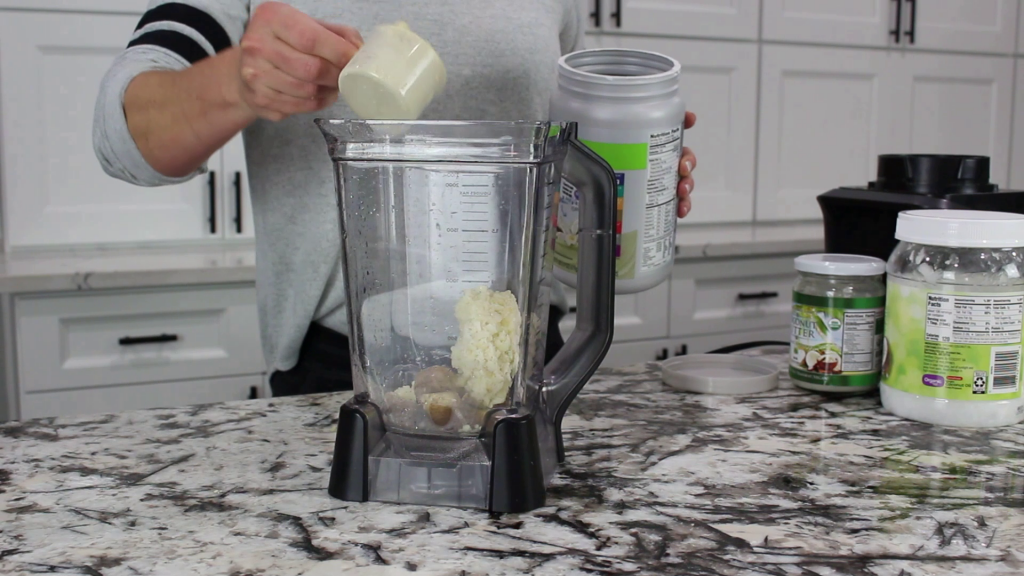
This carrot cake smoothie takes advantage of our winter root vegetables while packing an anti-inflammatory smoothie punch that’s filling and satisfies the sweet tooth!
So let’s talk ingredients.
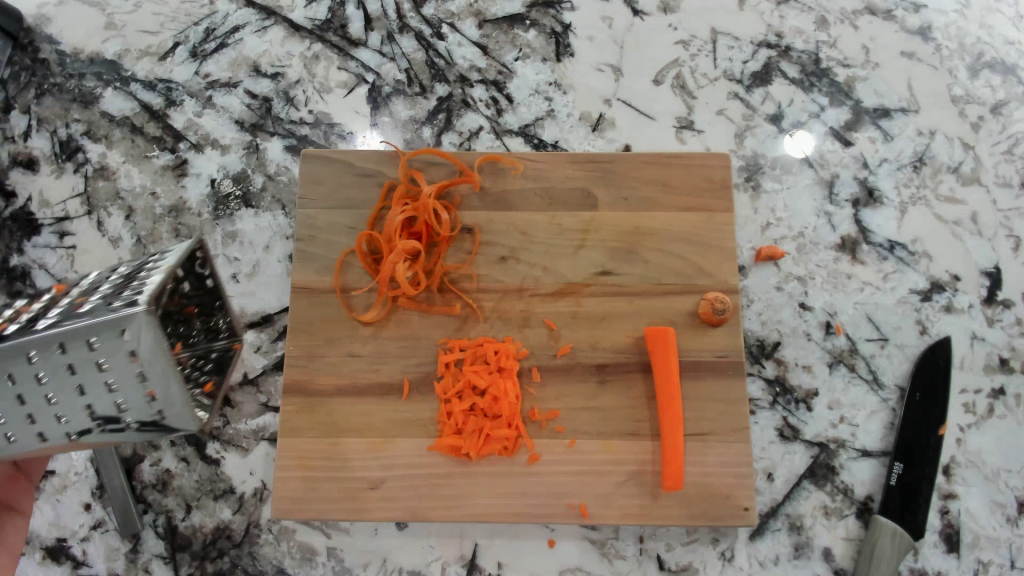
Carrot
Our carrot is gonna be raw so the smaller the pieces you can put in your blender, the easier it will be to get smooth.
Frozen bananas
If you don’t have a bag of frozen bananas and just toss bananas into the freezer when they’re about to go bad like I do, the easiest way to use them is to put in the microwave for about 20 seconds, then just slice the skin off the banana and slice the banana up.
I know it looks super gross, but bananas naturally brown in the freezer like that, so no worries.
Milk
The milk can either be dairy if you can tolerate it (organic, full fat) or any other non-dairy unsweetened milk. Make sure it’s unsweetened so it doesn’t have added sugar.
I really don’t like using oat milk either because it has so many carbs straight from grains with no fiber.
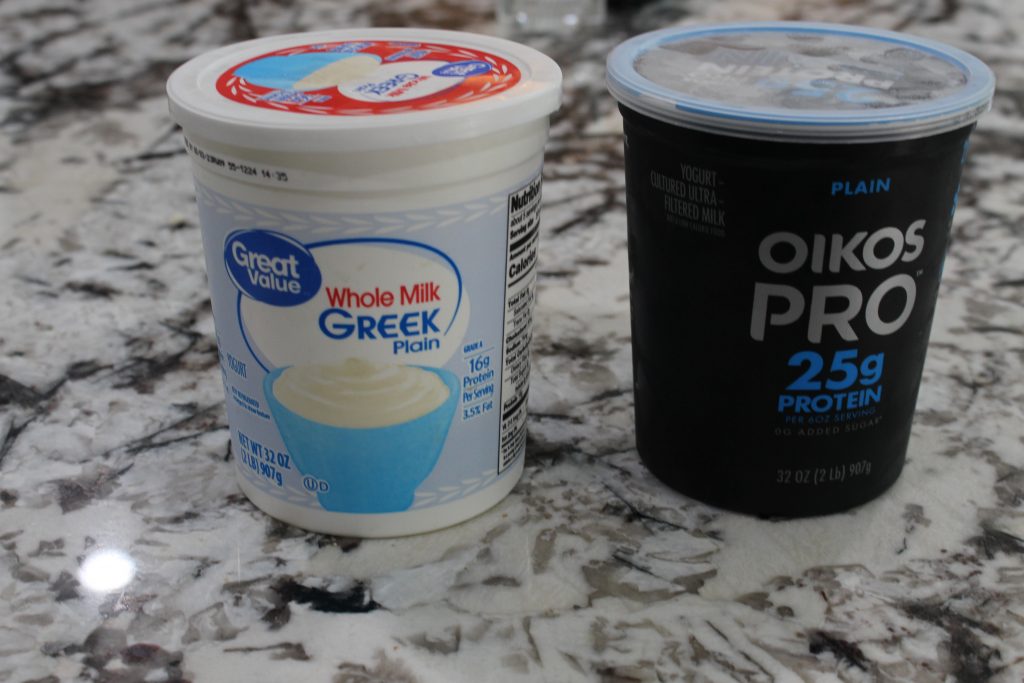
Yogurt
I personally prefer Greek yogurt, so if you can tolerate dairy- I’ve got 2 options for you that abide by anti-inflammatory diet guidelines.
The first is just plain unsweetened Greek yogurt.
The second is the Oikos brand called Oikos Pro.
I always prefer for any dairy to be organic, but if it’s not available, these options will do. The Oikos Pro has no sugar added, and no artificial sweeteners, but has added whey protein to bump up the protein content.
If you’re dairy free you can use coconut yogurt or any other dairy-free yogurt as long as it’s unsweetened.
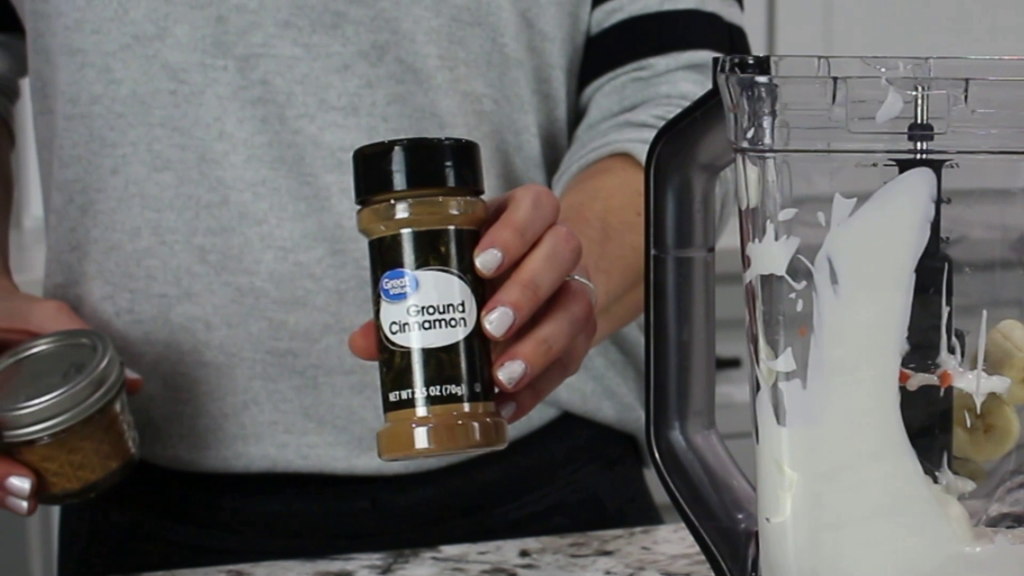
Cinnamon
Cinnamon is a beautiful spice that adds that perfect complimentary carrot cake spice, and not only is anti-inflammatory, but it also helps control blood sugar levels.
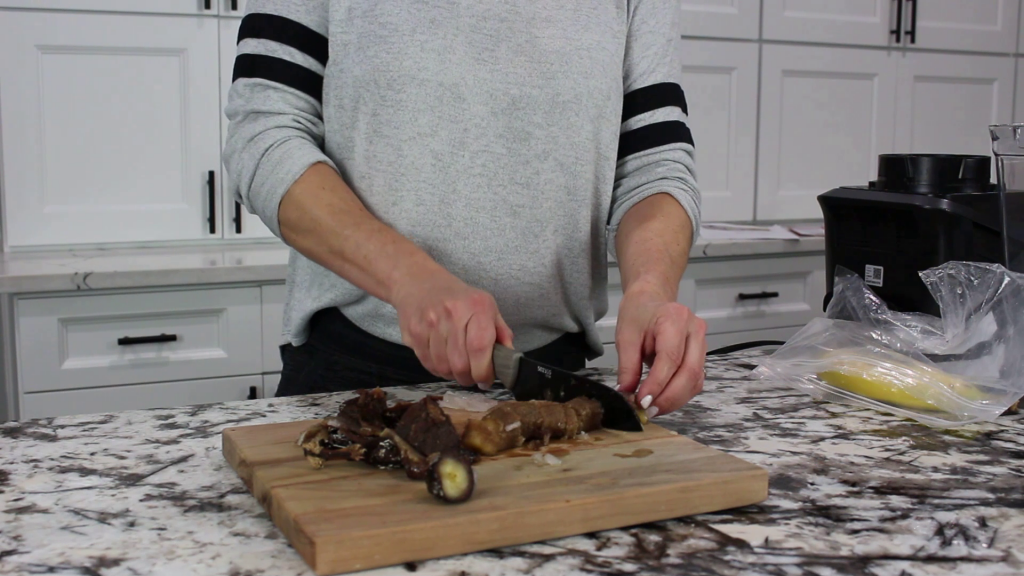
Fresh ginger
Lastly, fresh ginger is an amazing add-in whenever you’re able. It’s got anti-inflammatory properties and gives this smoothie recipe the bite that it needs to be fresh, zingy, and satisfy your sweet tooth.
Directions
So once we’ve got the carrot chopped or grated, add it into the blender with the bananas, milk, yogurt, cinnamon, and grated ginger.
Then blend it in your high-powered blender, pour up your anti-inflammatory Carrot Cake Smoothie, and enjoy!
This carrot cake smoothie takes advantage of our winter root vegetables while packing an anti-inflammatory smoothie punch that’s filling and satisfies the sweet tooth!
Author:Laura Brigance, MS, CHC
Yield:1 smoothie 1x
Ingredients
Scale
1 medium carrot, chopped or grated
2/3 of a frozen banana (or 2/3 cup frozen banana)
1/2 cup of unsweetened milk
1/2 cup Greek yogurt
1/4 tsp cinnamon
1 tsp grated ginger (fresh)
Instructions
Grate or finely chop the carrot.
Grate the fresh ginger.
Combine all ingredients into a high-powered blender. Blend on high until super smooth, taking care to ensure all the carrot chunks are broken down.


 QUICK-START GUIDE!