Citrus Pear Smoothie

This Citrus Pear Smoothie is a green anti-inflammatory smoothie that combines signature winter flavors to create an absolutely refreshing snack or breakfast smoothie.

citrus pear smoothie

So let’s talk ingredients.

citrus pear smoothie ingredients

Frozen avocado

So, first off, if you’re not using frozen avocado chunks, which you can buy at the grocery store, you can either freeze your own avocado ahead of time, or use it at room temperature.

Just know that if you use it at room temperature, that’s the only ingredient that was frozen, so we’ll need to use some ice in the place of part of the water so your smoothie is cold and slushie.

Pear

cutting a pear into wedges with an apple corer

We start out cutting up the pear and parsley. Pear is so delicious when it’s in season in the winter, and the skin is usually softer than an apple.

The skin is also full of antioxidants, and one in particular is quercetin, which has been shown to reduce inflammation, plus it has lots of fiber.

So I keep the skin on. You can cut the top and bottom off so it stands on its own, then use an apple corer get perfect wedges while taking the core out.

Parsley

chopping parsley on a cutting board

Parsley is full of vitamins K, C, A, and Bs. It’s also been shown to help reduce blood pressure and bloating, so I love to use parsley in any recipe I can. It just needs to be roughly chopped for this smoothie.

Lemon juice

juicing a lemon into a blender

Lemon juice adds just a bit of tang to this smoothie, as well as a bit more Vitamin c. Fresh is always best since most lemon juice in the bottle has added preservatives.

Water

pouring water into a blender for an anti inflammatory citrus pear smoothie

Make sure you use filtered water, and if your avocado isn’t frozen, use ½ cup of water and about ¾ to 1 cup of ice to replace the 1 cup of water.

Instructions

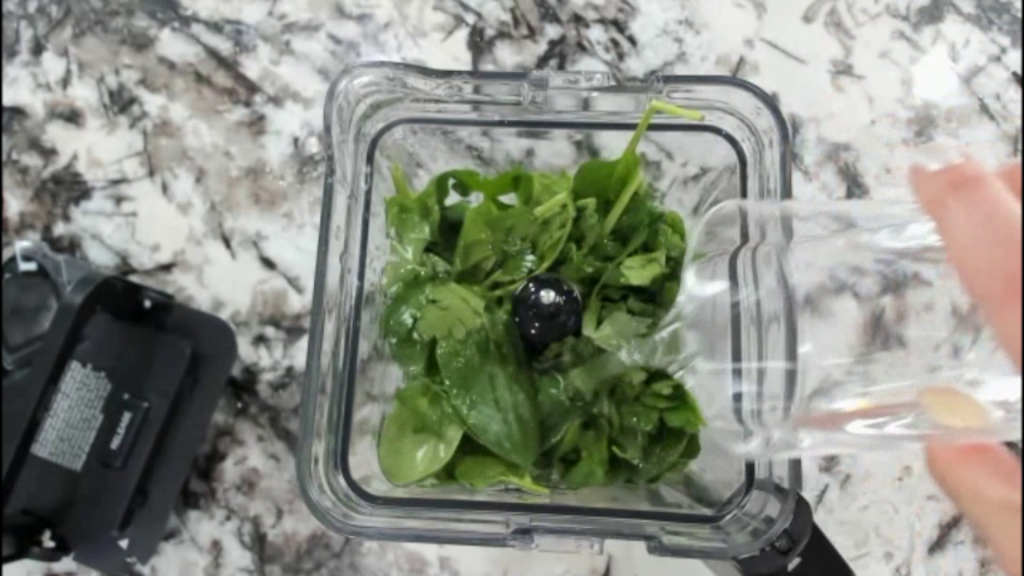
And then we just add all the ingredients to the high-powered blender, blend really well until all smooth—remember it’s chopping up pear skin if you kept it on, so you may need to let it go for a bit.

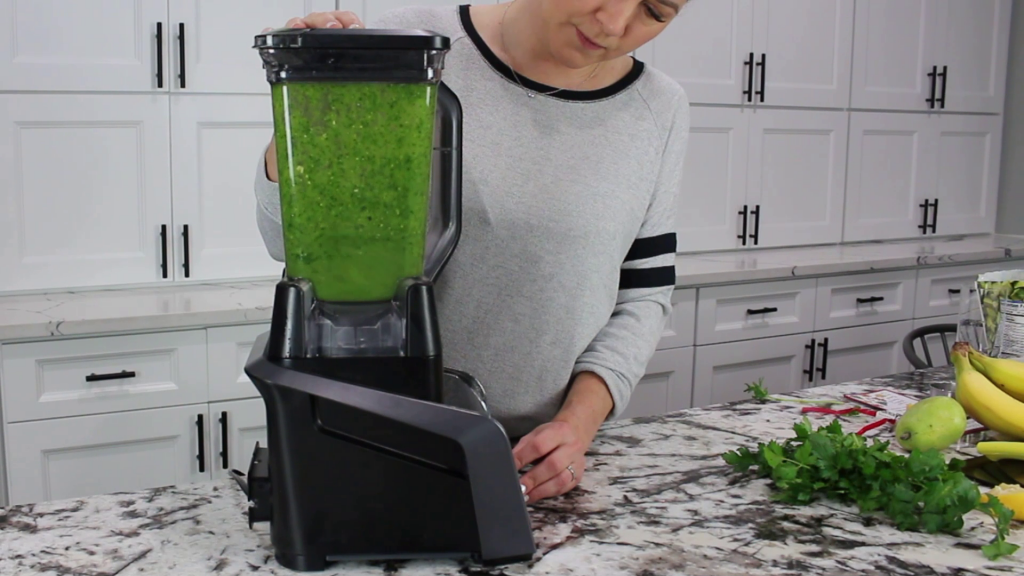
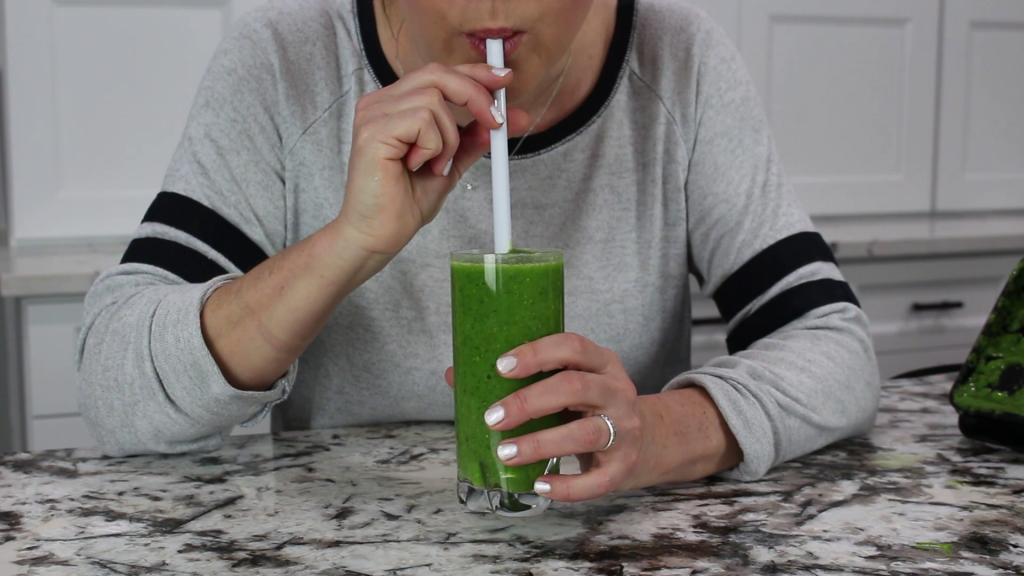
Then pour up and enjoy!

👇Grab the free Winter Anti-Inflammatory Meal Prep Guide! Click the image below! 👇

winter anti inflammatory meal plan
Print

Citrus Pear Smoothie

5 Stars 4 Stars 3 Stars 2 Stars 1 Star

No reviews

This smoothie combines the winter flavors of pear and citrus with anti-inflammatory greens to create a refreshing combo that will keep you full.

  • Author: Laura Brigance, MS, CHC
  • Prep Time: 5 minutes
  • Total Time: 5 minutes
  • Yield: 1 smoothie 1x

Ingredients

Scale

1/2 avocado (or 1/2 cup frozen avocado chunks)

1 pear

1 cup of spinach

1 handful of parsley (fresh)

1/2 of a lemon, juiced

1 cup of water

Notes

If you don’t have frozen avocado, you can freeze your own, or substitute 3/4 cup ice and 1/2 cup of water for the full cup of water in the recipe.

Did you make this recipe?

Share a photo and tag us @truewell.co — we can’t wait to see what you’ve made!

Don’t forget to SHARE this recipe or PIN IT for later!

3 Anti-Inflammatory Smoothies Perfect for Winter

Even though winter produce is less abundant than our other 3 seasons, there’s still plenty of goodness available—especially for anti-inflammatory smoothies.

So today I’m got 3 anti-inflammatory smoothie recipes to take advantage of the winter produce and give you a balanced anti-inflammatory breakfast smoothie, or snack.

We’ve got an anti-inflammatory green smoothie, which we call Citrus Pear Smoothie, a Lemon Tart Smoothie chock full of protein, and a Carrot Cake Smoothie that will satisfy your sweet tooth without the sugar.

Grab the Winter Anti-Inflammatory Meal Prep Guide: Click the image below!👇

anti inflammatory smoothies

Citrus Pear Smoothie

First up is our citrus pear smoothie. This green smoothie tastes clean and refreshing and is super yummy with the combination of pear and lemon.

green anti-inflammatory smoothie in glass

Grab the printable Citrus Pear Smoothie recipe HERE.

Lemon Tart Smoothie

This anti-inflammatory smoothie definitely has the tart flavor down. But it’s also packed with protein and healthy fat, which would make it a perfect meal replacement as well.

lemon tart smoothie on counter with lemons and straw

Grab the printable Lemon Tart Smoothie recipe HERE.

Carrot Cake Smoothie

And last, we have our Carrot Cake Smoothie which satisfies the sweet tooth while still being crazy healthy! I love to be able to use root vegetables from the winter, so this smoothie is perfect!

carrot cake smoothie

Grab the printable Carrot Cake Smoothie recipe HERE.

Let me know in the comments what your favorite is!

👇Don’t forget to SHARE this or PIN IT for later!👇

Blueberry Paleo Pancakes

One of the best things about summer has got to be the delicious assortment of fresh berries. And if your family is like mine, it’s pretty darn rare for anyone to turn their nose up these gorgeous juicy gems.

Our typical problem with baking with them is that so many recipes add in (totally unnecessary) sugar to sweeten berries up. The thing is, if they’re in season and fresh, they absolutely don’t need extra sweetness.

And one of our absolute favorite ways to use them is in pancakes. And these Paleo blueberry pancakes are super yummy AND can easily take a switchout for whichever summer berry goodness you have on hand!

Print

Blueberry Paleo Pancakes

5 Stars 4 Stars 3 Stars 2 Stars 1 Star

No reviews

These Paleo blueberry pancakes are super yummy AND can easily take a switchout for whichever summer berry goodness you have on hand!

  • Cook Time: 15 minutes
  • Total Time: 15 minutes
  • Yield: 2 1x
  • Category: Breakfast, Snack

Ingredients

Units Scale
  • 4 Eggs
  • 1/4 cup Unsweetened Almond Milk (or milk of choice)
  • 1 tsp white wine vinegar
  • 1 tsp vanilla extract
  • 1/2 cup almond flour
  • 1/3 cup tapioca flour
  • 1/4 cup coconut flour
  • 1/2 tsp baking powder
  • 1/4 tsp sea salt
  • 1 1/2 TBSP monk fruit sweetener (granulated, or keto maple syrup)
  • 1 1/2 tsp avocado oil (for pan)
  • 1/4 cup blueberries (fresh or frozen; or other summer berries)

Instructions

  1. In a mixing bowl, whisk all the wet ingredients EXCEPT the blueberries; in a separate bowl mix all the dry ingredients. Then add the dry into the wet a little at a time, whisking until completely combined.
  2. Either add blueberries into batter, or save for topping pancakes (or both!)
  3. Heat a pan over medium heat. When the pan is hot add the oil. Spoon the batter into the pan in scant 1/4 cup portions to form small pancakes. Divide the blueberries between pancakes and cook for about three to five minutes per side or until golden brown and cooked through. Repeat with any remaining batter, adding more oil to the pan as needed.
  4. Divide pancakes between plates and enjoy!

Nutrition

  • Calories: 241

Did you make this recipe?

Share a photo and tag us @truewell.co — we can’t wait to see what you’ve made!

Blueberry paleo pancakes

Anti Inflammatory Spring Charcuterie Board

When spring has sprung, we looove having friends over for weekend get-togethers! Admittedly, living in the Houston area has its benefits since we use our patio at least 8 months out of the year. But it does still get cold here!

anti inflammatory spring charcuterie board

One of my favorite things when we entertain is to make a charcuterie board, platter, or table because everyone seems so happy grazing while catching up.

But making it anti-inflammatory allows for everyone to enjoy the finger foods while not worrying about the ramifications later.

anti inflammatory spring charcuterie board

And this anti inflammatory spring charcuterie board seemed a fun addition to our weekends that signified the ending of winter.

anti inflammatory spring charcuterie board

Grab the recipe list below and let me know when you create your own spring board! Post it and tag me! 👉 @truewell.co

**Also, if you’re a charcuterie beginner, check out the mega guide: How to Build an Anti-Inflammatory Charcuterie Board

AND

Build a super cute Anti Inflammatory Easter Charcuterie Board! 🐇

Print

Anti Inflammatory Spring Charcuterie Board

5 Stars 4 Stars 3 Stars 2 Stars 1 Star

No reviews

Since charcuterie boards have pretty random different quantities depending on size of the board and how much is needed for creative license, I don't include amounts in the ingredient list. 🙂

  • Prep Time: 30 minutes
  • Total Time: 30 minutes
  • Yield: 6 1x
  • Category: Appetizer, Breakfast, Snack

Ingredients

  • deviled eggs
  • cauliflower
  • broccoli
  • celery
  • baby dill pickles
  • kalamata olives
  • green olives
  • cherry tomatoes
  • blueberries
  • strawberries
  • kiwi
  • raspberries
  • grapes
  • almonds
  • mozzerella pearls
  • chives (for garnish)
  • mint (for garnish)

Instructions

  1. Chop broccoli and cauliflower into tiny florets
  2. Peel and slice kiwi
  3. Slice strawberries
  4. Slice celery
  5. Arrange on board
  6. Add chive and mint garnish + additional spring flowers or other decor
  7. Serve!

Did you make this recipe?

Share a photo and tag us @truewell.co — we can’t wait to see what you’ve made!

Anti-Inflammatory Easter Charcuterie Board

Easter is, no doubt, one of the best times to get together with friends and family to have a brunch. After all, spring has sprung, the weather’s getting nice, and we’re all at our wit’s end with heavy winter recipes.

This Easter charcuterie board is made anti-inflammatory style to accommodate those of us who can’t have all the processed and cured meats.

easter charcuterie board anti inflammatory

If you’re new to charcuterie boards, check out the post on How to Build an Anti-Inflammatory Charcuterie Board for all the ins and outs, and then grab the recipe below to create your own Easter charcuterie board (or platter) anti-inflammatory style!

Here are ideas and tips for arranging your Easter anti-inflammatory board or platter:

easter charcuterie board anti inflammatory

Decide your pattern

For this platter, since it was oval-shaped like an egg, I wanted the design to resemble a decorated Easter egg. That meant lines across but with pattern interplayed.

easter charcuterie board anti inflammatory

Divide fruits and veggies

I decided that I had enough color to be able to divide the fruits to one side and the veggies to the other with the deviled eggs being the divider in the middle between the two.

I sometimes like to do this just to also make sure the savory flavored ingredients aren’t touching sweet ingredients. (You know what I mean if you’ve ever tasted a pickle-flavored strawberry. 😂)

easter charcuterie board anti inflammatory

Disperse color throughout

Unless you’re going for an ombre effect or specific color groupings, try to spread the colors through the board so that the eye moves through the entire thing. Remember, these things are made to be pretty!

(I realize I could’ve done a better job with the darker colors, but if you’ll notice the dramatic contrast of the blueberries on the top half, this sort of makes my point that contrast attracts the eye. Now looking at these photos later it sort of makes the bottom half look a bit boring, lol!)

easter charcuterie board anti inflammatory

Garnish

The last step is to decorate. So the first think I love doing is using fresh herbs because they’re brightly colored and are great finishers.

I used mint and chives in mine because they feel so much like spring. (My daughter also wanted it to look like there was grass on the platter, lol!)

easter charcuterie board anti inflammatory

Final decor

And the final decor would be any other items you want to place to round out the theme or look of the board or platter. These would be things like number or letter cutouts, flowers, or other themed accessories.

I chose tree blooms to go on this one because the redbud trees and Bradford pears were bursting when we made this board.

So grab the recipe/ingredient list below and let me know if you made one! Post it and tag me: @truewell.co

💖

Print

Anti-Inflammatory Easter Charcuterie Board (or Platter)

5 Stars 4 Stars 3 Stars 2 Stars 1 Star

No reviews

Since charcuterie board assembly has a bit of an 'unknown' factor when it comes to quantity (lest we dampen our creative process…) the quantities for ingredients are left out in this recipe.

  • Prep Time: 30 minutes
  • Total Time: 30 minutes
  • Yield: 6 1x
  • Category: Appetizer, Breakfast, Snack

Ingredients

  • deviled eggs
  • olives
  • baby dill pickles
  • broccoli
  • cauliflower
  • cherry tomatoes
  • celery
  • baby carrots
  • assortment of nuts (of choice)
  • grapes
  • blueberries
  • strawberries
  • raspberries
  • kiwi
  • any condiments, sauces, or dips of choice

Instructions

  1. Chop the broccoli and cauliflower into tiny florets.
  2. Slice celery.
  3. Peel and slice kiwi.
  4. Slice strawberries.
  5. Arrange on board or platter.
  6. Garnish with decor.
  7. Serve!

Did you make this recipe?

Share a photo and tag us @truewell.co — we can’t wait to see what you’ve made!

Green Smoothie Protein Muffins

When it comes to bulk recipes that are easy to grab-and-go, you can’t get much more balanced than these Green Smoothie Protein Muffins!

Not only do these powerhouse muffins have spinach in them (hence, the green color), but they’re also packed with fiber and a boost of protein to make these perfectly balanced.

Print

Green Smoothie Protein Muffins {anti-inflammatory, vegan, gluten-free}

5 Stars 4 Stars 3 Stars 2 Stars 1 Star

No reviews

  • Prep Time: 10 minutes
  • Cook Time: 20 minutes
  • Total Time: 30 minutes
  • Yield: 12 1x
  • Category: Breakfast, Snack

Ingredients

Units Scale
  • 1 tsp coconut oil (organic, virgin unrefined)
  • 2 1/3 cups baby spinach
  • 2 bananas (ripe)
  • 1/2 cup vanilla protein powder
  • 2 TBSP pitted dates
  • 3/4 cup whole milk (organic, or non-dairy unsweetened milk of choice))
  • 2 eggs
  • 2 cups oats (rolled or steel-cut or old-fashioned)
  • 1 TBSP baking powder

Instructions

  1. Preheat your oven to 350ºF (177ºC) and line a muffin tin with liners. Brush the liners with coconut oil or use silicone cups to prevent the muffins from sticking.
  2. In your blender, combine the baby spinach, bananas, protein powder, dates, and milk. Blend until smooth, then add the eggs, oats, and baking powder. Blend again until a batter is formed.
  3. Scoop the muffin batter into the cups. Bake for 18 to 20 minutes, or until a toothpick inserted into the middle of a muffin comes out clean.
  4. Let cool and enjoy!

Notes

  • Recommended Protein Powder

    This recipe was developed and tested with a plant-based protein powder. If using a different type of protein powder, results may vary.

  • Leftovers

    Store in an airtight container in the fridge for 4 days, or freeze for two months or more.

  • Add-Ins

    After blending, stir in chocolate chips, fresh berries, walnuts, or anything else you like to add to banana muffins!

Did you make this recipe?

Share a photo and tag us @truewell.co — we can’t wait to see what you’ve made!

green protein smoothie muffins spinach banana recipe anti-inflammatory

Egg, Bacon, + Avocado Bowl

This high-protein, high-fat breakfast bowl will keep you satisfied and focused for hours in the morning. Plus it’s a perfect post-workout muscle builder!

Print

Egg, Bacon, + Avocado Bowl

5 Stars 4 Stars 3 Stars 2 Stars 1 Star

No reviews

  • Prep Time: 5 minutes
  • Cook Time: 5 minutes
  • Total Time: 10 minutes
  • Yield: 1 1x
  • Category: Breakfast

Ingredients

Scale
  • 2 slices bacon (organic, uncured)
  • 2 eggs (medium to large)
  • 1/2 avocado (chopped)
  • 1 TBSP red onion (finely chopped)
  • 1 TBSP red bell pepper (finely chopped)
  • sea salt + pepper (to taste)

Instructions

  1. Prep all vegetables per the ingredients list
  2. Fry the bacon until crisp on a non-stick pan. Let it cool slightly and chop.
  3. Combine the bacon, eggs, avocado, onion, and bell pepper in a bowl.
  4. Season with salt and pepper to serve.

Notes

Per serving:

32 g fat

14 g carb

23 g protein

*For vegan option, replace eggs with meat-free substitute

Nutrition

  • Calories: 378

Did you make this recipe?

Share a photo and tag us @truewell.co — we can’t wait to see what you’ve made!

egg bacon avocado bowl breakfast low carb

Egg Broccoli + Turkey Muffins

These little savory muffins are full of comfort, without the carbs. They’re gluten-free, dairy-free, low-carb, and amazing as a batch-prepped breakfast or snack!

Print

Egg Broccoli + Turkey Muffins

5 Stars 4 Stars 3 Stars 2 Stars 1 Star

No reviews

  • Prep Time: 5 minutes
  • Cook Time: 15 minutes
  • Total Time: 20 minutes
  • Yield: 6 1x
  • Category: Breakfast, lunch, Snack

Ingredients

Units Scale
  • 1/2 head broccoli
  • 5 eggs (medium to large)
  • 1 clove garlic (minced)
  • 1 pinch chili flakes (optional)
  • 4 slices turkey (from deli)
  • 1/3 cup cheddar (shredded)

Instructions

  1. Preheat the oven to 360°F(180°C).
  2. Place the broccoli in a pot of boiling water and cook for approx. 3 minutes. Strain and cut into small pieces.
  3. Beat the eggs in a medium-size bowl, add the minced garlic and season with salt and pepper, and chili flakes if using.
  4. Grease a 6 muffin tray with oil or butter, and fill the muffin tin with evenly divided broccoli, ham, and grated cheese. Pour the beaten eggs into the muffin tin and bake in the oven for 10-15 minutes, or until eggs have set.

Notes

Per muffin nutrition:

6 g fat

4 g carb

10 g protein

*For vegan option, replace cheese with plant-based cheese + replace turkey with meat-free option.

Nutrition

  • Calories: 102

Did you make this recipe?

Share a photo and tag us @truewell.co — we can’t wait to see what you’ve made!

Avocado + Egg Salad

This delicious high-fat take on egg salad is a perfect breakfast or lunch, and can be easily paired with whole-grain or grain-free bread for a quick toast or filling sandwich.

Print

Avocado + Egg Salad

5 Stars 4 Stars 3 Stars 2 Stars 1 Star

No reviews

  • Prep Time: 20 minutes
  • Total Time: 20 minutes
  • Yield: 2 1x
  • Category: Breakfast, lunch, Snack

Ingredients

Scale
  • 3 eggs (medium to large)
  • 1 clove garlic (minced)
  • 1 avocado (ripe)
  • 1 tsp lemon juice
  • 1 tsp olive oil
  • 3 TBSP cilantro (fresh, chopped)

Instructions

  1. Boilthe eggs (put in warm water and cook 5 and a half minutes after the water hasboiled, then pour cold water in the pot and cool). Once cooled, peel and chop into cubes and put in a bowl.
  2. Press the garlic,and addto the eggs.
  3. Half the avocado, remove the stone and cut the flesh into cubes. Place the avocado and cilantro the bowl. Drizzle with lemon juice and olive oil.
  4. Season everything with salt and pepper, and gently mix. Garnish with more cilantro.
  5. Serve immediately on whole-grain or grain-free bread or on its own.

Notes

Per serving:

24 g fat

9 g carb

11 g protein

Nutrition

  • Calories: 298

Did you make this recipe?

Share a photo and tag us @truewell.co — we can’t wait to see what you’ve made!

Turmeric Poached Eggs

The addition of anti-inflammatory turmeric to these poached eggs adds a subtle spiciness that’s *just right*.

Print

Turmeric Poached Eggs

5 Stars 4 Stars 3 Stars 2 Stars 1 Star

No reviews

  • Prep Time: 10 minutes
  • Cook Time: 5 minutes
  • Total Time: 15 minutes
  • Yield: 2 1x
  • Category: Breakfast, lunch, Snack

Ingredients

Units Scale
  • 2 tsp pine nuts
  • 1 3/4 cups fresh spinach
  • 5/8 cup tomatoes (halved)
  • 1 TBSP olive oil
  • 1 TBSP white wine vingegar
  • 1 tsp ground turmeric
  • 2 eggs (medium sized)

Instructions

  1. Heat a dry frying pan and toast the pine nuts for 2 minutes, then set aside.
  2. In the meantime, heat the oil in a frying pan and stirfry the spinach and tomatoes for 2 minutes on medium heat until wilted. Season with salt and pepper.
  3. Bring a pot of water to a boil and add in the vinegar and turmeric. Turn the heatdown so that the water no longer bubbles. Carefully break in the egg and poach for 3 minutes; repeat with the second egg.
  4. Divide the spinach over two bowls, top with the poached egg and sprinkle with toasted pine nuts. Season withsalt and pepper. Breakopen the eggs just before serving.

Notes

Per serving:

15 g fat

12 g carbs

14 g protein

Nutrition

  • Calories: 219

Did you make this recipe?

Share a photo and tag us @truewell.co — we can’t wait to see what you’ve made!

turmeric poached egg breakfast healing bowls recipe

Raspberry Nice Cream

If you’re looking for a delicious summery treat to cool down, this tart and cool fruity ice cream with a sherbet feel is the best!

Super easy to make, no added sugars (it does have natural sugars in the berries and bananas, but comes with all the fiber goodness), and phytonutrients from these gorgeous raspberries!

*On a side-note, I know lots of readers + clients who aren’t crazy about the seeds in raspberries (myself included). If that’s the case, it’s perfectly fine to sub out the raspberries for blueberries, strawberries, or any other berry that’s frozen and does not have sugar added.

Enjoy!

Raspberry Nice Cream

A submlime and sugarfree sorbet-type ice cream for raspberry lovers!

  • Food Processor
  • Freezer safe container with lid (for storage)
  • 2 bananas (frozen, sliced)
  • 1 1/2 cups frozen raspberries
  • 2-3 TBSP milk of choice
  • 2 tsp vanilla extract
  1. Place the frozen bananas and raspberries into the food processor, add the vanilla extract and almond milk. Blend until creamy.

  2. You may need to add one or two tablespoons of milk, to achieve a thicksmoothie like consistency. 

  3. Serve immediately (soft-serve) or transfer into a dish or plasticcontainer, cover with a lid and freeze for 2 hours. 

Dessert, Snack
Dairy-Free, Gluten-Free, Low-Carb, Sugar-Free, Vegan

Cottage Cheese + Basil Omelet

This Mediterranean-flared omelet is nothing short of delicious!

*Wanna get a more rich flavor? Sub the cottage cheese for feta!

Print

Cottage Cheese + Basil Omelet

5 Stars 4 Stars 3 Stars 2 Stars 1 Star

No reviews

  • Prep Time: 10 minutes
  • Cook Time: 10 minutes
  • Total Time: 20 minutes
  • Yield: 4 1x
  • Category: Breakfast, lunch, Snack

Ingredients

Units Scale
  • 6 eggs (large)
  • 4 TBSP water
  • 1 TBSP avocado oil (or olive oil)
  • 1 bunch basil (fresh)
  • 7/8 cup cottage cheese (organic)
  • 12 cherry tomatoes

Instructions

  1. Beat the eggs with the water and season with salt and pepper. 
  2. Heat ¼ oil in a frying pan and bake 1 thin omelet, repeat until you have 4 omelets. Keep them warm under aluminumfoil.
  3. Chop the basil finely and mix with the cottagecheese. Seasonwith freshly ground pepper. 
  4. Cutthe tomatoes into quarters. Divide the cottage cheese and tomato over theomelets and roll them up. Cut diagonally and serve immediately.

Notes

Nutrition per serving:

14 g fat

3 g carb

15 g protein

Nutrition

  • Calories: 200

Did you make this recipe?

Share a photo and tag us @truewell.co — we can’t wait to see what you’ve made!

cottage cheese basil omelet low carb anti-inflammatory breakfast snack