Top 3 Mistakes in Anti Inflammatory Meal Planning + What to Do Instead

One thing I’ll say till I’m blue in the face is that meal planning is one of the most underrated forms of stress management. Especially when those meals are meant to help you manage or avoid a chronic condition.

So look, meal planning can be tough enough on its own, but when you add in a dietary style that you’re totally new to, that just makes it that much more complicated.

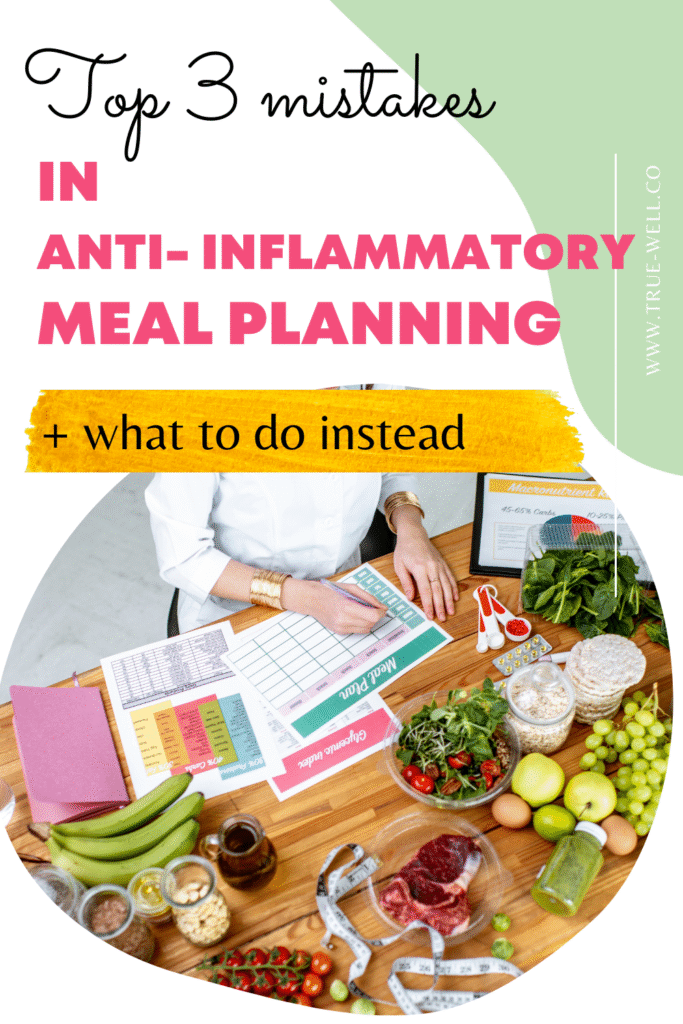
Over the years, I’ve seen clients make the same three mistakes with anti-inflammatory meal planning. These missteps cost them time, money, and energy … and make it way harder to get meals on the table consistently.

So let’s walk through the top 3 mistakes (and how to avoid them) so you can make meal planning feel easy, doable, and sustainable.

mistakes in anti inflammatory meal planning

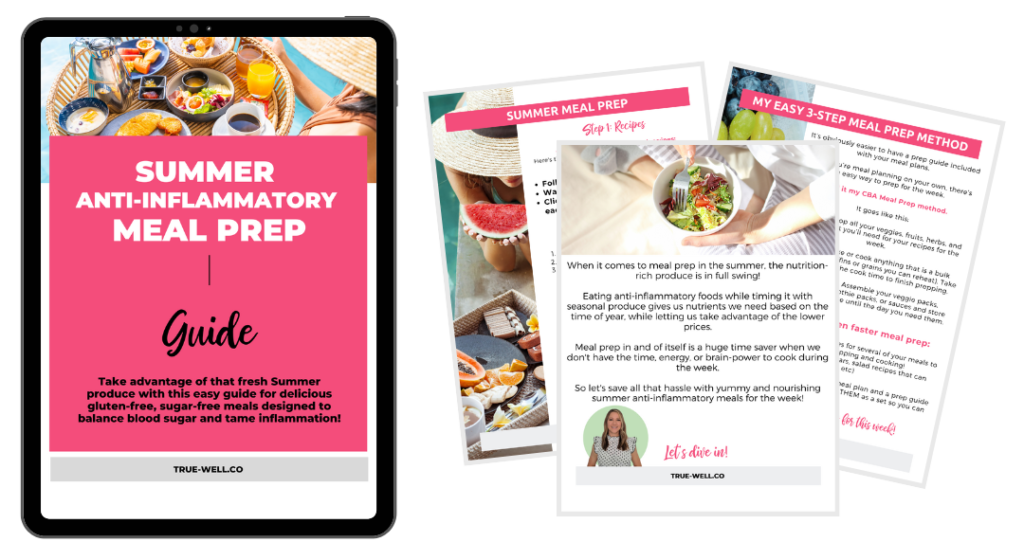
Brand new to the anti-inflammatory diet and lifestyle? Grab my free Anti-Inflammatory Quick-Start Guide HERE. It’ll give you a clear food list and simple swaps so meal planning feels less like guesswork.

And once you’re ready to streamline, don’t miss my free Meal Planning x LIFE Workshop, where I show you how to plan healthy meals using the templating method proven to save you hours each week in the kitchen.

Anti Inflammatory Meal Planning Mistake #1: Being overly ambitious

So I get it–when we get excited about something new (especially if it’s supposed to help us reach our goals like managing a condition, getting your blood sugar under control, or even kick-starting weight loss), we just want to jump all in…

But here’s the problem: being overly ambitious usually leads to burnout. You get overwhelmed, miss a night or two, and then throw in the towel.

✅ Do this instead: Start small. Plan to cook 3–4 dinners a week at first. Cook a little extra each time so you’ve got leftovers for lunch or another dinner. That way, you’re building confidence and consistency without the pressure.

top 3 mistakes in anti inflammatory meal planning

One of the really great strategies for this is when you cook those three to four meals go ahead and cook a little bit more so that you can have extra for other meals… which leads us into mistake number two.

Anti Inflammatory Meal Planning Mistake #2: Not cooking enough food at once

So before you get all up in arms and overwhelmed at that let me just explain.

It takes no extra time to cook 4 servings of a recipe versus 8 servings of a recipe.

You’re simply using double the ingredients so what I want you to think about is that when you’re only cooking one recipe at a time for whatever meal that is you’re missing out on the opportunity to save so much time later. 

The reason why that happens is that whenever you cook more you have extra time, you have a fallback, and you have a backup plan. 

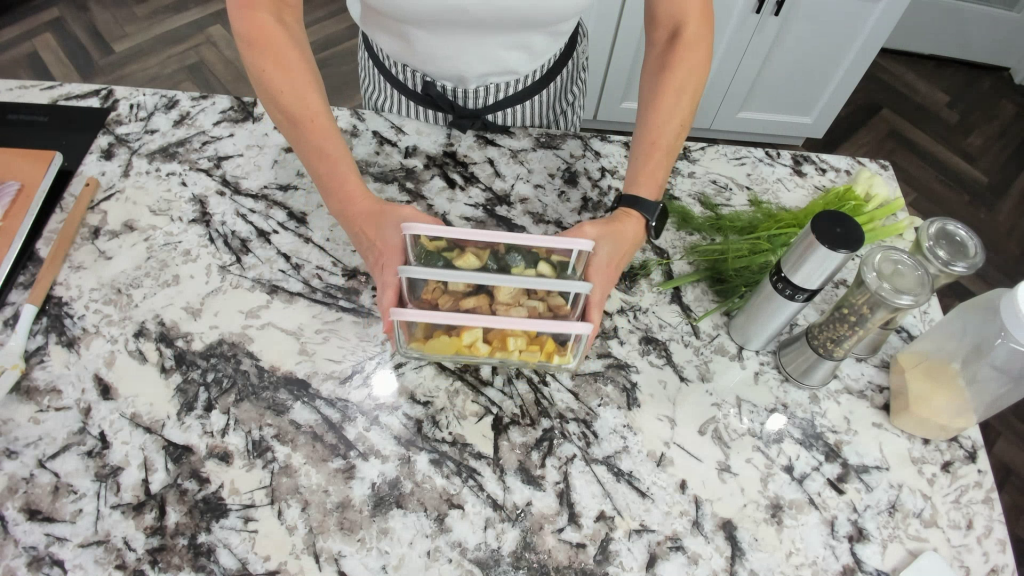
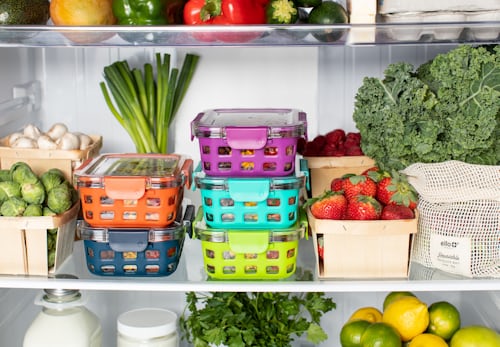
✅ Do this instead: When you cook dinner, make enough for tomorrow’s lunch or freeze a second batch for later. Bonus points if you schedule one night a week as a “leftovers night.” That’s one less meal you have to cook and clean up.

top 3 mistakes in anti inflammatory meal planning

I know a lot of families who do one night a week for leftovers for dinner, (we absolutely do that because it saves me cooking one night of the week and it also saves all of the other clean up that happens, and it cleans up whatever is left over in the fridge.) 

So instead, think about doing one and a half or even doubling up on your recipes. You do also have the option to take one recipe and cook it for your dinner that night and then make a second one at the same time to freeze for later. So I always recommend doing that and or making double at the recipe so that you can have enough for lunch the next day. 

I work out of the house but whenever I did not work out of the house I would get into that hangry situation right before lunch because I’d been really busy working and usually forgot to have a snack.

So by the time lunch got there I was just being like in this annoyed, starving state where I really didn’t care what I went to eat, so I would just grab the closest most convenient thing that I could. Which would never work out on this type of dietary style. 

So if you make enough for lunch the next day you can be assured that whatever you’re eating for lunch is compliant with the anti-inflammatory diet and that way you’re not even worrying about what you’re eating the next day because you know that it fit in because you made it for your dinner the night before.

Mistake #3: Not setting enough time aside

Mistake number three is not setting enough time aside for meal prep and for actual cooking.

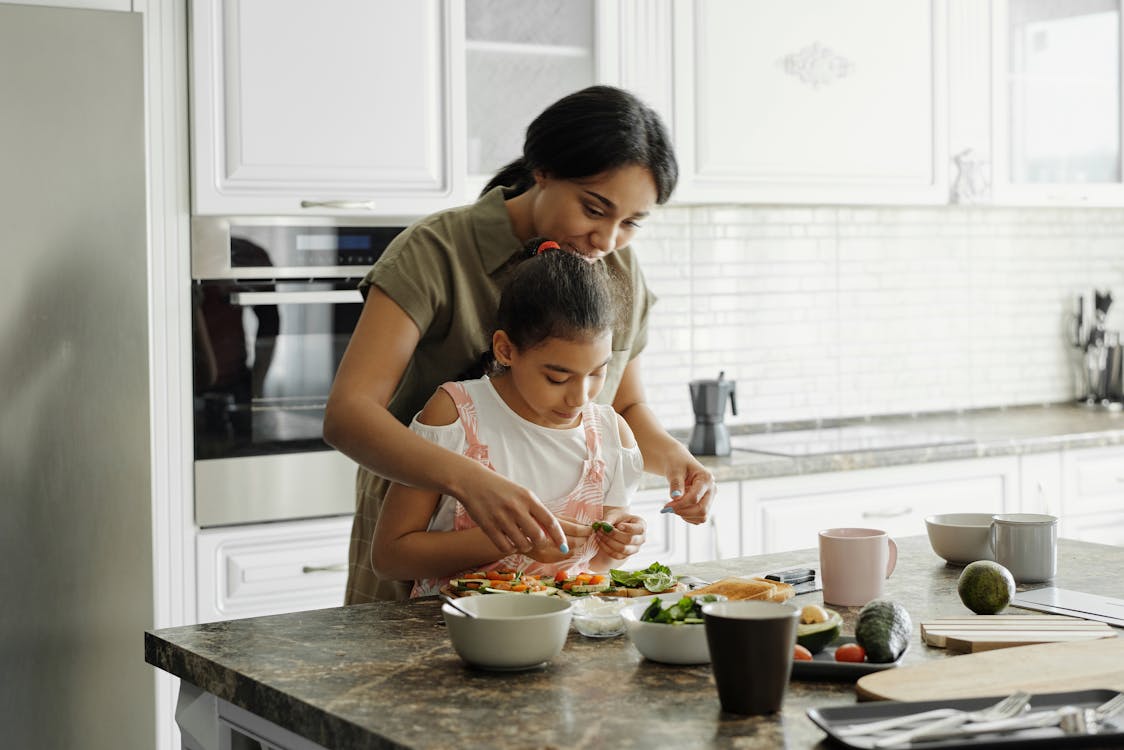
If you’ve ever tried to cook a full meal after work with nothing prepped, you know how stressful it can be. You end up frazzled, kids get to bed late, and it feels like meal planning is a burden.

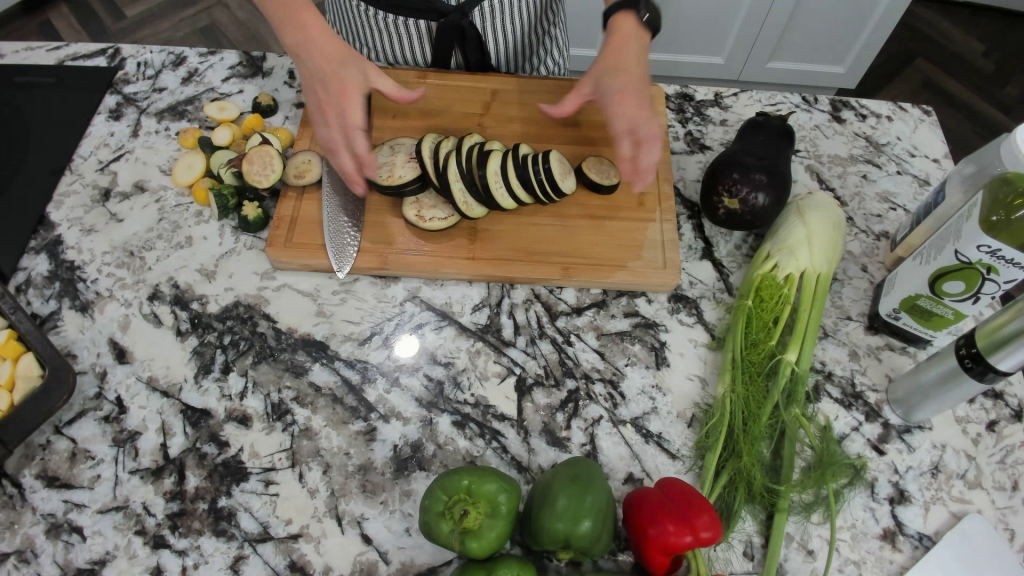
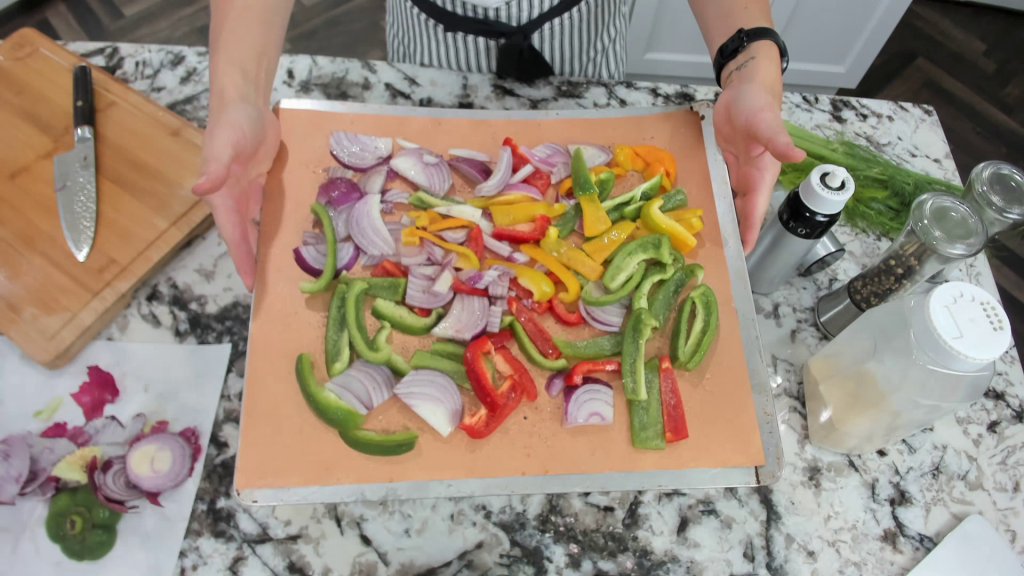
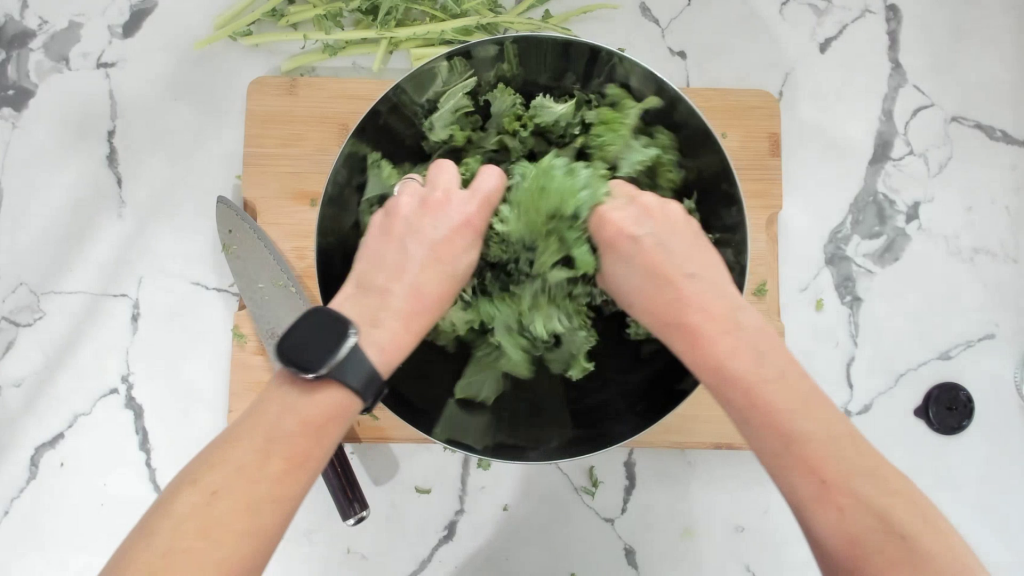
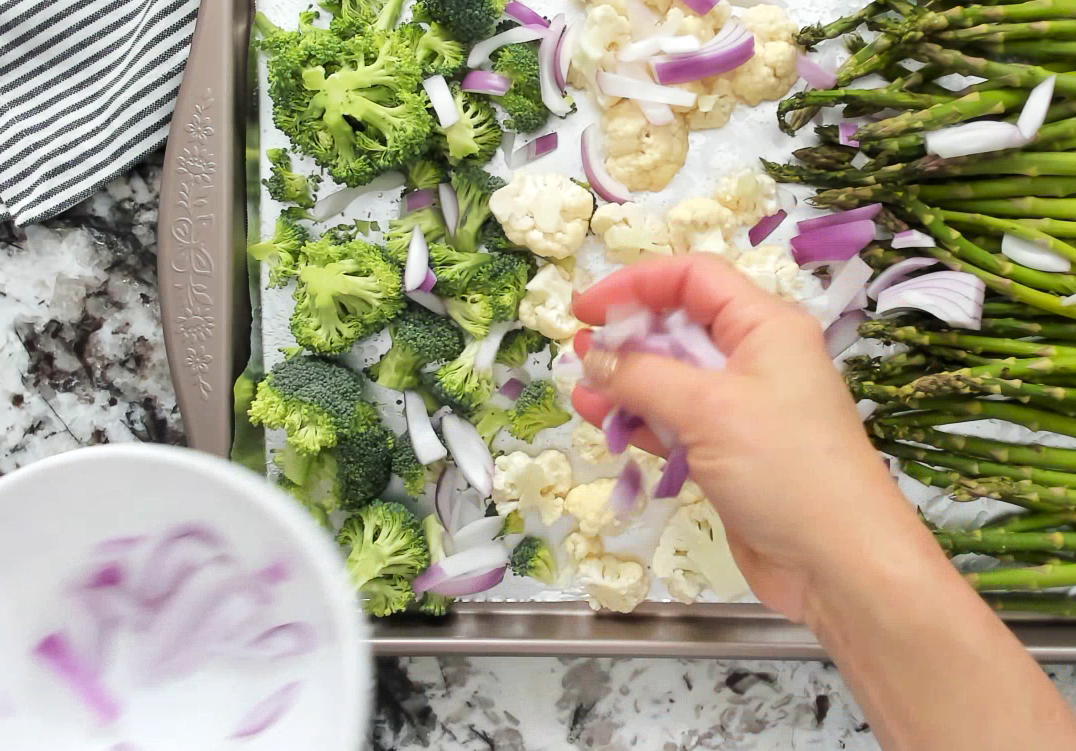
✅ Do this instead: Schedule 1 hour at the start of the week for meal prep. Chop veggies, cook proteins, or prep sauces ahead of time. Even just pre-chopping produce when you unload groceries can save you loads of stress later.

top 3 mistakes in anti inflammatory meal planning

Here’s why: When you do allow yourself enough time, it just makes your time spent cooking way more relaxing… You just assemble the ingredients cook what needs to be cooked at your own pace, no rush…Instead of frantically running around with your hair on fire just to get dinner ready. 

But it also gives you peace of mind during the day because you know that those things are already prepped and ready to go and have the extra time to cook dinner. 

I can’t tell you the number of clients that tell me that even though they have meal plans technically done they still have anxiety about getting the meals actually cooked at night because of how long it will take. 

✅What to do instead is to make sure that you schedule in an hour maybe on Sunday (or one other day at the start of the week) to meal prep: chop veggies and even go ahead and make some of the meat even sauces.

Sometimes if it’s a casserole a lot of those ingredients are pre-cooked and then you can just assemble them the night of and then just stick them in the oven so that you have as little to do as possible on the day of.

Bonus tip

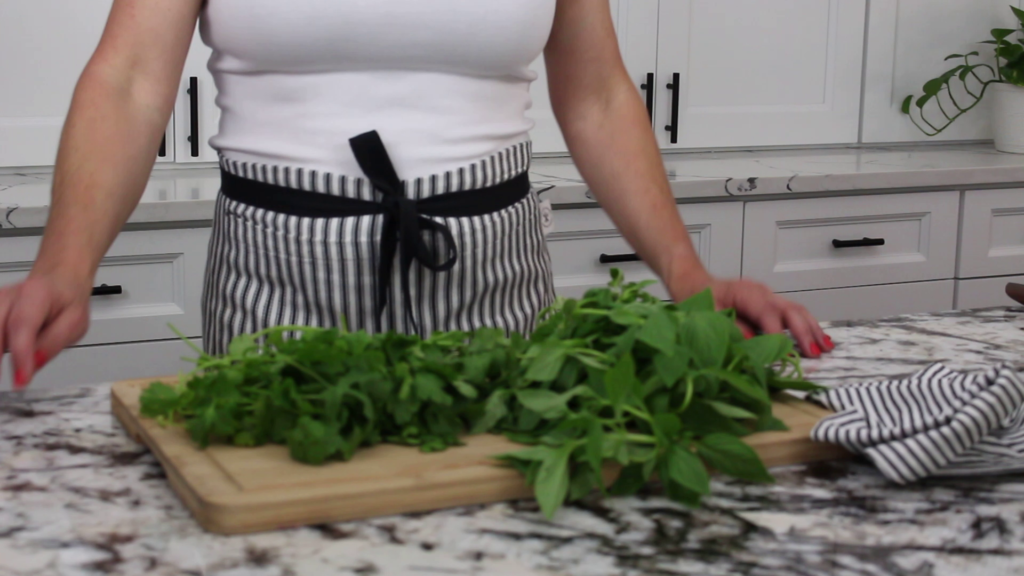
Shop once, prep once. When you walk in the door from the store, go ahead and wash + chop veggies right then. It’s one less barrier between you and actually cooking the food you bought.

You don’t have to be perfect at meal planning … you just need a system that works for your life.

👉 Start with the free Anti-Inflammatory Diet Quick-Start Guide. (Check it out below!) It gives you a clear list of foods to eat and avoid so you’re not second-guessing your meals.

👉 Then, watch my free Meal Planning x LIFE Workshop where I’ll show you how to build a realistic meal planning routine that fits into real life (without it taking over your Sundays).

Take it one step at a time. You’ll be amazed at how much simpler anti-inflammatory meal planning can feel when you’ve got the right tools in place. 🌿
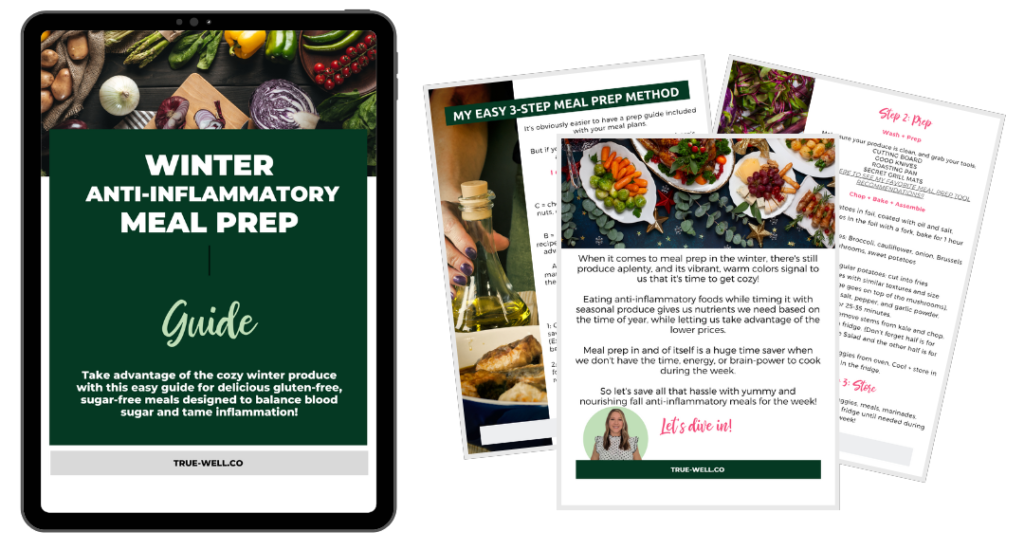
Discover My Unique 4-Pronged Approach to the Anti-Inflammatory Diet So You Can Get Started Immediately (Without Getting Overwhelmed or Cleaning Out Your Entire Pantry)

  • Why a full-scale pantry clean out is NOT the best way to start your anti-inflammatory journey, and the steps you can take instead to make sure you’re fueling your body with foods that love you back
  • The essential foods you MUST add into your diet if you want to nourish and heal your body naturally
  • My anti-inflammatory shopping list so you can quickly fill your cart with the right foods (no googling in the produce aisle or wasting hours staring at ingredient lists)

GET YOUR FREE 

ANTI-INFLAMMATORY

👇 QUICK-START GUIDE! 👇

Let me know in the comments if you’ve been making any of these mistakes (or even others that I didn’t touch on!)

Anti-Inflammatory Overnight Oats

Overnight oats can be a total game-changer for breakfast — quick, delicious, and perfect for busy mornings.

But here’s the thing: not all overnight oats recipes are created equal. Many recipes are loaded with sugar and fillers that can actually fuel inflammation instead of fighting it.

That’s why this version is different — no added sugar, anti-inflammatory add-ins, and a trick that makes it more blood sugar-friendly, too.

💡 Stop Guessing Which Breakfast Foods Trigger Inflammation.

My Anti-Inflammatory Quick Start Guide shows you:

  • 10 foods to swap first
  • Simple, ready-to-use shopping list
  • 4-step method to personalize your anti-inflammatory diet

👉 Yes! Send Me the Quick Start Guide →

anti inflammatory overnight oats

It is, however, a little harder to find one that’s sugar-free, as sugar is inflammatory. That’s why this basic overnight oats recipe is just as yummy, but without any added sugars.

So before I get into the recipe and how to make overnight oats, I want to talk about what exactly makes these overnight oats an anti-inflammatory recipe so you can do the same, no matter which flavor variation you make at home.

What Makes Overnight Oats Anti-Inflammatory?

There are three big factors that turn a basic overnight oats recipe into an anti-inflammatory one.

1. What You Leave Out

Skip the inflammatory extras you’ll find in many instant oat packets:

  • Added sugars
  • Artificial colorings and flavors
  • Preservatives
  • Low-quality, oxidized oils

By starting with plain, minimally processed oats and no added sugar, you’re already ahead of the game.

💡 Want a full list of pantry swaps to instantly make your meals more anti-inflammatory? Grab my Quick Start Guide here.

2. How You Prepare Anti-Inflammatory Overnight Oats

Oats are a carbohydrate, and how they’re cut — and how you prepare them — affects how quickly they spike your blood sugar.

For traditional overnight oats, you simply soak them in liquid overnight — but with this tweak, you get even more metabolic benefits.

different types of oats on a countertop

3. What You Add In

Here’s where you can turn a simple breakfast into an anti-inflammatory powerhouse:

Great add-ins:

  • Cinnamon (may help lower blood sugar)
  • Turmeric or ginger (natural anti-inflammatory spices)
  • Lower-sugar fruit like berries
  • Chopped nuts (almonds, macadamia, walnuts) for healthy fats and crunch

Healthier Micro-Action: Choose at least one spice and one healthy fat add-in every time you make this recipe.

Discover My Unique 4-Pronged Approach to the Anti-Inflammatory Diet So You Can Get Started Immediately (Without Getting Overwhelmed or Cleaning Out Your Entire Pantry)

  • Why a full-scale pantry clean out is NOT the best way to start your anti-inflammatory journey, and the steps you can take instead to make sure you’re fueling your body with foods that love you back
  • The essential foods you MUST add into your diet if you want to nourish and heal your body naturally
  • My anti-inflammatory shopping list so you can quickly fill your cart with the right foods (no googling in the produce aisle or wasting hours staring at ingredient lists)

GET YOUR FREE 

ANTI-INFLAMMATORY

👇 QUICK-START GUIDE! 👇

So let’s jump into how to make overnight oats to keep them anti-inflammatory and insulin friendly.

Basic recipe ingredients list for anti inflammatory overnight oats

Anti-Inflammatory Overnight Oats Ingredients

The typical ingredients in a basic overnight oats recipe are:

  • ½ cup oats (steel-cut or rolled)
  • ½ cup milk (unsweetened dairy or non-dairy)
  • ¼ cup plain yogurt (Greek or unsweetened dairy-free)
  • 1 Tbsp chia seeds
  • ½ tsp vanilla extract (real, not imitation)
  • Pinch of salt
  • Natural sweetener (stevia, monk fruit, erythritol, or allulose)
  • Anti-inflammatory add-ins (cinnamon, turmeric, berries, nuts)
  • Note: Oats are naturally gluten-free, but choose certified gluten-free to avoid cross-contamination.

Remember, the more intact the oats are, the better for your blood sugar levels.

Your options for oats are :

Steel cut, rolled, and quick oats. (Oat groats is the least refined version, and they have a bit the same texture as steel-cut).

📄Read all about Types of Oats and How to Choose Oats HERE.

You can see the difference in texture here, and if you’ve had any experience with oats and oatmeal you’ll know that the thinner the cut, the more mushy they can get.

different types of oats you can use in anti inflammatory overnight oats

Per anti-inflammatory diet basics, whole or partially cracked grains are acceptable because of those lower blood sugar hits, so I recommend using oat groats, steel-cut, or rolled (in that order).

As far as them being gluten free, oats are inherently gluten free, however, cross contamination is really frequent with oats, so I recommend getting oats that are labeled as gluten-free if you have celiac or a severe gluten intolerance.

gluten free oats package

Directions for Preparing Anti-Inflammatory Overnight Oats

1. Cook oats first (optional but recommended):

For this overnight oats recipe, we use ½ cup of oats.

**Now one thing to note in CASE you don’t have the correct type of oats and want to use up what you have is that there are different calorie and macro counts for the different types of oats because of the difference in their denseness.

adding oats to a meal prep container to make anti inflammatory overnight oats

So you want to make sure you match those if you are counting calories or macros for your weight.

2.Combine ingredients

Next, we add milk.

Not everyone *needs* to go dairy-free to follow an anti-inflammatory diet as the guidelines of anti-inflammatory dictate that it’s unique to each person after eliminating foods KNOWN to be inflammatory to all humans.

So, obviously, don’t use cow’s milk if you’re lactose intolerant, If you’re allergic, and if you’re adapting this recipe to be a vegan breakfast.

adding milk to a meal prep container to make anti inflammatory overnight oats

There are a ton of other non-dairy options.

However, make sure you find one that is sugar-free. The label will say ‘Unsweetened’, and try to find one with as few fillers and thickeners as possible.

Many people react to these and some people even end up making their own nut milks because of this.

We’ll need ½ cup of milk.

Next we’ll add yogurt. Again—if you’re fine with dairy, choose a plain, unsweetened yogurt (preferably organic).

adding yogurt to a meal prep container to make anti inflammatory overnight oats

I prefer Greek, and if you’re dairy-free or vegan, coconut milk yogurt or any other dairy-free option is fine as long as it’s plain and unsweetened.

Chia seeds are our next add-in. Chia seeds are great because they’re high in protein and healthy fat, can help lower LDL cholesterol, and they also help blunt that blood sugar spike.

chia seeds that have been soaked, in a bowl

And when they have moisture, the seed has sort of a gelatinous coating that helps us feel full, they give a tiny bit of a crunch.

Next we’re adding in vanilla extract. Just make sure this is REAL vanilla extract, not imitation as that’s an artificial flavoring.

The vanilla flavor goes with practically any flavor profile that you want to create, unless it’s a savory flavor, and it helps add to the overall sweetness factor.

So speaking of sweetness, let’s talk sweeteners.  Although there ARE savory flavors of overnight oats, most recipes are for sweeter versions. Since we’re eliminating sugar per anti-inflammatory diet guidelines, we can use zero calorie natural sweeteners.

Artificial sweeteners are terrible for your gut health, among other things, so we’re gonna steer clear of those.

I know many people will still insist on using natural sweeteners that do have sugar like honey or maple syrup. Those sweeteners are allowed in a Paleo diet, which is considered one type of anti inflammatory diet, so you use your own judgement for your own body.

natural zero calorie sweeteners you can use in anti inflammatory overnight oats

If you are trying to lose weight or reduce chronic inflammation, I recommend steering clear even of those natural sweeteners daily, and instead using stevia, monk fruit, erythritol, or allulose.

📄Read all about Choosing the Best Sugar Substitute for Your Body HERE.

Next we add salt. In all honesty, oats can sometimes taste a little like cardboard if you don’t know how to prepare them.

Salt livens up that plain grain flavor 💃, but it also adds a counter balance to the sweetness. So don’t forget to add in a pinch or two of salt.

And last is the anti-inflammatory add-ins.

Cinnamon has been shown to lower blood sugar, so it’s a perfect add-in if you have insulin resistance or are trying to lose weight.

Turmeric and ginger have a bit of a bite, but are perfect for helping to lower chronic inflammation as well. 

And if you want to add a bit more crunch, those chopped almonds, pistachios, macadamia nuts, or walnuts that I mentioned before are perfect here as well.

chopping assorted nuts on a cutting board

The flavor combinations are endless, but if you’d like some flavor pairing suggestions, check out the recommendations below.

Flavor Variations

  • Apple + cinnamon
  • Mashed banana + chopped pecans
  • Sugar-free peanut/almond butter + sugar-free chocolate chips
  • Strawberries + almond butter
  • Coconut flakes + almonds + keto maple syrup
stirring anti inflammatory overnight oats with a spoon on a countertop
anti inflammatory overnight oats

GO HERE FOR MORE ANTI-INFLAMMATORY BREAKFAST RECIPES / SNACK OPTIONS

Bottom Line: Build an Anti-Inflammatory Day, Not Just a Breakfast

This recipe is one easy win — but to really feel the difference, your whole day needs to work for you, not against you.

That’s where my Anti-Inflammatory Quick Start Guide comes in:

  • 10 foods to swap first
  • Simple, ready-to-use shopping list
  • 4-step method to personalize your anti-inflammatory diet

👉 Grab the Quick Start Guide and start feeling better fast →

Print

Anti-Inflammatory Overnight Oats

5 Stars 4 Stars 3 Stars 2 Stars 1 Star

No reviews

A fantastic anti inflammatory overnight oats recipe that’s gluten-free, dairy-free, and sugar-free, and totally customizable!

  • Author: Laura @ TRUEWELL
  • Prep Time: 5 minutes
  • Cook Time: 8 hours
  • Total Time: 8 hours 5 minutes
  • Yield: 1 1x
  • Category: Breakfast

Ingredients

Units Scale
  • 1/2 cup rolled oats (gluten-free (or steel-cut))
  • 1/2 cup milk (dairy or dairy-free)
  • 1/4 cup yogurt (Greek, or dairy-free option)
  • 1 TBSP monk fruit (granulated)
  • 1 TBSP chia seeds

Instructions

  1. Add all ingredients to container with a lid. Stir until well combined.
  2. Seal the container, and let sit in the fridge a minimum of 2 hours. (Best to prepare the night before and let it soak overnight.)
  3. Top with fresh or frozen fruit, and add other spices like cinnamon for a flavor boost!
  4. *If you prefer warm, pop in the microwave in the morning for 30-60 seconds.
  5. *Tip: For even more efficiency, double the recipe for 2 days worth of breakfasts. 🙂

Nutrition

  • Serving Size: Serving
  • Calories: 392
  • Sugar: 18.1 g
  • Sodium: 94.5 mg
  • Fat: 7.7 g
  • Saturated Fat: 2.7 g
  • Carbohydrates: 55.1 g
  • Fiber: 9.3 g
  • Protein: 18.5 g

Did you make this recipe?

Share a photo and tag us @truewell.co — we can’t wait to see what you’ve made!

DON’T FORGET TO SHARE THIS RECIPE OR PIN IT FOR LATER!

Quick and Easy Anti-Inflammatory Meal Prep for Fall

https://youtu.be/_7J-Bq8GoGU

Anti-inflammatory recipes are a great addition to a healthy eating pattern as they can help manage, prevent or reverse the effects of inflammation in the body.

Ingredients like dark leafy greens, beets and cauliflower are packed with anti-inflammatory properties which can help reduce chronic pain and prevent age-related illnesses.

Eating anti-inflammatory foods doesn’t have to be bland or boring either, as there are plenty of fresh and healthy recipes to choose from that cater to different dietary needs. Incorporating these recipes into your meal prep routine can help balance your blood sugar and reduce chronic inflammation.

What is an anti-inflammatory diet?

An anti-inflammatory diet focuses on consuming foods that have anti-inflammatory properties, like fruits, vegetables, whole grains, lean proteins, and healthy fats.

It aims to reduce chronic inflammation in the body, which can help prevent chronic diseases and promote overall health and well-being.

What are the benefits of anti-inflammatory meal prep?

No matter the season, your life is probably super busy. We have 4 kids (3 at home), and regardless of whether school is in or it’s summer or even winter break, things are always sorta chaotic.

So this method has actually been a lifesaver for us so that on weeks where I don’t even have the brainpower to put a meal plan together, this is our lifeline.

We have a backup.

No thinking about it all day, no scrambling at the last minute, and definitely no ultra-processed, inflammatory, and overpriced drive-thru or takeout.

So I’m gonna show you how to meal prep with fall anti-inflammatory foods (meaning: in season for fall in the US).

I’m also linking the example meals that we made for the week with all of the produce that we got.

And if you scroll a bit, you can get the GUIDE that shows you the details for all of this so you can keep it on hand for ANY time you have weeks like this.

Step 1: Choose your produce

So for anti-inflammatory meal prep, you start out by simply choosing a bunch of SEASONAL produce.

Our shopping order for this meal prep session I got:

  • broccoli,
  • brussels sprouts,
  • kale (can be already chopped up in a bag),
  • mushrooms, you can choose any kind,
  • sweet potatoes,
  • regular potatoes,
  • an onion,
  • sage,
  • and cauliflower.

And all of this was just random stuff that I know my family will eat and that gave us a pretty good variety for meals this week.

Step 2: Prep your workspace

And after washing all the produce, I pre-heated both ovens for 350 degrees F.

The tools you’ll need for your meal prep session are a large cutting board, good knives, and roasting pans- probably with a lip, and something to line it with so stuff doesn’t stick.

Now I use something I found by accident with is a BBQ grilling mat—I love these because I can cut them to fit perfectly in my pan and NOTHING sticks to them—they come in a pack all rolled up in a box.

(Some links may be affiliate links, meaning if you click on and then purchase, I’ll get a portion of the proceeds, at no additional charge to you.) 🙂

BBQ Grill Mats

BBQ Grill Mats

>>> Check out ALL my Best Kitchen Tools for Meal Prep HERE!

Step 3: Get your base seasoning out

So our base seasoning includes avodado oil to drizzle on, I use this to cook with because it has a high smoke point. Or you can use something like this Misto spray can where you put the oil in, pump air in to build pressure, and spray it on.

Then season with salt, pepper, and garlic powder, and it’s ready to go in the oven.

Click the image below to grab the free Fall Anti-Inflammatory Meal Prep Guide!👇

fall anti-inflammatory meal prep guide free pdf

Step 4: Prep foods that cook the longest first

So, even though I didn’t have full meals planned out when I got all this produce, I had a loose plan for a few things. So I knew I’d want to do baked potatoes one night, so since they take an hour to bake you’ll want to do these first if you’re doing baked potatoes one night.

And for baked potatoes, you just coat each one individually with oil, salt it, wrap it in foil, and then punch some holes with a fork.

Once I’ve got those all set and into the oven for one hour, I get to work chopping everything else.

Step 5: Prep all other foods that cook the same length of time

Broccoli and cauliflower

I started out with broccoli, and just basically cut all the florets off—and if you don’t like to chop you can always buy the bags where it’s pre-chopped. It does save time, but may cost a little more.

Once these were all cut up, I put them all on the pan on one end, because I put the cauliflower on the other end.

Then I started with the cauliflower and removed that large base then cut those into florets as well, breaking some of them apart. And you can also buy these prechopped if you don’t like cutting them up- it does save a lot of time and mess.

Then I placed all those on the second half of the pan where the broccoli was. I cook these on the same pan because cook at right about the same rate.

And then I wanted a bit more flavor than just our base seasoning, so I chopped an onion into chunks and just spread it out evenly on the pan.

Brussels sprouts

Next I prepped brussels sprouts, and the easiest way to do these is chop off the end piece slice them in half and lay them face down on the pan.

I arranged mine with a hole in the middle for all the loose little leaves because they get extra crispy and are a super yummy snack!

Then drizzle or spray with oil, then season with salt, pepper, and garlic powder.—and they’re ready to go!

Mushrooms.

I decided to split the mushrooms and do half chopped pretty small and the other half roasted.

I chopped one half because I like to mix them in with ground meat to give it bulk and really boost the vitamin content-and my kids can never tell! I don’t precook those, so I just put them in a baggie to store in the fridge until the night I needed them.

The other half I just spread out on the pan, and I had a pack of sage I grabbed at the store as well—this is such a fragrant and nutrition-packed herb, and perfect for colder weather.

So I just chopped some of it, sprinkled it on the mushrooms, then added our oil, salt, pepper, and garlic powder and it’s ready to go.

Sweet potatoes

I roughly chopped the sweet potatoes because I had loosely planned mashed sweet potates with cinnamon- my kids love those- and the rest I planned to use in my lunches during the week.

But that meant that all of them needed to be chopped.

Regular potatoes

Then I started on the rest of the regular potatoes I had. So for the ones I wasn’t using for a whole baked potato, we like to sometimes do homemade fries and this tool makes it super easy.

It’s a fry cutter and has this grid blade inside to cut the potato in perfectly squared fries.

So how it works is that you take the lid off, place the potato wedge on top of that grid, then put the lid on and push it down to force the potato through the grid. And you have perfectly shaped fries.

Fry and Vegetable Cutter

Fry and Vegetable Cutter

So I repeated this process until I got all the rest of the potatoes cut, then put them with the sweet potatoes on a pan, because they cook at about the same rate. I got them all seasoned and ready for the oven.

Step 6: Put all prepped veggies into the oven

All of the veggies go into the oven at that 350 degrees F for 30 minutes- just keep an eye out and take out anything that’s cooking a little too much.

Step 7: Any veg that won’t be pre-cooked

And the last thing I prepped was kale. Since this came in a bag, I picked out any bad pieces since it was already chopped, and planned to wilt some one night for dinner, and then would have a massaged kale salad one night as well.

So once all the bad pieces were picked out I just stored it in a Ziploc in the fridge.

Step 8: Remove veggies from oven

And when they’re done, just take all the pans out, and let them cool…

Step 9: Store prepped veggies

Then start putting them into your storage containers.

I do recommend putting them in separate containers because some veggies do have a higher water content and a lot of times they get a little bit mushy in there and you don’t want that water running into the other vegetables.

And then you’ve got all your veggies prepped for the week! You can store all of these AND your baked potatoes in the fridge until the night you need them.

4+ Meals with pre-prepped fall anti-inflammatory vegetables

The meals we cooked with our freestyle meal prep session were:

Chicken sausage with the broccoli and cauliflower,

Baked potato with shredded chicken, sugar-free bbq sauce, mushrooms, and brussels sprouts,

Turkey burgers that had the chopped mushrooms with sage built into it, and those homemade fries with Dijon mustard for dipping, and a massaged kale salad, AND

Lemony baked cod with wilted kale and mashed sweet potatoes with cinnamon.

And there ya go! That’s how to do Fall Anti-Inflammatory Meal prep!

Don’t forget to click the image below to grab the free Fall Anti-Inflammatory Meal Prep Guide! 👇

📌PIN IT FOR LATER!

Summer Anti-Inflammatory Meal Prep to Beat the Heat in Under an Hour

Today we’re doing anti-inflammatory meal prep for SUMMER that balances blood sugar, fights inflammation, and packs in nutrients from fresh seasonal produce.

I really love to eat seasonally, I think mother nature provides us with specific nutrients we need for each season, but also—it costs less to buy produce that’s in season.

summer anti inflammatory meal prep plan guide gluten free sugar free

Now I love to prep ingredients to be able to throw together, but I also know that weeks are CRAZY so it’s also important to have recipes that you’ve prepped for so you have as little as possible to think about during the week.

That being said—let me know in the comments if you like doing meal prep with actual recipes—or if you like prepping ingredients to assemble meals and snacks as you see fit throughout the week.

So this summer meal prep does both of those things – And I’ve created a PDF with instructions and links to the recipes so you can do this meal prep easily at home. 👇

Get the (free) Summer Anti-Inflammatory Meal Prep Guide!

summer anti inflammatory meal plan

Beat the summer heat with this 1-week gluten-free, sugar-free meal plan and prep guide! Featuring delicious anti-inflammatory recipes from fresh summer produce!

So today we’re meal prepping :

  • Cherry Almond Smoothies
  • A batch of Low Carb Blueberry  Scones

And our summer anti-inflammatory dinners we’re prepping vegetables and sauces for this week are:

  • Grilled salmon with sauteed green beans
  • Paleo Chicken Fajita bowls
  • Low Carb chicken and eggplant Parmesan casserole
  • Pesto chicken and zucchini and squash medley
Grilled Salmon with Sauteed Green Beans

Grilled Salmon with Sauteed Green Beans

Low Carb Eggplant Parmesan Casserole

Low Carb Eggplant Parmesan Casserole

Paleo Chicken Fajita Bowls

Paleo Chicken Fajita Bowls

Pesto Chicken with Zucchini and Squash Medley

Pesto Chicken with Zucchini and Squash Medley

So let’s get started prepping!

Summer anti-inflammatory meal prep steps

woman unpackaging summer vegetables on a countertop

Pre-step 1: Get out your prep foods and supplies, and wash everything

So to get started I get all that produce out. I get out my cutting board, my good knives, and a pan to roast the veggies on.

Then I go ahead and preheat the oven to 350 degrees F, and wash all the veggies really well.

placing a sil-mat on a sheet pan with summer vegetables on a counter top

Some people like to use a Sil match to roast veggies on because stuff doesn’t stick, but I found it really hard to find one of these that fits my pan perfectly.

I do still use this for things that I bake that won’t leak into the oven, but for roasting veggies I found a secret kitchen tool that I accidentally stumbled onto.

It’s a barbecue grill mat and I’m telling you nothing sticks to this! They usually come in a pack rolled up all nice in a box (linked below).

placing a grill mat onto a sheet pan with summer vegetables on a countertop

And what I do is actually cut them to fit my pans that have lips so that they fit perfectly. And I’ve done this with baking sheets and I’ve also done this with CorningWare dishes.

(Disclaimer: This is an affiliate link, so if you decide to purchase this product, I made a small percentage of the purchase price at no extra charge to you.)

BBQ Grill Mats

BBQ Grill Mats

>>> Check out ALL my Best Kitchen Tools for Meal Prep HERE!

Now for this summer meal prep session, I’ve got zucchini, summer squash, eggplant, green beans, bell peppers, and onions.

summer vegetables on a cutting board and counter top

Step 1: Chop

Once I make sure that everything’s been washed, I get started chopping.

So the way you want to chop veggies when you’re roasting them for meal prep like this is to try and cut them all around the same size. This just ensures that all those vegetable chunks cook at about the same rate.

Squash and zucchini

For the squash and zucchini, I just slice them in half lengthwise and then just chop slices all the way down.

sliced eggplant on a cutting board

Eggplant

Eggplants are tricky for some because they are part of the food family called nightshades. Nightshades cause inflammation in some people, but this isn’t a guarantee. Research has shown that nightshades causing inflammation is highly personal to each individual and any conditions they have, and the best way to know if you personally react is to do an elimination diet.

I like eggplants because they’re pretty filling but they have a soft texture without being mushy with liquid. Eggplant slices are really great for eggplant parmigiana, so it may help to slice it if you’d like to use it that way.

I’ve been told by an Italian chef before that they sometimes do that and leave the skin on to help the eggplant slice stay intact during cooking.

But I also like to peel mine and cut it into those kind of half-slices or half-moon slices to roast as well. One thing I’ve learned through the years about eggplant is that you may need to switch your peeling tool depending on the thickness of the skin.

For safety’s sake use a much smaller paring knife to get the eggplant skin off.

peppers and onions on a sheet pan

Bell peppers and onions

Then I moved on to my peppers and onions. For bell peppers, I usually will cut off the top and then I’ll work the knife around the insides to pull out that seed pod.

Then I’ll turn it upside down and give it a tap to get all those seeds out and then flip it upside down to cut it into slices. I did the same thing with my green, red, and orange bell peppers.

Then when those were done I peeled the skin of my onion. And then I cut the rest of it into larger slices to roast with the bell peppers.

These all get spread out onto a lined sheet pan as well.

Seasoning

Once I’ve got enough veggies to fill a pan I place all the chunks in sections.

The easiest way to prep roasted veggies–especially when you have recipes from different cuisines–is to do just the basic seasoning of:

  1. oil,
  2. salt,
  3. pepper,
  4. and garlic powder if you want

I used avocado oil because it has good monounsaturated fats, which is great for pulling down inflammation, and it also has a high smoke point. You can use the mister if you want a lighter coating of oil rather than it being drizzled.

Step 2A: Roast

Then everything’s ready and goes into the oven. We have a double oven so I actually take full advantage of that on days like this when I’ve got several pans to cook all at the same time.

I’ll just leave the light on in there so I can check in case something may need to come out a little earlier.

roasted summer vegetables on a baking sheet

The general time that I cook these summer vegetables is about 30 minutes.

While those are cooking, I’m gonna take advantage of that time in the oven and chop anything else, mix up my batter for the blueberry scones, and then assemble my marinades and sauces.

Other veggies that don’t get cooked

The last thing in this session that I did was chop green beans. I do like roasted green beans, but we’re having Grilled Salmon with Sauteed Green Beans for one of our meals this week.

I love sauteing green beans during the summer because the fresh ones taste really great when they still have a bit of crunch to them.

cutting green beans on a cutting board

So the green beans did not get roasted but they did get put into a storage container in the fridge.

Step 2B: Bake

And while everything is still roasting, we’re gonna mix our scone batter.

I want to go ahead and mix my batter for the Low-Carb Blueberry Scones, because as soon as the roasted veggies come out of the oven, the scones go in.

We start out mixing the dry ingredients, mix in all the wet ingredients, and then combine it really well. Then pour the batter onto a pan lined with parchment and shape it into a circle.

Chopping fruit

The summer fruits we’re using this week are blueberries, cherries, and limes.

The lime just needs to be sliced and juiced which takes no time, so I’m gonna leave that till the night I need it.

And I’m using frozen tart cherries, but if you’re using fresh, you’ll need to wash them, take the stems off, and pit the cherries to get the seed out. Then you’ll want to freeze them in a baggie until you need them for your smoothies because you want them to be nice and frozen.

So really the only prep for fruit is the cherries if you need to do that.

Chopping herbs

And then moved on to the herbs. This week I need cilantro and basil.

So I’m just gonna take the amount needed from the recipes and pull it from the stems.

herbs on a cutting board

Both of these recipes require the blender, so there’s really no need to go all out chopping these herbs unless your blender has a hard time pulling larger leaves like that down while it’s blending.

Veggies out | Scones in

By this time the veggies should be done in the oven, so we’ll pull the roasted veggies out of the oven to let them cool, and then the low carb blueberry scones go in at 350 F for 30 min.

Step 3: Assemble

Now that everything’s chopped and ready, and I’m still waiting on the scones to finish baking, I can start assembling prep packs and containers for stuff that will go in the fridge until the night or day I need it.

Smoothie packs

So let’s start with the Cherry Almond Smoothie packs. I’m making 2 of these for the week, and we just throw all the ingredients into a baggie that’s labeled.

These little handy things I’m using are called Baggie Stands, and I’m telling you—this makes it SO much easier to use baggies for storage when you have anything liquid, because if it tips at all—you’ve got liquid all over the counter if you don’t use these things.

That does NOT happen with these baggie stands.

You can grab them here: 👇

Baggie Stand Holders

Baggie Stand Holders

>>> Check out ALL my Best Kitchen Tools for Meal Prep HERE!

This recipe also includes a few ice cubes, but we hold off on those until the day we make them.

You can write instructions for the ice on the baggie too if you want. And then once those are made, they go in the fridge.

Marinades, dips, dressings

Next we’ll mix the marinades, dips, and dressings.

Fresh Cilantro Lime Dressing

The Cilantro Lime Dressing is gonna go on our Paleo Fajita Chicken Bowls and can also be used for dressing on salads, so you can double or triple this recipe if you want.

cilantro lime dressing with an avocado and lime

The ingredients just go all in the blender, blend it on high, and pour it into a container to seal and store in the fridge.

Homemade Low-Carb Marinara

Nex is our Homemade Low Carb Marinara for the Low-Carb Eggplant Parmesan Casserole. Now if you can find no-sugar added marinara in the store, it may be easier for you to just buy it made already. If you can’t, then this recipe is great.

And as long as you can find crushed tomatoes, you don’t even need to blend it if you don’t want to.

low carb marinara in a jar

Simply pour the ingredients into a saucepan, let it cook about 10-15 minutes, then when it’s cooled, store it in a jar in the fridge.

Fresh Easy Pesto

And last is our Easy Pesto—this is for our Pesto Chicken with Zucchini and Squash Medley, and again—is super easy.

All the ingredients go into the blender.

Now if you can’t find pine nuts, a good alternative is macadamia or even cashews.

pesto in a container with crackers and basil leaves on a platter

You just throw it into the blender, pulse it several times and then pour it into a container to seal and store in the fridge.

Scones out

When the timer goes off, you’ll pull the scones out of the oven and let them cool before cutting into them.

sugar free gluten free blueberry scones

You can alternately wrap the whole thing and store it in the fridge and cut it as needed during the week.

Cooling + storing meal prepped vegetables

The last step is getting the cooled veggies into containers to store in the fridge.

In our house, we use glass Pyrex storage containers that are rectangular shaped. I’m not sure who thought using round containers inside of a square-shaped fridge was a good idea of it in our house it pushes other dishes around and nearly pops them out of the fridge regularly, so we use square or rectangular shaped.

And then when they’re cool enough put the lids on and you can stack them nice and neat in the fridge until you need them during the week.

anti inflammatory foods in meal prep containers

Then during the week, you have all your veggie components ready to go for the week for these recipes.

And if you happen to have leftovers from your meal prep at the end of the week, my favorite way to use it is to make a nourish bowl or macro bowl with all the leftovers.

Now, as I mentioned at the start, I’ve created a summer meal prep guide for you that should hopefully make meal prep a little easier because it has the full prep guide as well as links to all the recipes.

And—when you grab the free PDF for the summer meal prep, you also get a huge discount on the blood sugar balancing Summer Anti Inflammatory Meal Prep Kit that has 4 weeks of summer meal plans, full recipes, and prep guides that include breakfast and snacks, lunches, dinners, and even desserts and cocktails—all sugar-free, gluten-free, and dairy-free adaptable!

Get the (free) Summer Anti-Inflammatory Meal Prep Guide!

summer anti inflammatory meal plan

Beat the summer heat with this 1-week gluten-free, sugar-free meal plan and prep guide! Featuring delicious anti-inflammatory recipes from fresh summer produce!

Let me know in the comments: What summer anti-inflammatory meals are your favorites?! 💖 🍍

📌PIN IT FOR LATER! 👇

The 15+ Amazing Best Kitchen Tools for Meal Prep that I Use Every Week

These are the best kitchen tools for meal prep that I use and LOVE in my household and recommend to others!

Meal prep isn’t just a trend, it’s really a revolution of efficiency. But truthfully, it gets even more efficient when you have the proper and best kitchen tools for meal prep.

As a nutrition specialist and health coach, some of the first things I discuss with clients are the roadblocks to making healthy eating happen, whether it’s general healthy foods or sticking to a dietary style for weight loss , food intolerance, reducing inflammation, or managing a condition like prediabetes. Lack of time is usually the biggest reason named, but it doesn’t have to be (which is what I work through with clients).

My philosophy is to always merge healthy + efficient to make an anti-inflammatory lifestyle doable daily.

Here are the best kitchen tools for meal prep that I feel are the most efficient in their own right to make meal prep happen with the least amount of frustration.

best kitchen tools for meal prep

Ninja all-in-one system

Ninja All-In-One System

Ninja All-In-One System

This Ninja system has everything you need to chop, dice, spiralize, blend, cream, and so much more! It comes with a bullet-sized smoothie cup, large blender, crazy-sharp blades that are absolutely amazing, a food processor bowl for chopping and ricing, and the smaller attachment for grating and spiralizing.

It also includes a dough blade! This system eliminates the need for 3 different appliances, and also has preset functions so you can push the button and walk away while it does its thing!

Instant pot 8-quart 9-in-1

Instant Pot 7-in-1

Instant Pot 7-in-1

This larger 8-quart Instant Pot has the size to cook larger or smaller amounts, and eliminates the need for a separate slow cooker, pressure cooker, rice cooker, saute pan, and more!

You can sear meat right in the pot before setting to slow cooker, you can use as a pressure cooker and even cook meats that came straight from the freezer (anyone forget to thaw something for dinner??), and it has settings for different types of meats, rice, eggs, yogurt, potatoes, and so much more.

It seriously eliminates the need for multiple different cooking devices! It even has a function for sterilizing! (Baby toys or bottles, anyone?) My feeling, especially if you have a lack of space, is that the best kitchen tools for meal prep can multi-task.

(I like the larger size because it can fit so much more or cook less.) And if you really wanna get high-tech crazy, there’s even a “Smart Wifi” model!

KitchenAid Stand Mixer

The KitchenAid stand mixer is another amazing all-in-one. It obviously mixes hands-free, but it comes with dough hook attachment AND whisk attachment.

But it also has a MILLION AND ONE add-ons! For example, meat grinder, spiralizer, pasta maker, juicer…. honestly the list goes on! The Aqua Sky color is the most popular, but check out the link below to explore all color options!

KitchenAid Stand Mixer

KitchenAid Stand Mixer

Silmat set

Silicone Baking Mat

Silicone Baking Mat

Ok, this may sound crazy, but this Silmat is amazing and eliminates the use of oil sprays or coatings when baking! I love that I have the option of cooking oil-free and know that it won’t stick!

I also love that this set has multiple sizes since not all baking sheets are the same size.

These can be used in baking sheets (whether baking, cooking, or roasting) or on the countertop for rolling out doughs WITHOUT the use of extra flour! The best kitchen tools for meal prep will also help eliminate extra ‘stuff’ you have might otherwise have to buy, like parchment paper, oil, flour, etc.

BBQ Grill Mats (my secret tool!)

BBQ Grill Mats

BBQ Grill Mats

Even though I love silmats, they pose the problem of not ever fitting inside my rimmed baking sheets or even my corningware and glass dishes. These BBQ grill mats solve that problem because they can be CUT to FIT PERFECTLY inside any pan!

Not only that, NOTHING sticks to them, and they’re easy to clean! (Win-win!)

Baggie Stand holders

Baggie Stand Holders

Baggie Stand Holders

Baggie stands are something I never knew I needed until I used them. Like something in my head told me this would be incredibly helpful, but having them makes my life so much easier when I meal prep!!

(Ever have a biggie fall over while pouring liquid in? 😭Yeah…no bueno.) With these baggie stands– PROBLEM SOLVED!

Reusable Storage Bags

Qinline Reusable Food Storage Bags

Qinline Reusable Food Storage Bags

If you’re a serial MEAL PREPPER like I am, or even WANT TO BE— these reusable storage bags ARE FOR YOU! I use a TON of baggies in meal prep!!

We also send berries, chips, granola, etc in baggies for the kids to school because we either make our own stuff, or buy the large bag and divide for cheaper snacks.

These reusable bags eliminate the overwhelming amount of plastic being thrown away, but also the overwhelming amount of baggies I’m buying every month!

Glass Food Storage Containers

Glass Food Storage Containers

Glass Food Storage Containers

Whether you do weekly meal prep or not, getting rid of plastic food storage containers is a MAJOR upgrade for your health!

I love these glass storage containers because they’re dishwasher safe, microwave safe, oven safe, and even freezer safe! They’re extremely versatile! Perfect for meal prep. Perfect for leftovers. Without the icky BPA.

Also, they don’t melt in the dishwasher. All the plastic meal prep containers you can buy will eventually lose their shapes (sometimes sooner, depending on the water temperature in your dishwasher). The glass meal prep containers are good to go forever.

And one last point– I’ve switched to rectangular and square-shaped storage containers because I’m not sure who thought it was a good idea to try and fit a round storage container in a square-shaped fridge, but I’m done having dishes ‘pop’ out of the fridge when trying to find something or make room for something else. 😉

Misto Oil Sprayer

Misto Oil Sprayer

Misto Oil Sprayer

For some dietary styles, reducing total oil is a must. And honestly, sometimes a ‘drizzle’ is a bit too heavy when it comes to oil.

Which is why I love the Misto oil sprayer. It’s free of butane (like is in cooking spray you buy at the grocery store) and you can use the type and quality of oil YOU prefer.

Silicone Muffin Pans

Silicone Muffin Pans

Silicone Muffin Pans

Silicone muffin pans are a dream for bakers and meal preppers alike! No more rusty pans. No more muffin papers.

No more sticking or using non-stick sprays. Oh yeah, and no more washing silicone muffin wrappers individually!!​ HUGE time saver for me!! (Remember: healthy + efficient!)

Saute Pans + Skillet

All Clad Sautee Pan + Skillet

All Clad Sautee Pan + Skillet

In case you’re been under a rock the last decade, you already know the reason Teflon isn’t normally used on skillets any more. And although that non-stick surface was hella useful, it’s crazy toxic.

Next best non-stick thing? Ceramic-coating! (If you have an induction cooktop, make sure to confirm the cookware works on it before purchasing!)

Fry Cutter

Fry and Vegetable Cutter

Fry and Vegetable Cutter

Although it’s not hard cutting a potato, cutting them into perfectly sized fries can be super tedious. That’s why I love our fry cutter.

One disclaimer on this one: I have several videos where I use a different brand. The one I use has never given us trouble, but on Amazon, it has a pretty low rating.

So I linked to an alternative with much better reviews and one that’s pretty darn durable. If your family likes home fries, this thing saves a TON of time and headache!

Enamel Coated Cookware

Enamel Coated Cookware

Enamel Coated Cookware

If you love the versatility of being able to go from cooktop to oven, or even fridge to cooktop or oven, then enamel coated cookware is the way to go!

The only ‘con’ I have to these is that they are very heavy because they’re cast-iron on the inside, and that means my kiddos can’t feasibly handle them, and also it means it’s nearly impossible to hold the skillets at an angle to pour contents out.

Otherwise, these pieces should last for years (and many high-end brands like Le Creuset should last a lifetime). Plus you can get them in a ton of really preeeetty colors! 🌈

Good Knives

Samurai Carbon Knife Set

Samurai Carbon Knife Set

The best kitchen tools for meal prep will always include a quality set of sharp knives. A good sharp set of knives can mean the difference between beautifully and quickly sliced foods and an urgent trip to the ER.

Invest in some really good knives!! Better knives cost more, but they last longer and are more durable. Plus if they get dull, you can sharpen them!

Mixing Bowls

KitchenAid Nesting Mixing Bowls

KitchenAid Nesting Mixing Bowls

This may sound like silly advice, but coming from someone who VALUES minimalism these days, a really GOOD, DURABLE, POURABLE, and STACKABLE set of mixing bowls that only takes up a SINGLE shelf in my kitchen is a mega win!! 🏅

Not to mention that this specific set has graters and a slicer you can attach right on top of the bowl!!

Proper Labeling Tools #1: Sharpies

Sharpies

Sharpies

When doing meal prep, the gold standard for labeling baggies is the good ole’ Sharpie. And while I LOVE me some colored Sharpies, unfortunately teal and lighter colors just won’t cut it. Use BLACK, DARK BLUE, PURPLE, or RED.

Proper Labeling Tools #2: Dry Erase Markers

Dry Erase Markers with Magnetic Cap

Dry Erase Markers with Magnetic Cap

Guess what—DRY ERASE markers aren’t ONLY for a dry erase board!! They’re PERFECT for labeling FOOD CONTAINERS when you’re meal prepping or have leftovers!! 🤩

THESE dry erase markers are my favorite, because they have a fine tip, are black (same importance as the Sharpie situation), and they have a magnet, so you can keep it on the side of the fridge for easy access when labeling leftover containers!

*And a tip–although you may be super tempted to use the wet-erase version (usually Vis-a-Vis brand), DON’T! If any moisture gets on the container, the words will smear right off onto your hands and then take 17 days to get off… speaking from experience.)

Meal Prep Cutting Board

Meal Prep Cutting Board with Drawers and Graters

Meal Prep Cutting Board with Drawers and Graters

Ok, so I’ve saved the BEST for last. I never realized how much of a pain it was cutting up tons of veggies and fruits for meal prep until I started. This is my FAVORITE thing ever!

A cutting board with containers for what you’ve chopped under it! Eeeekkk! There are a couple of other options for meal prep cutting boards, but this one is by far my favorite!

So there ya have it! My list of the 15 best kitchen tools for meal prep! Keep in mind it’s not a dire situation if you don’t have these or can’t afford them right now. They simply make it easier to meal prep.

Got any more suggestions? Let’s hear them in the comments below!

Know someone that could use advice on what the best kitchen meal prep tools are? SHARE this post!

best kitchen tools for meal prep

Spring Anti-Inflammatory Meal Prep Plan and Guide

If you’re looking for an easy way to pack in yummy and healthy seasonal anti-inflammatory meals, this Spring Anti-Inflammatory Meal Prep Plan and Guide is for you!

anti inflammatory meal prep for spring

I really love to eat seasonally, I think mother nature provides us specific nutrients we need for each season, but also—it costs less to buy produce that’s in season.

Now I love to prep ingredients to be able to throw together, but I also know that weeks are CRAZY so it’s also important to have recipes that you’ve prepped for so you have as little as possible to think about during the week.

So this spring meal prep does both of those things –

And I’ve created a PDF with instructions and links to the recipes so you can do this meal prep at home.

Get the (free) Spring Anti-Inflammatory 

Meal Prep Guide!

Spring into feeling fabulous with this 1-week gluten-free, sugar-free meal plan and prep guide! Featuring delicious anti-inflammatory recipes from fresh spring produce!

Spring Meal Prep Recipes

So today we’re meal prepping :

So let’s get started prepping!

Instructions

The order I like to do  my prepping is to:

  1. Chop all the vegetables, herbs, and fruit,
  2. Mix and bake anything that needs to go in the oven,
  3. And then while that’s cooking or baking, put together marinades and dips to store in the fridge until you need them during the week.

So let’s start with chopping everything.

Chopping

For this spring anti inflammatory meal prep session and meal plan, I started out chopping the vegetables – which were broccoli, cauliflower, asparagus, and onion.

Baking + Cooking

There are more veggies that I need to chop, but we can just go ahead and put that in the oven at 350 F for about 25-30 minutes and work on other stuff while that’s roasting.

While those are cooking, we’re gonna finish chopping fruits so we can get our smoothie packs, salad, and marinades put together, as well as get the muffins ready to go in the oven.

The spring fruits we’re using this week are oranges, strawberries, and lemons.

  • The orange needs to be zested, sliced in half, and then juiced.
  • The strawberries just need to be washed and then the leaves cut off the tops and cut in half or quartered—this mostly depends on your preference.
  • And the lemons just need to be sliced and juiced.

Then I want to go ahead and mix my batter for the strawberry muffins, because as soon as the roasted veggies come out of the oven, the muffins go in.

We start out mixing the dry ingredients: mix in the wet ingredients, and then combine it really well. Then divide the batter evenly into the muffin tins.

By this time the veggies should be done in the oven, so we’ll pull the roasted veggies out of the oven to let them cool, and then the strawberry muffins go in at 325F for 20-25  min.

Once the veggies are cool we’re gonna put them in separate containers to be stored in the fridge for side dishes through the week.

Remaining veggies + herbs

Next, I chopped the potatoes, and then moved on to the herbs. This week I need parsley, chives, and dill.

I also need some chopped almonds. You can buy these in slivers or chopped, I just happened to have whole ones, so I needed to just give them a rough chop.

Now that everything’s chopped and ready, and I’m still waiting on the muffins to finish baking, I can start assembling prep packs and containers for stuff that will go in the fridge until the night or day I need it.

Assembling prepped items for the fridge

Smoothie packs

So let’s start with the orange creamsicle smoothie packs. I’m making 2 of these for the week.

And we just throw all the ingredients into a baggie that’s labeled.

These little handy things I’m using are called Baggie Stands, and I’m telling you—this makes it SO much easier to use baggies for storage when you have anything liquid, because if it tips at all—you’ve got liquid all over the counter.

That does NOT happen with these baggie stands. You can find them online right here (affiliate link):

Baggie Stand Holders

Baggie Stand Holders

>>> Check out ALL my Best Kitchen Tools for Meal Prep HERE!

This recipe also includes a few ice cubes, but we hold off on those until the day we make them. You can write instructions for the ice on the baggie too if you want. And then once those are made, they go in the fridge.

Marinades, dips, and dressings

Next we’ll mix the marinades, dips, and dressing.

This Green goddess dressing is so fresh, you’re gonna absolutely love it! I like to make a really big batch of it so there’s enough for the chicken recipe and dressing for the week- we’ll be using it on our broccoli strawberry salad too.

So for the dressing we’re gonna use a blender cup, and put all the ingredients in. It’s super easy to make, you just throw it in and blend it on high.

Now, we’re gonna use part of it as a marinade for the Green Goddess chicken, part is to drizzle on the chicken once it’s cooked, and the extra is for dressing for salads for the week.

So we put our chicken in a labeled baggie, then pour just enough to coat the chicken, then store the green goddess chicken in the fridge, and for the rest of the dressing, store it in a sealed container or baggie to go in the fridge as well.

Next up is the lemon dill sauce for the salmon burgers.

First we’re gonna dump all the ingredients in a bowl.

Then we stir really well, then get it poured into a sealed container or labeled baggie to go in the fridge.

Next is the Homemade ranch dip. This is for the blanched veggie platter we’ll make in a few minutes.

Again- this recipe is super simple, and using a recipe like this eliminates the artificial junk and MSG that’s normally put into ranch dressing mix and dip mix.

So you start with organic sour cream, and just put all the other ingredients into it and stir really well. If you’re gonna store this for the week, you really can just mix it up right in the container it came in and then store it in the fridge until you need it.

And the last marinade we’ll make is for the Lemon Greek Chicken and Potatoes

And this marinade is actually for the vegetables, not the meat. The recipe has two separate steps for the vegetables, so using our baggie stands again, we’re gonna put potatoes, oil, and onions in one bag, and the asparagus and olives in the other. Then we just seal them up and store them in the fridge until the night they’re needed.

Next I’m gonna go ahead and prep the salmon burgers for the week.

To do that, I chop up the salmon into tiny pieces- do this rather than putting in the food processor, because it makes the whole thing too mushy really fast-

Mix in the rest of the ingredients,  then shape into patties.

These are super easy to stack on parchment and store in the fridge until the day you need them. When you cook them you’ll dredge them in arrowroot flour first and then cook them in oil in a skillet.

So, depending on how long your prep is taking, your strawberry muffins should be coming out of the oven, and when they’re cooled you can store them a few days on the counter, or make them last longer in the fridge.

Blanched Vegetables

The very last thing I’ll make is the Blanched Vegetables—Now the reason I love to blanch veggies for a platter is because they taste amazing, and also, it deepens the color of the vegetables to make it that much prettier!

Blanching is actually really easy. You use a large pot and either a steamer basket or a colander basket. You can do without if you don’t have one, but it’s much easier to use a basket.

Saucepan with Steamer Basket

Saucepan with Steamer Basket

>>> Check out ALL my Best Kitchen Tools for Meal Prep HERE!

Then you boil the water, put each vegetable in for 3-5 minutes, then immediately put it into an ice bath to stop the cooking process. Make it like an assembly line to be really efficient with this.

Then put each in a bowl to drain the excess water out, and you can store them for the week or go ahead and make a platter and then store it covered in the fridge.

And if you happen to have leftovers from your meal prep at the end of the week, my favorite way to use it is to make a nourish bowl or macro bowl with all the leftovers.

Now, as I mentioned at the start, I’ve created a spring meal prep guide for you that should hopefully make meal prep a little easier, because it has the full prep guide as well as links to the full recipes on the TRUEWELL website.

Get the (free) Spring Anti-Inflammatory 

Meal Prep Guide!

Spring into feeling fabulous with this 1-week gluten-free, sugar-free meal plan and prep guide! Featuring delicious anti-inflammatory recipes from fresh spring produce!

Quick and Easy Anti-Inflammatory Meal Prep for Winter

This winter anti-inflammatory meal prep isn’t just packed with nutritious and delicous seasonal winter produce– it’s a pretty darn quick and easy meal plan. I started out doing meal prep sort of on the fly by just shopping seasonal produce, and prepping it ahead of time to just make meals on the fly throughout the week. But I do also need a structured meal plan a lot of times as well.

anti-inflammatory meal prep for winter

But doing either way is a great way to make sure you’ve got anti-inflammatory meals through the week (especially when you’ve got those chaotic dumpster fire weeks when you need nourishing meals to keep you calm and collected even when nothing else in your life is.)

Click the image below to grab the free Winter Anti-Inflammatory Meal Prep Guide! 👇

winter anti inflammatory meal prep guide

The basic steps of anti-inflammatory meal prep are:

  1. Shop
  2. Chop
  3. Roast
  4. Store
  5. Create meals

Shopping for your anti-inflammatory meal prep session

For this winter meal prep session I grabbed a pumpkin, spaghetti squash, butternut squash, purple cabbage, kale, and collard greens.

We promote eating seasonally at TRUEWELL for a few reasons:

  1. Eating seasonally costs less
  2. You’re not getting produce that came from halfway around the world (in other words–you’re getting produce more local which means much more flavor, less transport and less chance of it getting harvested before it’s ripe), and
  3. Studies have shown produce that’s grown IN SEASON actually has substantially greater values of vitamins and phytonutrients than those out of season.
anti-inflammatory meal prep for winter

(And just to be clear on why I didn’t roast the pumpkin in my video… my kids freaked out about me roasting the pumpkin–cause they wanted to decorate it, and I had canned pumpkin in the pantry, so I used that for the meal that week…Long story short, kids ruin everything. 😂 Kidding. sort of)

Chopping veggies for your anti-inflammatory meal prep

So I started out with the spaghetti squash because it needs to be roasted, then needs to cool before you can scrape out the insides.

anti-inflammatory meal prep for winter

These used to intimidate the heck out of me but they’re actually pretty cool. For this session I cut the squash in half lengthwise, then cut strips; but I think it’s actually easier to just roast the halves and then scrape the insides out from those large pieces.

anti-inflammatory meal prep for winter

I have also learned that even scraping the seeds out is much easier when they’ve been roasted first.

anti-inflammatory meal prep for winter

So lay the pieces out evenly on a pan.

I use a BBQ grill mat liner, which I’ve learned is amazing, nothing sticks to it, which you can grab here:

{Some of the links are affiliate links, meaning I earn a small portion of the proceeds if you purchase it, with no additional charge to you.}

BBQ Grill Mats

BBQ Grill Mats

Next I started on the butternut squash. Cut the ends off, then cut it in half vertically.

anti-inflammatory meal prep for winter

Lay each half on the pan face down.

anti-inflammatory meal prep for winter

Then I started on the leeks. I peeled a few of the outside leaves, cut the end of the bulb off, then cut a slit down the center before chopping it. The dark green ends usually get pretty tough, so cut the white part and some of the lighter green part, then put it on the pan to roast as well.

anti-inflammatory meal prep for winter

Some of this produce is really best cooked right before eaten, as it’s sauteed or put into soups. But the squash always needs to be cooked anyway, and I also knew I wanted to put the leeks into a soup. So for sure these all needed to be roasted.

Roasting vegetables for anti-inflammatory meal prep

My normal base seasoning is salt, pepper, and garlic powder, which you can add or wait until you make your dish—And then roast it at 350 degrees F for about 25-30 minutes.

(For squash, it may take a bit longer to get it soft enough. You want to be able to scoop and scrape easily or else it will take forever…)

Then I got to work on the kale, and I knew I just wanted it for kale chips. You would think the bags of it already chopped would be more convenient, but I’ve found it takes longer to pick out all the stems than to just buy a bunch of it and trim them off myself.

anti-inflammatory meal prep for winter

I do a sort of scraping motion with the knife to get the leaves off, but you can also fold it in half and do just one cut to get the stems out.

Once all the leaves are torn and in a bowl, add oil, and massage it to soften the fibers.

For kale chips, don’t salt it until they’re out! They shrink and can turn out way too salty.

anti-inflammatory meal prep for winter

Kale chips go in the oven for about 20 minutes at 300 F.

anti-inflammatory meal prep for winter

Storing your anti-inflammatory meal prep vegetables

While that was cooking, I started cutting the greens.

I started on the collard greens. I wanted these to go in a soup, so I just washed them, trimmed them up the same way as kale, then store them in a baggie in the fridge until I need them that night.

anti-inflammatory meal prep for winter

👉 A method I’ve found useful is using a large 4-cup measuring cup to hold the baggie in place to put food into during meal prep if you don’t have the baggie stands.

anti-inflammatory meal prep for winter

The mustard greens got trimmed up the same way, and I wanted to sauté them later in the week, so I just store them in a baggie in the fridge as well.

anti-inflammatory meal prep for winter

Then I started on the cabbage. Peel those tough and usually dirty outer leaves, then chop it into slices, then into smaller pieces. I wanted to sauté it later in the week, so it goes into a baggie as well to store in the fridge.

I also grabbed some pears as a last minute add-on.

anti-inflammatory meal prep for winter

These can be peeled, but the skins are usually actually less tough than apples, so eating the skins is pretty yummy. Make sure you get the core out, it does have seeds like apples.

I chunked it up because I wanted to add it as a snack on top of Greek yogurt.

anti-inflammatory meal prep for winter

One trick is to cut the bottom off so it sits flat, then the top small part, then use an apple corer and slicer to slice it just like you would apples.

If you’re going to pre-cut them, they do also turn brown like apples, so add a bit of lemon juice to keep that from happening and store them in a container in the fridge.

anti-inflammatory meal prep for winter

Lastly we take the roasted veggies out of the oven and let them cool.

I put the leeks into a container to go in the fridge.

Then I started on the butternut squash. I’ve found using a grapefruit spoon with a serrated edge make scooping the seeds and flesh out really easy.

But I also sometimes use an avocado slicer to scoop it out. You can also use a paring knife to slice around the edges before scooping the flesh out.

Serrated Edge Grapefruit Spoons

Serrated Edge Grapefruit Spoons

Avocado Slicer Tool

Avocado Slicer Tool

Henckels Paring Knife

Henckels Paring Knife

>>> Check out ALL my Best Kitchen Tools for Meal Prep HERE!

I put it all in a container and seal it to store in the fridge.

Spaghetti squash can be a bit tricky. It definitely needs to be soft enough. But you can use a fork to scrape the spaghetti parts out into a container. Then store in the fridge.

And lastly, I pulled the kale chips out. Then I season with garlic and salt so it doesn’t get oversalted before because it shrinks. Scoop them into a container and enjoy as a snack.

anti-inflammatory meal prep for winter

Create anti-inflammatory dinners for the week

The meals for this winter anti-inflammatory meal prep session were…

anti-inflammatory meal prep for winter

Pumpkin alfredo on spaghetti squash with grilled chicken…

anti-inflammatory meal prep for winter

Leek and cauliflower soup

anti-inflammatory meal prep for winter

Sauteed chicken sausage and red cabbage

anti-inflammatory meal prep for winter

Creamy Collard Greens Soup (with butternut squash)…

anti-inflammatory meal prep for winter

And for a snack I had a Winter Pear and Yogurt Bowl.

And as promised, to grab the FREE Winter Anti-Inflammatory Meal Prep printable guide, just click the image below! 👇

winter anti-inflammatory meal plan

📌 Know someone that would love to learn Anti-Inflammatory Meal Prep? SHARE this post or PIN IT for LATER! 💖

anti-inflammatory meal prep for winter

Crispy Kale Chips

If you’re looking for a super easy and healthy winter snack, Crispy Kale Chips are a super easy choice! They’re the ‘savory cotton candy’ of the snack world. Each bite is lightly crisp but dissolves in each addictive bite.

The other plus is that these Crispy Kale Chips are crazy easy to make.

crispy kale chips

The printable recipe is below, and it’s also featured in our Winter Meal Prep session (check it out and get the printable guide!)

Step 1: Choose your kale

First of all, opt for organic if you can. Greens easily soak up pesticides, especially since the part you eat isn’t protected by a shell or a pod cover or skin. Pesticides are inflammatory to all bodies, so it’s best to be safe. If that’s not an option, make sure you wash it well when you get home.

Second, I know it can be tempting to grab a bag of the pre-chopped kale, but that’s a huge mistake. The reason is that they don’t remove the stems, and you’ll be left for an hour just trying to trim out all the mini stems.

crispy kale chips

Instead, get a bundle of whole kale leaves.

Step 2: Trimming kale for kale chips

One method I’ve found to trim kale leaves is to hold the end of the stem, and use a paring knife to sort of scrape the leafy part away from the stem.

crispy kale chips

You do have to be careful that you don’t cut through the stem, especially if your knife is super sharp.

The other option would be to lay the whole leaf flat and just cut out the stem. Or, you could fold the leaf in half and just make a single cut to remove the stem of the kale.

crispy kale chips

Once the stems are removed, simply tear the pieces in medium to large chunks and place in a bowl.

Step 3: Massaging kale for kale chips

Adding oil is going to help with the crispness, so drizzle some avocado, warmed coconut oil, or MCT oil on the kale leaves in the bowl.

Some people don’t think it’s necessary, but I do like to massage the leaves to loosen the fibers. Also this allows the oil to get evenly distributed.

You’ll literally just stick your hands in, massage the leaves, and turn over chunks as you’re working to get the oil on everything.

*DON’T SEASON YET!

crispy kale chips

Step 4: Cooking kale for kale chips

Cooking the kale is super easy. You simply place the contents of the bowl on a large baking pan.

crispy kale chips

Kale cooks at 300 degrees F for about 20 minutes or so. Keep an eye out and make sure they’re getting browned (this is how they get crispy) without getting burned.

Step 5: Cool, season, and enjoy!

Let them cool to finish crisping, and then add sea salt or any other seasonings you wish. It’s best to wait until they’re cooked to season because they shrink and it’s really easy to over-season your kale chips.

Kale Chips flavor options

Some flavor options are:

  • Ranch (nutritional yeast + lemon juice + salt)
  • Chili Lime (chili powder + lime juice + salt)
  • Salt and Vinegar (vinegar + salt)
crispy kale chips

And enjoy! They can be stored in a baggie or container on the counter for a few days.

Print

Crispy Kale Chips

5 Stars 4 Stars 3 Stars 2 Stars 1 Star

No reviews

  • Prep Time: 5 minutes
  • Cook Time: 20 minutes
  • Total Time: 25 minutes
  • Yield: 4 1x
  • Category: Snack

Ingredients

Scale
  • 1 bunch kale leaves (organic)
  • 1 TBSP avocado oil (or warmed coconut, or MCT)

Instructions

  1. Prehead the oven to 300 degress F.
  2. Wash and trim all kale leaves.
  3. Tear leaves into medium to large chunks and place in a large bowl.
  4. Drizzle the oil, and massage to evenly distribute the oil.
  5. Spread the entire bowl of kale on a baking sheet, spreading out as much as possible.
  6. Cook for about 20 minutes, making sure the leaves are getting browned without burning to ensure crispness.
  7. Remove from oven and let cool.
  8. Season with sea salt or any other seasoning of choice.
  9. Enjoy! (Can be stored on counter in a container for a few days)

Did you make this recipe?

Share a photo and tag us @truewell.co — we can’t wait to see what you’ve made!

Like this recipe? Prep it and 5 others with the Winter Anti-Inflammatory Meal Prep Guide! Click the image below to grab it! 👇

winter anti inflammatory diet meal plan
crispy kale chips

Lemony Cod, Mashed Sweet Potatoes, and Wilted Kale

One of the best ways to get quality protein in an anti-inflammatory diet is through fish, like this lemon cod recipe. It’s flaky and delicious, and super simple to make dairy-free.

lemon cod with cinnamon mashed sweet potatoes and wilted kale

This entire recipe is an anti-inflammatory meal, as we’ve added soft cinnamon-baked sweet potatoes and wilted kale into a perfect fall anti-inflammatory dinner using seasonal ingredients.

Cod is a really light and delicious fish that isn’t overpowering, but is full of healthy fats and protein. Sweet potatoes’ already high nutrient profile gets elevated with cinnamon. And kale rounds out this anti-inflammatory dinner recipe with a punch of vitamins and fiber in a delicious side dish.

**This recipe is featured in our Fall Anti-Inflammatory Meal Prep Session! 

Ingredients

  • 4- 4 oz Cod
  • 1 Lemon (juiced and zested)
  • 1/4 cup unsalted Butter (organic–or sub in avocado oil for dairy-free)
  • 4 Sweet Potatoes (small to medium)
  • Cinnamon
  • 1 bunch kale
  • Salt + Pepper
  • 1 tsp Garlic powder
  • 1 TBSP avocado oil

Prep + Instructions

  1. Preheat the oven to 400 F (204 C).
  2. If cod fillets are frozen, thaw them in a bowl of cold water.
  3. Cube the sweet potatoes and place them in a large saucepan or Dutch oven. Add water to the pan until they are covered about 1 inch. Turn the cooktop to medium-high heat until the water is simmering. Reduce the heat so that it’s still simmering and let cook for 9-12 minutes.
  4. While those are cooking…
  5. Pat cod fillets dry with paper towel. Then arrange them on a baking dish lined with foil or a grill mat.
  6. Melt 1/8 cup (half) of the butter, the lemon juice and zest in a microwave or on the cooktop, then brush it onto the fillets.
  7. Sprinkle salt, pepper, and garlic powder on the fillets, and place in the oven for 12-15 minutes depending on thickness. While those are cooking…
  8. Place the kale in a medium to large skillet with 1 TBSP avocado oil on medium heat. Season with salt, pepper, and garlic powder to taste, and stir to coat all the kale.
  9. Place a lid on the skillet and let wilt down while finishing the other parts of the meal.
  10. When the potatoes are tender, drain and return them to the pot. Mash, and add the remaining butter (1/4 cup) and cinnamon, to taste.
  11. Remove the cod from the oven when done and let rest 5 minutes.
  12. Remove the kale from heat once wilted.
  13. Plate all and serve!

Notes + Make it easier

**Any fish is so much better when it’s fresh vs. frozen, but it can be really hard to find fresh fish in many areas. Frozen is fine, just add a few extra minutes to thaw it in a bowl of cold water before cooking.

**Buy the sweet potatoes already cubed.

**If you don’t mind the stems, buy kale already chopped.

fall anti-inflammatory meal prep guide free pdf
Print

Lemony Cod, Mashed Sweet Potatoes, and Wilted Kale

5 Stars 4 Stars 3 Stars 2 Stars 1 Star

No reviews

  • Author: Laura Brigance, MS, CHC

Ingredients

Units Scale
  • 4– 4 oz Cod
  • 1 Lemon (juiced and zested)
  • 1/4 cup unsalted Butter (organic–or sub in avocado oil for dairy-free)
  • 4 Sweet Potatoes (small to medium)
  • Cinnamon
  • 1 bunch kale
  • Salt + Pepper
  • 1 tsp Garlic powder
  • 1 TBSP avocado oil

Instructions

  1. Preheat the oven to 400 F (204 C).
  2. If cod fillets are frozen, thaw them in a bowl of cold water.
  3. Cube the sweet potatoes and place them in a large saucepan or Dutch oven. Add water to the pan until they are covered about 1 inch. Turn the cooktop to medium-high heat until the water is simmering. Reduce the heat so that it’s still simmering and let cook for 9-12 minutes.
  4. While those are cooking…
  5. Pat cod fillets dry with paper towel. Then arrange them on a baking dish lined with foil or a grill mat.
  6. Melt 1/8 cup (half) of the butter, the lemon juice and zest in a microwave or on the cooktop, then brush it onto the fillets.
  7. Sprinkle salt, pepper, and garlic powder on the fillets, and place in the oven for 12-15 minutes depending on thickness. While those are cooking…
  8. Place the kale in a medium to large skillet with 1 TBSP avocado oil on medium heat. Season with salt, pepper, and garlic powder to taste, and stir to coat all the kale.
  9. Place a lid on the skillet and let wilt down while finishing the other parts of the meal.
  10. When the potatoes are tender, drain and return them to the pot. Mash, and add the remaining butter (1/4 cup) and cinnamon, to taste.
  11. Remove the cod from the oven when done and let rest 5 minutes.
  12. Remove the kale from heat once wilted.
  13. Plate all and serve!

Notes

*Any fish is so much better when it’s fresh vs. frozen, but it can be really hard to find fresh fish in many areas. Frozen is fine, just add a few extra minutes to thaw it in a bowl of cold water before cooking.

*Buy the sweet potatoes already cubed.

*If you don’t mind the stems, buy kale already chopped.

Did you make this recipe?

Share a photo and tag us @truewell.co — we can’t wait to see what you’ve made!

📌PIN IT FOR LATER!

lemon cod with cinnamon mashed sweet potatoes and wilted kale

Mushroom Sage Turkey Burgers with Home Fries and Massaged Kale Salad

Although these mushroom sage turkey burgers can be eaten with a grain-free bun, they’re absolutely delicious on their own. This turkey burger with home fries and a massaged kale salad always feels like fall 🍂 to me!

mushroom sage turkey burger with home fries and massaged kale salad

This anti-inflammatory dinner recipe is chock-full of seasonal fall anti-inflammatory foods. Sage, mushrooms, potatoes, and kale are deliciously cozy and filling while the ground turkey gives healthy protein that’s leaner on fat.

**This recipe is featured in our Fall Anti-Inflammatory Meal Prep Session! 

Ingredients

  • 1 lb ground turkey
  • 1 bunch sage
  • 8 oz Button Mushrooms
  • Salt + Pepper
  • 1/2 yellow Onion
  • Garlic powder
  • 2 Russet potatoes (or other potato)
  • 1 bunch Kale
  • 2 TBSP Avocado oil

Prep + Instructions

  1. Preheat the oven to 350 F.
  2. Using either a fry-cutter or a large knife, cut the potatoes into fries.
  3. Spread them on a baking sheet lined with foil or a grill mat.
  4. Drizzle the fries with 1 TBSP oil, then season with salt, pepper, and garlic powder.
  5. Put in the oven for 25-30 minutes until golden. (You can stir halfway through if you like.)
  6. Finely chop the sage and add it to a large bowl.
  7. Finely chop the onion and mushrooms (or chop them in a food processor). Place in the bowl with the sage. Add the ground turkey, and salt, pepper, and garlic powder to taste.
  8. Mix the turkey mixture until all is incorporated. Pat into burgers.
  9. Heat a skillet on medium (unless you’re grilling the burgers). Cook burgers until cooked through. Remove from skillet and let rest.
  10. Cut the stems out of the kale leaves, and chop them into small-medium pieces.
  11. Place the kale in a medium bowl. Drizzle with the remaining 1 TBSP avocado oil, then season with salt, pepper, and garlic powder. Massage kale, while folding the oil and seasoning in until the entire bowl has softened and is coated with oil and seasoning.
  12. Remove fries from the oven when done and plate.
  13. Enjoy!

Notes + Make it easier

*Having to cut the fries is an extra step, but I do it because I have yet to find frozen pre-cut fries that weren’t loaded with inflammatory oils and other unnecessary (but inflammatory) ingredients.

*Although fries are typically made from white potatoes, colored potatoes have more polyphenols that snatch up free radicals. The skins have more nutrients as well. 🙂

*If you don’t have an onion, onion flakes will do for flavor, but since turkey can be a bit more dry than other fattier meats, the fresh onion really adds some moisture.

*If you don’t mind the stems being in it, you can buy kale already pre-chopped to save a little time.

👇Grab the free Fall Anti-Inflammatory Meal Prep Guide by clicking the image below!

fall anti-inflammatory meal prep guide free pdf
Print

Mushroom Sage Turkey Burgers with Home Fries and Massaged Kale Salad

5 Stars 4 Stars 3 Stars 2 Stars 1 Star

No reviews

**This recipe is featured in our Fall Anti-Inflammatory Meal Prep Session!

  • Author: Laura Brigance, MS, CHC
  • Prep Time: 10 minutes
  • Cook Time: 20 minutes
  • Total Time: 30 minutes

Ingredients

Units Scale
  • 1 lb ground turkey
  • 1 bunch sage
  • 8 oz Button Mushrooms
  • Salt + Pepper
  • 1/2 yellow Onion
  • Garlic powder
  • 2 Russet potatoes (or other potato)
  • 1 bunch Kale
  • 2 TBSP Avocado oil

Instructions

  1. Preheat the oven to 350 F.
  2. Using either a fry-cutter or a large knife, cut the potatoes into fries.
  3. Spread them on a baking sheet lined with foil or a grill mat.
  4. Drizzle the fries with 1 TBSP oil, then season with salt, pepper, and garlic powder.
  5. Put in the oven for 25-30 minutes until golden. (You can stir halfway through if you like.)
  6. Finely chop the sage and add it to a large bowl.
  7. Finely chop the onion and mushrooms (or chop them in a food processor). Place in the bowl with the sage. Add the ground turkey, and salt, pepper, and garlic powder to taste.
  8. Mix the turkey mixture until all is incorporated. Pat into burgers.
  9. Heat a skillet on medium (unless you’re grilling the burgers). Cook burgers until cooked through. Remove from skillet and let rest.
  10. Cut the stems out of the kale leaves, and chop them into small-medium pieces.
  11. Place the kale in a medium bowl. Drizzle with the remaining 1 TBSP avocado oil, then season with salt, pepper, and garlic powder. Massage kale, while folding the oil and seasoning in until the entire bowl has softened and is coated with oil and seasoning.
  12. Remove fries from the oven when done and plate
  13. Enjoy!

Notes

*Having to cut the fries is an extra step, but I do it because I have yet to find frozen pre-cut fries that weren’t loaded with inflammatory oils and other unnecessary (but inflammatory) ingredients.

*Although fries are typically made from white potatoes, colored potatoes have more polyphenols that snatch up free radicals. The skins have more nutrients as well. 🙂

*If you don’t have an onion, onion flakes will do for flavor, but since turkey can be a bit more dry than other fattier meats, the fresh onion really adds some moisture.

*If you don’t mind the stems being in it, you can buy kale already pre-chopped to save a little time.

**This recipe is featured in our Fall Anti-Inflammatory Meal Prep Session!

Nutrition

  • Serving Size: 4

Did you make this recipe?

Share a photo and tag us @truewell.co — we can’t wait to see what you’ve made!

📌 PIN IT FOR LATER!

mushroom sage turkey burger with home fries and massaged kale salad

BBQ Chicken Baked Potato with Sage-Roasted Mushrooms and Brussels Sprouts

This sugar-free BBQ Chicken Baked Potato with Sage Roasted Mushrooms and Brussels Sprouts is absolutely delicious, easy, and anti-inflammatory!

I have to give props to my husband, who came up with this main recipe. He wanted something different and easy, so he decided on BBQ chicken (shredded) topped on a baked potato. It’s quick, super yummy, and the kids love it!

bbq chicken baked potato with sage roasted mushrooms and brussels sprouts

I added in these perfect fall sides to get our vegetables in: Sage-Roasted Mushrooms and Brussels Sprouts.

Although baked potatoes aren’t low-carb, they can still fit into an anti-inflammatory diet. They’re full of vitamins, minerals, and fiber.

Plus when you cook them (like with meal prep), let them cool in the fridge, then reheat them for dinner, it increases the resistant starches (which are amazing for your gut health!)

**This recipe is featured in our Fall Anti-Inflammatory Meal Prep Session! 

Ingredients

  • Chicken breast
  • BBQ Sauce (sugar-free) –> Grab my favorite HERE
  • Shredded cheddar (can omit if dairy-free)
  • Butter (or avocado oil if dairy-free)
  • Potatoes
  • Sage
  • Mushrooms
  • Brussels Sprouts
  • Salt and Pepper
  • Garlic Powder

Prep + Instructions

Prep for this anti-inflammatory dinner is pretty simple.

  1. Wrap the potatoes in foil, coated with oil, salt and pepper.
  2. Bake at 350 F for one hour.
  3. Place the chicken breast in a baking dish and salt + pepper it.
  4. Chop the veggies and sage.
  5. Place mushrooms on one end of a baking sheet that’s covered in foil (or a baking/grilling mat) and Brussels sprouts on the other end.
  6. Drizzle with oil, then lightly salt, pepper, and garlic powder all the veggies.
  7. Sprinkle sage all over the mushrooms.
  8. Place the chicken on the top rack, veggies on the middle rack. Roast for approximately 25-35 minutes at 350 F.
  9. Once the potatoes are done, let them cool on the counter while either shredding the chicken or cubing it. We shred it in the food processor and add the BBQ sauce right into it.
  10. Assemble toppings onto potatoes, and serve the roasted fall vegetables on the side.

Make it easier

  • Buy shredded chicken from the deli (try your hardest for organic!)
  • Buy the mushrooms sliced
  • Buy the Brussels sprouts already sliced

Grab the free Fall Anti-Inflammatory Meal Prep Guide by clicking the image below! 👇

fall anti-inflammatory meal prep guide free pdf
Print

BBQ Chicken Baked Potato with Sage-Roasted Mushrooms and Brussels Sprouts

5 Stars 4 Stars 3 Stars 2 Stars 1 Star

No reviews

This sugar-free BBQ Chicken Baked Potato with Sage Roasted Mushrooms and Brussels Sprouts is absolutely delicious, easy, and anti-inflammatory!


  • Author: Laura Brigance, MS, CHC
  • Prep Time: 10 minutes
  • Cook Time: 1 hour
  • Total Time: 1 hour 10 minutes
  • Yield: 4 servings 1x
  • Category: Dinner
  • Method: Oven

Ingredients

Units Scale

Chicken

  • 1 lb chicken breast
  • BBQ Sauce (sugar -free)

Baked Potatoes

  • 1/2 cup Shredded cheddar (omit if dairy free)
  • 4 tsp Butter (sub avocado oil if dairy free)
  • 4 Russet potatoes (medium)

Sage Roasted Mushrooms

  • Mushrooms
  • 1 bunch of sage

Brussels Sprouts

  • 1 bag of Brussels Sprouts
  • Salt + Pepper
  • Garlic powder

Instructions

    1. Wrap the potatoes in foil, coated with oil, salt and pepper.
    2. Bake at 350 F for one hour.
    3. Place the chicken breast in a baking dish and salt + pepper it.
    4. Chop the veggies and sage.
    5. Place mushrooms on one end of a baking sheet that’s covered in foil (or a baking/grilling mat) and Brussels sprouts on the other end.
    6. Drizzle with oil, then lightly salt, pepper, and garlic powder all the veggies.
    7. Sprinkle sage all over the mushrooms.
    8. Place the chicken on the top rack, veggies on the middle rack. Roast for approximately 25-35 minutes at 350 F.
    9. Once the potatoes are done, let them cool on the counter while either shredding the chicken or cubing it. We shred it in the food processor and add the BBQ sauce right into it.
    10. Assemble toppings onto potatoes, and serve the roasted fall vegetables on the side.

Notes

Make it easier:

    • Buy shredded chicken from the deli (try your hardest for organic!)
    • Buy the mushrooms sliced
    • Buy the Brussels sprouts already sliced

  •  

Did you make this recipe?

Share a photo and tag us @truewell.co — we can’t wait to see what you’ve made!

📌 PIN IT FOR LATER!

bbq chicken baked potato with sage roasted mushrooms and brussels sprouts

Chicken Sausage with Roasted Broccoli and Cauliflower

When it comes to easy anti-inflammatory dinners, this Chicken Sausage with Roasted Broccoli and Cauliflower couldn’t be easier.

chicken sausage with roasted broccoli and cauliflower

Chicken sausage is one of my favorite ways to eat chicken because it’s a little different than our same ole’, same ole’ chicken, and you can find it with delicious add-ins like feta and sundried tomato.

Broccoli and cauliflower are cold-weather staples, but an important part of an anti-inflammatory diet for their phytochemicals.

This entire meal is super simple and low carb, which is important for keeping blood sugar under control, thereby controlling chronic inflammation.

This recipe is also a snap to meal prep! 😉

**This recipe is featured in our Fall Anti-Inflammatory Meal Prep Session! 

Ingredients

  • 1 pack of chicken sausage
  • 1 head of broccoli
  • 1 head of cauliflower
  • 1/2 red onion
  • avocado or olive oil
  • salt + pepper
  • garlic powder

Prep + Instructions

This meal is so simple because the ingredients are very straightforward, with no complex prep or cooking.

  1. Preheat the oven to 350 F.
  2. Chop florets from broccoli and cauliflower, as well as the onion.
  3. Place them on a sheet pan lined with foil or a grill mat.
  4. Drizzle oil, then season with salt, pepper, and garlic powder.
  5. Place broccoli and cauliflower pan into the oven for 25-30 minutes.
  6. Cut the chicken sausage links into bite-sized pieces.
  7. In a skillet, heat the sausage until warm and golden.
  8. Remove the skillet from heat; plate the chicken sausage.
  9. Remove the broccoli and cauliflower from the oven when done; plate with the chicken sausage.
  10. Enjoy!

Notes + Make it easier

*Most chicken sausage is already pre-cooked, you need only heat it up. But CONFIRM this, as the sausage will need to cook much longer to ensure it’s fully cooked if it doesn’t specify ‘precooked’ or ‘fully cooked’ on the label.

*Save time by buying broccoli and cauliflower pre-chopped.

*If you’ve prepped/roasted the broccoli and cauliflower ahead of time, reheat it in the microwave while warming the chicken sausage in a skillet.

👇Click the image below to grab the free Fall Anti-Inflammatory Meal Prep Guide! 👇

fall anti-inflammatory meal prep guide free pdf
Print

Chicken Sausage with Roasted Broccoli and Cauliflower

5 Stars 4 Stars 3 Stars 2 Stars 1 Star

No reviews

  • This entire meal is super simple and low carb, which is important for keeping blood sugar under control, thereby controlling chronic inflammation.


**This recipe is featured in our Fall Anti-Inflammatory Meal Prep Session!

  • Author: Laura Brigance, MS, CHC
  • Prep Time: 5 minutes
  • Cook Time: 25-30 minutes
  • Total Time: 0 hours
  • Yield: 4 servings 1x
  • Category: Dinner
  • Method: Oven + Cooktop

Ingredients

Scale
  • 1 pack of chicken sausage
  • 1 head of broccoli
  • 1 head of cauliflower
  • 1/2 red onion
  • avocado or olive oil
  • salt + pepper
  • garlic powder

Instructions

  1. Preheat the oven to 350 F.
  2. Chop florets from broccoli and cauliflower, as well as the onion.
  3. Place them on a sheet pan lined with foil or a grill mat.
  4. Drizzle oil, then season with salt, pepper, and garlic powder.
  5. Place broccoli and cauliflower pan into the oven for 25-30 minutes.
  6. Cut the chicken sausage links into bite-sized pieces.
  7. In a skillet, heat the sausage until warm and golden.
  8. Remove the skillet from heat; plate the chicken sausage.
  9. Remove the broccoli and cauliflower from the oven when done; plate with the chicken sausage.
  10. Enjoy!

Notes

*Most chicken sausage is already precooked, you need only heat it up. But CONFIRM this, as the sausage will need to cook much longer to ensure it’s fully cooked if it doesn’t specify ‘precooked’ or ‘fully cooked’ on the label.

*Save time by buying the broccoli and cauliflower pre-chopped.

*If you’ve prepped/roasted the broccoli and cauliflower ahead of time, reheat it in the microwave while warming the chicken sausage in a skillet.

Did you make this recipe?

Share a photo and tag us @truewell.co — we can’t wait to see what you’ve made!

📌PIN IT FOR LATER!

chicken sausage with roasted broccoli and cauliflower

Summer Anti-Inflammatory Charcuterie Board

The thing I love about charcuterie boards is that they’re like edible works of art. I’m a very visual person, so even if food tastes good, if the presentation is beautiful, it makes it that much better– kinda like how the same gift feels so much more if it’s beautifully wrapped vs presented in a paper bag. 

Presentation goes a long way.

Now to go one step further and get that perfect trifecta for food– it also needs to be healthy. And since we’re all about an anti-inflammatory diet that’s sugar-free and gluten-free, I’m gonna show you how to create a gorgeous summer charcuterie board that’s also anti-inflammatory. 

summer anti inflammatory charcuterie board

What is a Charcuterie Board?

We really need to start this conversation out with defining what qualifies a board as “charcuterie”, and how you can make your board anti-inflammatory.

So the word ‘charcuterie’ is actually French and it means “cured meat”. 

And if you know anything about an anti-inflammatory diet, you know that cured and processed meats are a big no-no because they’re usually highly inflammatory.

This obviously poses a challenge when you want to make an anti-inflammatory version of a charcuterie board.

So when you’re making an anti-inflammatory charcuterie board, you have two options:

1-You can find meats that would be great on a board that are NOT cured and don’t have nitrates, OR- you can skip the meats, but just know that this will technically not be a charcuterie board at that point. 

Instead, it would technically be like a veggie or veggie, fruit, and cheese board or any combination of those. 

You can also include any of the meats and then just not partake in those meats in sticking to an anti-inflammatory way of eating.

Or you can purposely decide you’re gonna have a little cheat/treat meal.

You’re a grown adult and I leave it to you to make that decision on your own 😁, but choosing the CORRECT meats per the guidelines I just gave are what will keep the meat-part anti-inflammatory.

2- If you’ve found that you need to be dairy-free to reduce inflammation as well, you can either skip the cheeses, or go for any of the same options I gave for meats. 

Per anti-inflammatory guidelines, choose organic cheese if at all possible, because the fats in the cheese will have better omega 3 to 6 ratios. 

If you want the FULL How to video on creating charcuterie boards, check that out by clicking here: 👇

Summer Anti-Inflammatory Charcuterie Board

Ingredients for a summer anti-inflammatory charcuterie board

Ok, so let’s get to the summer board I made and what summer produce and ingredients I included to make it look like THIS– 

summer anti inflammatory charcuterie board

The summer veggies I used were:

summer anti inflammatory charcuterie board vegetables
  • Zucchini
  • Summer squash
  • Asparagus
  • Green onions
  • Bell peppers in all different colors
summer anti inflammatory charcuterie board homemade ranch dip

For the cheeses and dips:

  • I added 2 different types of cubed cheese
  • And I put our homemade ranch dip in the middle to dip veggies in

The summer fruits I used were:

summer anti inflammatory charcuterie board fruit
  • Cherries
  • Blueberries
  • Strawberries
  • Kiwi
  • Mango
  • Pineapple
  • And watermelon

And then for garnish I used sprigs of:

  • Mint and basil

Click the image below to grab the Summer Anti-Inflammatory Meal Prep Guide! 👇

summer anti inflammatory meal plan

Placing ingredients on the summer anti-inflammatory charcuterie board

So for this board I started out with putting my containers on the board, and I placed the dip right in the middle.

Then I added in the asparagus in a sort of ‘X’ pattern to create some delineation on the board. 

placing vegetables for summer anti inflammatory charcuterie board

Sometimes just placing little groupings of stuff randomly all over the board can be really pretty, and sometimes creating a pattern or sections can also be really pretty.

So from there, I started with the vegetables and sort of spread them in different sections, trying to balance out the colors all over the board. 

Next, I just flanked the ranch dip with the containers of cheese cubes. You want to get containers on the board first and then work around them.

placing grain-free crackers for summer anti inflammatory charcuterie board

Next, I added grain-free crackers, and then zucchini, which I rolled from really thin slices, and added some summer squash sticks. 

Next, I put part of the topper of a pineapple in to beef up the decor factor, 

And then added in little watermelon triangles that I cut from three different colors of watermelon. (If you’ve never tried yellow or orange watermelon, I highly recommend it! We were leary because they weren’t the bright pink of traditional watermelon, but they were absolutely delicious!)

placing cheese for summer anti inflammatory charcuterie board

Then I added in all three colors of bell peppers, some strawberries, cherries, and tomatoes. These were carefully spread throughout the board to make sure the colors were dispersed enough to make the eye move around. 

placing fruit for summer anti inflammatory charcuterie board

I placed the kiwi and mango, which were cut into these cute patterns, then placed the green onions to give a bit more wow factor on the corners.

Next, I added a few little pineapple spears and then filled in all the blank spots with blueberries. 

You don’t want the board showing anywhere if possible. 

And then the very last thing that really gives it a wow factor is to add in sprigs of herbs, so I added my mint on the fruit and the basil in the ranch dip. 

summer anti inflammatory charcuterie board

And lastly, I had a bouquet of summer flowers I got from the grocery store and I snipped off a few of the flowers to give the final perfect touches. 

What’s so great about this board is that it’s perfect whether you’re entertaining or just want an easy summer dinner.

Grab the Summer Anti-Inflammatory Meal Prep Guide {click the image below!} 👇

summer anti inflammatory meal plan
Print

Summer Anti-Inflammatory Charcuterie Board

5 Stars 4 Stars 3 Stars 2 Stars 1 Star

No reviews

  • Author: Laura Brigance, MS, CHC
  • Prep Time: 20 minutes
  • Total Time: 20 minutes
  • Yield: 4 servings 1x

Ingredients

Scale

Vegetables

  • 1 zucchini
  • 1 summer squash
  • 1 bunch of asparagus
  • a few springs of green onion
  • cherry tomatoes (in assorted colors)
  • bell peppers (in assorted colors)

Fruit

  • cherries
  • blueberries
  • pineapple (whole fruit)
  • kiwi (1 or 2)
  • strawberries
  • mango
  • watermelon (get in assorted colors if available)

Cheese

  • cubed organic Colby jack
  • cubed organic white cheddar

Dip

  • Homemade Ranch Dip

Garnish

  • Sprigs of mint
  • Sprigs of basil

Instructions

  1. Start out placing any containers on your board: dips and anything that would be messy if put straight on the board 
  2. Use the asparagus to create an ‘X’ to delineate some spaces
  3. Start placing vegetables, keeping in mind to spread colors throughout the board
  4. Place fruit, also dispursing color and texture throughout the board
  5. Save small fruits like blueberries for very last to fill in all the dead spaces (you don’t want to see ANY of the board underneath if possible!)
  6. Take sprigs of herbs to garnish the dip and other areas that contrasting colors would look pretty.
  7. Finish it off with snips of edible flowers for that final wow factor.

Notes

Can be stored in the fridge for about a day.

Did you make this recipe?

Share a photo and tag us @truewell.co — we can’t wait to see what you’ve made!

📌 PIN IT FOR LATER!

summer anti inflammatory charcuterie board

Low Carb Eggplant Parmesan Casserole (Without Breadcrumbs)

With only a handful of simple ingredients, this Low Carb Eggplant Parmesan Casserole (without breadcrumbs) is easy to make and perfect for busy weeknights or summer meal prep.

low carb eggplant parmesan casserole without breadcrumbs

We’re covering step-by-step instructions for the perfect eggplant casserole every time, and even give you ideas for customizing the flavors to your liking. So, let’s get started and satisfy those cravings!

😎🍉THIS LOW-CARB EGGPLANT PARMESAN CASSEROLE RECIPE IS FEATURED IN OUR SUMMER ANTI-INFLAMMATORY MEAL PREP SESSION + GUIDE! CLICK HERE TO SEE IT IN ACTION AND GET THE FREE MEAL PRINTABLE MEAL PREP GUIDE!

Why This Eggplant Casserole Recipe is a Game Changer

This eggplant casserole recipe is a game-changer for several reasons:

  1. First, it’s made with simple and flavorful ingredients that are easy to find at any grocery store. I especially love that it’s full of anti-inflammatory summer produce.
  2. Second, it’s a low-carb and gluten-free option that doesn’t compromise on taste. Instead of using simple carb packed gluten-free flour or breadcrumbs, we just omit the breadcrumbs altogether.
  3. Finally, it has a larger number of servings, so it can be meal prepped and served for more than one meal.

Let’s explore the ingredients that make this dish so delicious.

Simple and Flavorful Ingredients

Eggplant

Eggplant is one of my favorite anti-inflammatory summer vegetables! Not only is it packed with antioxidants, vitamins, and fiber, it’s also a great substitute for meat. Oh yeah–and it’s low-carb!

Low Carb Marinara

As most things on the grocery store shelf these days… marinara or any other kind of tomato-based sauce most likely has (completely unnecessary) added sugar.

If you’re buying your marinara, check the ingredient label and make sure it’s sugar-free as sugar is extremely inflammatory.

If you can’t find any, make our Low-Carb Marinara sauce for this recipe instead.

Cheeses

The best way to keep as anti-inflammatory as possible with any cuisine (like Italian) that has loads of dairy is to buy organic.

Extra virgin olive oil

This oil is a staple in Italian cooking, and is also an anti-inflammatory staple. It’s loaded with monounsaturated fats and has been used in Mediterranean cuisine for centuries.

If you can’t find an EVOO oil spray, try out a Misto. You can fill it with any kind of oil you like and pump it to get the can pressurized so you can spray oil onto your food.

And if you don’t have EVOO on hand, you can use avocado oil, butter, ghee, or coconut oil.

Step-by-Step Instructions for Perfect Eggplant Casserole Every Time

  1. If you don’t have jarred sauce, make the Low-Carb Marinara first.
  2. Preheat your oven to 450°F. Line 2 baking sheets with a grill mat, or with foil, and spray the foil with avocado oil.
  3. While the sauce is cooking, slice the eggplant into 1/4 inch thick slices. Place the slices on the prepared pans. Season with salt and bake for 20 minutes.
  4. Meanwhile combine ricotta, egg, parsley and 1/4 cup of grated cheese in a medium bowl.
  5. Pour 1/2 cup sauce on the bottom of a 9×12 baking dish, add 1/3 of eggplant to cover the bottom of the dish. Top with 1/3 of the ricotta cheese mixture, 3/4 cup of the mozzarella cheese and 3/4 cup of the sauce. Then repeat the process two more times, reserving the third layer of mozzarella for the topping. Finish with 2 tablespoons of grated cheese.
  6. Push the oven temp up to 400F.
  7. Cover the baking dish with foil and bake approximately 40 min, until cheese is melted and bubbling.
  8. Remove the foil and bake an additional 10 minutes.
  9. Remove from the oven and let it set and cool about 10 minutes before serving.

Ideas for Customizing Your Eggplant Casserole to Your Tastes

Now that you have the basics of the low-carb eggplant parmesan casserole down, it’s time to get creative and add your own twist to the recipe. One idea is to switch up the cheese by using cheddar or feta instead of mozzarella.

You can also add in different vegetables such as zucchini or spinach, or even some ground beef or turkey for a heartier dish.

For those who like a little kick in their meals, try adding some red pepper flakes or cayenne pepper to the tomato sauce. And if you’re a fan of herbs, consider throwing in some basil or oregano to give the casserole a fresh and flavorful taste.

Want more protein? Add a pound of cubed or shredded chicken breast into the layering process.

With so many possibilities for customization, you can make this low-carb eggplant parmesan casserole a staple in your meal rotation by switching up the ingredients and flavors to your liking.

Frequently Asked Questions About Eggplant Casserole

With its hearty combination of vegetables and savory spices, eggplant casserole is a versatile and satisfying dish that’s easy to tweak to your taste. Here are some of the most frequently asked questions about this eggplant casserole:

How do I prepare the eggplant?

To prepare the eggplant for the casserole, you’ll need to slice it into rounds or long strips, depending on your preference. Sprinkle some salt on the slices and let them sit for about 30 minutes to draw out any bitterness. Then rinse the eggplant and pat it dry before proceeding with the recipe.

Can I use other vegetables besides eggplant?

Absolutely! Eggplant casserole is a great dish for using up whatever vegetables you have on hand. Some popular additions include zucchini, bell peppers, mushrooms, and onions. You can also experiment with different cheeses, herbs, and spices to create your own unique flavor profile.

Can I remove the eggplant skin or do I leave it on?

Most recipes for eggplant parmesan will have you leave the skins on. This helps maintain the structure of the slices, but cooking will actually soften the skins. There are a ton of phytonutrients in the skin, so I say leave it on!

Can I make this dish ahead of time?

Yep! Eggplant casserole is a great dish for meal prep, as it can be made ahead of time and reheated later.

  1. Simply assemble the casserole according to the recipe,
  2. Then cover it tightly with plastic wrap and store it in the fridge for up to 2 days.
  3. When you’re ready to eat, simply remove the plastic wrap and pop the casserole in the oven for about 30 minutes, or until heated through.

Whether you’re pressed for time or looking for a flexible meal prep option, this recipe is your new go-to. And with tips for customizing the flavors, you can enjoy it again and again, every summer.

😎🍉THIS LOW-CARB EGGPLANT PARMESAN CASSEROLE RECIPE IS FEATURED IN OUR SUMMER ANTI-INFLAMMATORY MEAL PREP SESSION + GUIDE! CLICK HERE TO SEE IT IN ACTION AND GET THE FREE MEAL PRINTABLE MEAL PREP GUIDE!

Print

Low Carb Eggplant Parmesan Casserole (Without Breadcrumbs)

5 Stars 4 Stars 3 Stars 2 Stars 1 Star

No reviews

With only a handful of simple ingredients, this Low Carb Eggplant Parmesan Casserole (without breadcrumbs) is easy to make and perfect for busy weeknights or meal prep. 

  • Author: Laura Brigance, MS, CHC
  • Prep Time: 10 minutes
  • Cook Time: 70 minutes
  • Total Time: 1 hour 20 minutes
  • Yield: 6 1x
  • Category: Dinner
  • Method: Oven
  • Cuisine: Italian

Ingredients

Units Scale
  • 2 pounds eggplant, 1 large or 2 medium
  • extra virgin olive oil spray
  • 1 teaspoon sea salt
  • 12 ounces part-skim ricotta, organic
  • 1/4 cup + 2 tbsp Parmesan
  • 1/4 cup fresh parsley, chopped
  • 1 large egg
  • 21/2 cups part-skim mozzarella, organic
  • 4 cups Low-Carb Marinara Sauce or sugar-free jarred marinara sauce

Instructions

  1. If you don’t have jarred sauce, make the Low-Carb Marinara first.
  2. Preheat your oven to 450°F. Line 2 baking sheets with a grill mat, or with foil, and spray the foil with EVOO. Use a Misto and fill with extra virgin olive oil if you can’t find avocado cooking spray at the store.
  3. While the sauce is cooking, slice the eggplant into 1/4 inch thick slices. Place the slices on the prepared pans. Season with salt and bake for 20 minutes.
  4. Meanwhile combine ricotta, egg, parsley and 1/4 cup of grated cheese in a medium bowl.
  5. Pour 1/2 cup sauce on the bottom of a 9×12 baking dish, add 1/3 of eggplant to cover the bottom of the dish. Top with 1/3 of the ricotta cheese mixture, 3/4 cup of the mozzarella cheese and 3/4 cup of the sauce. Then repeat the process two more times, reserving the third layer of mozzarella for the topping. Finish with 2 tablespoons of grated cheese.
  6. Push the oven temp up to 400F.
  7. Cover the baking dish with foil and bake approximately 40 min, until cheese is melted and bubbling.
  8. Remove the foil and bake an additional 10 minutes.
  9. Remove from the oven and let it set and cool about 10 minutes before serving.

Notes

Make this recipe up to 2 days ahead of time and store it in the fridge covered.

To meal prep this, prepare your Low-Carb Marinara ahead of time, as well as the eggplant. Bake it and store in the fridge in a sealed container until you need to assemble the casserole.

Nutrition

  • Serving Size:
  • Calories: 343
  • Fat: 21.8 g
  • Saturated Fat: 7.8 g
  • Carbohydrates: 16.3 g
  • Fiber: 2.7 g
  • Protein: 20.4 g

Did you make this recipe?

Share a photo and tag us @truewell.co — we can’t wait to see what you’ve made!

📌 PIN IT FOR LATER!

low carb eggplant parmesan casserole without breadcrumbs

Savor the Season: Pesto Chicken with Zucchini and Squash Medley

When it comes to fresh and easy for anti-inflammatory summer dinners, this Pesto Chicken with Zucchini and Squash Medley are at the top of the list!

This fresh recipe takes advantage of the anti-inflammatory summer produce, while giving a super yummy, balanced, and low carb dinner in no time. Plus it’s super easy to meal prep!

pesto chicken with zucchini and squash medley

😎🍉THIS PESTO CHICKEN WITH ZUCCHINI AND SQUASH MEDLEY RECIPE IS FEATURED IN OUR SUMMER ANTI-INFLAMMATORY MEAL PREP SESSION + GUIDE! CLICK HERE TO SEE IT IN ACTION AND GET THE FREE MEAL PRINTABLE MEAL PREP GUIDE!

I LOVE recipes that use several seasonal and fresh produce options like this one. I grew up on a farm, so we always had a ton of fresh vegetables during the summer. But… we didn’t make pesto, like…ever.

It took until I was a real grownup before I started venturing in Italian cuisine beyond spaghetti and meatballs. And boy was I missing out!

Pesto is the perfect dressing for this dish, as the ingredients for it are in season during summer as well.

You’ll need:

Ingredients

  • 1 lb boneless, skinless chicken breasts
  • Salt and pepper to taste (approx 1/2 tsp of each)
  • 2 medium zucchini
  • 2 medium summer squash
  • 1/2 onion, yellow or red
  • 2 TBSP avocado oil
  • Fresh Easy Pesto

Instructions

Chicken

Cut the chicken breast into cubes, then toss into a large pan with the avocado oil. Cook until mostly cooked through.

If you’re looking for a plant-based or vegan recipe, the chicken can easily be subbed out for firm (organic!) tofu or white beans (canned).

closeup of a person holding zucchini

Zucchini , squash, and onion

Wash and cut the zucchini and squash into cubes. Roughly chop the onion.

When chicken is nearly done, add the zucchini, squash, and onion, and season everything with salt and pepper.

Saute until the zucchini and squash are soft and cooked.

Remove from heat.

pesto in a jar with basil and garlic

Plating

Toss the medley with our Fresh and Easy Pesto, then plate and serve.

Notes

  • Make sure to use the freshest zucchini and summer squash you can. And during the summer you may find several different varieties. They’re pretty much all delicious and cook about the same, so get creative if you want!
  • The chicken can be subbed out for firm tofu or even white beans if you’d like this to be plant-based or vegan.

😎🍉THIS PESTO CHICKEN WITH ZUCCHINI AND SQUASH MEDLEY RECIPE IS FEATURED IN OUR SUMMER ANTI-INFLAMMATORY MEAL PREP SESSION + GUIDE! CLICK HERE TO SEE IT IN ACTION AND GET THE FREE MEAL PRINTABLE MEAL PREP GUIDE!

Print

Savor the Season: Pesto Chicken with Zucchini and Squash Medley

5 Stars 4 Stars 3 Stars 2 Stars 1 Star

No reviews

This fresh recipe takes advantage of the anti-inflammatory summer produce, while giving a super yummy, balanced, and low carb dinner in no time. Plus it’s super easy to meal prep!

  • Author: Laura Brigance, MS, CHC
  • Prep Time: 5 minutes
  • Cook Time: 15
  • Total Time: 20 minutes
  • Yield: 4 1x
  • Category: Dinner
  • Method: Cooktop
  • Cuisine: Italian

Ingredients

Scale

    • 1 lb boneless, skinless chicken breasts
    • Salt and pepper to taste (approx 1/2 tsp of each)
    • 2 medium zucchini
    • 2 medium summer squash
    • 1/2 onion, yellow or red
    • 2 TBSP avocado oil
    • Fresh Easy Pesto

Instructions

  1. Cut the chicken breast into cubes, then toss into a large pan with the avocado oil. Cook until mostly cooked through.
  2. Wash and cut the zucchini and squash into cubes. When chicken is nearly done, add the zucchini and squash, and season everything with salt and pepper. Saute until the zucchini and squash are soft and cooked.
  3. Remove from heat.
  4. Toss the medley with our Fresh and Easy Pesto, then plate and serve.

Notes

  • Make sure to use the freshest zucchini and summer squash you can. And during the summer you may find several different varieties. They’re pretty much all delicious and cook about the same, so get creative if you want!
  • The chicken can be subbed out for firm tofu or even white beans if you’d like this to be plant-based or vegan.

Nutrition

  • Serving Size:
  • Calories: 495
  • Fat: 36.4 g
  • Saturated Fat: 6.1 g
  • Carbohydrates: 11.1 g
  • Fiber: 3 g
  • Protein: 30.6 g

Did you make this recipe?

Share a photo and tag us @truewell.co — we can’t wait to see what you’ve made!

📌 PIN IT FOR LATER!

Paleo Chicken Fajita Bowls

When it comes to easy anti-inflammatory meal prep dinners that are also crowd-pleasers, these Paleo Chicken Fajita Bowls with fresh cilantro lime dressing take the prize.

paleo chicken fajita bowls

What’s so great about fajita bowls is that they’re so easy to personalize. We normally just cook the ingredients and set it out assembly line to let the kids create their own chicken fajita bowls.

😎🍉THIS PALEO CHICKEN FAJITA BOWLS RECIPE IS FEATURED IN OUR SUMMER ANTI-INFLAMMATORY MEAL PREP SESSION + GUIDE! CLICK HERE TO SEE IT IN ACTION AND GET THE FREE MEAL PRINTABLE MEAL PREP GUIDE!

Another thing about these versatile meal prep chicken bowls is that you really can adjust the veggies to whatever season it is. This recipe is perfect for summer as we use lettuce and bell peppers that are in season during summer.

Also to note is that–again, speaking to the versatility of these bowls–they can be made dairy-free and grain-free. (See notes below.)

Ingredients

  • Boneless, skinless chicken breasts (organic are best)
  • Bell peppers (any color, but organic is best as peppers are on the Dirty Dozen list)
  • Onion (red, yellow, or whatever you have on hand)
  • Lime (the juice really kicks up the flavor of chicken fajita!)
  • Brown rice (or cauliflower rice for Paleo, low-carb/keto)
  • Salt and pepper (to taste)
  • Fajita seasoning (make sure this is sugar-free)
  • 1 can of black beans, drained and rinsed (omit if sticking to Paleo)
  • Cheddar cheese or feta for topping (omit if sticking to Paleo)
  • Avocado (make sure it’s ripe)
  • Cilantro Lime Dressing
  • Avocado oil (for cooking-if you don’t have any, you can use butter, ghee, or coconut oil)

Instructions

Chicken

To begin preparing these tasty Paleo Chicken Fajita Bowls, start by slicing your chicken breasts into thin strips and season with the fajita seasoning. Next, slice up your onions and bell peppers, taking care to remove all seeds and stems.

Once that’s done, heat up your skillet and add some avocado oil, then toss in your chicken and stir until cooked through. Then squeeze the lime juice all over your chicken.

Next, add your sliced onions and bell peppers to the skillet and stir-fry until they are slightly softened.

squeezing lime on chicken fajita bowl

Rice

While the onions and peppers are cooking, make your rice (or cauliflower rice) according to package instructions.

Beans

Black beans or pinto beans are traditional for Latin fare. If you’re following Paleo guidelines these can be omitted.

Otherwise, make sure to drain the beans from the can, then rinse them really well. This helps minimize bloating if you’re sensitive to beans.

You can warm them a little in a pot on the cooktop with a little water, salt, and chopped cilantro. (Sometimes I’ll throw in some dried onion flakes to give them a bit more flavor.)

chicken fajita bowls

Toppings

Choose your toppings based on whether or not you’re going true Paleo (dairy-free) or not.

Then it’s time to layer your bowls. The base is usually rice or other whole grain, then layer in your fajita chicken, peppers, and onions. Top with black beans, cheese, and avocado. Then drizzle the fresh cilantro lime dressing on top!

Additional Tips

These are super easy to meal prep for the week:

  1. Just make the chicken, peppers, and onions; and rice ahead of time, then layer into meal prep containers.
  2. Store up to 5 days in the fridge. Heat up when you’re ready to eat it, then drizzle the dressing on top before serving.

😎🍉THIS PALEO CHICKEN FAJITA BOWLS RECIPE IS FEATURED IN OUR SUMMER ANTI-INFLAMMATORY MEAL PREP SESSION + GUIDE! CLICK HERE TO SEE IT IN ACTION AND GET THE FREE MEAL PRINTABLE MEAL PREP GUIDE!

Print

Chicken Fajita Bowls Meal Prep

5 Stars 4 Stars 3 Stars 2 Stars 1 Star

No reviews

When it comes to easy anti-inflammatory meal prep dinners that are also crowd-pleasers, these Paleo Chicken Fajita Bowls with fresh cilantro lime dressing take the prize.

  • Author: Laura Brigance, MS, CHC
  • Prep Time: 5 minutes
  • Cook Time: 25-30 minutes
  • Total Time: 30
  • Yield: 6 1x
  • Category: Dinner, Lunch
  • Method: Cooktop
  • Cuisine: Mexican

Ingredients

Units Scale
  • 1 lb organic chicken breasts
  • 1 onion (red or yellow)
  • 2 bell peppers (any color/s)
  • Brown rice (or cauliflower if doing Paleo/low-carb/keto)
  • 2 Limes (or 1/4 cup lime juice)
  • Black beans (unless Paleo/low-carb/keto)
  • 1/2 cup shredded cheddar or Mexican blend cheese (omit if dairy-free or Paleo)
  • 1 Avocado (large and ripe)
  • Fresh Cilantro Lime Dressing

Instructions

  1. Start by slicing your chicken breasts into thin strips.
  2. Next, slice up your onions and bell peppers, taking care to remove all seeds and stems.
  3. Heat up your skillet and add some avocado oil, then toss in your chicken and stir until cooked through.
  4. Next, add your sliced onions and bell peppers to the skillet and stir-fry until they are slightly softened.
  5. If you’re following Paleo guidelines these can be omitted. Otherwise, make sure to drain the beans from the can, then rinse them really well. 
  6. Warm them a little in a pot on the cooktop with a little water, salt, and chopped cilantro. (Sometimes I’ll throw in some dried onion flakes to give them a bit more flavor.)
  7. Choose your toppings based on whether or not you’re going true Paleo (dairy-free) or not.
  8. Layer your bowls starting with the rice, then layer in your fajita chicken, peppers, and onions.
  9. Top with black beans, cheese, and avocado.
  10. Then drizzle the fresh cilantro lime dressing on top!

Notes

These are super easy to meal prep for the week:

    1. Just make the chicken, peppers, and onions; and rice ahead of time, then layer into meal prep containers.

    1. Store up to 5 days in the fridge. Heat up when you’re ready to eat it, then drizzle the dressing on top before serving.

Nutrition

  • Serving Size:
  • Calories: 396
  • Fat: 12.8 g
  • Saturated Fat: 3.2 g
  • Carbohydrates: 46.7 g
  • Fiber: 8.3 g
  • Protein: 25.9 g

Did you make this recipe?

Share a photo and tag us @truewell.co — we can’t wait to see what you’ve made!

📌PIN IT FOR LATER!

Fresh Cilantro Lime Dressing

This Fresh Cilantro Lime Dressing is not only a refreshing and yummy summer classic, but it also boasts incredible anti-inflammatory properties.

fresh cilantro lime dressing

😎🍉THIS FRESH CILANTRO LIME DRESSING RECIPE IS FEATURED IN OUR SUMMER ANTI-INFLAMMATORY MEAL PREP SESSION + GUIDE! CLICK HERE TO SEE IT IN ACTION AND GET THE FREE MEAL PRINTABLE MEAL PREP GUIDE!

Crafted with a handful of wholesome and fresh summer ingredients, this Anti-Inflammatory Cilantro Lime Dressing is a simple yet powerful addition to your kitchen repertoire.

By incorporating this dressing into your meals, you can effortlessly infuse your dishes with health-enhancing benefits, promoting well-being from within.

Ingredients

  • 1 bunch of fresh cilantro
  • 1 TBSP minced garlic
  • 3 TBSP lime juice
  • 1/4 cup extra virgin olive oil
  • 1 avocado
  • 1/2 tsp salt (or to taste)

Instructions

This sauce is so easy. You literally throw everything in a high-powered blender and pulse into a sauce. Done.

*If your blender isn’t blending this, it’s perfectly ok to add a few more TBSP lime juice and/or EVOO until the blender can do its thing.

Notes

  • Store up to 3 days in the fridge (the sauce will naturally start to brown due to the avocado.)
  • Perfect on our Paleo Chicken Fajita Bowls recipe!

😎🍉THIS FRESH CILANTRO LIME DRESSING RECIPE IS FEATURED IN OUR SUMMER ANTI-INFLAMMATORY MEAL PREP SESSION + GUIDE! CLICK HERE TO SEE IT IN ACTION AND GET THE FREE MEAL PRINTABLE MEAL PREP GUIDE!

Print

Fresh Cilantro Lime Dressing

This Fresh Cilantro Lime Dressing is not only a refreshing and yummy summer classic, but also boasts incredible anti-inflammatory properties.

  • Author: Laura Brigance, MS, CHC
  • Prep Time: 5 minutes
  • Total Time: 5 minutes
  • Yield: 4 1x
  • Category: Dinner
  • Method: Blender
  • Cuisine: Mexican

Ingredients

Scale
  • 1 bunch of fresh cilantro
  • 1 TBSP minced garlic
  • 3 TBSP lime juice
  • 1 avocado

  • 1/2 tsp salt (or to taste)

Instructions

  1. Throw all the ingredients in a blender.
  2. Blend until smooth.

Notes

    • Store up to 3 days in the fridge (the sauce will naturally start to brown due to the avocado.)

    • Perfect on our Paleo Chicken Fajita Bowls recipe!

Nutrition

  • Serving Size:
  • Calories: 103
  • Fat: 8.9 g
  • Saturated Fat: 1.2 g
  • Carbohydrates: 6.8 g
  • Fiber: 4.1 g
  • Protein: 1.4 g

Did you make this recipe?

Share a photo and tag us @truewell.co — we can’t wait to see what you’ve made!

📌 PIN IT FOR LATER!

fresh cilantro lime dressing

Low-Carb Marinara Sauce

Packed with vibrant flavors and anti-inflammatory ingredients, this Low-Carb Marinara Sauce is a delicious way to keep inflammation at bay and blood sugar balanced.

low carb marinara sauce

Say goodbye to traditional marinara sauces loaded with sugars and unhealthy additives, and say hello to a healthier, low-carb alternative that doesn’t compromise on taste.

Each spoonful of this delightful sauce boasts a harmonious blend of antioxidant-rich tomatoes, aromatic herbs, and a hint of garlic, providing a burst of flavor that will leave you craving for more. (Seriously- my kids would rather have this than the store-bought kind.)

😎🍉THIS LOW-CARB MARINARA RECIPE IS FEATURED IN OUR SUMMER ANTI-INFLAMMATORY MEAL PREP SESSION + GUIDE! CLICK HERE TO SEE IT IN ACTION AND GET THE FREE MEAL PRINTABLE MEAL PREP GUIDE!

What makes this marinara different is two things:

  1. We don’t add any sugar like so many of the store-bought brands do. Sugar is highly inflammatory, as well as addictive, so we eliminate that right off the bat. Tomatoes are already slightly sweet so there’s no reason to add it in the first place.
  2. Instead of extra virgin olive oil, we use avocado oil (see ingredients below for more details.)

Ingredients

Tomatoes

Tomatoes, the star ingredient, are bursting with lycopene—an antioxidant known to reduce inflammation and protect against chronic diseases.

Garlic

Alongside tomatoes, we’ve added a touch of garlic, known for its immune-boosting and anti-inflammatory properties, enhancing both the taste and health benefits of this sauce.

Italian seasoning

Dried Italian seasonings add a burst of flavor to this low-carb marinara sauce, but also have antioxidant properties. They’re added right in with all other ingredients at the same time so the flavors can meld as the herbs are rehydrated.

If you happen to have fresh herbs (like oregano, rosemary, and thyme), it’s absolutely fine to add these, but don’t do it until right before the sauce is ready.

Fresh herbs don’t need long to inject their flavors, and shouldn’t be overcooked.

Extra virgin olive oil

Extra virgin olive oil is the quintessential ingredient for Mediterranean fare, so it’s no surprise that it’s the oil of choice for this recipe. My tip for buying EVOO is to check the label and try to find one that comes out of California.

Tests were done several years back and they found that olive oils that come from other countries weren’t 100% olive oil. They were being mixed with cheaper oils, and it was considered legal because of the labeling and import laws in other countries.

In the US they’re strict about that, so buying your EVOO from California ensures you’re actually getting olive oil and not a mix.

Instructions

  1. Peel and smash your garlic, then sautee it right in the pot you’ll be making your sauce in, with the avocado oil in the bottom.
  2. After 1-2 minutes, add all the rest of the ingredients and stir really well.
  3. Let the sauce simmer 15-20 minutes and you’re done!

Notes

  • This sauce is amazing for dipping as well!
  • Store in the fridge, sealed, up to a week.

😎🍉THIS LOW-CARB MARINARA RECIPE IS FEATURED IN OUR SUMMER ANTI-INFLAMMATORY MEAL PREP SESSION + GUIDE! CLICK HERE TO SEE IT IN ACTION AND GET THE FREE MEAL PRINTABLE MEAL PREP GUIDE!

Print

Low-Carb Marinara Sauce

5 Stars 4 Stars 3 Stars 2 Stars 1 Star

No reviews

 Packed with vibrant flavors and anti-inflammatory ingredients, this Low-Carb Marinara Sauce is a delicious way to keep inflammation at bay and blood sugar balanced.

  • Author: Laura Brigance, MS, CHC
  • Prep Time: 5 minutes
  • Cook Time: 15-20 minutes
  • Total Time: 0 hours
  • Yield: 4 1x
  • Category: Dinner
  • Method: Cooktop
  • Cuisine: Italian

Ingredients

Scale
  • 28 oz can crushed tomatoes
  • 2 cloves garlic, smashed
  • 2 TBSP Italian seasoning
  • 1 tsp Extra virgin olive oil
  • salt + pepper, to taste

Instructions

  1. Add the crushed tomatoes into a high-powered blender. Pulse until smooth and pureed into a sauce.
  2. In a large pot, saute the garlic with extra virgin olive oil, then add all the other ingredients. Let simmer 15-20 minutes.

Notes

    • This sauce is amazing for dipping as well!

    • Store in the fridge, sealed, up to a week.

Nutrition

  • Serving Size:
  • Calories: 39
  • Fat: 1.6 g
  • Saturated Fat: 0.3 g
  • Carbohydrates: 6.6 g
  • Fiber: 2.2 g
  • Protein: 1.4 g

Did you make this recipe?

Share a photo and tag us @truewell.co — we can’t wait to see what you’ve made!

📌PIN IT FOR LATER!

Low Carb Blueberry Scones | Grain-Free, Sugar-Free


Not only are these Low-Carb Blueberry Scones grain-free and sugar-free, they’re also super delicious and the perfect summer bulk recipe to bake to have a quick + easy breakfast or snack on hand anytime!

low carb blueberry scones

What’s even better about this low-carb scone is that it’s bursting with juicy blueberries. So each bite is infused with antioxidants that combat inflammation, supporting your body’s natural healing processes.

😎🍉THIS LOW-CARB BLUEBERRY SCONES RECIPE IS FEATURED IN OUR SUMMER ANTI-INFLAMMATORY MEAL PREP SESSION + GUIDE! CLICK HERE TO SEE IT IN ACTION AND GET THE FREE MEAL PRINTABLE MEAL PREP GUIDE!

The other beautiful thing about this anti-inflammatory breakfast recipe is that these scones are low in carbs, making them a fantastic option for those following a low-carbohydrate lifestyle.

These ingredients provide a delightful balance of flavors, while keeping the carb count in check– which means your blood sugar stays balanced as well.

blueberries scattered on a plate

Ingredients

Sounds silly, but I love when summer is here simply for the large selection in berries. Blueberries are notorious for their low-sugar qualities and anti-inflammatory superpowers, so I love using them fresh as much as possible!

  • 1 1/3 cups almond flour (blanched)
  • 1/4 cup arrowroot flour (the package may say ‘arrowroot powder’
  • Pinch of sea salt
  • 1 tsp baking powder
  • 1 cup fresh blueberries (make sure to wash them first and let them dry)
  • 1/4 cup avocado oil
  • 3 TBSP keto maple syrup (if you don’t have this, you may try another sugar-free natural sweetener that’s granulated. Usually erythritol or allulose are good choices for baking; Swerve brand is great!)
  • 2 tsp vanilla extract (pure, not the fake stuff!)
  • 1 egg (large, organic)

Instructions

  1. Preheat oven to 350 F (177 C) and line a metal baking pan with parchment paper.
  2. Whisk the dry ingredients together in a medium mixing bowl. Then stir in the blueberries.
  3. Whisk the wet ingredients together in a small mixing bowl, then stir into the dry ingredients until a batter is formed.
  4. Pour the batter into the baking pan, shaping into a circle if you wish.
  5. Bake for approximately 30 minutes.
  6. Let cool for at least 10 minutes, cut into eight servings, and enjoy!
low carb blueberry scones

Tips + Notes

  • Any other nut flour (except tiger nut as it’s not really a nut) should be able to be subbed in this recipe.
  • Letting the scones completely cool down after baking is *really* important as it’s grain-free, and the cooling process helps the other binder ingredients in the recipe set.
  • You can also sub any other fresh berry! (We make this recipe with raspberries and cherries as well!)

😎🍉THIS LOW-CARB BLUEBERRY SCONES RECIPE IS FEATURED IN OUR SUMMER ANTI-INFLAMMATORY MEAL PREP SESSION + GUIDE! CLICK HERE TO SEE IT IN ACTION AND GET THE FREE MEAL PRINTABLE MEAL PREP GUIDE!

Print

Low Carb Blueberry Scones | Grain-Free, Sugar-Free

5 Stars 4 Stars 3 Stars 2 Stars 1 Star

No reviews

When keeping blood sugar balanced by avoiding grains and sugar is necessary, it’s a sure hit to have a recipe on hand like these Low-Carb Blueberry Scones. 

  • Author: Laura Brigance, MS, CHC
  • Prep Time: 5 minutes
  • Cook Time: 30 + 10 min cool down
  • Total Time: 45 minutes
  • Yield: 8 1x
  • Category: Breakfasts and Snacks
  • Method: Oven
  • Cuisine: American
  • Diet: Diabetic

Ingredients

Units Scale
  • 1 1/3 cups almond flour
  • 1/4 cup arrowroot flour
  • Pinch of sea salt
  • 1 tsp baking powder
  • 1 cup fresh blueberries
  • 1/4 cup avocado oil
  • 3 TBSP keto maple syrup
  • 2 tsp vanilla extract
  • 1 egg

Instructions

  1. Preheat oven to 350 F and line a metal baking pan with parchment paper.
  2. Whisk the dry ingredients together in a medium mixing bowl. Then stir in the blueberries.
  3. Whisk the wet ingredients together in a small mixing bowl, then stir into the dry ingredients until a batter is formed.
  4. Pour the batter into the baking pan, shaping into a circle if you wish.
  5. Bake for approximately 30 minutes.
  6. Let cool for at least 10 minutes, cut into eight servings, and enjoy!

Notes

*Any other nut flour (except tiger nut as it’s not really a nut) should be able to be subbed in this recipe.

*Letting the scones completely cool down after baking is *really* important as it’s grain-free, and the cooling process helps the other binder ingredients in the recipe set.

*You can also sub any other fresh berry!

Nutrition

  • Serving Size:
  • Calories: 224
  • Sugar: 7.2 g
  • Sodium: 301.9 mg
  • Fat: 10.8 g
  • Carbohydrates: 15.3 g
  • Protein: 3.6 g
  • Cholesterol: 23.3 mg

Did you make this recipe?

Share a photo and tag us @truewell.co — we can’t wait to see what you’ve made!

low carb blueberry scones

The Effortless Guide to Perfectly Roasted Spring Vegetables Every Time

One thing that always makes me super happy in spring is to have already meal prepped roasted spring vegetables ready to add to any meal.

In this guide, we’ll show you how to effortlessly roast your favorite spring vegetables with maximum flavor and minimal effort. From choosing the right vegetables to testing for doneness, we’ve got you covered. So, grab your sheet pan, and let’s get roasting!

This recipe is featured in our Spring Anti-Inflammatory Meal Prep Guide! Grab it HERE!

Choosing the Right Spring Vegetables

Before you start roasting your spring vegetables, it’s important to choose the right ones. Not all vegetables are created equal when it comes to roasting. Some may become too mushy, while others may not cook through evenly.

Also, we’re going for in-season vegetables because of their natural nutrient content and also price. So, how do you choose the right spring vegetables for roasting?

In-season spring vegetables

Since choosing veg that are in season is the name of the game, just know that we’re in North America (just outside Houston), so our spring may be different than yours.

If you’re in the same hemisphere, here are some great spring vegetables to roast (that I’m using in these photos):

  • Broccoli
  • Asparagus
  • Cauliflower
  • Onions

Get an entire week of spring anti-inflammatory meals with our Spring Meal Prep Guide click HERE!

Size, texture, and flavor

First and foremost, consider the size of the vegetable. Vegetables that are too big, such as large broccoli or cauliflower florets, may take longer to cook and may not roast evenly.

It’s super easy to just cut up larger vegetables or buy it already cut and bagged. Or you can stick to smaller and more uniform vegetables like baby carrots and thin green beans.

Next, consider the texture of the vegetable. Vegetables with a firm texture, like Brussels sprouts or cauliflower, will hold up well during roasting and won’t become too mushy. On the other hand, softer vegetables like zucchini or yellow squash may become too tender and fall apart during roasting.

Finally, think about the flavor profile of the vegetable. Roasting can bring out the natural sweetness of vegetables, so choose vegetables that will complement each other. For example, try roasting a mix of sweet bell peppers and red onions for a delicious and colorful side dish.

Prepping your spring vegetables

Before you can start roasting your spring vegetables, it’s important to properly prep them.

Start by washing and drying the vegetables thoroughly. Then, cut them into evenly sized pieces to ensure they cook uniformly.

Seasoning for Flavor

With your vegetables prepped and ready to go, it’s time to move on to seasoning them for maximum flavor. Salt and pepper are essential, but don’t be afraid to experiment with other spices that complement your vegetables. For example, rosemary and thyme are perfect for hearty spring root vegetables like potatoes and carrots.

For a more exotic flavor, consider using cumin and coriander on cauliflower or turmeric on Brussels sprouts. To add a little kick, try a pinch of red pepper flakes on your asparagus or broccoli.

When seasoning your vegetables, be sure to coat them evenly with (an appropriate) oil or butter to help the spices stick. This will also help them crisp up in the oven.

Roasting techniques

To ensure that your roasted vegetables come out perfectly, it’s important to use the right roasting techniques. Here are a few tricks to keep in mind:

First, preheat your oven to 325 degrees F (163 C). This ensures that your veggies cook evenly and don’t dry out. Next, chop your vegetables into evenly-sized pieces so that they roast uniformly. Spread them out in a single layer on a baking sheet before adding oil or butter and seasonings.

Make sure to toss your vegetables halfway through the cooking process. This helps them cook evenly on both sides and ensures that they’re crispy on the outside and tender on the inside. Finally, let your vegetables rest for a few minutes after cooking to allow the flavors to meld together.

Testing for Doneness

Roasting vegetables can be a breeze, as long as you know when they’re done cooking. Overcooking can result in a mushy or burned, unappetizing mess while undercooking can leave them tough and lacking in flavor. Here are a few tips for testing for doneness when roasting your favorite spring veggies.

First, use a fork or a skewer to test the texture of your vegetables. You should be able to pierce them easily without too much resistance. If they’re still hard or crunchy, they need more time in the oven. On the other hand, if they’re too soft or mushy, they may be overcooked.

Second, check the color of your vegetables. They should be evenly browned and caramelized, with no raw or uncooked areas. If they’re still pale or green, they need more time in the oven. Conversely, if they’re starting to char or blacken, they may be overcooked.

Third, use your senses to determine if your vegetables are ready. They should smell fragrant and delicious, with a slightly sweet and nutty aroma. They should also sound crispy and crackly when you move them around in the pan.

Once you’re confident that your vegetables are done, take them out of the oven and let them rest for a few minutes before serving. This allows the flavors to mingle and intensify, resulting in a more delicious and satisfying dish.

If you’re cooking your spring veg for meal prep, let them cool completely before putting them into storage containers and into the fridge. I recommend separating them out as some vegetables have more liquid in them than others.

Roasting spring vegetables doesn’t have to be a daunting task. With the right techniques and a little bit of patience, you can achieve crispy and delicious veggies every time to take advantage of the seasonal anti-inflammatory produce!

Print

Perfectly Roasted Spring Vegetables

5 Stars 4 Stars 3 Stars 2 Stars 1 Star

No reviews

How to effortlessly make your favorite roasted spring vegetables with maximum flavor and minimal effort. Perfect for side dishes during the week or meal prep!

  • Author: Laura Brigance, MS, CHC
  • Prep Time: 10 minutes
  • Cook Time: 25-30 minutes
  • Total Time: 0 hours
  • Yield: 4 1x
  • Method: Oven

Ingredients

Scale
  • 1 head of broccoli
  • 1 head of cauliflower
  • 1 bunch of asparagus
  • 1/2 onion

Instructions

  1. Preheat your oven to 350 degrees F (163 C).
  2. Chop your vegetables into evenly-sized pieces so that they roast uniformly.
  3. Spray a sheet pan with avocado oil.
  4. Spread the vegetables out in a single layer on the baking sheet.
  5. Give a light spray of avocado oil. Season with salt, pepper, garlic powder, and any other seasonings you wish.
  6. Roast for 25-30 minutes until done. Let cool, then serve.

Did you make this recipe?

Share a photo and tag us @truewell.co — we can’t wait to see what you’ve made!