One thing I’ll say till I’m blue in the face is that meal planning is one of the most underrated forms of stress management. Especially when those meals are meant to help you manage or avoid a chronic condition.
So look, meal planning can be tough enough on its own, but when you add in a dietary style that you’re totally new to, that just makes it that much more complicated.
Over the years, I’ve seen clients make the same three mistakes with anti-inflammatory meal planning. These missteps cost them time, money, and energy … and make it way harder to get meals on the table consistently.
So let’s walk through the top 3 mistakes (and how to avoid them) so you can make meal planning feel easy, doable, and sustainable.
And once you’re ready to streamline, don’t miss my free Meal Planning x LIFE Workshop, where I show you how to plan healthy meals using the templating method proven to save you hours each week in the kitchen.
Anti Inflammatory Meal Planning Mistake #1: Being overly ambitious
So I get it–when we get excited about something new (especially if it’s supposed to help us reach our goals like managing a condition, getting your blood sugar under control, or even kick-starting weight loss), we just want to jump all in…
But here’s the problem: being overly ambitious usually leads to burnout. You get overwhelmed, miss a night or two, and then throw in the towel.
✅ Do this instead: Start small. Plan to cook 3–4 dinners a week at first. Cook a little extra each time so you’ve got leftovers for lunch or another dinner. That way, you’re building confidence and consistency without the pressure.
One of the really great strategies for this is when you cook those three to four meals go ahead and cook a little bit more so that you can have extra for other meals… which leads us into mistake number two.
Anti Inflammatory Meal Planning Mistake #2: Not cooking enough food at once
So before you get all up in arms and overwhelmed at that let me just explain.
It takes no extra time to cook 4 servings of a recipe versus 8 servings of a recipe.
You’re simply using double the ingredients so what I want you to think about is that when you’re only cooking one recipe at a time for whatever meal that is you’re missing out on the opportunity to save so much time later.
The reason why that happens is that whenever you cook more you have extra time, you have a fallback, and you have a backup plan.
✅ Do this instead: When you cook dinner, make enough for tomorrow’s lunch or freeze a second batch for later. Bonus points if you schedule one night a week as a “leftovers night.” That’s one less meal you have to cook and clean up.
I know a lot of families who do one night a week for leftovers for dinner, (we absolutely do that because it saves me cooking one night of the week and it also saves all of the other clean up that happens, and it cleans up whatever is left over in the fridge.)
So instead, think about doing one and a half or even doubling up on your recipes. You do also have the option to take one recipe and cook it for your dinner that night and then make a second one at the same time to freeze for later. So I always recommend doing that and or making double at the recipe so that you can have enough for lunch the next day.
I work out of the house but whenever I did not work out of the house I would get into that hangry situation right before lunch because I’d been really busy working and usually forgot to have a snack.
So by the time lunch got there I was just being like in this annoyed, starving state where I really didn’t care what I went to eat, so I would just grab the closest most convenient thing that I could. Which would never work out on this type of dietary style.
So if you make enough for lunch the next day you can be assured that whatever you’re eating for lunch is compliant with the anti-inflammatory diet and that way you’re not even worrying about what you’re eating the next day because you know that it fit in because you made it for your dinner the night before.
Mistake #3: Not setting enough time aside
Mistake number three is not setting enough time aside for meal prep and for actual cooking.
If you’ve ever tried to cook a full meal after work with nothing prepped, you know how stressful it can be. You end up frazzled, kids get to bed late, and it feels like meal planning is a burden.
✅ Do this instead: Schedule 1 hour at the start of the week for meal prep. Chop veggies, cook proteins, or prep sauces ahead of time. Even just pre-chopping produce when you unload groceries can save you loads of stress later.
Here’s why: When you do allow yourself enough time, it just makes your time spent cooking way more relaxing… You just assemble the ingredients cook what needs to be cooked at your own pace, no rush…Instead of frantically running around with your hair on fire just to get dinner ready.
But it also gives you peace of mind during the day because you know that those things are already prepped and ready to go and have the extra time to cook dinner.
I can’t tell you the number of clients that tell me that even though they have meal plans technically done they still have anxiety about getting the meals actually cooked at night because of how long it will take.
✅What to do instead is to make sure that you schedule in an hour maybe on Sunday (or one other day at the start of the week) to meal prep: chop veggies and even go ahead and make some of the meat even sauces.
Sometimes if it’s a casserole a lot of those ingredients are pre-cooked and then you can just assemble them the night of and then just stick them in the oven so that you have as little to do as possible on the day of.
Bonus tip
Shop once, prep once. When you walk in the door from the store, go ahead and wash + chop veggies right then. It’s one less barrier between you and actually cooking the food you bought.
You don’t have to be perfect at meal planning … you just need a system that works for your life.
👉 Start with the free Anti-Inflammatory Diet Quick-Start Guide. (Check it out below!) It gives you a clear list of foods to eat and avoid so you’re not second-guessing your meals.
👉 Then, watch my free Meal Planning x LIFE Workshop where I’ll show you how to build a realistic meal planning routine that fits into real life (without it taking over your Sundays).
Take it one step at a time. You’ll be amazed at how much simpler anti-inflammatory meal planning can feel when you’ve got the right tools in place. 🌿
Discover My Unique 4-Pronged Approach to the Anti-Inflammatory Diet So You Can Get Started Immediately (Without Getting Overwhelmed or Cleaning Out Your Entire Pantry)
Why a full-scale pantry clean out is NOT the best way to start your anti-inflammatory journey, and the steps you can take instead to make sure you’re fueling your body with foods that love you back
The essential foods you MUST add into your diet if you want to nourish and heal your body naturally
My anti-inflammatory shopping list so you can quickly fill your cart with the right foods (no googling in the produce aisle or wasting hours staring at ingredient lists)
Anti-inflammatory recipes are a great addition to a healthy eating pattern as they can help manage, prevent or reverse the effects of inflammation in the body.
Ingredients like dark leafy greens, beets and cauliflower are packed with anti-inflammatory properties which can help reduce chronic pain and prevent age-related illnesses.
Eating anti-inflammatory foods doesn’t have to be bland or boring either, as there are plenty of fresh and healthy recipes to choose from that cater to different dietary needs. Incorporating these recipes into your meal prep routine can help balance your blood sugar and reduce chronic inflammation.
What is an anti-inflammatory diet?
An anti-inflammatory diet focuses on consuming foods that have anti-inflammatory properties, like fruits, vegetables, whole grains, lean proteins, and healthy fats.
It aims to reduce chronic inflammation in the body, which can help prevent chronic diseases and promote overall health and well-being.
What are the benefits of anti-inflammatory meal prep?
No matter the season, your life is probably super busy. We have 4 kids (3 at home), and regardless of whether school is in or it’s summer or even winter break, things are always sorta chaotic.
So this method has actually been a lifesaver for us so that on weeks where I don’t even have the brainpower to put a meal plan together, this is our lifeline.
We have a backup.
No thinking about it all day, no scrambling at the last minute, and definitely no ultra-processed, inflammatory, and overpriced drive-thru or takeout.
So I’m gonna show you how to meal prep with fall anti-inflammatory foods (meaning: in season for fall in the US).
I’m also linking the example meals that we made for the week with all of the produce that we got.
And if you scroll a bit, you can get the GUIDE that shows you the details for all of this so you can keep it on hand for ANY time you have weeks like this.
And all of this was just random stuff that I know my family will eat and that gave us a pretty good variety for meals this week.
Step 2: Prep your workspace
And after washing all the produce, I pre-heated both ovens for 350 degrees F.
The tools you’ll need for your meal prep session are a large cutting board, good knives, and roasting pans- probably with a lip, and something to line it with so stuff doesn’t stick.
Now I use something I found by accident with is a BBQ grilling mat—I love these because I can cut them to fit perfectly in my pan and NOTHING sticks to them—they come in a pack all rolled up in a box.
(Some links may be affiliate links, meaning if you click on and then purchase, I’ll get a portion of the proceeds, at no additional charge to you.) 🙂
So our base seasoning includes avodado oil to drizzle on, I use this to cook with because it has a high smoke point. Or you can use something like this Misto spray can where you put the oil in, pump air in to build pressure, and spray it on.
Then season with salt, pepper, and garlic powder, and it’s ready to go in the oven.
Click the image below to grab the free Fall Anti-Inflammatory Meal Prep Guide!👇
Step 4: Prep foods that cook the longest first
So, even though I didn’t have full meals planned out when I got all this produce, I had a loose plan for a few things. So I knew I’d want to do baked potatoes one night, so since they take an hour to bake you’ll want to do these first if you’re doing baked potatoes one night.
And for baked potatoes, you just coat each one individually with oil, salt it, wrap it in foil, and then punch some holes with a fork.
Once I’ve got those all set and into the oven for one hour, I get to work chopping everything else.
Step 5: Prep all other foods that cook the same length of time
Broccoli and cauliflower
I started out with broccoli, and just basically cut all the florets off—and if you don’t like to chop you can always buy the bags where it’s pre-chopped. It does save time, but may cost a little more.
Once these were all cut up, I put them all on the pan on one end, because I put the cauliflower on the other end.
Then I started with the cauliflower and removed that large base then cut those into florets as well, breaking some of them apart. And you can also buy these prechopped if you don’t like cutting them up- it does save a lot of time and mess.
Then I placed all those on the second half of the pan where the broccoli was. I cook these on the same pan because cook at right about the same rate.
And then I wanted a bit more flavor than just our base seasoning, so I chopped an onion into chunks and just spread it out evenly on the pan.
Brussels sprouts
Next I prepped brussels sprouts, and the easiest way to do these is chop off the end piece slice them in half and lay them face down on the pan.
I arranged mine with a hole in the middle for all the loose little leaves because they get extra crispy and are a super yummy snack!
Then drizzle or spray with oil, then season with salt, pepper, and garlic powder.—and they’re ready to go!
Mushrooms.
I decided to split the mushrooms and do half chopped pretty small and the other half roasted.
I chopped one half because I like to mix them in with ground meat to give it bulk and really boost the vitamin content-and my kids can never tell! I don’t precook those, so I just put them in a baggie to store in the fridge until the night I needed them.
The other half I just spread out on the pan, and I had a pack of sage I grabbed at the store as well—this is such a fragrant and nutrition-packed herb, and perfect for colder weather.
So I just chopped some of it, sprinkled it on the mushrooms, then added our oil, salt, pepper, and garlic powder and it’s ready to go.
Sweet potatoes
I roughly chopped the sweet potatoes because I had loosely planned mashed sweet potates with cinnamon- my kids love those- and the rest I planned to use in my lunches during the week.
But that meant that all of them needed to be chopped.
Regular potatoes
Then I started on the rest of the regular potatoes I had. So for the ones I wasn’t using for a whole baked potato, we like to sometimes do homemade fries and this tool makes it super easy.
It’s a fry cutter and has this grid blade inside to cut the potato in perfectly squared fries.
So how it works is that you take the lid off, place the potato wedge on top of that grid, then put the lid on and push it down to force the potato through the grid. And you have perfectly shaped fries.
So I repeated this process until I got all the rest of the potatoes cut, then put them with the sweet potatoes on a pan, because they cook at about the same rate. I got them all seasoned and ready for the oven.
Step 6: Put all prepped veggies into the oven
All of the veggies go into the oven at that 350 degrees F for 30 minutes- just keep an eye out and take out anything that’s cooking a little too much.
Step 7: Any veg that won’t be pre-cooked
And the last thing I prepped was kale. Since this came in a bag, I picked out any bad pieces since it was already chopped, and planned to wilt some one night for dinner, and then would have a massaged kale salad one night as well.
So once all the bad pieces were picked out I just stored it in a Ziploc in the fridge.
Step 8: Remove veggies from oven
And when they’re done, just take all the pans out, and let them cool…
Step 9: Store prepped veggies
Then start putting them into your storage containers.
I do recommend putting them in separate containers because some veggies do have a higher water content and a lot of times they get a little bit mushy in there and you don’t want that water running into the other vegetables.
And then you’ve got all your veggies prepped for the week! You can store all of these AND your baked potatoes in the fridge until the night you need them.
4+ Meals with pre-prepped fall anti-inflammatory vegetables
The meals we cooked with our freestyle meal prep session were:
Whether you need to balance your blood sugar, calm inflammation, are trying to lose weight, or just cut out sugar for your health, finding the best sugar substitute is going to be a really crucial thing to keep you on track.
As a former sugar addict, I can testify that beginning an anti-inflammatory diet and lifestyle by cutting out sugar and trying to find the best sugar substitute can be super hard when you imagine all the sweets you now CAN’T have.
But the truth is, there are a ton of things you can still enjoy, and sweets you can have when eating an anti-inflammatory diet. The trick is to use the right sweeteners.
Different sugar substitutes and how to choose the best one based on your health goals
One of the first things we do when shifting into an anti-inflammatory diet is cutting out sugar and refined carbs. This is because sugar drives inflammation and blood sugar spikes, and both of those things lead to insulin resistance.
The problem with going sugar-free is that there are so many different alternatives, and marketing by the companies that make them can create a lot of confusion about what the best options might be.
So we’re gonna cover :
Natural sweeteners
Artificial sweeteners
Sugar-free natural sweeteners
Which would be your best option in going sugar-free that will help you reach your health goals
Give recommendations on favorite brands and where to find them
Natural sweeteners
When it comes to sugar substitutes that are considered natural, these options usually come into play when people are looking for unrefined options other than regular sugar.
Natural unrefined sweeteners can include:
honey,
pure maple syrup,
coconut sugar,
and agave.
And, in fact, these can be really popular ingredients used in a Paleo diet, which is based on whole foods.
The problem with these sweeteners is that they’re STILL sugar.
So for someone who needs precise blood sugar management, and for a reduction in chronic inflammation, getting rid of all added sugars—even those that are unrefined—is going to be really important.
Another aspect to this is that there are a lot of people who do emotional eating and are hooked on sweets, and it’s really easy to convince yourself that you can still eat those types of foods and recipes that use natural sugars just because it’s unrefined.
Keeping yourself stuck on those added sugars – even when they’re natural and unrefined—is a critical mistake that’s keeping yourself locked in that emotional eating cycle.
Laura @ TRUEWELL
So my recommendation for these sweeteners is to cut them out, especially when you’re first trying to start a sugar-free diet, so that your body and your brain can reset itself to not have cravings for it.
If you find that you’re in that spot where you feel like you can’t quit eating sugar and refined carbs, CLICK HERE for more resources on breaking free from emotional eating and sugar.
Artificial sweeteners
Artificial sweeteners are created in a lab, and they date back to the 70s and some are more recent.
The problems with these types of sweeteners is that they:
Can disrupt insulin signaling and increase the chances of insulin resistance
Some have been connected with certain types of cancers.
The gut bacteria piece is really important because 70-80% of your immune system is in your gut, and your gut also produces about 95% of the serotonin in your body, which is one of the main neurotransmitters related to anxiety and depression.
Gut bacteria also play a role in insulin resistance and become really important for anyone with conditions like prediabetes, diabetes, and PCOS, just to name a few.
Other conditions like autoimmune conditions and other inflammatory conditions rely on gut health as well, because leaky gut allows proteins, toxins, and bacteria to get through that gut barrier, which worsens those conditions.
Some studies have also shown that eating artificial sweeteners can impair the body’s ability to recognize when it truly needs insulin. So if your body is pumping out insulin when you don’t need it, it pulls down blood sugar levels too low, then the body tries to compensate for that, and not only are you on a blood sugar rollercoaster, but that additional insulin is telling your body to store fat.
You can recognize artificial sweeteners in a couple of different ways.
When you go into a restaurant or coffee shop, they’re the pink, blue, and yellow packets.
The names for artificial sweeteners are:
Sucralose, which goes under the brand name Splenda for the most part-and uses the yellow packet;
Aspartame and/or Acesulfame potassium/ Ace K are under the brand names Nutrisweet or Equal and are in the blue packet;
Saccharine, which goes under the brand name Sweet & Low, and is in the pink packet.
Get familiar with these names because so many sugar-free products use these sweeteners in them, and once you can recognize these names, you’ll know which of those foods and drinks to avoid.
Natural zero-calorie sweeteners
1. Stevia
Stevia, derived from the leaves of the Stevia plant, is a popular natural sweetener known for its zero-calorie and zero-glycemic impact.
It’s from 200-350x sweeter than sugar but it can have a bit of a bitter aftertaste. I personally don’t mind it, but it can taste a lot like the aftertaste that a diet soft drink would have.
You can get stevia in liquid form, which usually has an alcohol or glycerine base, or in powdered form. The powdered form is where this gets a bit tricky because a really common powder base is dextrin, which is a sugar.
So if you opt for powdered stevia, find one that is either mixed with erythritol, or in the pure powdered form (links for my faves are below).
2. Monk Fruit
Monk fruit is another sweetener that comes from a plant—it’s from a fruit that’s native to southern China. Monk fruit is about 100-250 times sweeter than sugar.
Studies are showing that monk fruit has antioxidants that support reduced inflammation and anti-cancer properties. It also is a mild antihistamine.
The flavor of monk fruit is far less bitter than stevia, and monk fruit is great for baking.
It can also be found in liquid and powder form, but the powder form is often a blend with erythritol (links for my faves are below).
3. Allulose
Allulose is a newer sugar substitute that is found in some fruits and corn. It’s only about 70% as sweet as sugar and has around 10% of the calories of the same measurement of table sugar.
Allulose bakes and freezes like sugar, but keep in mind that unless the package says it’s a cup-for-cup equivalent to substitute for sugar, you may have to do some calculations to substitute it.
Allulose does not have an impact on blood sugar and can also be found in liquid, powder, and granulated forms—but remember that it does still have calories (links for my faves are below).
4. Sugar Alcohols
Sugar alcohols don’t actually contain sugar or alcohol. But they are becoming more popular because they don’t have the bitter aftertaste that other sugar substitutes do.
They have only about half the calories of sugar and they don’t absorb well in the intestines, meaning they don’t contribute to the same amount of carbohydrates that sugar would in the same amount.
The most popular types are erythritol and xylitol. (Links for my faves are below).
A) Erythritol
Erythritol has gained attention in the last few years because it’s being mixed with many other natural sugar substitutes. This helps with flavor profile and the ability to measure it cup for cup as you would sugar.
Erythritol has a cooling sensation besides tasting a lot like sugar. But it can cause stomach upset for people with GI issues.
B) Xylitol
Xylitol is another sugar alcohol that occurs naturally in many fruits and vegetables, but is produced commercially from corn cob and birch bark. The sweetness is similar to sugar, but contains 40% less calories than sugar and gives an extremely small blood glucose response.
Xylitol has been shown to have a lot of health benefits, including having anti-inflammatory effects, possibly preventing ear infections, and is an amazing sweetener for gum and foods because it can help prevent tooth decay.
And in recent years is being used in neti pots and nasal spray because it can help break up mucous and has anti-microbial and anti-viral properties.
The downside of xylitol is that it can cause GI disturbances and it’s extremely toxic to dogs.
What’s the best sugar substitute option?
So, overall, before making recommendations, I want to emphasize that there is still a LOT of research to be done on all of these alternatives.
From the studies we have so far, I recommend staying away from the artificial sweeteners altogether. These are your yellow, pink, and blue packets and those names that we talked about associated with them.
For the natural sweeteners like honey and maple syrup, I also recommend getting away from those as well because of the blood sugar spikes and inflammation that those can still cause. Those are all STILL SUGAR.
And then in the natural sugar-free options, take these ideas into consideration when choosing…
1-Choosing based on taste:
First, I’d recommend that you try a few and experiment with the taste, and with adding them to different types of things. Like maybe you experiment with adding it into a pitcher of tea, your coffee, maybe a vinaigrette, and then also try baking with it.
Come at it from an experimental frame of mind.
2- Choosing based on conditions:
If you’re dealing with a condition like IBS, IBD, or other GI conditions—including leaky gut or autoimmune issues, the sugar alcohol options may not be the best option for you. You can always try just a little and see how it affects you and then go from there.
If you have allergies, monk fruit may be your best option.
And if you have frequent sinus or ear infections or oral infections, xylitol may be your best option.
3- Choosing based on cost:
Some of these can be much more expensive than others.
One trick I use on this front is if I find something that’s more expensive but that I really like, it gives me more incentive to wean myself back from it. And in the case of weaning off of sugar and sweets, this is a good tactic to help with that.
Check out all the links below for more resources and where to find these, let me know in the comments what other questions you have about going sugar-free!
*These links may be affiliate links, meaning if you click through I may get a small portion of the proceeds, with no extra cost to you.
Best Tasting Stevia
So when we’re talking best stevia brand, specifically for flavor, this is a tough one. This is because everyone’s tastes are so completely different, you really won’t know until you TRY them!
Here’s why–stevia is a liquid from the stevia leaf, so they need to either add it to a liquid carrier, or make it into powdered form. In a liquid carrier, this can be alcohol or glycerine. This is the brand that I use, and it’s a larger bottle, so it lasts a long time and sweetens my coffee every morning, sugar-free and carb-free!: 👇
In powdered form, usually this sometimes means adding raw stevia to a powder or granulated base. Sometimes this is maltodextrin, sometimes it’s erythritol.
This makes it in powdered form in a volume so you can measure it cup for cup when doing low carb baking or keto baking.
Like I mentioned before, you want to stay away from the ones with dextrin or maltodextrin. This is a sugar, even though it’s a small amount. But it’s usually from GMO corn, which is coated in toxic chemicals.
If you want powdered stevia that’s pure with no fillers, I recommend these brands:
One last word about stevia– I love it because it’s also made in little packets (like ones on the restaurant tables) that are super convenient to carry in your purse and use when going out to eat! JUST KNOW—the ones made with erythritol do NOT dissolve very well in cold beverages. So you may have to stir for a bit.
I keep them in my purse at all times and use them instead of the awful artificial sweeteners when I’m out.
Next is monk fruit. It can be hard to find monk fruit on its own. The liquid drops are awesome for sweetening beverages, especially on the go. I don’t recommend the Splenda brand for this because of the preservatives they add. Instead I recommend this brand: 👇
In powdered form, it is usually either mixed with erythritol or maltodextrin. Like mentioned before, the maltodextrin or dextrose is made from GMO corn, and is still a sugar. So I recommend staying away from those.
There are a ton of different brands of powdered monk fruit, so again–your best bet is to maybe look at reviews online and see what resonates with you, in addition to what properties you’re looking for, and then of those find the one that tastes best to you and your family.
Allulose is the newest of all the sweeteners I recommend. It’s about 70% as sweet as sugar, so even though you can find it on its own, it is normally blended with a sweetener that is much sweeter than sugar to be able to get that cup per cup same measurement as sugar for recipes.
One cool thing that food manufacturers have found is that blending some of these sweeteners can cut the unfavorable flavors and make the blend taste way more like regular sugar.
It also helps that the ratio of sweetness is different for those sweeteners as well so that they can mix it to be cup-for-cup measurements of what regular sugar would be in recipes.
If you’re ok with erythritol (you don’t experience any GI effects), try out some of the erythritol and monk fruit or stevia blends. It’s also great to try out the allulose blends as well and find the one that works best for you and your family.
Today we’re doing anti-inflammatory meal prep for SUMMER that balances blood sugar, fights inflammation, and packs in nutrients from fresh seasonal produce.
I really love to eat seasonally, I think mother nature provides us with specific nutrients we need for each season, but also—it costs less to buy produce that’s in season.
Now I love to prep ingredients to be able to throw together, but I also know that weeks are CRAZY so it’s also important to have recipes that you’ve prepped for so you have as little as possible to think about during the week.
That being said—let me know in the comments if you like doing meal prep with actual recipes—or if you like prepping ingredients to assemble meals and snacks as you see fit throughout the week.
So this summer meal prep does both of those things – And I’ve created a PDF with instructions and links to the recipes so you can do this meal prep easily at home. 👇
Get the (free) Summer Anti-Inflammatory Meal Prep Guide!
Beat the summer heat with this 1-week gluten-free, sugar-free meal plan and prep guide! Featuring delicious anti-inflammatory recipes from fresh summer produce!
And our summer anti-inflammatory dinners we’re prepping vegetables and sauces for this week are:
Grilled salmon with sauteed green beans
Paleo Chicken Fajita bowls
Low Carb chicken and eggplant Parmesan casserole
Pesto chicken and zucchini and squash medley
Grilled Salmon with Sauteed Green Beans
Low Carb Eggplant Parmesan Casserole
Paleo Chicken Fajita Bowls
Pesto Chicken with Zucchini and Squash Medley
So let’s get started prepping!
Summer anti-inflammatory meal prep steps
Pre-step 1: Get out your prep foods and supplies, and wash everything
So to get started I get all that produce out. I get out my cutting board, my good knives, and a pan to roast the veggies on.
Then I go ahead and preheat the oven to 350 degrees F, and wash all the veggies really well.
Some people like to use a Sil match to roast veggies on because stuff doesn’t stick, but I found it really hard to find one of these that fits my pan perfectly.
I do still use this for things that I bake that won’t leak into the oven, but for roasting veggies I found a secret kitchen tool that I accidentally stumbled onto.
It’s a barbecue grill mat and I’m telling you nothing sticks to this! They usually come in a pack rolled up all nice in a box (linked below).
And what I do is actually cut them to fit my pans that have lips so that they fit perfectly. And I’ve done this with baking sheets and I’ve also done this with CorningWare dishes.
(Disclaimer: This is an affiliate link, so if you decide to purchase this product, I made a small percentage of the purchase price at no extra charge to you.)
Now for this summer meal prep session, I’ve got zucchini, summer squash, eggplant, green beans, bell peppers, and onions.
Step 1: Chop
Once I make sure that everything’s been washed, I get started chopping.
So the way you want to chop veggies when you’re roasting them for meal prep like this is to try and cut them all around the same size. This just ensures that all those vegetable chunks cook at about the same rate.
Squash and zucchini
For the squash and zucchini, I just slice them in half lengthwise and then just chop slices all the way down.
Eggplant
Eggplants are tricky for some because they are part of the food family called nightshades. Nightshades cause inflammation in some people, but this isn’t a guarantee. Research has shown that nightshades causing inflammation is highly personal to each individual and any conditions they have, and the best way to know if you personally react is to do an elimination diet.
I like eggplants because they’re pretty filling but they have a soft texture without being mushy with liquid. Eggplant slices are really great for eggplant parmigiana, so it may help to slice it if you’d like to use it that way.
I’ve been told by an Italian chef before that they sometimes do that and leave the skin on to help the eggplant slice stay intact during cooking.
But I also like to peel mine and cut it into those kind of half-slices or half-moon slices to roast as well. One thing I’ve learned through the years about eggplant is that you may need to switch your peeling tool depending on the thickness of the skin.
For safety’s sake use a much smaller paring knife to get the eggplant skin off.
Bell peppers and onions
Then I moved on to my peppers and onions. For bell peppers, I usually will cut off the top and then I’ll work the knife around the insides to pull out that seed pod.
Then I’ll turn it upside down and give it a tap to get all those seeds out and then flip it upside down to cut it into slices. I did the same thing with my green, red, and orange bell peppers.
Then when those were done I peeled the skin of my onion. And then I cut the rest of it into larger slices to roast with the bell peppers.
These all get spread out onto a lined sheet pan as well.
Seasoning
Once I’ve got enough veggies to fill a pan I place all the chunks in sections.
The easiest way to prep roasted veggies–especially when you have recipes from different cuisines–is to do just the basic seasoning of:
oil,
salt,
pepper,
and garlic powder if you want
I used avocado oil because it has good monounsaturated fats, which is great for pulling down inflammation, and it also has a high smoke point. You can use the mister if you want a lighter coating of oil rather than it being drizzled.
Step 2A: Roast
Then everything’s ready and goes into the oven. We have a double oven so I actually take full advantage of that on days like this when I’ve got several pans to cook all at the same time.
I’ll just leave the light on in there so I can check in case something may need to come out a little earlier.
The general time that I cook these summer vegetables is about 30 minutes.
While those are cooking, I’m gonna take advantage of that time in the oven and chop anything else, mix up my batter for the blueberry scones, and then assemble my marinades and sauces.
Other veggies that don’t get cooked
The last thing in this session that I did was chop green beans. I do like roasted green beans, but we’re having Grilled Salmon with Sauteed Green Beans for one of our meals this week.
I love sauteing green beans during the summer because the fresh ones taste really great when they still have a bit of crunch to them.
So the green beans did not get roasted but they did get put into a storage container in the fridge.
Step 2B: Bake
And while everything is still roasting, we’re gonna mix our scone batter.
I want to go ahead and mix my batter for the Low-Carb Blueberry Scones, because as soon as the roasted veggies come out of the oven, the scones go in.
We start out mixing the dry ingredients, mix in all the wet ingredients, and then combine it really well. Then pour the batter onto a pan lined with parchment and shape it into a circle.
Chopping fruit
The summer fruits we’re using this week are blueberries, cherries, and limes.
The lime just needs to be sliced and juiced which takes no time, so I’m gonna leave that till the night I need it.
And I’m using frozen tart cherries, but if you’re using fresh, you’ll need to wash them, take the stems off, and pit the cherries to get the seed out. Then you’ll want to freeze them in a baggie until you need them for your smoothies because you want them to be nice and frozen.
So really the only prep for fruit is the cherries if you need to do that.
Chopping herbs
And then moved on to the herbs. This week I need cilantro and basil.
So I’m just gonna take the amount needed from the recipes and pull it from the stems.
Both of these recipes require the blender, so there’s really no need to go all out chopping these herbs unless your blender has a hard time pulling larger leaves like that down while it’s blending.
Veggies out | Scones in
By this time the veggies should be done in the oven, so we’ll pull the roasted veggies out of the oven to let them cool, and then the low carb blueberry scones go in at 350 F for 30 min.
Step 3: Assemble
Now that everything’s chopped and ready, and I’m still waiting on the scones to finish baking, I can start assembling prep packs and containers for stuff that will go in the fridge until the night or day I need it.
Smoothie packs
So let’s start with the Cherry Almond Smoothie packs. I’m making 2 of these for the week, and we just throw all the ingredients into a baggie that’s labeled.
These little handy things I’m using are called Baggie Stands, and I’m telling you—this makes it SO much easier to use baggies for storage when you have anything liquid, because if it tips at all—you’ve got liquid all over the counter if you don’t use these things.
This recipe also includes a few ice cubes, but we hold off on those until the day we make them.
You can write instructions for the ice on the baggie too if you want. And then once those are made, they go in the fridge.
Marinades, dips, dressings
Next we’ll mix the marinades, dips, and dressings.
Fresh Cilantro Lime Dressing
The Cilantro Lime Dressing is gonna go on our Paleo Fajita Chicken Bowls and can also be used for dressing on salads, so you can double or triple this recipe if you want.
The ingredients just go all in the blender, blend it on high, and pour it into a container to seal and store in the fridge.
Homemade Low-Carb Marinara
Nex is our Homemade Low Carb Marinara for the Low-Carb Eggplant Parmesan Casserole. Now if you can find no-sugar added marinara in the store, it may be easier for you to just buy it made already. If you can’t, then this recipe is great.
And as long as you can find crushed tomatoes, you don’t even need to blend it if you don’t want to.
Simply pour the ingredients into a saucepan, let it cook about 10-15 minutes, then when it’s cooled, store it in a jar in the fridge.
Now if you can’t find pine nuts, a good alternative is macadamia or even cashews.
You just throw it into the blender, pulse it several times and then pour it into a container to seal and store in the fridge.
Scones out
When the timer goes off, you’ll pull the scones out of the oven and let them cool before cutting into them.
You can alternately wrap the whole thing and store it in the fridge and cut it as needed during the week.
Cooling + storing meal prepped vegetables
The last step is getting the cooled veggies into containers to store in the fridge.
In our house, we use glass Pyrex storage containers that are rectangular shaped. I’m not sure who thought using round containers inside of a square-shaped fridge was a good idea of it in our house it pushes other dishes around and nearly pops them out of the fridge regularly, so we use square or rectangular shaped.
And then when they’re cool enough put the lids on and you can stack them nice and neat in the fridge until you need them during the week.
Then during the week, you have all your veggie components ready to go for the week for these recipes.
And if you happen to have leftovers from your meal prep at the end of the week, my favorite way to use it is to make a nourish bowl or macro bowl with all the leftovers.
Now, as I mentioned at the start, I’ve created a summer meal prep guide for you that should hopefully make meal prep a little easier because it has the full prep guide as well as links to all the recipes.
And—when you grab the free PDF for the summer meal prep, you also get a huge discount on the blood sugar balancing Summer Anti Inflammatory Meal Prep Kit that has 4 weeks of summer meal plans, full recipes, and prep guides that include breakfast and snacks, lunches, dinners, and even desserts and cocktails—all sugar-free, gluten-free, and dairy-free adaptable!
Get the (free) Summer Anti-Inflammatory Meal Prep Guide!
Beat the summer heat with this 1-week gluten-free, sugar-free meal plan and prep guide! Featuring delicious anti-inflammatory recipes from fresh summer produce!
These are the best kitchen tools for meal prep that I use and LOVE in my household and recommend to others!
Meal prep isn’t just a trend, it’s really a revolution of efficiency. But truthfully, it gets even more efficient when you have the proper and best kitchen tools for meal prep.
As a nutrition specialist and health coach, some of the first things I discuss with clients are the roadblocks to making healthy eating happen, whether it’s general healthy foods or sticking to a dietary style for weight loss , food intolerance, reducing inflammation, or managing a condition like prediabetes. Lack of time is usually the biggest reason named, but it doesn’t have to be (which is what I work through with clients).
My philosophy is to always merge healthy + efficient to make an anti-inflammatory lifestyle doable daily. ✨
Here are the best kitchen tools for meal prep that I feel are the most efficient in their own right to make meal prep happen with the least amount of frustration.
This Ninja system has everything you need to chop, dice, spiralize, blend, cream, and so much more! It comes with a bullet-sized smoothie cup, large blender, crazy-sharp blades that are absolutely amazing, a food processor bowl for chopping and ricing, and the smaller attachment for grating and spiralizing.
It also includes a dough blade! This system eliminates the need for 3 different appliances, and also has preset functions so you can push the button and walk away while it does its thing!
This larger 8-quart Instant Pot has the size to cook larger or smaller amounts, and eliminates the need for a separate slow cooker, pressure cooker, rice cooker, saute pan, and more!
You can sear meat right in the pot before setting to slow cooker, you can use as a pressure cooker and even cook meats that came straight from the freezer (anyone forget to thaw something for dinner??), and it has settings for different types of meats, rice, eggs, yogurt, potatoes, and so much more.
It seriously eliminates the need for multiple different cooking devices! It even has a function for sterilizing! (Baby toys or bottles, anyone?) My feeling, especially if you have a lack of space, is that the best kitchen tools for meal prep can multi-task.
(I like the larger size because it can fit so much more or cook less.) And if you really wanna get high-tech crazy, there’s even a “Smart Wifi” model!
The KitchenAid stand mixer is another amazing all-in-one. It obviously mixes hands-free, but it comes with dough hook attachment AND whisk attachment.
But it also has a MILLION AND ONE add-ons! For example, meat grinder, spiralizer, pasta maker, juicer…. honestly the list goes on! The Aqua Sky color is the most popular, but check out the link below to explore all color options!
Ok, this may sound crazy, but this Silmat is amazing and eliminates the use of oil sprays or coatings when baking! I love that I have the option of cooking oil-free and know that it won’t stick!
I also love that this set has multiple sizes since not all baking sheets are the same size.
These can be used in baking sheets (whether baking, cooking, or roasting) or on the countertop for rolling out doughs WITHOUT the use of extra flour! The best kitchen tools for meal prep will also help eliminate extra ‘stuff’ you have might otherwise have to buy, like parchment paper, oil, flour, etc.
Even though I love silmats, they pose the problem of not ever fitting inside my rimmed baking sheets or even my corningware and glass dishes. These BBQ grill mats solve that problem because they can be CUT to FIT PERFECTLY inside any pan!
Not only that, NOTHING sticks to them, and they’re easy to clean! (Win-win!)
Baggie stands are something I never knew I needed until I used them. Like something in my head told me this would be incredibly helpful, but having them makes my life so much easier when I meal prep!!
(Ever have a biggie fall over while pouring liquid in? 😭Yeah…no bueno.) With these baggie stands– PROBLEM SOLVED!
If you’re a serial MEAL PREPPER like I am, or even WANT TO BE— these reusable storage bags ARE FOR YOU! I use a TON of baggies in meal prep!!
We also send berries, chips, granola, etc in baggies for the kids to school because we either make our own stuff, or buy the large bag and divide for cheaper snacks.
These reusable bags eliminate the overwhelming amount of plastic being thrown away, but also the overwhelming amount of baggies I’m buying every month!
Whether you do weekly meal prep or not, getting rid of plastic food storage containers is a MAJOR upgrade for your health!
I love these glass storage containers because they’re dishwasher safe, microwave safe, oven safe, and even freezer safe! They’re extremely versatile! Perfect for meal prep. Perfect for leftovers. Without the icky BPA.
Also, they don’t melt in the dishwasher. All the plastic meal prep containers you can buy will eventually lose their shapes (sometimes sooner, depending on the water temperature in your dishwasher). The glass meal prep containers are good to go forever.
And one last point– I’ve switched to rectangular and square-shaped storage containers because I’m not sure who thought it was a good idea to try and fit a round storage container in a square-shaped fridge, but I’m done having dishes ‘pop’ out of the fridge when trying to find something or make room for something else. 😉
For some dietary styles, reducing total oil is a must. And honestly, sometimes a ‘drizzle’ is a bit too heavy when it comes to oil.
Which is why I love the Misto oil sprayer. It’s free of butane (like is in cooking spray you buy at the grocery store) and you can use the type and quality of oil YOU prefer.
Silicone muffin pans are a dream for bakers and meal preppers alike! No more rusty pans. No more muffin papers.
No more sticking or using non-stick sprays. Oh yeah, and no more washing silicone muffin wrappers individually!! HUGE time saver for me!! (Remember: healthy + efficient!)
In case you’re been under a rock the last decade, you already know the reason Teflon isn’t normally used on skillets any more. And although that non-stick surface was hella useful, it’s crazy toxic.
Next best non-stick thing? Ceramic-coating! (If you have an induction cooktop, make sure to confirm the cookware works on it before purchasing!)
Although it’s not hard cutting a potato, cutting them into perfectly sized fries can be super tedious. That’s why I love our fry cutter.
One disclaimer on this one: I have several videos where I use a different brand. The one I use has never given us trouble, but on Amazon, it has a pretty low rating.
So I linked to an alternative with much better reviews and one that’s pretty darn durable. If your family likes home fries, this thing saves a TON of time and headache!
If you love the versatility of being able to go from cooktop to oven, or even fridge to cooktop or oven, then enamel coated cookware is the way to go!
The only ‘con’ I have to these is that they are very heavy because they’re cast-iron on the inside, and that means my kiddos can’t feasibly handle them, and also it means it’s nearly impossible to hold the skillets at an angle to pour contents out.
Otherwise, these pieces should last for years (and many high-end brands like Le Creuset should last a lifetime). Plus you can get them in a ton of really preeeetty colors! 🌈
The best kitchen tools for meal prep will always include a quality set of sharp knives. A good sharp set of knives can mean the difference between beautifully and quickly sliced foods and an urgent trip to the ER.
Invest in some really good knives!! Better knives cost more, but they last longer and are more durable. Plus if they get dull, you can sharpen them!
This may sound like silly advice, but coming from someone who VALUES minimalism these days, a really GOOD, DURABLE, POURABLE, and STACKABLE set of mixing bowls that only takes up a SINGLE shelf in my kitchen is a mega win!! 🏅
Not to mention that this specific set has graters and a slicer you can attach right on top of the bowl!!
When doing meal prep, the gold standard for labeling baggies is the good ole’ Sharpie. And while I LOVE me some colored Sharpies, unfortunately teal and lighter colors just won’t cut it. Use BLACK, DARK BLUE, PURPLE, or RED.
Guess what—DRY ERASE markers aren’t ONLY for a dry erase board!! They’re PERFECT for labeling FOOD CONTAINERS when you’re meal prepping or have leftovers!! 🤩
THESE dry erase markers are my favorite, because they have a fine tip, are black (same importance as the Sharpie situation), and they have a magnet, so you can keep it on the side of the fridge for easy access when labeling leftover containers!
*And a tip–although you may be super tempted to use the wet-erase version (usually Vis-a-Vis brand), DON’T! If any moisture gets on the container, the words will smear right off onto your hands and then take 17 days to get off… speaking from experience.)
Ok, so I’ve saved the BEST for last. I never realized how much of a pain it was cutting up tons of veggies and fruits for meal prep until I started. This is my FAVORITE thing ever!
A cutting board with containers for what you’ve chopped under it! Eeeekkk! There are a couple of other options for meal prep cutting boards, but this one is by far my favorite!
So there ya have it! My list of the 15 best kitchen tools for meal prep! Keep in mind it’s not a dire situation if you don’t have these or can’t afford them right now. They simply make it easier to meal prep.
Got any more suggestions? Let’s hear them in the comments below!
Know someone that could use advice on what the best kitchen meal prep tools are? SHARE this post!
This lemon tart smoothie is full of protein and healthy fats, making it a perfect anti-inflammatory smoothie for breakfast, snacks, or even a meal replacement!
In this winter anti-inflammatory smoothie recipe we’re gonna be taking advantage of cauliflower and, obviously, lemon.
This smoothie recipe includes:
1 lemon, juiced
1 frozen banana
1 cup of frozen cauliflower
2 tbsp of coconut butter
1/4 cup of vanilla protein powder
And 1 ½ cups of unsweetened milk
Frozen bananas
Now if you don’t have a bag of frozen bananas and just toss bananas into the freezer when they’re about to go bad like I do, the easiest way to use them is to put in the microwave for about 20 seconds, then just slice the skin off the banana and slice the banana up. I know it looks super gross, but bananas naturally brown in the freezer like that, so no worries.
Frozen cauliflower
For the cauliflower, you can find this in the freezer section at your grocery store, but just know that they should have cauliflower florets, and riced cauliflower. You can use either, but I prefer the riced because that’s just that much less blending you’ll need to get the chunks out of your smoothie.
Coconut butter
Now for the coconut butter, this can sometimes be tricky to find. Basically, coconut butter is the coconut meat ground down into butter, the same way that peanut butter or any other nut butter is made.
So for this recipe if you can’t find coconut butter, you can do one of 2 things:
Either make your own coconut butter with coconut flakes—but you’ll need to make sure they’re free of any type of coating,
Or you can use coconut oil.
The difference in the two lies in the fact that the fat is all extracted from the coconut butter, which is the oil. So on these containers you can see that they have the same servings size, and per 1 TBSP, the coconut butter has 100 calories, 10 grams of fat, 3 grams of carbs, and 2 grams of fiber.
Coconut oil, on the other hand, is 120 calories of only fat. No carbs and no fiber.
If you’re counting calories and/or macros, this is something to be aware of if you need to sub out the coconut butter.
Protein powder
For the protein powder, I recommend checking the label and making sure there’s no sugar added. A lot of reputable protein powders are now using stevia or monk fruit to sweeten the powder.
If you can handle dairy, a whey protein powder is great. If you need non-dairy or vegan, pea protein powder is really great.
Milk
And lastly, the milk can either be dairy if you can tolerate it or any other non-dairy unsweetened milk. Make sure it’s unsweetened so it doesn’t have added sugar.
I really don’t like using oat milk either because it has so many carbs straight from grains with no fiber.
Directions
So into the blender, we juice our whole lemon, add in the frozen banana, 1 cup of frozen cauliflower, 2 TBSP coconut butter, ¼ cup of vanilla protein powder, and 1 ½ cups of unsweetened milk.
Then blend or pulse it in a high-powered blender until it’s super smooth, pour, and enjoy!
This anti inflammatory smoothie is packed with protein, fiber, and healthy fat, making it perfect for a winter breakfast, snack, or even meal replacement.
This Citrus Pear Smoothie is a green anti-inflammatory smoothie that combines signature winter flavors to create an absolutely refreshing snack or breakfast smoothie.
So let’s talk ingredients.
Frozen avocado
So, first off, if you’re not using frozen avocado chunks, which you can buy at the grocery store, you can either freeze your own avocado ahead of time, or use it at room temperature.
Just know that if you use it at room temperature, that’s the only ingredient that was frozen, so we’ll need to use some ice in the place of part of the water so your smoothie is cold and slushie.
Pear
We start out cutting up the pear and parsley. Pear is so delicious when it’s in season in the winter, and the skin is usually softer than an apple.
The skin is also full of antioxidants, and one in particular is quercetin, which has been shown to reduce inflammation, plus it has lots of fiber.
So I keep the skin on. You can cut the top and bottom off so it stands on its own, then use an apple corer get perfect wedges while taking the core out.
Parsley
Parsley is full of vitamins K, C, A, and Bs. It’s also been shown to help reduce blood pressure and bloating, so I love to use parsley in any recipe I can. It just needs to be roughly chopped for this smoothie.
Lemon juice
Lemon juice adds just a bit of tang to this smoothie, as well as a bit more Vitamin c. Fresh is always best since most lemon juice in the bottle has added preservatives.
Water
Make sure you use filtered water, and if your avocado isn’t frozen, use ½ cup of water and about ¾ to 1 cup of ice to replace the 1 cup of water.
Instructions
And then we just add all the ingredients to the high-powered blender, blend really well until all smooth—remember it’s chopping up pear skin if you kept it on, so you may need to let it go for a bit.
Then pour up and enjoy!
👇Grab the free Winter Anti-Inflammatory Meal Prep Guide! Click the image below! 👇
How to Drink More Water With These 8 Hacks Every Day.
Waaaay back when I was in high school and college, how to drink more water wasn’t on the forefront of health news. And they certainly hadn’t started bashing added sugars, nor begun scolding us for drinking sodas. So back in those days, my beverages consisted of mainly straight juice, sweet tea (I am from the South), and sodas. All full of sugar. Like, LOADED with sugar!
I couldn’t understand why certain weird and undesirable things were going on as a teenager and young adult in my body. Things like terrible skin, horrible mood swings, and what I now know was the beginning of my panic attacks.
Being dehydrated, or even almost dehydrated can cause some really crummy things to go on in your body. And as a busy Mama, these crummy things are just some of the little things that stress us out, and put us on edge when we’re already being pushed to our limits in day to day life. Being hydrated by learning to drink more water is part of self-care because it’s crucial to health and processes going on in our bodies. This includes having enough energy every day. I constantly promote finding the magic place where healthy + efficient merge, and drinking more water every day absolutely holds a place high on the list of things that tick off both boxes.
The Importance of Staying Hydrated
Being properly hydrated every day is so, so important! It helps you think better, it gives you energy, and it keeps your systems running properly.
Think about how well a dish sponge would work with only a tiny bit of water in it. It would be extremely hard to get a dish properly cleaned with a ton of goop and not enough water, right? That’s what happens in your body.
But also, your kidneys are trying to balance the minerals in your body (which affects your circulatory system!) They get bogged down when there’s not enough fluid in your body. So don’t underestimate the importance of staying hydrated properly!
ALL of those things make it uber worth it to me to drink more water!! How about you?!
How much water should you drink in a day?
The amount of water needed in a single day has had lots of debate over the past few years. But here’s the reason why: Every person’s body composition is different, every person’s health situation is different, and every person’s activity level is different. Plus every person lives in a different climate. There are so many variables that it really depends on several different things. But here’s where to start:
Calculate your body weight, then divide by 2. That’s how many liters you should start with each day. Or-
However—if you live in a very dry climate, if it’s summer, if you’re sick, if you’re taking meds that make you dehydrated, if you drink lots of coffee, AND if you’re very active—you should drink more than that!
I challenge you to start out with the basic formula, then
add as needed. See how you feel every few days and add more if you feel like it.
How can you drink more water when you don’t like it or when you’re not thirsty?
1. Drink It Before Every Meal
The first tip for drinking more
water on a regular basis is simple – just have a full glass before each meal
and snack you consume, including before your morning cup of coffee. This is
one of those simple reminders that allows you to drink more of the good stuff,
without really having to think too much about it. Train your mind to know that
if you are going to put anything into your body, whether it is your breakfast
or a late-night treat, you have to drink 8 ounces of water first.
This provides multiple benefits. First, it reminds you to drink another glass. It’ll also
going to help your food digest a little better. Plus, it
prevents you from overeating since it helps to fill you up a little. It’s not
uncommon to think you’re hungry, when you’re actually thirsty. (Especially if
you’ve eaten a super salty meal earlier in the day!) If you’re not hungry after
a full glass, wait a bit before eating.
You should also try to drink a glass
of water before or after every other beverage you drink. Force yourself to
drink the same amount of it as the other beverage you’ve consumed.
2. Infuse or Flavor It
A common problem people have with
drinking water isn’t that they don’t remember to drink it, but they’re just not
interested in it. This is totally true for me, and
was a big issue when I was pregnant. I finally found one brand that I sort of
craved. (Yeah, that had to do with hormones, those darn things!) The good news
is, you have some other options. You don’t necessarily have to drink just plain
filtered or tap water all day, every day. There are many ways to add flavor and
make it more interesting, without piling on the sugar and calories.
The Simple Method
If you are short on time and just
want a super quick way to add flavor, go with lemon water. All you need
to do is add a few lemon wedges, squeezing in the juice first, then putting the
wedges in it. Lemons have a lot of tart juice, so this will flavor your water
quickly and easily. You can also try a mixture of lemon and lime, or use other
juicy fruits like grapefruit. (Just one tip is to not let it sit for a long
time, even in the fridge. The rinds have a tendency to leech out super bitter/sour
taste if left too long. Trust me. It’s mouth-puckering.)
Fruit or Vegetable Infused
This is one of my absolute
favorites! And when I make this ahead of time and store it in a beautiful
pitcher in the fridge, I find that I crave it all day! When you can spend more
time on it, you can use other fruits, vegetables, and even herbs to flavor
your water. This is called infused water, since it’s a longer infusing
process. You aren’t just flavoring it with these ingredients, but adding more
nutrients from the produce and herbs.
To make infused water, you should
have a glass pitcher and access to filtered water preferably. Prepare your
fruits, veggies, and herbs depending on what they are. Berries should be sliced
so you can access the juice inside, fruits with hard skin should be peeled
first. Veggies should also be peeled and chopped. Muddle your herbs to release
the oils and flavors.
Add the ingredients to the bottom of
the pitcher, cover with ice, then add your water. Let it sit in the
refrigerator for as long as you can before drinking it, which really allows
those flavors and nutrients to come through. And oh goodness, are they
delicious!
3. Choose a Cup You Love to Use
Do you want to encourage yourself to
hydrate more? It’s all in the cup! Seriously, I’m so guilty of this, and it
drives my husband nuts! If you use boring water bottles you don’t like, then
you probably won’t drink as much as you should. A good way to have fun with
it and remember to bring the bottle everywhere with you is to choose a bottle
or cup that works best for you.
This might mean the overall look and
color of it, or the ease of holding onto it while walking. There are so many
small details that determine if it’s a good fit or not. For example, if you
drive a lot, you want it to fit perfectly in your cup holder. On the other
hand, if you bike for exercise, you may want it to have a tight lid, but one
that is easy to pop off when drinking while riding.
Try out a few different cups until
you feel like you have found the one that is perfect for you.
4. Limit Other Drinks You Consume
Another little trick for drinking
more water is to reduce all of the other drinks you consume. This
doesn’t mean drinking water 100 percent of the time. But, it does help to
reduce the ‘bad’ beverages, so that when you are thirsty, you go for water
instead. This eventually increases your water intake simply because you’re
going for water when you feel thirsty, and not other beverages.
5. Track Your Water Intake
This isn’t something you need to do
every day for the rest of your life, but for now, it might be hard to determine
how much water to drink, and if you’ve even reached your goal for the day. Start
by figuring out a good way to track your water. This can be an app on your
phone, a notepad, a planner you keep in your purse, or a program on your
computer. {Or just download the one below!}
Start by tracking your water for a
few days before trying to increase how much you drink. This lets you know how
much you’re currently drinking on an average day. If it’s less than 8-10
glasses of water (8 ounces each) a day, you need to start increasing it. Once
you are tracking daily, it helps you know how and when to drink a little more
throughout the day.
6. Enjoy Fruits & Veggies with High Water Content
If you find that you simply can’t
drink enough water, then eat your water instead! You should still try to
drink as much as you can, but this is good for the days when you’re a little
below your water intake goal. There are fruits and veggies that have a high
water content, therefore helping to hydrate you. (Read: This does NOT mean
drinking these as a juice–this means eating the fruit or veggie, thereby
getting the fiber to offset the sugars you’ll be ingesting.) These include:
Cucumbers
Grapefruit
Apples
Pineapple
Lettuce
Celery
Radishes
Watermelon
7. Try These Reminders
If you enjoy water, but you often
forget to drink more of it, these little reminders can be helpful for you.
Drink water before every meal, snack, and other
beverage
Have a glass first thing when you wake up
Hydrate before or after your workouts
Drink a glass of water after every trip to the bathroom
Have a glass or bottle every time you enter your office
or your home
As long as you keep these reminders
in the back of your mind, and follow the other tips mentioned, you should be on
your way to dramatically increasing your water intake and reaping the awesome
benefits from it! I promise your body will thank you!!
What tricks do you use to get more hydrated? Let me know in the comments!
Know someone that could use help with increasing their hydration? Please SHARE this post!
As a busy mom, I’m sure you can relate to the dinner-time frenzy of ‘what’s for dinner?’, as well as the panic that beginners of meal planning encounter regularly. It’s seriously draining to have tiny humans to feed when you have no clue how to meal plan or where to start meal planning.
I actually advocate meal planning as one of the FIRST things to get in order in your household to help reduce stress. (Seriously–order and a plan = calm + collected).
Finding the magic ✨ middle between healthy + efficient will change everything.
But there are actually a lot of other reasons to meal plan, and here’s why you should get your ish in order and get started!
1. Benefits of meal planning
Meal planning is one of those things that people just hate doing. It usually feels like an impossible task, not knowing where to start or end. Most people are very confused about what meals they should include for staying with a particular dietary style, which meals through the week they should plan for, and how make the shopping lists.
I get it—before I started meal planning it felt completely overwhelming. Evenings were stressful, because even if we did agree on a meal, I had no idea if we had the ingredients to make it. (Forget whether or not it fit into our ‘diet’ we tried to adhere to at the time!) The frustration of not ever really knowing what was for dinner got the best of me once we had kids and our time became a gazillion times for valuable (because it was qucily becoming in more short supply).
That’s when I decided to get serious about meal planning.
And you know what? I discovered that there were several benefits to meal planning I didn’t even realize until we were into it a couople weeks.
First, our ‘diet’ we were trying to follow—we stuck to it because I took the time to search out recipes that followed it. The confidence it built in both my husband and I after eating good for two weeks was amazing! That alone helped us stay motivated to keep working out as well. We didn’t want to waste our efforts at proper eating habits.
Second, we saved money. (Serious.) When you have an actual plan, you don’t wander through the store and grab at whatever looks good. You get your stuff and get out. This also allows to intentiaonally search up recipes that cost less if you’re serious about bringing your budget down on groceries.
Third, we eliminated multiple trips to the store. Translation: time saver!! We honestly didn’t have time to make so many trips to the store in the first place, and this just put me into panic runaround mode the days I had to ‘stop real quick’. Think about how much time (and brainpower) it’s taking for you to realize you forgot something or you’re out of whatever you dreamed up for dinner on a whim, then the time to get into the store (especially if you have to take kids in with you!), the time in the store, loading the car back up, then unloading everything while unloading kids. Oh yeah—and getting everything put up. This can suck hours out of your week. Only one trip a week has saved me boatloads of time!
And last, our stress levels were exponentially less in the evenings. That may sound like an exaggeration, but I’m not kidding. There was no scrambling around, no arguments, no searching online like a madwoman for something—anything—I could make with mushrooms and ajar of relish. We had a plan, we both helped in cooking every night, and we started having some amazing conversations while spending relaxing before-dinner time with the kiddos.
So now that you’re convinced you’re definitely on the right track–
2. How do you start meal planning?
Meal planning will come down to a couple of different things.
First, are there any dietary styles you need to adhere to? If so, those are the kinds of recipes you need to search up.
Second, how many people will you be cooking for at night? Think about if you need to cook for adults and kids.
Third, do you want to take advantage of leftovers for lunches? This will determine the number of servings you cook of the dinner recipe. This is a GREAT way to also make sure you stay on track with your dietary style. As long as you cook your dinners in that style, you’re assured your lunch is the same when you’re using them as leftovers. Plus you don’t have to go searching for lunch when you’re hungry. It’s already done and ready in the fridge.
Do you need to plan for breakfasts, snacks, or more lunches? If so, you should also account for these when sitting down to meal plan.
3. How do I create a weekly meal plan?
Creating a meal plan takes a little time each week, but once you have a system set, you begin to follow it automatically and it gets easier.
The first thing you should do is print out a meal planning template (which you can get below), and find recipes. Consider all those things above when coming up with your plan.
Next, start filling in the days and slots you need a meal for with the recipes you’ve found. Think about any nights you won’t be home for kids’ practices, nights you eat out, or nights you’re planning for leftovers. Mark those out or make a note.
You’ll also want to note any nights you want to cook but it needs to be simple or a slow cooker meal that you threw in first thing in the morning to be ready by dinnertime.
Third, you’ll need to create shopping lists. This can be done by either using recipe or meal planning apps, or by simply writing a list with a meal planning template and shopping list template yourself while looking at the recipe. It’s a little time-consuming, but once you get the hang of it, it’s not difficult.
Fourth, double-check you don’t already have those ingredients (I hate when I buy something I already had 5 of !)
Last, I suggest posting your weekly meal plans somewhere anyone can find it. This is so that if your partner needs/wants to start the meal, or even has questions about it, you always have a designated place so there are no questions.
4. Meal Planning Template With Shopping List
Meal planning templates with a shopping list can be very simple, planning only for dinners, or you can find very complex meal planning templates when you need to plan for multiple meals per day. The advantage of printing these out is that you have a very clear, organized picture of your week right in front of you.
5. Schedule in Meal Planning Every Week
One of the biggest mistakes I see beginners make is not taking the time to meal plan, and not making it a priority. If you’re serious about saving time in your week and nixing the constant anxiety about what’s for dinner- schedule in a time to sit and do meal planning every single week!
6. Get organized
Every time I ask a client where their recipes are, I know what’s coming: “Oh they’re on my phone”. But the where is the bigger issue. I know how this works– we get going down the recipe rabbit hole on Pinterest, pin a thousand recipes that all look amazing, then we never see them again.
Friend! Stop doing this!! If you find something you think looks fantastic and your family will love it, do yourself a HUGE favor and get organized with your recipes so you can find them again later!! I use a recipe organization app that’s amazing at analyzing nutrition information, too. They use a ‘collections’ feature to organize recipes, and (although they will have an official ‘meal planner’ feature soon within the app), I use that ‘collections’ feature to do my meal planning. Plus they generate my shopping list and you can send it any store from there for shopping– SO EASY!!
7. Save + Reuse Favorites
This one is so easy, but always easily forgotten. When you find something that everyone likes, don’t forget to save it and reuse it. These start to fall under the category I call ‘Family Faves’. What’s so great about these is that once you’ve made it a time or two, it starts to be second nature– meaning it takes you less time and brainpower to make it. Heck-some of ours I actually know all the ingredients by heart now!
Know someone else that could use help meal planning? SHARE this post!
As a nutrition specialist, this is by far the most commonly asked question. And I get it– your dietary style has a lot to do with how you feel every single day.
I wasted so much time trying to lose baby weight after my second and third kid using a dietary style that didn’t support my body type and allergic condition.
It was a miserable multitude of months seeing weight go up and down while relying on daily antihistamines and asthma medication that made me feel like I was in outer space.
I felt like a failure, and I didn’t get why my allergies, hormones, and energy levels seemed to get worse even though I was eating ‘healthy’.
(In my defense, I didn’t understand food labeling or what even food intolerances can do, at the time–that came much later as I completed my formal education in nutrition.)
How do I know what diet is best for me?
So when people ask this question, the thing to know first of all is this:
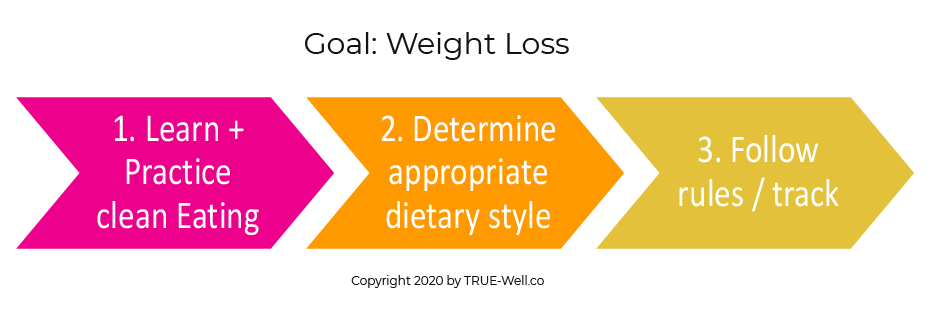
Whether your goal is losing weight, maintaining weight loss, managing a condition, or looking for steady energy and emotional stability, finding YOUR perfect dietary STYLE, first and foremost, is where you should start.
This means a dietary style that supports your conditions in addition to your health goals.
*If you’re looking to lose weight, START with a dietary style that supports your body first, then calculate your daily energy needs and do things to boost your metabolism. Another option is reducing portion sizes, which inherently reduces calories or carbs (or both).
What is the number 1 healthiest diet?
Studies from the last decade or so have consistently deemed the Mediterranean diet a top global recommendation because of its lack of junk food and calorie dense foods, and focus on healthy foods that have been shown to reduce disease risk. This includes heart disease, type 2 diabetes, and inflammatory conditions, among others.
Instead of it being in the shrinking lot of low fat diets, or even a low carb diet, it focuses onfiber and resistant starches (healthy carbs) in the form of lots of vegetables, fruit, whole grains, and beans, legumes, and lentils, and also promotes healthy fats like olive oil, avocado oil, and even coconut oil.
It also limits red meat and unhealthy forms of saturated fats while eliminating added sugars and processed foods.
Other examples are the paleo diet and a more plant-forward dietary style. The common factor is that these are all anti-inflammatory diets, which is what TRUEWELL is all about.
How do I know what diet is best for me?
Most people want to know this as if there’s a magic answer. But there’s a lot more that goes into this question. Here’s why.
First, every single body is different. Meaning your metabolism is different. Your body type is different. Yes, your DNA is different. But also, your tastes, environmental factors, lifestyle, and habits are all so very different!
So what I aim to do is give you some guidance on where to start based on what your goals are. Then you can further research different dietary styles with the resources listed below.
And keep in mind that many people have more than one health issue that needs to be addressed with diet. When you’re looking at your issues, notice recurring dietary style recommendations. These are where you should start.
But I cannot stress enough 2 important things:
1) EATING CLEAN will do more for you right off the bat than counting anything. If you’re eating starchy or sugary junk (sugar + processed junk foods), refined carbs and flours, and processed foods, eliminate those first.
2) Finding the closest dietary style should be a goal in getting curious about healing your condition and managing inflammation with food. This will make it easier to find recipes.
3) It will probably require you TRYING a few styles to get the one that’s BEST FOR YOU. There’s almost no way around that. But there are some guidelines to which ones you SHOULD try. So let’s get started.
Start with your conditions, intolerances, or food allergies
What I like to guide clients and readers to do is figure out which goals they have based on their medical issues FIRST.
Do you need to avoid foods you’re allergic or intolerant to, pull down blood sugar levels, decrease inflammation, manage anxiety and/or depression, get your gut health back on track, get energy levels steady all day, get blood pressure under control, or something else? This is not all-inclusive, by the way–there are many, many other health issues that could be leading the way on this.
Bottom line is that starting with the Mediterranean framework (or basic anti-inflammatory dietary style), then eliminating possible foods inflammatory to YOU can be accomplished with an elimination diet. This is the best way to find the anti-inflammatory dietary style unique to YOU and your needs.
Next think about your habits
Unfortunately, some dietary styles are harder to maintain until you get the hang of it.
Some will start a dietary style only to quit because they get in the habit of listening to friends or family members giving advice or push-back.
Some get in the habit of going in hard and strong, only to lose interest in a couple of weeks.
And yet others are in the habit of trying simply to see ‘how hard’ this is gonna be before throwing in the towel.
My whole-hearted advice is to:
Go into this with the attitude that this is going to be a life-long change for you (and maybe your family), so instead of worrying about if it’ll be ‘too hard’ or ‘too boring’, look at in through the lens of you and your family’s lifelong health and well-being.
Just be prepared up front for some work on your part. The sad truth is the diet industry has purposely made this as complicated as possible. Honor yourself by being ready for some work, but seeking the truth for YOU, and being prepared to put in that work up front to make massive gains for your life.
Don’t brush off the idea of CHANGING your habits to ensure you can stick to your perfect dietary style. Of course it’s easiest to just keep your current habits and figure out how to work within them. But you wouldn’t be reading this article if you believed your current habits were keeping you healthy. So be ready to learn about modifying or eliminating habits when it comes to behavior change that will benefit your health for life.
Which type of diet is best to lose weight?
I consistently recommend starting with an anti-inflammatory lifestyle change that includes an ideal diet for yourself, then working on a weight loss program within that if you also seek weight loss.
Part of this is because once you start eating clean and reset your body from processed junk foods, refined flours, and sugar, weight tends to naturally come off. So if you’re supporting your body’s needs first it’s much easier to just adjust your macro levels within that framework to achieve even greater weight loss.
Since studies have shown that the best diet is the one you’ll stick to, I recommend following the above process to nail down a dietary style perfect for you FIRST, then working on your metabolism.
As far as what works with your body type, some people do much better on low-carb or keto styles where you severely limit carbohydrates. Others do better when limiting total calories.
This is a lot of information overall, and it can be confusing to figure out overall.
So really dig into what diets you’ve tried in the past and how you’ve FELT on each.
Think about your past attempts to lose weight
Ask yourself these questions:
Did I lose weight in a healthy, steady way?
Were the recipes and types of food easy to find, cook, and choose when out (eating out/drive-thru)?
Did I have enough energy to do my work AND exercise?
Did the diet disrupt any gut issues? Or solve any?
Were there any other noticeable changes (good or bad) regarding skin, mood, and brain fog/focus?
Why did you quit? What were the barriers that made it unsustainable for you?
Here’s a flow chart to get an overview of what this means so far:
How to Choose a Diet or Dietary Style
Once you’ve explored the options for each dietary style, see which recurring ones come up for your conditions.
And now comes the fun part: Trying different things.
Yes, this is a pain in the butt. Yes, it takes time. But this is the way to finding the *perfect* diet or dietary style for you. You wanna be in the group of people that actually lose weight because you stick to it? Then quit asking, ‘what is the best diet for me’ and actually do the work to find it!
YOUR NEXT STEPS –> Get started with the free Anti-Inflammatory Quick-Start Guide below! 👇
Discover My Unique 4-Pronged Approach to the Anti-Inflammatory Diet So You Can Get Started Immediately (Without Getting Overwhelmed or Cleaning Out Your Entire Pantry)
Why a full-scale pantry clean out is NOT the best way to start your anti-inflammatory journey, and the steps you can take instead to make sure you’re fueling your body with foods that love you back
The essential foods you MUST add into your diet if you want to nourish and heal your body naturally
My anti-inflammatory shopping list so you can quickly fill your cart with the right foods (no googling in the produce aisle or wasting hours staring at ingredient lists)


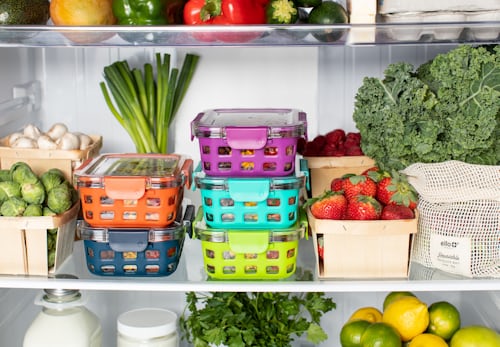


 QUICK-START GUIDE!


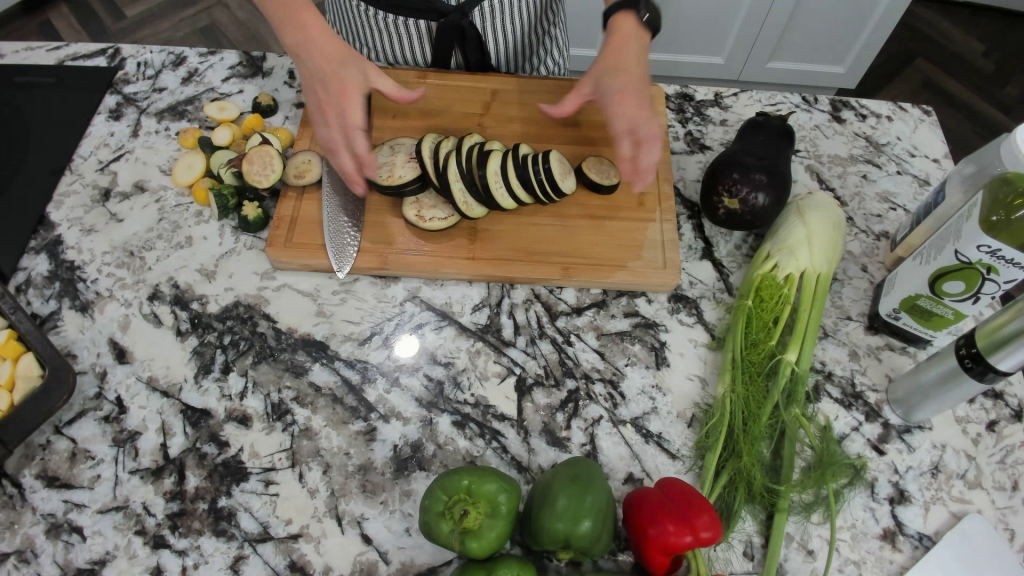
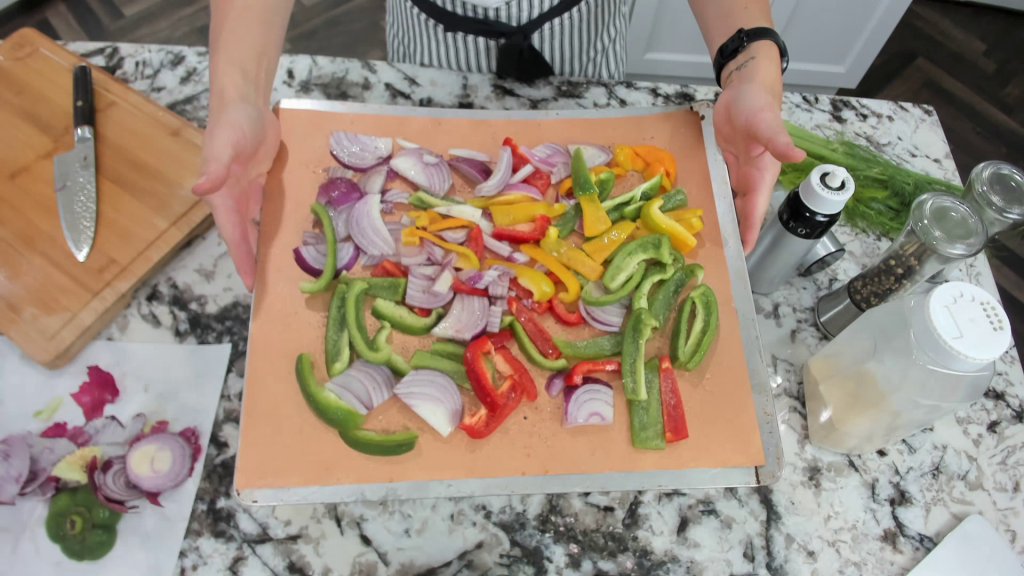


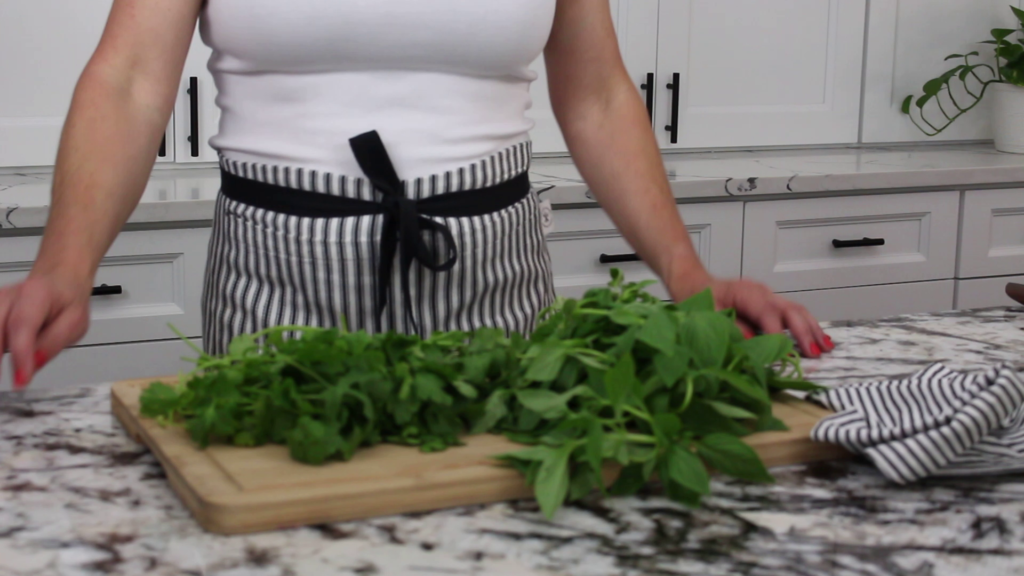

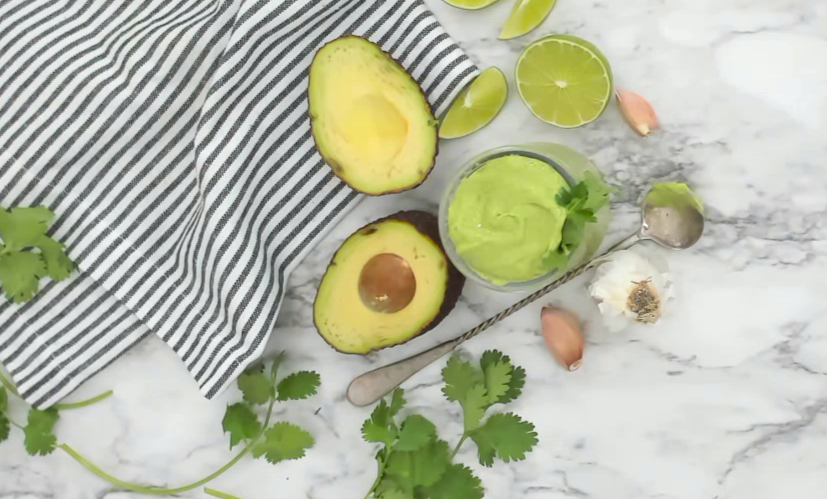


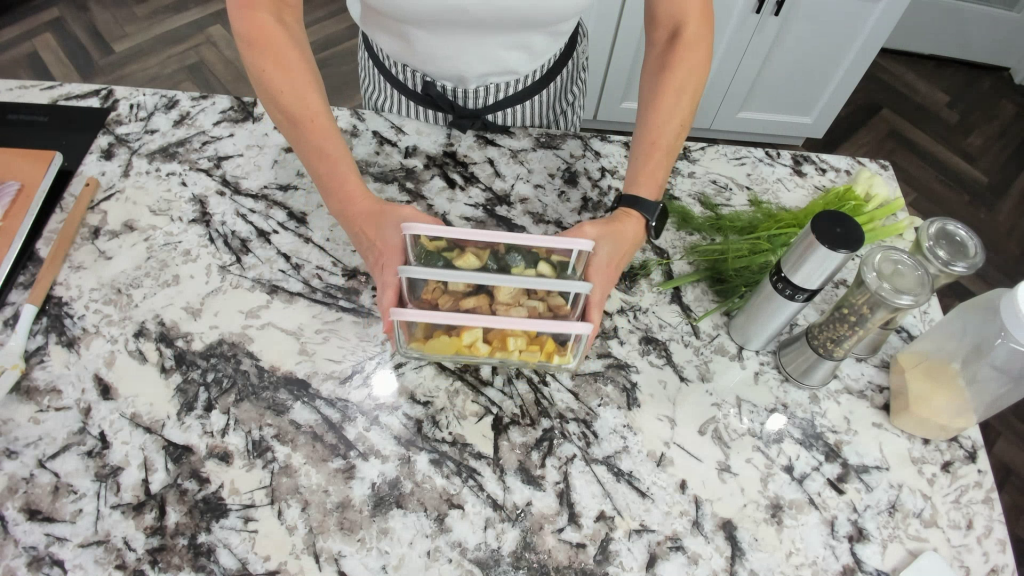


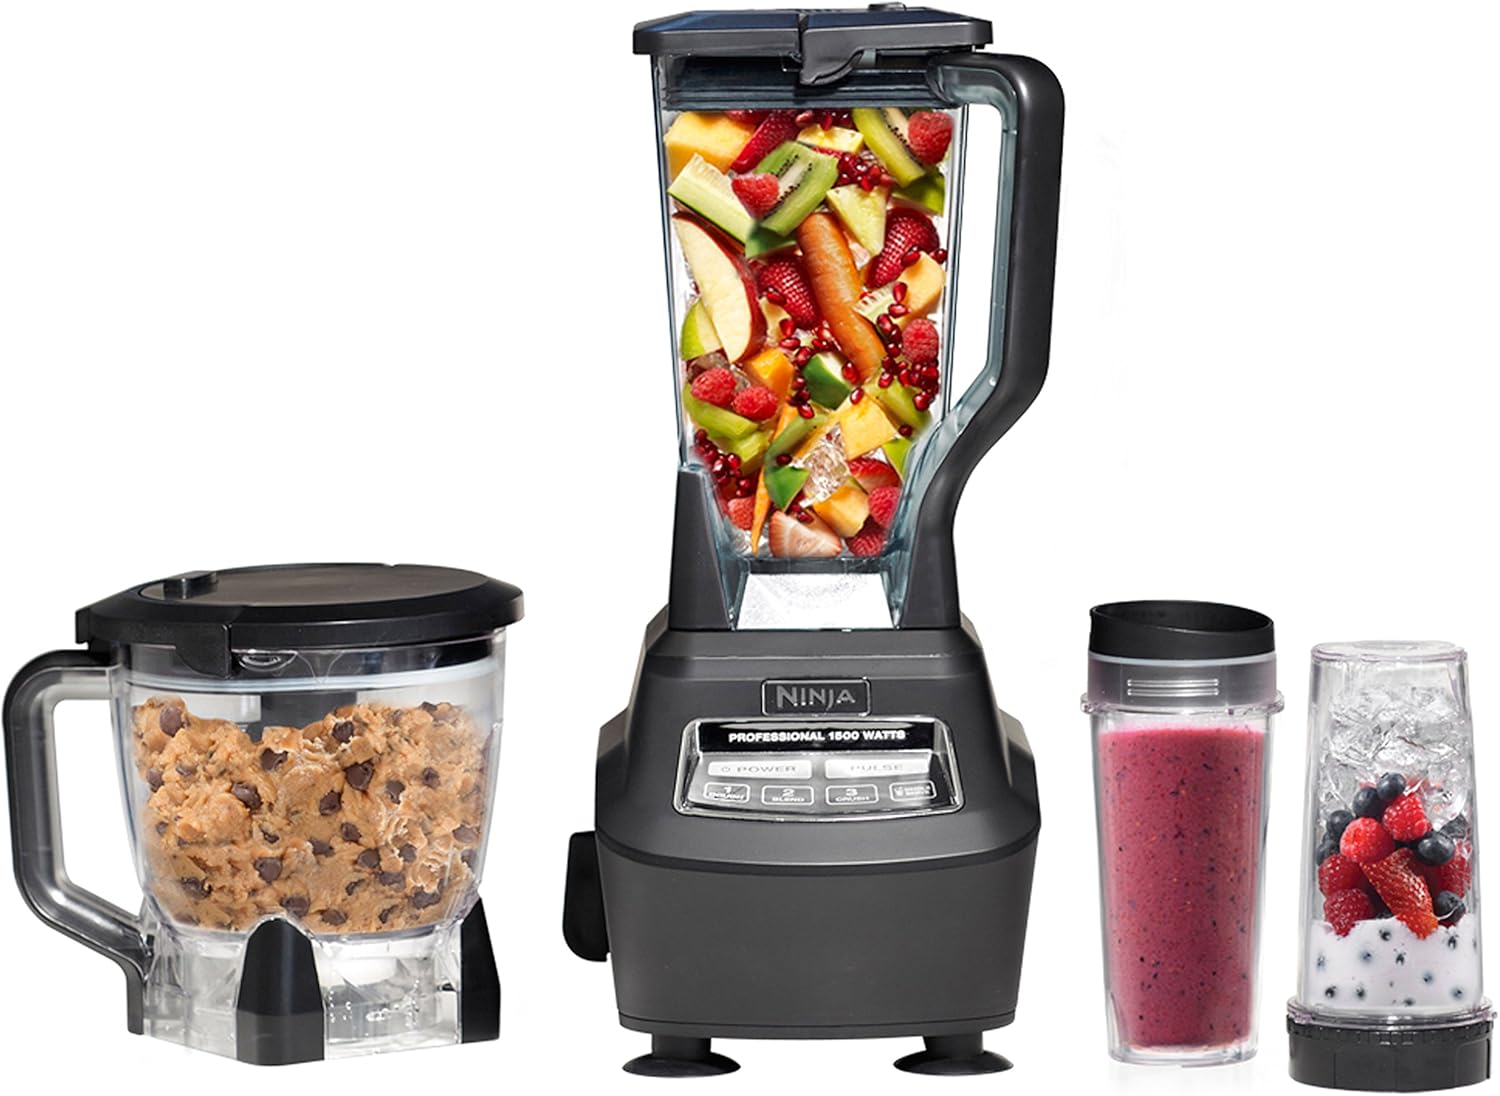


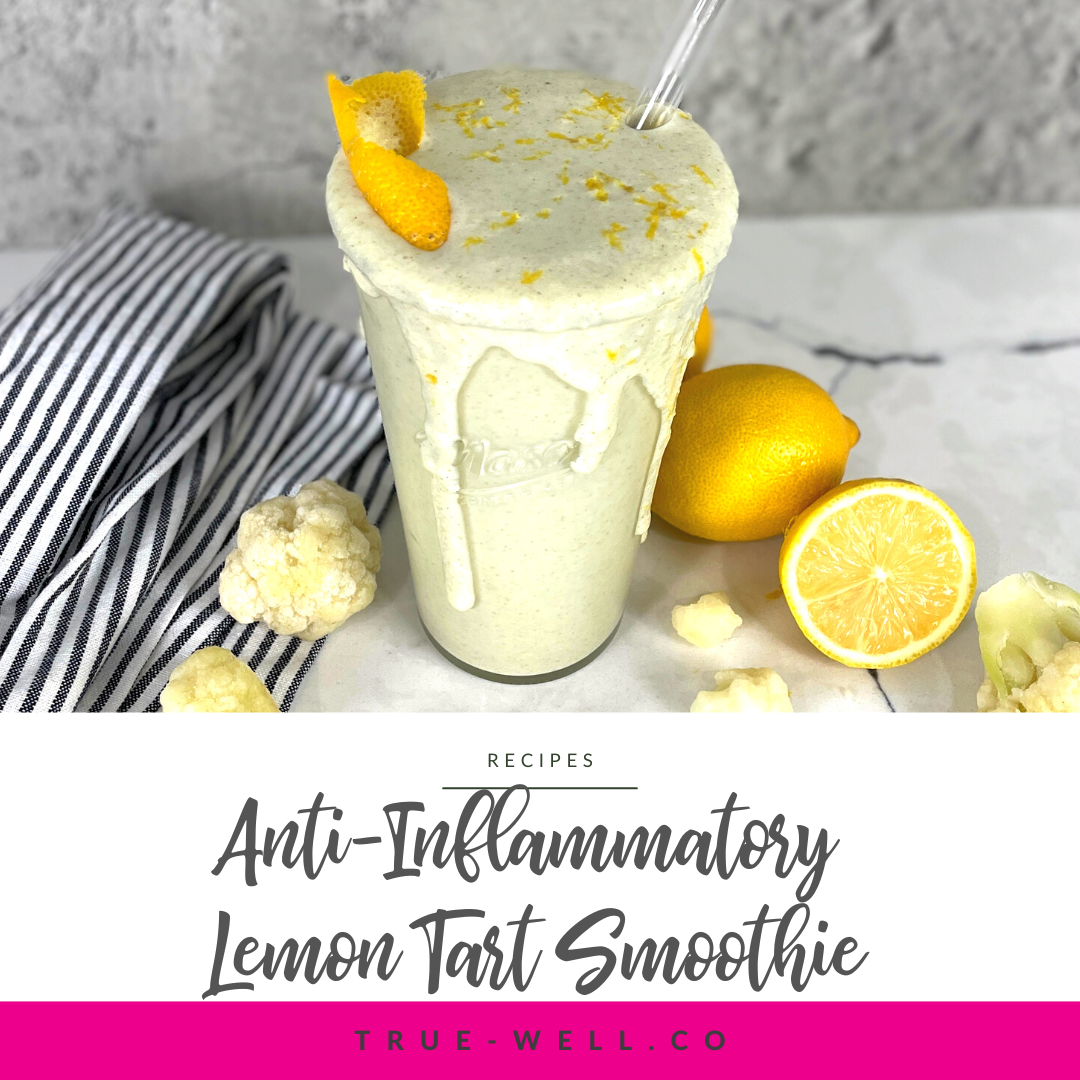

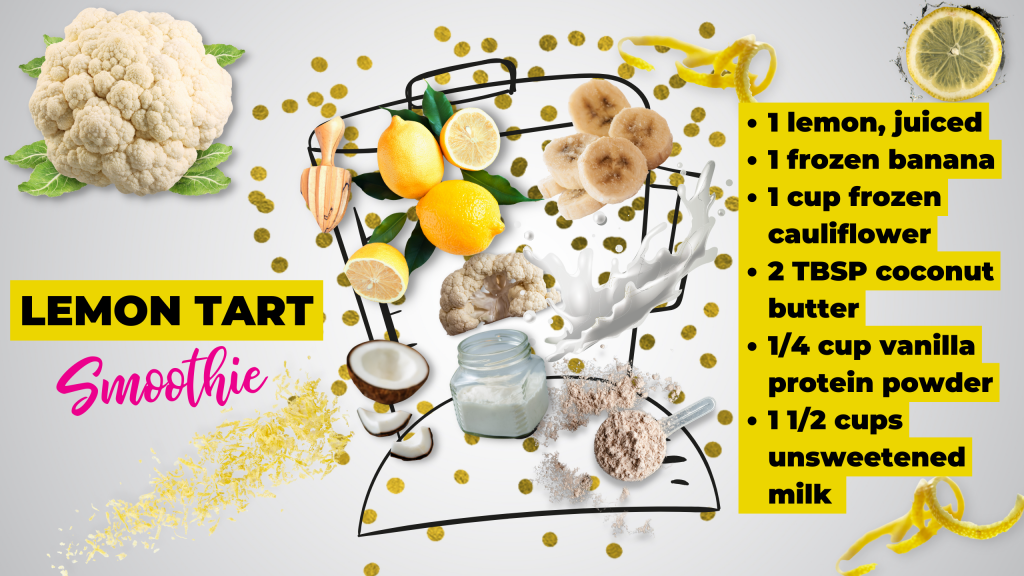


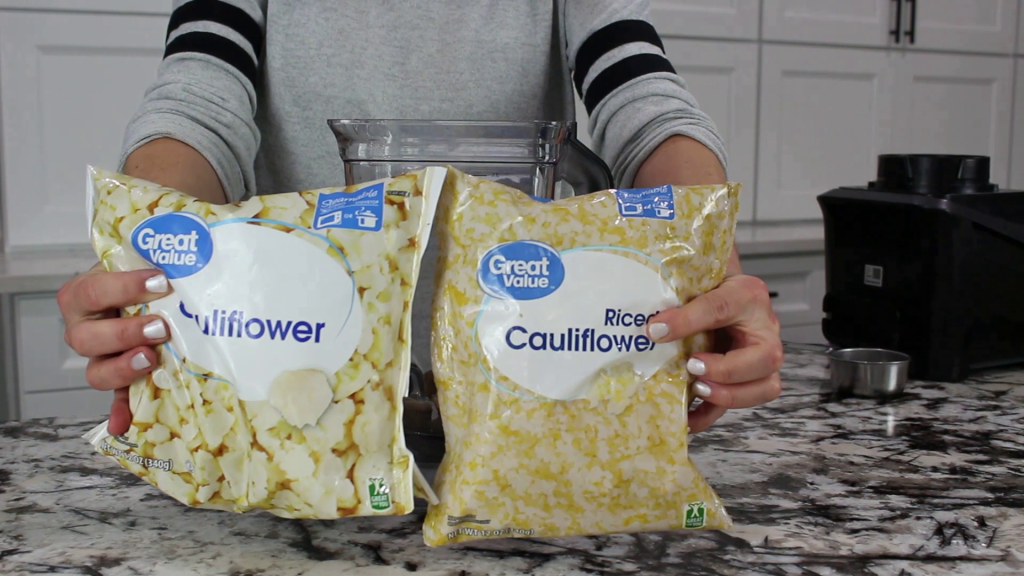


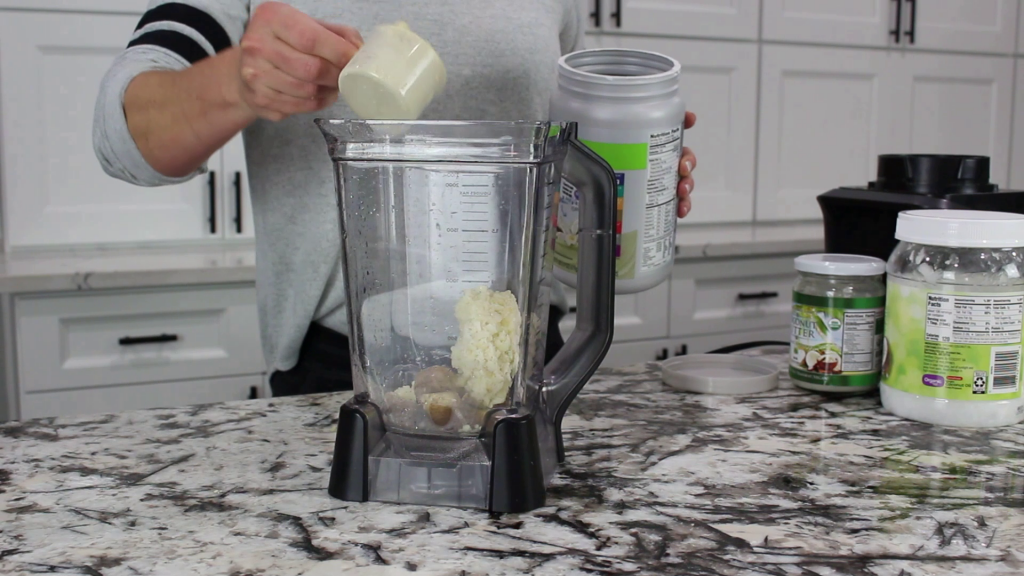


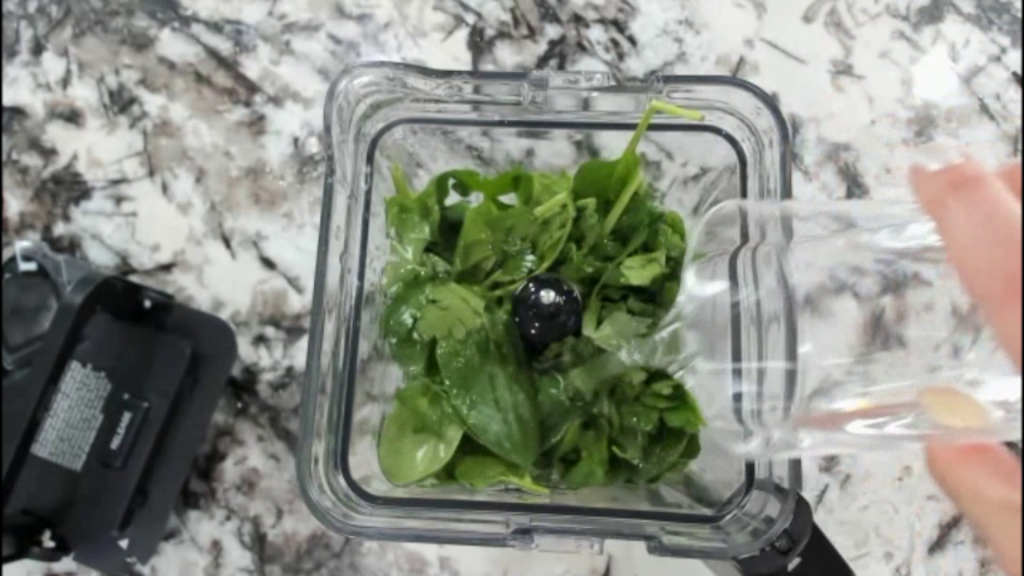
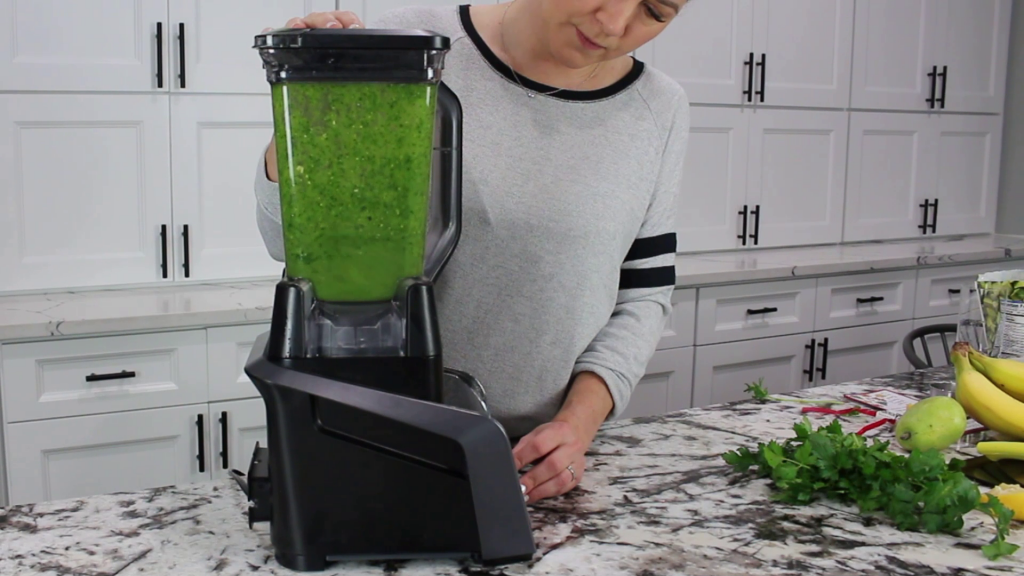


 place where healthy + efficient merge, and drinking more water
  every day absolutely holds a place high on the list of things that tick off both boxes.