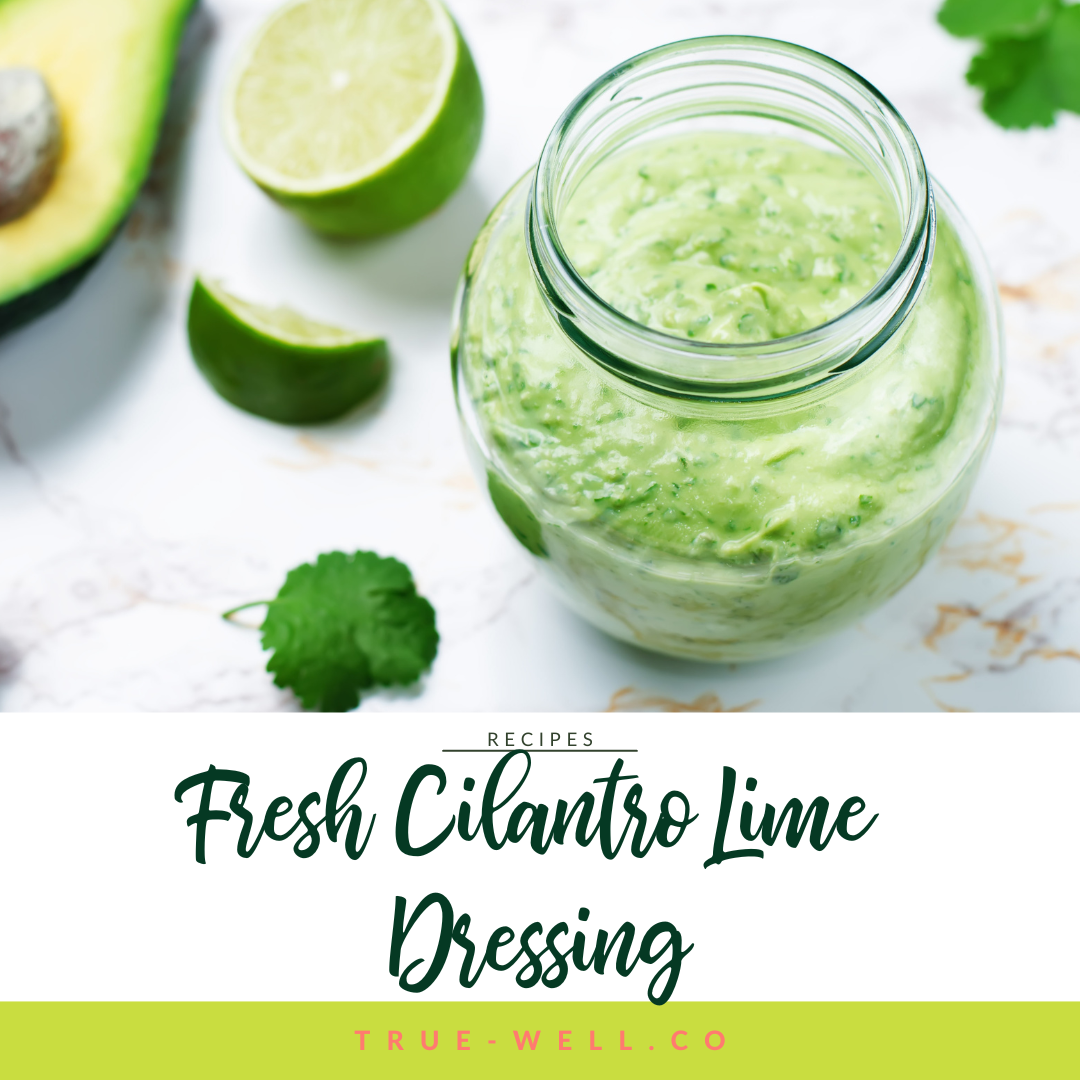
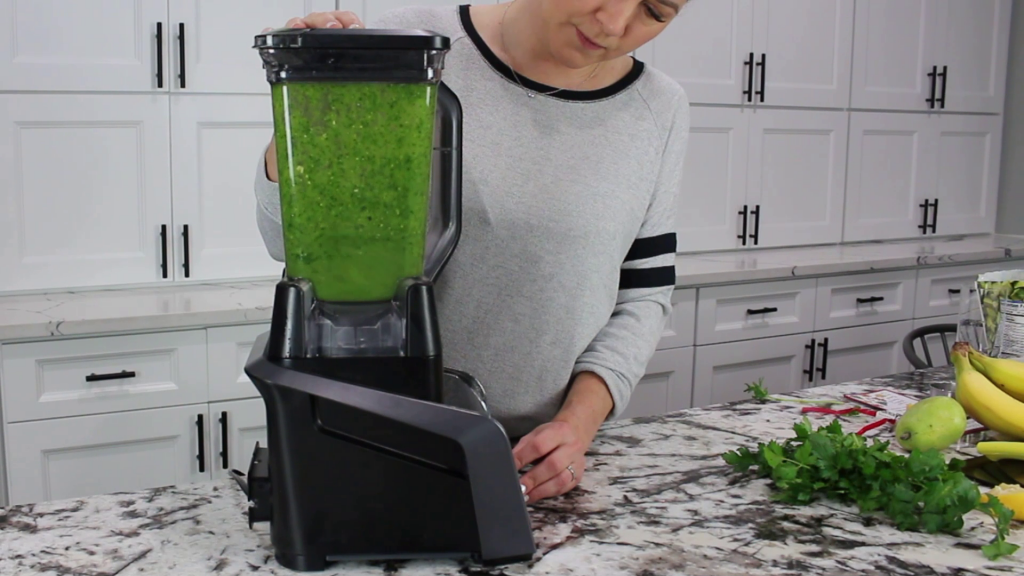
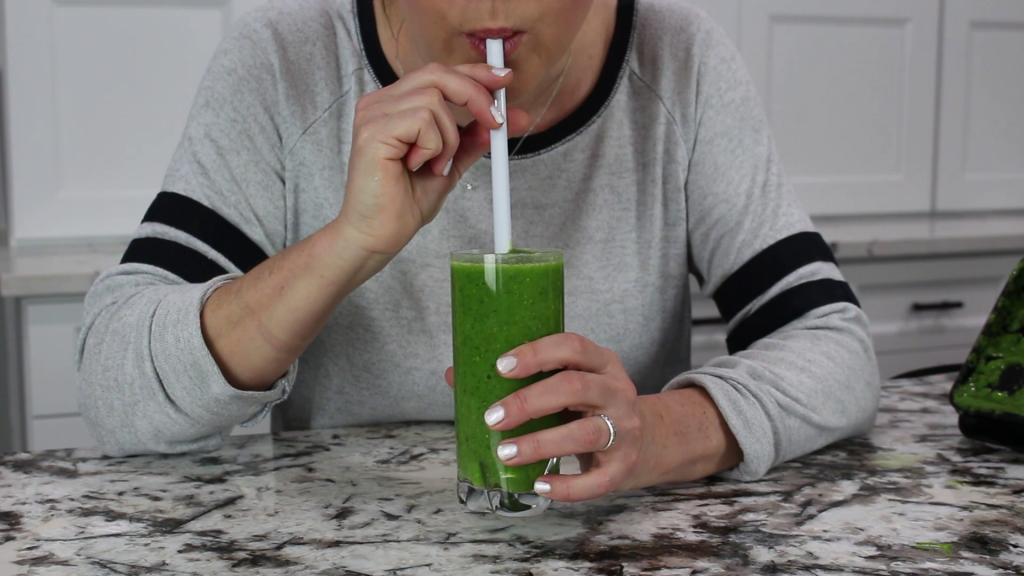
Crafted with a handful of wholesome and fresh summer ingredients, this Anti-Inflammatory Cilantro Lime Dressing is a simple yet powerful addition to your kitchen repertoire.
By incorporating this dressing into your meals, you can effortlessly infuse your dishes with health-enhancing benefits, promoting well-being from within.
Ingredients
1 bunch of fresh cilantro
1 TBSP minced garlic
3 TBSP lime juice
1/4 cup extra virgin olive oil
1 avocado
1/2 tsp salt (or to taste)
Instructions
This sauce is so easy. You literally throw everything in a high-powered blender and pulse into a sauce. Done.
*If your blender isn’t blending this, it’s perfectly ok to add a few more TBSP lime juice and/or EVOO until the blender can do its thing.
Notes
Store up to 3 days in the fridge (the sauce will naturally start to brown due to the avocado.)
Packed with vibrant flavors and anti-inflammatory ingredients, this Low-Carb Marinara Sauce is a delicious way to keep inflammation at bay and blood sugar balanced.
Say goodbye to traditional marinara sauces loaded with sugars and unhealthy additives, and say hello to a healthier, low-carb alternative that doesn’t compromise on taste.
Each spoonful of this delightful sauce boasts a harmonious blend of antioxidant-rich tomatoes, aromatic herbs, and a hint of garlic, providing a burst of flavor that will leave you craving for more. (Seriously- my kids would rather have this than the store-bought kind.)
We don’t add any sugar like so many of the store-bought brands do. Sugar is highly inflammatory, as well as addictive, so we eliminate that right off the bat. Tomatoes are already slightly sweet so there’s no reason to add it in the first place.
Instead of extra virgin olive oil, we use avocado oil (see ingredients below for more details.)
Ingredients
Tomatoes
Tomatoes, the star ingredient, are bursting with lycopene—an antioxidant known to reduce inflammation and protect against chronic diseases.
Garlic
Alongside tomatoes, we’ve added a touch of garlic, known for its immune-boosting and anti-inflammatory properties, enhancing both the taste and health benefits of this sauce.
Italian seasoning
Dried Italian seasonings add a burst of flavor to this low-carb marinara sauce, but also have antioxidant properties. They’re added right in with all other ingredients at the same time so the flavors can meld as the herbs are rehydrated.
If you happen to have fresh herbs (like oregano, rosemary, and thyme), it’s absolutely fine to add these, but don’t do it until right before the sauce is ready.
Fresh herbs don’t need long to inject their flavors, and shouldn’t be overcooked.
Extra virgin olive oil
Extra virgin olive oil is the quintessential ingredient for Mediterranean fare, so it’s no surprise that it’s the oil of choice for this recipe. My tip for buying EVOO is to check the label and try to find one that comes out of California.
Tests were done several years back and they found that olive oils that come from other countries weren’t 100% olive oil. They were being mixed with cheaper oils, and it was considered legal because of the labeling and import laws in other countries.
In the US they’re strict about that, so buying your EVOO from California ensures you’re actually getting olive oil and not a mix.
Instructions
Peel and smash your garlic, then sautee it right in the pot you’ll be making your sauce in, with the avocado oil in the bottom.
After 1-2 minutes, add all the rest of the ingredients and stir really well.
Let the sauce simmer 15-20 minutes and you’re done!
Packed with vibrant flavors and anti-inflammatory ingredients, this Low-Carb Marinara Sauce is a delicious way to keep inflammation at bay and blood sugar balanced.
Author:Laura Brigance, MS, CHC
Prep Time:5 minutes
Cook Time:15-20 minutes
Total Time:0 hours
Yield:41x
Category:Dinner
Method:Cooktop
Cuisine:Italian
Ingredients
Scale
28 oz can crushed tomatoes
2 cloves garlic, smashed
2 TBSP Italian seasoning
1 tsp Extra virgin olive oil
salt + pepper, to taste
Instructions
Add the crushed tomatoes into a high-powered blender. Pulse until smooth and pureed into a sauce.
In a large pot, saute the garlic with extra virgin olive oil, then add all the other ingredients. Let simmer 15-20 minutes.
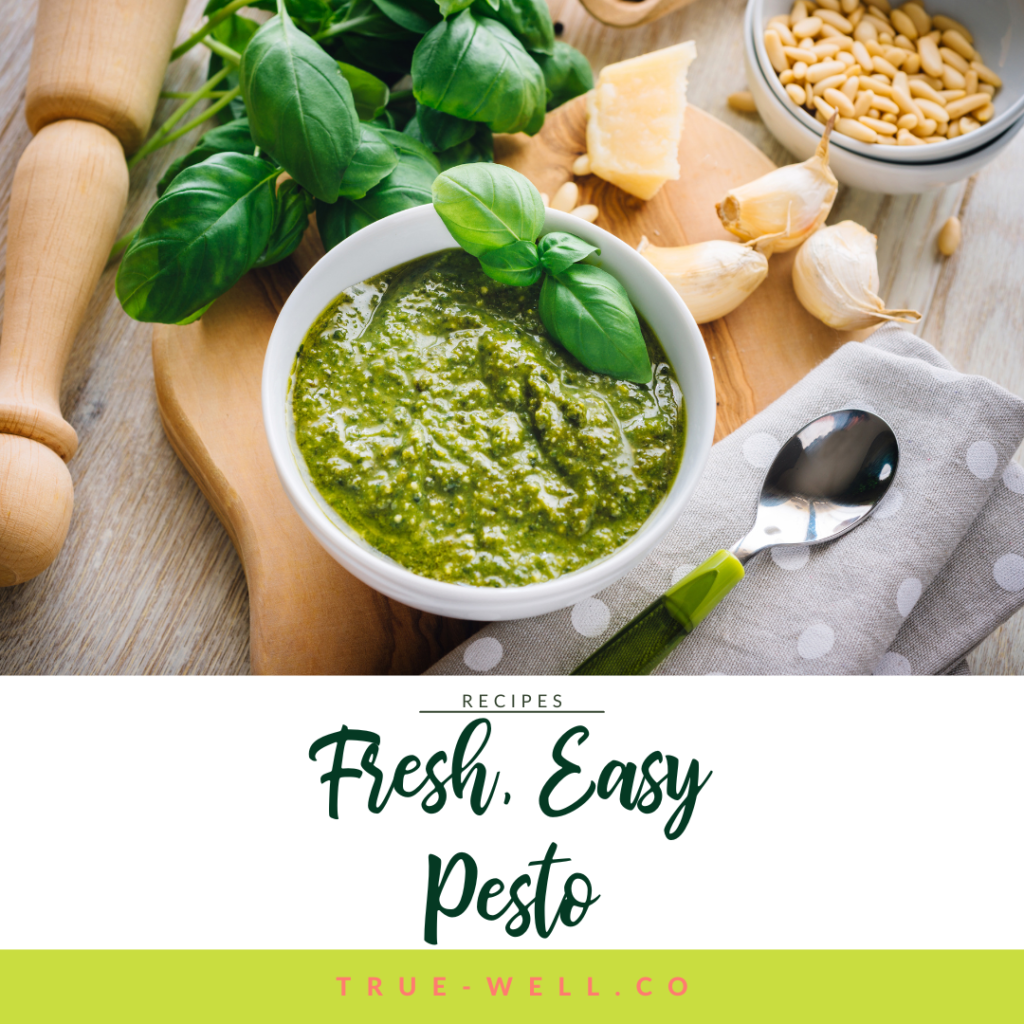
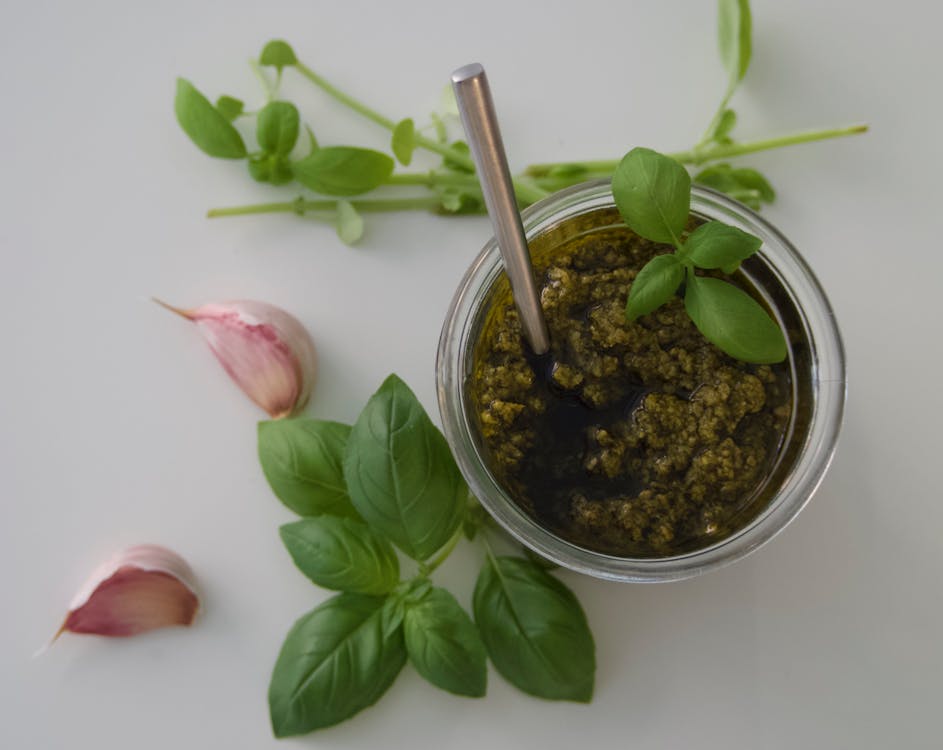
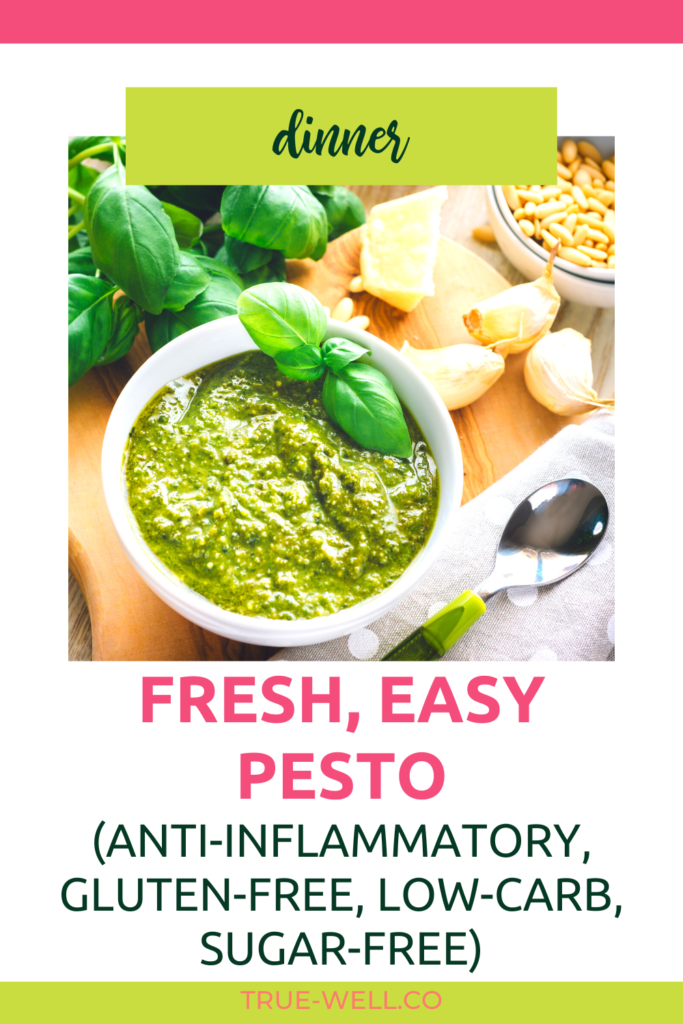
Our Fresh Easy Pesto boasts a vibrant blend of aromatic basil leaves, rich extra virgin olive oil, toasted nuts, and zesty garlic. It’s super simple to make and takes a boring dish to amazing in, like, 5 minutes!
Not only does this Fresh Easy Pesto recipe provide an explosion of flavors, but it also offers a myriad of health advantages. The basil leaves contain essential oils that have been found to possess anti-inflammatory properties, helping to reduce swelling and pain.
The extra virgin olive oil is packed with heart-healthy monounsaturated fats, known for their anti-inflammatory effects, while also providing a luscious texture to the pesto.
Ingredients
Basil
Basil is such an aromatic herb, and summer dishes are perfect with it! Honestly, herbs like this can get so expensive that we just grow them on our back patio. I even have friends who grow them in their kitchen window boxes to enjoy the health and flavor benefits.
I know you may be tempted to buy the chopped basil at the grocery store, but I beg you to use super fresh, it makes such a difference!
Parmesan
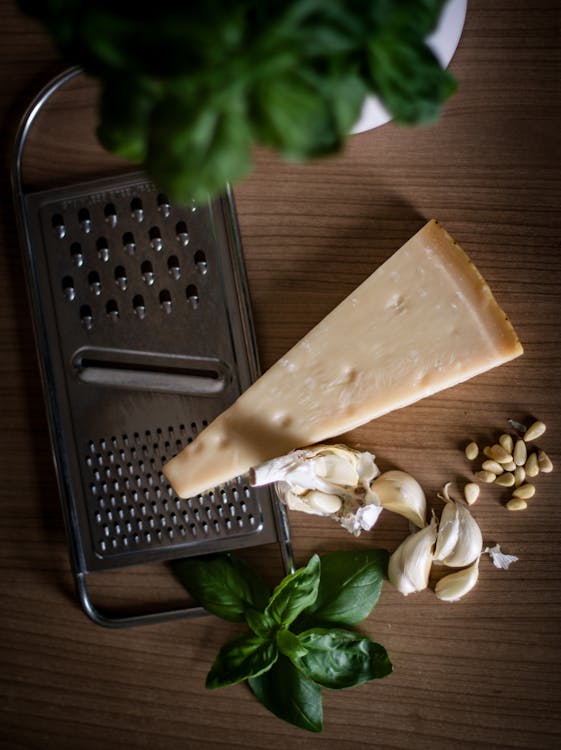
Parmesan is another ingredient that can get real pricey, real quick. Grating your own is always the best option, because when a manufacturer does it, they add some type of starch to keep it from clumping. This can affect any recipe you’re making. So I always advise buying a block of parmesan and grating it yourself.
Extra virgin olive oil
Extra virgin olive oil is the perfect oil for this recipe, because you’re not cooking it. SO many food bloggers and cooking websites have it wrong on this! EVOO has a very low smoke point, which means if you cook with it, it will burn and oxidize easily.
That’s why fresh sauces and dressings like this recipe are perfect for the bold flavor of extra virgin olive oil. If you don’t have any on hand, you can sub avocado oil.
Minced garlic
Garlic can be tricky to keep on hand because it tends to dry out really fast if it’s not super fresh. And it can be tricky to find super fresh. Even though it’s super convenient to keep a jar of minced garlic on hand in the fridge, I don’t always advise it because they add preservatives to keep it from going bad.
That being said, if I’ve had a run of our grocery store giving me dried-out old garlic cloves, I’ve been guilty of throwing my hands up and buying a jar of minced. Do what’s best for your household. 🙂
Pine nuts
Pine nuts are really thought of as essential to classic pesto recipes. But many people are allergic to nuts, and they can also get really expensive. There’s been a huge trend in using different types of nuts in leu of pine nuts, so it’s absolutely ok to sub out a different type of nut, or just omit them altogether.
I will say I love experimenting with different flavors, so if you’re a curious cook like me, try some walnuts or cashews!
Instructions
Literally the only prep you need for this is to throw it into the blender in the order the recipe says. Done and done!
Notes
Make sure to store this in a sealed container, and you can even double or triple this to make sure you have enough on hand for a couple of weeks!
Our Fresh Easy Pesto boasts a vibrant blend of aromatic basil leaves, rich extra virgin olive oil, toasted nuts, and zesty garlic. It’s super simple to make and takes a boring dish to amazing in, like, 5 minutes!
Author:Laura Brigance, MS, CHC
Prep Time:5
Total Time:5 minutes
Yield:4 servings 1x
Category:Dinner
Method:Blender
Cuisine:Italian
Ingredients
UnitsScale
2cups fresh basil leaves
1/2cupParmesan (freshly grated)
1/2cupextra virgin olive oil
1 TBSP minced garlic (about 3 cloves)
salt + pepper to taste
1/3cuppine nuts (or other nuts / optional)
Instructions
Place basil and nuts in a high-powered blender and pulse 3-4 times.
Add garlic and cheese and pulse again.
Add olive oil and pulse until smooth.
Notes
*Use over salads or even as a dip!
*Store in fridge for up to 2 weeks; may need to let come to room temperature before using as olive oil can solidify in the fridge.
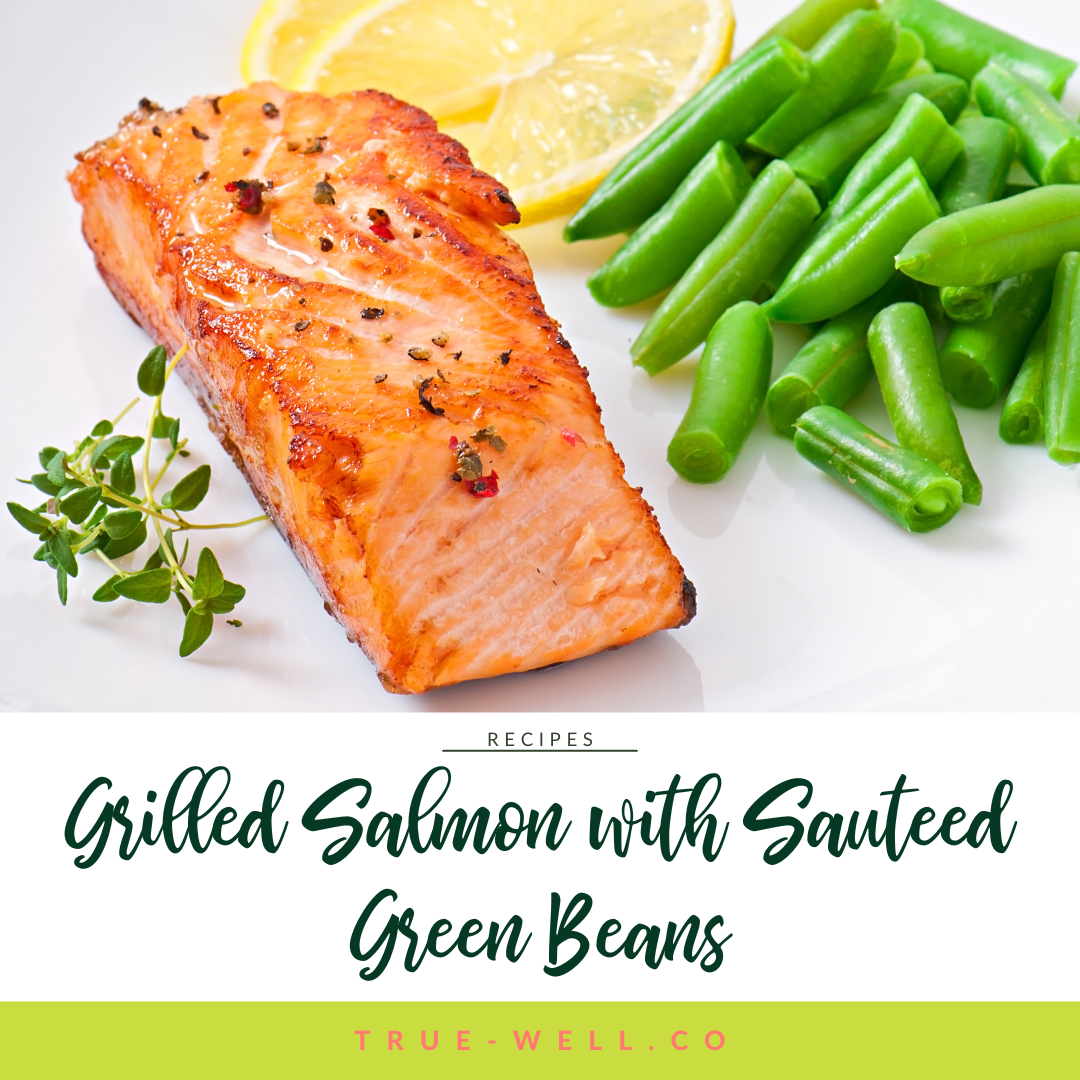
Summer is in full swing, and there’s nothing quite like a sizzling grill to usher in the season. (Not that my husband needs summer as an excuse.)
Grilled salmon and sautéed green beans make for a wholesome, flavorful meal that’s perfect for any weeknight meal. Get ready to elevate your grilling game and enjoy a healthy, mouthwatering meal that’s sure to impress even your pickiest eaters.
To reap the health benefits of these dishes, it’s important to understand why salmon and green beans are a nutritional powerhouse.
Salmon is a great source of omega-3 fatty acids, which have been shown to reduce inflammation, protect against heart disease and stroke, and potentially even improve brain function.
Similarly, green beans are packed with vitamins and nutrients like vitamin C, vitamin K, and iron, all of which contribute to healthy bones, skin, and immune function.
Plus, both dishes are high in protein and low in calories, making them a great choice for an anti-inflammatorydinner that won’t spike blood sugar.
Salmon
To create the perfect grilled salmon, you need to start with a good cut of fish.
Look for fresh salmon fillets with firm, pink flesh and no signs of discoloration or strong odor. Choose wild-caught salmon over farm-raised for the healthiest option.
Green Beans
When you’re picking out the best summer green beans, there are a few things you should look for. First, go for beans that are bright green and feel nice and firm when you touch them.
Avoid beans that look dull or have any yucky spots on them. You want the beans to be crispy and make a snapping sound when you bend them.
Also, try to find beans that are skinny and smooth because they’re tastier and easier to cook. If you can, get beans that are all about the same size so they cook evenly.
Instructions
This meal is a bit of a back-and-forth dance, so be patient but have your ingredients ready to go.
Grilling salmon to perfection
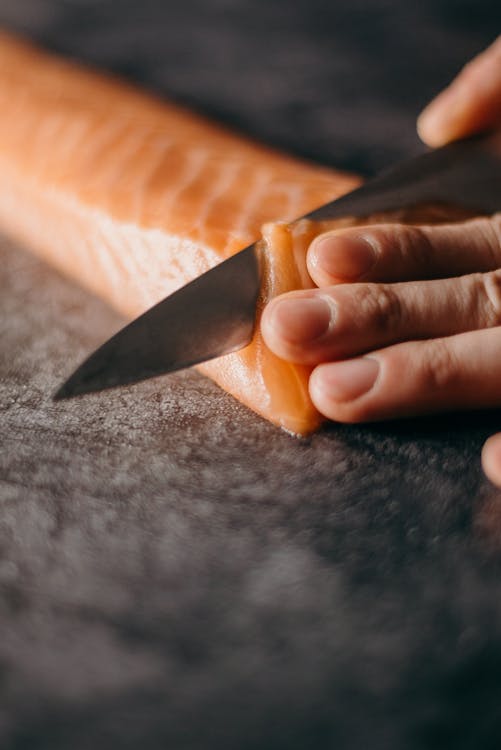
Before grilling, remove the skin from the salmon fillets. To do this, use a sharp knife to make a small incision between the flesh and skin at one end of the fillet. Hold the skin with one hand and use a back-and-forth motion with the knife to separate the skin from the flesh, pulling the skin away as you go.
Next, season your salmon fillets with the dry seasonings.
When grilling, preheat your grill to medium-high heat and lightly oil the grates. Place the salmon fillets on the grill, skin-side down if left on, and cook for 6-8 minutes per side or until the flesh is opaque and flakes easily with a fork.
Grilling is a great way to prepare salmon, as it highlights the natural flavors of the fish and adds a smoky touch to it. Before grilling, make sure to preheat your grill to medium-high heat and lightly oil the grates to prevent the fish from sticking.
The key to grilling salmon is to avoid overcooking it, as it can quickly become dry and lose its delicate texture.
Creating Flavorful Sauteed Green Beans
These sautéed green beans will add a delicious pop of flavor to your grilled salmon dish, making it a complete and satisfying meal for a summer day.
To create flavorful sautéed green beans, start by heating up a pan with a little bit of avocado oil. You want just enough oil to coat the bottom of the pan. Once the pan is hot, add the green beans, salt, and onion flakes. Stir the green beans to ensure they are evenly coated with the oil and seasoning.
Cook the green beans until they are tender but still slightly crispy, which should take around 8-10 minutes. You want to be sure not to overcook them as they can turn mushy and lose their flavor.
Other sides to pair it with
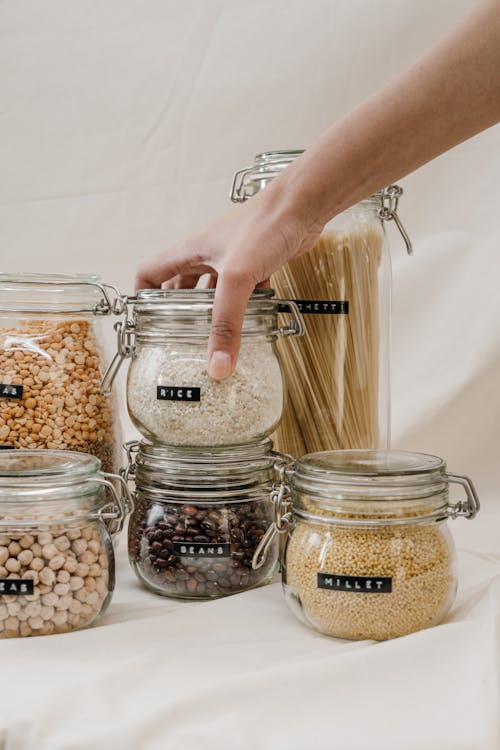
This simple meal really is very low-carb. For some this is perfect. But if you’d like to add more complex carbs, a small serving of brown rice or quinoa are perfect sides to pair it with. These whole grains give some healthy carbohydrates and fiber to keep you feeling full.
Notes
Make sure fish reaches an internal temperature of 145 F (63 C) using a food thermometer.
To prevent the salmon from sticking to the grates, make sure the grill is super clean, and that the grill is super hot. (You can use tongs and a paper towel coated in oil to get the grates well-oiled.)
With a (sugar-free) sweet soy sauce marinade and hints of lemon and garlic, this Grilled Salmon pairs beautifully with sauteed green beans for the perfect quick and delicious summer dinner!
Author:Laura Brigance, MS, CHC
Prep Time:2 hours
Cook Time:20 minutes
Total Time:2 hours 20 minutes
Yield:61x
Category:Dinner
Method:Cooktop + Grill
Ingredients
UnitsScale
Grilled Salmon
1 1/2poundssalmon fillets (wild-caught)
1 tsp lemon pepper seasoning
1 tsp garlic powder
1/2 tsp sea salt
1/3cupgluten-free soy sauce (or Liquid Aminos)
1/3cupbrown erythritol (Swerve brand is great)
1/4 avocado oil
Sauteed Green Beans
1lb Fresh green beans
salt to taste
1 TBSP onion flakes
1 TBSP avocado oil (for the pan)
Instructions
Season the salmon fillets with the lemon pepper, garlic powder, and salt. Place the salmon in a large baggie.
Stir together soy sauce (or liquid aminos), brown erythritol, water, and avocado oil in a small bowl until the brown erythritol has dissolved.
Pour the mixture into the baggie of the salmon fillets. Seal, then turn to coat the fillets.
Let them marinate for at least 2 hours in the fridge.
When it’s time to cook dinner, preheat the grill to medium heat and make sure the grate is very clean and oiled.
While the grill is heating, trim the ends off the green beans.
In a large skillet, heat the avocado oil over medium high heat. Add the green beans.
After about 3 minutes sprinkle the green beans with sea salt and onion flakes. Turn them to coat with oil and the seasonings. Then let them saute for another 5-7 minutes, turning once.
While the green beans are cooking, place the salmon fillets on the grill and discard the remaining marinade.
Cook the salmon until it easily flakes with a fork, approximately 6-8 minutes per side.
Check the green beans are sauteed to personal preference.
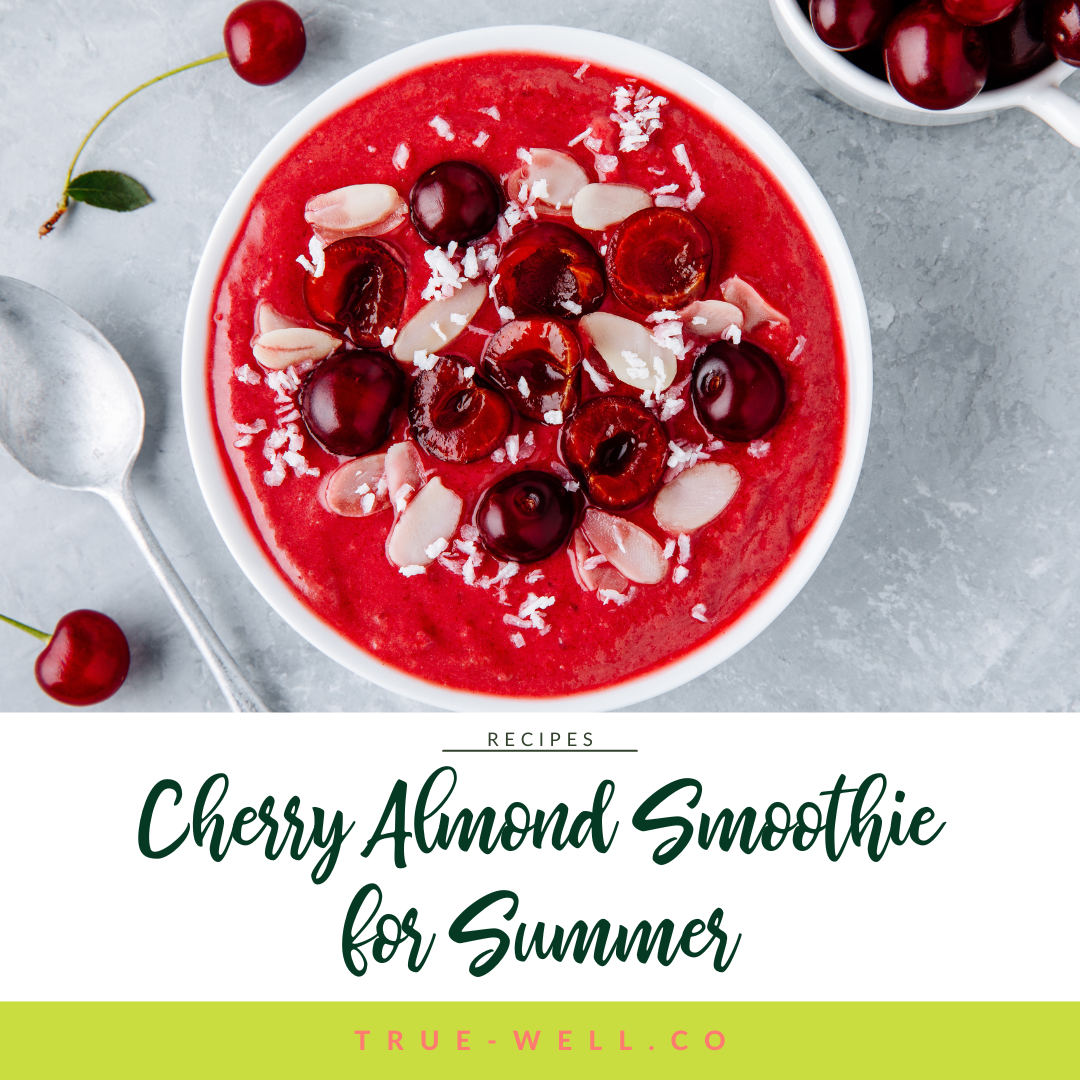
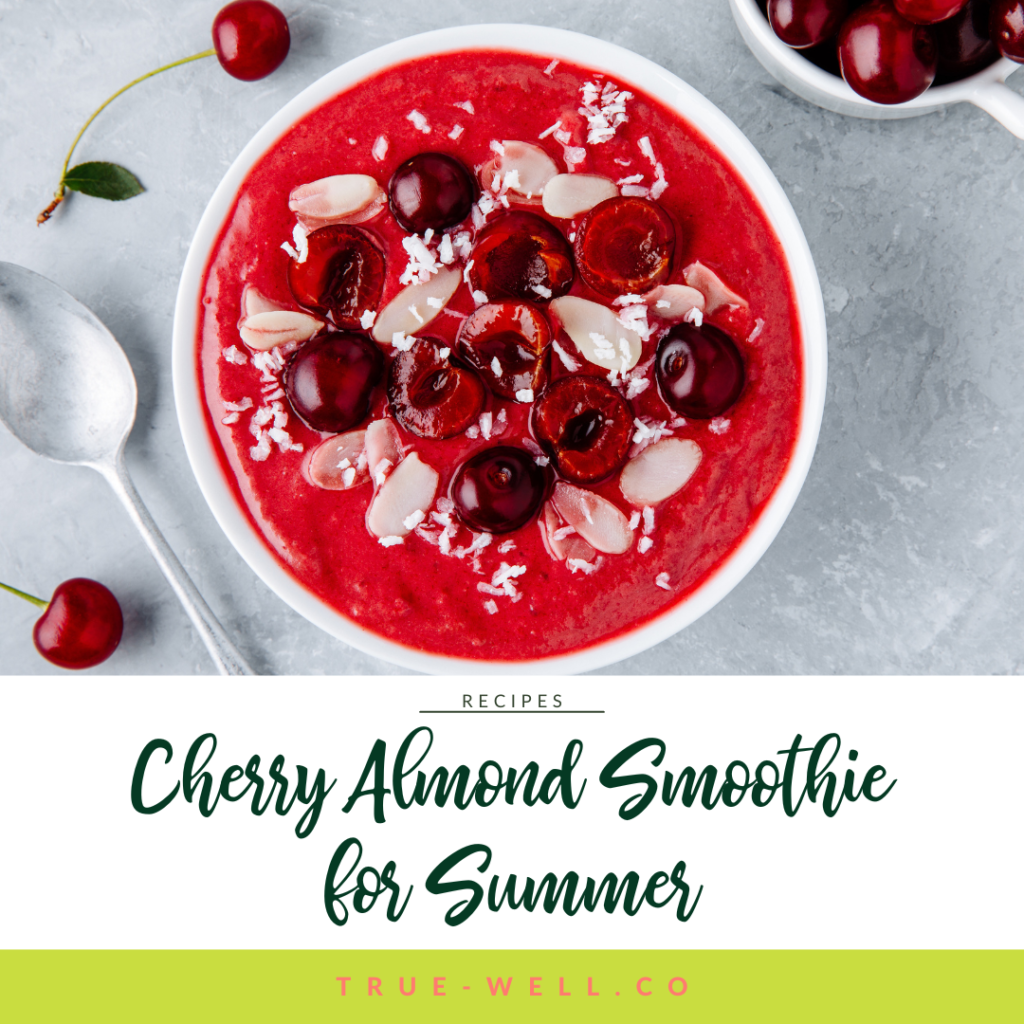
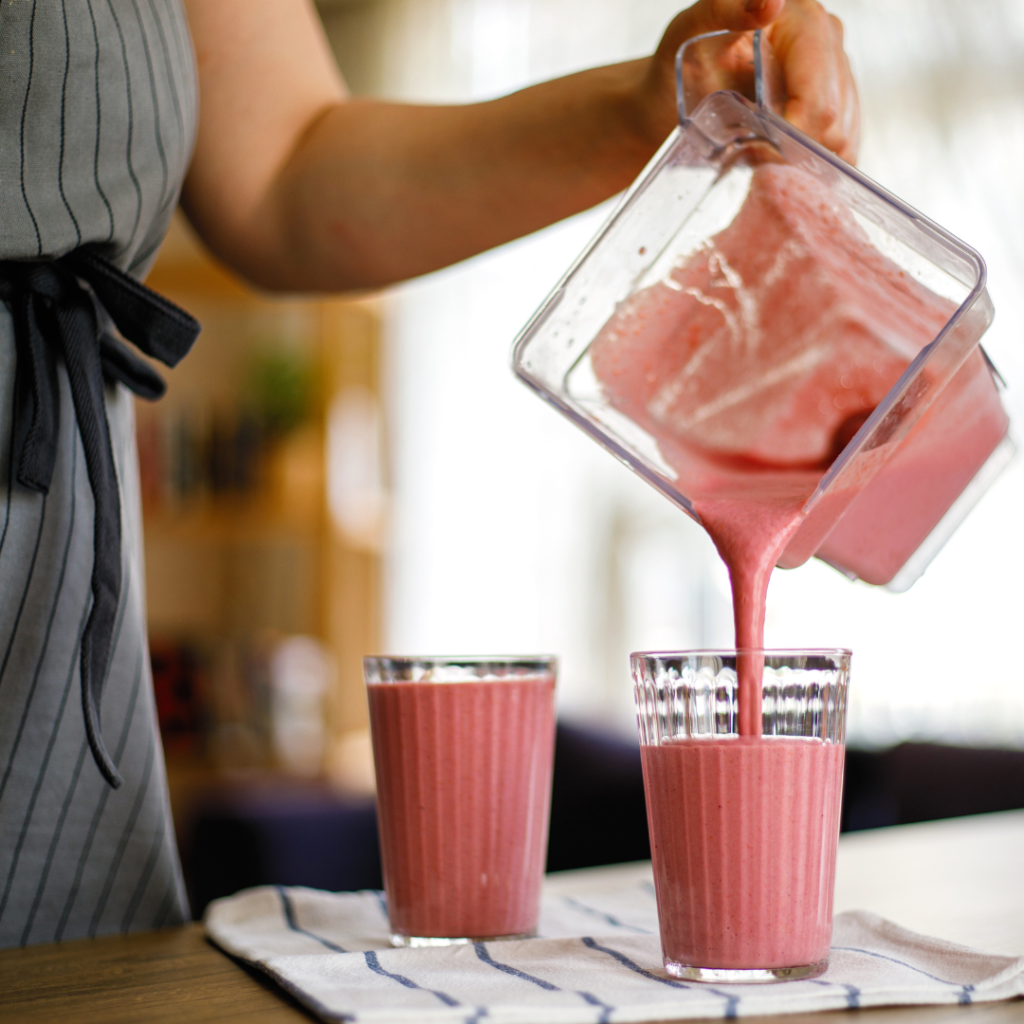
As summer heats up, there’s nothing quite as refreshing as this Cherry Almond Smoothie to help you cool down and nourish your body–and takes less than 5 minutes to make!
This Anti-Inflammatory Cherry Almond Smoothie is especially great since it harnesses the power of anti-inflammatory ingredients that packs a punch of flavor while promoting your overall well-being.
Cherries, the star ingredient of this vibrant smoothie, are not only a delectable summer fruit but also a nutritional powerhouse. Bursting with antioxidants and phytochemicals, cherries boast potent anti-inflammatory properties.
By incorporating these luscious berries into your diet, you can help combat inflammation and potentially reduce the risk of chronic diseases.
But- another lesser-known fact is that tart cherries have specifically been studied for their ability to boost sleep. So if you’re having trouble sleeping, maybe opt for this smoothie as your dinner or after-dinner snack on those hot summer nights!
Almonds
Almonds not only add a delightful nutty flavor but also offer a wealth of nutrients. Packed with healthy fats, fiber, and vitamin E, almonds have been known to reduce inflammation and support heart health.
What makes this smoothie even more appealing is that it’s sugar-free. This is important since sugar is one of the most inflammatory foods you can eat.
Substitutions and additions
Milk
The almond milk should be unsweetened and with as few thickeners as possible. If you don’t have almond milk, you can easily sub regular cow’s milk if dairy isn’t inflammatory to you, unsweetened coconut milk, or any other unsweetened non-dairy milk.
I don’t recommend oat milk because it’s straight simple carbs, and raising blood sugar levels is inflammatory.
Protein powder
Don’t skip this ingredient!
Protein in smoothies is SO important because of the usually high carb content from fruits. The protein (and healthy fats) are what complete the ‘trifecta’ of macros to create this balanced and anti-inflammatory Cherry Almond Smoothie.
Many people prefer whey protein powder because of the studies showing it’s more beneficial at muscle assimilation than other proteins. However, it is derived from dairy. If you’re dairy-free, you can absolutely use a plant-based protein powder or even egg white protein powder.
If you opt for plant-based, it can get thicker than whey protein powder, so keep in mind you may need to add a little more milk.
If you opt for egg white powder, keep in mind that it may not come with the vanilla flavoring. You may need to test and see if this means you add a couple drops of vanilla extract as well, or if the almond and cherry flavors are beautiful on their own.
On ANY protein powder substitution, be aware of the sweetener component. Many protein powders contain some type of sweetener. So make sure it’s not an artificial sweetener.
If you choose a protein powder that doesn’t have a sweetener, keep reading for what sweeteners you can add.
Sweetener
If you do add sweetener because the protein powder isn’t sweetened or just want it sweeter, make sure you use an anti-inflammatory option. This means aiming for natural zero-calorie sweeteners like stevia, monk fruit, allulose, or erythritol.
Almond butter
Although the almond butter really helps kick up the almond flavor in this recipe, if you don’t have any, you can easily substitute a different nut. Pistachios, coconut, hazelnuts, or pecans are amazing flavor pairings with cherries. You can sub in the same amount of nuts as nut butter.
If you’re avoiding nuts, use a seed like sunflower, pumpkin, or tahini (sesame).
Peanut butter is also an option!
Almond extract
Although the almond butter gives a small amount of flavoring overall, almond extract can really boost that popular almond punch that pairs so beautifully with cherries for this healthy smoothie. (Especially if you’re using a different type of nut butter and still want that almond flavor to shine through.)
Instructions
For any smoothie, the best way to make sure it isn’t easily clumped is to add the liquid in first, then everything else. Blenders need a lot of moisture to help blend and chop at the same time, while ensuring proper movement of the whole smoothie.
I have to say, every time we make this smoothie the kids are in love. I’ve found that it’s definitely cheaper to buy frozen tart cherries than fresh in the summer (which is a total bummer), but we do still buy fresh and make some seriously yummy summer creations (like this Cherry Almond Smoothie!)
What makes it super fun is adding shaved dark chocolate on top and a fun straw! 😋
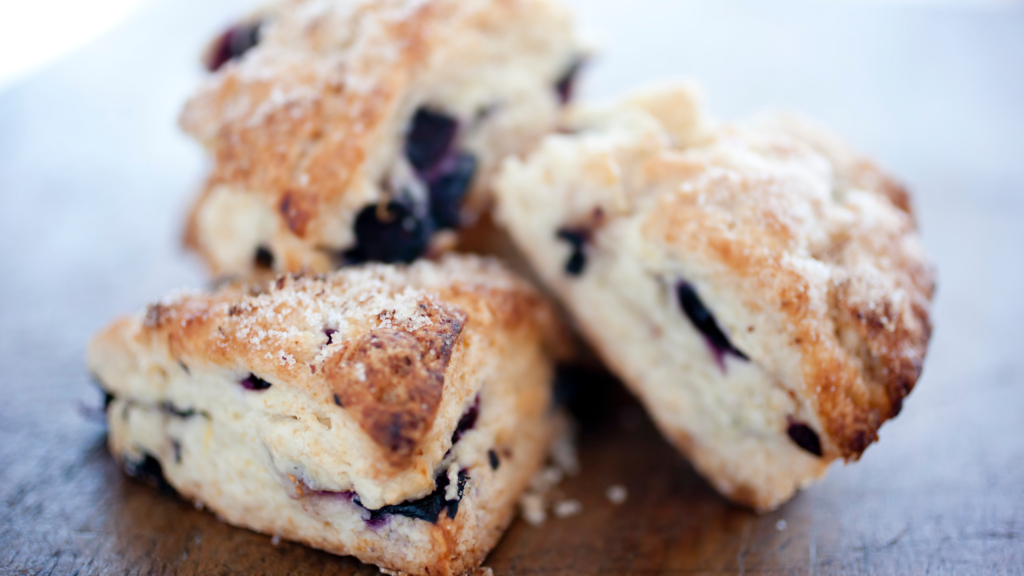
Not only are these Low-Carb Blueberry Scones grain-free and sugar-free, they’re also super delicious and the perfect summer bulk recipe to bake to have a quick + easy breakfast or snack on hand anytime!
What’s even better about this low-carb scone is that it’s bursting with juicy blueberries. So each bite is infused with antioxidants that combat inflammation, supporting your body’s natural healing processes.
The other beautiful thing about this anti-inflammatory breakfast recipe is that these scones are low in carbs, making them a fantastic option for those following a low-carbohydrate lifestyle.
These ingredients provide a delightful balance of flavors, while keeping the carb count in check– which means your blood sugar stays balanced as well.
Ingredients
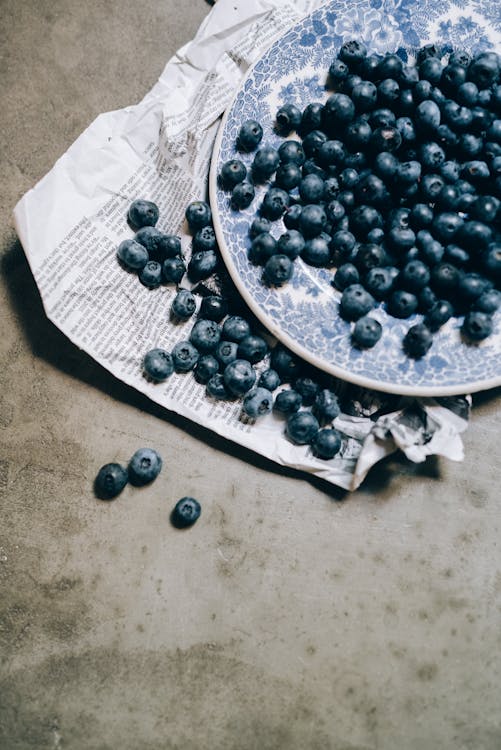
Sounds silly, but I love when summer is here simply for the large selection in berries. Blueberries are notorious for their low-sugar qualities and anti-inflammatory superpowers, so I love using them fresh as much as possible!
1 1/3 cups almond flour (blanched)
1/4 cup arrowroot flour (the package may say ‘arrowroot powder’
Pinch of sea salt
1 tsp baking powder
1 cup fresh blueberries (make sure to wash them first and let them dry)
1/4 cup avocado oil
3 TBSP keto maple syrup (if you don’t have this, you may try another sugar-free natural sweetener that’s granulated. Usually erythritol or allulose are good choices for baking; Swerve brand is great!)
2 tsp vanilla extract (pure, not the fake stuff!)
1 egg (large, organic)
Instructions
Preheat oven to 350 F (177 C) and line a metal baking pan with parchment paper.
Whisk the dry ingredients together in a medium mixing bowl. Then stir in the blueberries.
Whisk the wet ingredients together in a small mixing bowl, then stir into the dry ingredients until a batter is formed.
Pour the batter into the baking pan, shaping into a circle if you wish.
Bake for approximately 30 minutes.
Let cool for at least 10 minutes, cut into eight servings, and enjoy!
Tips + Notes
Any other nut flour (except tiger nut as it’s not really a nut) should be able to be subbed in this recipe.
Letting the scones completely cool down after baking is *really* important as it’s grain-free, and the cooling process helps the other binder ingredients in the recipe set.
You can also sub any other fresh berry! (We make this recipe with raspberries and cherries as well!)
When keeping blood sugar balanced by avoiding grains and sugar is necessary, it’s a sure hit to have a recipe on hand like these Low-Carb Blueberry Scones.
Author:Laura Brigance, MS, CHC
Prep Time:5 minutes
Cook Time:30 + 10 min cool down
Total Time:45 minutes
Yield:81x
Category:Breakfasts and Snacks
Method:Oven
Cuisine:American
Diet:Diabetic
Ingredients
UnitsScale
1 1/3cupsalmond flour
1/4cuparrowroot flour
Pinch of sea salt
1 tsp baking powder
1cup fresh blueberries
1/4cupavocado oil
3 TBSP keto maple syrup
2 tsp vanilla extract
1 egg
Instructions
Preheat oven to 350 F and line a metal baking pan with parchment paper.
Whisk the dry ingredients together in a medium mixing bowl. Then stir in the blueberries.
Whisk the wet ingredients together in a small mixing bowl, then stir into the dry ingredients until a batter is formed.
Pour the batter into the baking pan, shaping into a circle if you wish.
Bake for approximately 30 minutes.
Let cool for at least 10 minutes, cut into eight servings, and enjoy!
Notes
*Any other nut flour (except tiger nut as it’s not really a nut) should be able to be subbed in this recipe.
*Letting the scones completely cool down after baking is *really* important as it’s grain-free, and the cooling process helps the other binder ingredients in the recipe set.
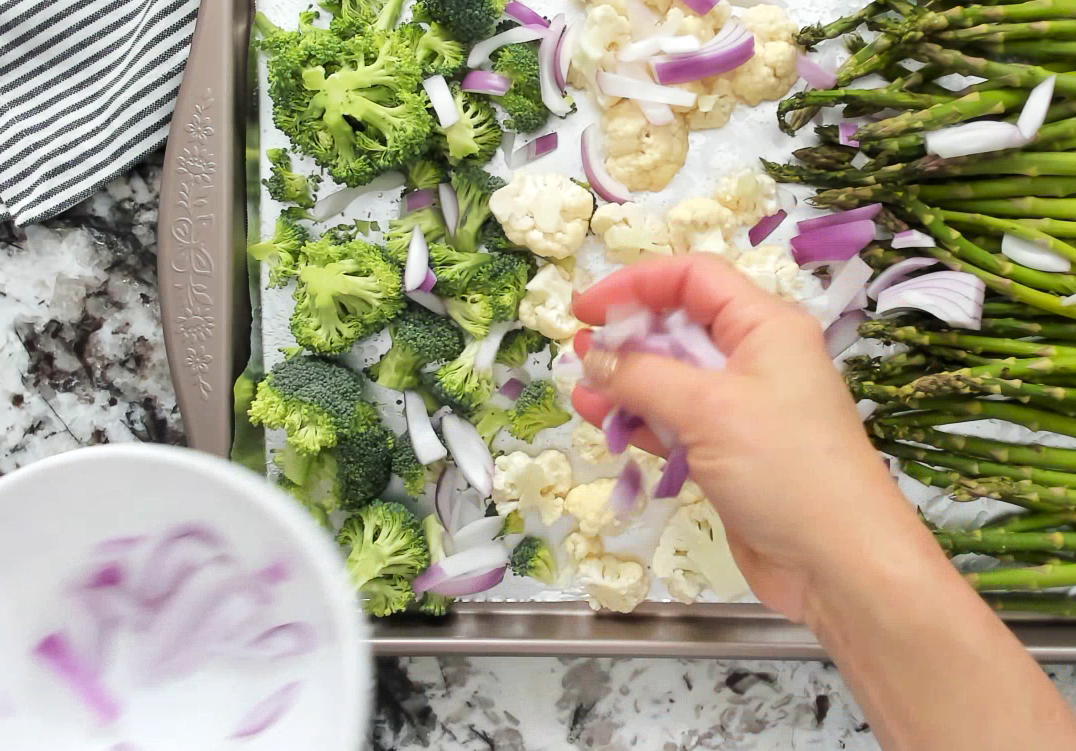
One thing that always makes me super happy in spring is to have already meal prepped roasted spring vegetables ready to add to any meal.
In this guide, we’ll show you how to effortlessly roast your favorite spring vegetables with maximum flavor and minimal effort. From choosing the right vegetables to testing for doneness, we’ve got you covered. So, grab your sheet pan, and let’s get roasting!
Before you start roasting your spring vegetables, it’s important to choose the right ones. Not all vegetables are created equal when it comes to roasting. Some may become too mushy, while others may not cook through evenly.
Also, we’re going for in-season vegetables because of their natural nutrient content and also price. So, how do you choose the right spring vegetables for roasting?
In-season spring vegetables
Since choosing veg that are in season is the name of the game, just know that we’re in North America (just outside Houston), so our spring may be different than yours.
If you’re in the same hemisphere, here are some great spring vegetables to roast (that I’m using in these photos):
First and foremost, consider the size of the vegetable. Vegetables that are too big, such as large broccoli or cauliflower florets, may take longer to cook and may not roast evenly.
It’s super easy to just cut up larger vegetables or buy it already cut and bagged. Or you can stick to smaller and more uniform vegetables like baby carrots and thin green beans.
Next, consider the texture of the vegetable. Vegetables with a firm texture, like Brussels sprouts or cauliflower, will hold up well during roasting and won’t become too mushy. On the other hand, softer vegetables like zucchini or yellow squash may become too tender and fall apart during roasting.
Finally, think about the flavor profile of the vegetable. Roasting can bring out the natural sweetness of vegetables, so choose vegetables that will complement each other. For example, try roasting a mix of sweet bell peppers and red onions for a delicious and colorful side dish.
Prepping your spring vegetables
Before you can start roasting your spring vegetables, it’s important to properly prep them.
Start by washing and drying the vegetables thoroughly. Then, cut them into evenly sized pieces to ensure they cook uniformly.
Seasoning for Flavor
With your vegetables prepped and ready to go, it’s time to move on to seasoning them for maximum flavor. Salt and pepper are essential, but don’t be afraid to experiment with other spices that complement your vegetables. For example, rosemary and thyme are perfect for hearty spring root vegetables like potatoes and carrots.
For a more exotic flavor, consider using cumin and coriander on cauliflower or turmeric on Brussels sprouts. To add a little kick, try a pinch of red pepper flakes on your asparagus or broccoli.
When seasoning your vegetables, be sure to coat them evenly with (an appropriate) oil or butter to help the spices stick. This will also help them crisp up in the oven.
Roasting techniques
To ensure that your roasted vegetables come out perfectly, it’s important to use the right roasting techniques. Here are a few tricks to keep in mind:
First, preheat your oven to 325 degrees F (163 C). This ensures that your veggies cook evenly and don’t dry out. Next, chop your vegetables into evenly-sized pieces so that they roast uniformly. Spread them out in a single layer on a baking sheet before adding oil or butter and seasonings.
Make sure to toss your vegetables halfway through the cooking process. This helps them cook evenly on both sides and ensures that they’re crispy on the outside and tender on the inside. Finally, let your vegetables rest for a few minutes after cooking to allow the flavors to meld together.
Testing for Doneness
Roasting vegetables can be a breeze, as long as you know when they’re done cooking. Overcooking can result in a mushy or burned, unappetizing mess while undercooking can leave them tough and lacking in flavor. Here are a few tips for testing for doneness when roasting your favorite spring veggies.
First, use a fork or a skewer to test the texture of your vegetables. You should be able to pierce them easily without too much resistance. If they’re still hard or crunchy, they need more time in the oven. On the other hand, if they’re too soft or mushy, they may be overcooked.
Second, check the color of your vegetables. They should be evenly browned and caramelized, with no raw or uncooked areas. If they’re still pale or green, they need more time in the oven. Conversely, if they’re starting to char or blacken, they may be overcooked.
Third, use your senses to determine if your vegetables are ready. They should smell fragrant and delicious, with a slightly sweet and nutty aroma. They should also sound crispy and crackly when you move them around in the pan.
Once you’re confident that your vegetables are done, take them out of the oven and let them rest for a few minutes before serving. This allows the flavors to mingle and intensify, resulting in a more delicious and satisfying dish.
If you’re cooking your spring veg for meal prep, let them cool completely before putting them into storage containers and into the fridge. I recommend separating them out as some vegetables have more liquid in them than others.
Roasting spring vegetables doesn’t have to be a daunting task. With the right techniques and a little bit of patience, you can achieve crispy and delicious veggies every time to take advantage of the seasonal anti-inflammatory produce!
How to effortlessly make your favorite roasted spring vegetables with maximum flavor and minimal effort. Perfect for side dishes during the week or meal prep!
Author:Laura Brigance, MS, CHC
Prep Time:10 minutes
Cook Time:25-30 minutes
Total Time:0 hours
Yield:41x
Method:Oven
Ingredients
Scale
1 head of broccoli
1 head of cauliflower
1 bunch of asparagus
1/2 onion
Instructions
Preheat your oven to 350 degrees F (163 C).
Chop your vegetables into evenly-sized pieces so that they roast uniformly.
Spray a sheet pan with avocado oil.
Spread the vegetables out in a single layer on the baking sheet.
Give a light spray of avocado oil. Season with salt, pepper, garlic powder, and any other seasonings you wish.
Roast for 25-30 minutes until done. Let cool, then serve.
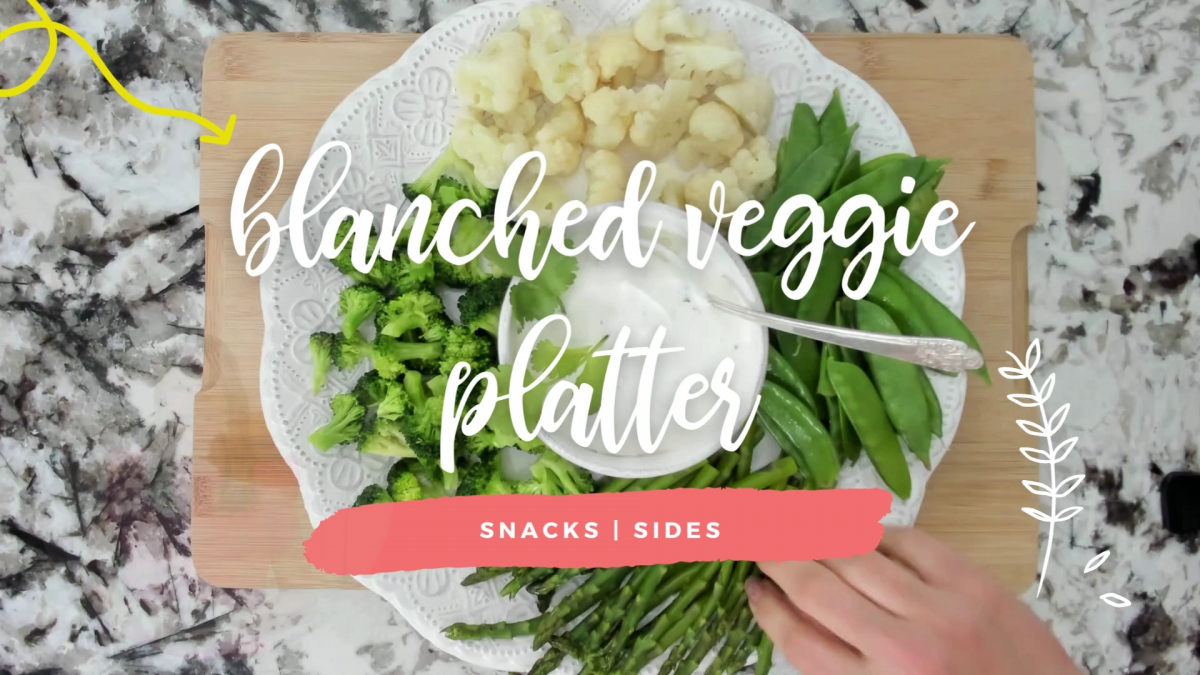
This Spring Blanched Vegetable Platter takes a veggie board to the next level! Not only does blanching bring out even more flavor in veggies, it also brightens their colors, making an even more gorgeous spring vegetable board.
Steamer basket or colander insert that will sit inside the pot, but low enough for water to reach the vegetables inside
If you don’t have a steamer basket or colander insert, you can still blanch the veggies in the pot of water. It’s just much easier with the insert.
Also, many people would rather simply steam the veggies with this basket to lose as few nutrients as possible in the boiling water. Either method works.
Difference between Steaming and Blanching
So let’s talk about the difference between steaming and blanching really quick…
Blanching is actually fully submerging the veggies in the water, then putting in an ice-bath to stop the cooking process;
While Steaming is letting the hot water boil below the veggies, enough to create steam, and that steam is actually what’s cooking the vegetables.
Many people like steaming over boiling because you can cook a lot of the nutrients out of vegetables if you boil them, and they’re left in the water.
Blanching is sort of the compromise between the two because you’re only cooking the vegetables for 3-5 minutes, not longer times like is typical with longer cooking in boiling water.
Instructions
Make sure to watch the video at the top to see this in action! 😉
Bring a large pot of water to a boil. Add salt.
Fill an extra large bowl halfway with ice, and fill to 3/4 full with cold water. Keep near the pot of water.
Put your first vegetables into the steamer basket or colander insert.
Lower the steamer basket into the pot of boiling water.
Cook about 3-5 minutes, then lift the steamer basket out of the water.
Dump veggies into the bowl of ice water to immediately stop the cooking process.
While those veggies are cooling, move on to the next set of vegetables.
While that set is cooking, spoon the first veggies out of the cold water with a slotted spoon and place in a bowl for the water to drain.
Keep this going until all vegetables are blanched, cooled, and into a bowl to rest.
The vegetables can be stored a few days in the fridge, or plated on a platter.
This Spring Blanched Vegetable Platter takes a veggie board to the next level! Not only does blanching bring out even more flavor in veggies, it also brightens their colors, making an even more gorgeous spring vegetable board.
Author:Laura Brigance, MS, CHC
Prep Time:5 minutes
Cook Time:15
Total Time:20 minutes
Yield:61x
Ingredients
UnitsScale
4 quarts of water
2 TBSP kosher salt
1 bunch asparagus, ends trimmed
1 head of broccoli, chopped into florets
1 head of cauliflower, chopped into florets
8ozsnow peas
Instructions
Bring a large pot of water to a boil. Add salt.
Fill an extra large bowl halfway with ice, and fill to 3/4 full with cold water. Keep near the pot of water.
Put your first vegetables into the steamer basket or colander insert.Lower the steamer basket into the pot of boiling water.
Cook about 3-5 minutes, then lift the steamer basket out of the water.
Dump veggies into the bowl of ice water to immediately stop the cooking process.
While those veggies are cooling, move on to the next set of vegetables.
While that set is cooking, spoon the first veggies out of the cold water with a slotted spoon and place in a bowl for the water to drain.
Keep this going until all vegetables are blanched, cooled, and into a bowl to rest.
The vegetables can be stored a few days in the fridge, or plated on a platter.
Pair with our Anti-Inflammatory Homemade Ranch Dip for the ultimate healthy, delicious, and gorgeous crowd-pleaser!
Notes
If you’re not using the vegetables immediately, you can store them in the fridge for a few days in a sealed container.
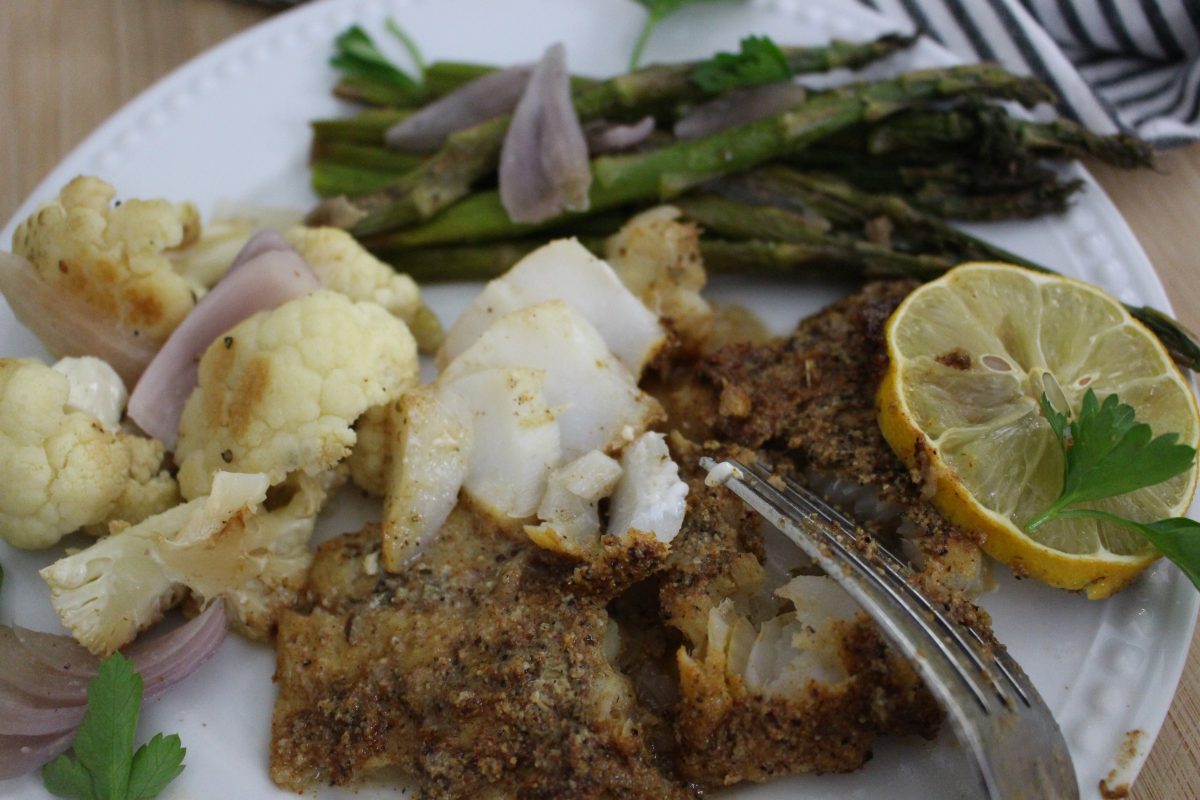
This delicious Flaky Lemon Pepper White Fish is packed with flavor, and is a super easy anti-inflammatory dinner to make! It’s amazing paired with seasonal spring veggies but can truly be enjoyed year-round.
Preheat oven to 425F. Cover a sheet pan with foil.
Place fish on pan. Drizzle with oil, then sprinkle all seasonings on top evenly.
Place lemons on top of fish, then bake for 12-15 minutes. The fish should be flaky and done, but not dry.
Serve with parsley sprinkled over fish.
Notes
*To meal prep this dish, simply close the foil into a pouch, sealed on all sides so no liquid leaks out, and store in the fridge until the night needed.
This delicious Flaky Lemon Pepper Fish is packed with flavor, and is a super easy anti-inflammatory dinner to make! It’s amazing paired with seasonal spring veggies but can truly be enjoyed year-round.
Author:Laura Brigance, MS, CHC
Prep Time:5 minutes
Cook Time:12-15 minutes
Total Time:17-20 minutes
Yield:41x
Category:Dinner
Method:Oven
Ingredients
Scale
4 pieces of white fish (like cod)
1 TBSP lemon pepper
1 tsp garlic powder
1 tsp Italian seasoning blend
1 tsp smoked paprika
2 TBSP avocado oil
1 lemon, sliced
2 TBSP parsley, finely chopped
Instructions
Preheat oven to 425F. Cover a sheet pan with foil.
Place fish on pan. Drizzle with oil, then sprinkle all seasonings on top evenly.
Place lemons on top of fish, then bake for 12-15 minutes. The fish should be flaky and done, but not dry.
Serve with parsley sprinkled over fish
Notes
*To meal prep this dish, simply close the foil into a pouch, sealed on all sides so no liquid leaks out, and store in the fridge until the night needed.
This Greek Lemon Chicken and Potatoes isn’t just a super easy one-pan dinner. It’s a delicious anti-inflammatory and gluten-free healthy dinner that also happens to be super easy to prep ahead using whole food ingredients that are fresh for spring!
This Greek Lemon Chicken and Potatoes isn’t just a super easy one-pan dinner. It’s a delicious anti-inflammatory and gluten-free healthy dinner that also happens to be super easy to prep ahead using whole food ingredients that are fresh for spring!
Author:Laura Brigance, MS, CHC
Prep Time:15 minutes
Cook Time:25-30 minutes
Total Time:0 hours
Yield:41x
Ingredients
UnitsScale
8 boneless chicken thighs
1 tsp salt, divided
1 tsp pepper, divided
1 TBSP avocado oil
2lbsfingerling potatoes, halved
1 bunch of asparagus, with ends cut off
1/2 red onion, thinly sliced
2 lemons, zested and juiced
1 garlic clove, minced
1 can of black olives, drained and sliced
1 TBSP oregano, fresh and chopped
1/2 TBSP thyme, fresh and chopped
Instructions
Preheat oven to 400 F. Cover a large sheet pan with foil, and lightly coat with avocado oil.
Cut the potatoes, onions, asparagus, garlic, and herbs.
In a large bowl, place the potatoes, onions, herbs, lemon zest and juice, and 1/2 TBSP avocado oil. Stir really well to combine.
Place the chicken on one end of the pan, leaving about 2/3 for the veggies.
Place the asparagus on the pan and sprinkle the olives around. Drizzle with oil.
Fill in the rest of the pan with the potato mixture.
Salt and pepper the entire pan.
Bake for 25-30 minutes, until the chicken is done. Remove from oven.
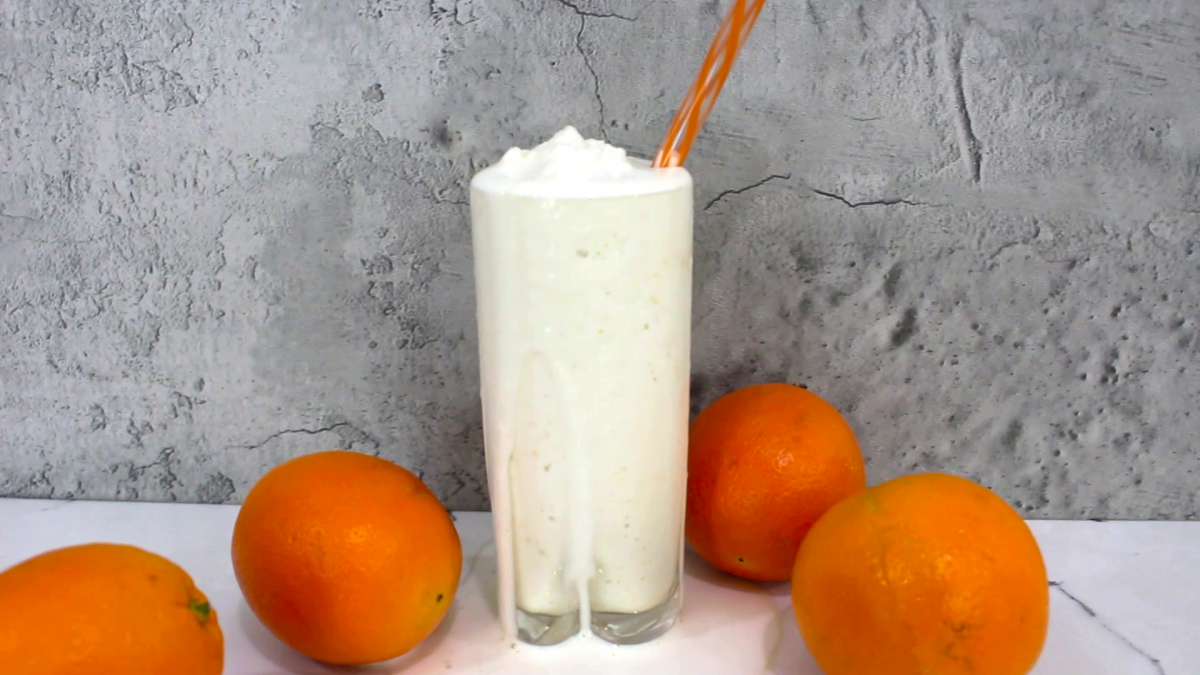
The anti-inflammatory breakfast smoothie offers the fun spring flavor of orange creamsicles but without the sugar. It’s creamy but with the familiar sweet and tangy hints of orange and vanilla, while keeping you full with a serving of protein.
1/4 cup heavy cream (or coconut cream for dairy free)
3/4 cup unsweet almond milk
1/4 vanilla protein powder
zest from 1/2 large orange
1/4 tsp real vanilla extract
5-7 drops liquid stevia (to taste)
4 ice cubes
Notes
*For a creamier texture, you can add 1 tsp chia seeds or 1 TBSP of almond or cashew butter. Cashew butter will give a milder flavor than almond butter.
*Make in bulk by placing all ingredients except ice cubes into a container and save in the fridge for 2-3 days until needed.
The anti-inflammatory breakfast smoothie offers the fun spring flavor of orange creamsicles but without the sugar. It’s creamy but with the familiar sweet and tangy hints of orange and vanilla, while keeping you full with a serving of protein.
Author:Laura Brigance, MS, CHC
Prep Time:5 minutes
Total Time:5 minutes
Yield:1 smoothie 1x
Ingredients
UnitsScale
1/4 cup heavy cream (or coconut cream for dairy free)
3/4cupunsweet almond milk
1/4 vanilla protein powder
zest from 1/2 large orange
1/4 tsp real vanilla extract
5–7 drops liquid stevia (to taste)
4 ice cubes
Instructions
Add all ingredients into a high-powered blender.
Blend on high until smooth.
Adjust sweetness, if desired.
Pour into glass and enjoy immediately!
Notes
*For a creamier texture, you can add 1 tsp chia seeds or 1 TBSP of almond or cashew butter. Cashew butter will give a milder flavor than almond butter.
*Make in bulk by placing all ingredients except ice cubes into a container and save in the fridge for 2-3 days until needed.
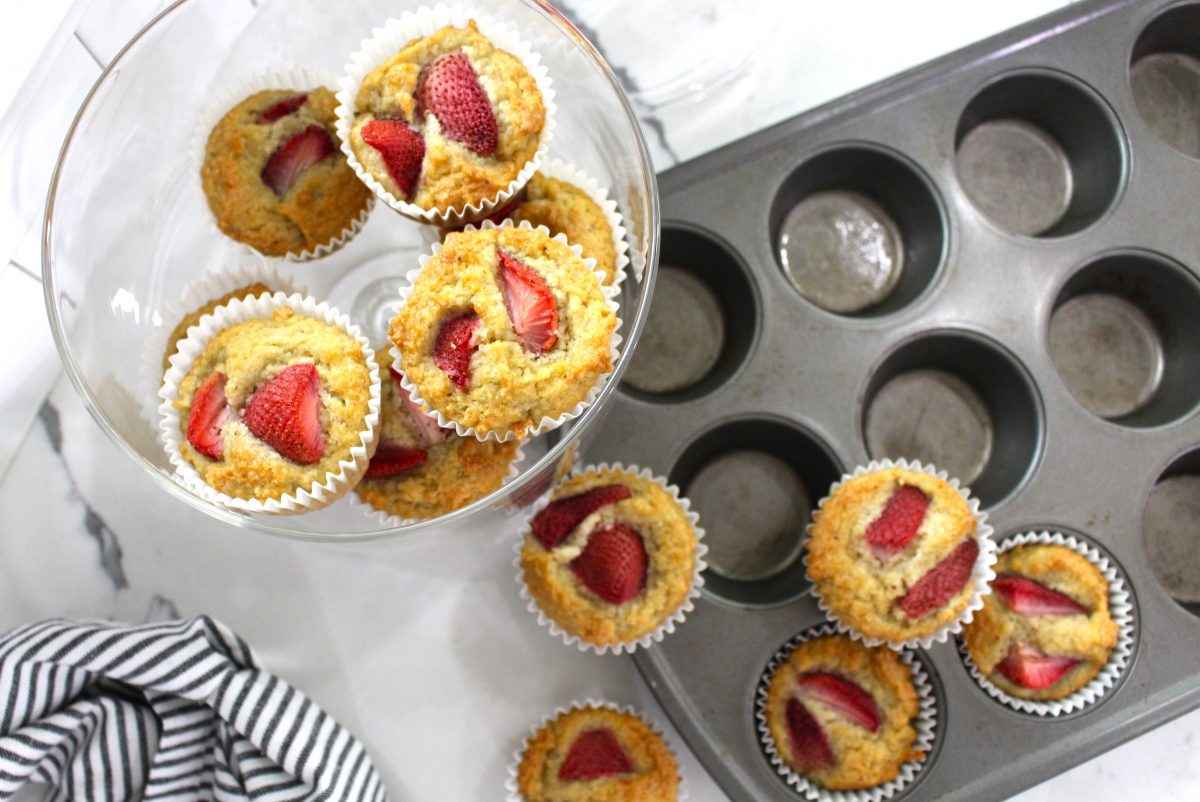
Making bulk breakfast and snack recipes like these anti-inflammatory Strawberry Breakfast Muffins is one of my favorite ways to save time and brainpower cooking for the week during meal prep.
Not only are these anti-inflammatory breakfast muffins gluten-free and sugar free, they’re also packed with flavor and fresh seasonal berries!
1/4 cup allulose (or other granulated natural zero-calorie sweetener for baking)
1/8 tsp salt
1 TBSP coconut oil (melted)
3 eggs (medium)
1 TBSP ghee (melted)
1 TBSP lemon juice
1 cup strawberries (sliced)
1 tsp vanilla extract
Instructions
Preheat oven to 325 F (163 C) and grease muffin tin or line with baking cups.
Combine all the dry ingredients into a large bowl: almond flour, baking soda, cardamom, allulose, and salt. Stir until well combined.
Combine all wet ingredients in a separate medium bowl: coconut oil, eggs, ghee, lemon juice, and vanilla. Whisk together until well combined.
Pour wet ingredients into large bowl with dry ingredients and mix well.
Fold in strawberries.
Divide batter into all 12 muffin cups.
Bake 20-25 minutes until golden on top. A toothpick inserted should come out clean.
Let cool and enjoy!
Notes
*You can chop up strawberries really small and fold in, or keep them halved to quartered and place a few on top like I did in the video.
*If I make a batch of muffins like these and realize I won’t be able to eat them all before they go bad, I’ll cut them into quarters and pop them into the freezer in a freezer bag– instant Frozen Muffin Bites! (Great with yogurt or as an ice cream topper!)
Making bulk breakfast and snack recipes like these Strawberry Breakfast Muffins is one of my favorite ways to save time and brainpower cooking for the week. Not only are these anti-inflammatory breakfast muffins free of sugar and gluten, they’re also packed with flavor and fresh seasonal berries!
Author:Laura Brigance, MS, CHC
Prep Time:10 minutes
Cook Time:20-25 min
Total Time:30 – 35 minutes
Yield:12 1x
Ingredients
UnitsScale
2 cups Amond flour
1/2 tsp baking soda
1 dash cardamom, ground
1/4cupallulose (or other granulated natural zero-calorie sweetener for baking)
1/8 tsp salt
1 TBSP coconut oil (melted)
3 eggs (medium)
1 TBSP ghee (melted)
1 TBSP lemon juice
1cupstrawberries (sliced)
1 tsp vanilla extract
Instructions
Preheat oven to 325 F (163 C) and grease muffin tin or line with baking cups.
Combine all the dry ingredients into a large bowl: almond flour, baking soda, cardamom, allulose, and salt. Stir until well combined.
Combine all wet ingredients in a separate medium bowl: coconut oil, eggs, ghee, lemon juice, and vanilla. Whisk together until well combined.
Pour wet ingredients into large bowl with dry ingredients and mix well.
Fold in strawberries.
Divide batter into all 12 muffin cups.
Bake 20-25 minutes until golden on top. A toothpick inserted should come out clean.
Let cool and enjoy!
Notes
*You can chop up strawberries really small and fold in, or keep them halved to quartered and place a few on top like I did in the video.
*If I make a batch of muffins like these and realize I won’t be able to eat them all before they go bad, I’ll cut them into quarters and pop them into the freezer in a freezer bag– instant Frozen Muffin Bites! (Great with yogurt or as an ice cream topper!)
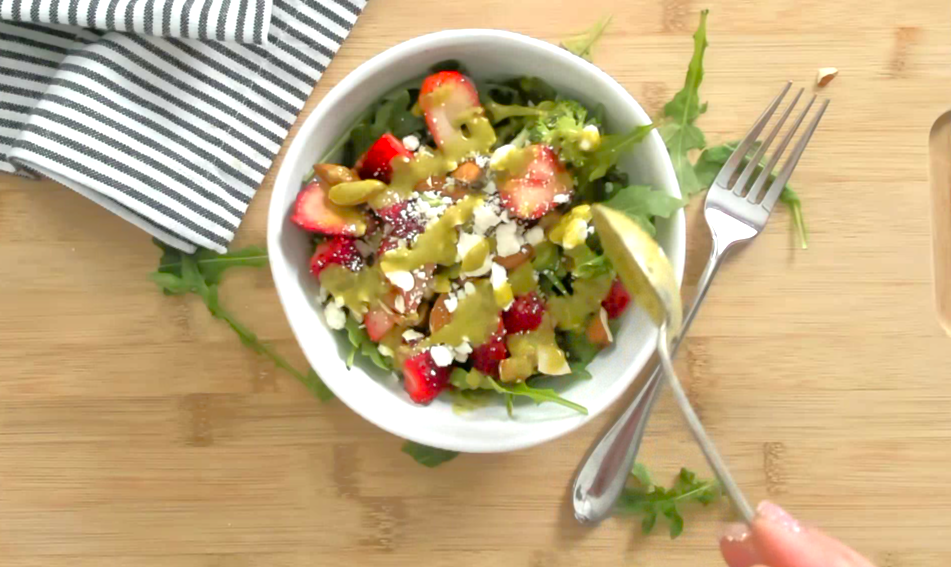
This Broccoli Strawberry Salad is the perfect spring anti inflammatory meal prep lunch or dinner side. It’s full of color, flavor, and fresh spring produce!
*We love to premake these salads for meal prep for the week! Simply chop the veggies and store in separate containers until you want to assemble them.
OR you can choose the mason jar method where you put the dressing in the bottom of the jar, then layer the veggies. When you’re ready to eat, just shake the jar to mix all the ingredients and enjoy!
This Broccoli Strawberry Salad is the perfect spring anti inflammatory meal prep lunch or dinner side. It’s full of color, flavor, and fresh spring produce!
Author:Laura Brigance, MS, CHC
Prep Time:5 minutes
Total Time:5 minutes
Yield:41x
Ingredients
UnitsScale
2 cups of broccoli florets
1cup of strawberries (cut in half or chopped)
1/4cupred onion (finely chopped)
1/4cupfeta cheese
1/4cup chopped almonds (or sliced)
3 TBSP Green Goddess Dressing
5ozmixed spring salad greens (arugula or mesclun mix)
Instructions
Chop all the veggies and almonds if not purchased that way; crumble the feta.
Mix the broccoli, onion, strawberries, almonds, and feta in a bowl.
Portion out the salad greens into bowls, top with the broccoli and strawberry mixture.
Drizzle with Green Goddess Dressing. Enjoy!
Notes
*We love to premake these salads for meal prep for the week! Simply chop the veggies and store in separate containers until you want to assemble them.
OR you can choose the mason jar method where you put the dressing in the bottom of the jar, then layer the veggies. When you’re ready to eat, just shake the jar to mix all the ingredients and enjoy!
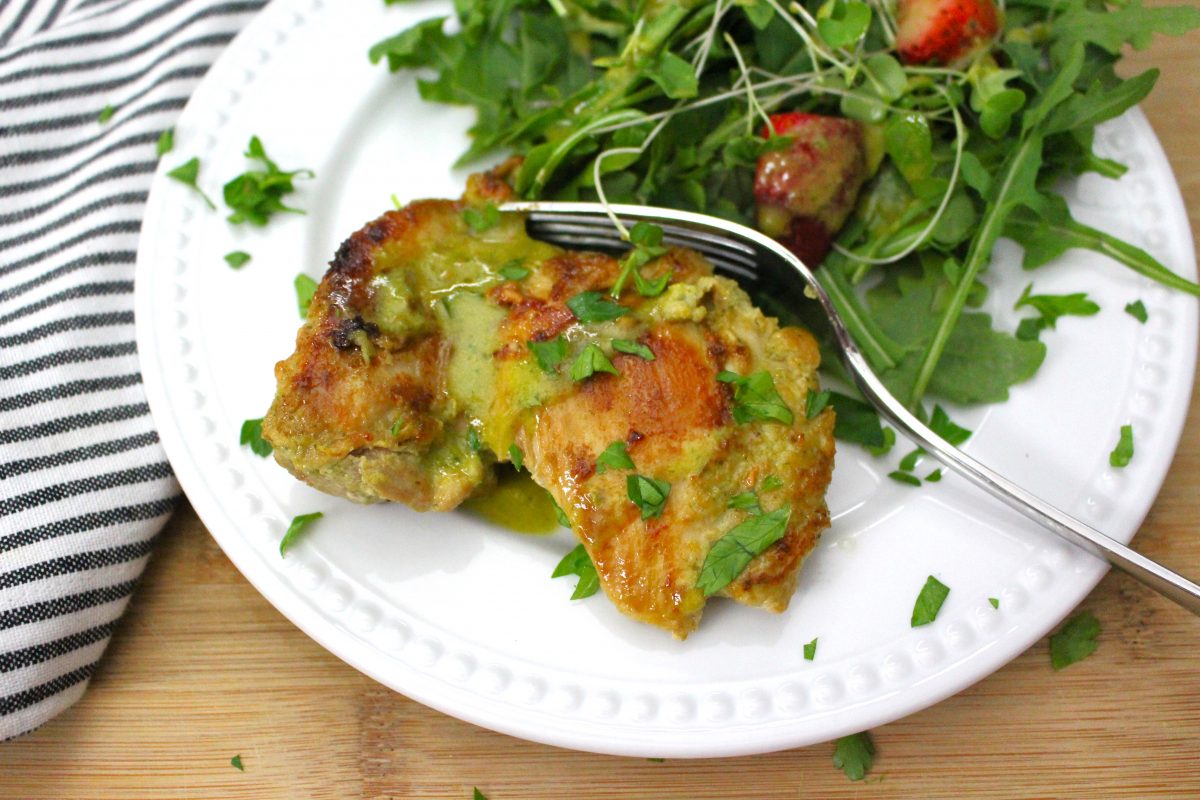
This Green Goddess Chicken is full of flavor and will quickly become a weeknight favorite. Use your favorite cuts of chicken for a healthy, anti-inflammatory dinner that’s quick, juicy, and delicious!
Make the Green Goddess Dressing first, as it will be the marinade. The recipe is for way more than is needed for this chicken recipe, so either use the rest for salads all week, or cut the recipe into 1/3 to fit this recipe.
Place the chicken into a bowl or baggie and pour enough dressing to coat the chicken. (If only making enough for this recipe, make sure to reserve around 2-3 TBSP for drizzling on the finished chicken.)
Toss the chicken to coat, then place in the fridge for at least 2 hours to marinate.
Set your cooktop to medium-high heat and let a large non-stick skillet get warm. Add the oil, then the chicken to the pan. (Don’t save any of the marinade from the bowl or baggie!)
Cook the chicken for 5-6 minutes on each side, then remove from the skillet.
Drizzle the reserved dressing over the top and serve!
Notes
*To prep this for the week, simply leave the chicken to marinate in a baggie or container in the fridge until the night it is needed.
This Green Goddess Chicken is full of flavor and will quickly become a weeknight favorite. Use your favorite cuts of chicken for a healthy, anti-inflammatory dinner that’s quick, juicy, and delicious!
Author:Laura Brigance, MS, CHC
Prep Time:2 hours, 5 minutes
Cook Time:15
Total Time:2 hours, 20 minutes
Yield:41x
Ingredients
Scale
8 boneless chicken thighs (or equivalent of favorite chicken cuts)
Make the Green Goddess Dressing first, as it will be the marinade. The recipe is for way more than is needed for this chicken recipe, so either use the rest for salads all week, or cut the recipe into 1/3 to fit this recipe.
Place the chicken into a bowl or baggie and pour enough dressing to coat the chicken. (If only making enough for this recipe, make sure to reserve around 2-3 TBSP for drizzling on the finished chicken.)
Toss the chicken to coat, then place in the fridge for at least 2 hours to marinate.
Set your cooktop to medium-high heat and let a large non-stick skillet get warm. Add the oil, then the chicken to the pan. (Don’t save any of the marinade from the bowl or baggie!)
Cook the chicken for 5-6 minutes on each side, then remove from the skillet.
Drizzle the reserved dressing over the top and serve!
Notes
*To prep this for the week, simply leave the chicken to marinate in a baggie or container in the fridge until the night it is needed.
*I’ve always loved chicken thighs better than breasts for their extra flavor. However, you can still use the equivalent in weight in chicken breasts if you prefer those over thighs.
When it comes to fresh and tasty dressings–this anti-inflammatory Green Goddess Dressing can’t be beat! Not only is it super yummy on salads, but it can also easily be used as a marinade or topping for fish or chicken (like our Green Goddess Chicken recipe!)
The ingredients are whole and fresh, kicking this dressing up a level!
When it comes to fresh and tasty dressings–this anti-inflammatory Green Goddess Dressing can’t be beat! Not only is it super yummy on salads, but it can also easily be used as a marinade or topping for fish or chicken (like our Green Goddess Chicken recipe!)
The ingredients are whole and fresh, kicking this dressing up a level!
Author:Laura Brigance, MS, CHC
Ingredients
UnitsScale
1cup packed fresh parsley
3 TBSP chopped green onion
3 cloves of garlic
6 TBSP extra virgin olive oil
4 1/2 TBSP water
3 tsp sesame oil
2 TBSP coconut aminos (or liquid aminos)
4 1/2 TBSP apple cider vinegar
4 1/2 TBS nutritional yeast
Instructions
Place all ingredients into a high-powered blender.
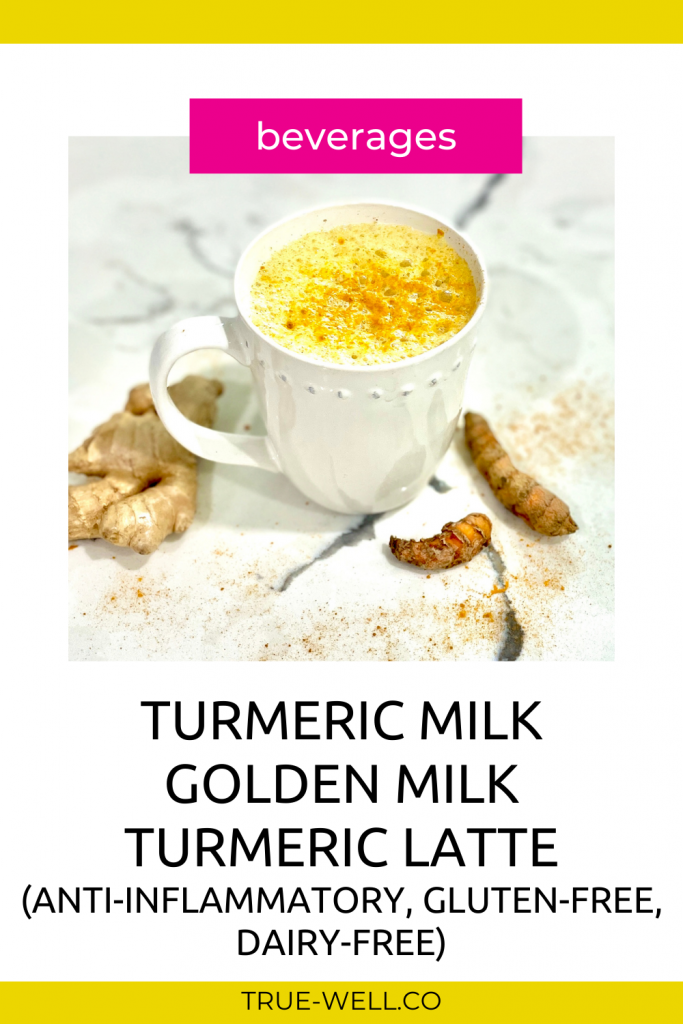
One of the belles of the ball when it comes to anti-inflammatory beverages (and coffee alternatives) is definitely turmeric milk (or golden milk or turmeric latte–depending on your choice of names).
One thing I’ve noticed, however, is that even though most recipes have the intent of helping to lower inflammation, they still have sugar in them. Usually maple syrup.
That’s why this sugar-free version is just as yummy, with just as much inflammation-busting power, but without the added sugar.
So whether you call it golden milk or turmeric milk this winter recipe is super yummy, smells amazing, and is full of anti-inflammatory superfoods—Here’s how to make easy turmeric golden latte.
The ingredients you’ll need are:
2 cups of coconut milk
1 tsp of ground turmeric
½ tsp ground cinnamon
1/8 tsp black pepper
1-2 TBSP keto maple syrup or granulated natural zero-calorie sweetener
And ¼ tsp pure vanilla extract
Directions:
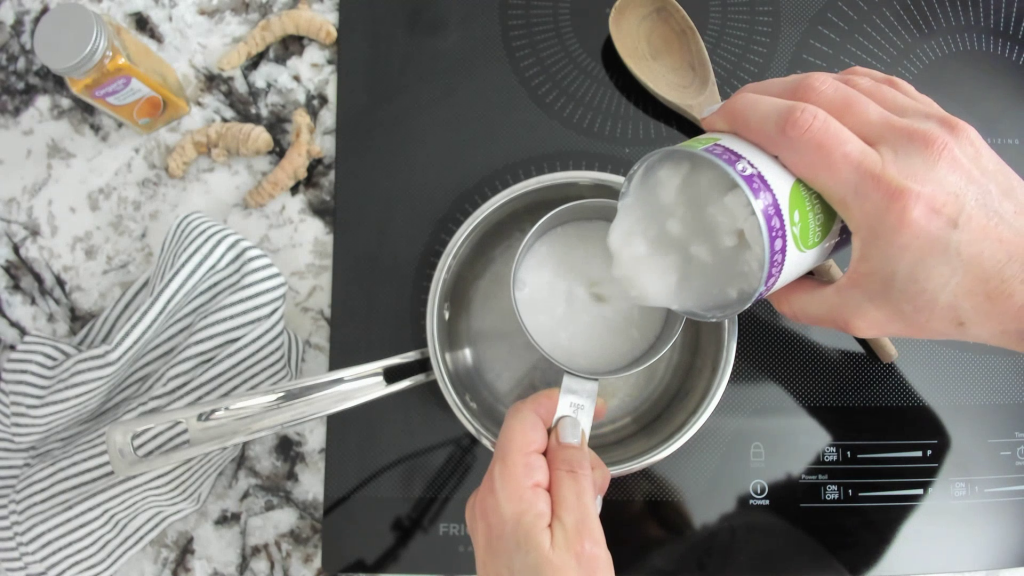
Start out with a small to medium-sized pot, and add 2 cups of coconut milk
Turn your heat onto low to medium
Then add the ground turmeric,
The ground cinnamon,
Freshly ground black pepper – this is to increase the absorption of the turmeric
1-2 TBSP keto maple syrup or granulated natural zero-calorie sweetener
And the pure vanilla extract
So next you’ll stir these together as they get warm, and you may have to smash the little clumps of the dried ingredients. I also get my little frother out and get it really mixed together and frothy.
Simmer this up to 10 minutes, then pour into 2 mugs and enjoy!
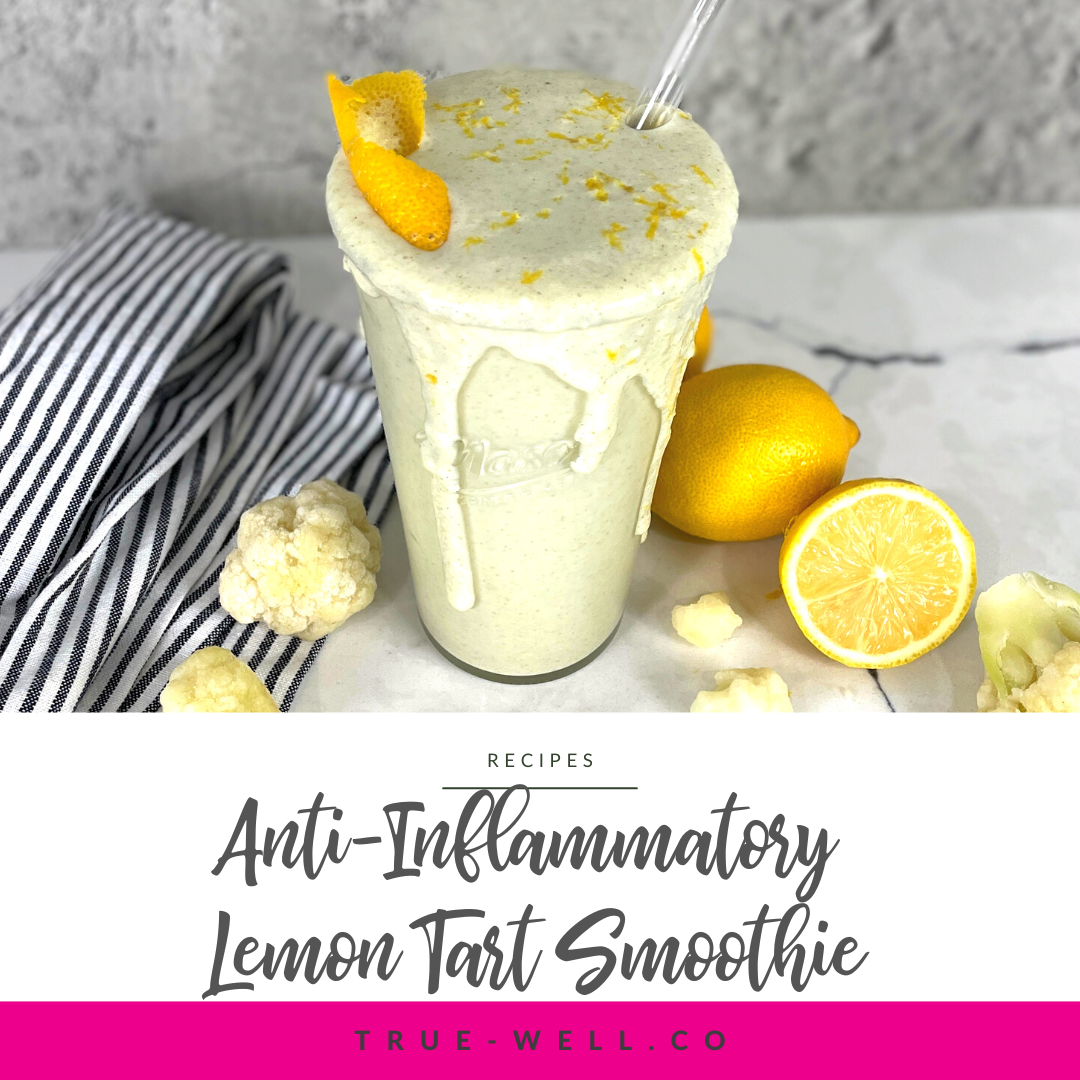
This lemon tart smoothie is full of protein and healthy fats, making it a perfect anti-inflammatory smoothie for breakfast, snacks, or even a meal replacement!
In this winter anti-inflammatory smoothie recipe we’re gonna be taking advantage of cauliflower and, obviously, lemon.
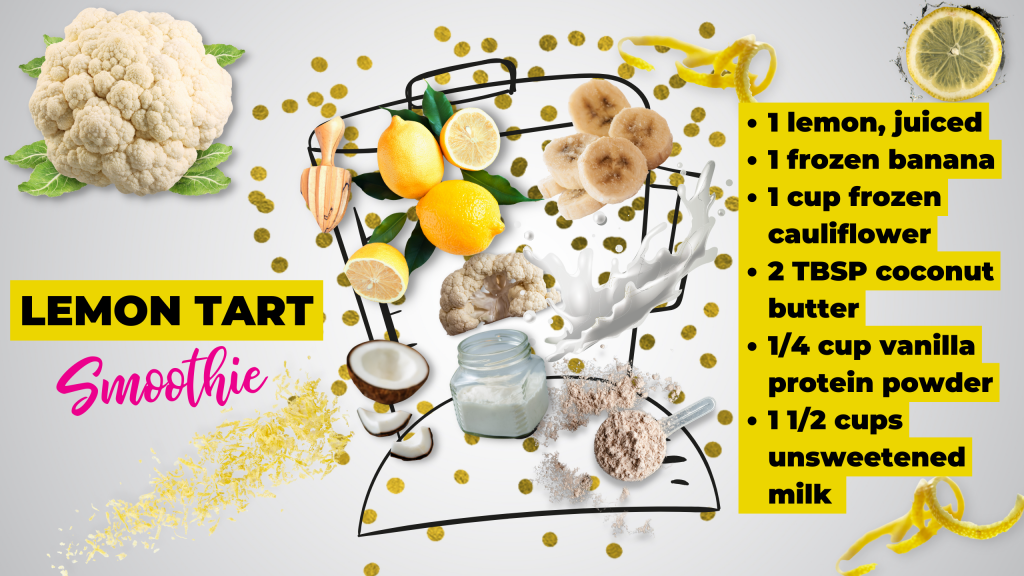
This smoothie recipe includes:
1 lemon, juiced
1 frozen banana
1 cup of frozen cauliflower
2 tbsp of coconut butter
1/4 cup of vanilla protein powder
And 1 ½ cups of unsweetened milk
Frozen bananas
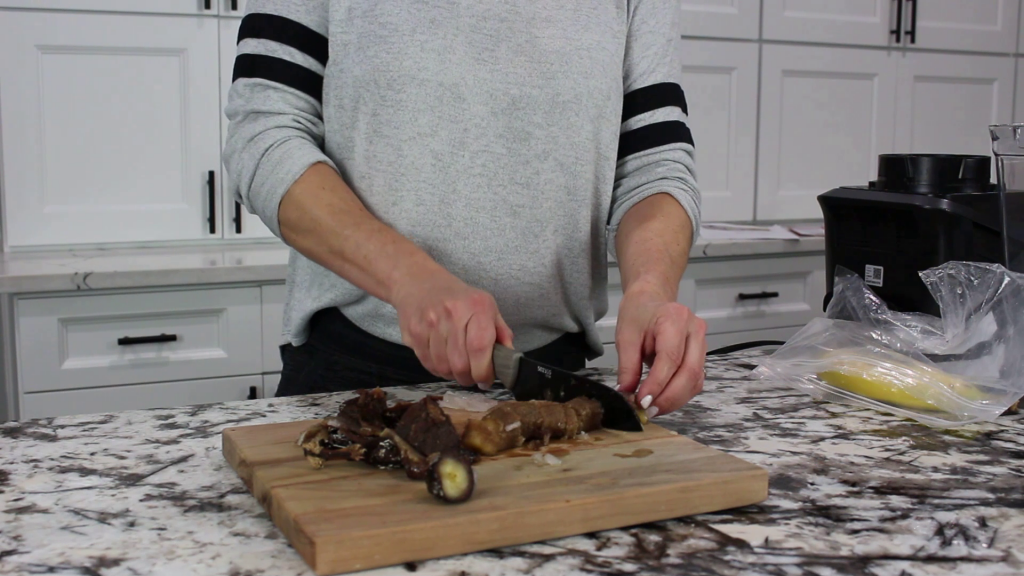
Now if you don’t have a bag of frozen bananas and just toss bananas into the freezer when they’re about to go bad like I do, the easiest way to use them is to put in the microwave for about 20 seconds, then just slice the skin off the banana and slice the banana up. I know it looks super gross, but bananas naturally brown in the freezer like that, so no worries.
Frozen cauliflower
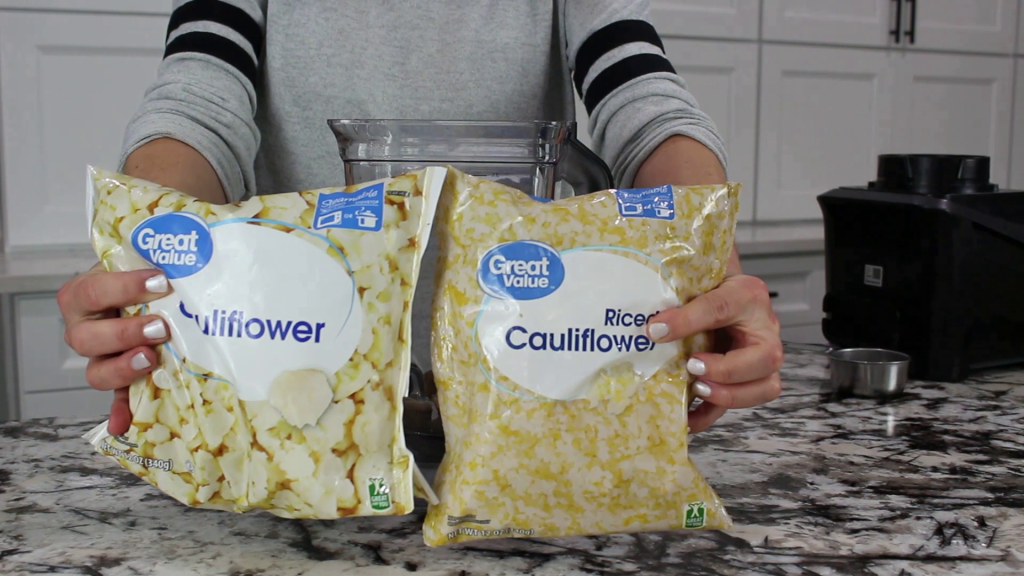
For the cauliflower, you can find this in the freezer section at your grocery store, but just know that they should have cauliflower florets, and riced cauliflower. You can use either, but I prefer the riced because that’s just that much less blending you’ll need to get the chunks out of your smoothie.
Coconut butter
Now for the coconut butter, this can sometimes be tricky to find. Basically, coconut butter is the coconut meat ground down into butter, the same way that peanut butter or any other nut butter is made.
So for this recipe if you can’t find coconut butter, you can do one of 2 things:
Either make your own coconut butter with coconut flakes—but you’ll need to make sure they’re free of any type of coating,
Or you can use coconut oil.
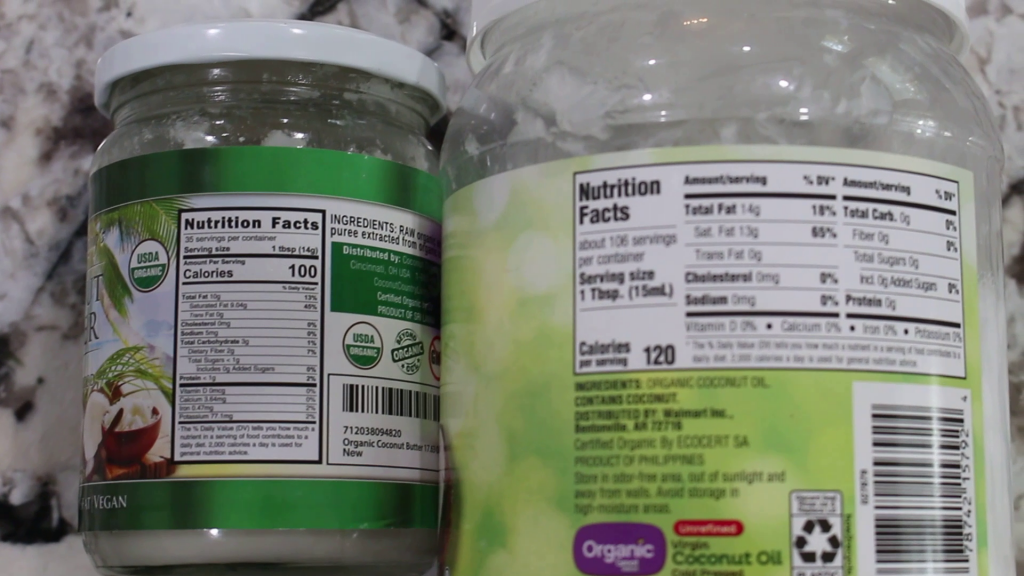
The difference in the two lies in the fact that the fat is all extracted from the coconut butter, which is the oil. So on these containers you can see that they have the same servings size, and per 1 TBSP, the coconut butter has 100 calories, 10 grams of fat, 3 grams of carbs, and 2 grams of fiber.
Coconut oil, on the other hand, is 120 calories of only fat. No carbs and no fiber.
If you’re counting calories and/or macros, this is something to be aware of if you need to sub out the coconut butter.
Protein powder
For the protein powder, I recommend checking the label and making sure there’s no sugar added. A lot of reputable protein powders are now using stevia or monk fruit to sweeten the powder.
If you can handle dairy, a whey protein powder is great. If you need non-dairy or vegan, pea protein powder is really great.
Milk
And lastly, the milk can either be dairy if you can tolerate it or any other non-dairy unsweetened milk. Make sure it’s unsweetened so it doesn’t have added sugar.
I really don’t like using oat milk either because it has so many carbs straight from grains with no fiber.
Directions
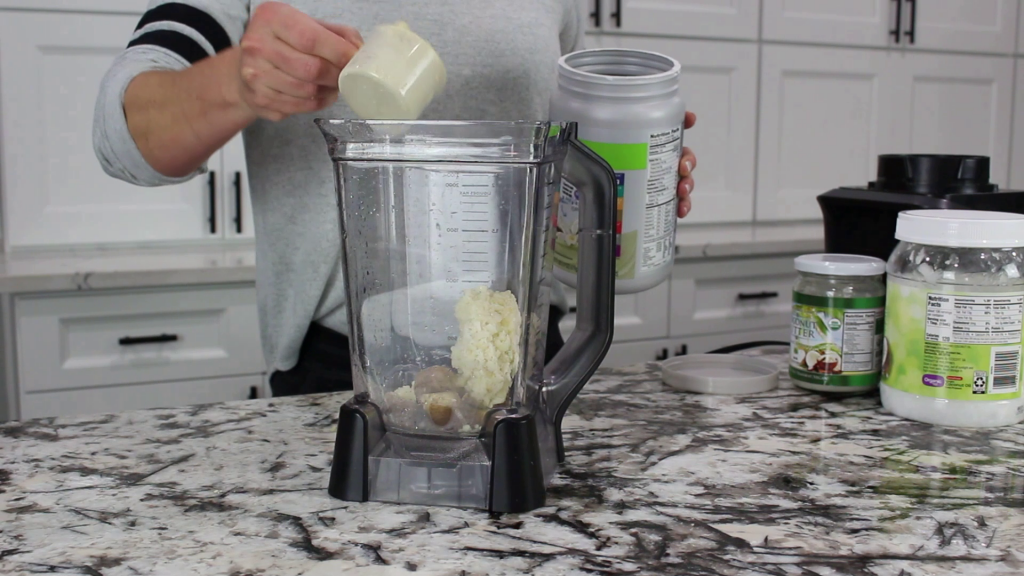
So into the blender, we juice our whole lemon, add in the frozen banana, 1 cup of frozen cauliflower, 2 TBSP coconut butter, ¼ cup of vanilla protein powder, and 1 ½ cups of unsweetened milk.
Then blend or pulse it in a high-powered blender until it’s super smooth, pour, and enjoy!
This anti inflammatory smoothie is packed with protein, fiber, and healthy fat, making it perfect for a winter breakfast, snack, or even meal replacement.
This Citrus Pear Smoothie is a green anti-inflammatory smoothie that combines signature winter flavors to create an absolutely refreshing snack or breakfast smoothie.
So let’s talk ingredients.
Frozen avocado
So, first off, if you’re not using frozen avocado chunks, which you can buy at the grocery store, you can either freeze your own avocado ahead of time, or use it at room temperature.
Just know that if you use it at room temperature, that’s the only ingredient that was frozen, so we’ll need to use some ice in the place of part of the water so your smoothie is cold and slushie.
Pear
We start out cutting up the pear and parsley. Pear is so delicious when it’s in season in the winter, and the skin is usually softer than an apple.
The skin is also full of antioxidants, and one in particular is quercetin, which has been shown to reduce inflammation, plus it has lots of fiber.
So I keep the skin on. You can cut the top and bottom off so it stands on its own, then use an apple corer get perfect wedges while taking the core out.
Parsley
Parsley is full of vitamins K, C, A, and Bs. It’s also been shown to help reduce blood pressure and bloating, so I love to use parsley in any recipe I can. It just needs to be roughly chopped for this smoothie.
Lemon juice
Lemon juice adds just a bit of tang to this smoothie, as well as a bit more Vitamin c. Fresh is always best since most lemon juice in the bottle has added preservatives.
Water
Make sure you use filtered water, and if your avocado isn’t frozen, use ½ cup of water and about ¾ to 1 cup of ice to replace the 1 cup of water.
Instructions
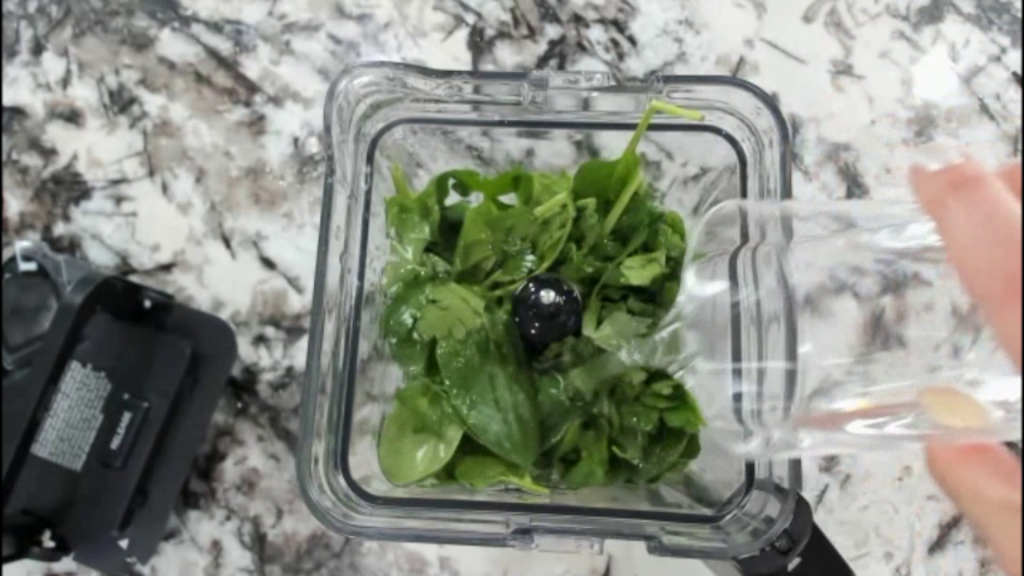
And then we just add all the ingredients to the high-powered blender, blend really well until all smooth—remember it’s chopping up pear skin if you kept it on, so you may need to let it go for a bit.
Then pour up and enjoy!
👇Grab the free Winter Anti-Inflammatory Meal Prep Guide! Click the image below! 👇
When spring has sprung, we looove having friends over for weekend get-togethers! Admittedly, living in the Houston area has its benefits since we use our patio at least 8 months out of the year. But it does still get cold here!
One of my favorite things when we entertain is to make a charcuterie board, platter, or table because everyone seems so happy grazing while catching up.
But making it anti-inflammatory allows for everyone to enjoy the finger foods while not worrying about the ramifications later.
And this anti inflammatory spring charcuterie board seemed a fun addition to our weekends that signified the ending of winter.
Grab the recipe list below and let me know when you create your own spring board! Post it and tag me! 👉 @truewell.co
Since charcuterie boards have pretty random different quantities depending on size of the board and how much is needed for creative license, I don't include amounts in the ingredient list. 🙂
Prep Time:30 minutes
Total Time:30 minutes
Yield:61x
Category:Appetizer, Breakfast, Snack
Ingredients
deviled eggs
cauliflower
broccoli
celery
baby dill pickles
kalamata olives
green olives
cherry tomatoes
blueberries
strawberries
kiwi
raspberries
grapes
almonds
mozzerella pearls
chives (for garnish)
mint (for garnish)
Instructions
Chop broccoli and cauliflower into tiny florets
Peel and slice kiwi
Slice strawberries
Slice celery
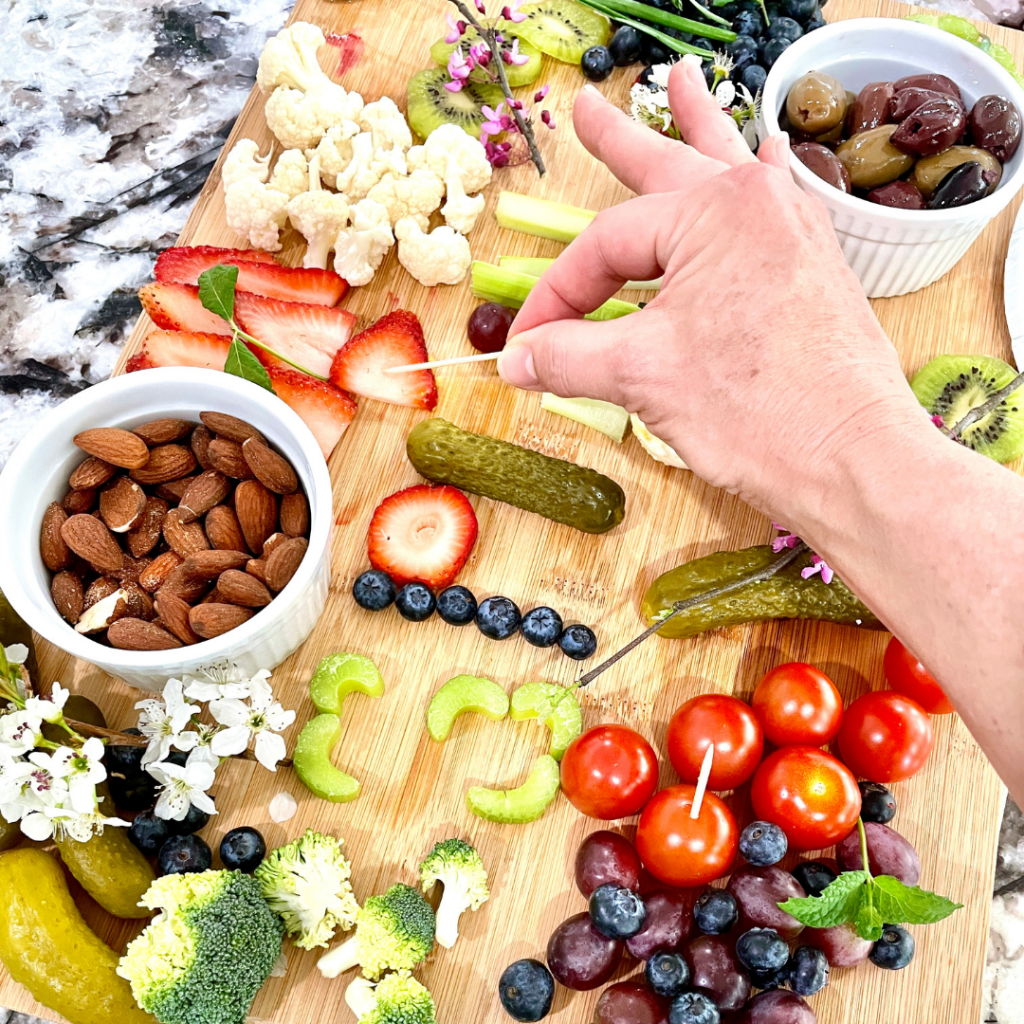
Arrange on board
Add chive and mint garnish + additional spring flowers or other decor
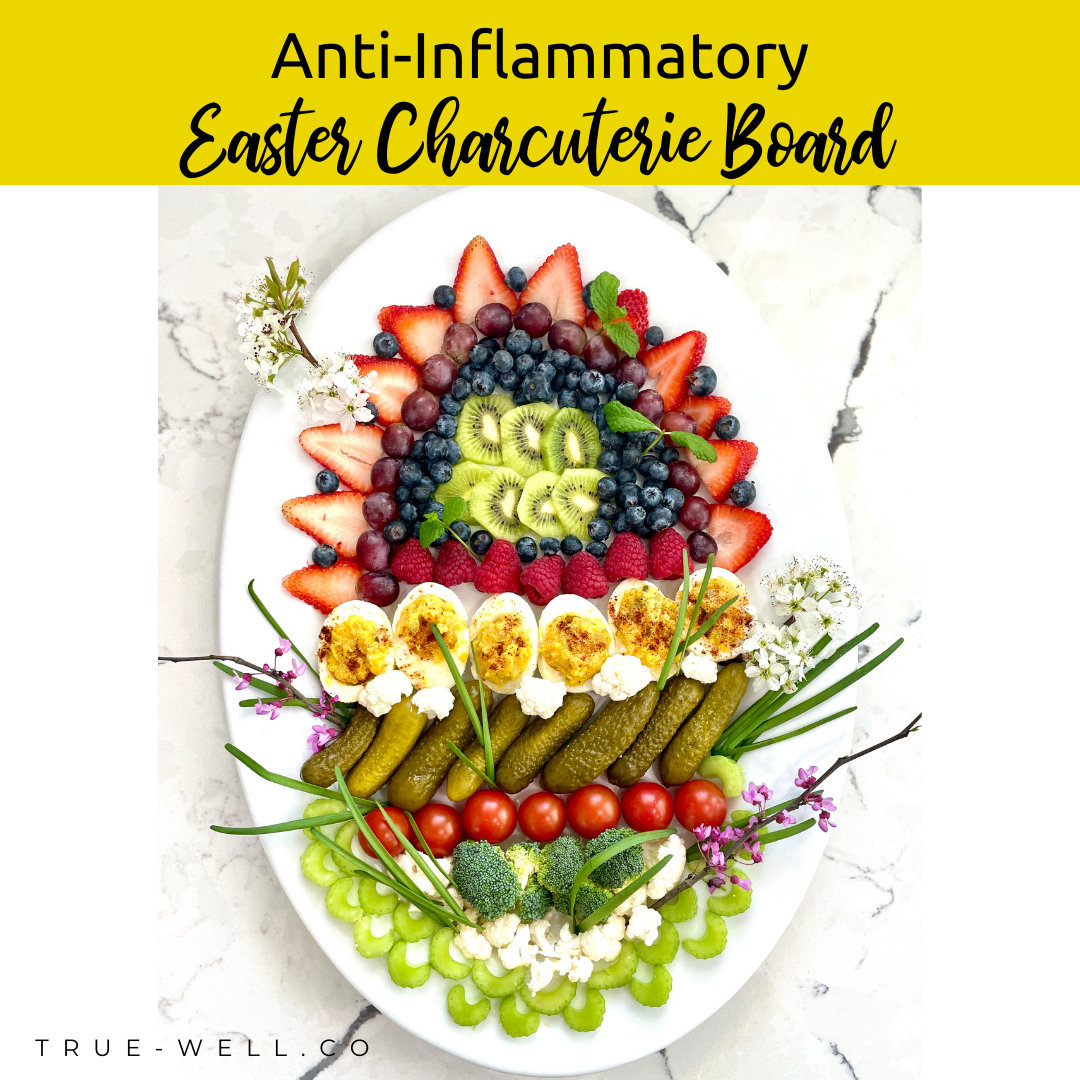
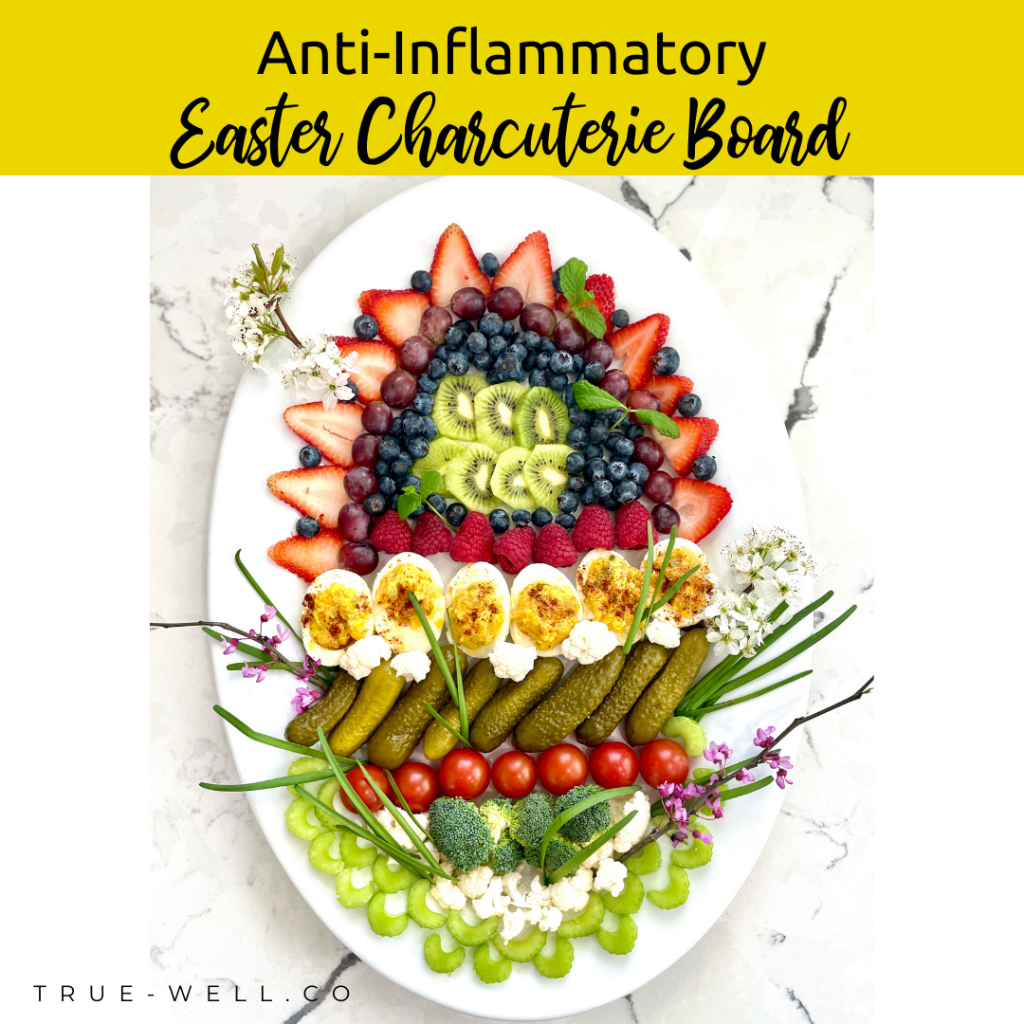
Easter is, no doubt, one of the best times to get together with friends and family to have a brunch. After all, spring has sprung, the weather’s getting nice, and we’re all at our wit’s end with heavy winter recipes.
This Easter charcuterie board is made anti-inflammatory style to accommodate those of us who can’t have all the processed and cured meats.
If you’re new to charcuterie boards, check out the post on How to Build an Anti-Inflammatory Charcuterie Board for all the ins and outs, and then grab the recipe below to create your own Easter charcuterie board (or platter) anti-inflammatory style!
Here are ideas and tips for arranging your Easter anti-inflammatory board or platter:
Decide your pattern
For this platter, since it was oval-shaped like an egg, I wanted the design to resemble a decorated Easter egg. That meant lines across but with pattern interplayed.
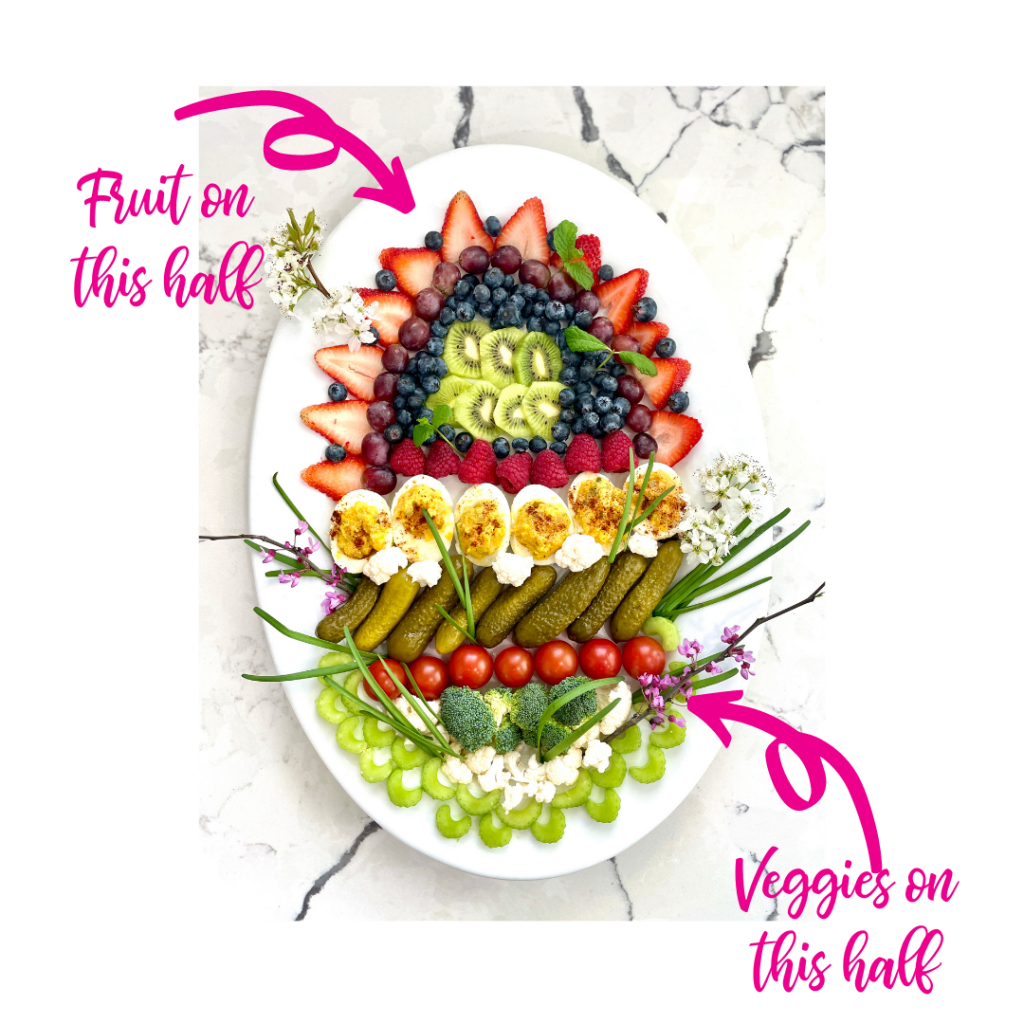
Divide fruits and veggies
I decided that I had enough color to be able to divide the fruits to one side and the veggies to the other with the deviled eggs being the divider in the middle between the two.
I sometimes like to do this just to also make sure the savory flavored ingredients aren’t touching sweet ingredients. (You know what I mean if you’ve ever tasted a pickle-flavored strawberry. 😂)
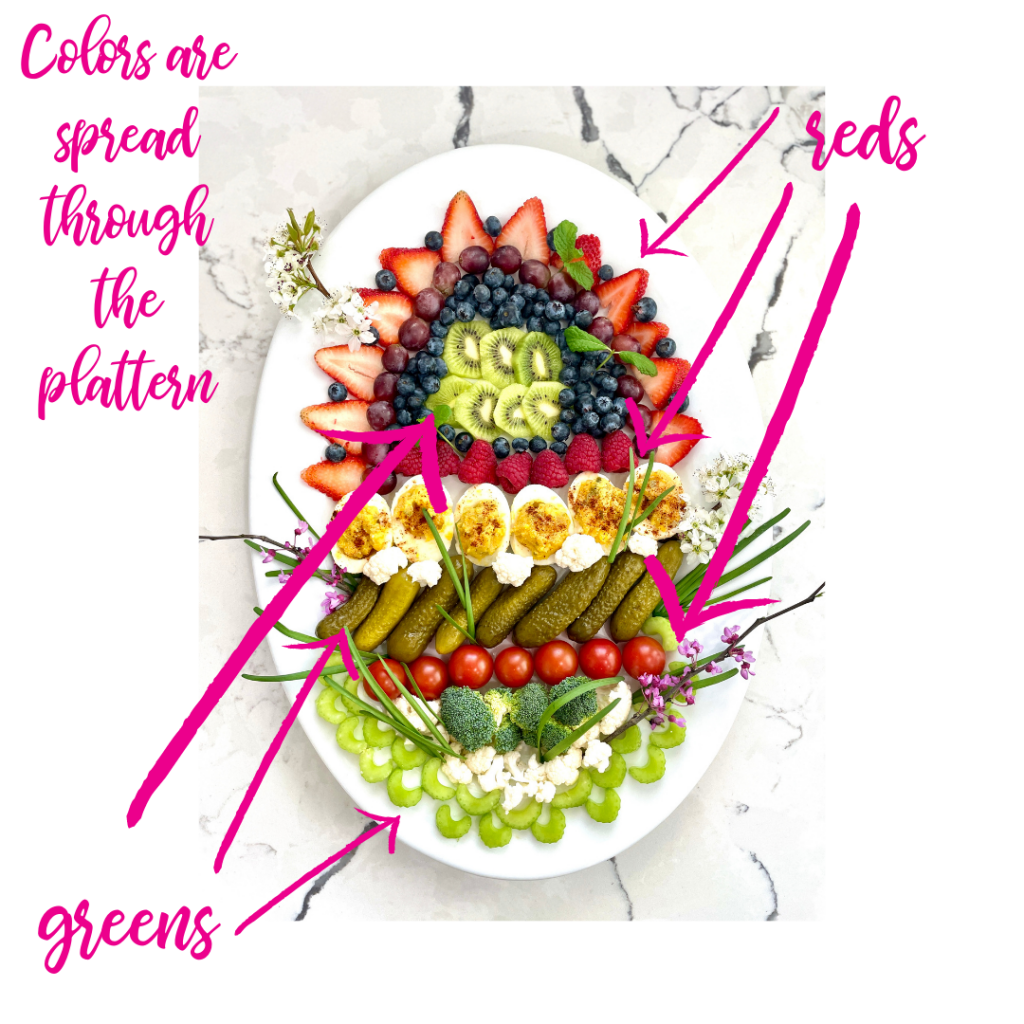
Disperse color throughout
Unless you’re going for an ombre effect or specific color groupings, try to spread the colors through the board so that the eye moves through the entire thing. Remember, these things are made to be pretty!
(I realize I could’ve done a better job with the darker colors, but if you’ll notice the dramatic contrast of the blueberries on the top half, this sort of makes my point that contrast attracts the eye. Now looking at these photos later it sort of makes the bottom half look a bit boring, lol!)
Garnish
The last step is to decorate. So the first think I love doing is using fresh herbs because they’re brightly colored and are great finishers.
I used mint and chives in mine because they feel so much like spring. (My daughter also wanted it to look like there was grass on the platter, lol!)
Final decor
And the final decor would be any other items you want to place to round out the theme or look of the board or platter. These would be things like number or letter cutouts, flowers, or other themed accessories.
I chose tree blooms to go on this one because the redbud trees and Bradford pears were bursting when we made this board.
So grab the recipe/ingredient list below and let me know if you made one! Post it and tag me: @truewell.co
Since charcuterie board assembly has a bit of an 'unknown' factor when it comes to quantity (lest we dampen our creative process…) the quantities for ingredients are left out in this recipe.
Prep Time:30 minutes
Total Time:30 minutes
Yield:61x
Category:Appetizer, Breakfast, Snack
Ingredients
deviled eggs
olives
baby dill pickles
broccoli
cauliflower
cherry tomatoes
celery
baby carrots
assortment of nuts (of choice)
grapes
blueberries
strawberries
raspberries
kiwi
any condiments, sauces, or dips of choice
Instructions
Chop the broccoli and cauliflower into tiny florets.